Cubase Tutorial: Become a Power User Part 7 – MixConsole
In version 7 of Cubase, Steinberg announced a major update of the Mixer that was long overdue. In the latest Cubase Power User tutorial Tim Hallas explores MixConsole… Version 7 of Cubase saw Steinberg announcing a major update to the mixer that was long overdue. Until then the mixer had remained largely unchanged, right back […]
In version 7 of Cubase, Steinberg announced a major update of the Mixer that was long overdue. In the latest Cubase Power User tutorial Tim Hallas explores MixConsole…
Version 7 of Cubase saw Steinberg announcing a major update to the mixer that was long overdue. Until then the mixer had remained largely unchanged, right back to the days of the SX/SL/SE incarnations. The mixer itself really provided control over only the basics of setting volume levels and pan – both of which are obviously very important, but when the user needed to access and edit sends, EQ or inserts, it became clear a rethink was in order.
The easiest way to access the aforementioned sends, EQ and inserts was to have a Channel Edit window open at the same time as the mixer, but as soon as you clicked on it the mixer disappeared (unless ‘Always On Top’ was selected by right/[Ctrl]-clicking – something I always forgot to do!).
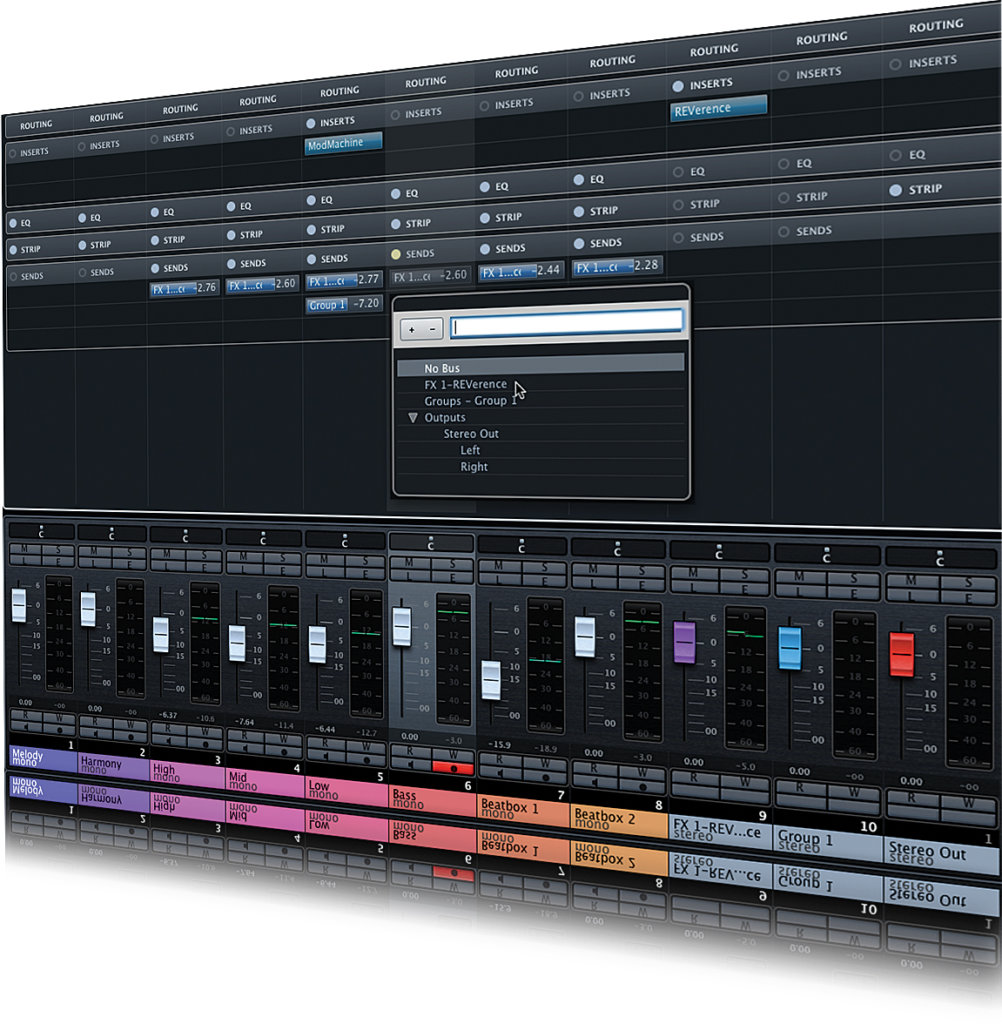
Alternatively, you could use the Track Inspector and select the inserts and sends from there with the mixer open at the same time, but this came with the same problem of having to re-select the Arrange window. Happily, in version 7, Cubase’s MixConsole gives access to inserts and sends as well as the newest additions to the mixing features in the Channel Strip, and you can edit most things without leaving the window.

The Channel Strip feature gives each track a range of the most common dynamics processors – much like a real-world large-format mixing console. These have to be activated, but they are always there and they save a huge amount of time – 99% of the time the first job I do is load a gate and a compressor onto a track, so having these instantly available without having to load them from the inserts each time is a great time-saver.
Automation is something that we as computer-based musicians and producers use all the time, but I often forget that automation can be controlled from the MixConsole as well as the Arrange window, and it has buttons for latching movements when the mixer is adjusted. This is really useful for getting a more human sound in a mix and is the way to work if you have a hardware control surface operating the mixer, but we’ll get to automation later on.
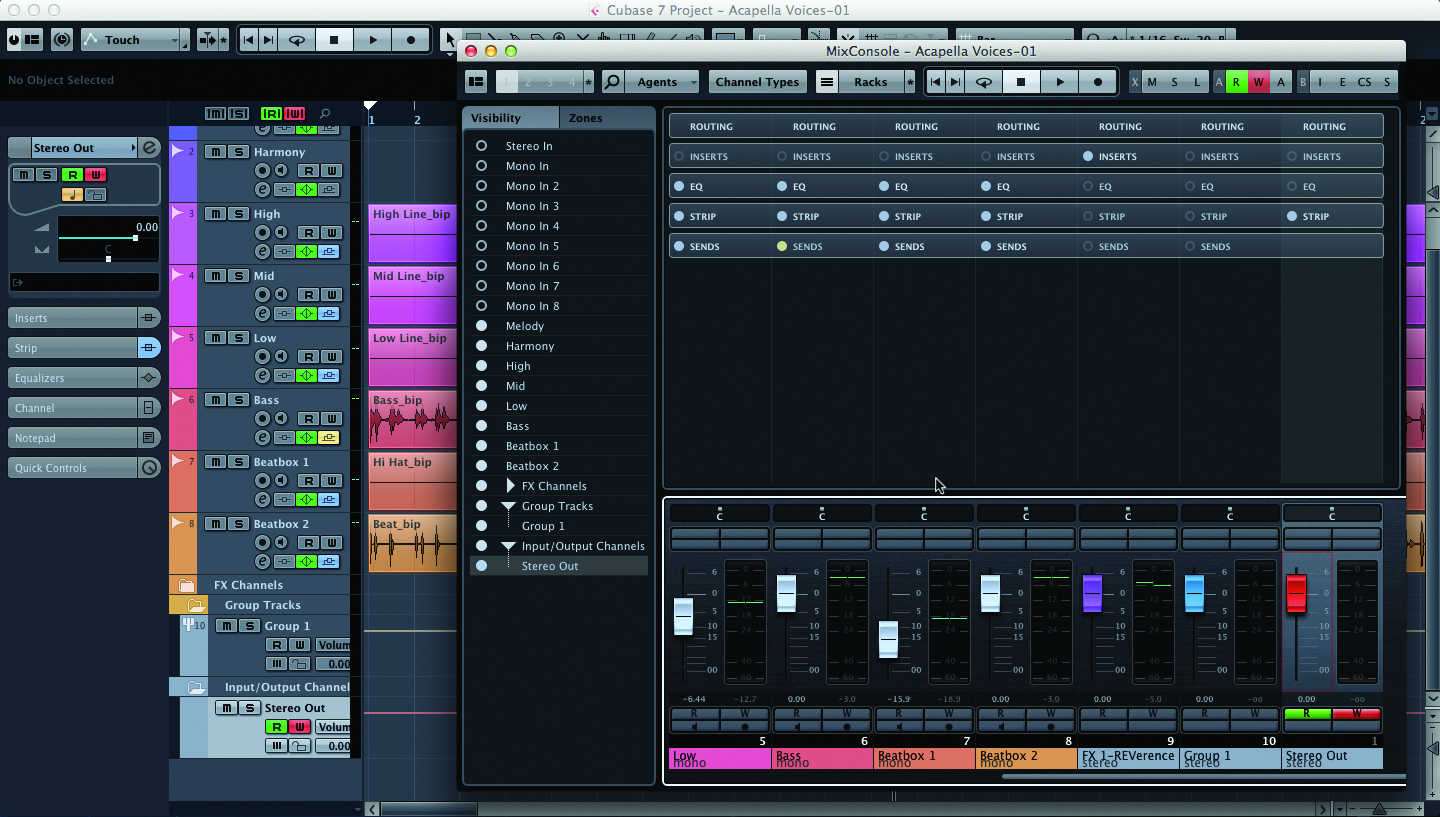
The Channel Strip
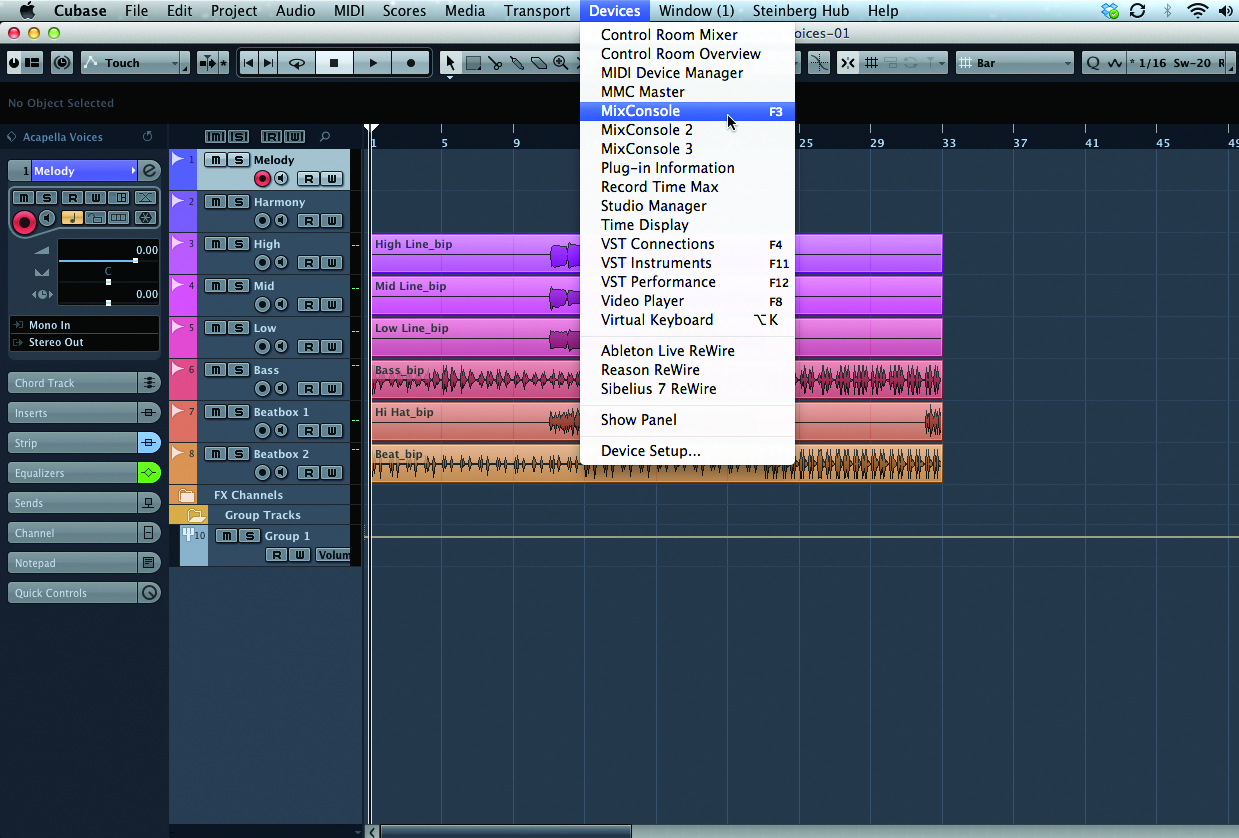
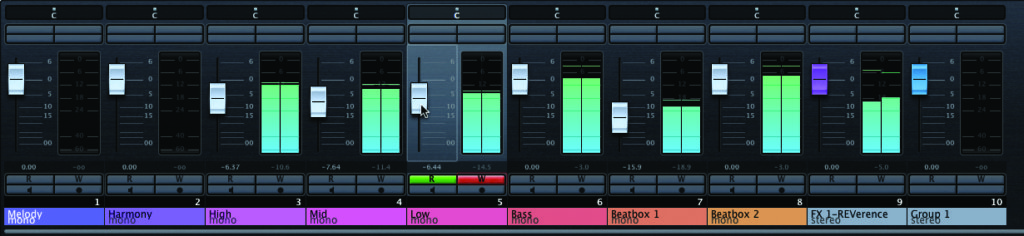
1: Begin by opening the MixConsole window. This can be done by selecting Devices>MixConsole or by pressing [F3] on the keyboard. Clicking on the Channel Strip tab opens that part of the view across all channels and shows the different processors available, whether they are activated and their current settings.
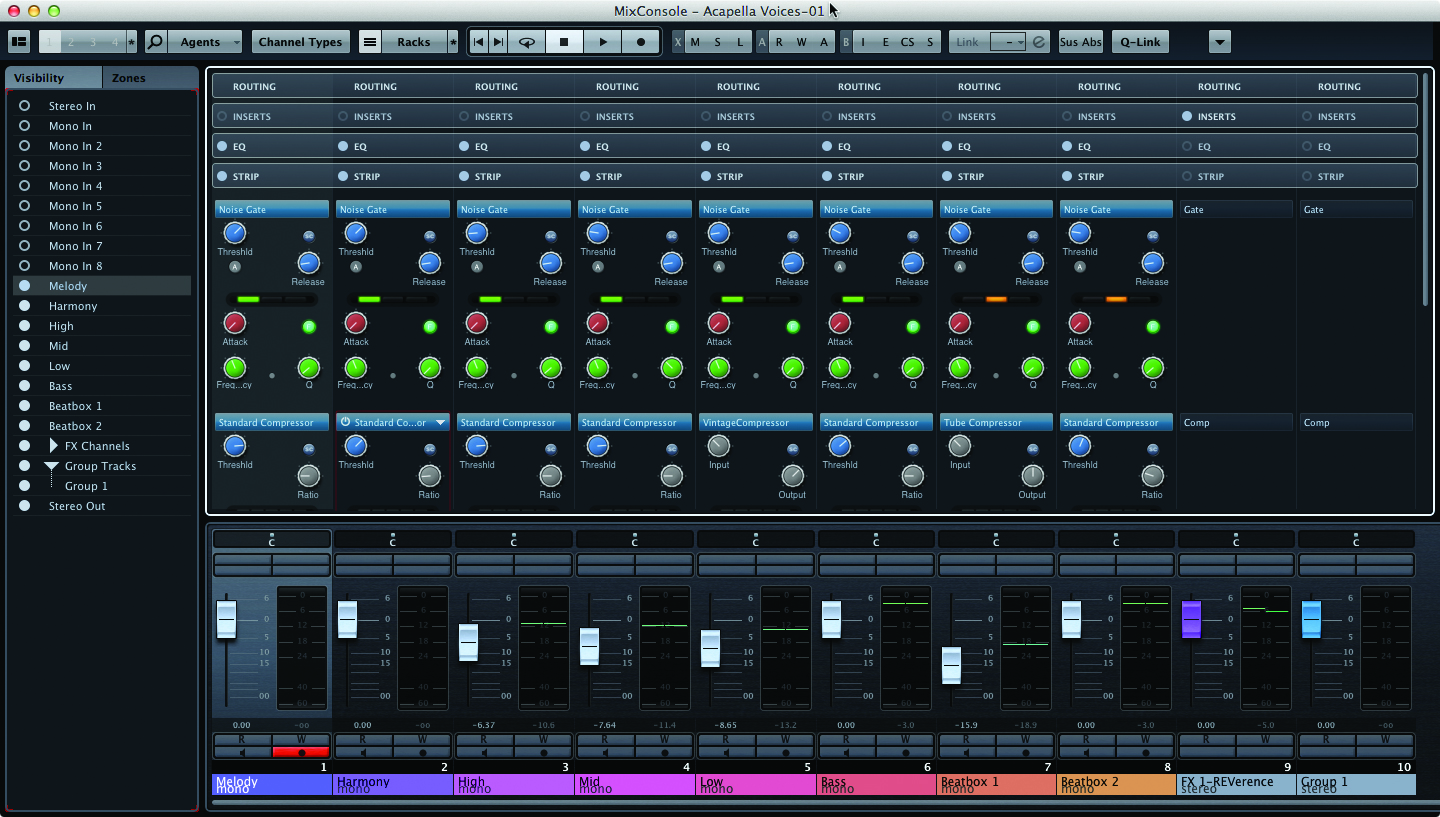
2: By default each slot will be empty and can have one or more different processors loaded into it within that heading. To load an effect, click on the down arrow to the right-hand side of the header and select the appropriate processor. Cubase loads it activated by default, but it can be turned off – essentially a bypass – via the power button on the left-hand side.
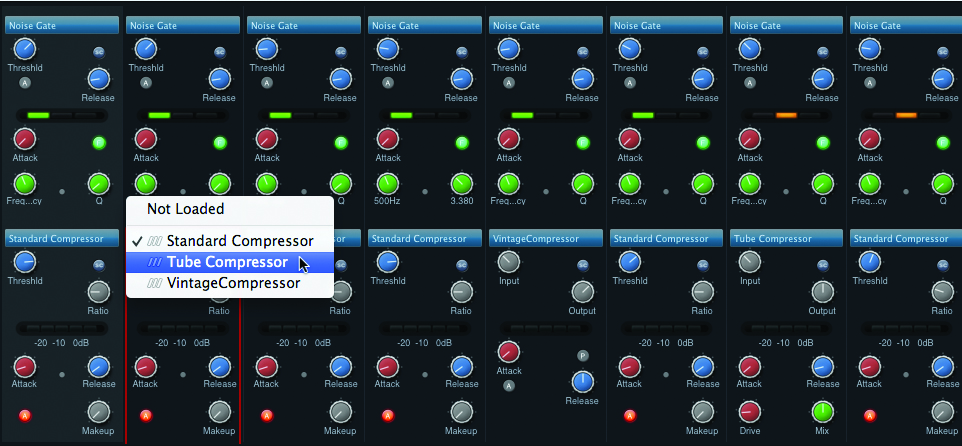
3: The Compressor has three different models from which to choose. The default is the Standard Compressor, which has a nice, clean sound. If you want something warmer, try the Tube Compressor, which features a Drive control for pushing the signal if desired. There is also the Vintage Compressor, the simplest of the three.
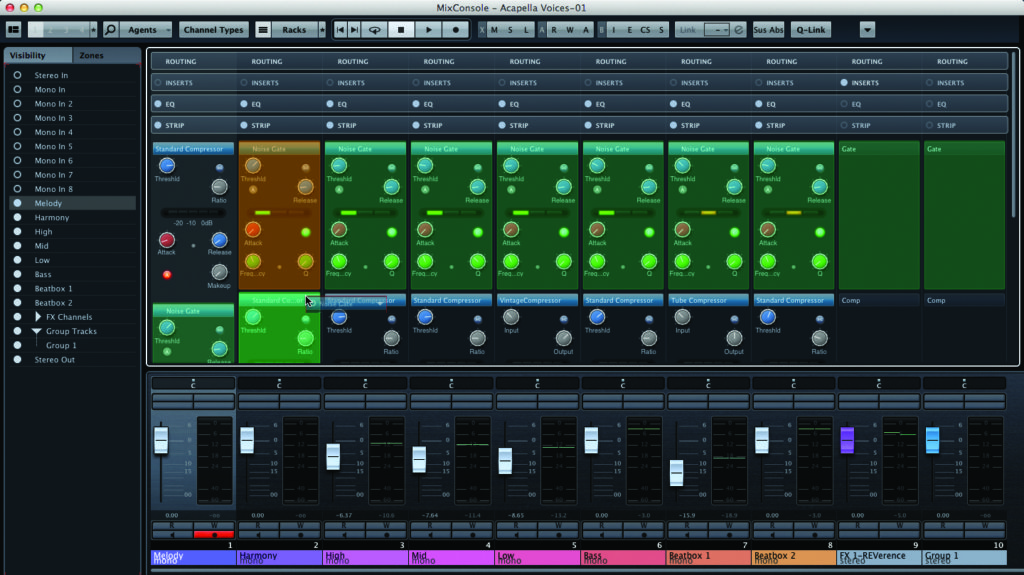
4: The default routing is Gate, Compressor, EQ and so on, but this can be altered if you want them in a different order. To do this, grab the header of the effect you want to move and, while clicking and holding, move it to the header position of the effect you want it to be after. Altering the signal chain will have a big impact on the sound, so it is worth thinking this through before you do it.
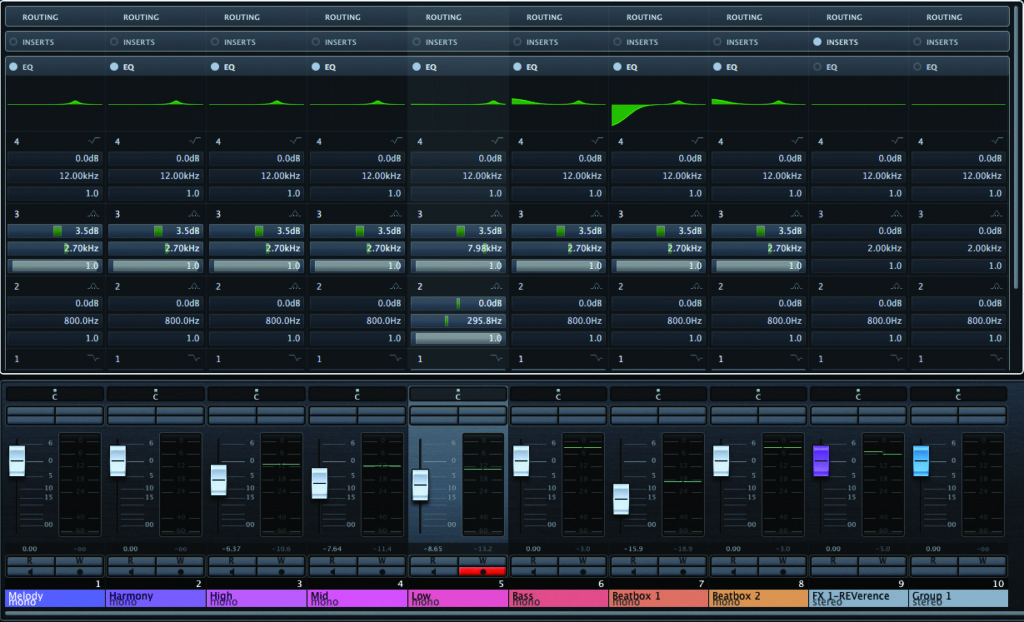
5: The EQ section of the mixer has (sort of) been incorporated into the Channel Strip. Although it has its own set of dropdown lists, it appears in the Channel Strip for adjusting within the signal chain. To open the EQ in the MixConsole, click on one of the EQ headers in the view to expand the boxes.
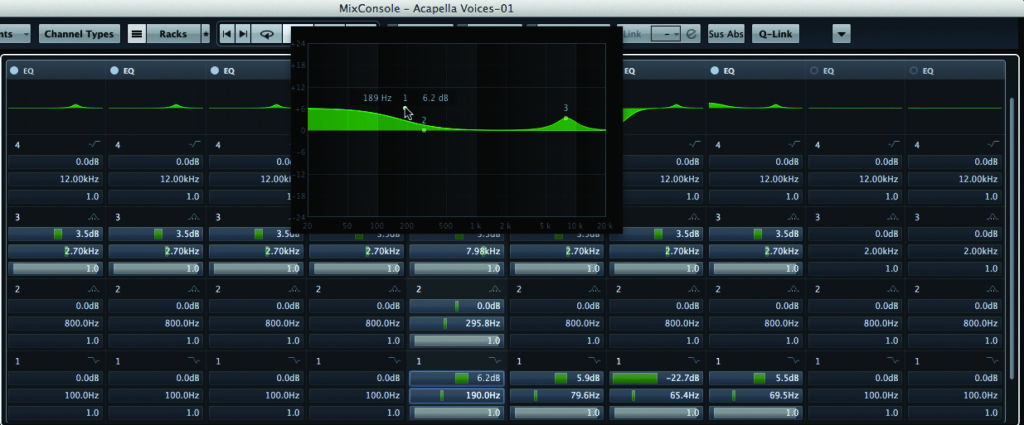
6: The EQ can be adjusted in two ways – the first is visually, whereby you move the EQ curve around with the mouse. The second is parametrically via the boxes; this allows access to the different curves available from the dropdown boxes. The standard frequency (Hz), gain (dB) and Q controls can be adjusted via the sliders or by typing in values.
Automation

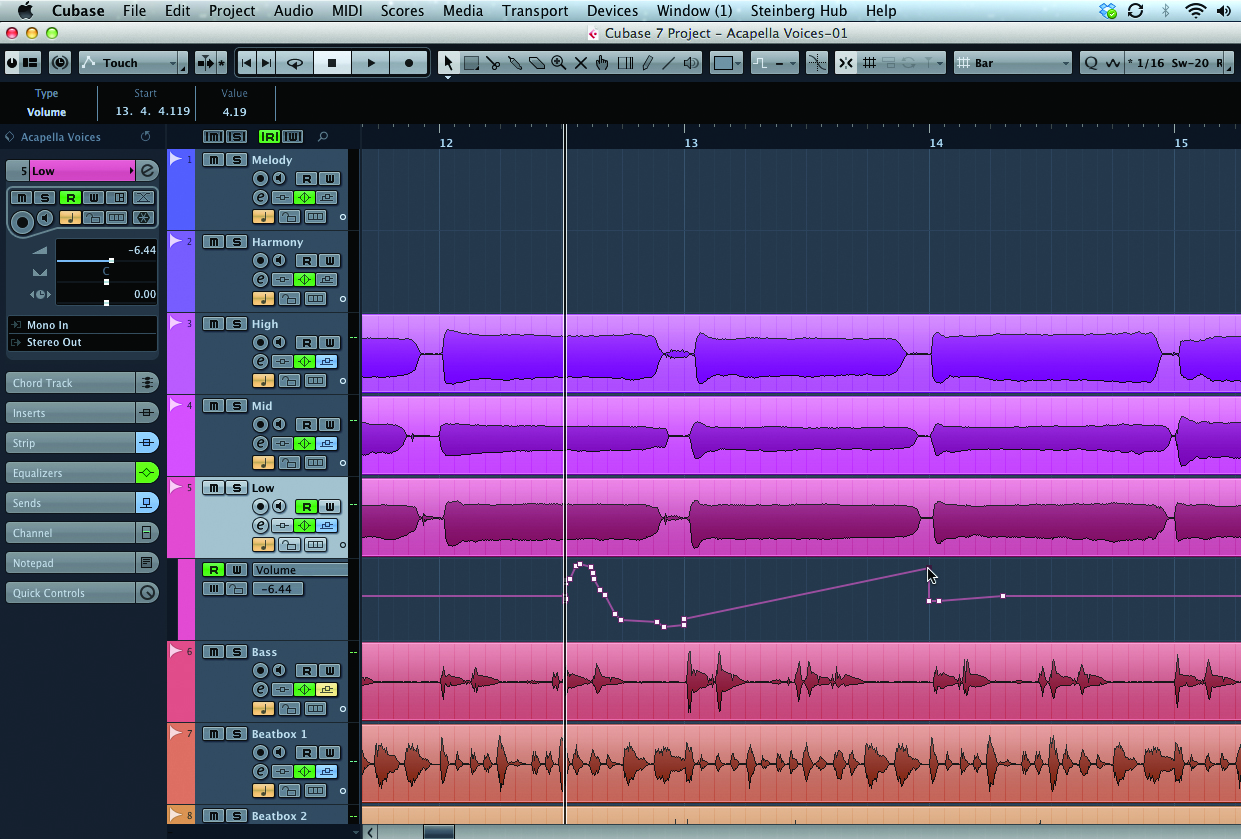
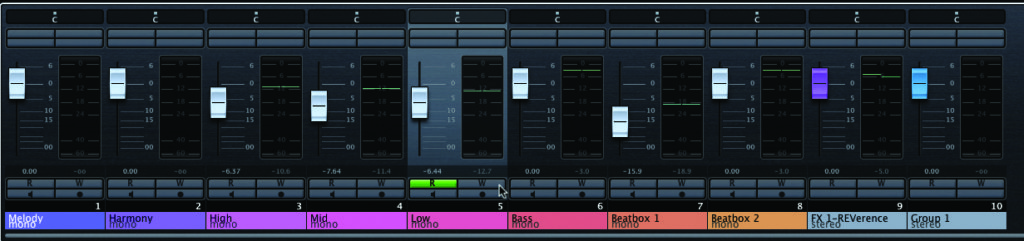
1: Cubase offers multiple ways of creating and editing automation, but one of simplest is via the MixConsole. Start with the MixConsole window open, find the track you want to automate and click on the Read/Write automation buttons labelled R (green when on) and W (red when on). These can be found at the bottom of each track, below the fader.
2: Having the R/W buttons activated enables Cubase to follow any existing automation that is on the track and to record adjustments to the mixer as you make them via the fader or another controller. Locate the controller that you want to adjust and click play on the transport. Make the change and it is then written into the automation track.
3: Once adjustments have been made, ensure that you deselect the Write control (W) as otherwise any effect adjustments you make to any control will be written into the automation rather than globally as it is unlikely that every edit you make will be automation – most will be global. Keep the Write control activated only while it is being used.
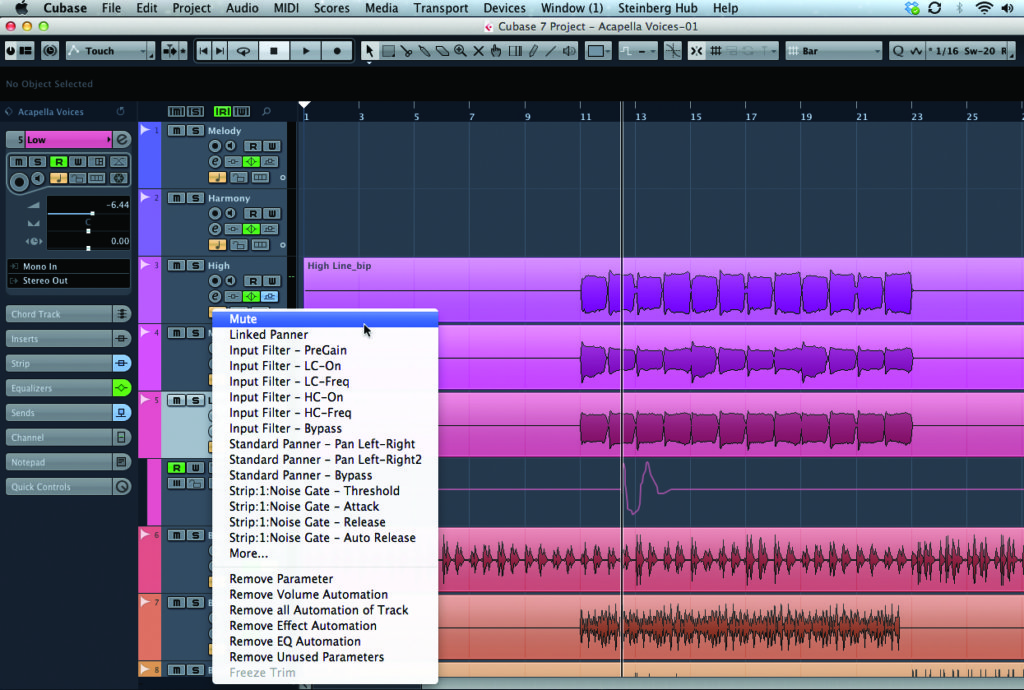
4: Once your automation has been recorded it can be viewed in the Arrange window, tidied up and edited. To access this, close the MixConsole, find the track in the Arrange window and then locate the dropdown arrow in the track header. It will default to Volume, but when you click on the list of available automation controls, ones that have been edited will appear at the top.
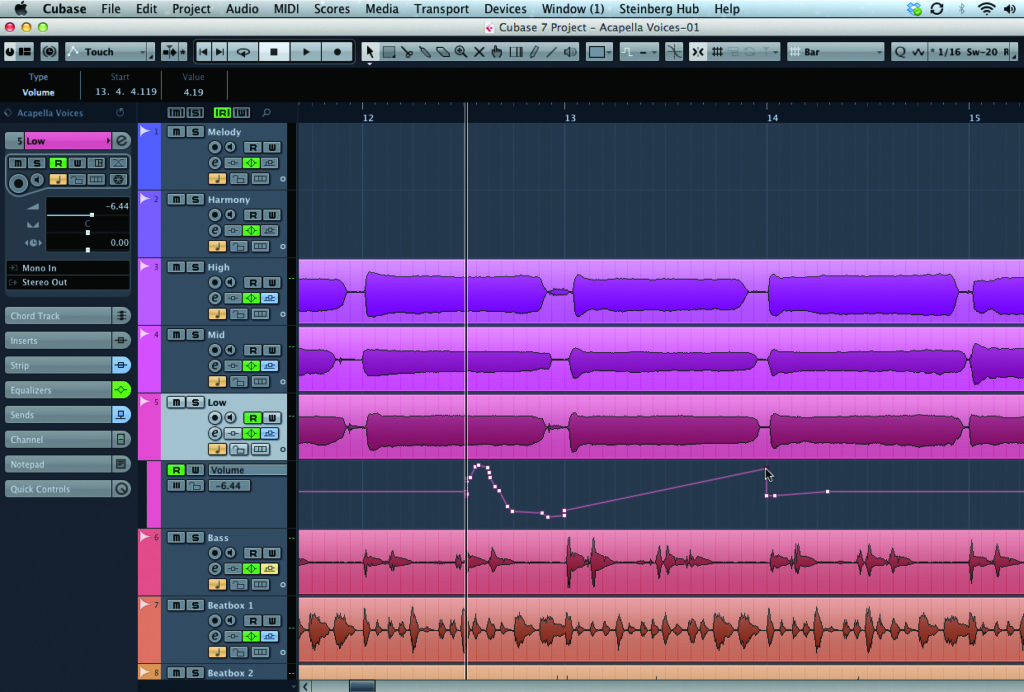
5: Once the automation track is open it can be adjusted and tidied via the cursor, Pencil and Eraser tools. Select the module you want to edit with the appropriate tool and either move it or delete it. I tend to try to keep my automation nice and neat as it makes it clearer to see what is happening.
6: Strangely, I use automation as a very quick way of getting the Master Stereo Out track into the Arrange window. By repeating the process above on the main output track it creates a track header for it in the Arrange window – I can then create a nice fade-out or similar on this using the available editing tools.