Cubase Tutorial: Recording Instruments Part One – Step by Step
In this step by step guide Andy Price shows you how to setup Cubase to record your first demo… 1: Open your DAW, and you’ll be prompted to choose your audio interface. In Cubase 8 you’ll see the Steinberg Hub, which syncs online and provides a range of useful tutorial videos. Click on the Recording […]
In this step by step guide Andy Price shows you how to setup Cubase to record your first demo…
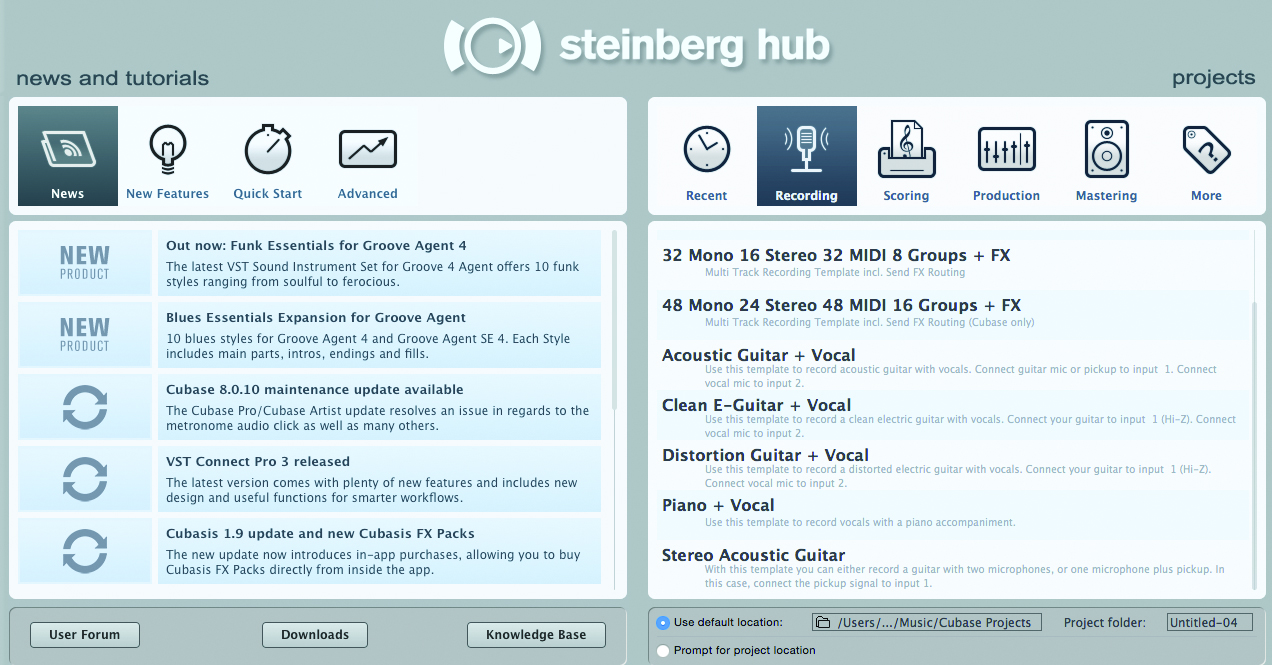
1: Open your DAW, and you’ll be prompted to choose your audio interface. In Cubase 8 you’ll see the Steinberg Hub, which syncs online and provides a range of useful tutorial videos. Click on the Recording tab and you’ll get a list of templates, with suggestions of how best to use them. Select the one that best applies to your style/instrumentation. I’m going to choose ‘Acoustic + Vocal’.
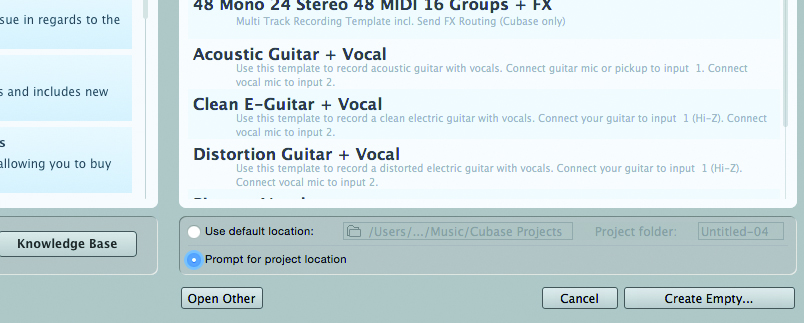
2: Be sure to also click ‘Prompt for Project Location’ before you click Create – this will enable you to create a new folder and a name for your project on your desktop, so it’s easily locatable later.
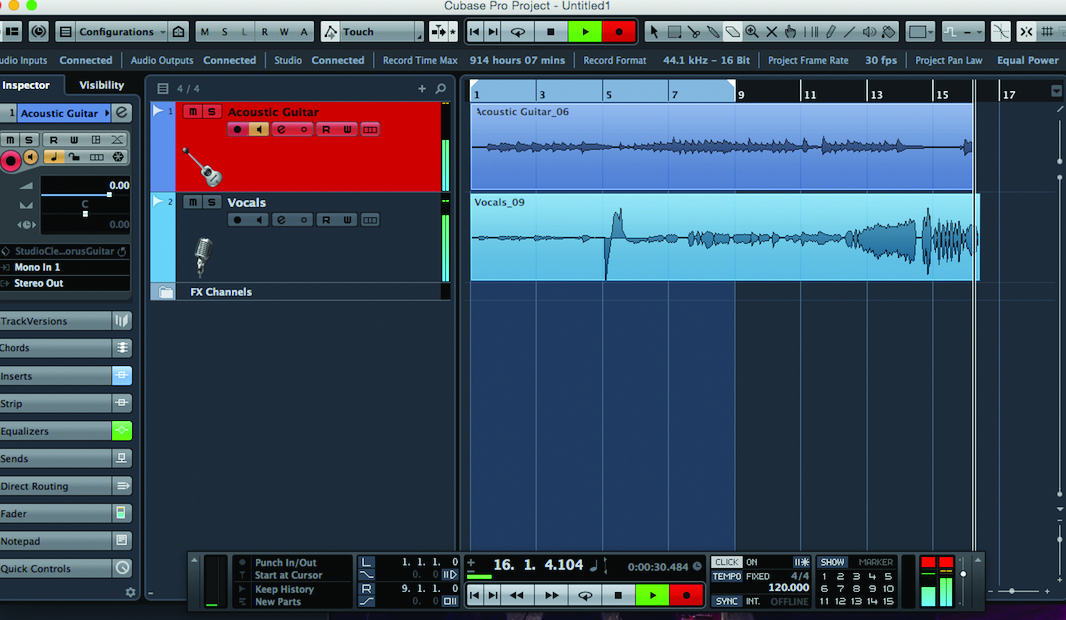
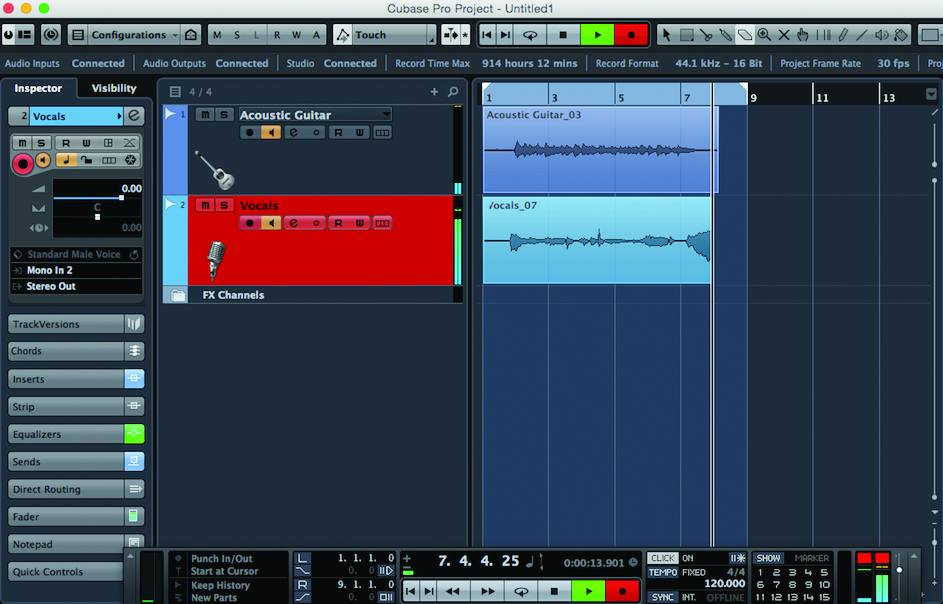
3: You’ll now be thrown into the project window – get used to it, because this is where you’ll be spending hours of your life! In here, you can manipulate every single aspect of the sound you’re about to record. When opening a preset template in Cubase 8, you’ll notice that it will have automatically added relevant EQ and reverb effects to the individual tracks.
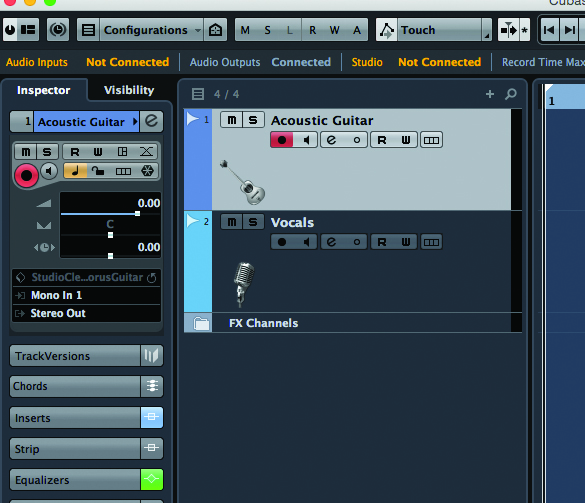
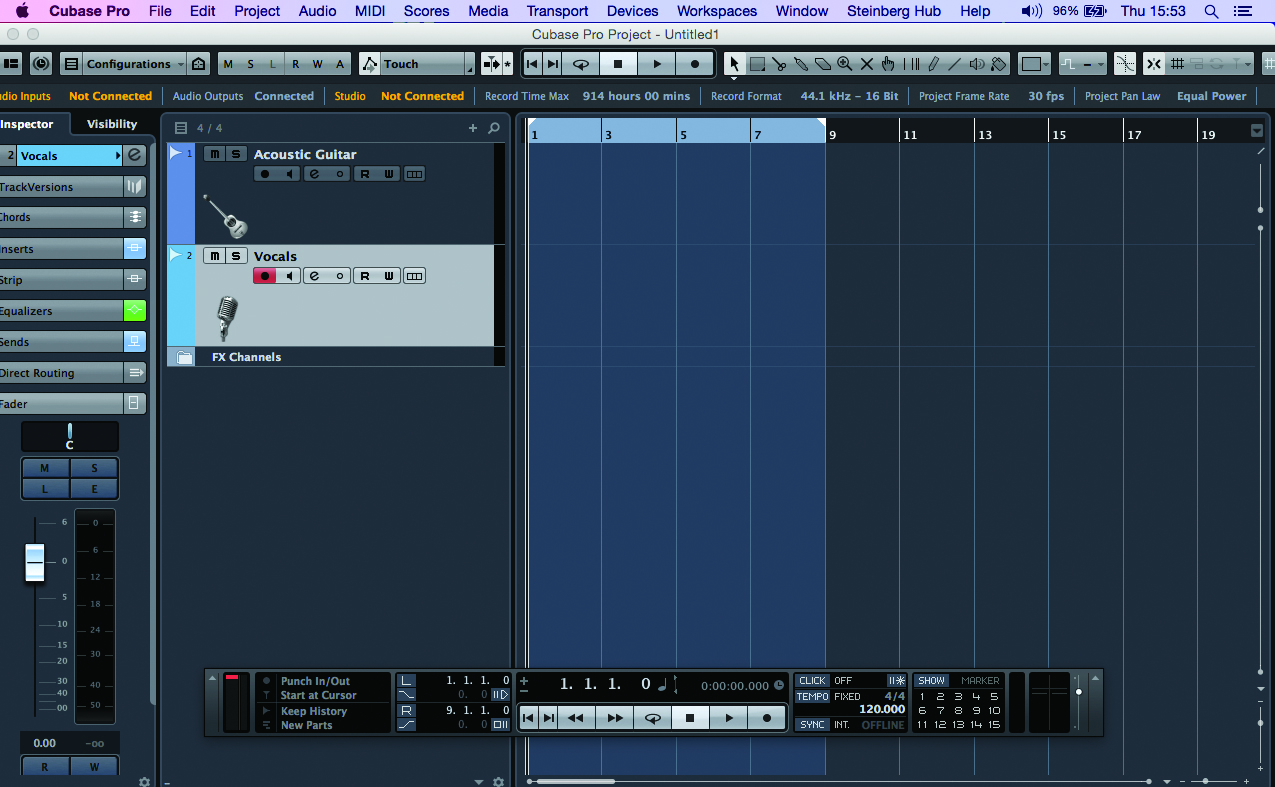
4: On the left of your tracks, you’ll have some options; the one we need to look at is above Trackversions, and is the recording inputs and outputs. Make your sure vocal track input corresponds to your microphone input, your guitar track to the jack input, etc. It sounds obvious, but it can take a while to get every track set up correctly. The output should automatically sync to your interface’s output
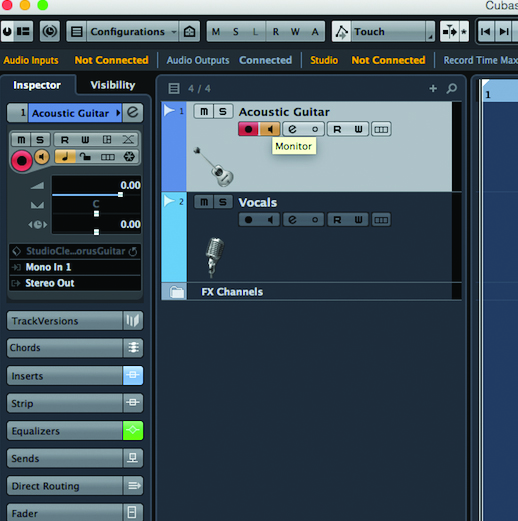
5: Be sure to click the ‘input monitor’ button so you can actually hear what you’re doing with your tracks. Once selected, you should be able to hear your microphone and/or guitar through your monitors or headphones. Make sure you have also selected the Record Enable button to arm these tracks for recording.

6: Call up the MixConsole (F3). Here, we can see the levels for all our tracks. As our track is set to monitor the input, we should be able to see the signal levels from the sounds we’re making going up and down in their respective channels. We can also see that the faders are set to zero. Going higher than this causes a problem that is one of the biggest bugbears of any sound recorder’s life…
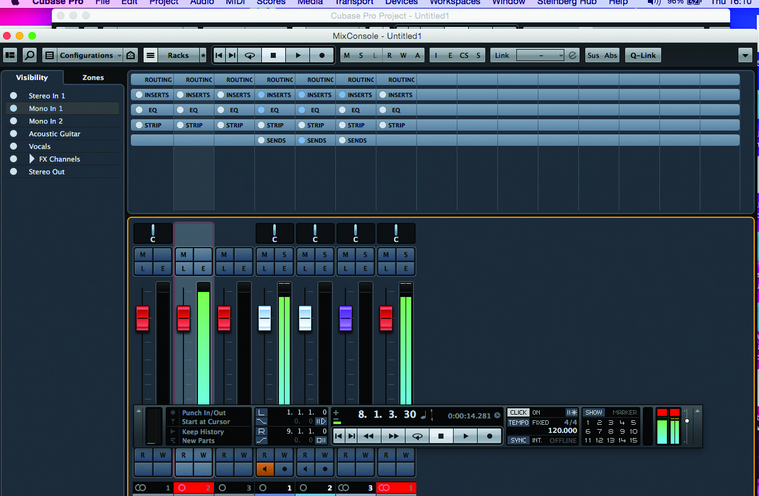
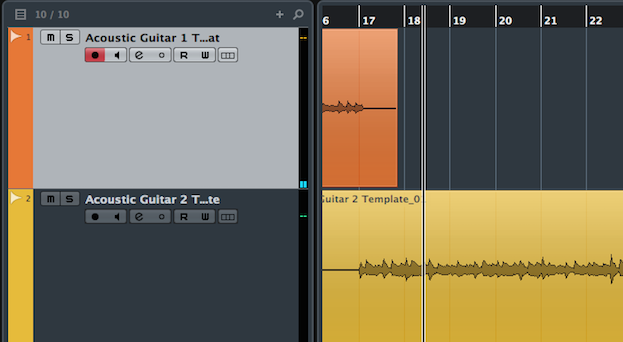
7: If we go beyond the designated fader level, clipping will occur – fuzzy, distorted sound that results from the input overloading – and the bottom of the track will turn red. If this happens, it’s imperative to go back and re-record the sound, as there’s no way of addressing this later on in the process. Make sure your input volume isn’t set too high and we should be able to avoid this happening.
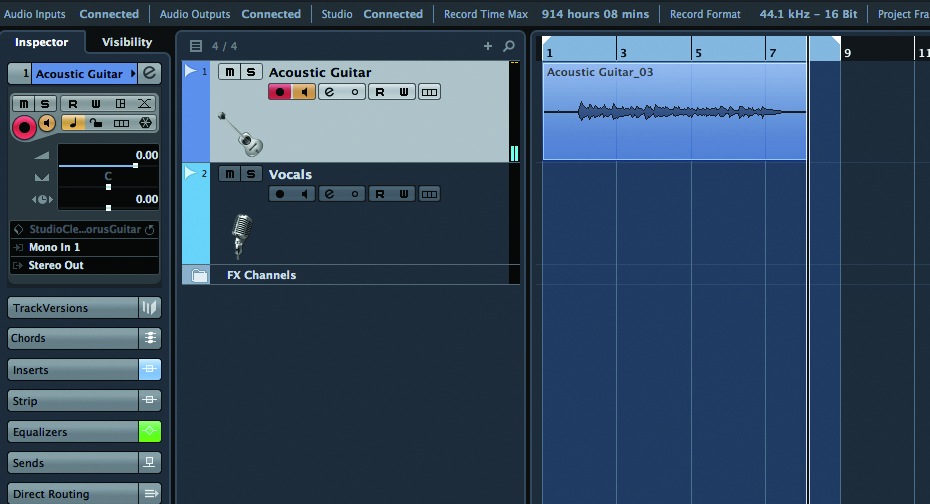
8: Does that all make sense? OK, that’s the basic stuff out of the way, now it’s best to record a short passage of your song to make sure that your levels are set correctly. Record around four bars and you should get a good indication of how you’re sounding.
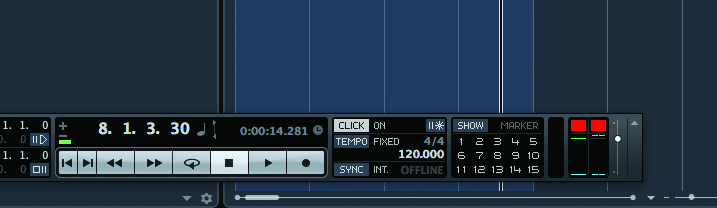
9: Set your tempo by clicking inside the transport panel (the long floating rectangle that defaults at the bottom of your window). A ‘fixed’ tempo keeps the entire project set to one BPM. However, if you intend to up the BPM, you can do so by unclicking ‘Fixed’, which should now say ‘Track’. Cubase 8 allows us to easily ‘draw in’ BPM changes (command + T). We’ll cover this further later in the series.
10: Once we’ve set our BPM, we can now record with our click track (press ‘C’) so our recorded parts are in time. It’s important to play and sing in time with this digital metronome, as this is what every other element of the project will be guided by.
11: We’re going to cover general recording techniques later in the series; for now it’s best to record in a comfortable environment (as you may have to record several takes of the same track). Make sure you’re not too close to the microphone when recording vocals, as this is a sure-fire way of clipping the track. Keep your guitar volume low. Now you can begin to record a take of your song – or part of it.
12: Disable the input monitor to listen back to your recording. Does it sound good? If any clipping occurred, we’re going to have to re-record whichever track it was on. If you’re happy with the recording generally, but have noticed slight problems (a fudged note or chord for example), don’t worry – we can edit this audio later. So long as our levels aren’t clipping, we’ve got a good solid recording to play with
