Cubase Tutorial: Become a Power User: Part 1 – Advanced Project Setup
Don’t let tedious set-up tasks be an obstacle to creativity – have Cubase all ready to go whenever you are. Tim Hallas explains the importance of being prepared… Welcome to the first in this new series of Cubase tutorials, the aim of which is to improve everyday workflow and make the process of […]
Don’t let tedious set-up tasks be an obstacle to creativity – have Cubase all ready to go whenever you are. Tim Hallas explains the importance of being prepared…
Welcome to the first in this new series of Cubase tutorials, the aim of which is to improve everyday workflow and make the process of using the software quicker and simpler. We will be looking over the coming year at a range of shortcuts and some more in-depth techniques you can use within Cubase – after all, the software is there to support you and help you make the music you want to make, it shouldn’t present obstacles that prevent you from doing what you want to do.
In this first instalment we’ll be looking at setting up projects and creating a smoother workflow to enable you to make music without having to bother about all the boring preparatory stuff. There will obviously be occasions when you’ll need to do something different, but for the most part, if you’re anything like me, you’ll be using the same basic setup for a range of activities.
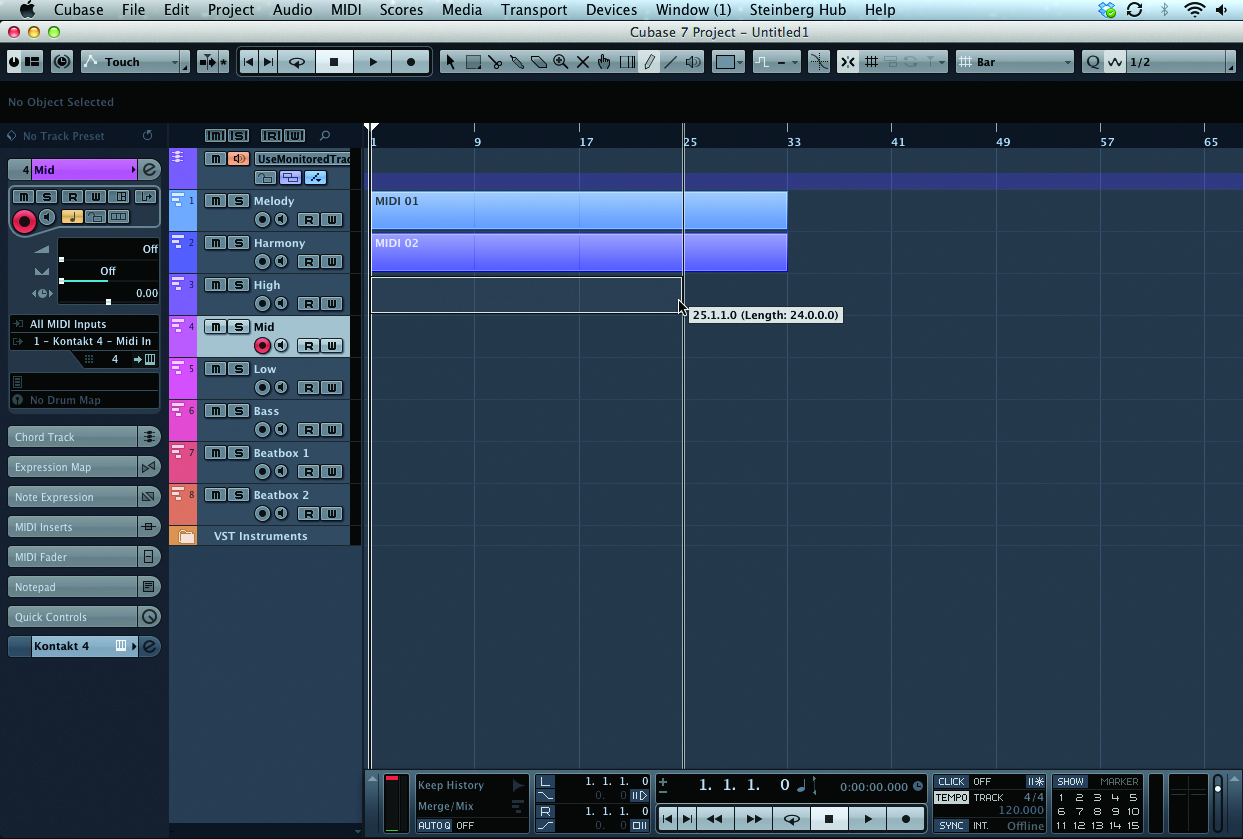
Over the last few weeks I have been creating vocal arrangements that needed to have a very specific number of parts, so I couldn’t go beyond a certain number of tracks and I was recording all of the parts to these tracks separately via one input channel. To save myself a bit of time I was simply copying and pasting track presets to allow the project to be tracked quickly and then adjusting them later during the mix stage. But how often have you had inspiration suddenly strike yet have to go through the repetitive process of assigning inputs to the right channels, loading up a range of soft synths ready for your project, then loading up the same set of plug-ins for the same instruments over and over?
To speed things up and to provide you with the templates to immediately start writing and recording music, we’ll look at some of the shortcuts we can use, which include creating plug-in chains, creating project templates and setting up in/out templates.
If you spend a few minutes preparing Cubase and creating presets for most of the typical projects that you work on, these assorted shortcuts can save precious creative time when the muse strikes. I would recommend that you spend that little bit of one-off preparation time and save yourself time later on – you’ll certainly appreciate it should you need to start recording at a moment’s notice.
Setting Up A Project Template
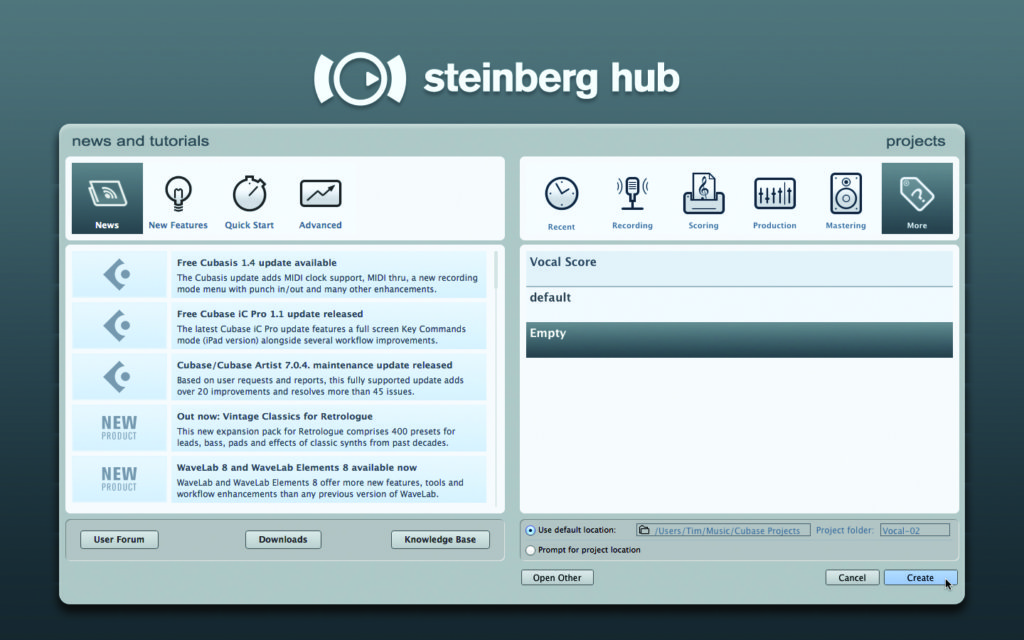
1: Begin by creating an Empty template from which we can work. This can be found when you open Cubase 7 under the ‘More’ tab. Select this option and store the project in the default location or in your own preferred location. Give it a title such as Blank Project or similar, then click Continue.
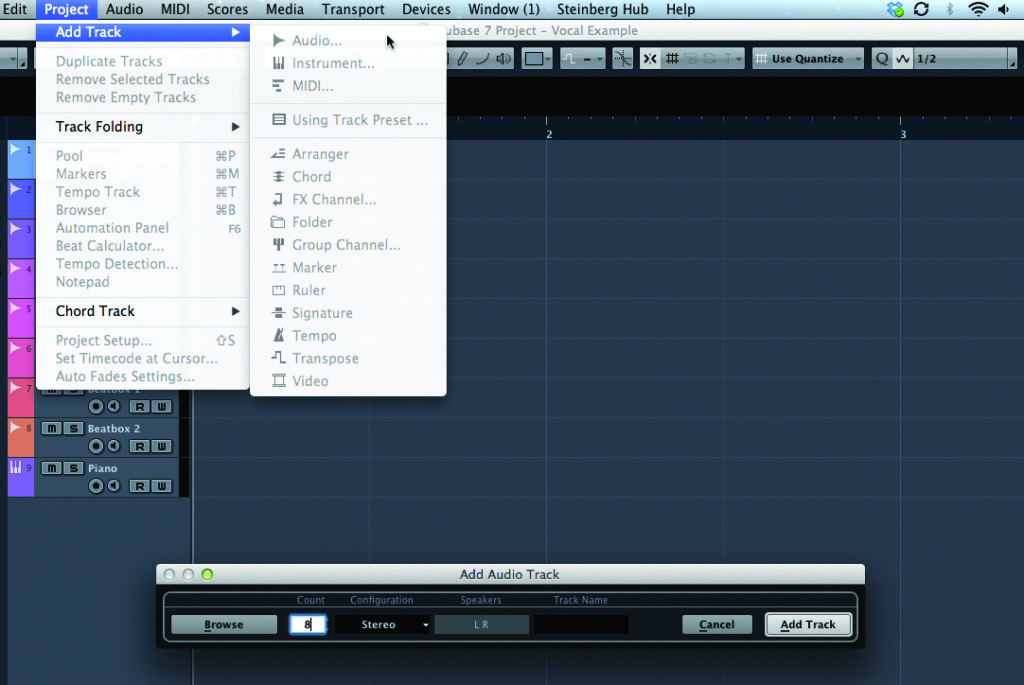
2: You now need to add the elements that you’ll want in your project template. Cubase has a number of typical templates, so check that what you need isn’t already there. If not, make your own, adding tracks (Project>Add Track) and so on. Most of my projects will feature a basic soft synth piano for recording a guide track, so even in an all-audio project, my templates include an instrument track.
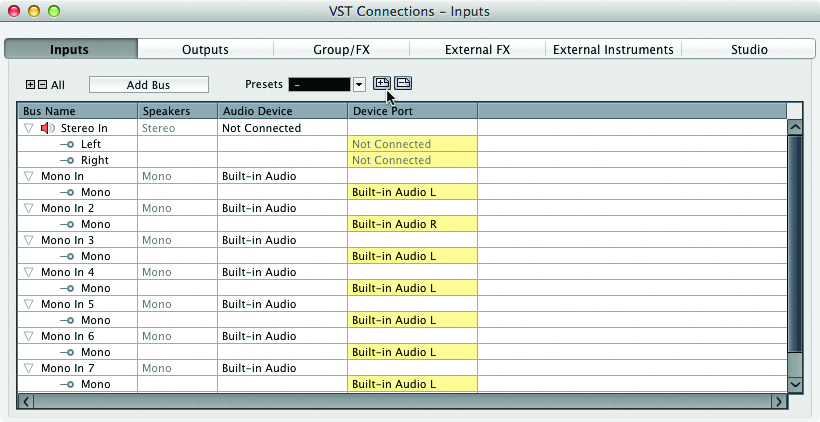
3: You need to set your input and output channels for the project, so click on Devices>VST Connections (F4) and select the Input tab (it will normally default to Stereo In). To add more inputs, click on the Add Bus button. This will open a pop-up box that gives you a range of input options. Select the type you want and then route your hardware channels to it via the right-hand column, labelled Device Port.
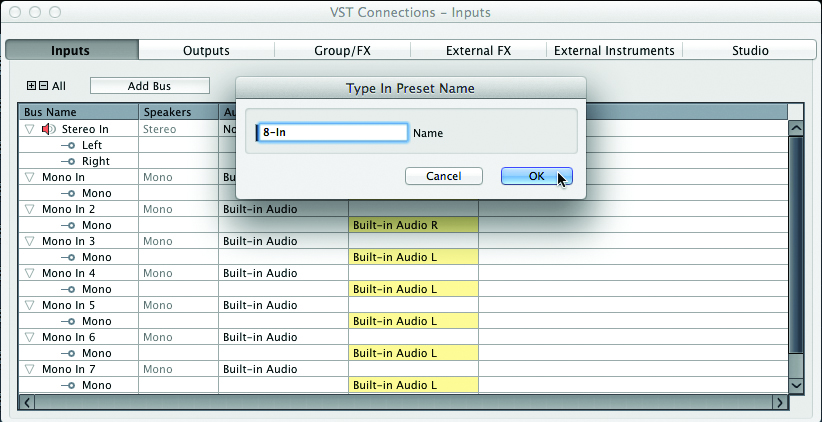
4: Once these are set, they need to be saved as a preset – click on the + button to the right of the Preset dropdown and it will ask you to give it a preset name. Choose something generic such as ‘8 mono in/4 stereo out’, as this will be available in all projects and might be applicable for other setups.
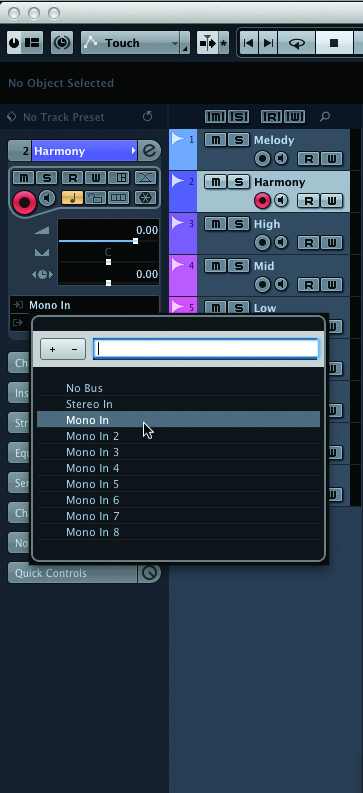
5: It is now worth labelling the tracks and checking that the routing in the Inspector window to the left is correct, as all this information is carried across to your template. To alter the track titles simply double-click on the existing name within the Arrange window and type in the new one. To change input/output routing, select the dropdown list from within the Inspector panel.
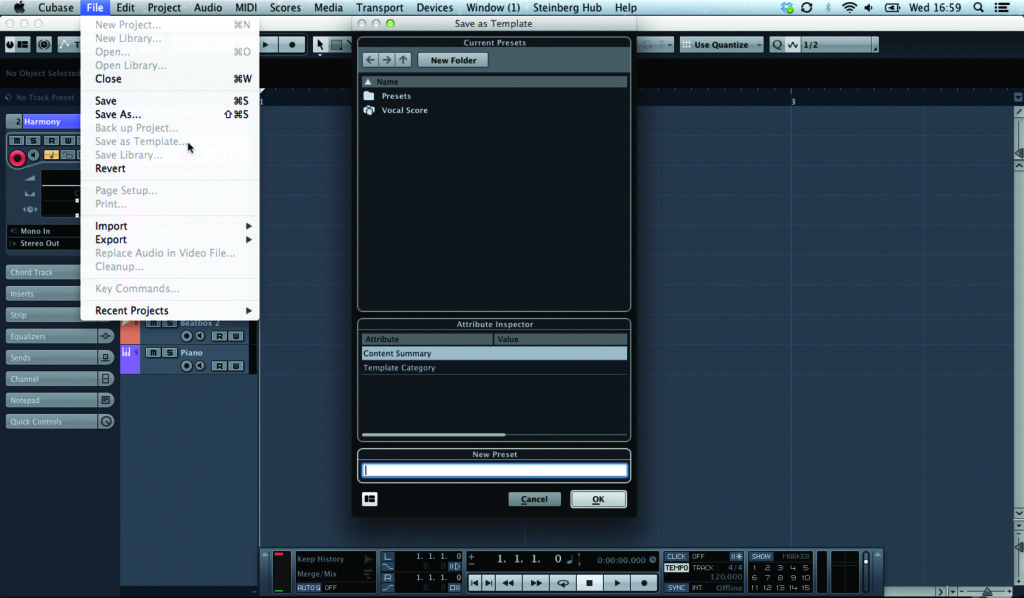
6: Once all of this is set, you are now ready to save your preset. Click on File>Save As Template. This will open a pop-up window that looks similar to the MediaBay window and enables you to save the template in a location of your choice and give it an appropriate name. As mine is a vocal project, this is how it is labelled
Continue to Page 2 – Setting up Insert Effects and Score Presets
