Cubase Tutorial: Power Up Your Workflow
Being productive in the studio means knowing the most efficient way to work. Hollin Jones explores workflow improvements in this Cubase Tutorial For all but the most nostalgic of producers, the days of laying down guitars to tape are long gone. Even those who do still work mainly with real instruments are highly […]
Being productive in the studio means knowing the most efficient way to work. Hollin Jones explores workflow improvements in this Cubase Tutorial
For all but the most nostalgic of producers, the days of laying down guitars to tape are long gone. Even those who do still work mainly with real instruments are highly likely to be recording and editing on a computer-based system, and increasingly, the musician and producer tend to be the same person.
It’s no longer enough to be an axe hero or a keyboard whiz: you have to be able to operate the software, too. As DAWs have become almost insanely capable, developers have fought hard to keep them usable as they have taken on hundreds and even thousands of tools and features. Steinberg is well known for being very good at this, and Cubase is still regarded as one of the most user-friendly top-flight DAWs around.
Cubase 7 makes some important strides forward in this respect, with various fundamental rethinks and redesigns of the way you view, manage and access parts of your project. What’s crucial is that these are really useful, real-world improvements that help you on a day-to-day basis. And as we all know, less time digging through menus means more time thinking about music…
From The Top
When you start a new project you are presented with the Hub, combining online update news and the template chooser window.
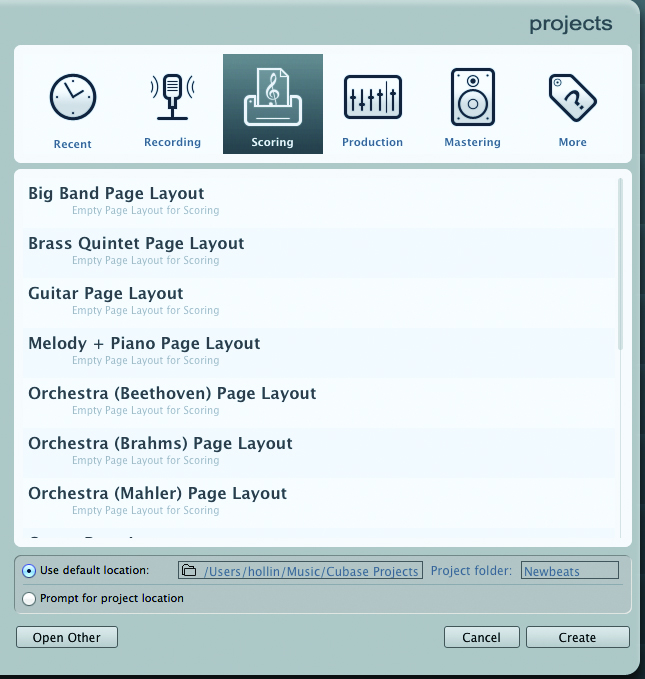
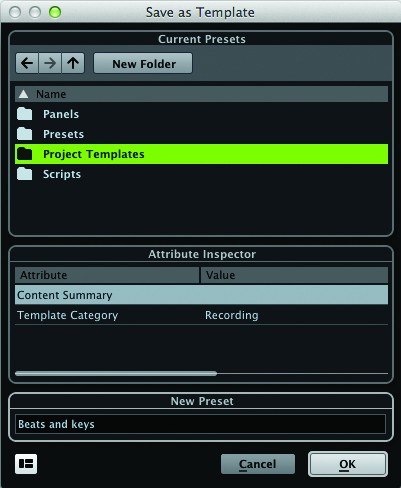
At the base of the right-hand column you will see a file path display telling you where the template files are stored on your Mac or PC. By creating your own template files and storing them in this location you can make them appear as options when you start any new project. So, for example, let’s say you create a template file with 12 audio tracks pre-mapped to the hardware inputs of your audio interface, complete with some effects already inserted for vocal and drum channels. Plus, perhaps, a couple of pre-loaded MIDI instrument tracks so you can fire it up and be creating in seconds without having to build a project. To save any project as a template simply choose File>Save as Template and enter a name, location and category in the Options window.
Cubase has had key commands for years, and these are an excellent way of triggering commonly used actions with user-definable key combinations. Select File>Key Commands to enter the Key Commands window. Here you can find any parameter you like by navigating through the folders or, perhaps even better, typing into the search field. When you find the command you want you can view or modify an existing key combo or enter your own. If there is a conflict, Cubase will ask you what to do, and you can save multiple sets of Key Commands using the Presets menu here.
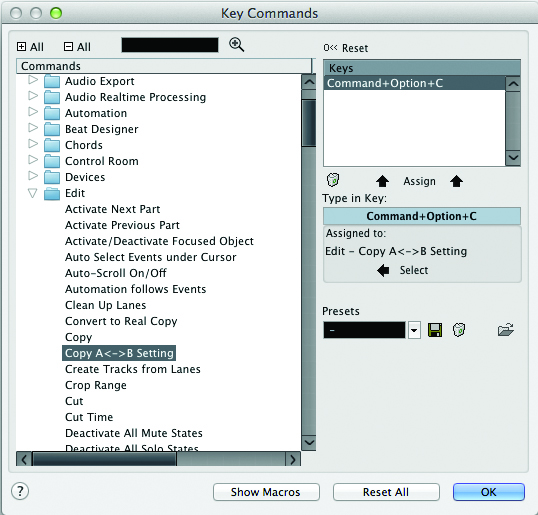
It’s hard to overemphasise how useful keyboard shortcuts are – they’re an integral part of most professionals’ workflow. Although there are thousands of parameters available you will probably use only ten or 20 with any great regularity. In my case these tend to be shortcuts to import an audio file, call up the Scissors tool, add a track and zoom in/out based on the current project size. Yours may be different, but this feature is a massive time-saver irrespective of you use it.
Put It In Context
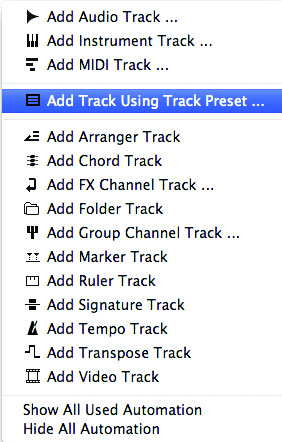
Another excellent and long-standing time-saver in Cubase is the contextual menu, revealed by right-/ [Ctrl]-clicking on most screen elements. The list of options changes depending on what you have clicked on, but it’s almost always faster than going to the menu bar to find something. Here, for example, right clicking in an empty area lets us add tracks quickly.
You can take things even further by using Folder tracks. Tracks that are collected inside a Folder can be edited en masse, as you can see here with these multitracked drums.
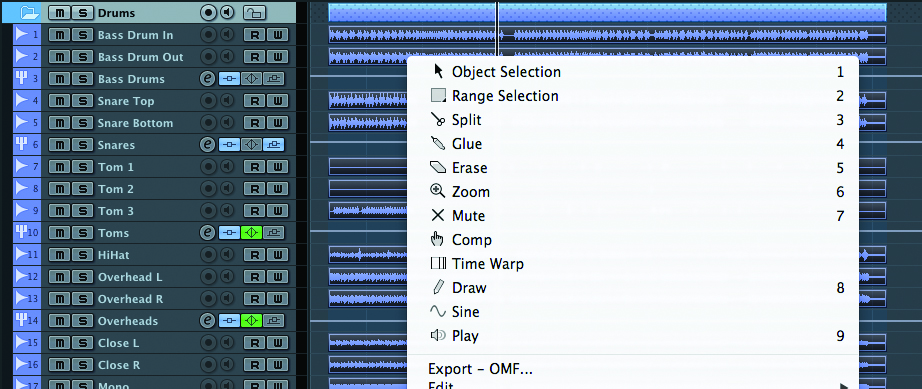
Calling up the contextual menu from one of these tracks enables you to perform tasks on all of them at once, such as splitting, normalizing, applying effects in place and more. Again, you will probably learn where your most-used commands live and be zapping straight to them pretty quickly.
The term ‘power-user’ is a little corny but it does fairly accurately describe those who are serious about using Cubase to its fullest potential. And even if you don’t consider yourself to be in this category, you can still benefit from mastering Cubase’s workspace tools. Projects can get big and unwieldy, and before you know it you have multiple windows cluttering your screen.
If you go to the Window menu and choose Workspace>Organize you can configure multiple screensets which can be saved with the project or globally so that they are visible from any project.
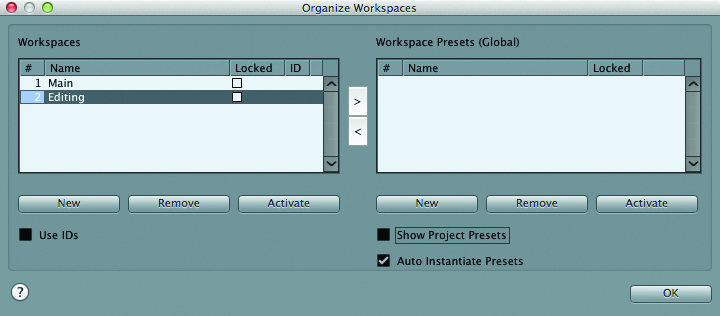
Screensets save the order, layout and position of windows so they can save lots of time when you are flipping between, say, editing and mixing. Have one layout set up to show the Project window and another the MixConsole, with specific tweaks made to each to suit your working practices.
Mix It Up
New to Cubase 7, MixConsole radically changes the way you work with channels and mixing. It also has some great time-saving features, such as the ability to save up to four views and flip between these instantly using the buttons at the top-left of the screen. These can be managed from the same location.
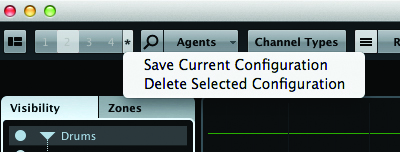
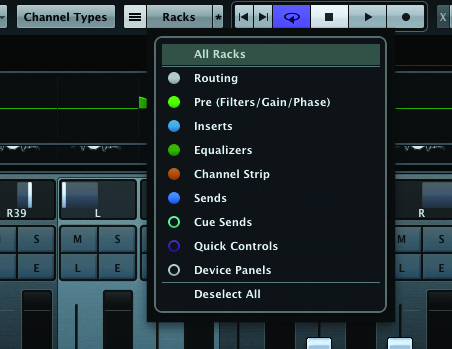
You can configure each view by determining what is visible and what is hidden using the Channel Type and Rack menus and choosing what to show.
Combining these tools you could, for example, easily set up one view that comprises channel strip, fader and EQ, and another that has only ReWire channels, for quickly mixing ReWire sources. Another excellent new way to manage large projects is to use the Agents menu. This enables you to quickly show only tracks that meet certain criteria, such as containing data at the current playback position.
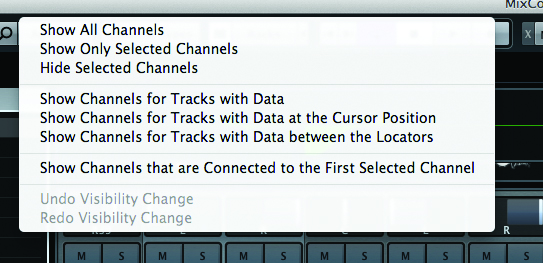
Click on the Search icon here and you can instantly filter the track list to show only tracks that match your criteria.
This is incredibly useful in many situations and means no more scrolling around the mixer. You will have to remember to name your tracks sensibly for it to work properly, though, otherwise you won’t benefit from it so much.
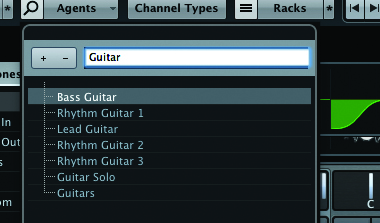
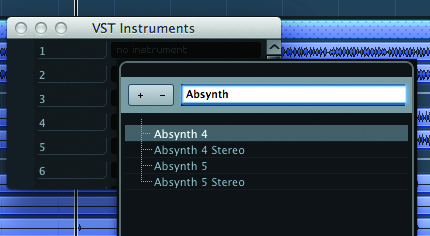
In the same way that MixConsole now lets you search for tracks simply by entering text, there’s a new Cubase-wide system for working with plug-ins. Click on any plug-in slot and you now get a simpler, text-based list with a search option.
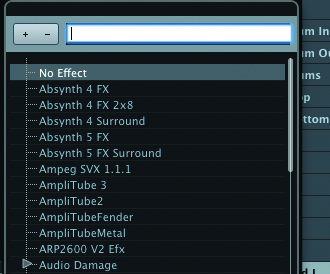
This is far better than the previous system of navigating through various submenus, which were sometimes not all that logically arranged. For some reason this new browser is not implemented in the Add Instrument Track window as yet, but it is if you use the VST Instrument rack to add an instrument.
If you have a lot of plug-ins the new browser can really speed up the process of adding them to projects. Of course, the existing system of Track Presets is still featured, and these too are a great time-saver. Tracks can be saved as Track Presets complete with volume, pan, EQ and plug-in settings, and assigned tags and attributes. Then, at any point in the future, choose to add a track from a preset and it will be called up just as you had saved it.
More Than Minor
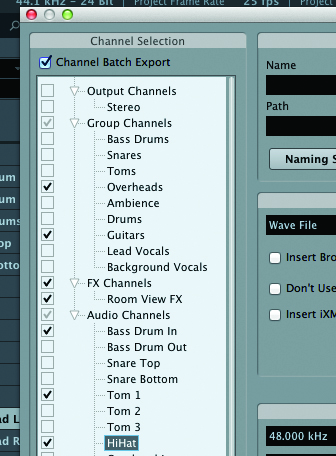
And it’s not only when mixing and editing that you can save time by knowing some shortcuts. When it comes time to export your finished product you will probably want to output it as a single, high-quality stereo file. But in the Export Audio Mixdown window there’s also the option to batch-export selected tracks and groups of tracks. This is standard practice in studios for backup and remix purposes, and by ticking the relevant boxes you can export separate stems in a ‘fire and forget’ style and make a drink while Cubase does the hard work.
There are many other more minor tricks for saving presets and zipping around Cubase, but the ones we have looked at are the major ones and the others work in much the same way. Of course, you don’t want to get too bogged down in the mechanics of software, but having a good understanding of shortcuts and time-savers will make you more productive and ultimately able to spend more time on your music.