How to use automation in Cubase (Part One)
Cubase contains loads of tools for creating and editing automation data, and practically every mix, instrument and effect parameter can be controlled via this data. We bring you the details.
Automation is one of the features that make DAWs such powerful music-making tools, with much more creative potential than basic mixer control. Synths can be brought to life by modifying just a couple of parameters over time, while even modest automation of effect parameters can have a dramatic impact on sonic interest.
Deciding when, where and how to apply automation isn’t always easy. Also, when working with tracks that already contain automation, it becomes too easy to get muddled over which parameters are being automated, or to interfere with existing automation data unintentionally. So, over the next couple of issues, I’m focusing on automation in Cubase, starting with the basics and working up to some neat tricks and techniques.
Automation lanes
Automation can be added to a number of different track types: audio, MIDI, instrument, group, effect, sampler and VCA (the latter being a special case, as I’ll explain next month). Each can host as many automation lanes as required, one for every automatable parameter that’s available to the track. These lanes appear below the track they’re associated with.
The automation data itself is shown as a continuous line, referred to as a ‘curve’, representing the value of the associated parameter. Where you have set a value manually, a breakpoint marker is drawn, and Cubase calculates – or ‘tweens’ – the curve between consecutive breakpoints. We’ll look at how to modify this later.
An automation curve is tied to its track and the timeline, not to the parts on the track, and this can create problems. You may create a repeating saw-wave shaped automation curve to drive a reverse bass effect, but then move that part to another track. Unless you do this in the right way, the automation data will be left behind. Similar problems can arise when rearranging a part within its own track.
Creating automation data
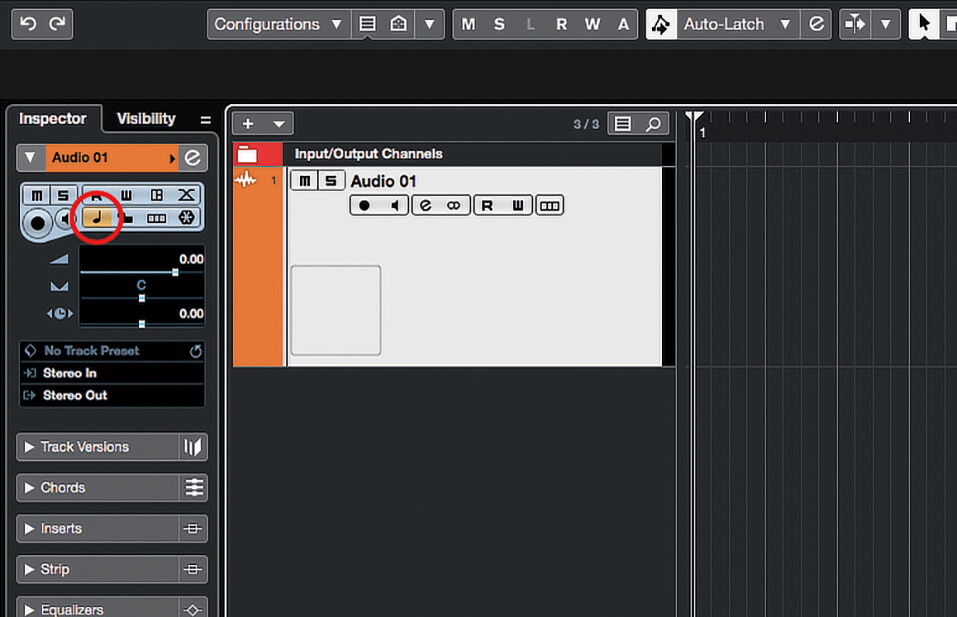
You can create automation offline by drawing and manipulating breakpoints and curves in the project window, or in real time while Cubase is playing your project. For the latter to work, the track, parameter or plug-in has to be placed into Automation Write mode. This is done by clicking on the W button that’s shown on tracks, automation lanes, and at the top of plug-in windows.
When you do this, the corresponding R (Automation Read) button will also light up. When in Write mode, modifying a parameter while Cubase is playing, whether by adjusting an onscreen control with the mouse or using an external hardware controller, will cause automation data to be written to the track. If the entire track is in Write mode then any change to any parameter will create breakpoints for that parameter; if only placing specific parameters into Write mode, then automation will only be written for those parameters.
When writing automation to a lane that already contains automation, Cubase’s automation Punch Out mode – Touch, Auto-Latch or Crossover – comes into play. This determines how Cubase responds when you stop adjusting the parameter, by releasing the mouse button or removing your finger from the fader or knob on your hardware controller. We’ll explore these Punch Out modes in the walkthrough.
Automation vs MIDI CC
Many parameters of MIDI and Instrument tracks can be controlled by MIDI CC messages rather than track automation curves; such automation is more portable because CC messages are an intrinsic element of the MIDI part. However, MIDI CCs tend to have a much lower resolution than used by track automation; in MIDI there are only 128 values between minimum and maximum volume, but in track automation the resolution is far higher.
A bigger issue with using MIDI CCs is that they’re much clumsier to work with, lacking the tweening ability and curve modification tools available to track-level automation; MIDI CC values simply step from one value to the next. This results in automation that’s difficult to modify, and that causes something as mundane as a parameter fade-up to produce a dense set of breakpoints. The resulting splurge of MIDI data can be more than some instruments can handle, especially older synths.
Let’s have a play with some automation now to see all of this in action.
Using Automation: step-by-step
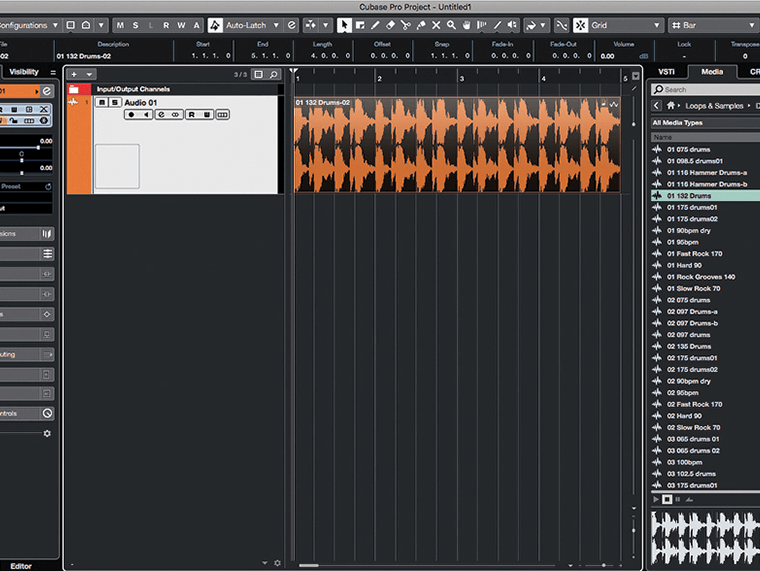
1. Create a new empty project in Cubase and add a stereo audio track. Open the Track Inspector and ensure the track is using musical time base, so the amber note icon is showing rather than the grey clock face.

2. Open the project window’s left-hand zone, then open its Media Browser tab and use the Loops & Samples section to find a drum loop (your own or from Cubase’s library). Drag the loop to the beginning of the new audio track.
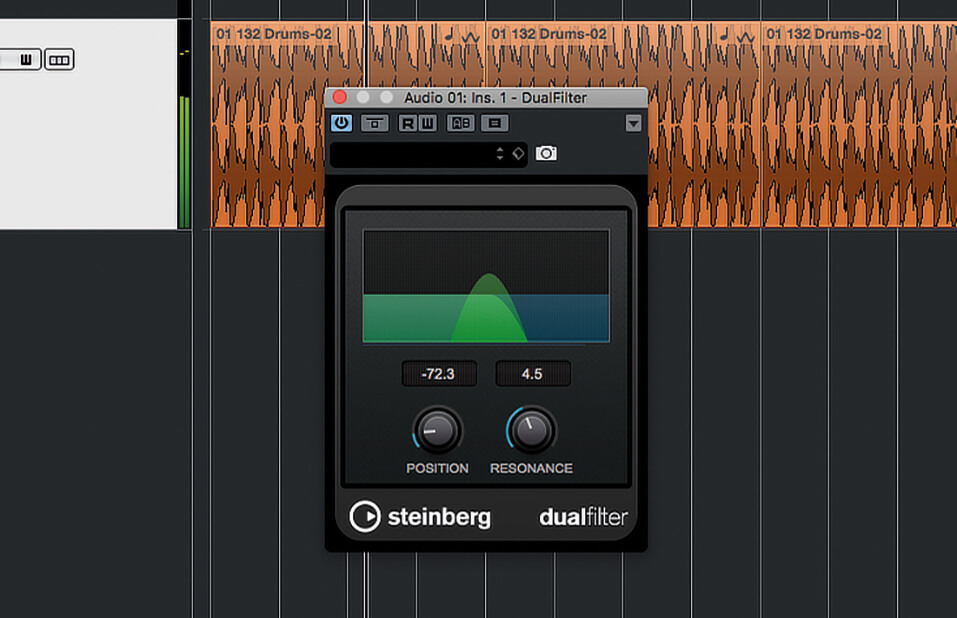
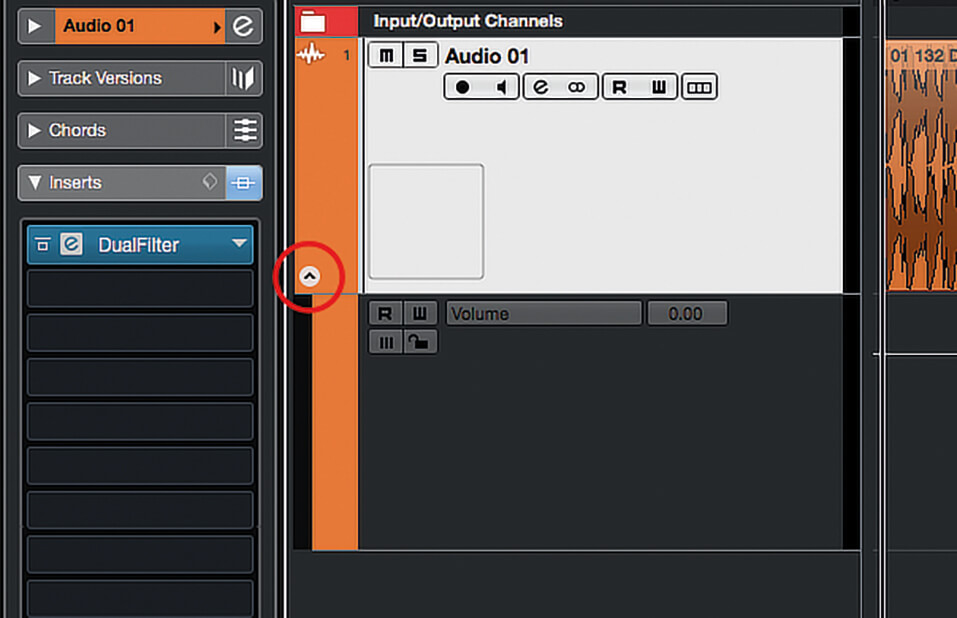
3. Close the right-hand zone and then duplicate the loop using [Cmd]+[D]/[Ctrl]+[D]. Open the Inserts section of the Track Inspector and add a filter processor, like DualFilter. Play the track and set initial values for the filter.
4. Click the W button at the top of the plug-in window (the adjacent R button will also light up). Start playback from the beginning, and then make some smooth adjustments to the filter’s parameters. Stop playback when you’re done.
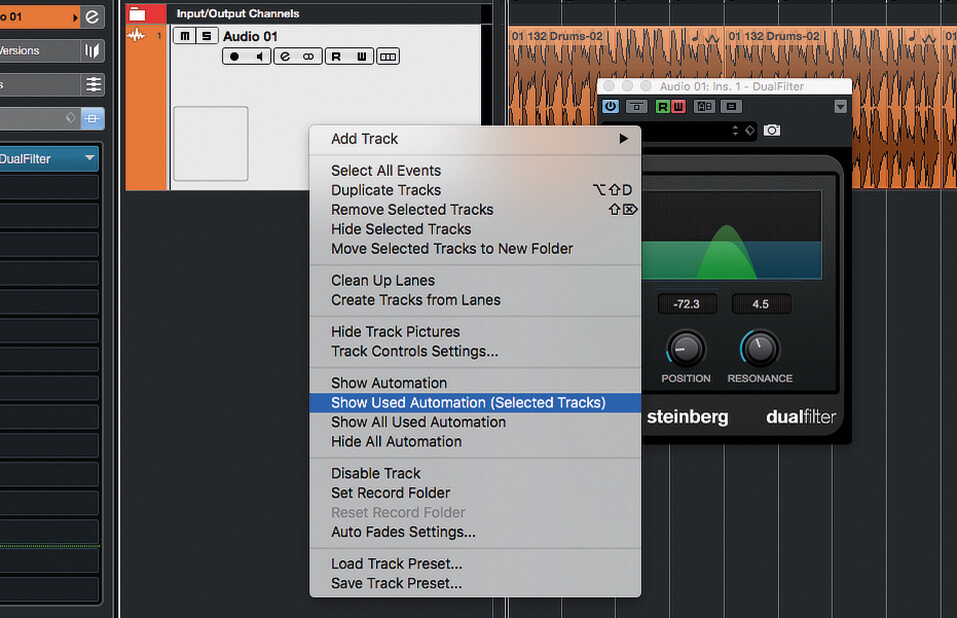
5. There are various ways to show automation lanes. Right-click on a track in the tracklist and select Show Used Automation (Selected Tracks). Start playback, noting how the plug-in’s controls replay your original movements.
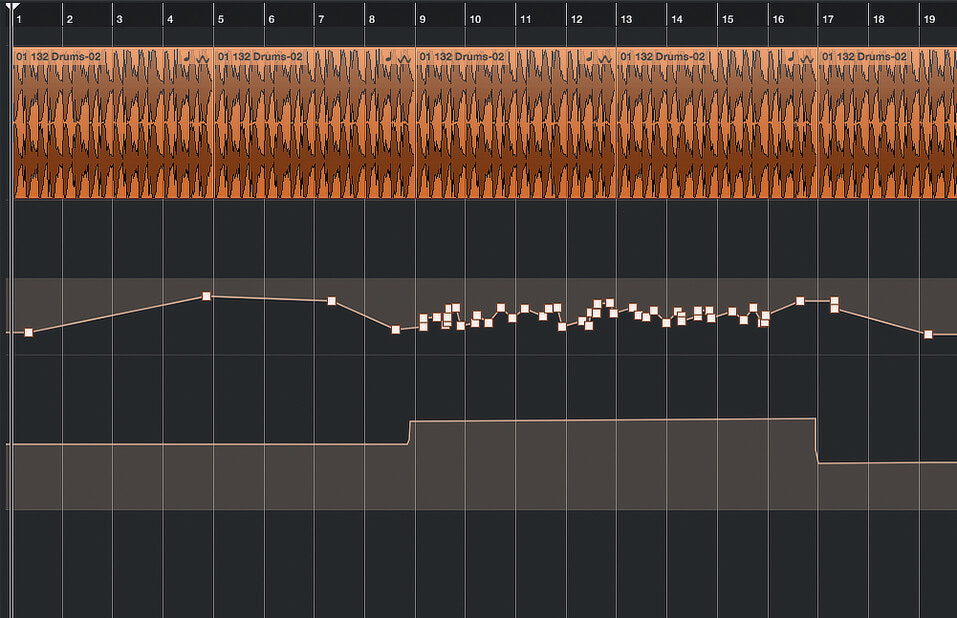
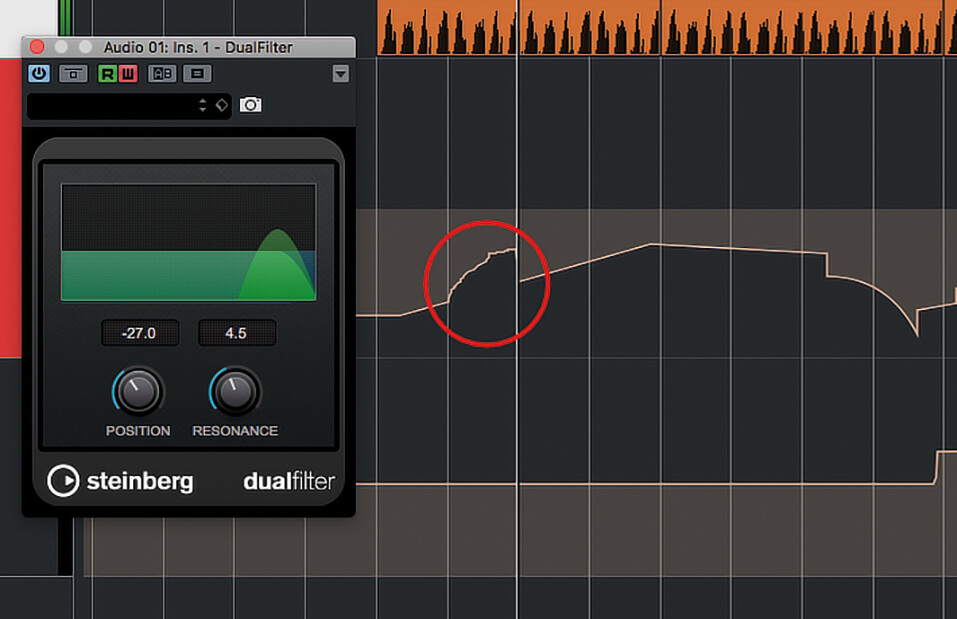
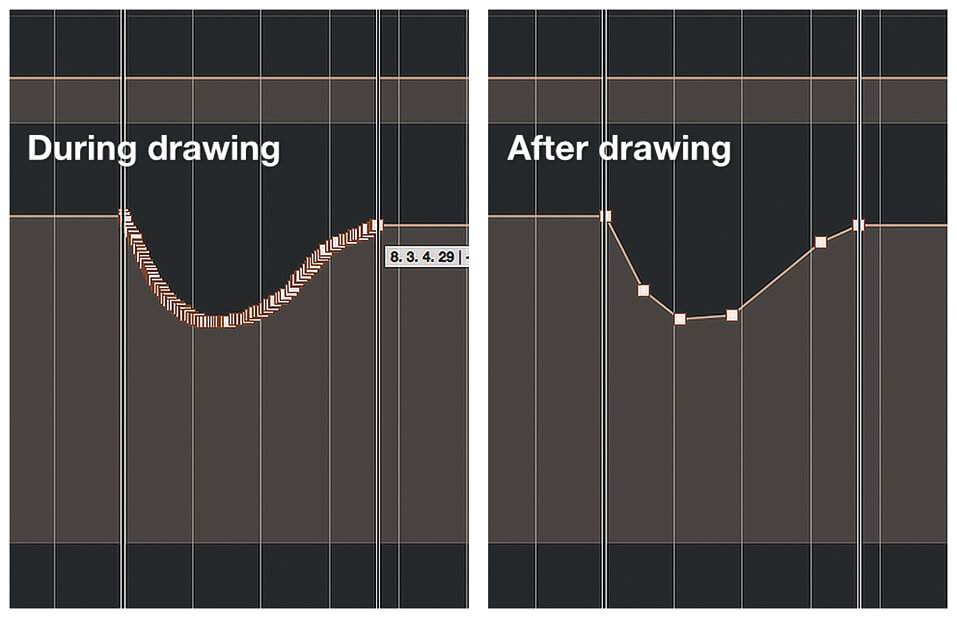
6. Close the filter plug-in and hold the mouse over one of the automation curves to show the breakpoints. Rather than writing a stream of breakpoints, Cubase has automatically tweened the curve, thinning out the breakpoints.
![]()
TWEENING The term tweening comes from the world of animation and refers to the transitional frames that lie between poses and scenes. Similarly, when dealing with parameter automation in a DAW, the term refers to the calculated values that lie between consecutive pairs of user-defined parameter values.
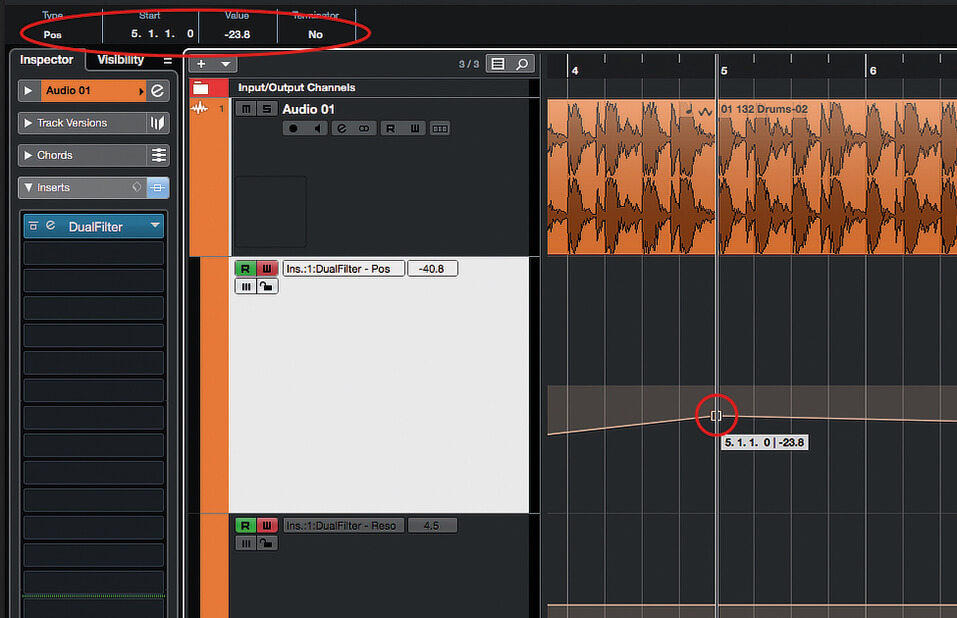
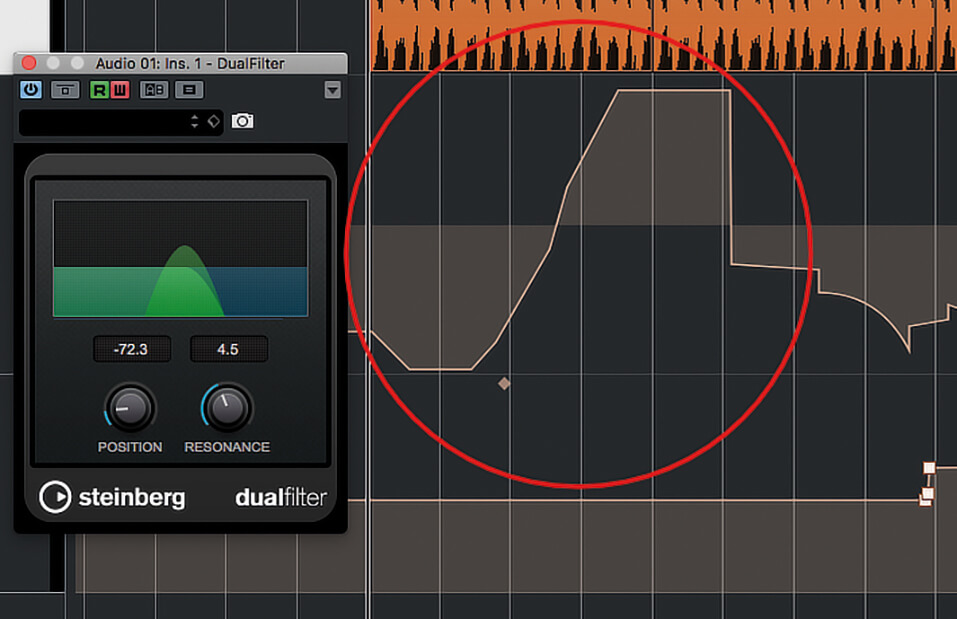
7. Zoom the timeline to get a closer view of some breakpoints. Click-and-drag a breakpoint. Note how it conforms to the grid snapping setting. The breakpoint’s details are shown in the info bar and can be modified from there.
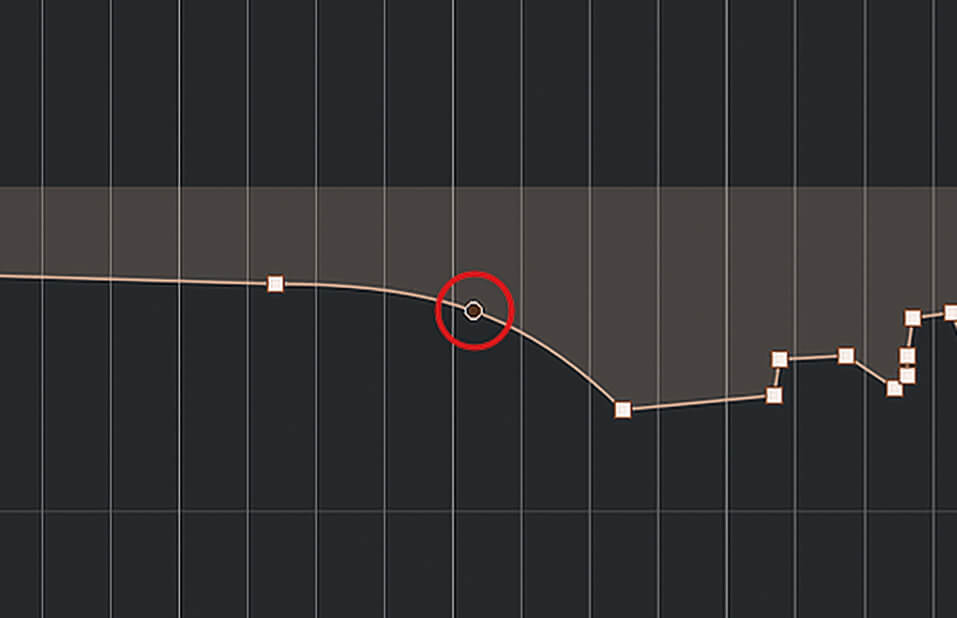
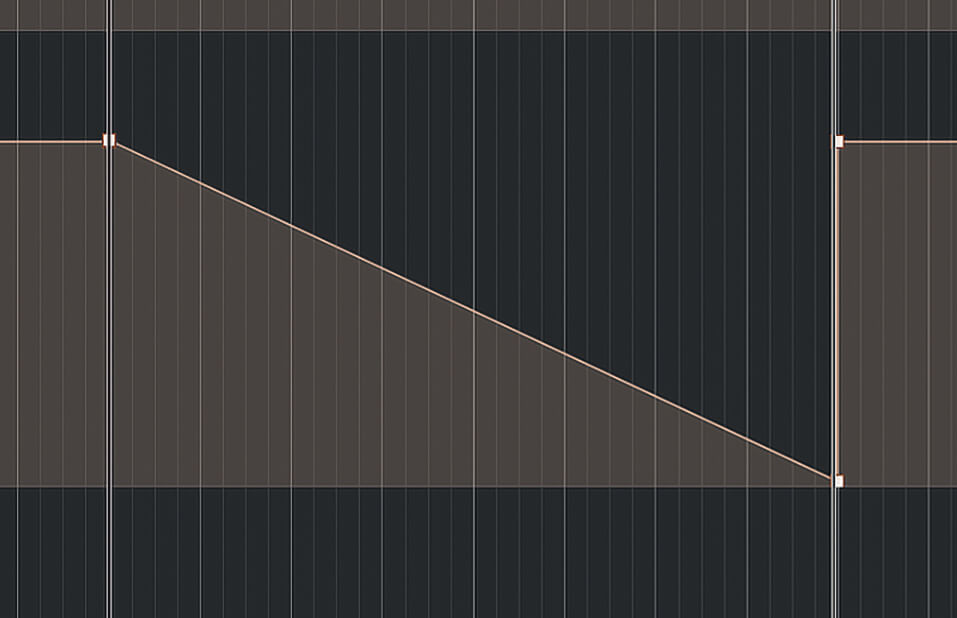
8. Position the view so you can clearly see a tweened section of the curve. Hold the mouse over the section and grab the round marker that appears. Drag this marker to see how it shapes the tweened curve.
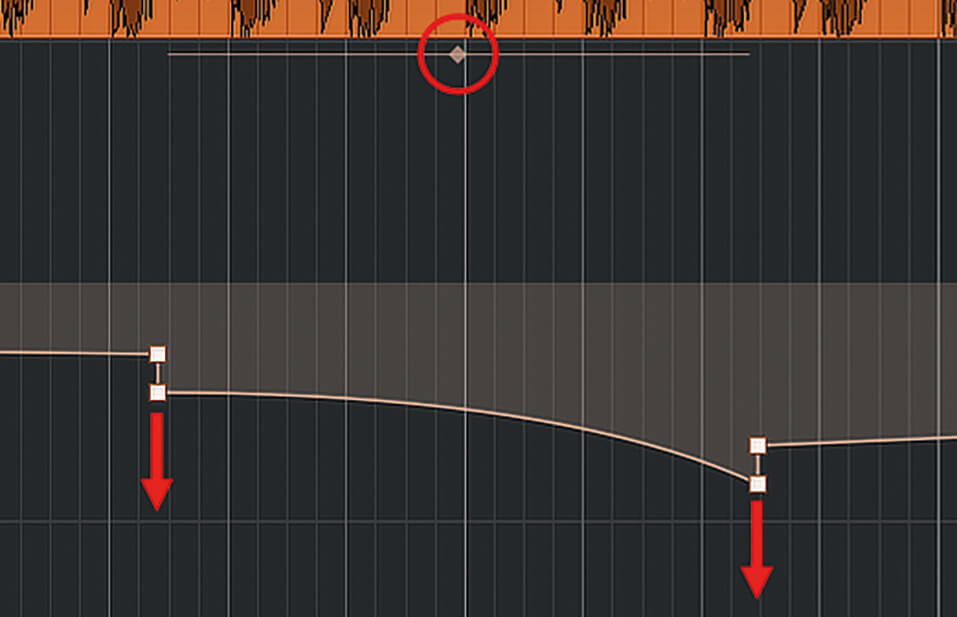
9. With the mouse still over a tweened section of curve, click and drag the diamond-shaped marker shown at the top of the lane above the section. This changes the values of the breakpoints at either end of the section.
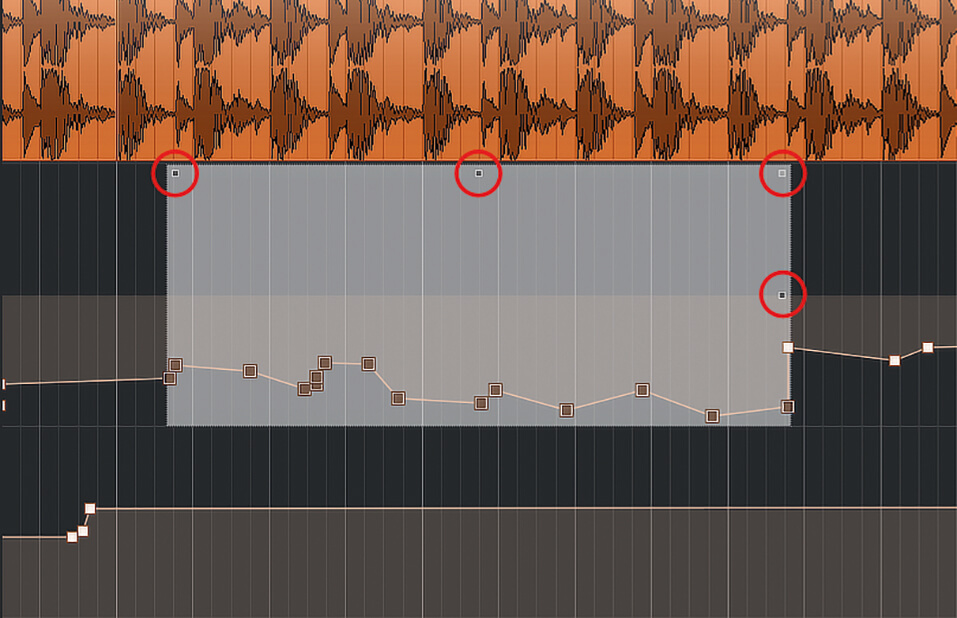
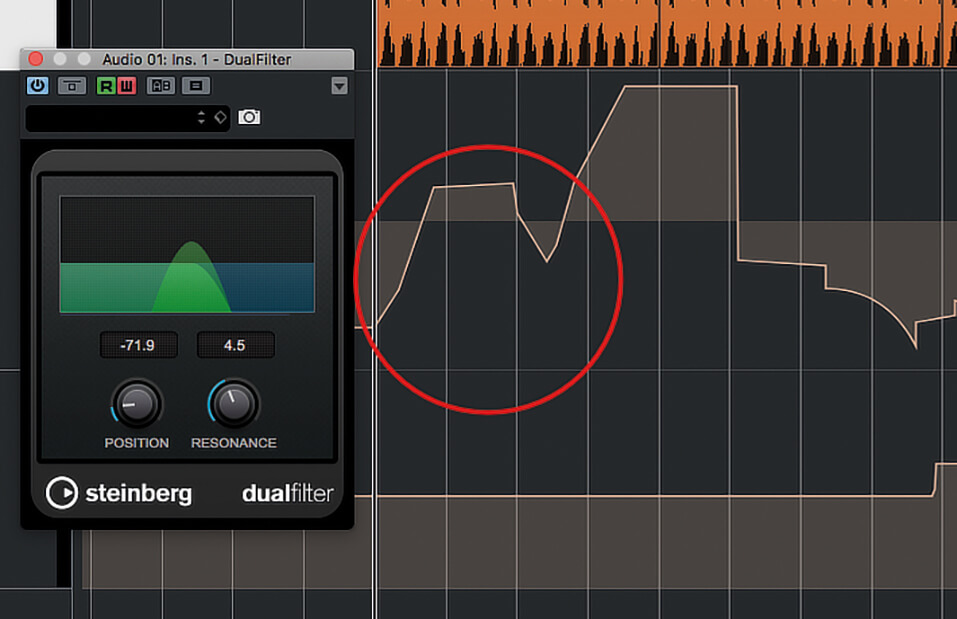
10. Drag a selection box around a number of breakpoints – a range selection will also be created. The handles drawn on the range selection can scale and tilt the curve; you can also drag the range around the timeline.
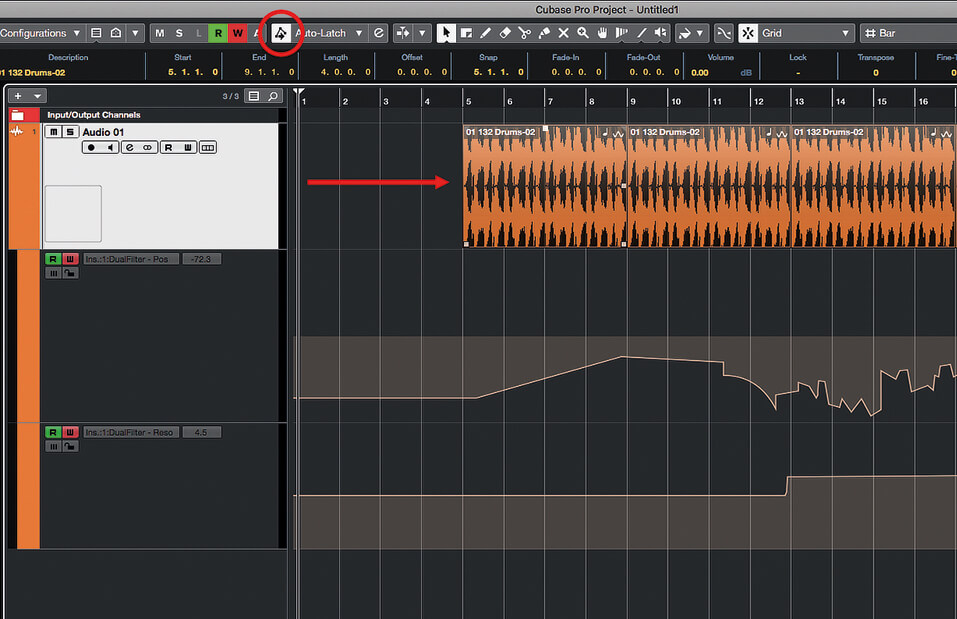
11. Activate the Automation Follows Events button. Zoom out and select all the drum parts, and then move them forward by a couple of bars. By activating the button, we ensured the automation was moved with the parts.
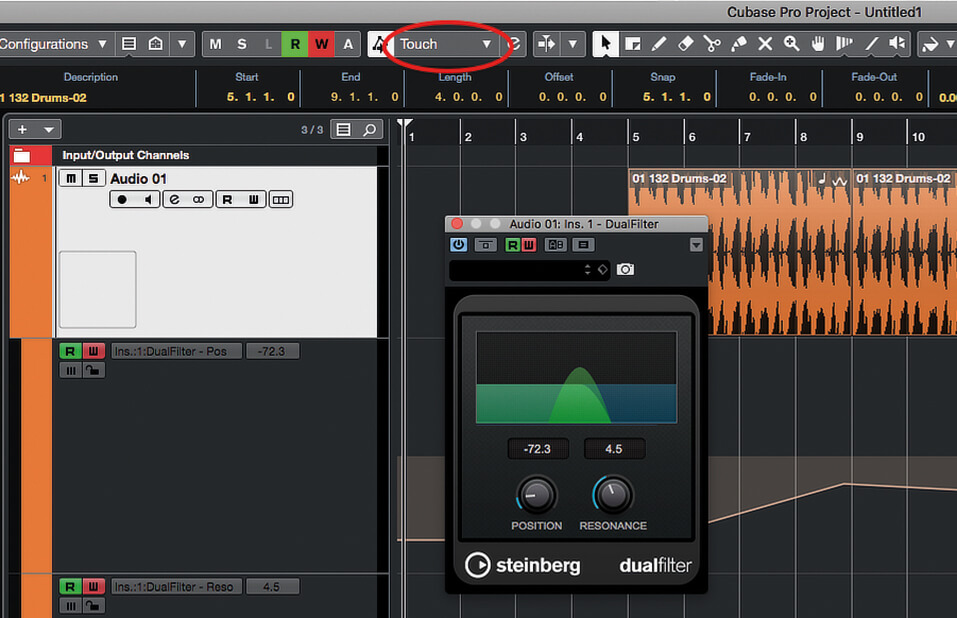
12. When overwriting automation, the Punch Out mode comes into play. This is set from the drop-down alongside the button we used in the last step. Use the drop-down to activate Touch mode and open the filter plug-in’s panel.
![]()
SELECTING LANES In Cubase, clicking the downward-pointing arrow that appears when you hold the mouse over the lower-left area of a track in the tracklist will open an automation lane. You can then choose which parameter will be shown by clicking the lane’s Parameter Name field.
13. Play a couple of bars of the track and grab a filter control and adjust it. Notice that your new curve overwrites the existing automation, and that when you let go of the control, the curve snaps back to the existing curve.
14. Switch to Auto-Latch Punch Out mode. Start playback and adjust the filter control again. Notice that when you let go of the control, the curve sticks at the new value, and when you stop it snaps back to the existing curve.
15. Switch to Crossover Punch Out mode. Start playback, move the control, let go and then move it again, this time back to the original curve. When the new curve intersects the old, Cubase stops overwriting existing automation.
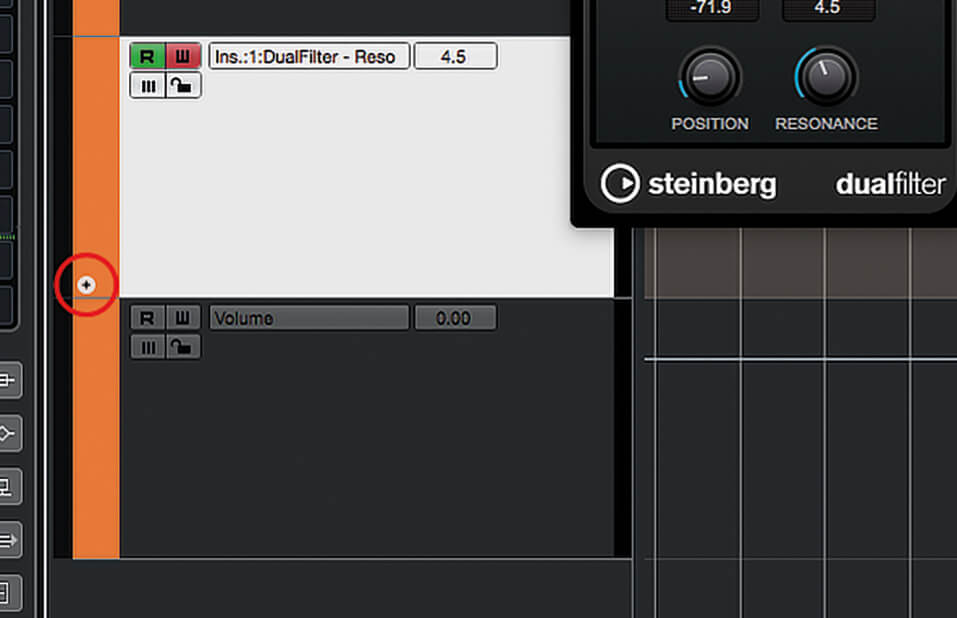
16. Cubase also allows you to draw curves completely by hand. Let’s do this with some volume automation. Hold the mouse over the lower-left corner of the bottom lane in the tracklist, and click the small + button that appears.
17. The new lane shows volume automation. Right-click to open the toolbox, select the Draw tool and draw a curve on the volume automation lane. When you stop, some breakpoints are replaced with a tweened curve.
18. Switch to the Line tool and click and drag a line on the volume curve to create a smooth fade between the breakpoints. Keep experimenting with curves and come back next time, when we’ll cover advanced techniques.