How to use Folders, Groups and Link Groups in Cubase
Cubase offers various methods for combining multiple tracks so that they can be edited, mixed and/or processed as though they are a single track. Let’s examine how these can streamline your projects and workflow.
At its heart, Cubase is focused on music creation, but that doesn’t stop it from performing well with spoken/voice-centric projects, mastering, audio post-production for TV and film and all the rest of it.
No matter what sort of material you’re producing, though, it’s very common to end up with large numbers of parts, tracks and channels filling up your Project and MixConsole windows, especially in the latter stages of production. Not only can this slow your progress, it can lead to slip-ups when editing parts and adjusting mix parameters, and can lead to inefficient use of the host system’s resources.
Helping you to work around such problems are Folder tracks, Group tracks, and Link Groups, all of which can be used individually or in combination. Knowing the best option(s) to use in different situations allows you to set things up in a streamlined way before you even start laying tracks, and is a much quicker way of working than juggling and moving tracks, channels and processors once your project has grown in size.
Folder tracks
Folder tracks allow tracks in the Project window to be ‘nested’ into a single encompassing track. On the timeline, a Folder track shows a part that’s a visual representation of the tracks within the Folder, and any edits made to this Folder part are applied simultaneously to the other tracks within the Folder. In addition, enabling a Folder track’s Group Edit Mode causes edits made on any track within that folder to be duplicated to all other tracks within the folder.
Folder tracks can be used to create logical groupings of the tracks and channels in your project. For example, Cubase automatically creates folders for input and output channels, instruments and more. However, where they are indispensable is when dealing with multi-tracked parts such as drum kits, stacked vocal parts and so on, simplifying the editing process by ensuring continuity across all related parts.
Group tracks
Folder tracks aren’t directly represented in MixConsole windows. They don’t create a mixer channel, nor do they create any visual cues to indicate whether a channel’s track is within a Folder (they do, however, play a part in channel ordering). Grouping mixer channels, then, is done using Group tracks. These create a buss to which other channels can be routed, providing both a master volume for those channels and a place where those channels can be processed simultaneously.
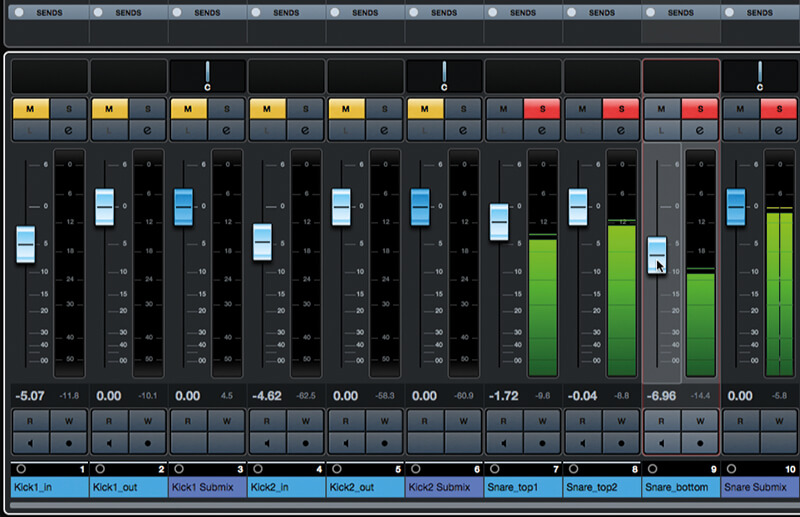
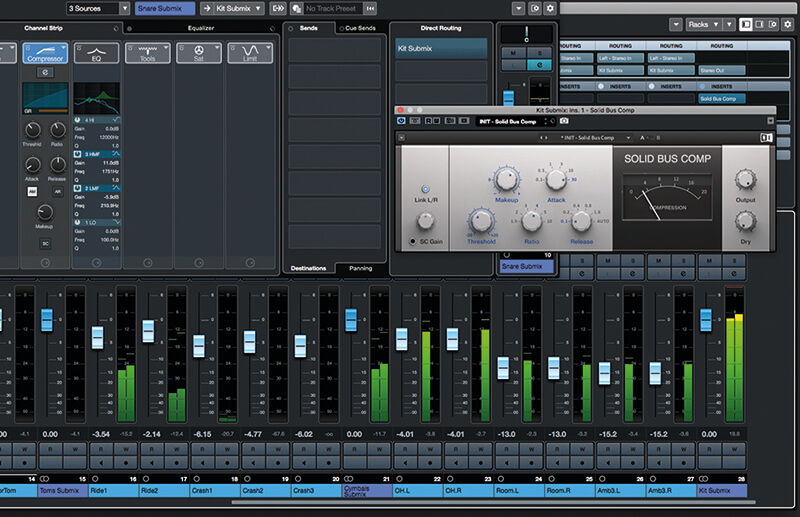
A Group track can itself be routed to another Group track. A good use for this is when working with an acoustic drum kit. Let’s say you have both top and bottom mics on a snare drum; it makes sense for these two channels to be in a group, so that – once their relative volume is set – you can adjust the overall volume with a single fader, and process the combined signal with one plug-in chain and one set of send effect settings. The kick drum, too, may use a couple of mics and it also makes sense to give toms and cymbals their own groups as well. These Groups could then be routed to another Group track that acts as the main submix for the entire kit, perhaps with a buss compressor applied to tie the sound together and give it some punch.
Link Groups
Like Group tracks, Link Groups are primarily concerned with managing mixer channels, but the two concepts are fundamentally different. When channels are joined together in a Link Group, changes made to the parameters of one of those channels will be duplicated to all other channels in the group. This makes them ideal for things like joining multiple mono channels together into a multi-channel group, and because they don’t create their own buss, they can be easier on the host computer than a Group track set up to perform a similar task.
Each Link Group specifies the channel parameters it will govern – mute/solo, sends, panning, etc. If including channel volume in a Link Group, you have the option of controlling this with a VCA Fader – without a VCA Fader, changes to a channel fader will be applied to all other channels in the group; with a VCA Fader, changes to individual channel faders aren’t replicated, but changes to the VCA Fader are applied to all channels in the group. Link Groups operate in a relative rather than absolute fashion, so any relative differences between linked parameters are retained when adjusting that parameter.
Combining methods
In practice, it’s normal to combine the above methods in different ways. A multi-tracked drum recording is a great way to explore this – if you have one to hand, then dig it out, otherwise a quick web search should turn up some suitable example material.
Using folders, groups and link groups: step-by-step
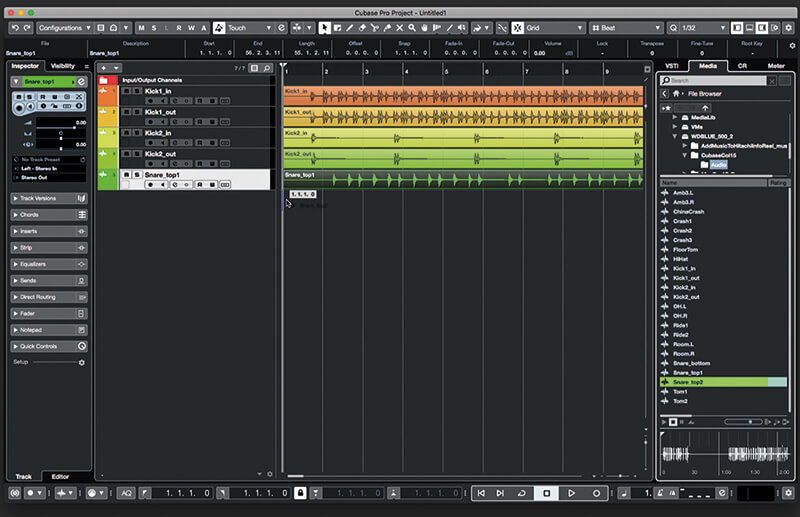
1. Launch Cubase and create a new, empty project. Open the right-hand zone of the Project window, select the Media tab and use the File Browser to locate your multi-tracked drum stems. Drag these to the Project window, creating a new track for each.
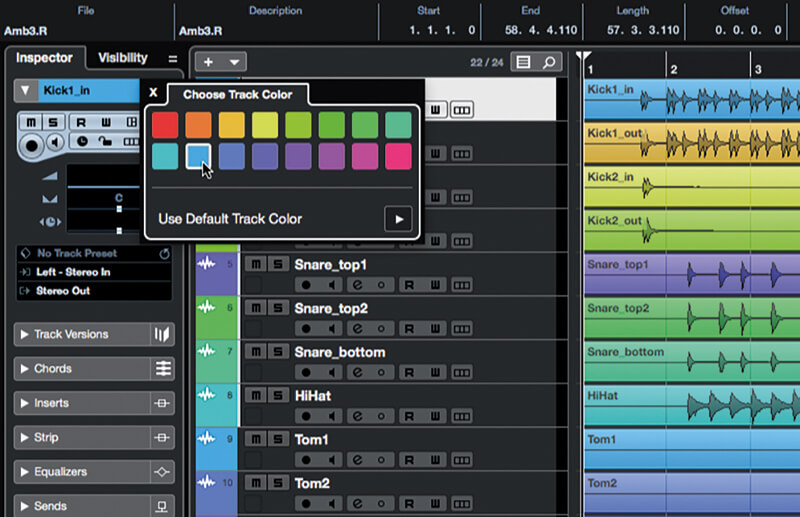
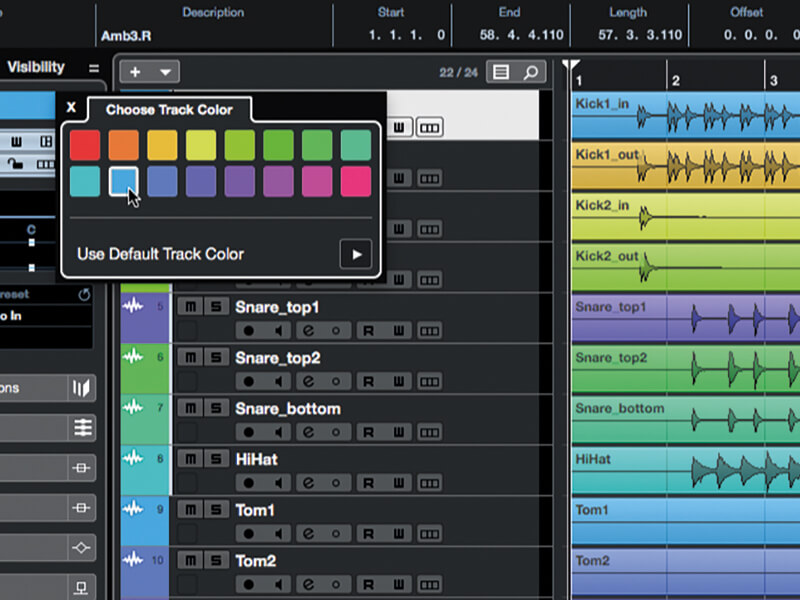
2. Open the Track Inspector and select the first track. In the Inspector, click the arrow at the left of the track’s name field, then choose a colour for the track. Repeat this for every track, assigning the same colour to all.
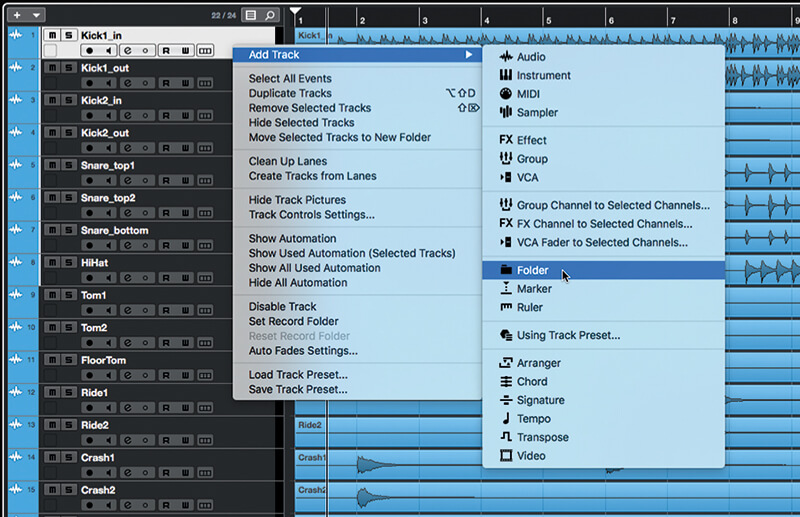
3. Right-click anywhere in the track list and select Add Track > Folder. We’re creating only a single Folder track, so enter 1 into the Count field in the dialogue window that opens, then click Add Track.
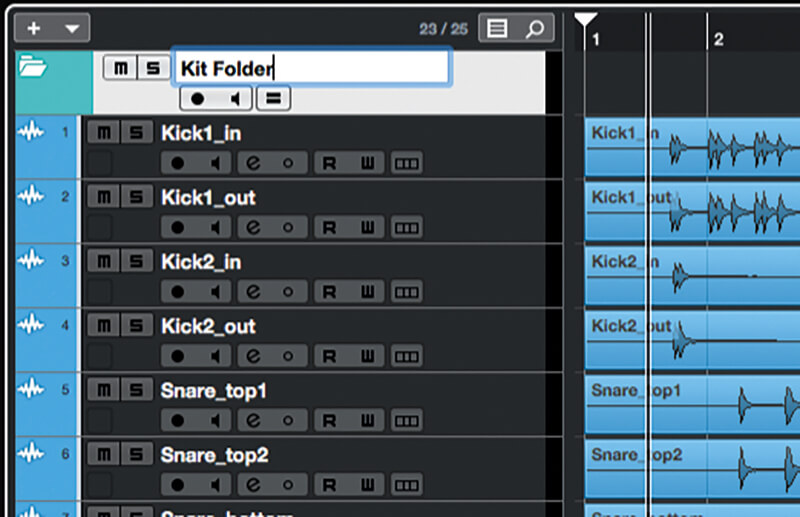
4. Locate the new Folder track and drag it to the top of the track list and set its colour in the Track Inspector (use a different shade of the colour you used for the audio tracks). Change the Folder track’s name to ‘Kit Folder’.
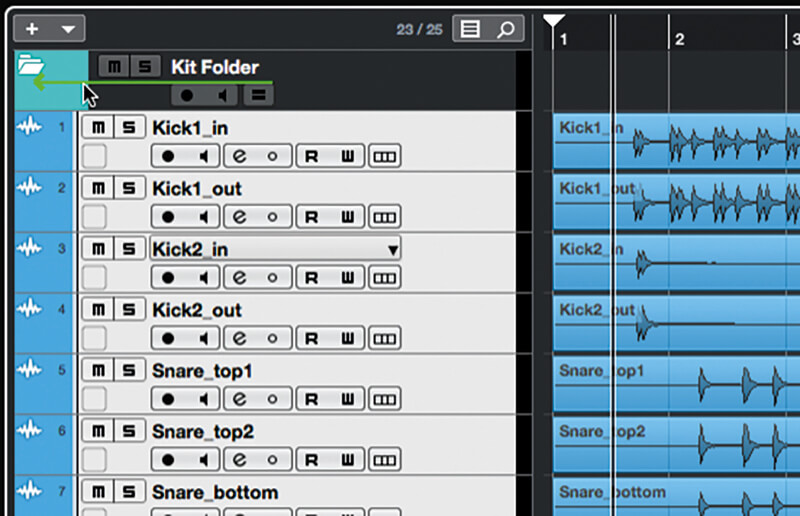
5. Select all of the audio tracks in the track list (but not the Kit Folder track). Drag the tracks onto the Kit Folder track, and release the mouse button when a green left-pointing arrow appears over the Folder track.
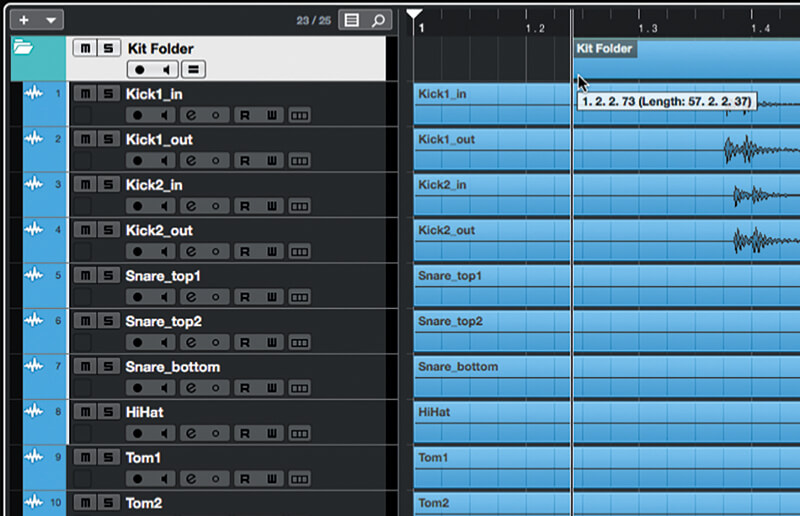
6. Trim the Folder track’s part, noticing how the audio parts follow suit. Now trim an audio part, noticing that the other audio parts are unaffected (enabling Group Edit mode on the folder would change this behaviour). Undo these changes before moving on.
COLOUR-CODING Using a consistent colour scheme for the tracks and parts in your projects is a great way to make things more visually intuitive. You can modify and add to Cubase’s palette of 16 preset colours, as well as naming colours to help you remain consistent.
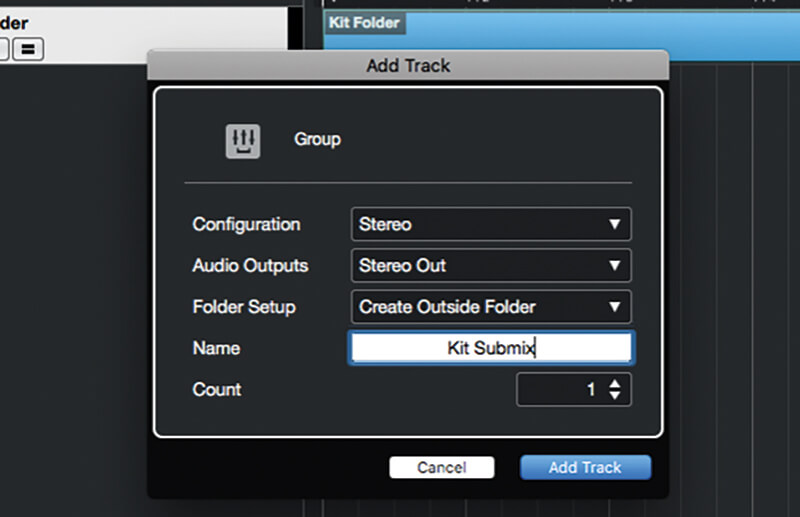
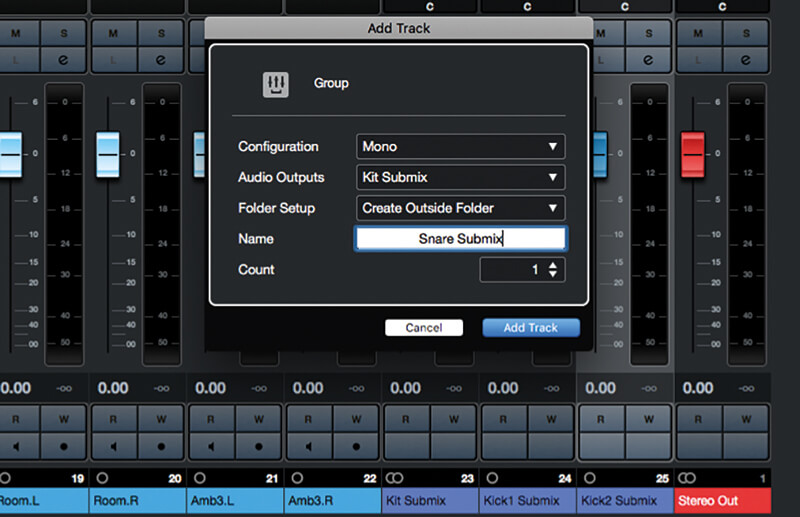
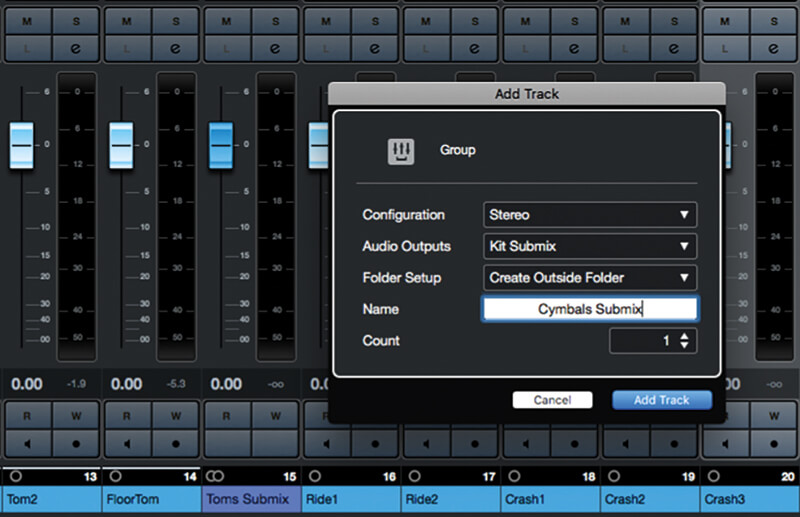
7. Click the folder icon on the Kit Folder track to hide its constituent tracks. Right-click in an empty area of the track list and select Add Group Track. Copy the settings shown in the image above into the dialogue that opens, then click Add Track.
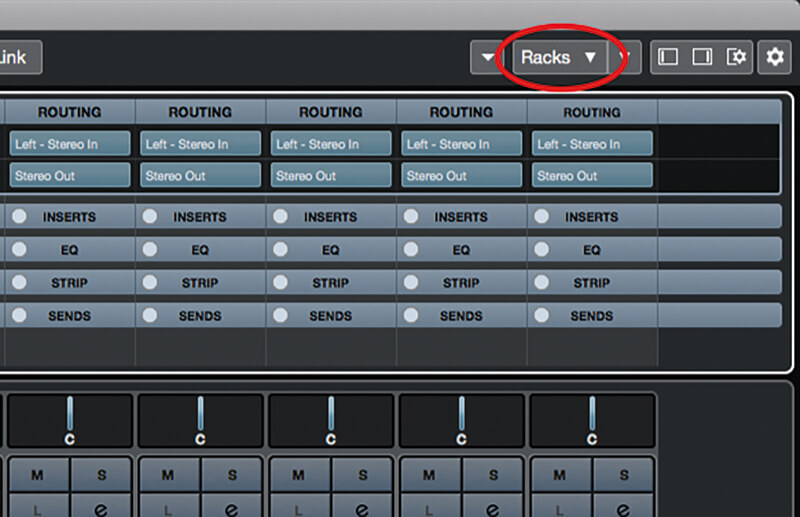
8. Change the colour of the new Group track, using a different shade of the colour you used for the audio tracks. Open the MixConsole and expand the Routing rack at the top of the mixer (you may need to enable this from the mixer’s Racks menu).
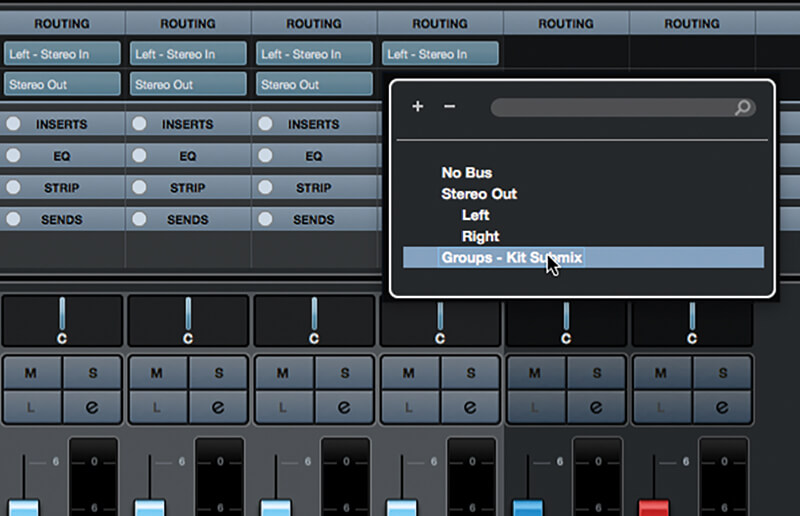
9. Click the name field of the first drum audio channel, hold [Shift], and then click the last audio channel. Hold [Shift] and click the output-routing button in the Routing rack. Select Drum Submix – all drum channels should now be routed to Drum Submix.
10. If the recording you’re using employs multiple channels for a single drum (a top and bottom snare mic, for example), use the above method to create new Group tracks for each of these, routed to the Drum Submix track (typically these will be mono groups).
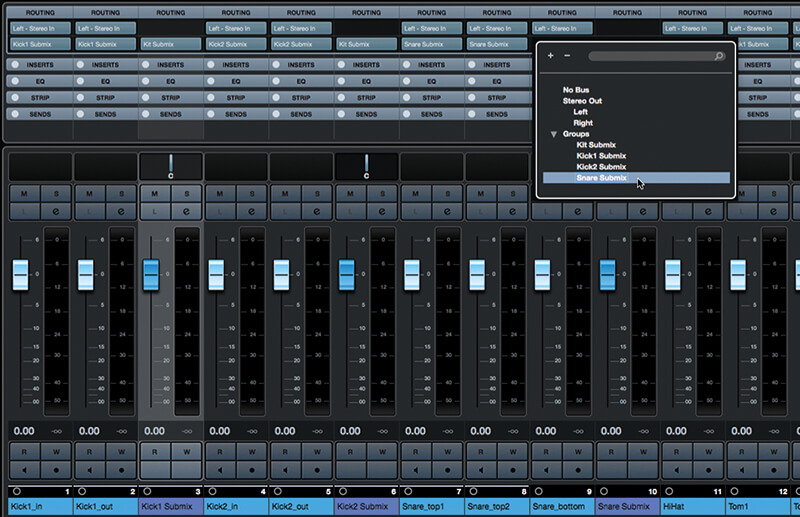
11. Switch to the Project window. Expand Kit Folder and move all of the new Groups into the folder. Place the multi-mic groups so they sit alongside their related audio tracks. Back in the mixer, route the multi-mic audio channels to their new groups.
12. Solo your first multi-mic group, hit play, and then set the balance between the drum’s individual mics using their audio channels. If any individual mics needs processing or treatment, apply this to the audio track, too. Repeat this for all multi-mic groups.
TRACK AND CHANNEL VISIBLITY A good way of decluttering your Project and MixConsole windows is to hide tracks, folders and groups that you don’t immediately need. You do this from the Visibility tab found in the left-hand zone of both Project and MixConsole windows.
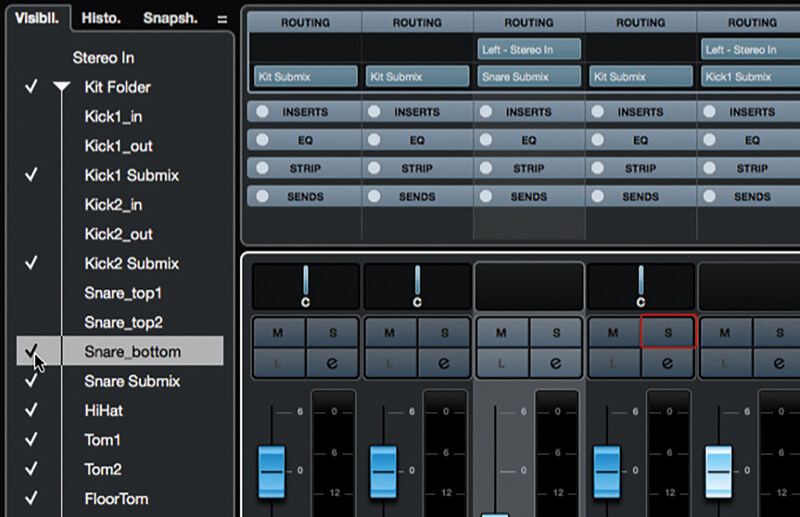
13. Open the left-hand zone of the MixConsole. Select the Visibility tab. Untick (ie, hide) the multi-mic audio channels, leaving just their groups visible. These Group tracks can now be used for mixing and processing the combined mic signals.
14. As well as combining multi-mic’d drums into groups, it’s common to create Group tracks for sets of related drums – toms or cymbals, for instance. Do this now, being sure to use stereo Groups so that the individual drums can be panned within their group.
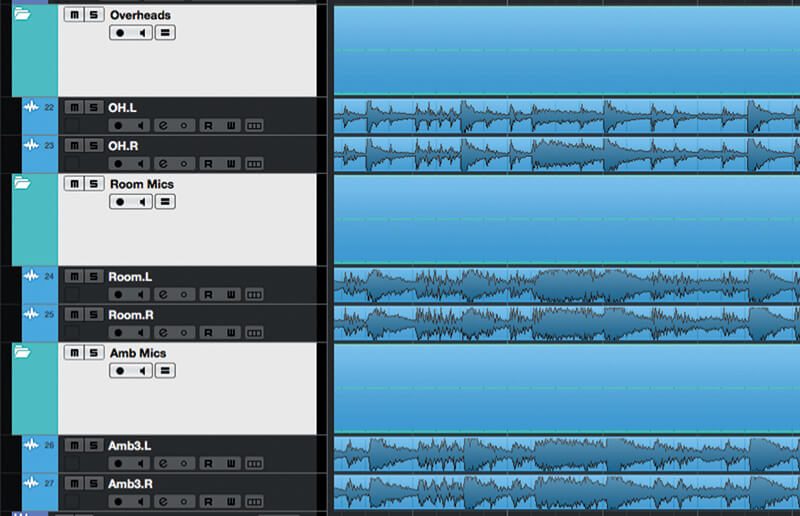
15. Your recording may include individual mono channels that are part of a stereo pair – overheads and room mics for example. Create Folder tracks for any such left-right pairs, giving a suitable name to each and nest the audio tracks within the new folders.
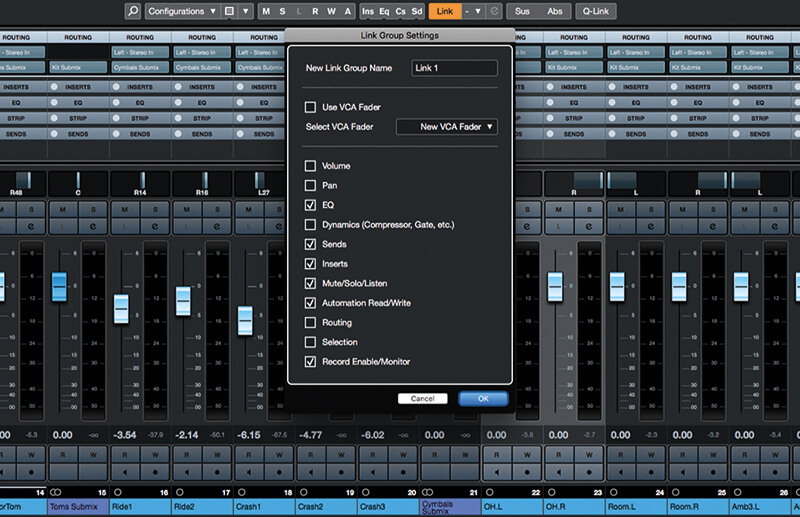
16. In the MixConsole, select the first pair of L-R channels (clicking a name field is often the easiest way to select a channel in the MixConsole). Click the Link button at the top of the MixConsole – the Link Group Settings panel will open.
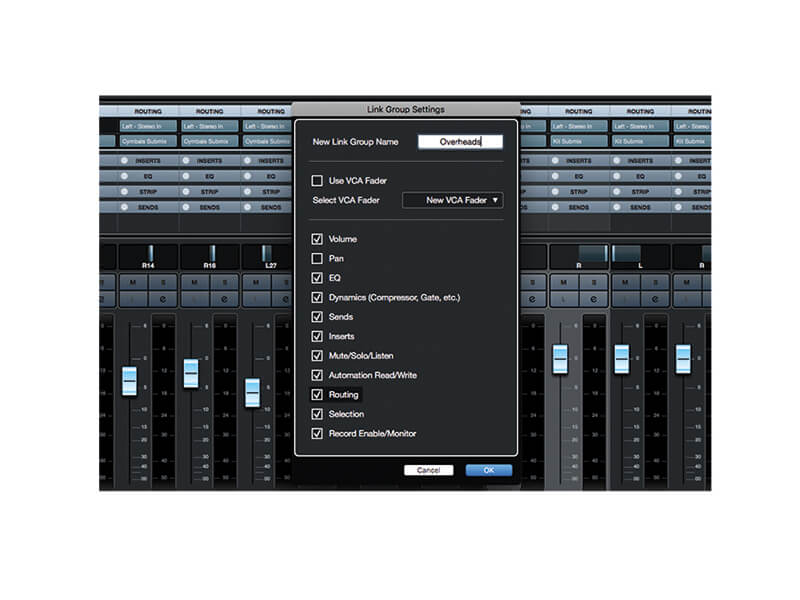
17. Enter an appropriate name, such as ‘Overheads’, then select (ie, tick) every option other than Use VCA Fader and Pan. Click OK to create the Link Group. Repeat this process for any other pairs of left-right channels.
18. You now have a comprehensive and efficient multi-channel drum setup that simplifies the editing and mixing process while retaining maximum flexibility for adding effects and processors. Keep experimenting with Folders, Groups and Link Groups so that you fully appreciate their similarities and differences.
For more Cubase tutorials and workshops, check here.