How to use Score Editor in Cubase Pro
The ability to convert MIDI notes into scored music, and vice versa, has been one of the strings to Cubase’s bow ever since the app’s inception, but there’s an awful lot more to using this feature than meets the eye.

Printed music, notation, scoring, ‘the dots’ – call it what you will, this method of representing music in a visual form has existed for hundreds of years, and remains the principal written language of music. Cubase has been able to convert MIDI recordings into such notation, as well as allow the user to enter music in notated form that can then be played as MIDI notes, ever since the very first version. “Fabulous!” we all thought back in 1989 when we witnessed our improvised keyboard noodles being instantly converted into notation, “No more spending hours with pen and expensive manuscript paper writing out parts for ‘the talent’ to perform”. Unfortunately, things are rarely as straightforward as they may appear!
When writing a spoken language such as English there is not much room for ambiguity in how you represent each word – you either spell a word correctly so that it can be understood, or you dot’n, and it ins’t. But music notation is a much more interpretive form of script, and whilst it is perfectly capable of defining a specific pitch without any ambiguity, the timing, feel, fingering, dynamics and so-on can be much more open to interpretation. Ultimately it falls to the performer to decipher the composer’s intended meaning, as computers – modern advanced AI aside – are not the best at interpreting things that are so… well… human.
You can hear this for yourself: If you were to take a printed score and use Cubase’s Score Editor to slavishly copy-in each note, and using the intended instrumentation for each part, the resulting performance will hit all of the correct notes, but will also sound mechanical and soulless. It will lack the ‘feel’ – the pushing and pulling against the beat, the dynamic fluctuations, the performance nuances – that a musician would introduce if performing the exact same music.
If you are coming at things from the other direction, aiming to notate something you’ve already performed and recorded as MIDI data, the computer’s lack of innate human empathy and understanding can create other complications. Cubase does try to notate what you intended rather than exactly what you have played, but there are limits to what this can achieve, especially when it comes to complex polyphonic parts. When Cubase can’t work out what was intended, it falls back on pure accuracy, which isn’t as desirable as you may think.
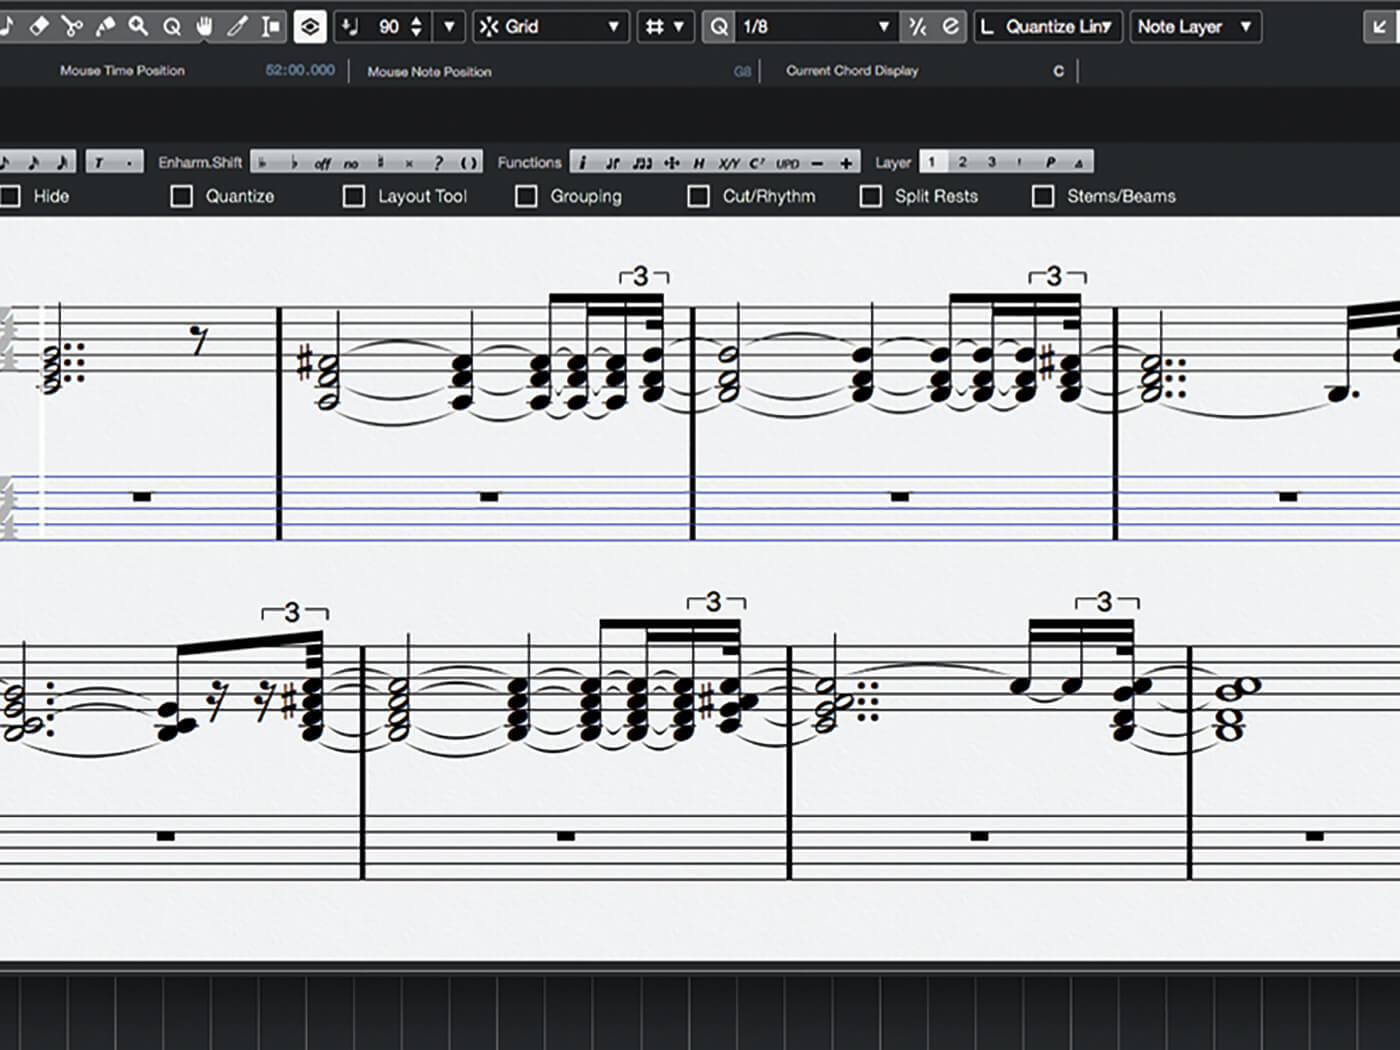
For example, where a note is played as a crotchet (i.e. a 1/4 note), but is in fact a smidgen shorter or longer than a quarter of a bar as measured by a super-accurate computer, then it may end up being drawn as a series of tied notes whose lengths add up to what was actually played. This issue can then be compounded by notes that are played slightly off-time, and which therefore result in unintended rests being created to ‘pad’ the note start positions and/or length.
The practical upshot of all of this is that you can’t just open the Score Editor and expect to see notation that accurately reflects what you had intended – the initial appearance is often more like a page of spider’s footprints! You may think of using quantisation to accurately align note-on events and note lengths, but hard quantising would kill the nuances of the performance, whilst iterative quantising is unlikely to solve problems caused by over-accuracy, because some timing subtlety will remain.
Layers of adjustment
Cubase’s Score Editor acts as a sort-of visual layer that sits over the top of the music, and that allows all sorts of modifications to the appearance of notes on the stave without those changes impacting the underlying MIDI recording. In general, these modifications are applied ‘on-the-fly’ so that any changes made to the underlying MIDI recording will bubble up to the Score Editor in the correct way.
There’s more to notated music than just staves and notes, though – there are clef marks, key and time signatures and all sorts of other symbols, markers and text that may need to be added in order to create a finished score. And once the score itself is created you may require different layouts and arrangements of it: A full score for a band leader, but individual parts for each instrumentalist, for instance.
Cubase has the tools to assist with all of this, but the Score Editor is a very deep topic so we can’t chomp through all of its mysteries in a single sitting. This time around we’re going to get the ball rolling by looking at the basics of Cubase’s scoring tools, but be sure to come back for future instalments where we’ll be digging into some of the Score Editor’s more advanced features and functions.
Score editing in Cubase Pro: step-by-step
1. Launch Cubase and create a new project. Create a new Instrument track using HALion Sonic SE. Use HALion Sonic’s browsers to load a piano patch – we’ve plumped for Mellow Grand Piano, but you can choose whichever you like.
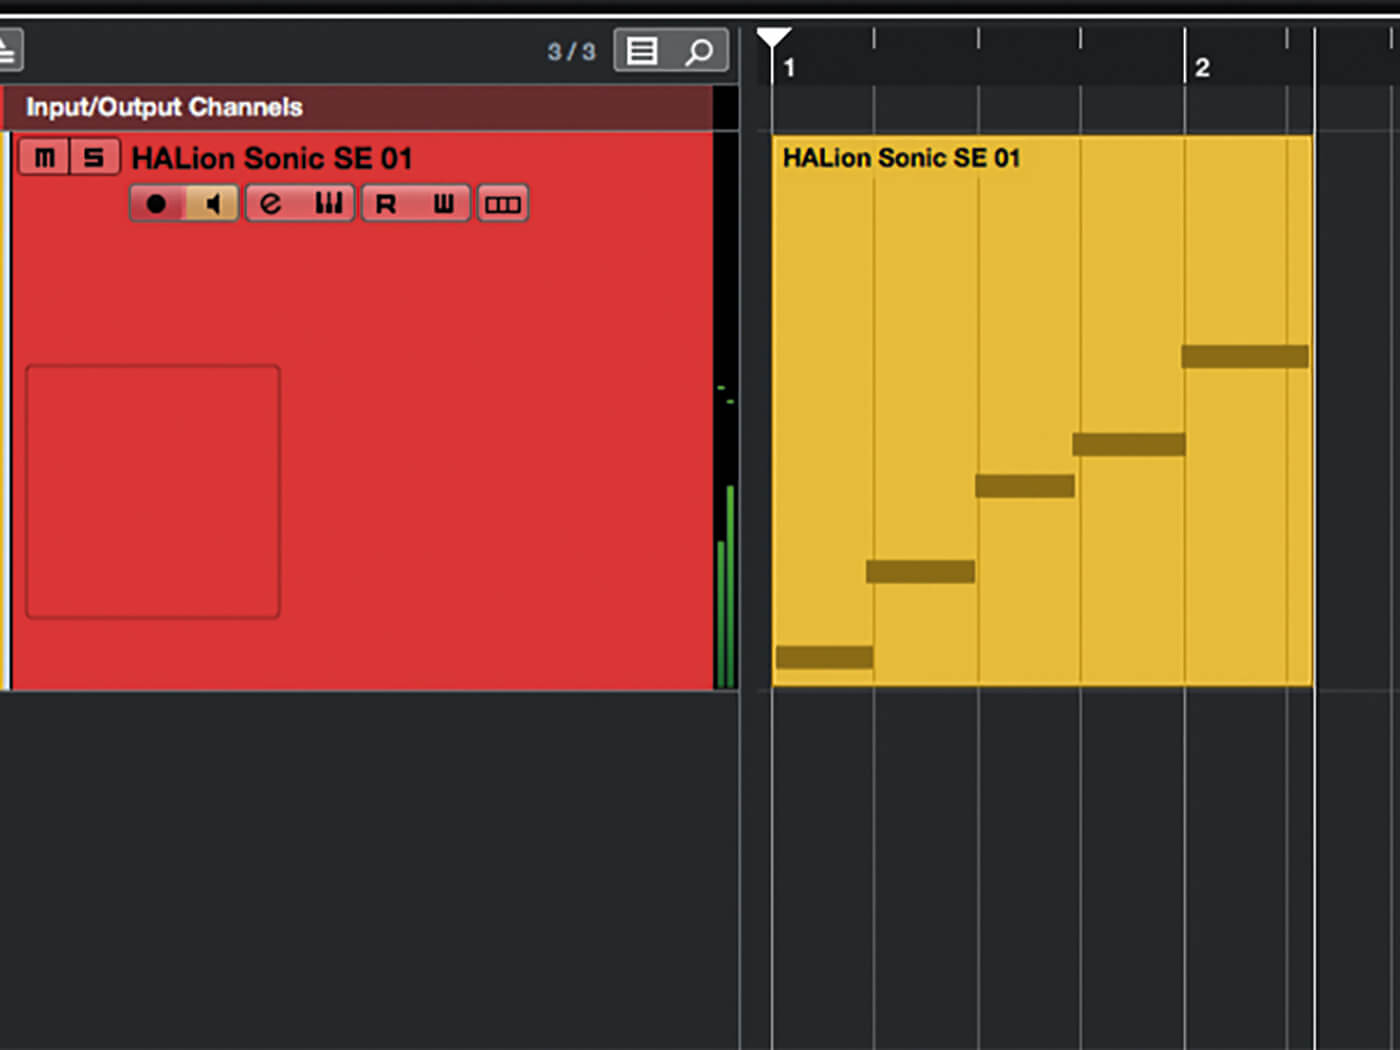
2. Set the tempo to something comfortable – 90-100 BPM is ideal – and enable the metronome. Record a simple one octave C major scale in crotchets (i.e. one note per beat), starting from middle C (i.e. C3).

3. Select the part you’ve just recorded, then select Open Score Editor from the Scores menu. Cubase has done a good job of interpreting the monophonic playing and ignoring timing inaccuracies – those inaccuracies are revealed by the Key Editor, so take a look there for comparison.
4. Close the Score Editor and delete the monophonic part you recorded. Hit record again, and this time play a series of chords (right hand only), with each chord lasting a full bar (i.e. four beats). Open the part in the score editor when done.
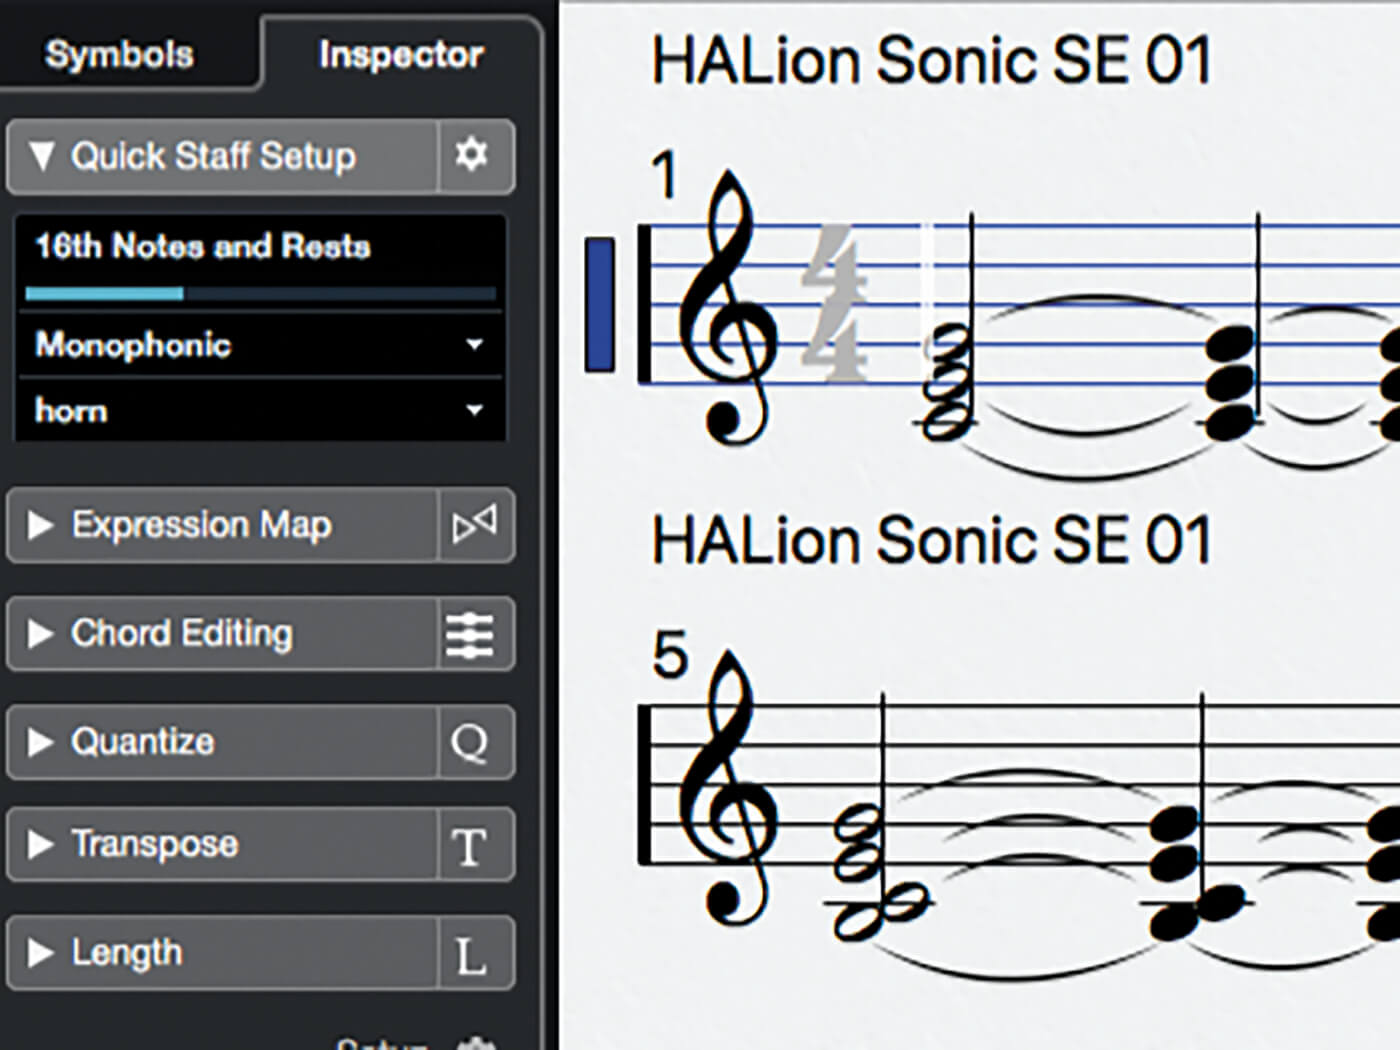
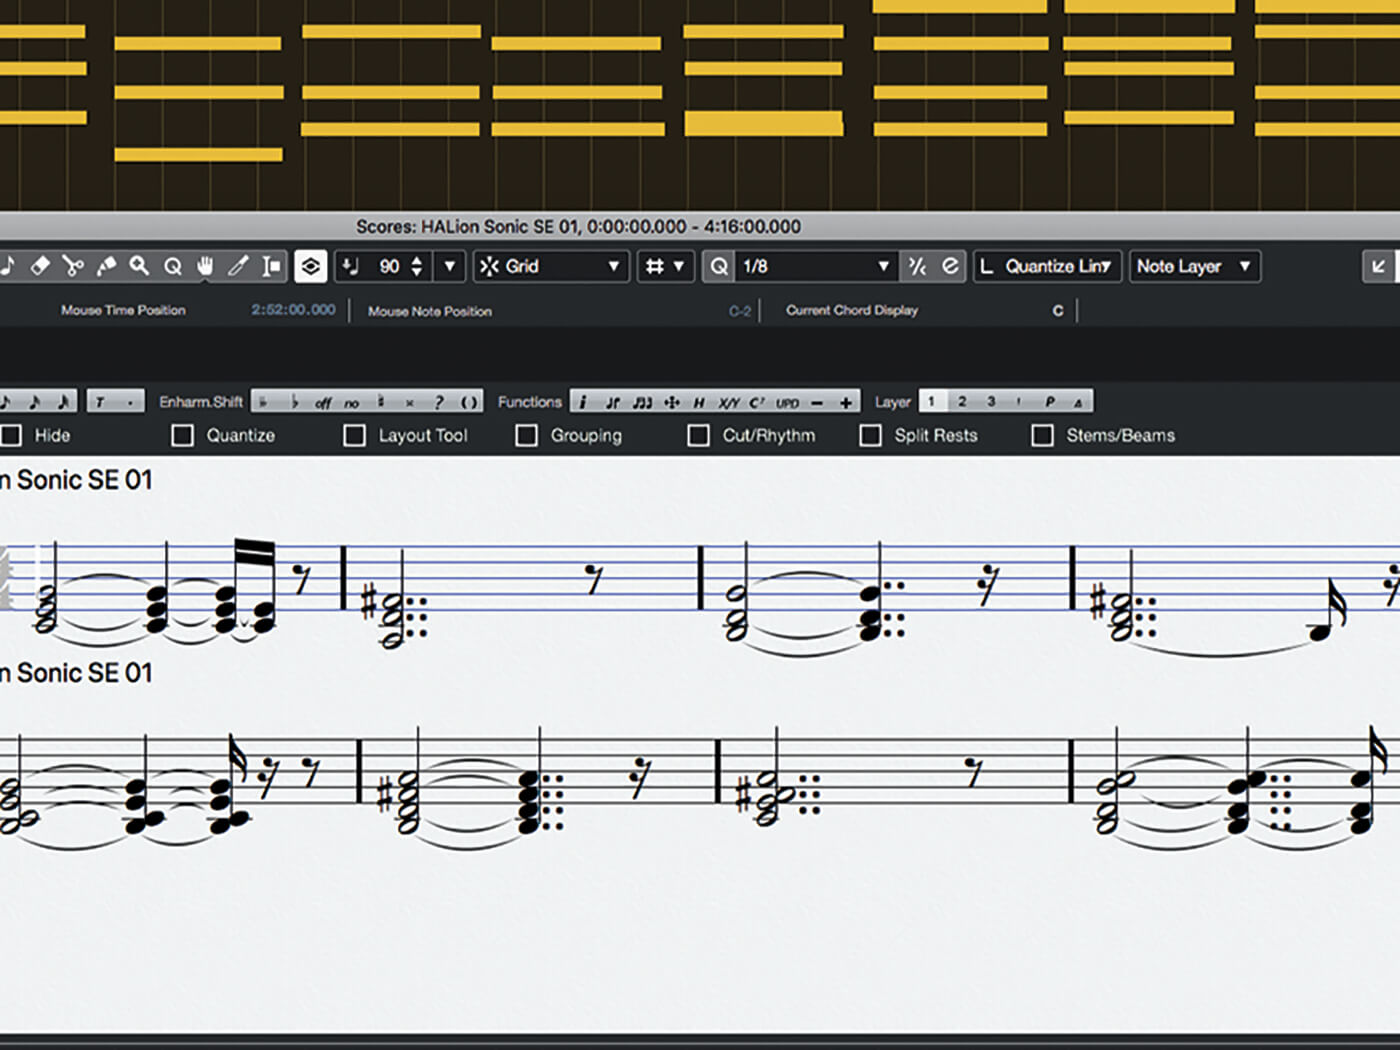
5. Cubase will likely have been unable to decipher your intended musical meaning, and so has created quite a messy score. The first step towards remedying this is to configure the stave appropriately, so open the Quick Staff Setup section of the editor’s left zone.
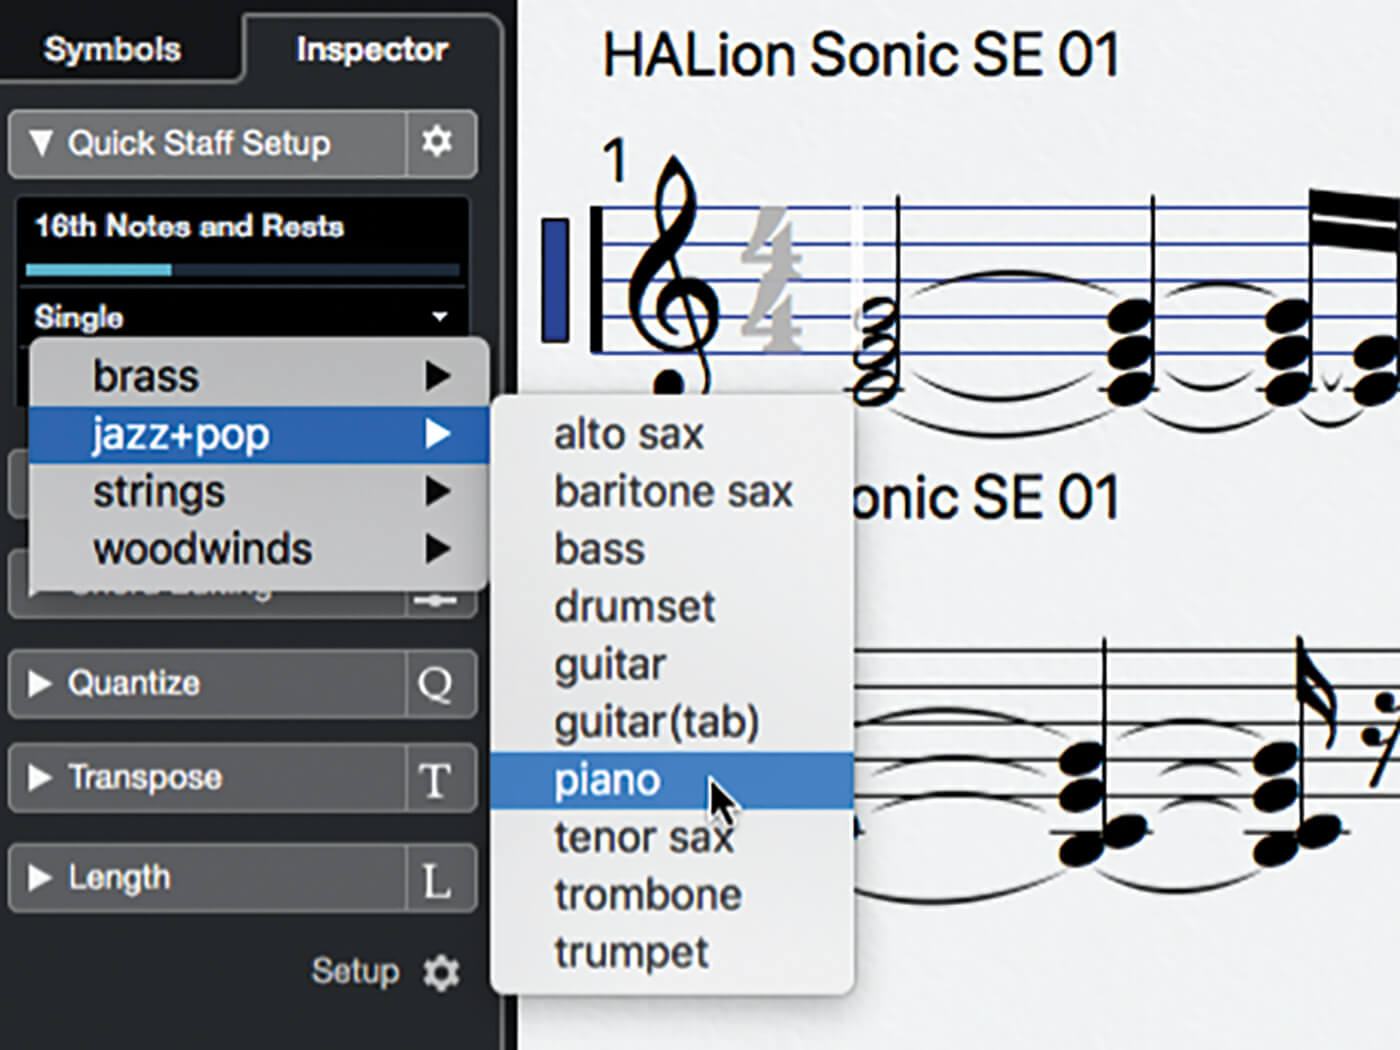
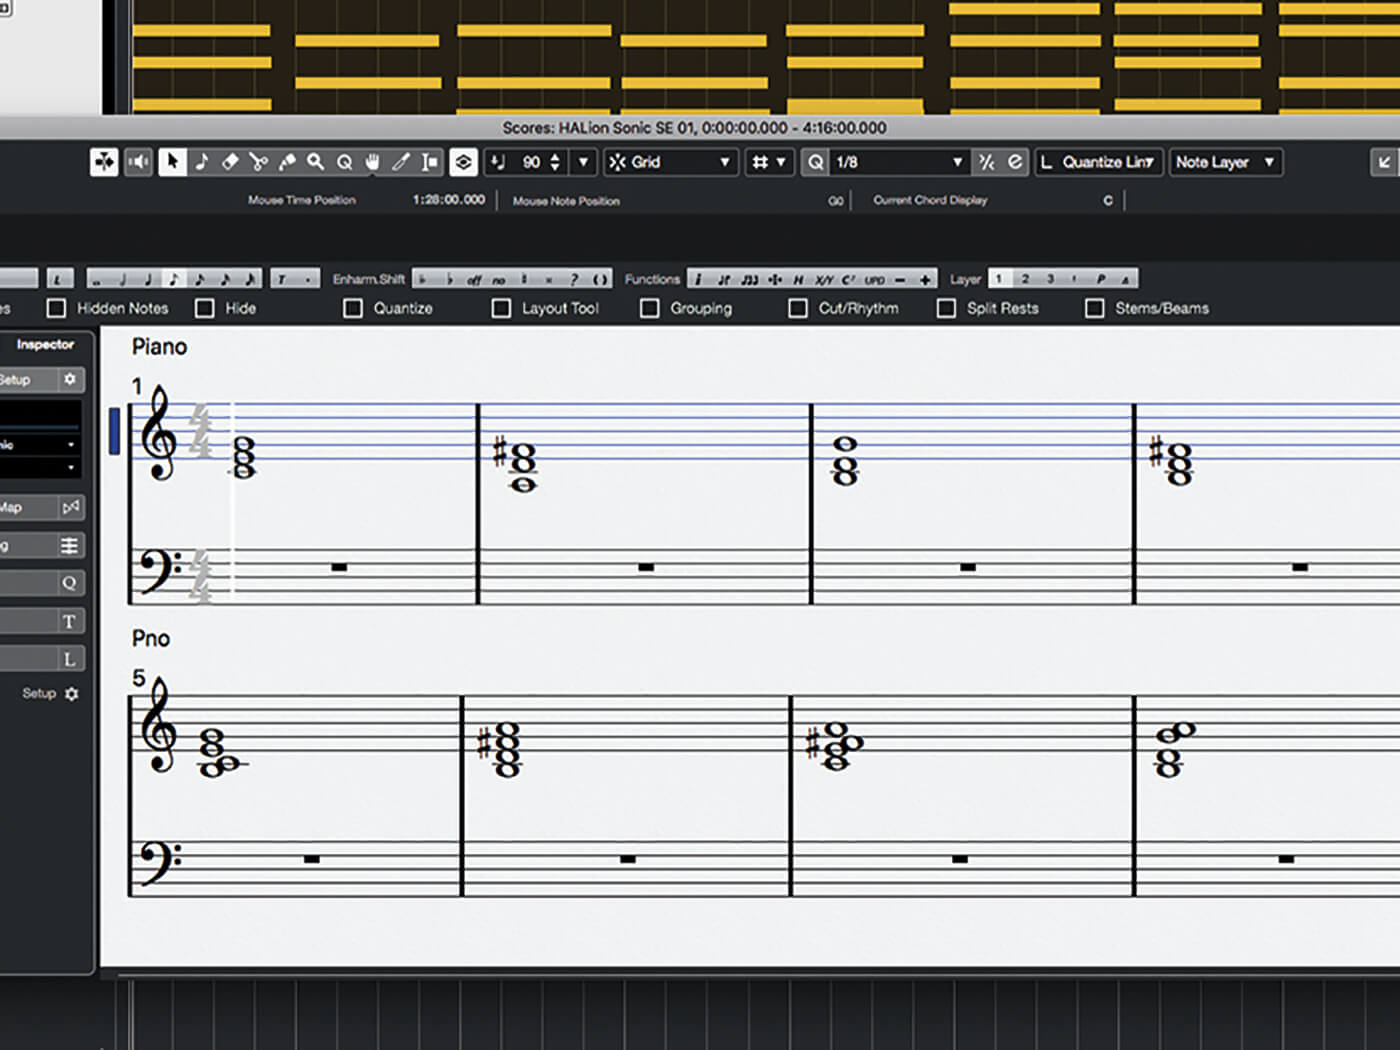
6. We need to define the instrument that’s being used – this defaults to Horn, although does not have an impact until you actually modify the setting. Click on the Horn label in the Quick Staff Setup panel and select Jazz+Pop > Piano from the pop-up menu.
7. You will now have a traditional two-part piano stave, and the stave mode will have changed to Piano Polyphonic. If you used a sustain pedal during recording then those events will have been converted to note lengths, thereby removing some unwanted rests.
![]()
SCORE EDITOR VOICES When dealing with polyphonic instruments, a single musical stave can contain multiple independent clusters and passages of notes – held chords with a melody playing over the top, for example. Cubase uses the concept of ‘voices’ to manage scoring for each of these clusters and passages.
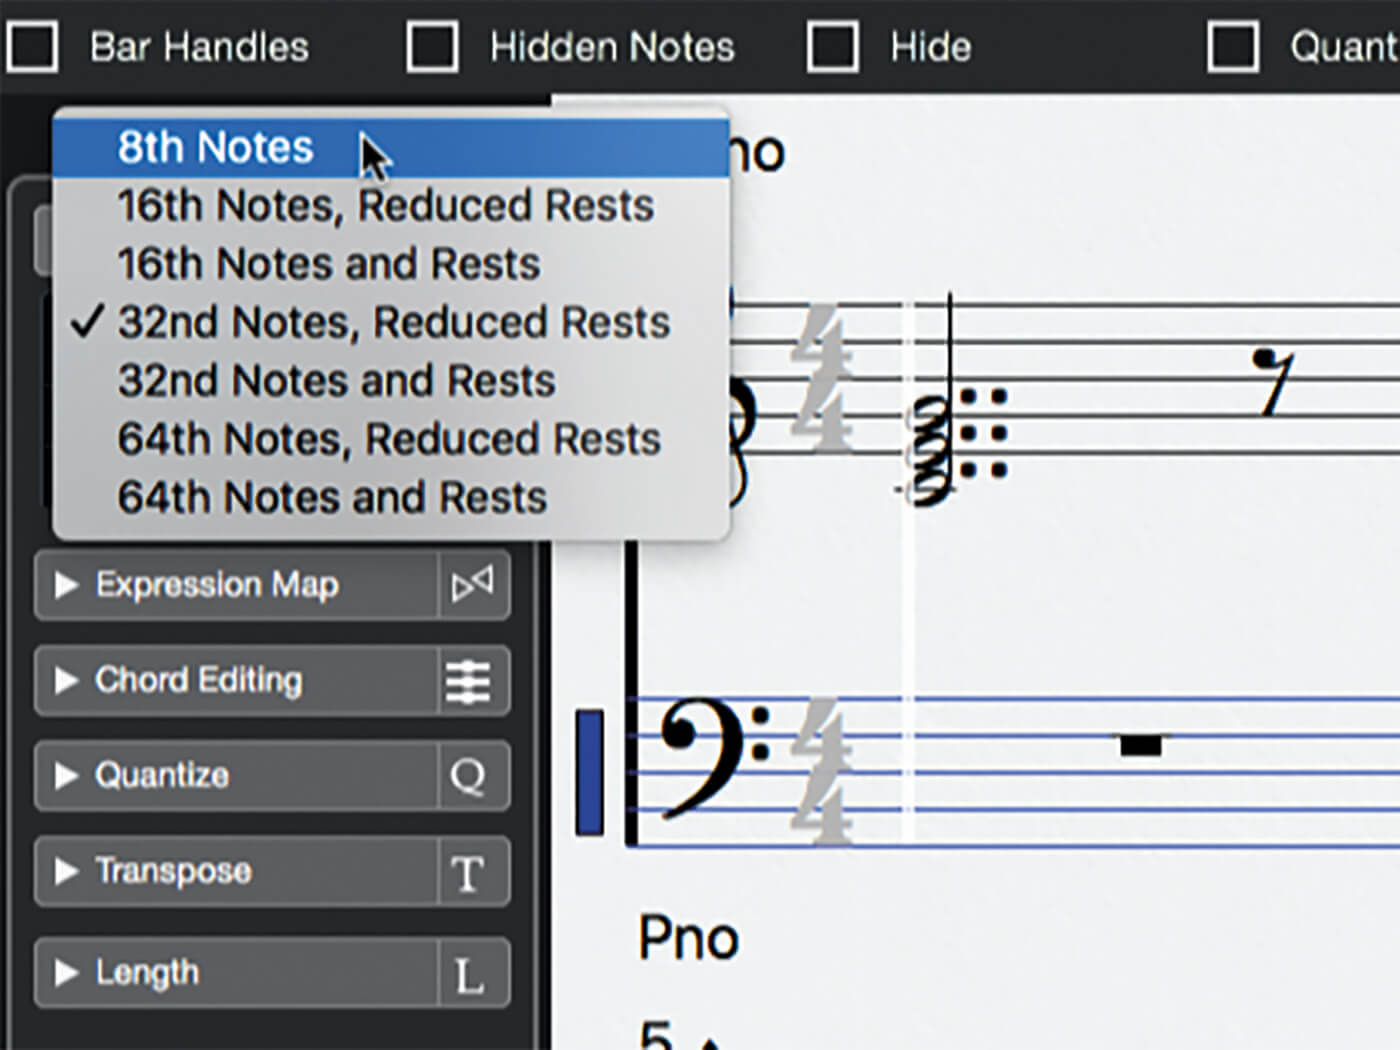
8. The first item in the Quick Staff Setup panel determines the basic grid size of the stave. You can adjust this by dragging the slider or by clicking the item and choosing an option from the pop-up window. Set this to 8th Notes.
9. Unless your playing was very loose, you should now see an improved score that shows the chords you played as bar-long semibreves (aka whole notes). Now we need to set a key signature if, like us, you didn’t play chords in C major.
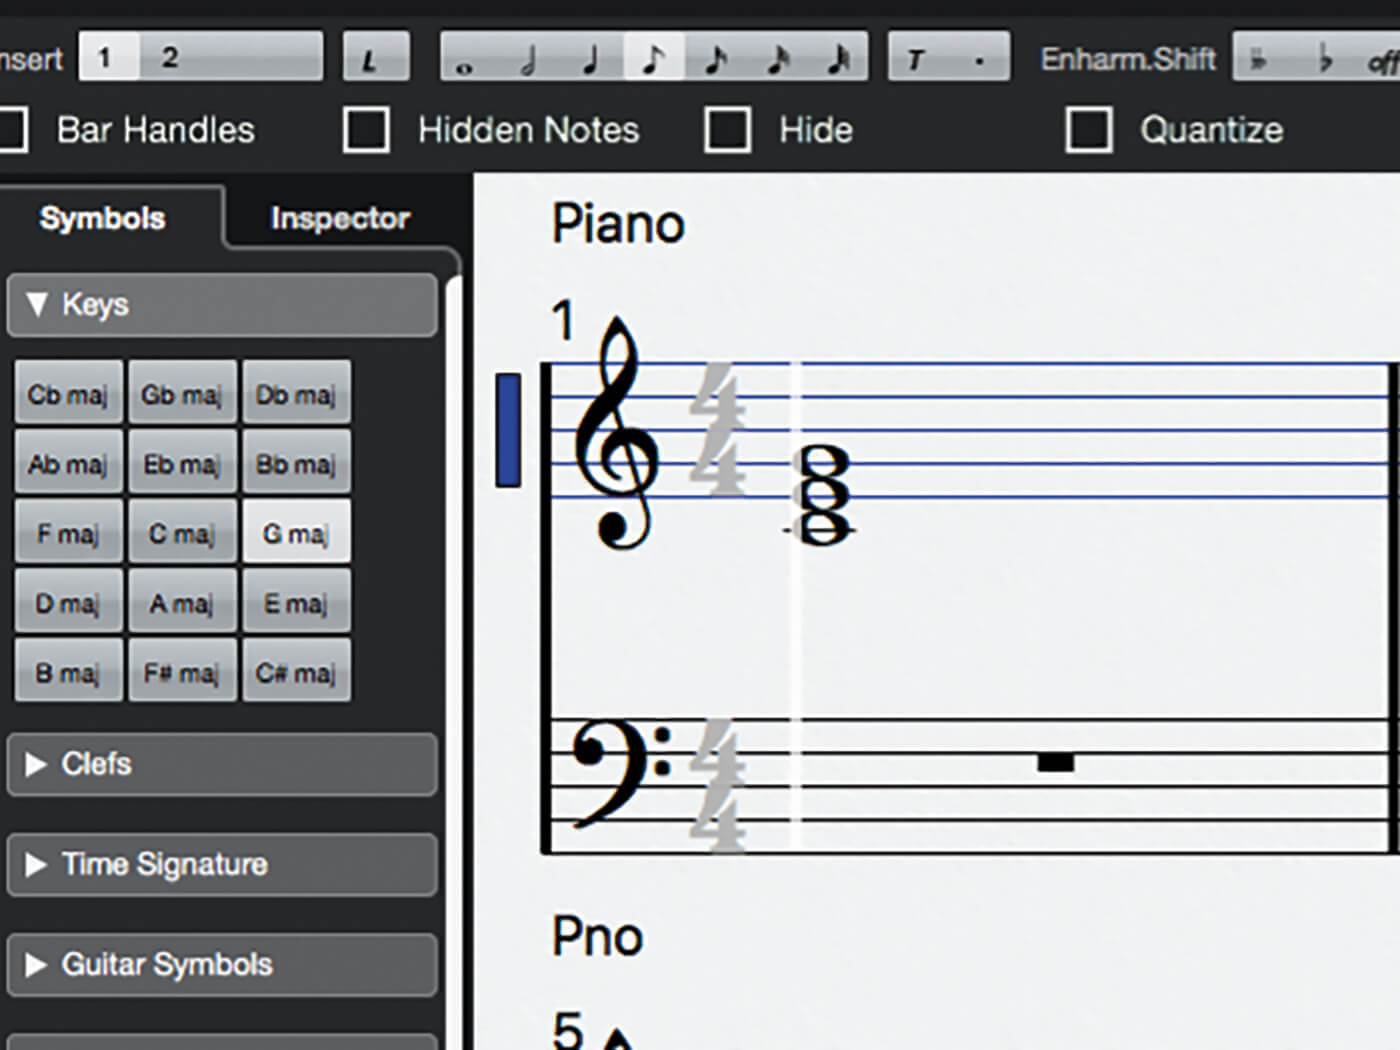
10. Switch to the Symbols tab in the left-hand zone of the editor and open the Keys panel. Select the desired key signature in the panel – we’re in G major (i.e. ‘one sharp’). Notice that the mouse has changed to a pencil.
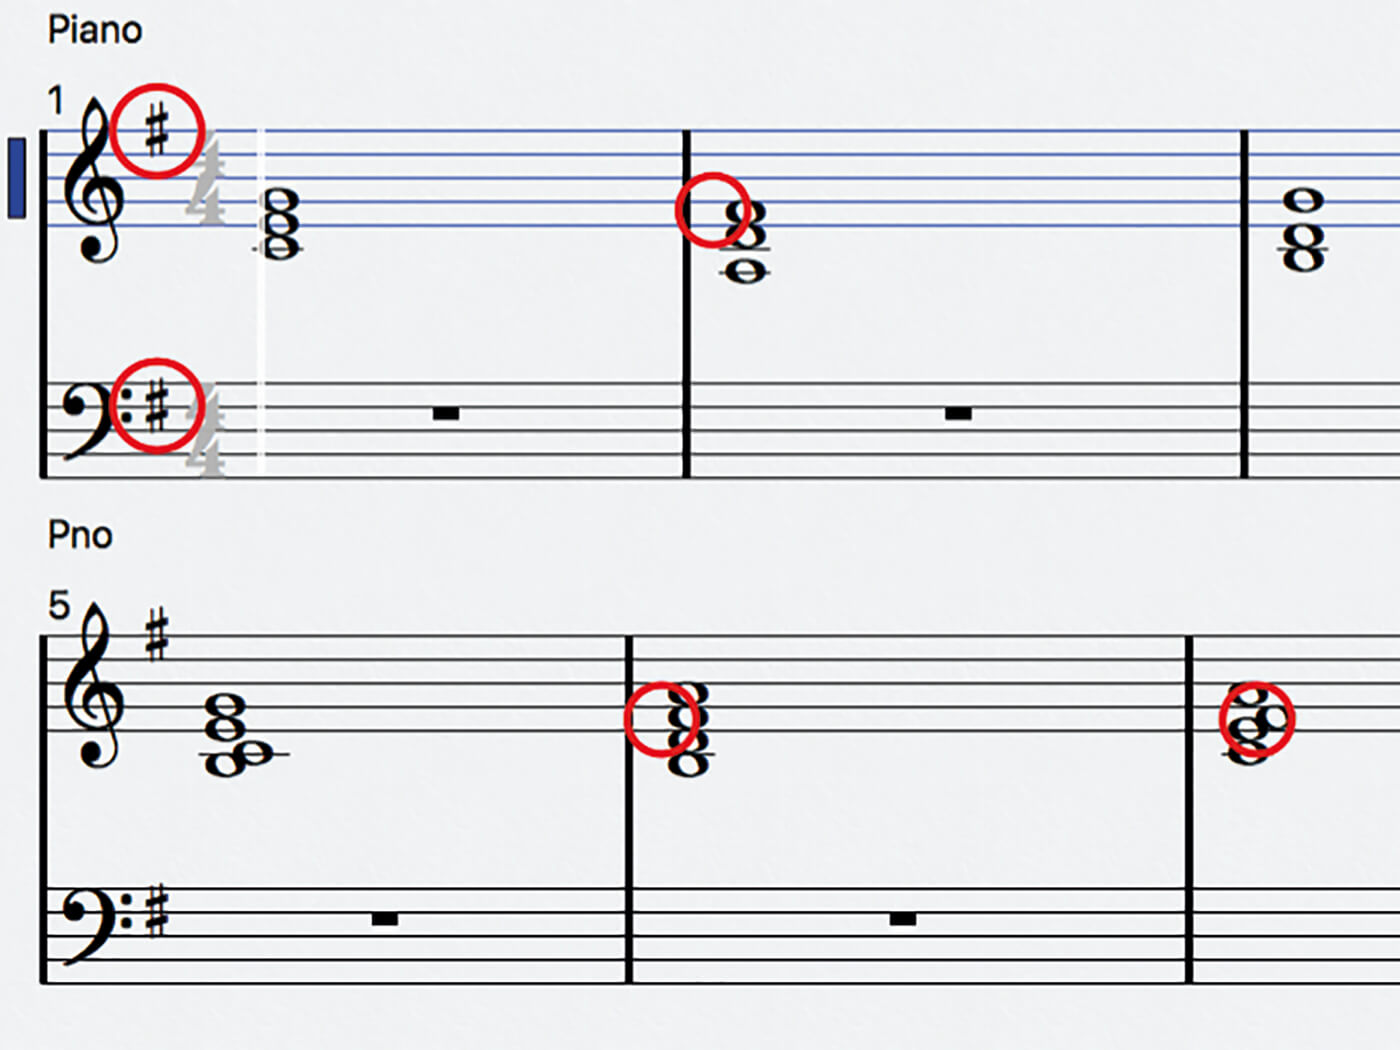
11. Move the pencil over the stave and click at the beginning of the score between the clef mark and the time signature. The key signature will be inserted, and any accidentals that are diatonic to the inserted key signature will be removed.
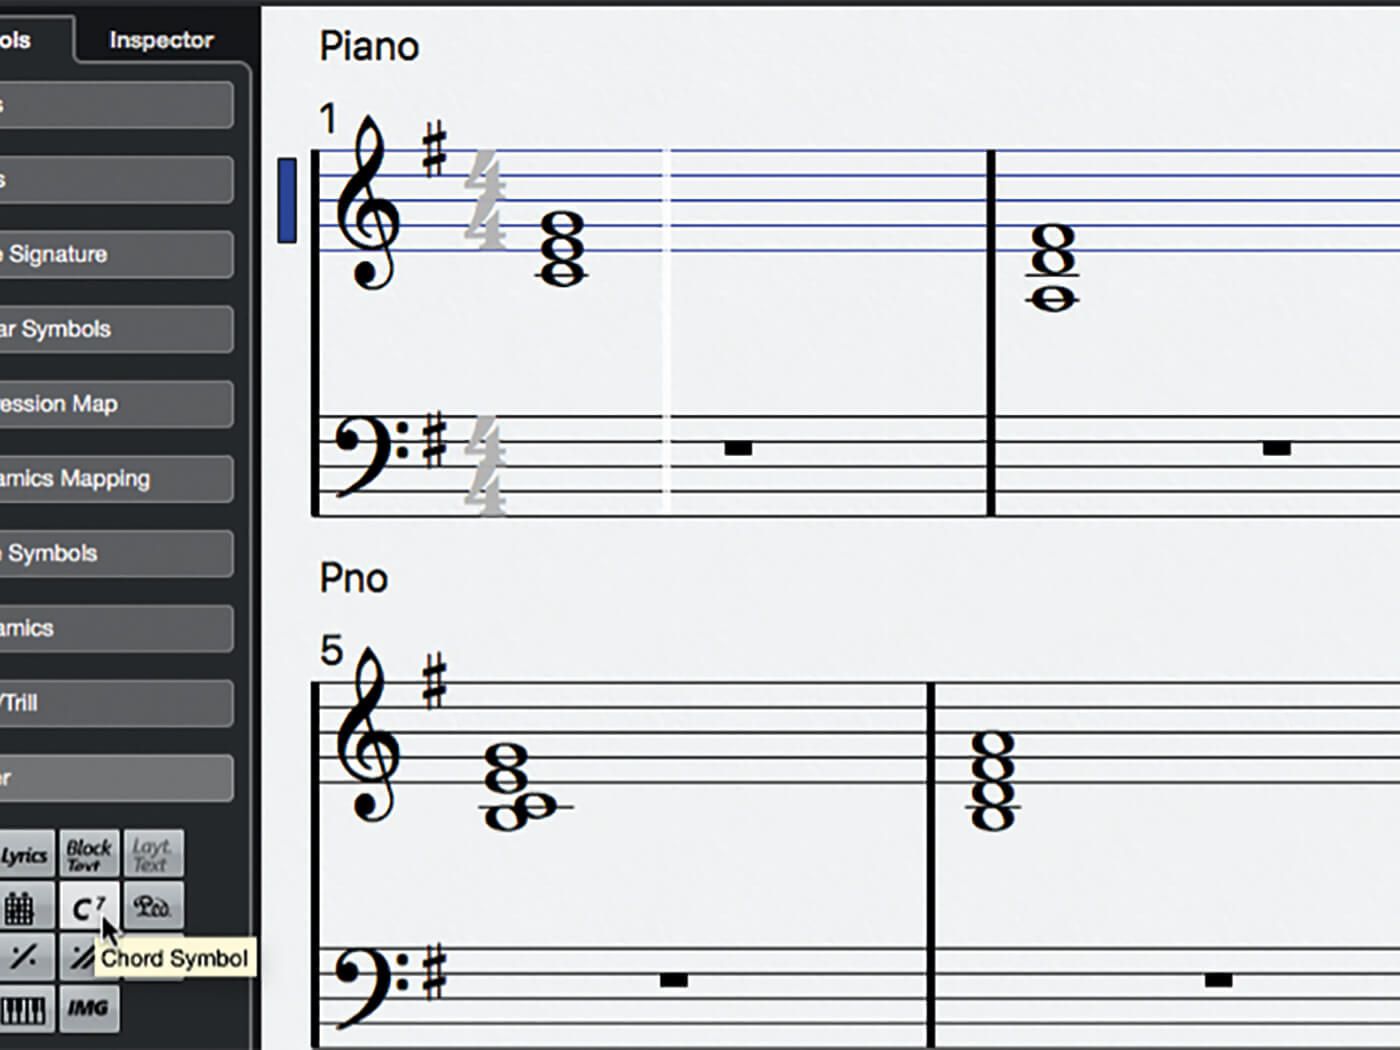
12. It’s common to see chord names printed above bars of music notation, and Cubase makes it easy to add these. Open the Other panel under the Symbols tab of the editor’s left zone, then click on the button that says C7.
![]()
DORICO / DORICO SE If you require more advanced scoring tools than are offered by Cubase Pro, or use one of the slimmed-down versions of Cubase but require more powerful scoring, then Steinberg Dorico may be the perfect solution. There is also a new SE version that is free to download and use!
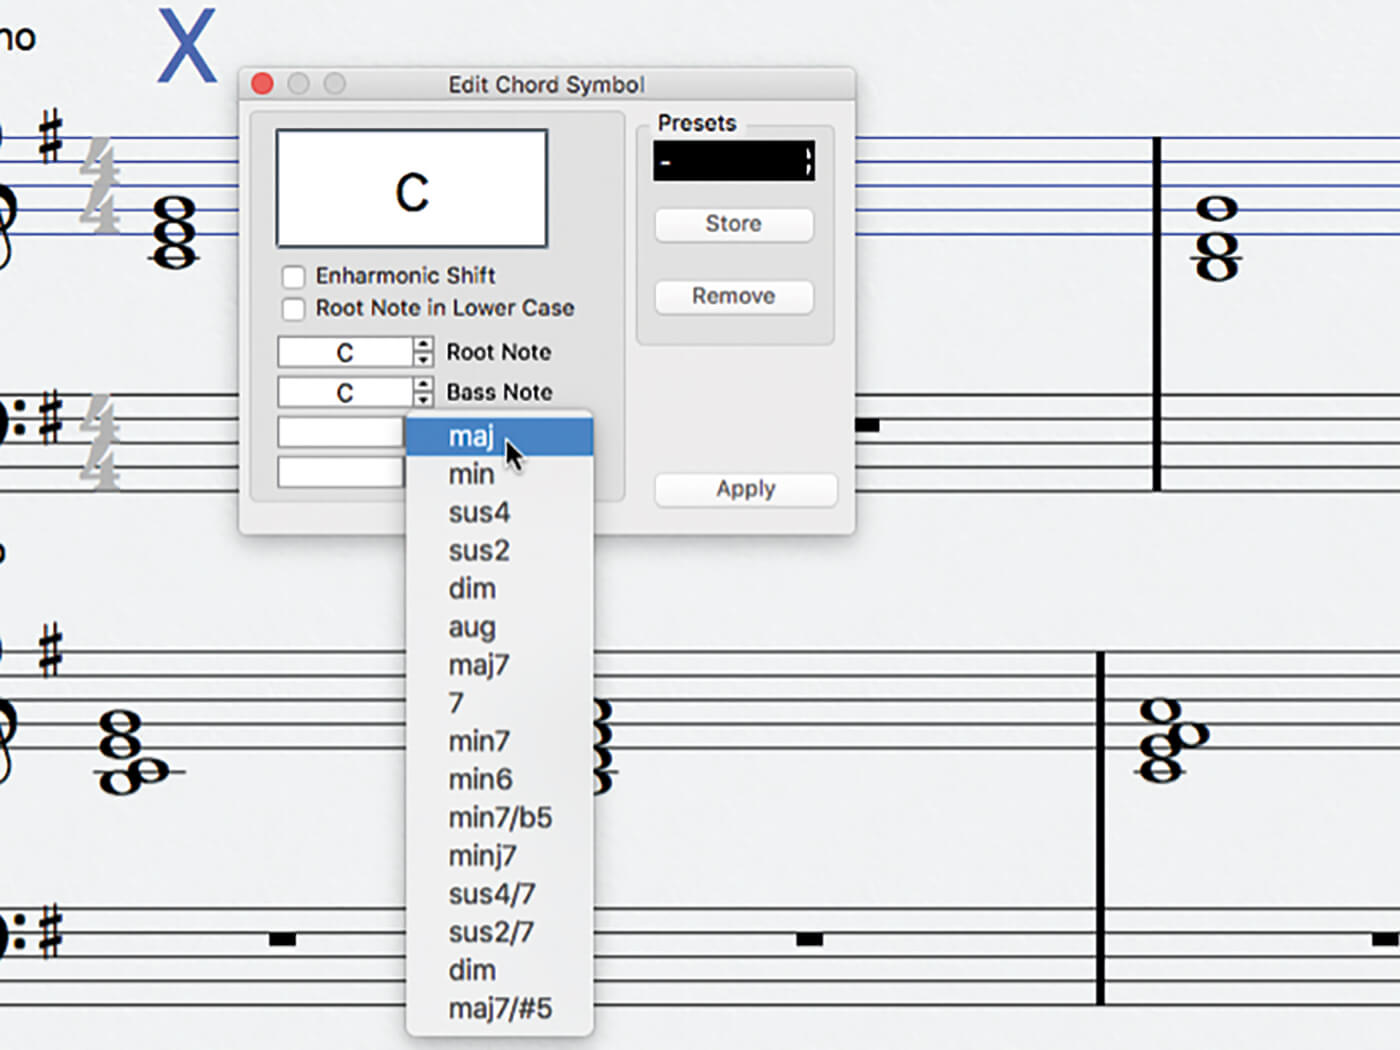
13. Again, the mouse will have changed to a pencil – use this to click once above the first chord in your score. A large ‘X’ will appear and the Edit Chord Symbol panel will open. Use this panel to specify the chord’s name, then click Apply.

14. The desired chord name will now be displayed. Repeat the process to name the rest of your chords. Take the opportunity to explore the Edit Chord Symbol panel, noticing that you can both type-in chord names and use the drop-downs to specify them.
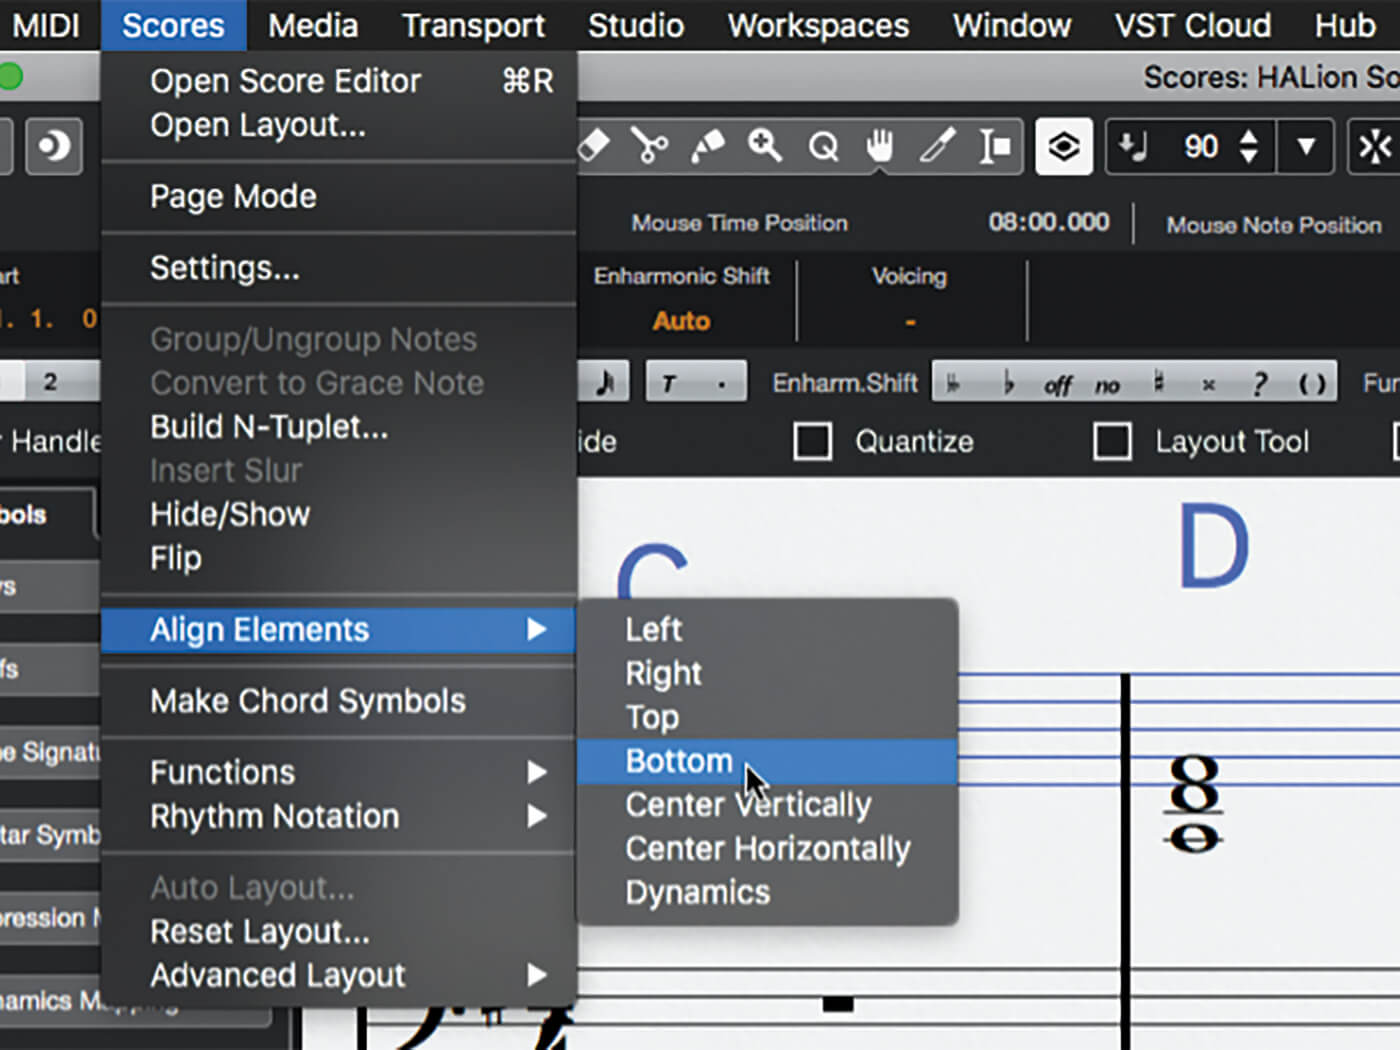
15. Select all of the chord names in the top line of your stave, then open the main Scores menu and select Align Elements > Bottom. Position them at the desired height above the stave then repeat for each line of your score.
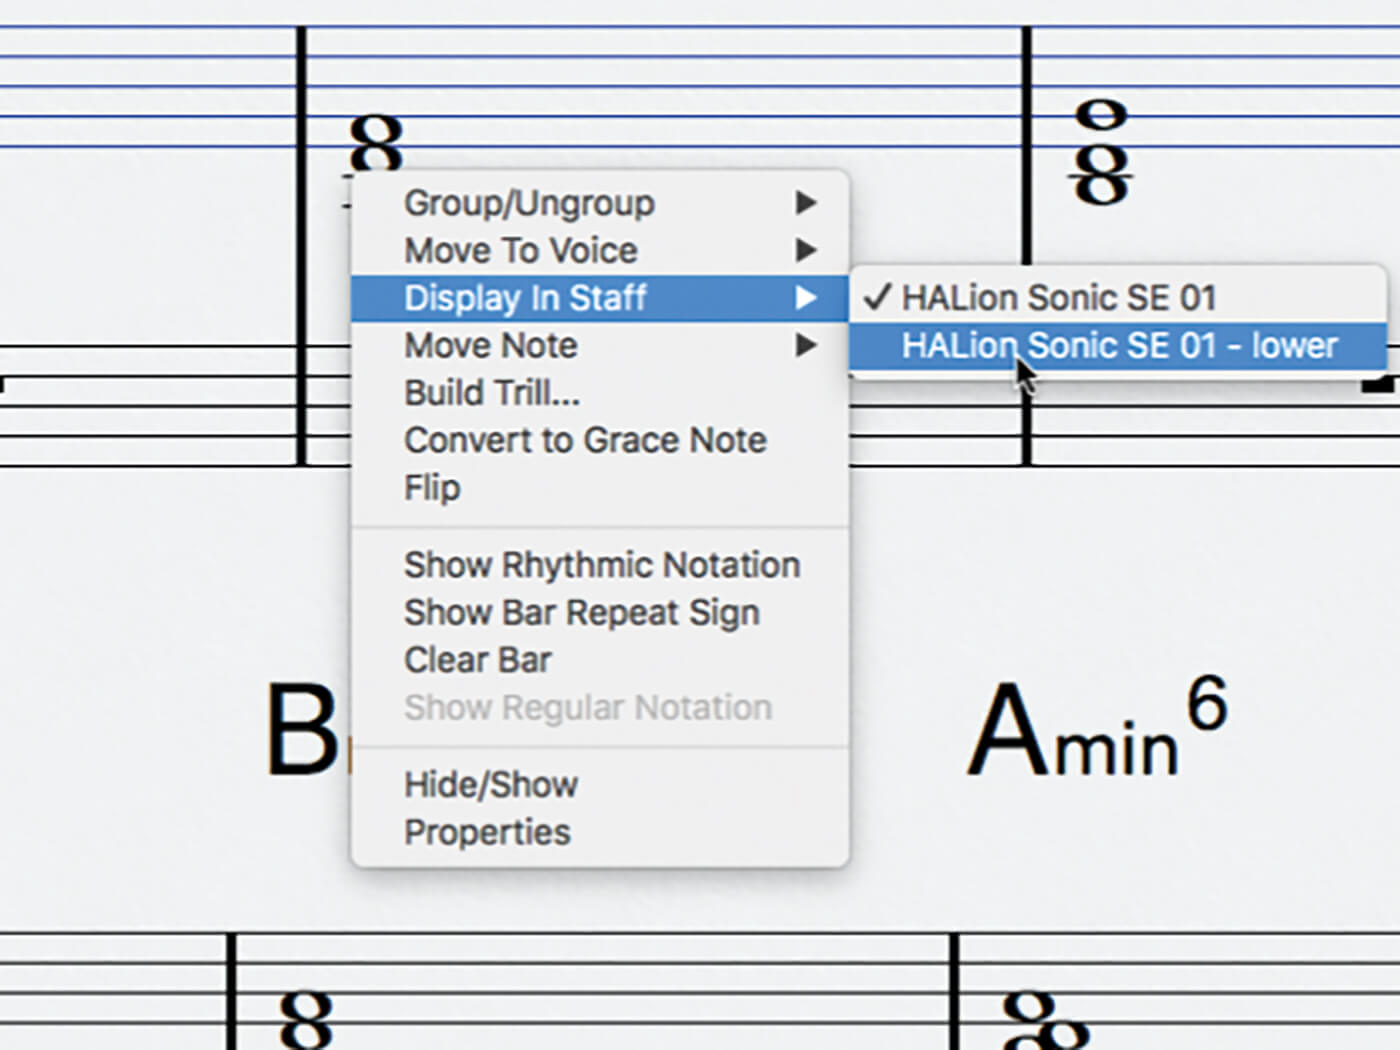
16. If you have notes appearing on the treble clef stave that are below middle C, you may wish to move these to the lower stave. Right-Click on such a note and roll over Display In Staff, from where you can select the lower stave.
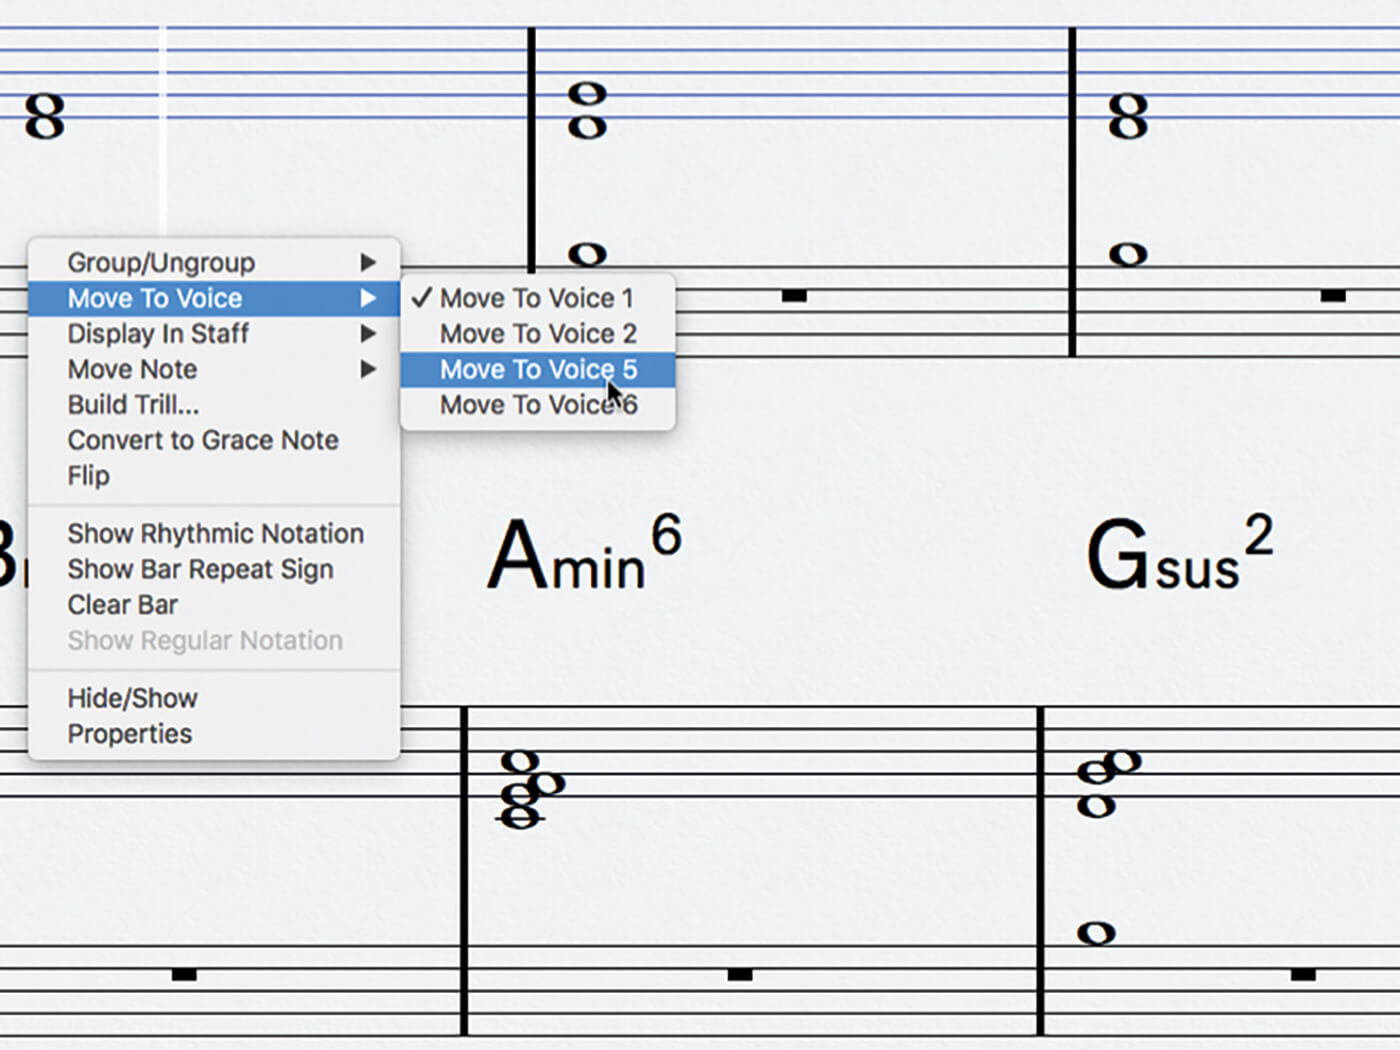
17. Notice that moving the notes to the lower stave has not removed the rests from the lower stave. To fix this, Right-Click on each moved note and select Move To Voice > Move To Voice 5 (we’ll come back to score voices next time).
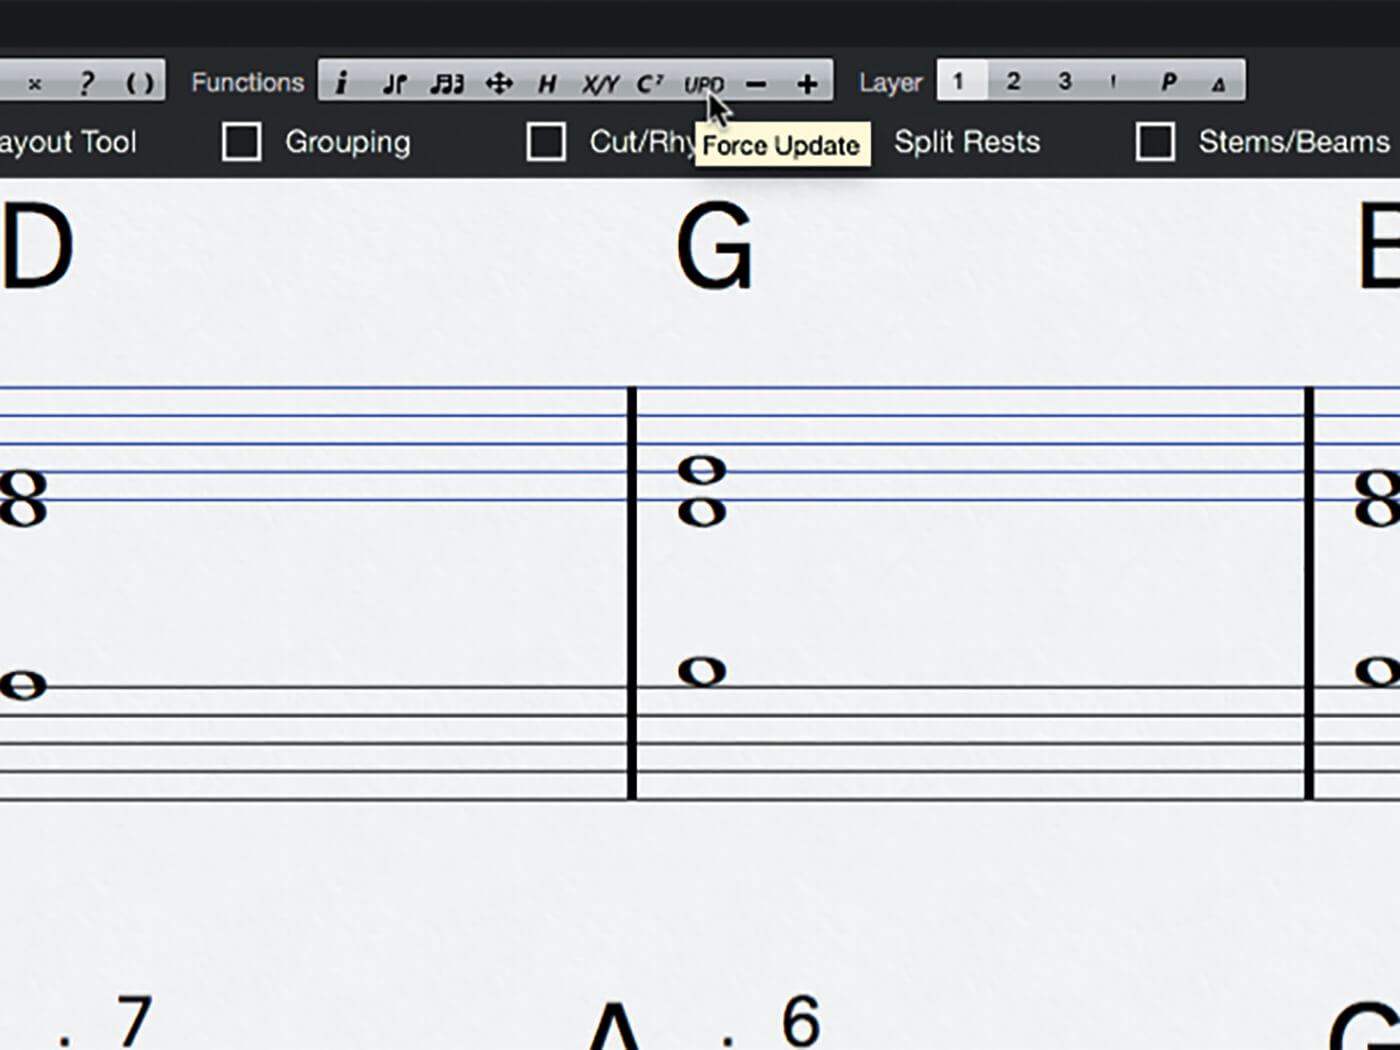
18. When working in the Score Editor you may sometimes get unwanted graphical glitches, or note timings may suddenly change, and other annoyances. Normally, all it takes to fix these glitches is a quick click on the Force Update function button.
For more Cubase tutorials and workshops, click here.