Understanding mid/side processing in Cubase
The flexibility of Mid/Side processing can bring big advantages during mixing, but Cubase doesn’t have any built-in M/S capabilities. All it takes, though, is a free plug-in and a bit of clever routing.
Despite heading towards its 90th birthday and having an ever-increasing number of multi-channel upstarts snapping at its venerable heels, the stereo format remains by far the most widely used channel set-up in music-making. The simple concept of balancing a signal between a left and right sides is easy to work with, delivers a realistic sense of space and depth, and does not require vast arrays of amps and speakers in order to reproduce the intended aural image. There is, however, a different way of representing a stereophonic sound field: Mid/Side, or M/S, encoding.
Just like conventional Left/Right stereo, M/S uses two discrete mono audio signals, but with one carrying the ‘mid’ signal, the other carrying the ‘side’ signal. Technically speaking, the mid signal is the sum of the left and right signals, whilst the side signal is the difference between them. Thus, when summing L/R signals for the mid channel, component sounds that are centrally panned will have the same phase and so be reinforced through phase addition, whilst sounds that are panned off-centre will be weakened by phase cancellation and hard-panned sounds will be cancelled-out altogether.
Conversely, in the side signal, centrally-panned sounds are phased-out completely, while sounds with increasing levels of pan are increasingly reinforced through phase addition. When the M/S signal is decoded back to L/R, these phase cancellations and additions are reversed, and if no other processing was performed in the interim the result is a perfect facsimile of the original L/R stereo signal.
The mid and side signals themselves are just mono audio signals like any other, but in practical terms they can be thought of as representing the central ‘core’ and the stereo ‘width’ of the stereo sound. Being simple mono signals also means that they can be processed and monitored as such – in other words you can process the centre of the stereo signal independently of its width. That processing may be nothing more than a gain adjustment, resulting in a widening or narrowing of the stereo image; that is, increasing the level of the side signal with respect to the mid will widen the image, while increasing the mid with respect to the side will narrow the image.
Adding different processors to the channels makes for even more interesting results: compressing the mid but not the side gives punchiness and power whilst retaining dynamic detail and subtlety, for example.
Not just for mastering
This sort of M/S processing is often thought of as the preserve of mastering processing, which is why apps like Wavelab have it built in, and certain mastering-grade plug-ins, such as the Elysia Alpha Compressor, use M/S internally. As such, M/S processing in Cubase is a great way to do your own mastering without having to fork out for specialist DAWs and plug-ins.
But M/S processing is relevant outside of mastering too: during mixing, M/S processing can be very effective (no pun intended), especially across stereo submixes. Also, if you use M/S miking techniques to capture a stereo acoustic sound (drum kit overheads or room mics, for example) it is beneficial to be able to record the M/S signal and decode to L/R on playback, rather than decoding before recording.
Unfortunately, then, Cubase doesn’t offer any built-in support for M/S processing, but the use of a free plug-in and a bit of routing is all you need to make it possible. By placing a M/S encoder into a stereo channel’s insert point, the channel’s two signal busses change from L/R to M/S beyond that point. Any plug-ins that can process in a dual-mono mode can be added in the same insert FX chain, below the M/S encoder, but such plug-ins aren’t common. The solution then is to route the signal to two new channels for processing.
Route canal
This routing isn’t quite as straightforward as it could be though, as Cubase isn’t the most flexible when it comes to shifting signals around. What we need to do is split the stereo channel (converted to mid and side signals) into two mono signals for processing. This is best done using channel sends, but in Cubase sending a stereo signal to a mono channel delivers a summed signal to the mono channel, even if the send is hard-panned left or right (which is not correct behaviour – sort it out Steinberg!). Because of this, we need to send to stereo channels for processing, even though the signal being fed to those channels will be mono.
Once you’ve processed the mid and side signals, the last stage is to decode them back to a conventional L/R stereo signal. Let’s take a look at how to set all of this all up….
M/S processing in Cubase: step-by-step

1. Do a web search for ‘M/S encoder plug-ins’ and choose a plug-in that’s suitable for your platform. Some are Windows only, but Voxengo MSED, which we’re using, works on both Mac and Windows. Install the plug-in and then fire-up Cubase.
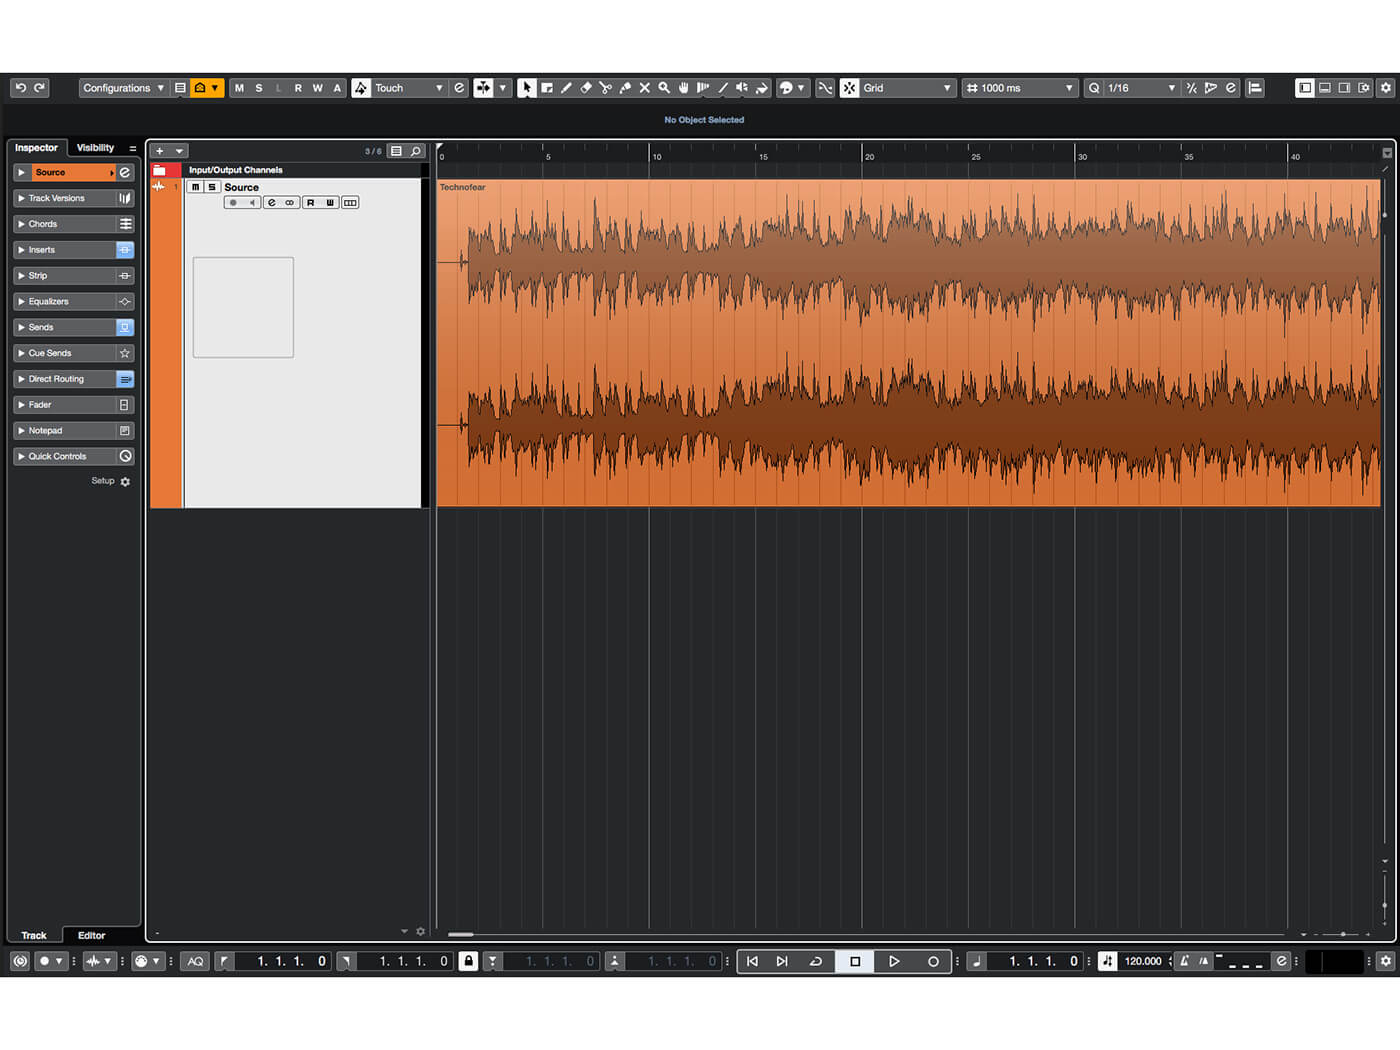
2. Create a new project and drag a finished stereo mix to a new track. The following techniques work just the same within a multitracked project, but working on a single stereo track makes it easier to understand the routing being employed.
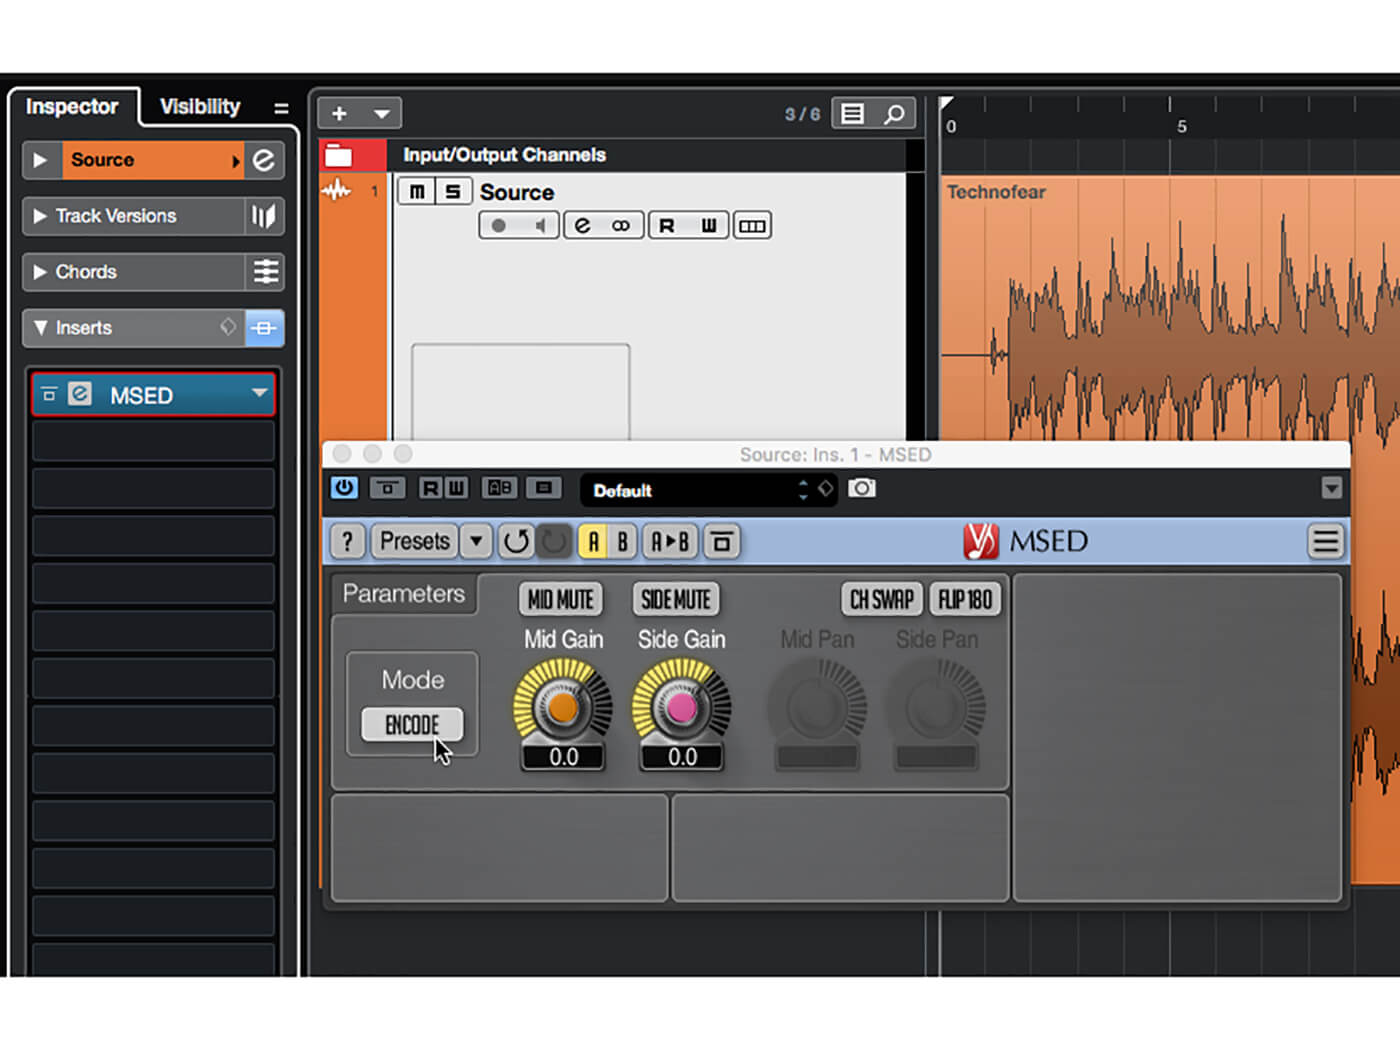
3. Insert an instance of your M/S Encoder/Decoder plug-in on the new track, and set it to its ‘encode’ mode. Hit play and listen to how the sound coming through the left and right channels is now very different to L/R stereo.
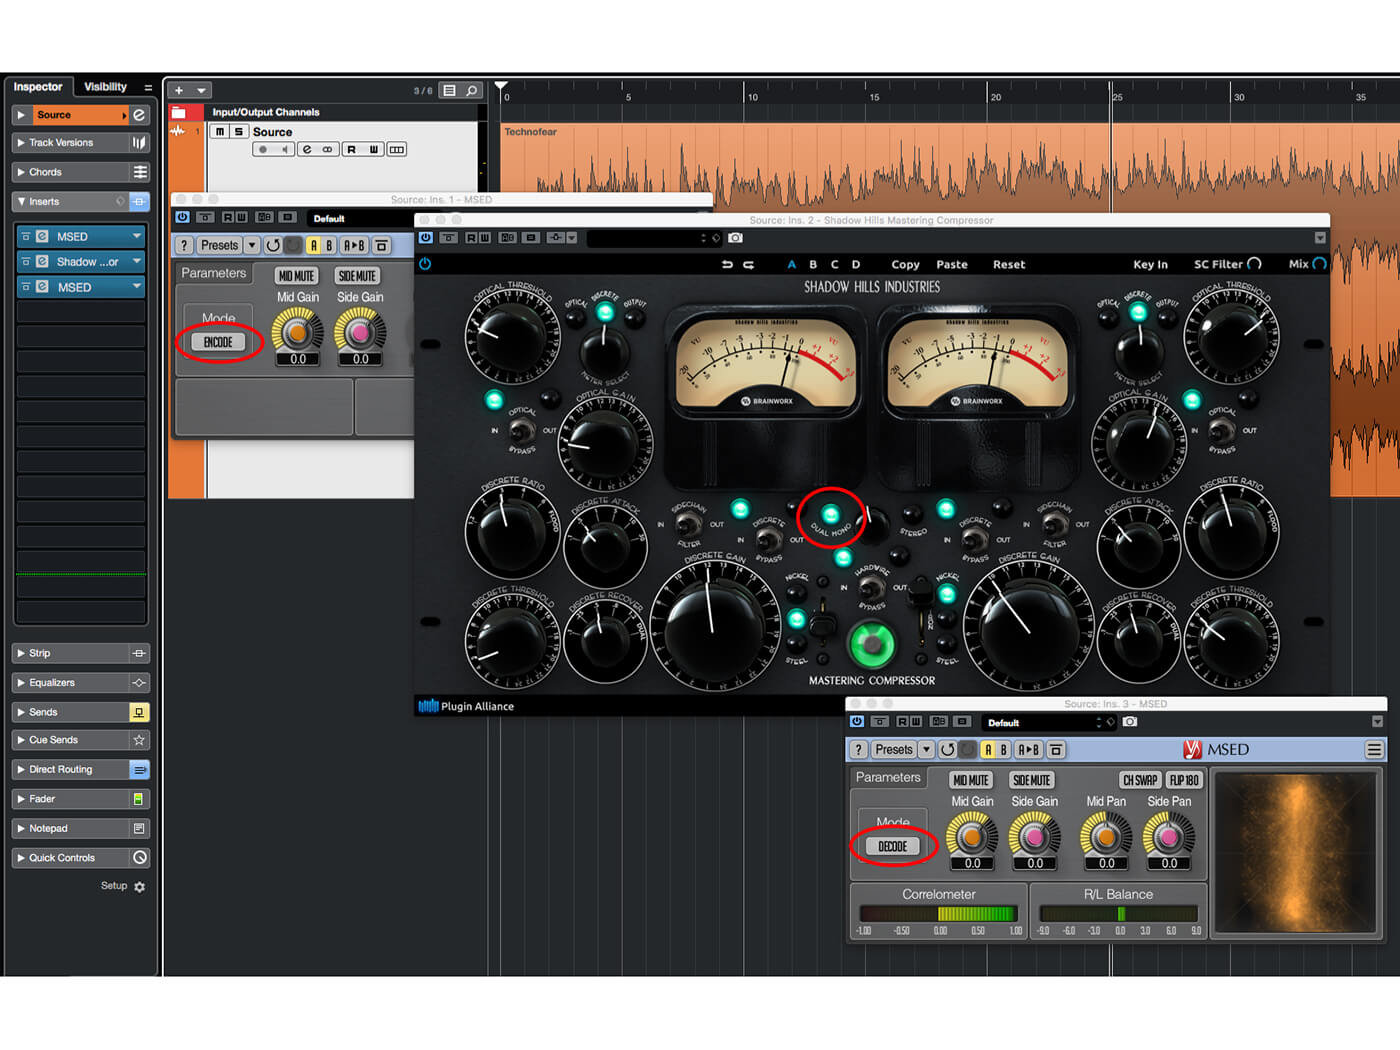
4. If the plug-ins you wish to use are capable of operating in a dual-mono mode, then you can simply add these to the plug-in chain. You would then finish the chain with another instance of the M/S plug-in, set to its decode mode.
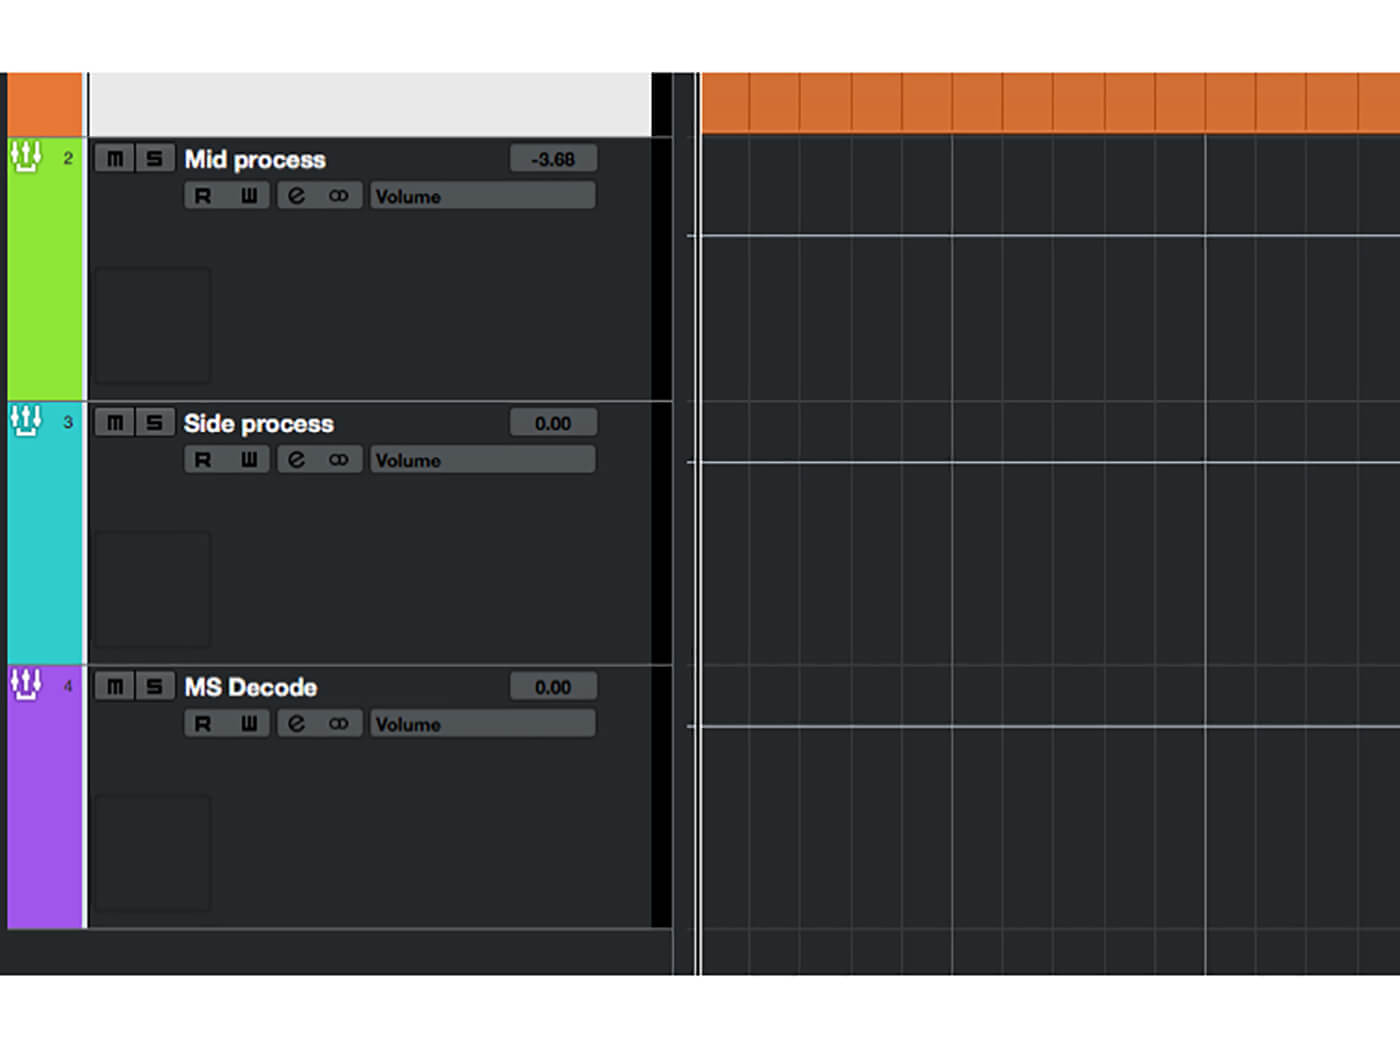
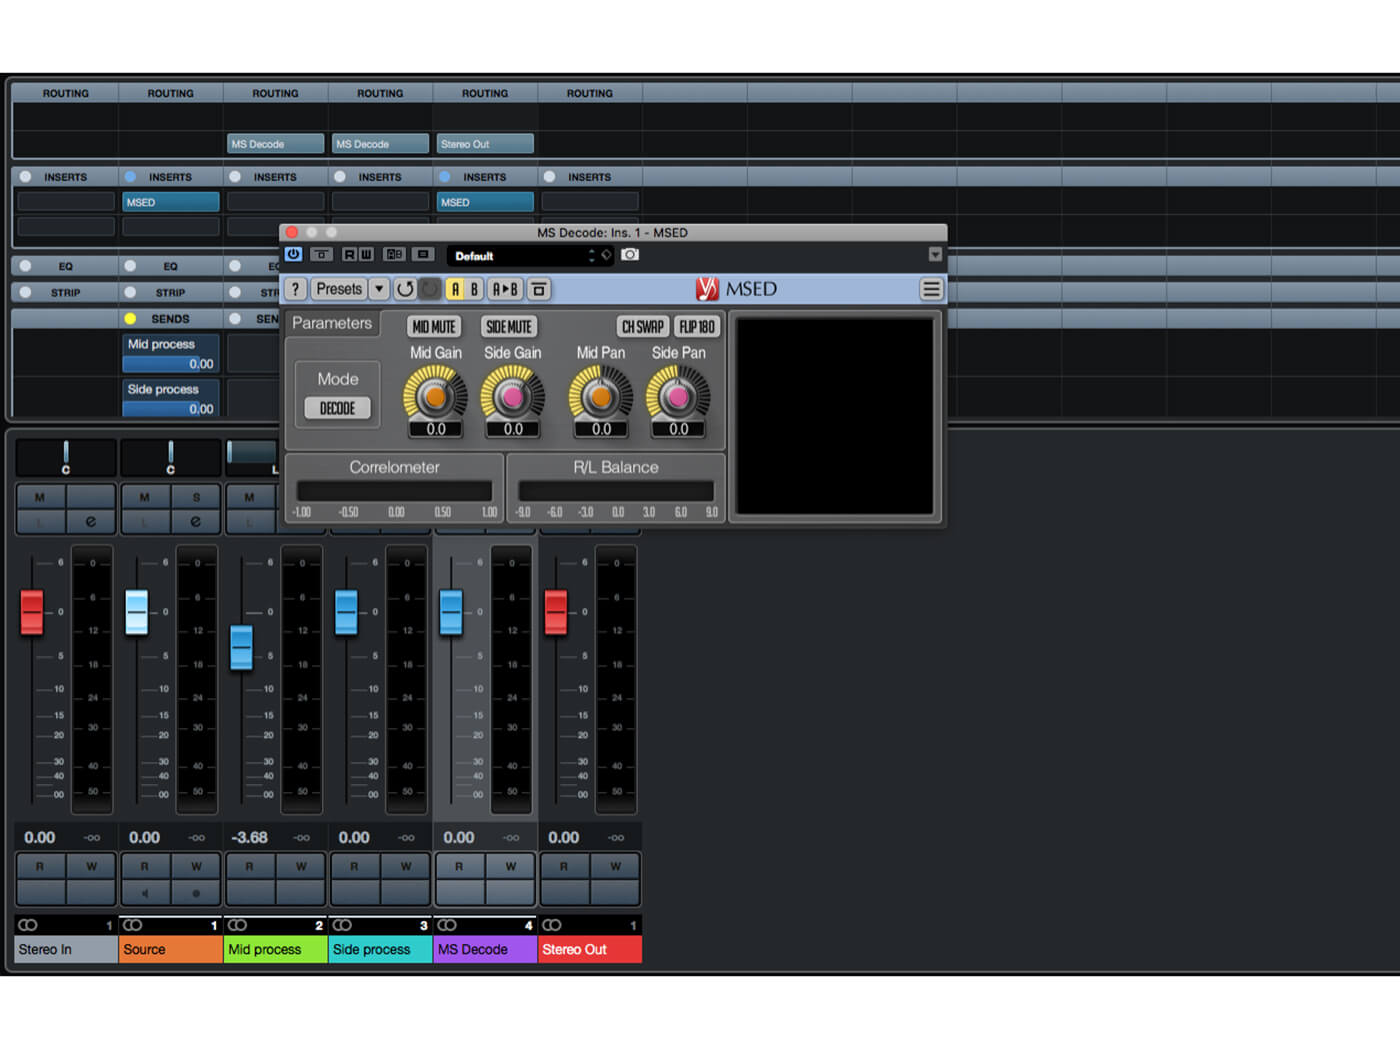
5. Few plug-ins can operate in dual-mono however, so routing is needed. Remove any effects you added in Step 4 (keep the initial M/S encoder in place), then add three stereo group tracks. Name these ‘Mid process’, ‘Side process’, and ‘M/S decode’.
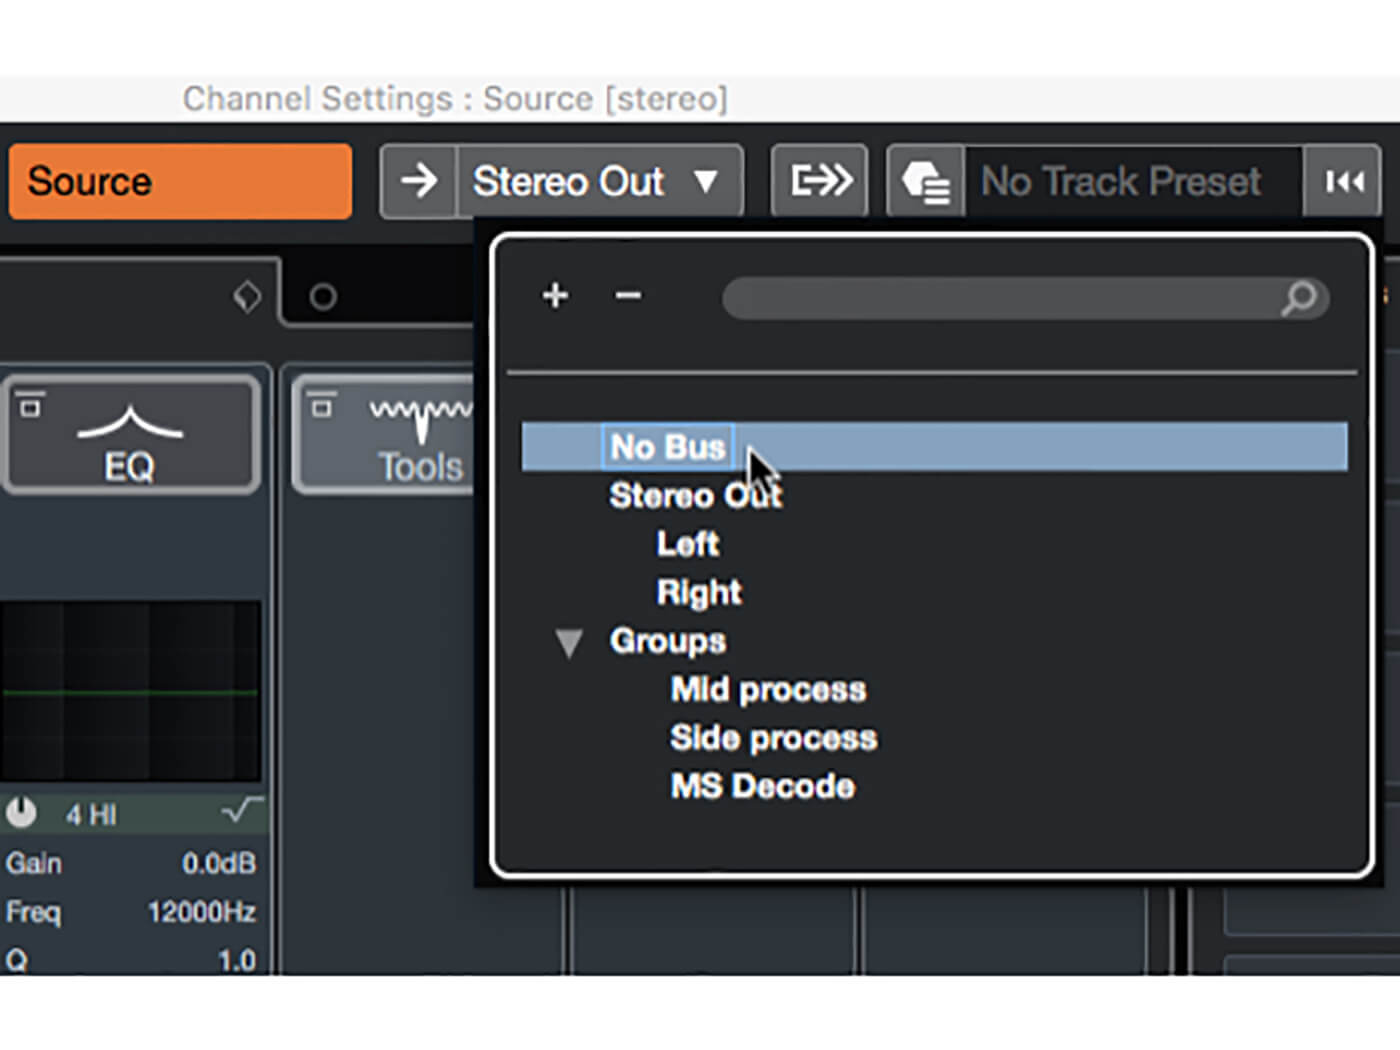
6. Open the Channel Settings panel for the track that contains your audio recording (click the ‘e’ icon on the track head). Open the output routing drop-down, located at the top-centre of the panel, and select No Bus.
![]()
M/S PLUG-INS M/S encoder/decoder plug-ins are easy to lay your hands on, as there are a few out there and most (if not all) are free. You’re free to use whichever you like, as all have the same set of features, but we’re using Voxengo MSED.
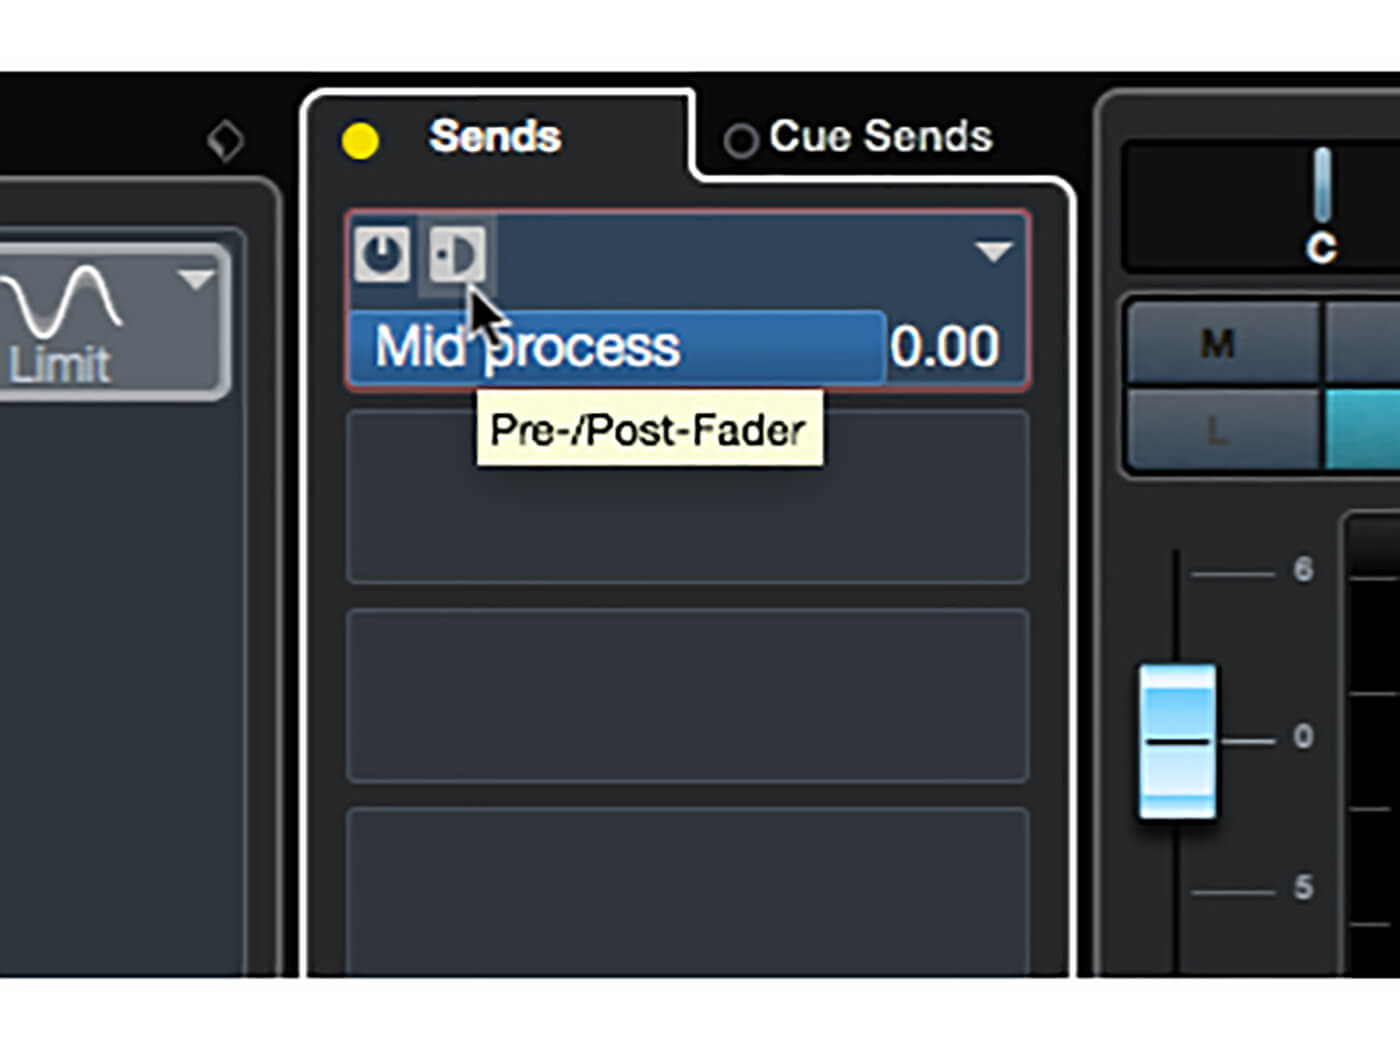
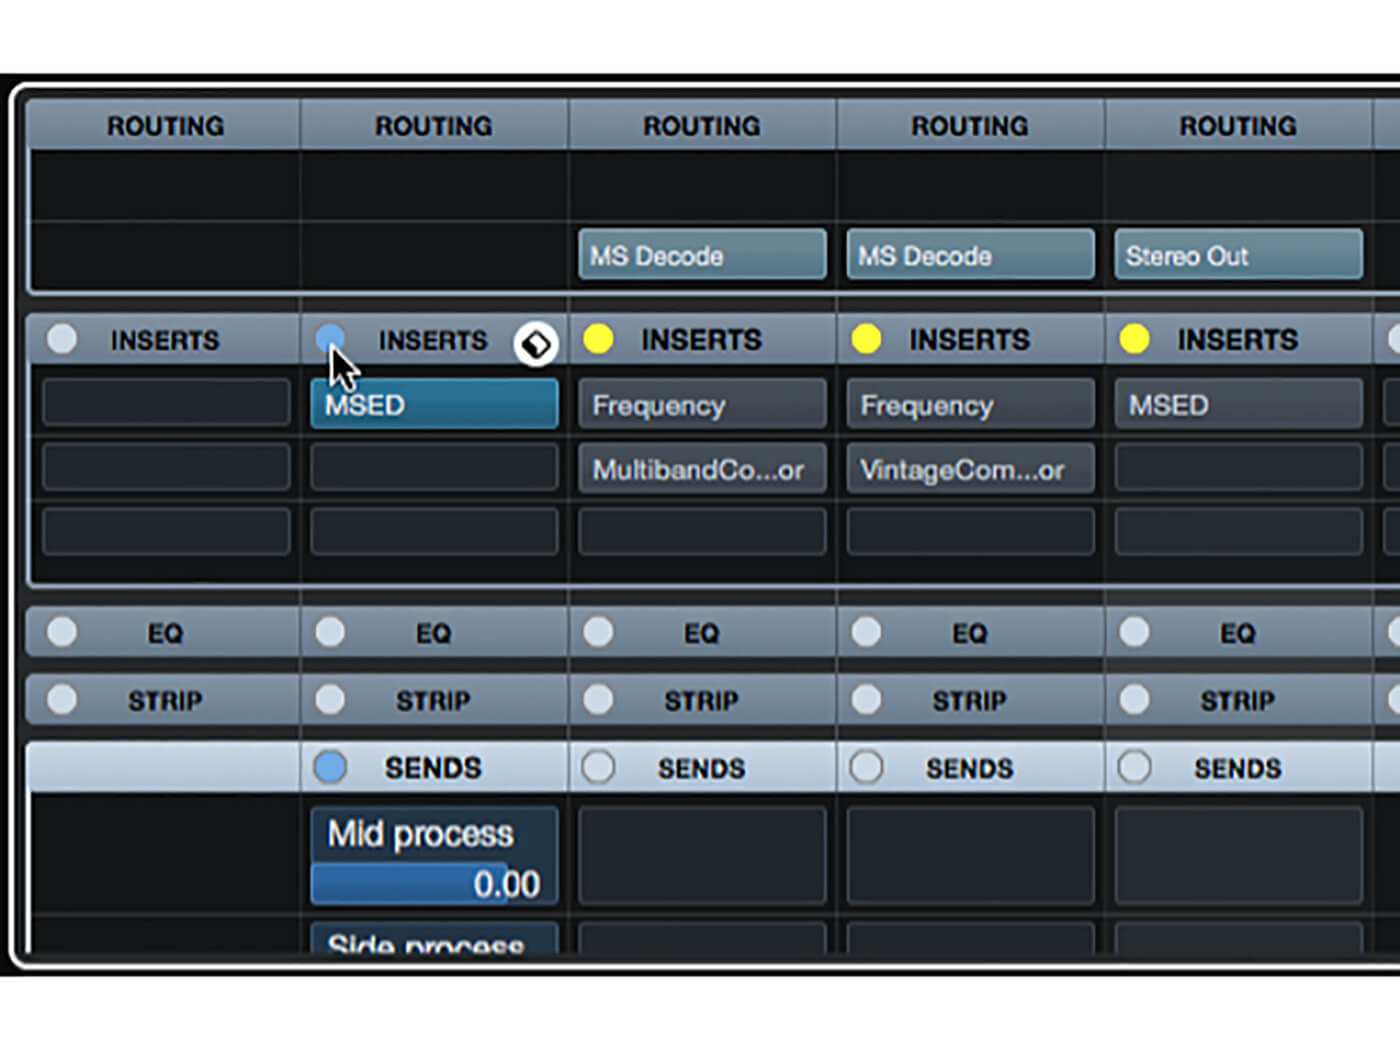
7. In the Sends section of the Channel Settings panel, add a send that routes to the Mid process group channel. Enable the send and switch it to pre-fade mode by clicking the button alongside the Enable/disable button – the send’s graphics will turn blue.
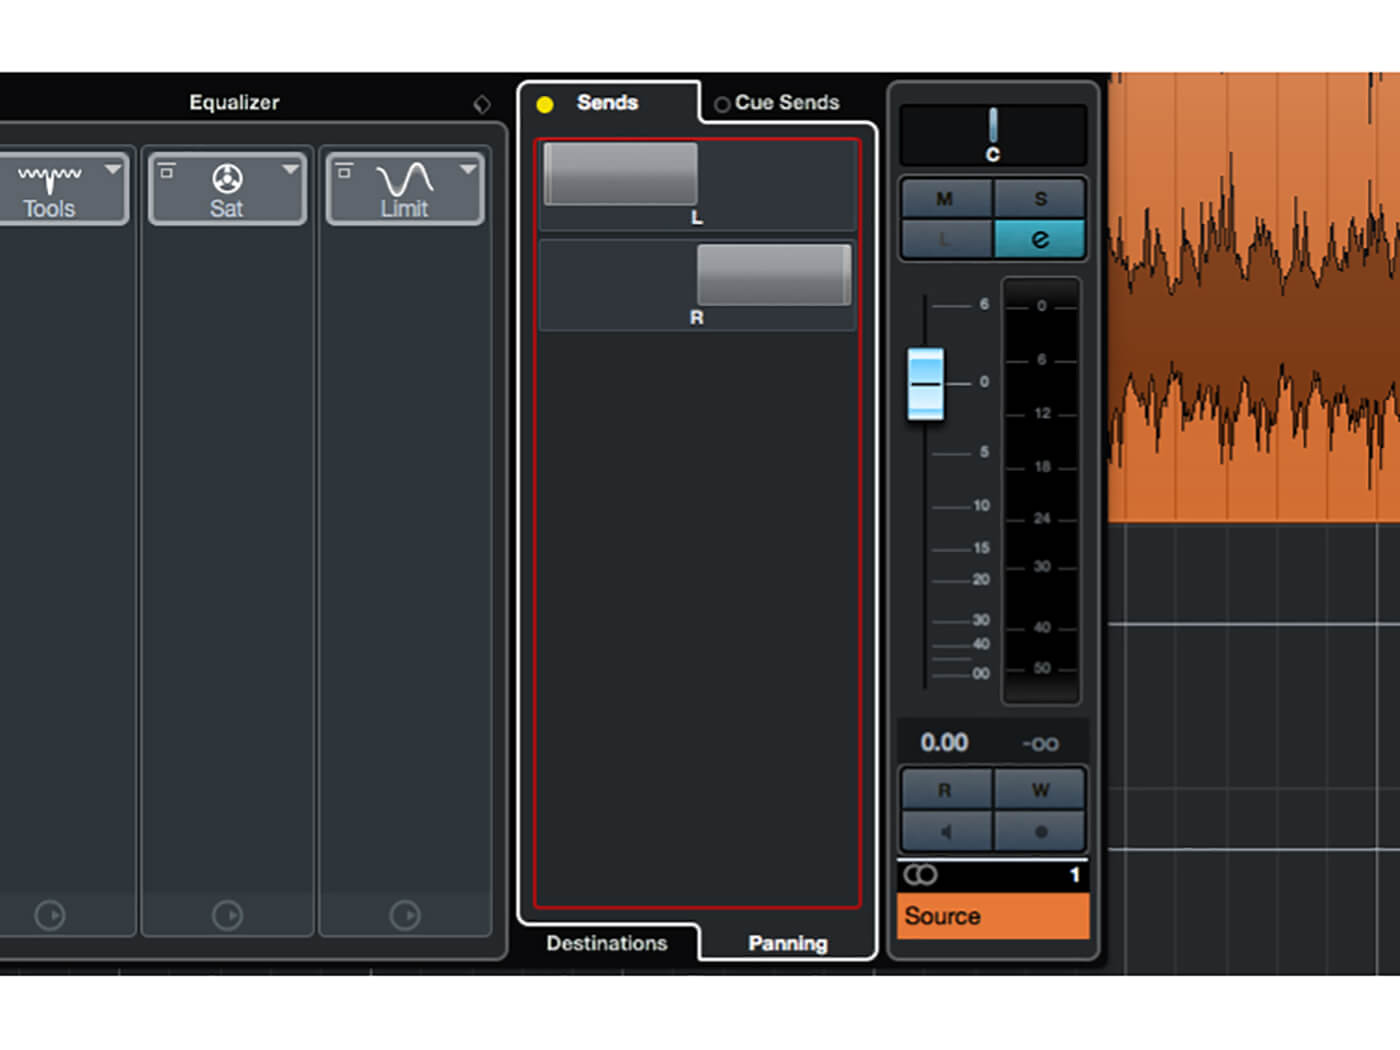
8. Add another pre-fade send routed to the Side process group, then click the Panning sub-tab at the bottom of the sends strip. Pan the first send hard left and the second hard right – these will now carry mid and side signals respectively.
9. Move to your Mid process group track, and route its output to the MS Decode group track. Do the same with the Side process track. Move to the MS Decode track and insert your M/S plug-in, setting it to decode mode.
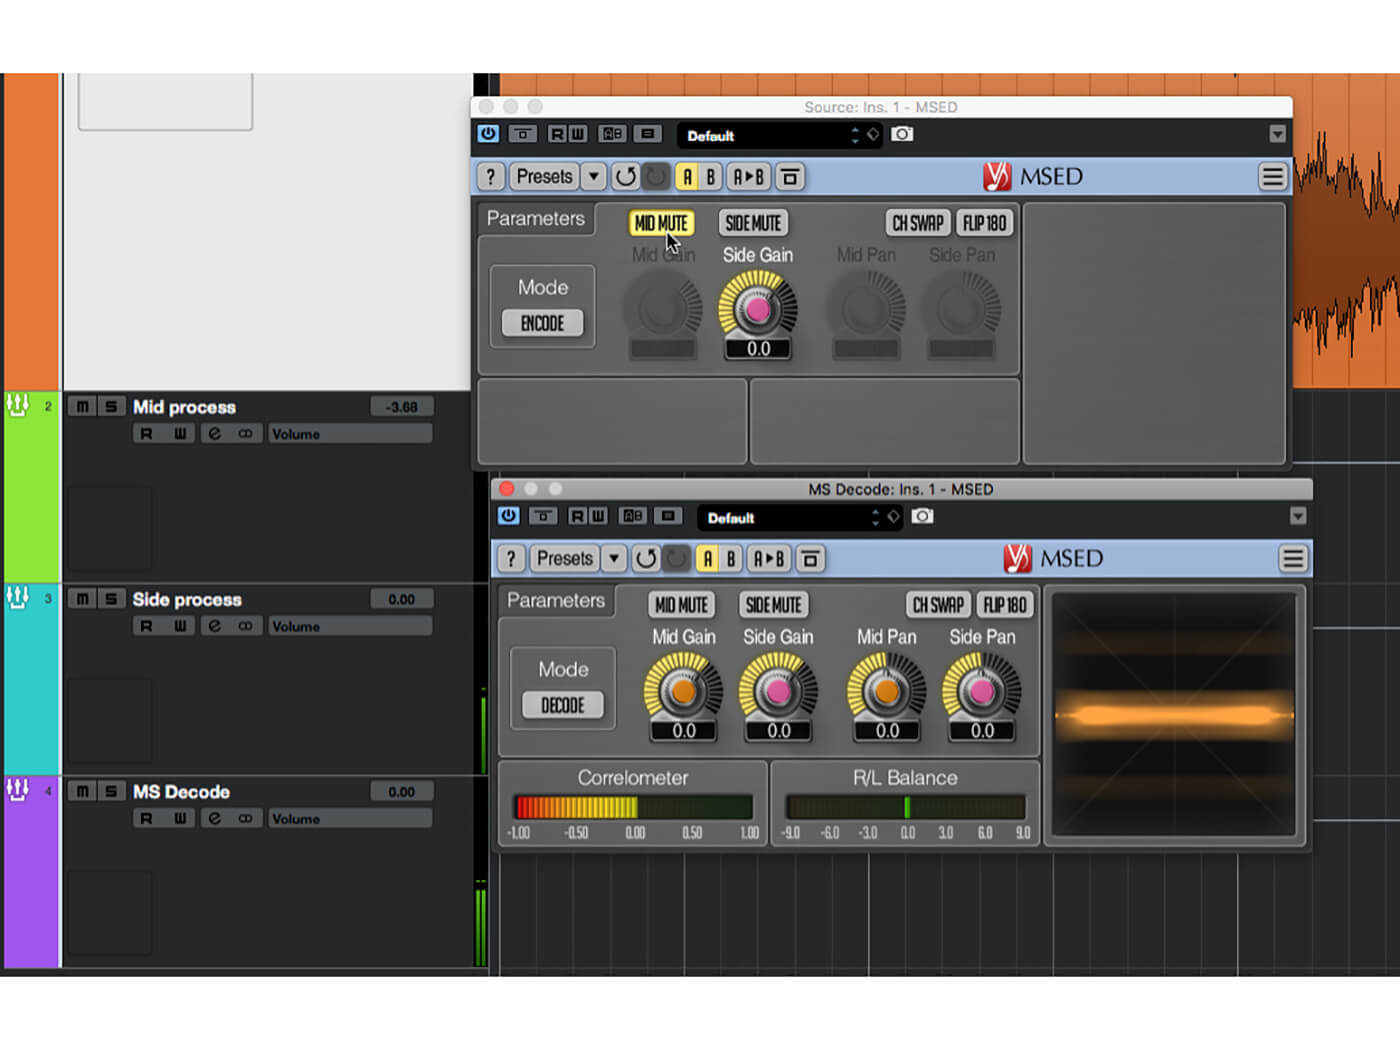
10. Hit play. You should now hear the conventional L/R stereo signal. Open the M/S encoder on the source audio track and alternate between muting the mid and side signals, noting in particular how the side signal is now heard in stereo, not mono.
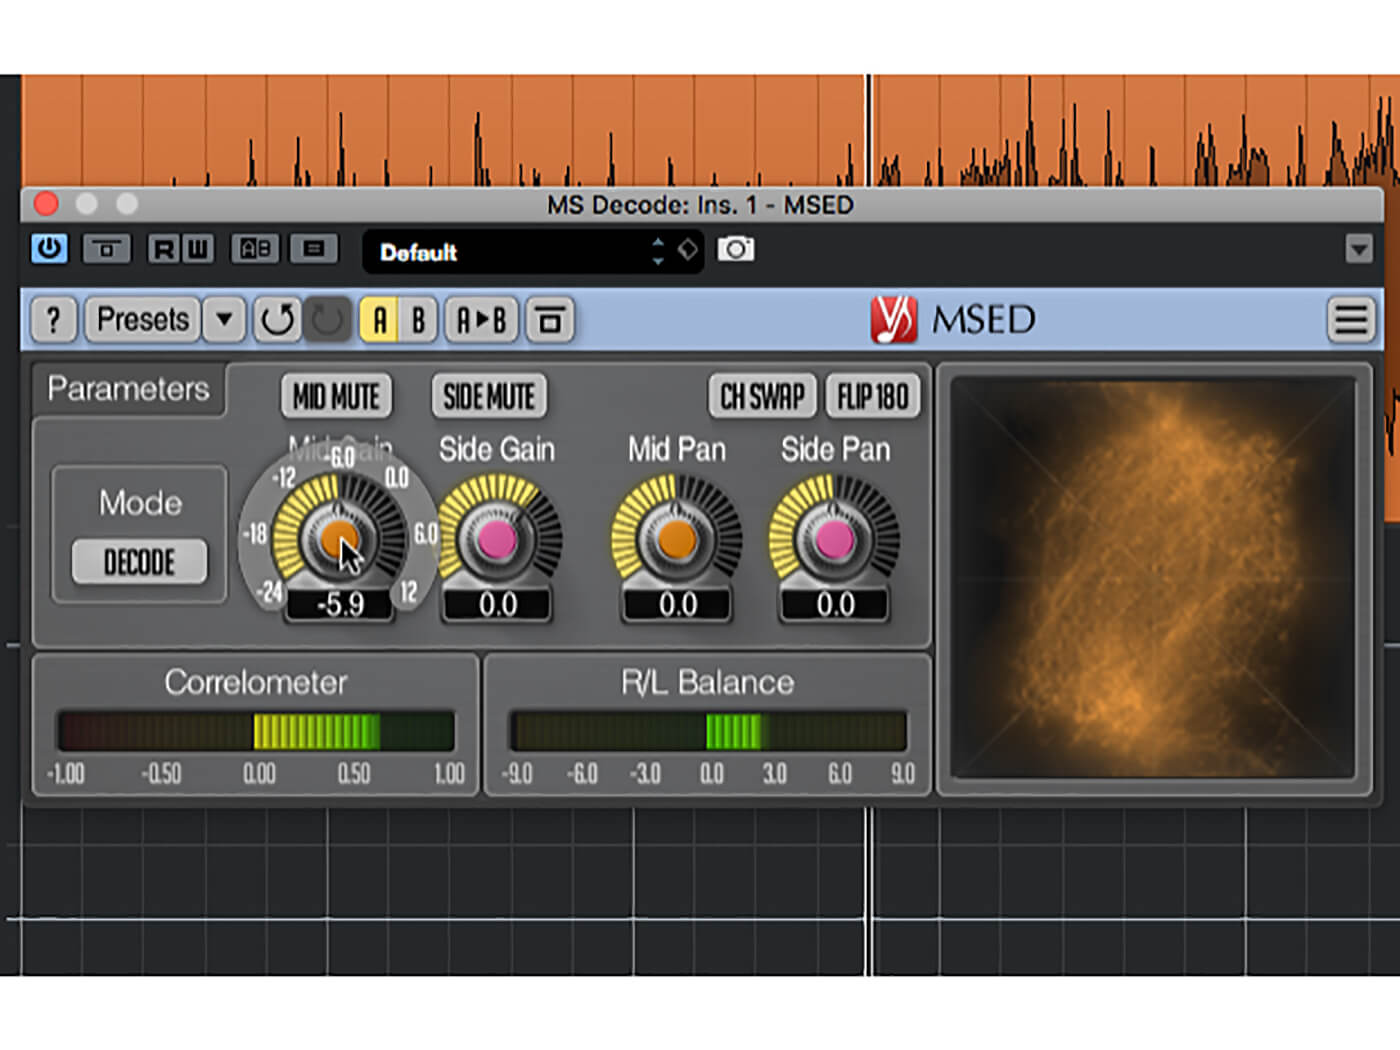
11. Okay, so let’s do some processing. The simplest M/S processing trick is to adjust the stereo width by changing the balance between mid and side signal levels. Open the M/S decoder instance and experiment with this now.
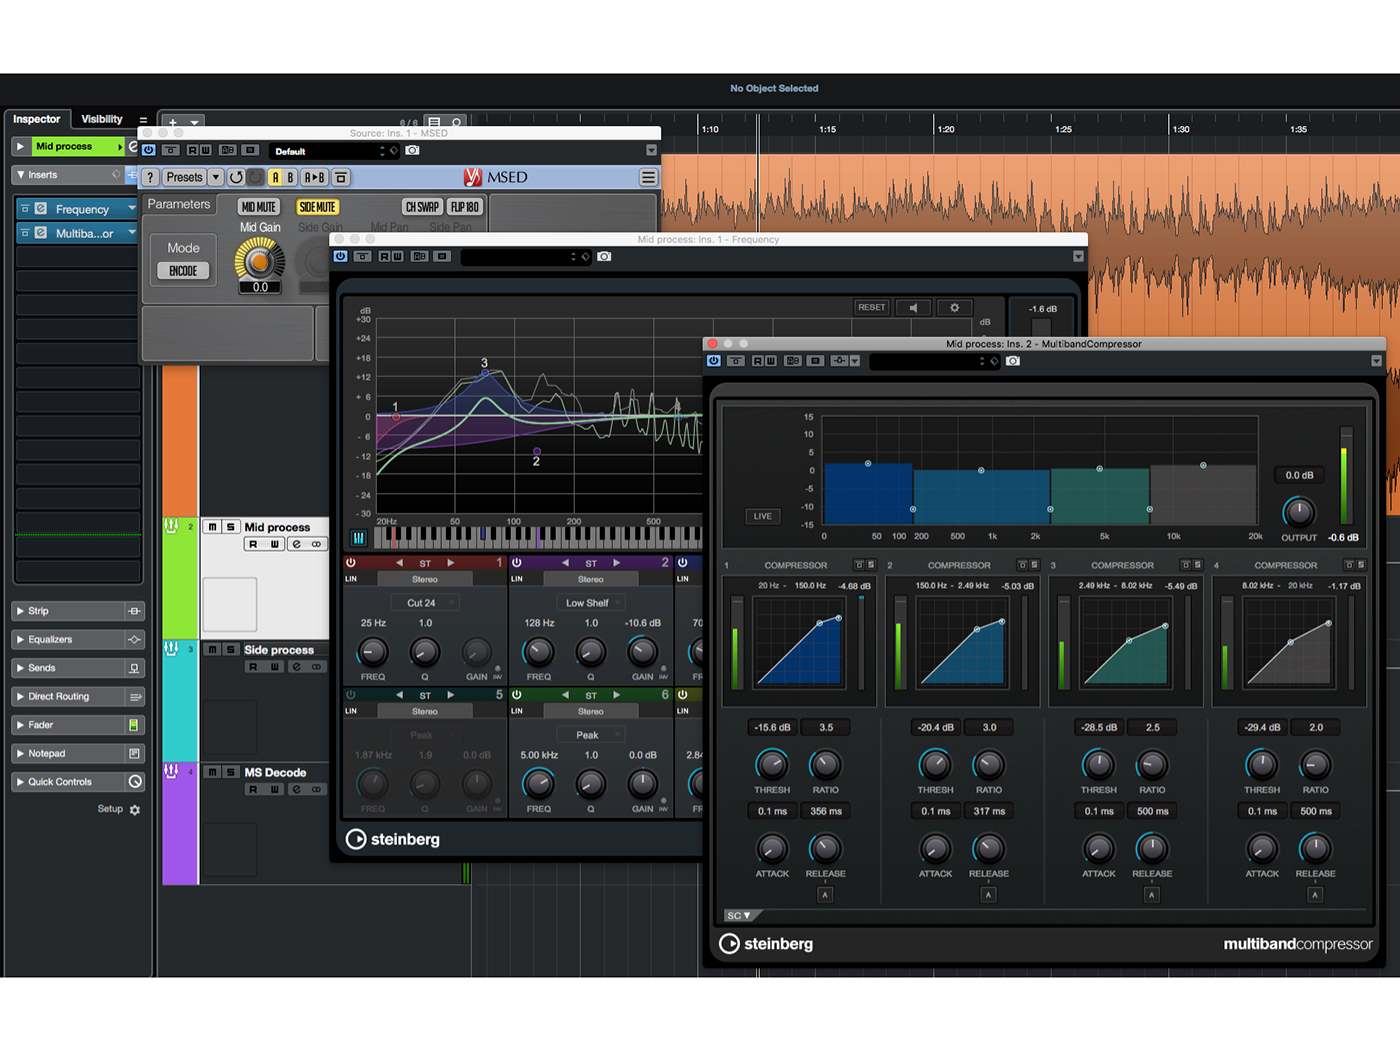
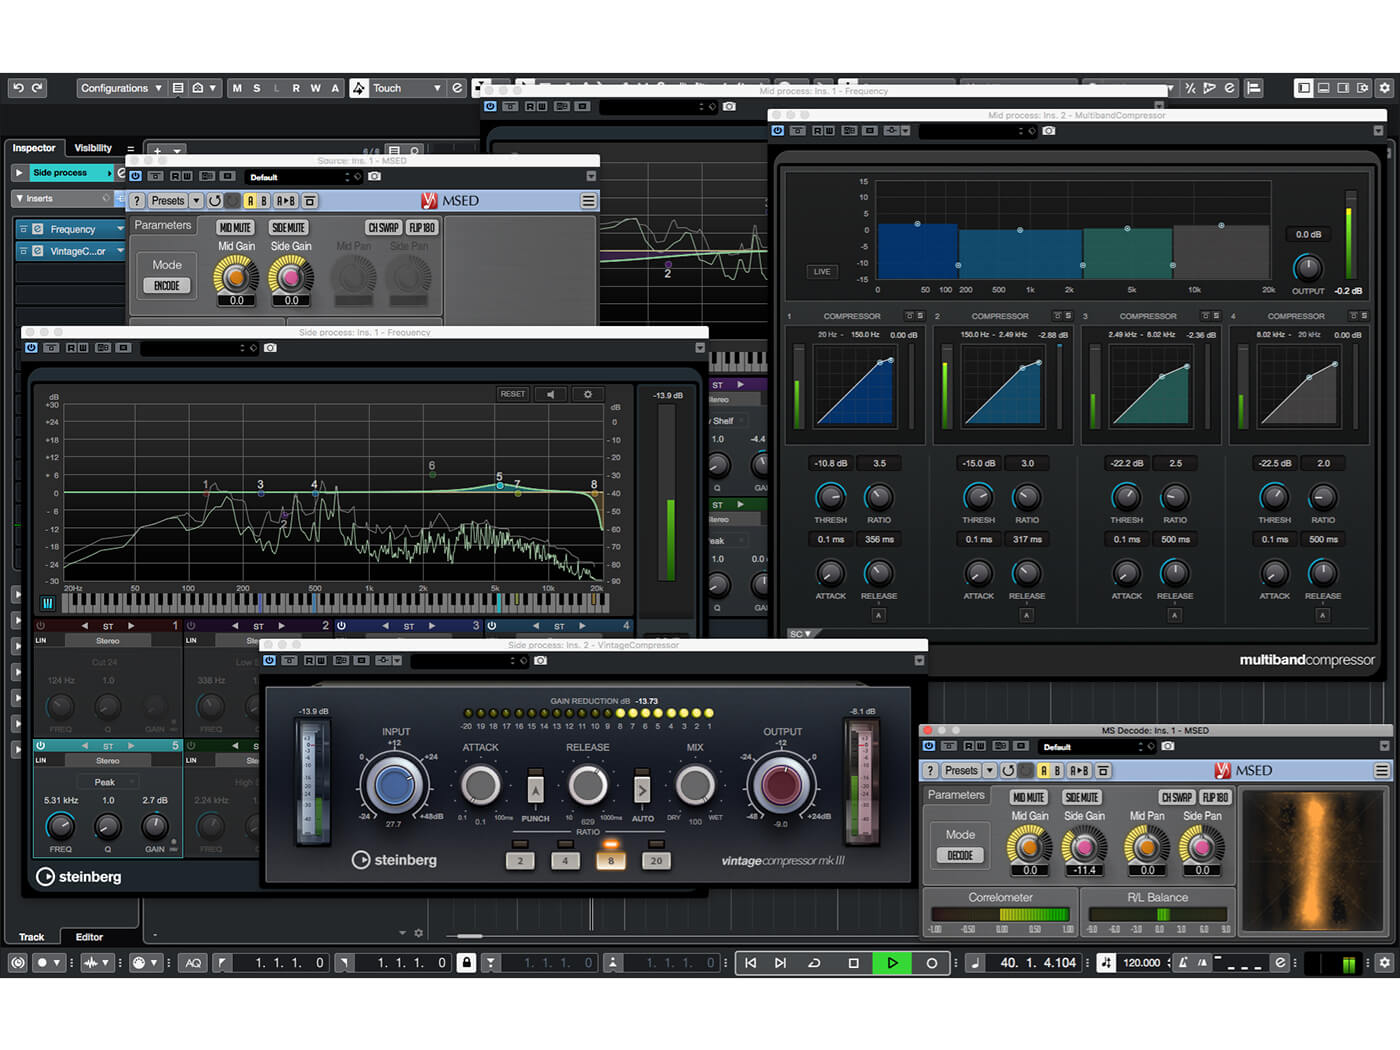
12. Mute the side signal using the M/S encoder instance, so that only the mid is audible. On the Mid process channel, insert an EQ (one with linear phase if possible) and a multiband compressor. Set these up to give a punchy, full-bodied sound.
![]()
LINEAR PHASE EQ M/S encoding/decoding works via phase addition and cancellation, so it is important to try not to disturb signal phases too much during processing. Regular EQ does disturb signal phase, so it’s best to use linear phase EQ when M/S processing.
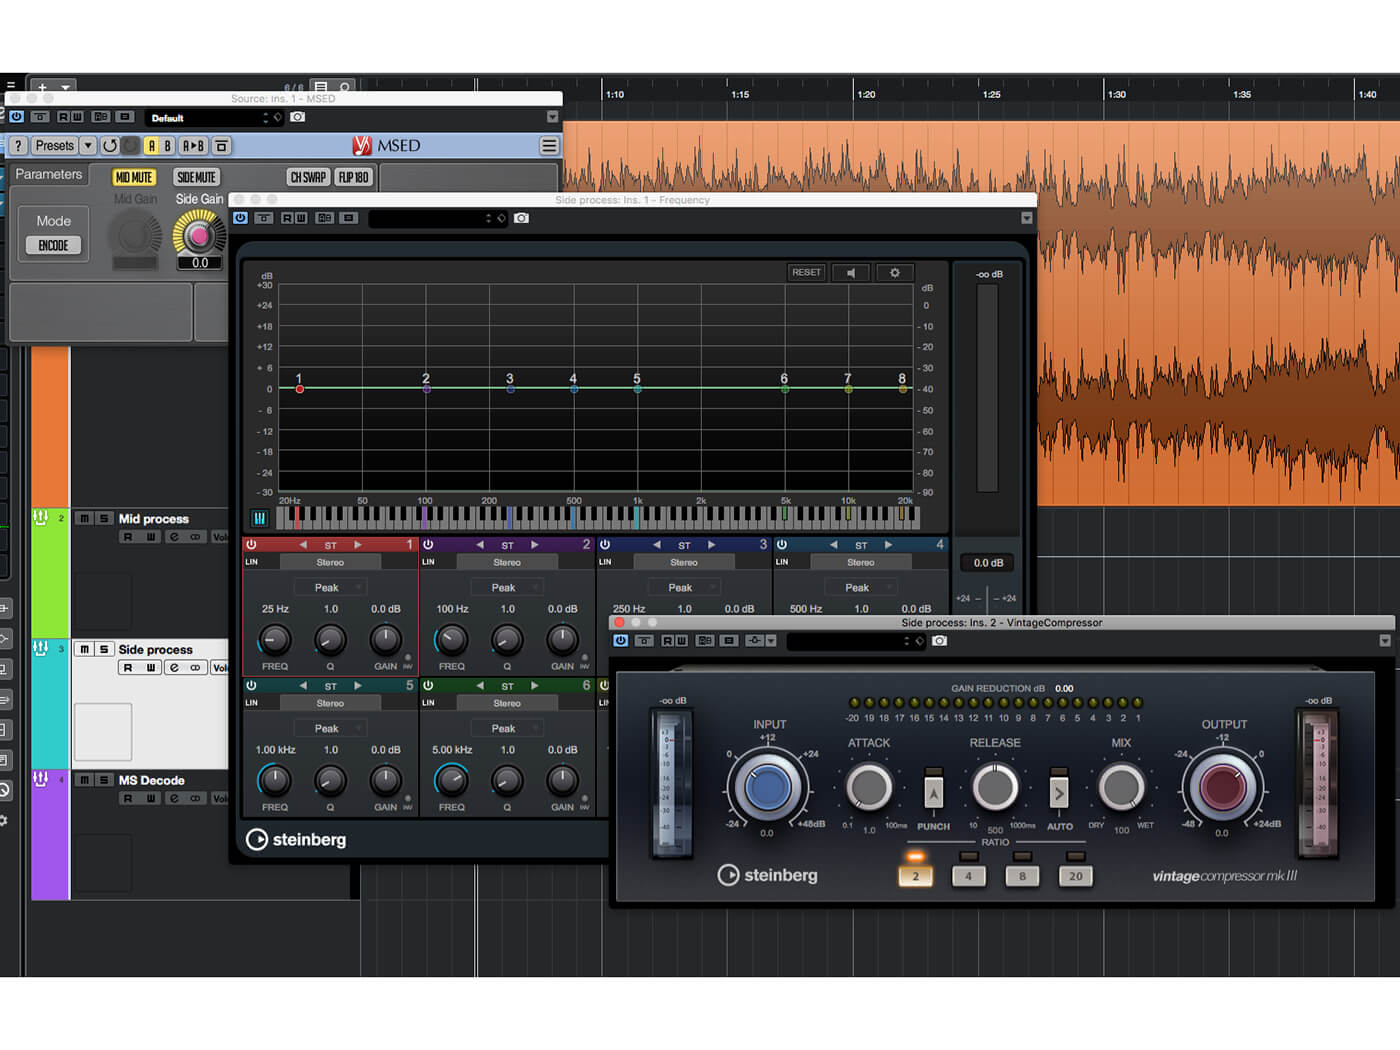
13. In the M/S encoder, mute the mid signal and unmute the side, then switch to the Side process track. Insert an EQ (again, linear phase if you have such) and an optical-style compressor such as Steinberg Vintage Compressor.
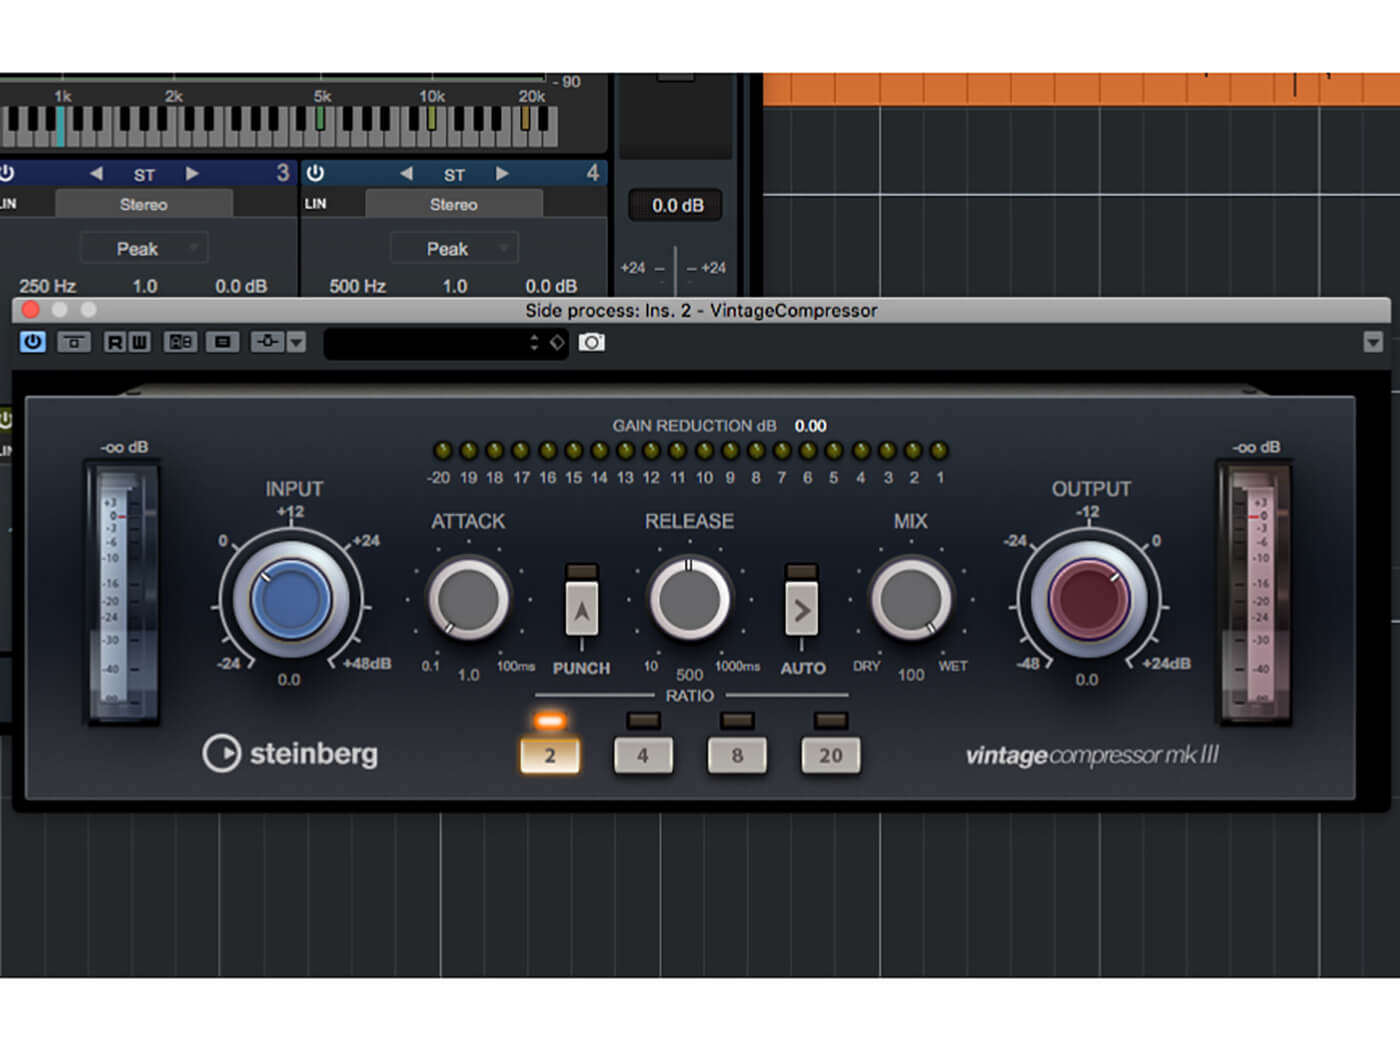
14. The side signal tends not to have much low end in it, so won’t make a broadband compressor pump unpleasantly, and can convey a lot of dynamic information to the listener, so gentle compression can be desirable, hence using an optical-style compressor.
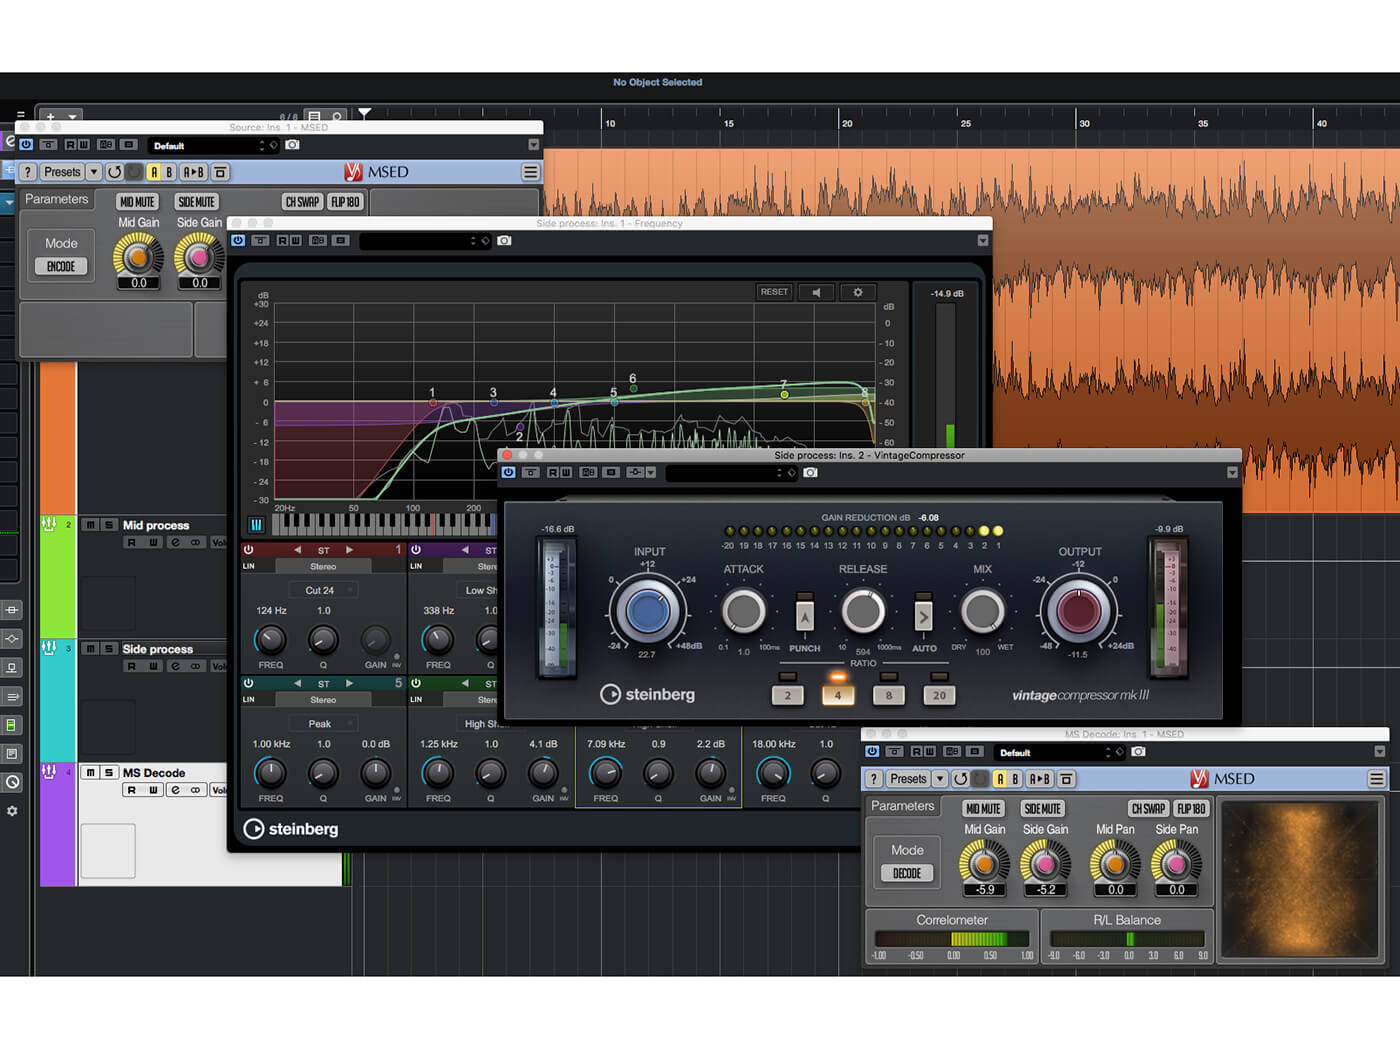
15. Set up the EQ to give a light, ‘airy’ sound, and on the compressor dial-in settings that even out the dynamics without sounding obvious or harsh. When done, unmute the mid channel then use the M/S decoder to set the stereo width.
16. Have a listen to the results, and tweak the processors until you’re satisfied. The simplest way to compare with the dry signal is to bypass all of the various insert chains, which is a bit inconvenient, but less so if done in the mixer window.
17. Let’s create a different result now. Mute the encoder’s side channel. Change the mid processing settings to give a subtler sound than before, with less punch and body. Change the side processing by increasing the compression and removing some of the airiness.
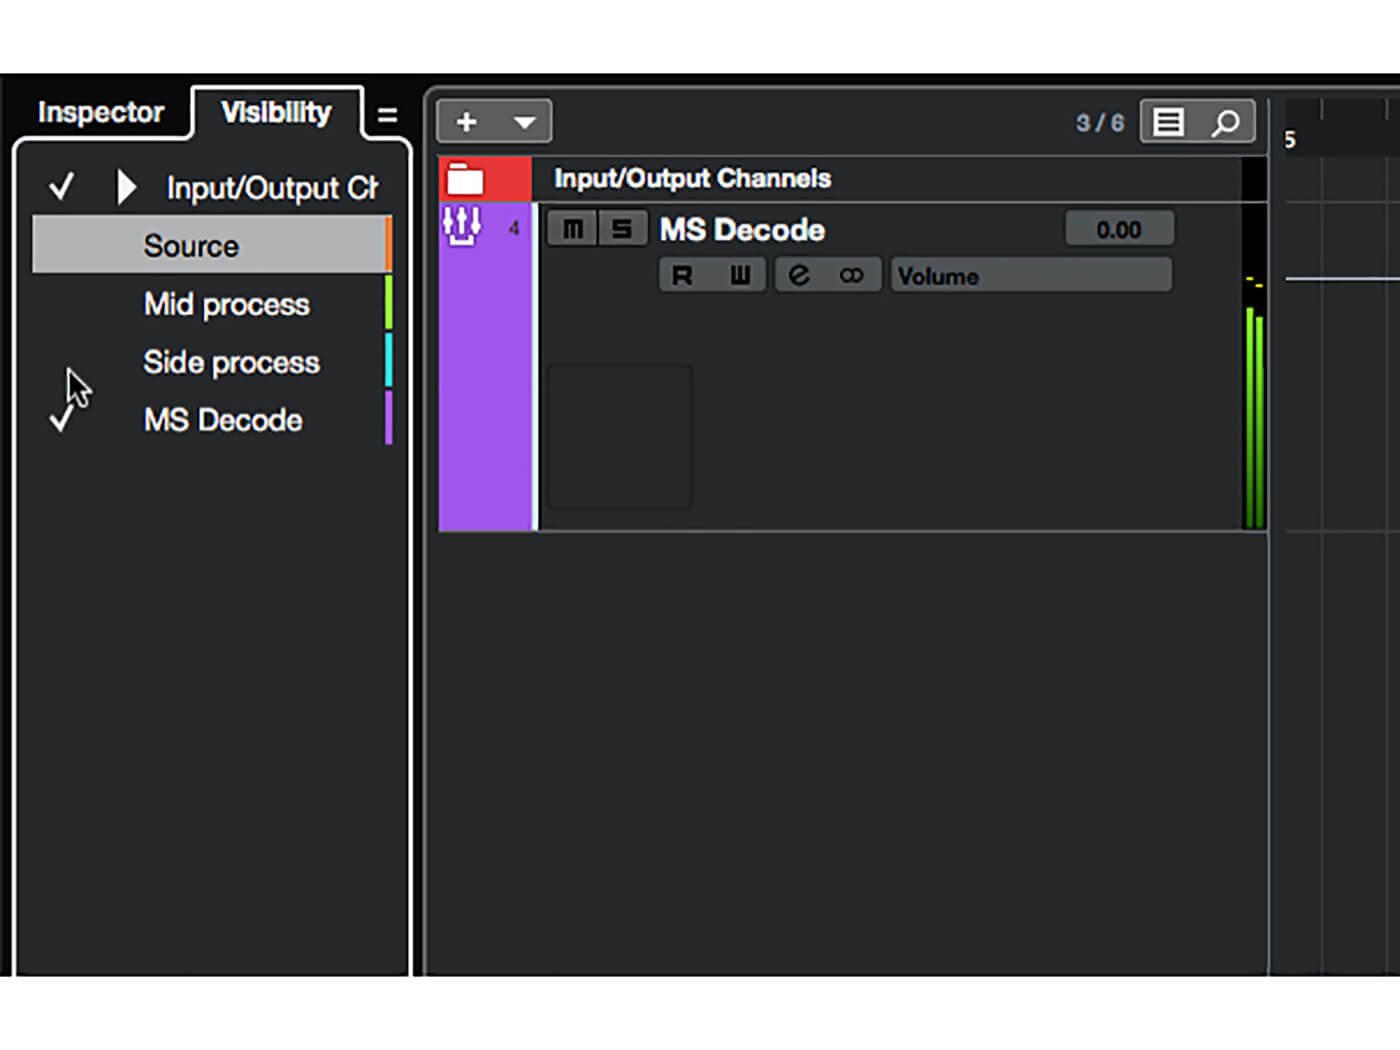
18. The extra track clutter you’ve created can be hidden away using the track visibility panel. You could also use an audio rather than group track for the M/S decoding, allowing you to record the results whilst retaining the settings that got you there.
For more Cubase tutorials and workshops, click here.