Dance Music Build-Ups Step-By-Step (Continued)
We’re continuing our foray into creating epic dance music build-ups in Logic. Alex Holmes adds new effects to the mix to create something incredible. Check out part 1. 7. Let’s develop the main synth build by setting automation to Touch and recording an increase in the Feedback of a Tape Delay. Tweaking Character and Modulation […]
We’re continuing our foray into creating epic dance music build-ups in Logic. Alex Holmes adds new effects to the mix to create something incredible. Check out part 1.
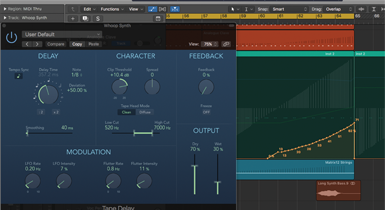
7. Let’s develop the main synth build by setting automation to Touch and recording an increase in the Feedback of a Tape Delay. Tweaking Character and Modulation controls can sound more organic.
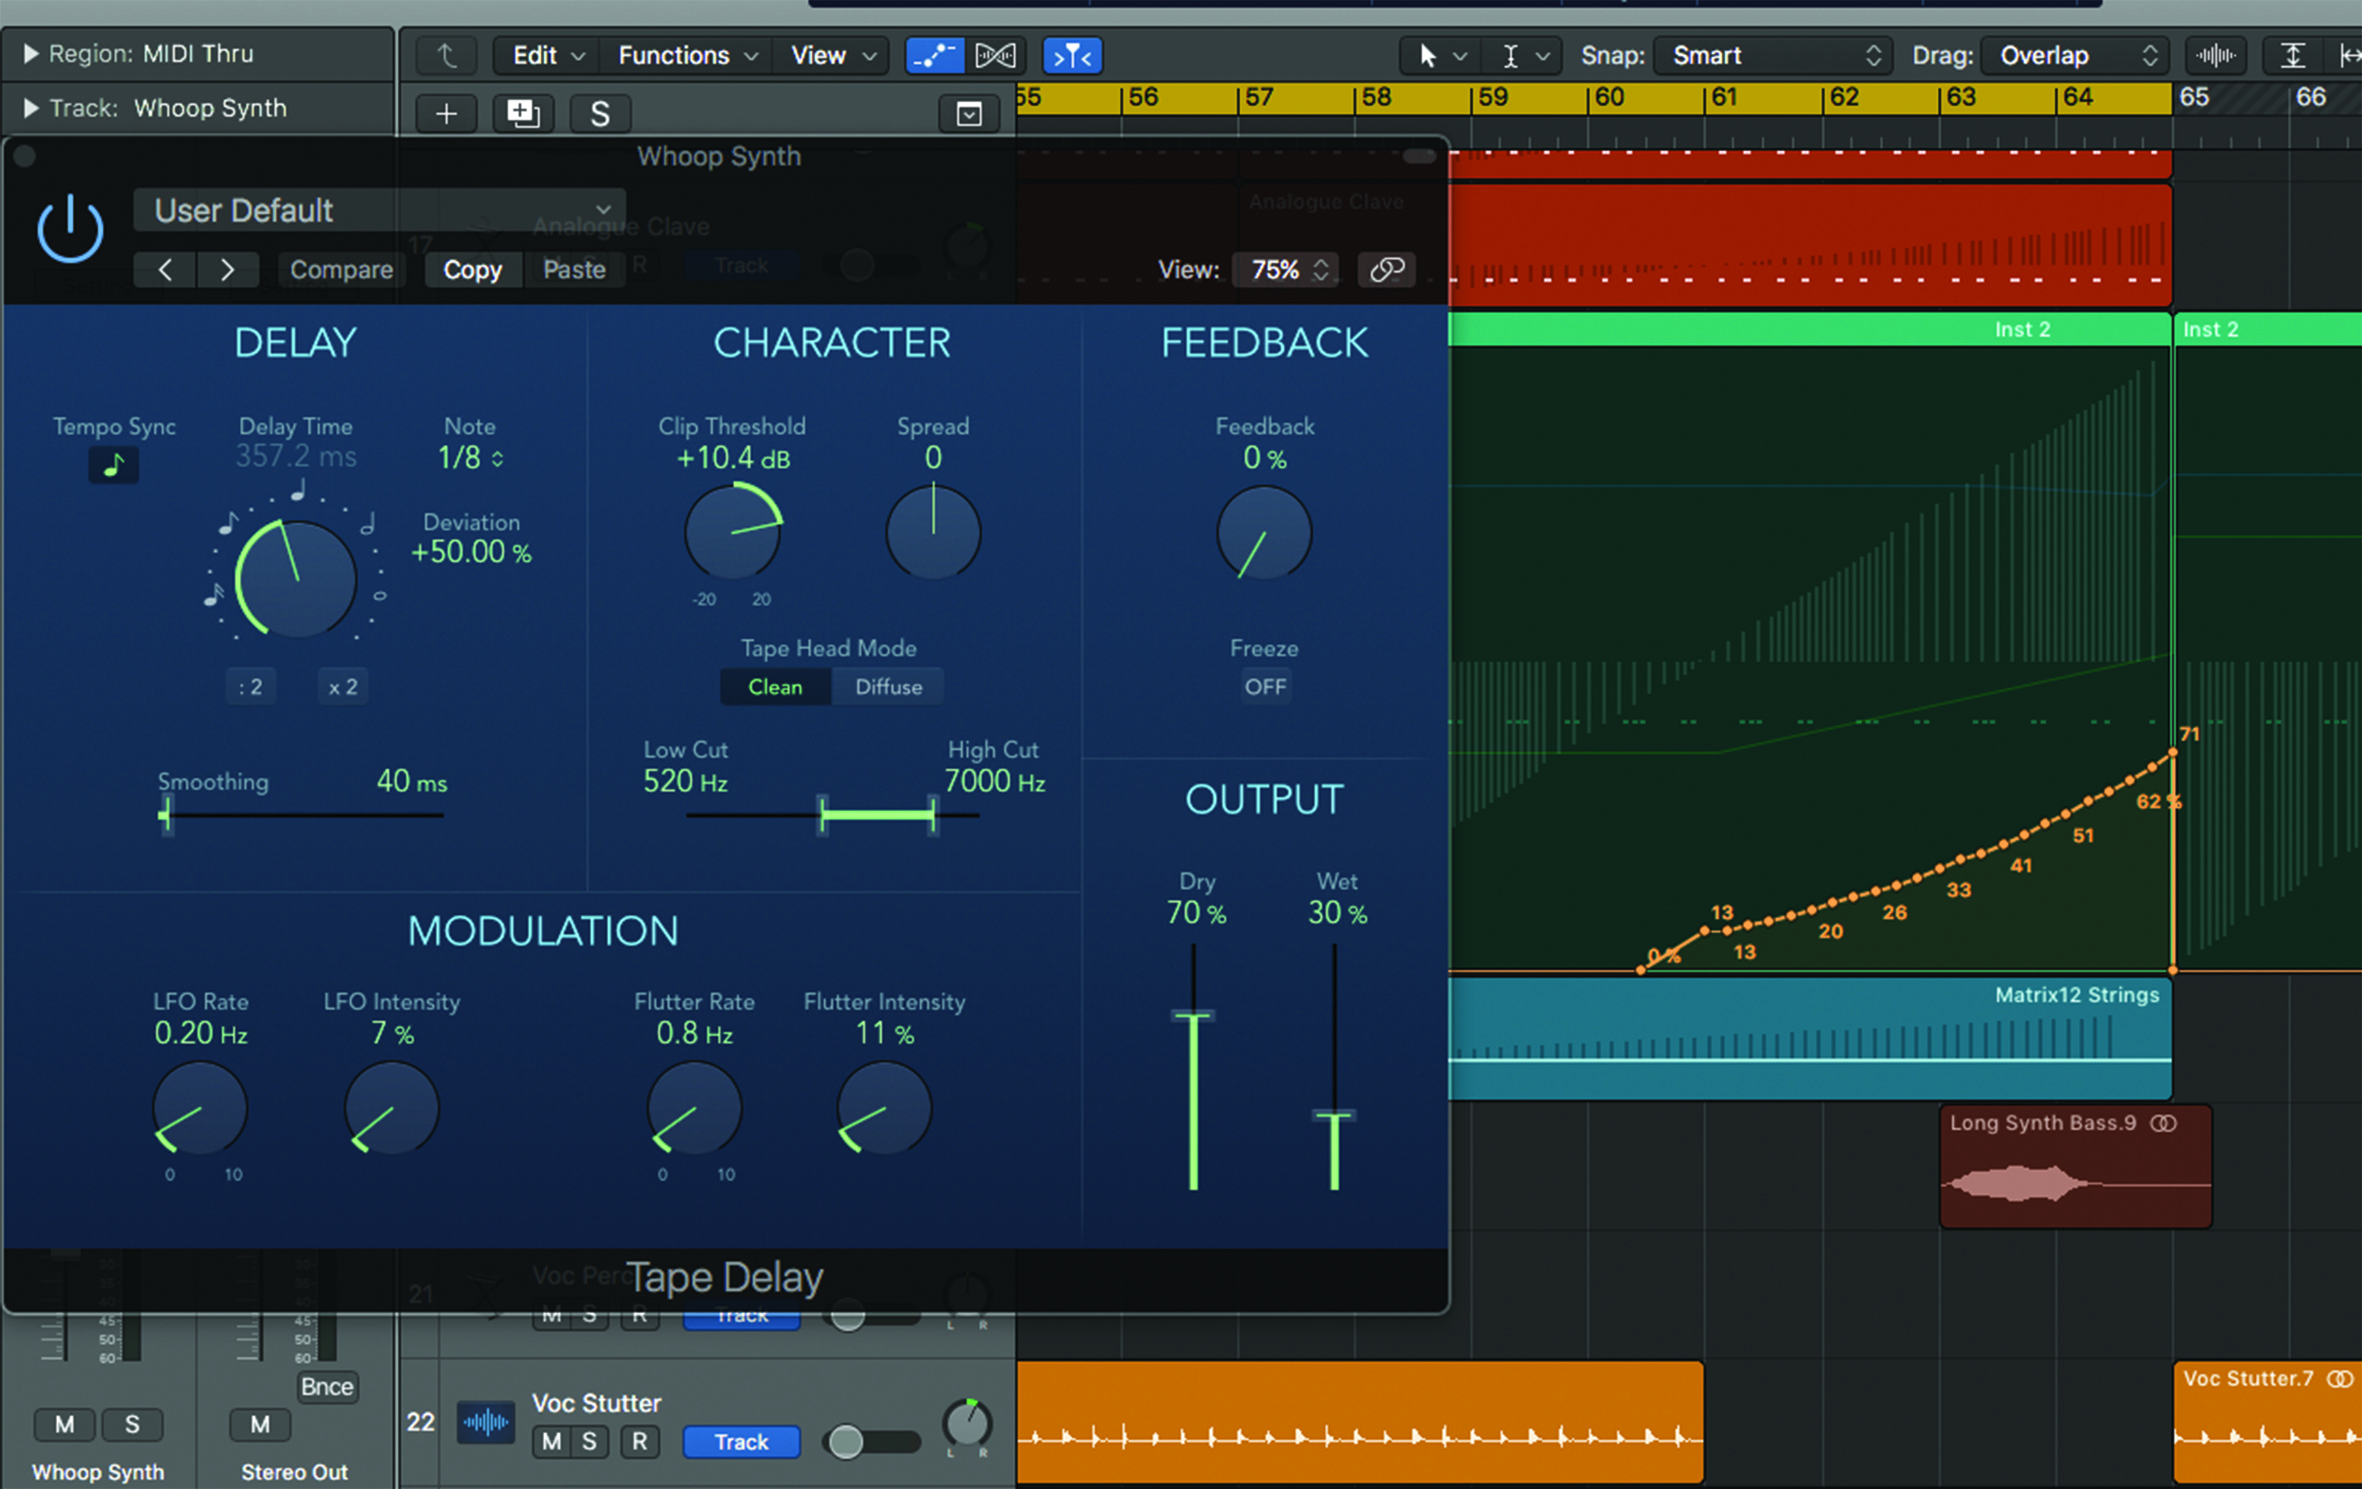
8. Filters and volume fades are staples of any build-up. Fade in hi-hats to build high-frequency energy, but leave a couple of extra dBs or Hz so there’s an extra bump of sizzle on the drop.
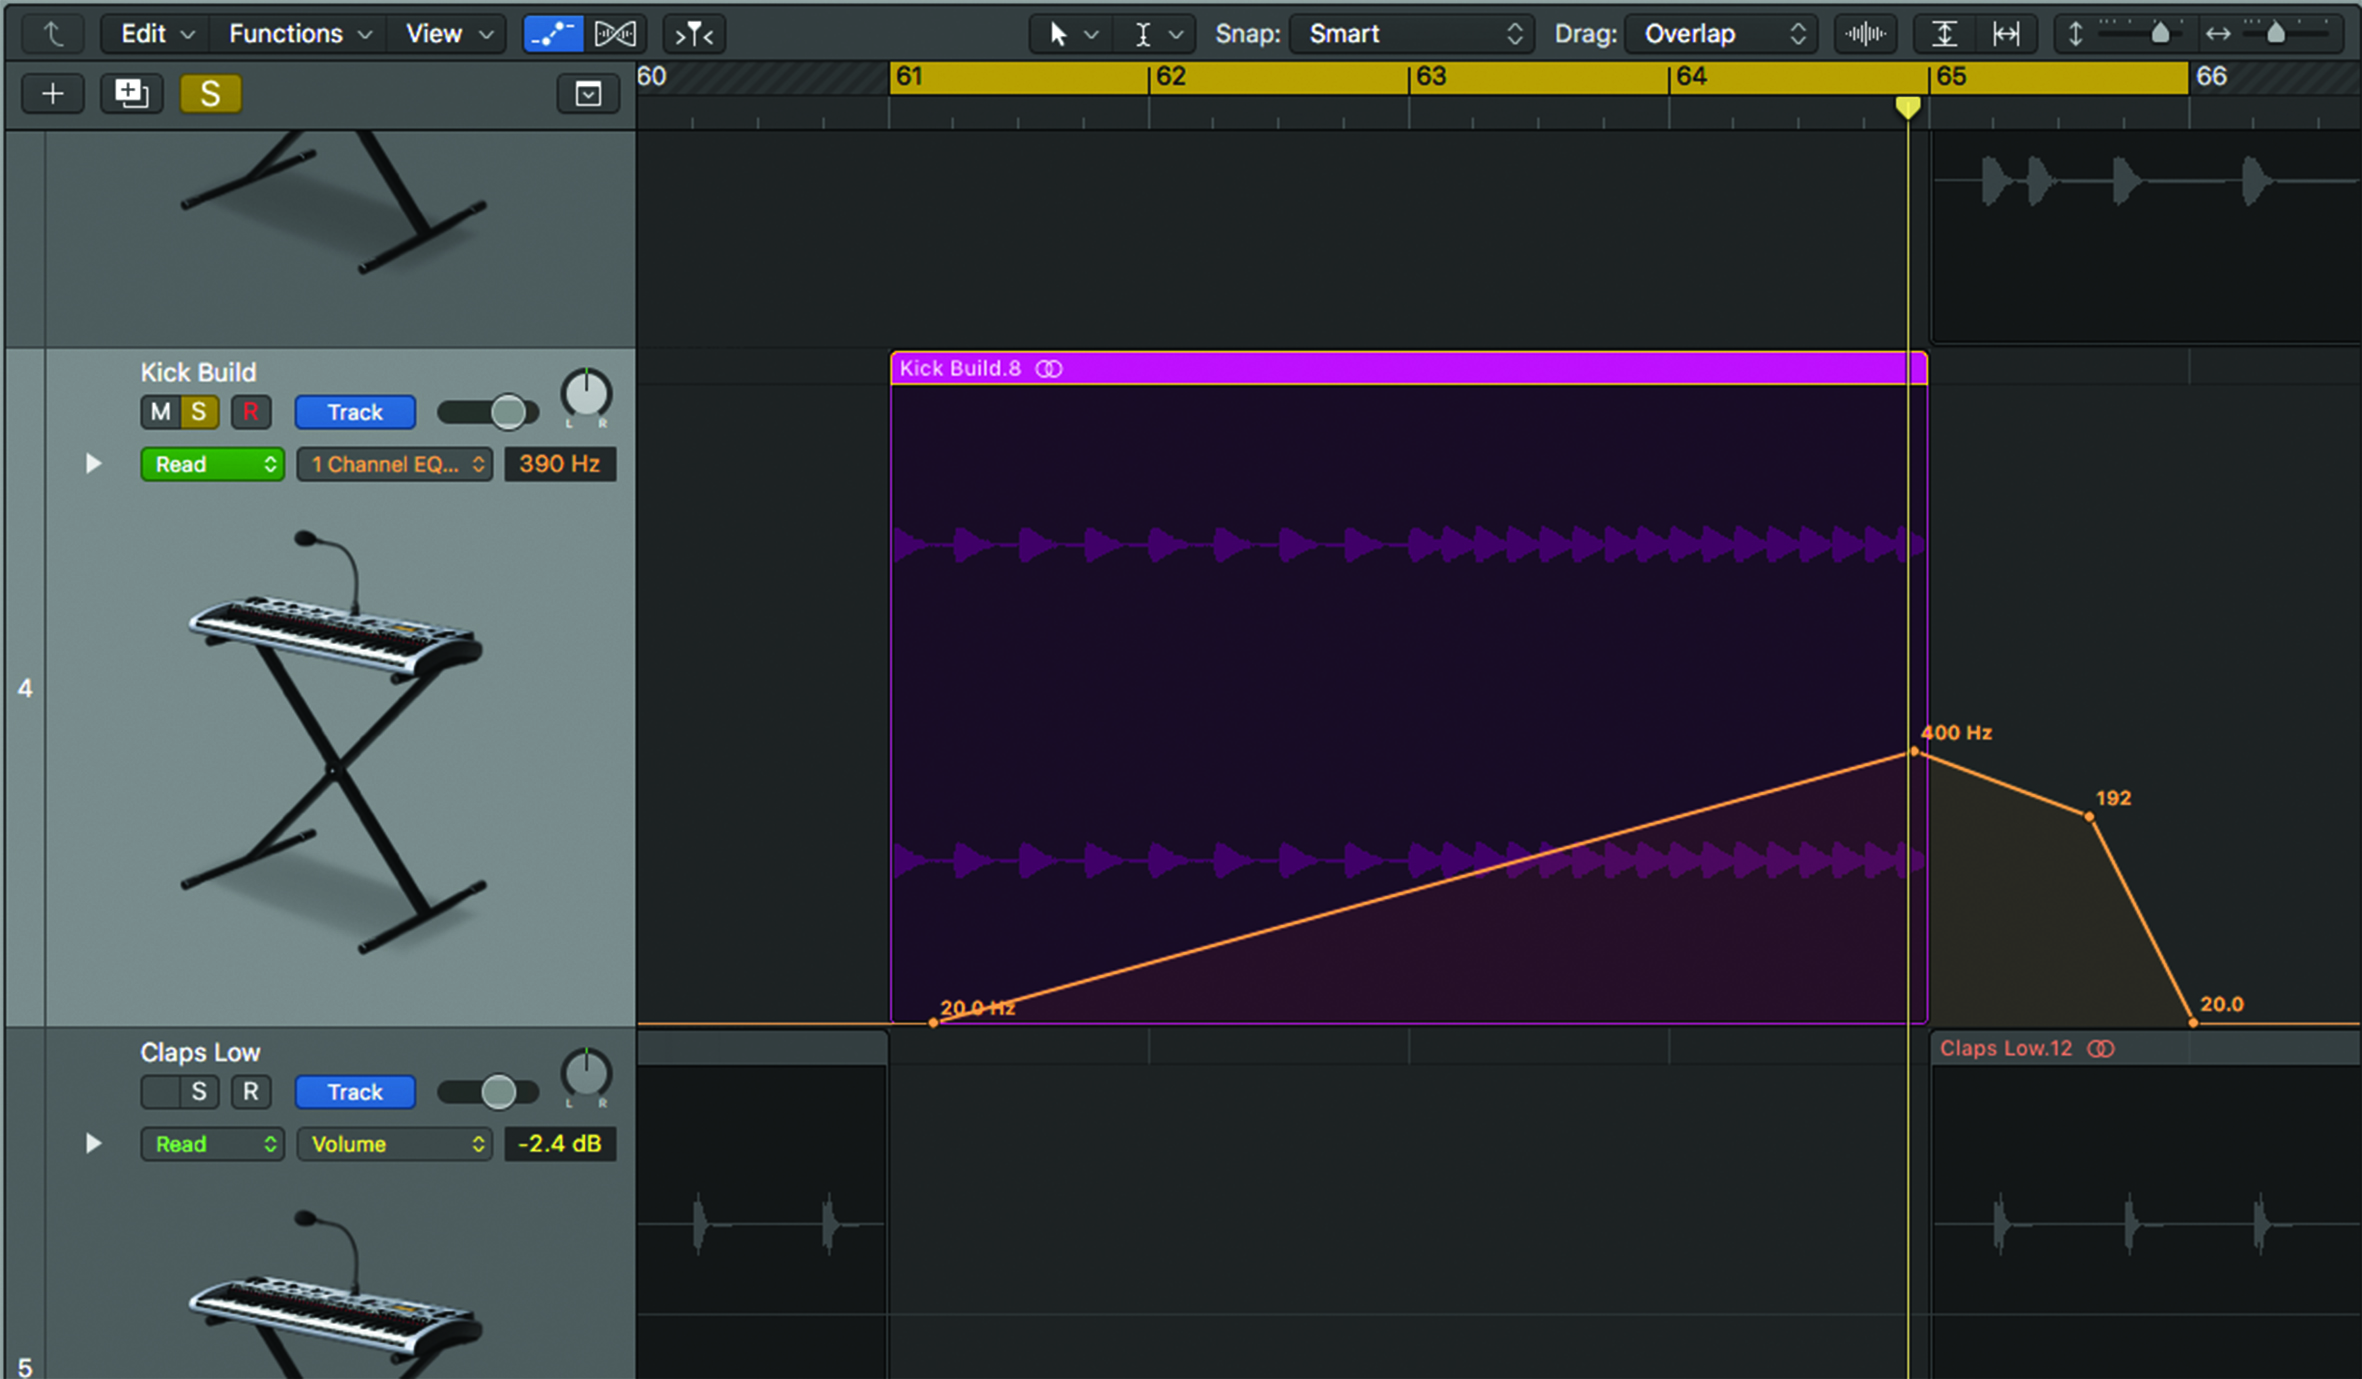
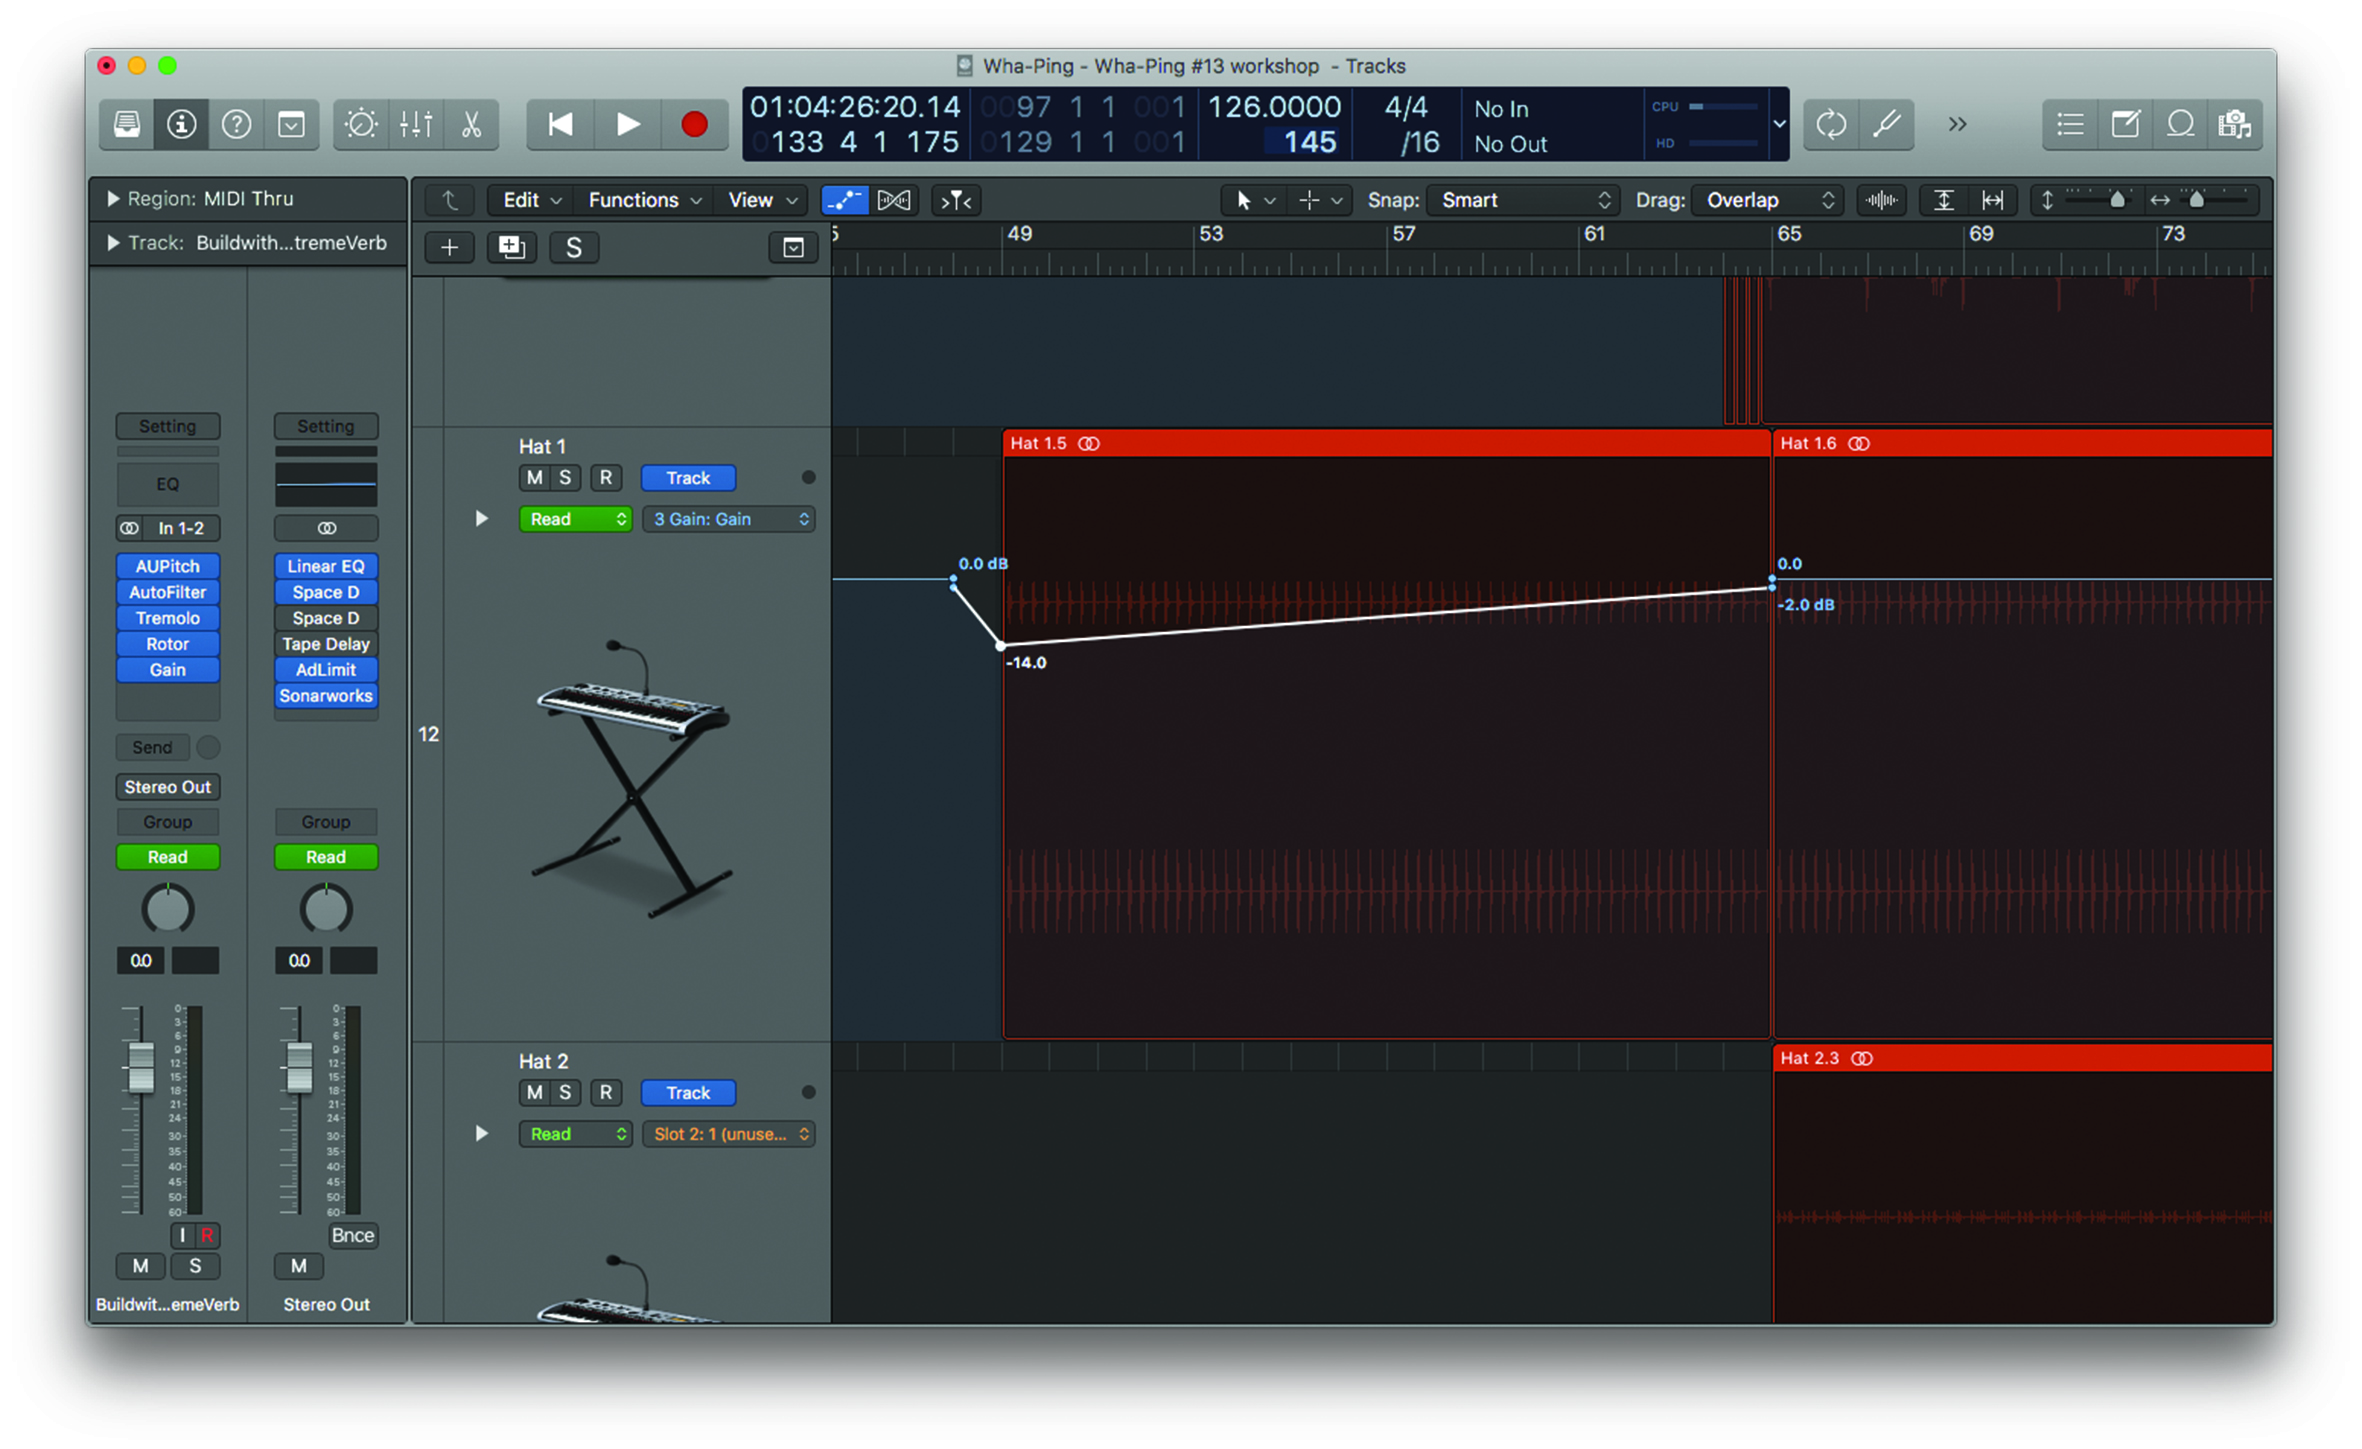
9. High-pass filter sweeps, either up or down, work especially well on kick fills. Our kick-drum fill lasts for 4 bars leading into the drop, with an upwards sweep that makes the fill sound like it’s rising.

10. For a different movement flavour, we’ve put a Phaser on the flat pad chord and turned the LFO rates down to 0Hz: now we can draw in automation for the Sweep Floor and Ceiling, for our own rise.
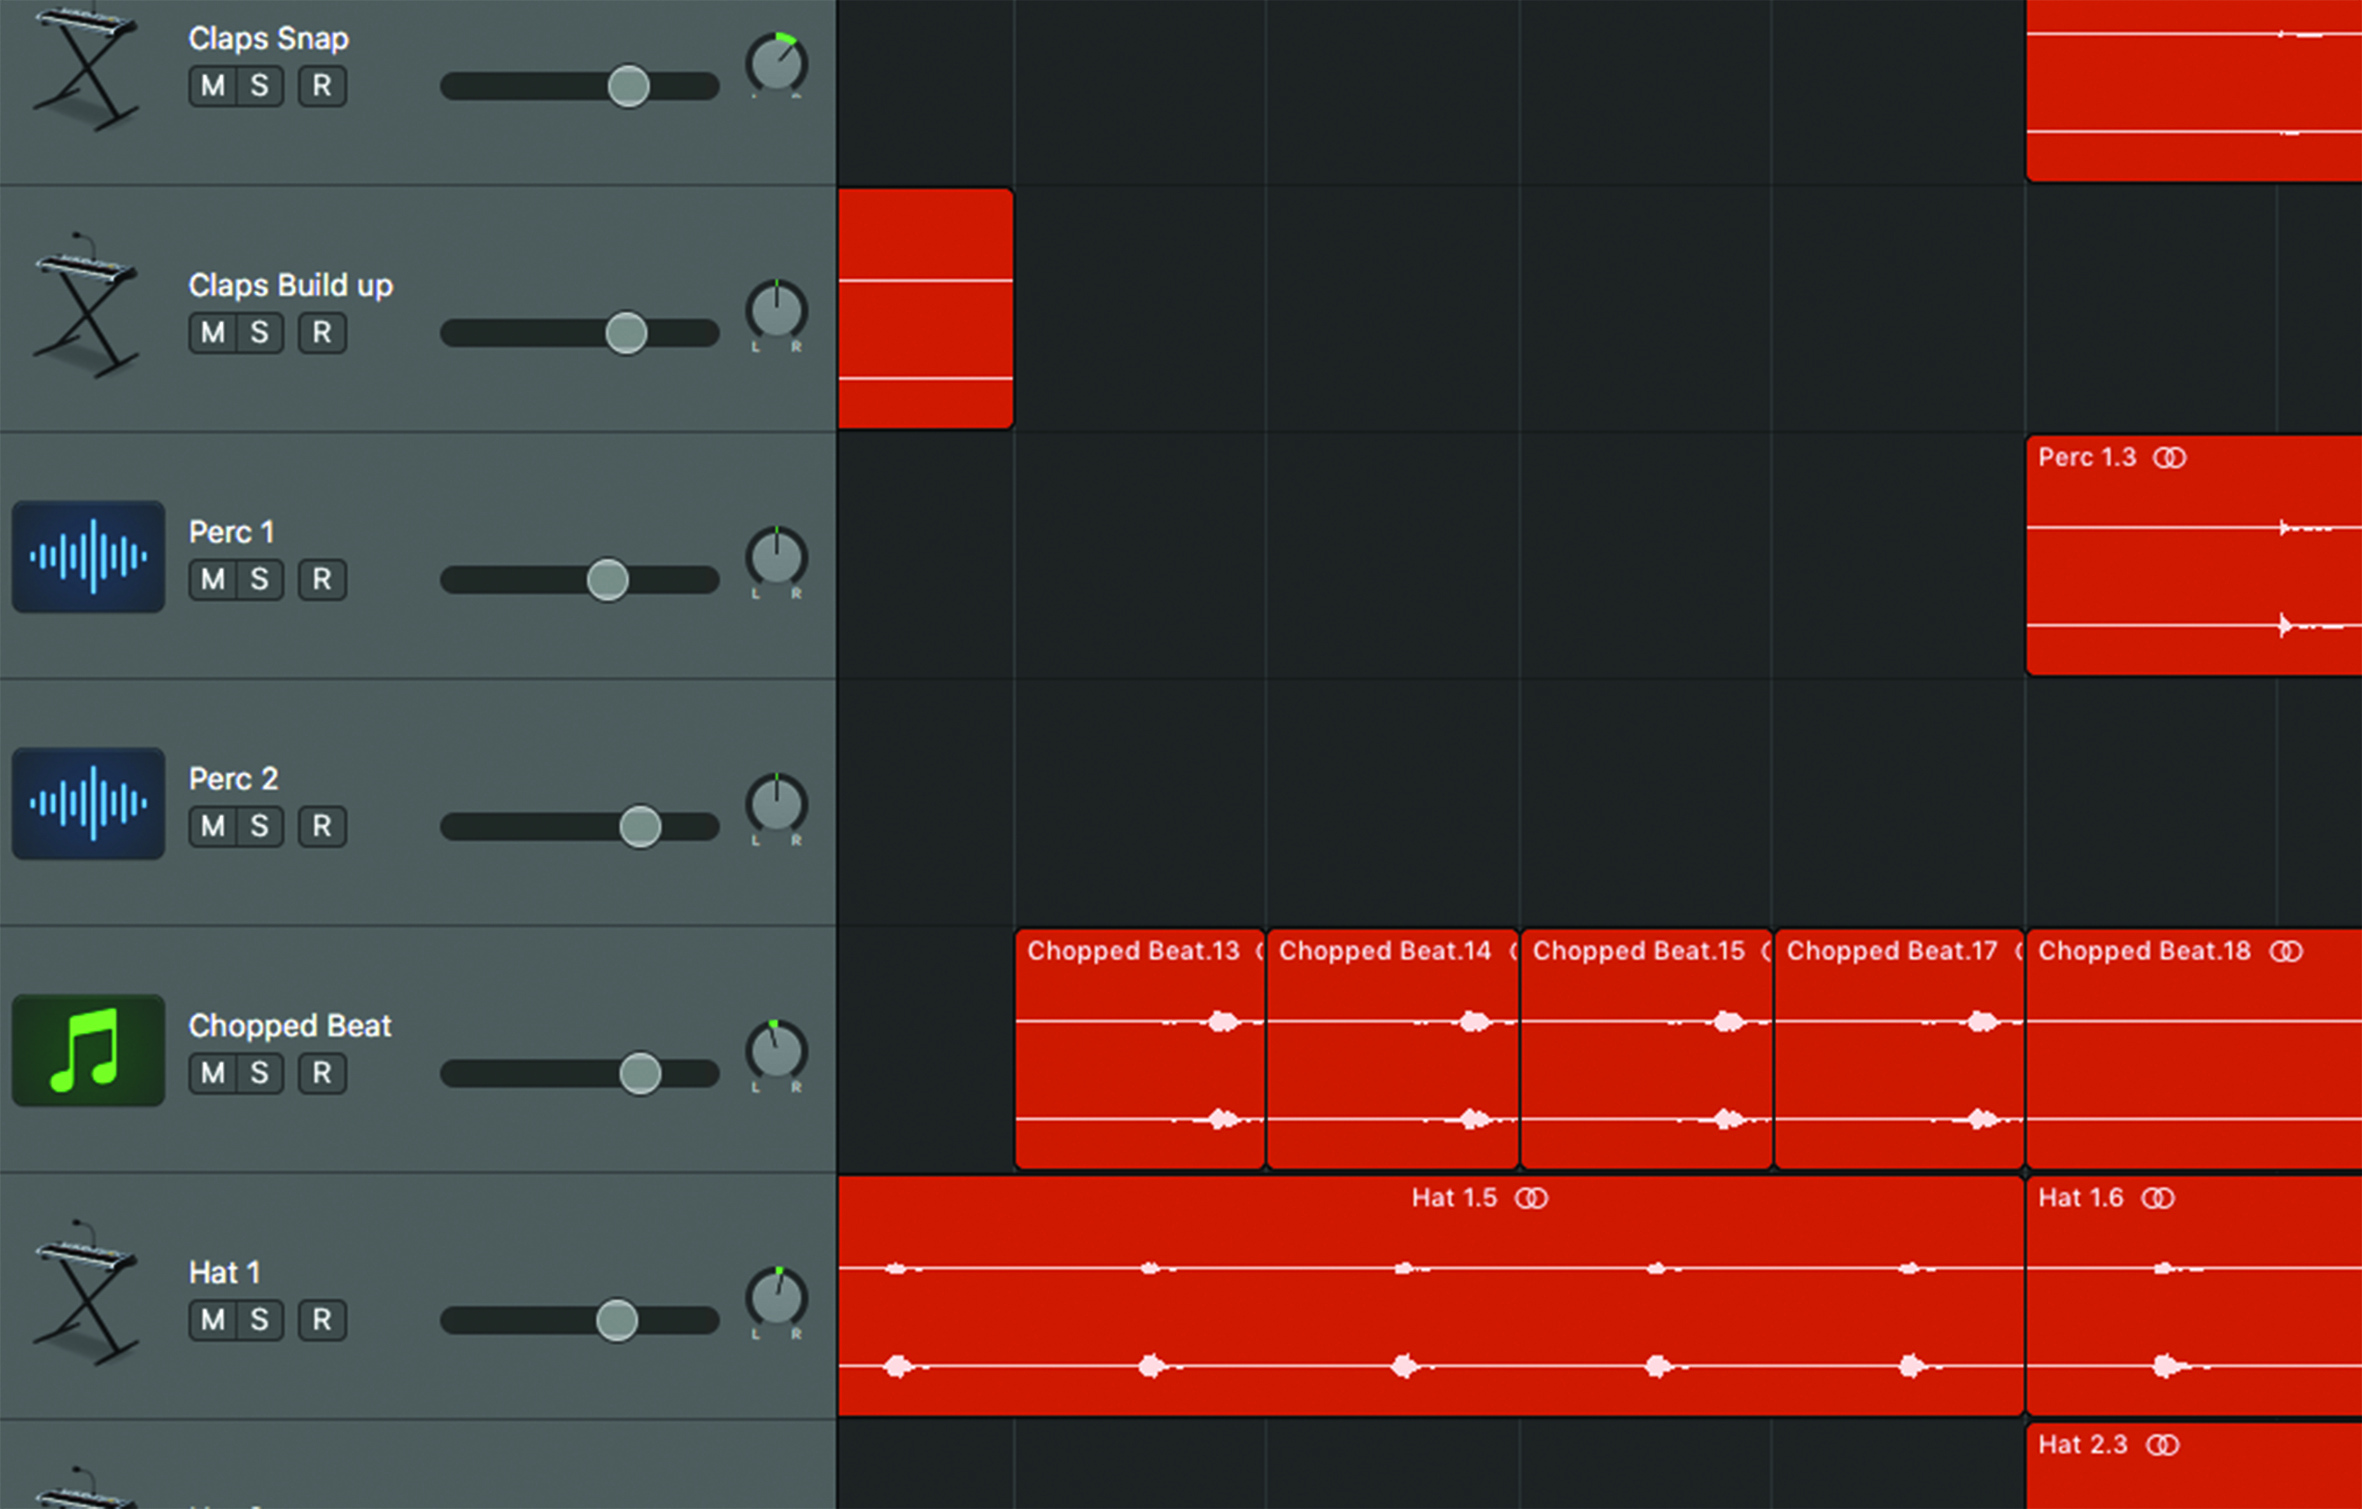
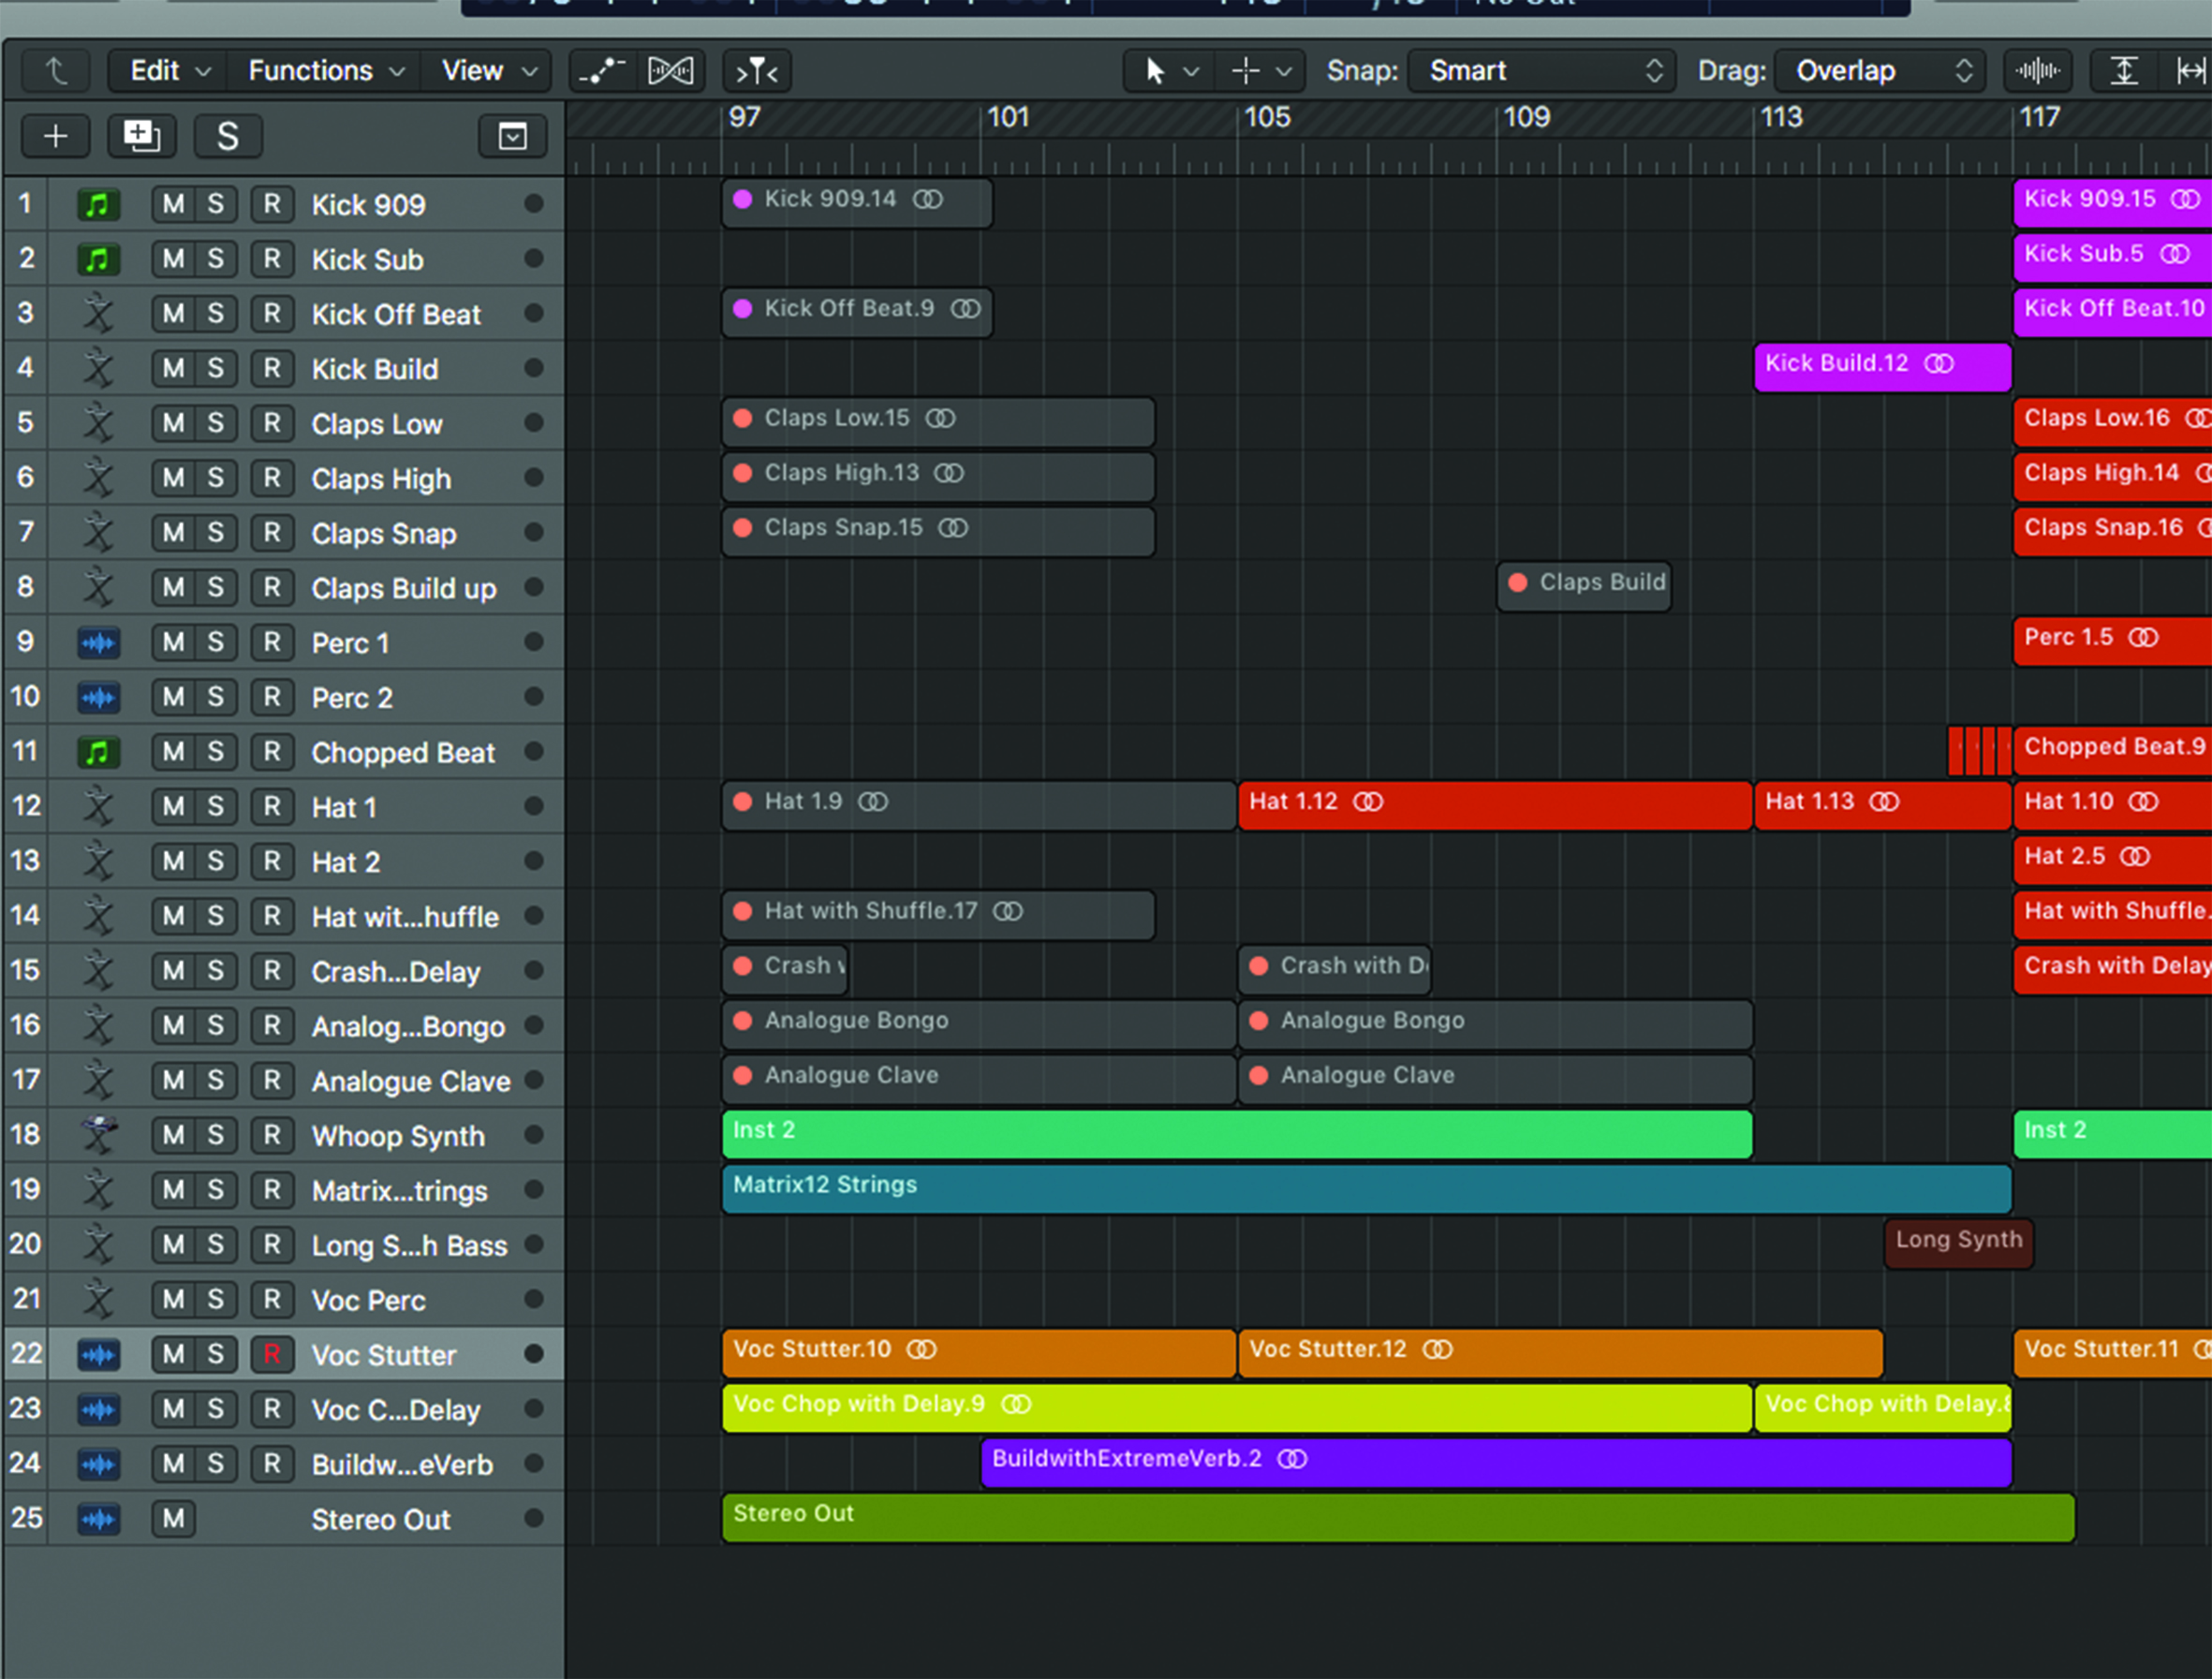
11. Depending on your build-up’s style, you may need a big or small detail in the final bars before everything kicks in. Drum fills work well, but we’ve faded in a small chop from elsewhere in the beat.

12. Let’s go extreme. Load up a Space Designer on the master with a very long reverb, EQ out some low end and remove the dry signal. Then bounce the whole build-up section for washed-out reverb sound.
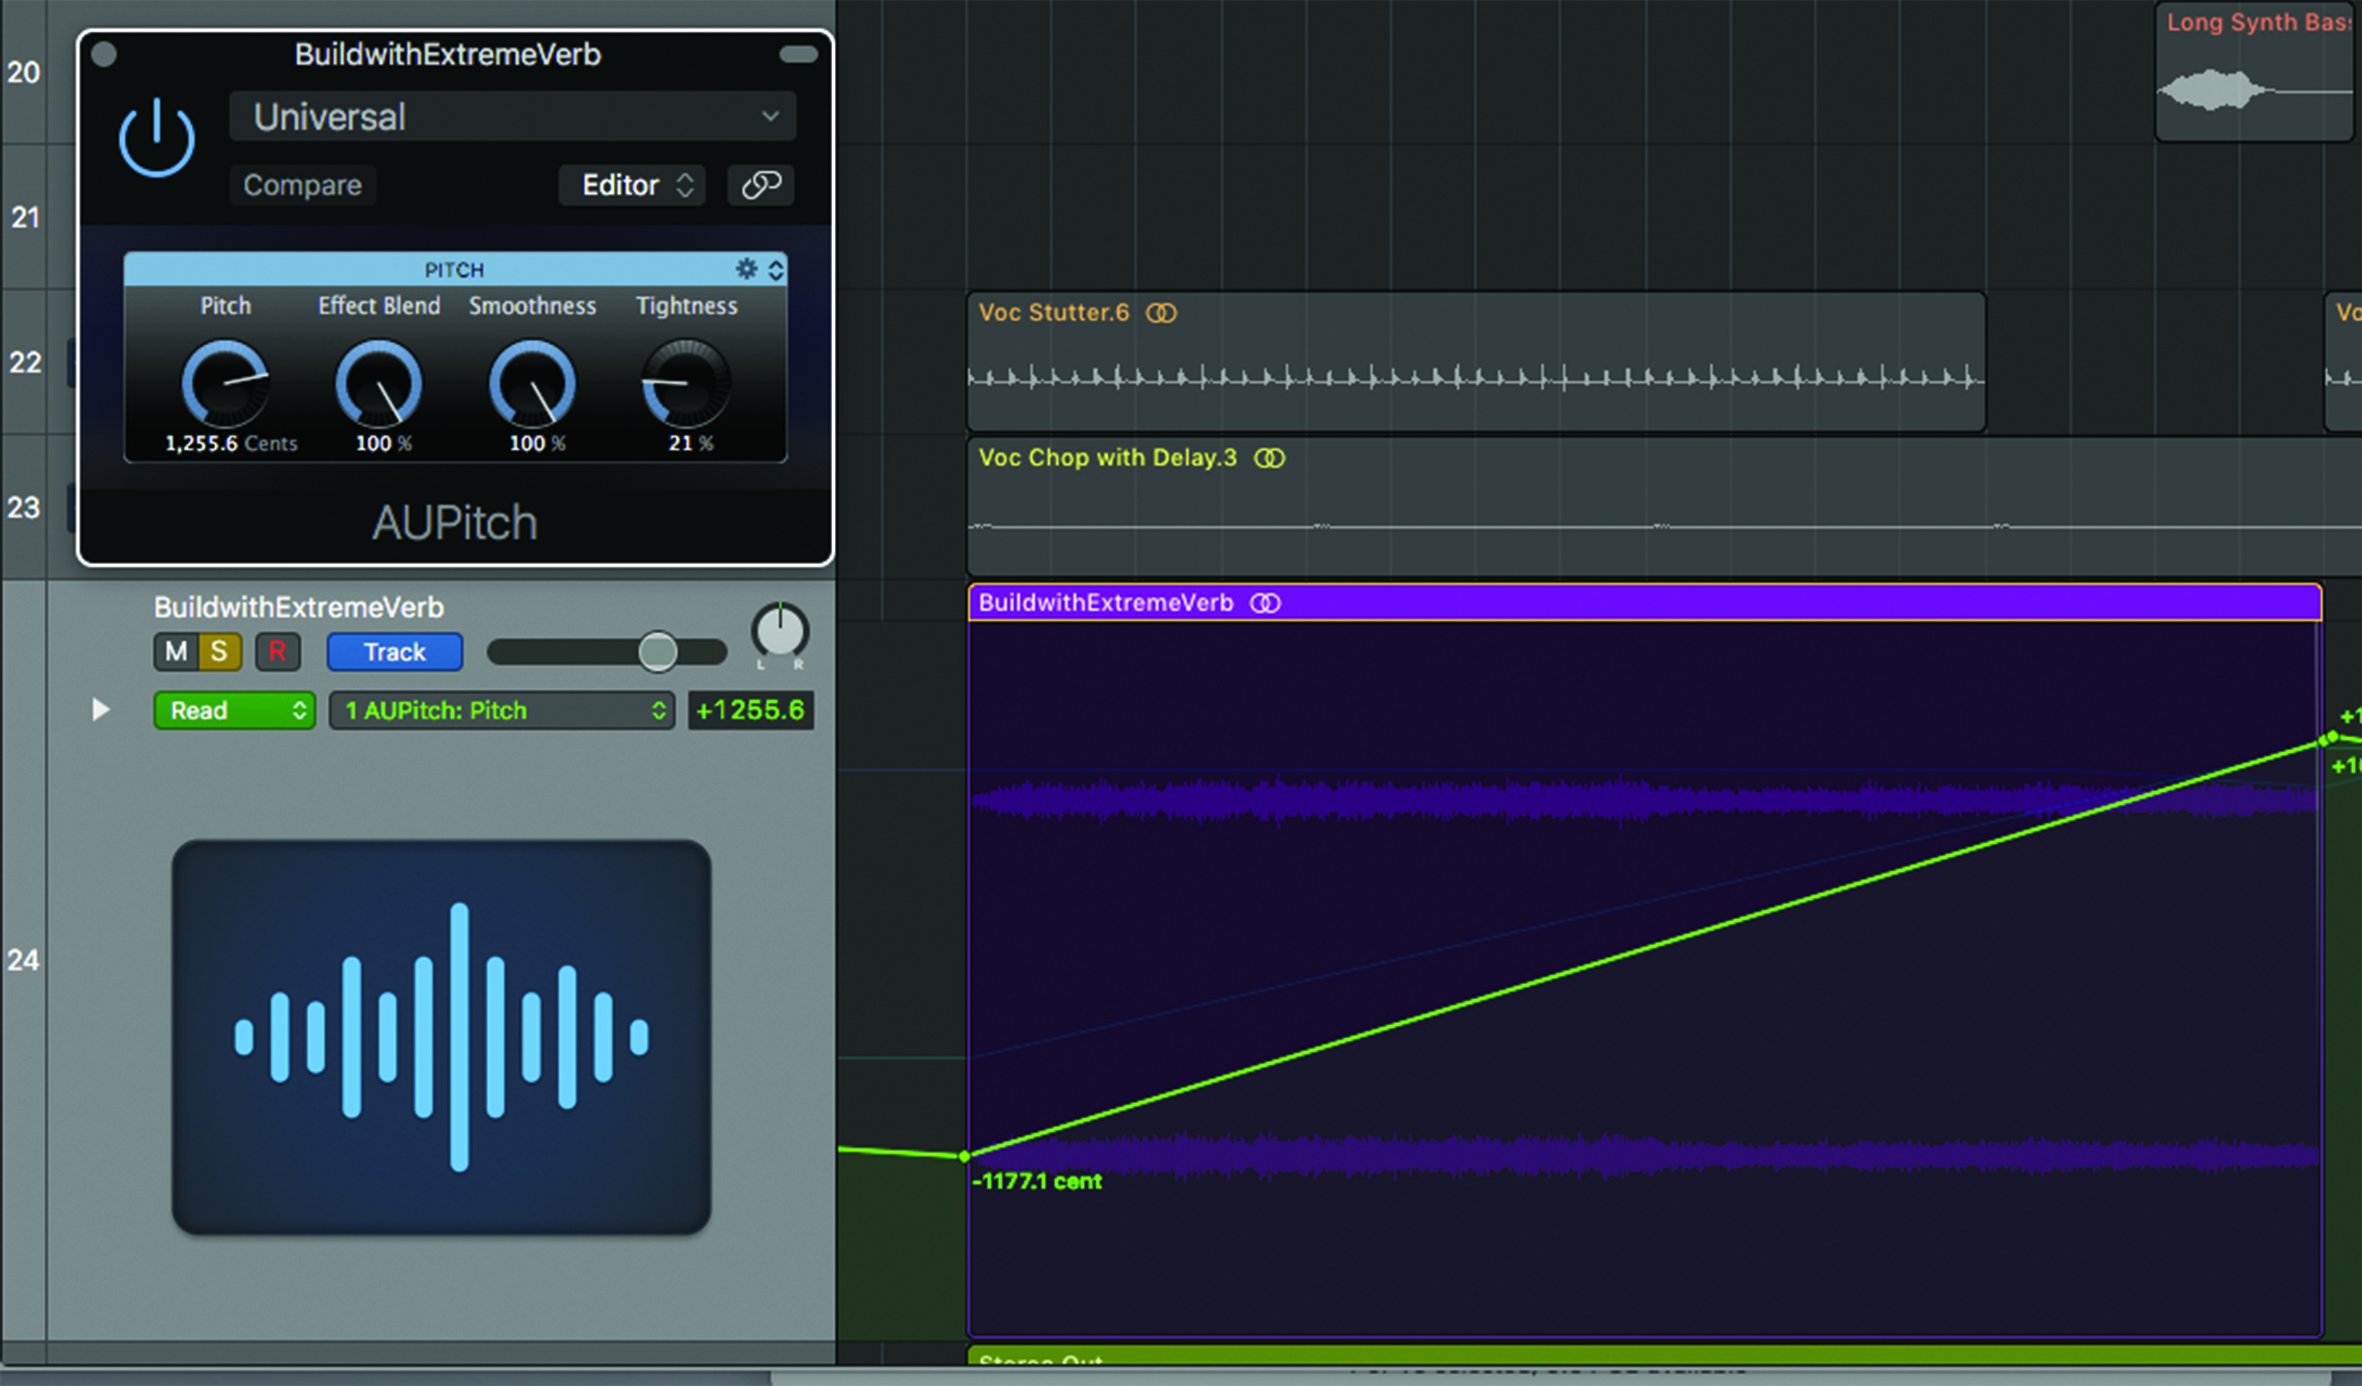
13. Load this onto another track. Add an AUPitch plug-in, in Audio Units > Apple. Turn down Tightness, turn up the Smoothness, and you can automate a long rise (which Logic’s Pitch Shifter can’t do).

14. As a final touch to our background rising effect, automate a resonant band-pass filter using the AutoFilter and add in a Rotor effect set to Gig Rig, to increase width and create space in the centre.
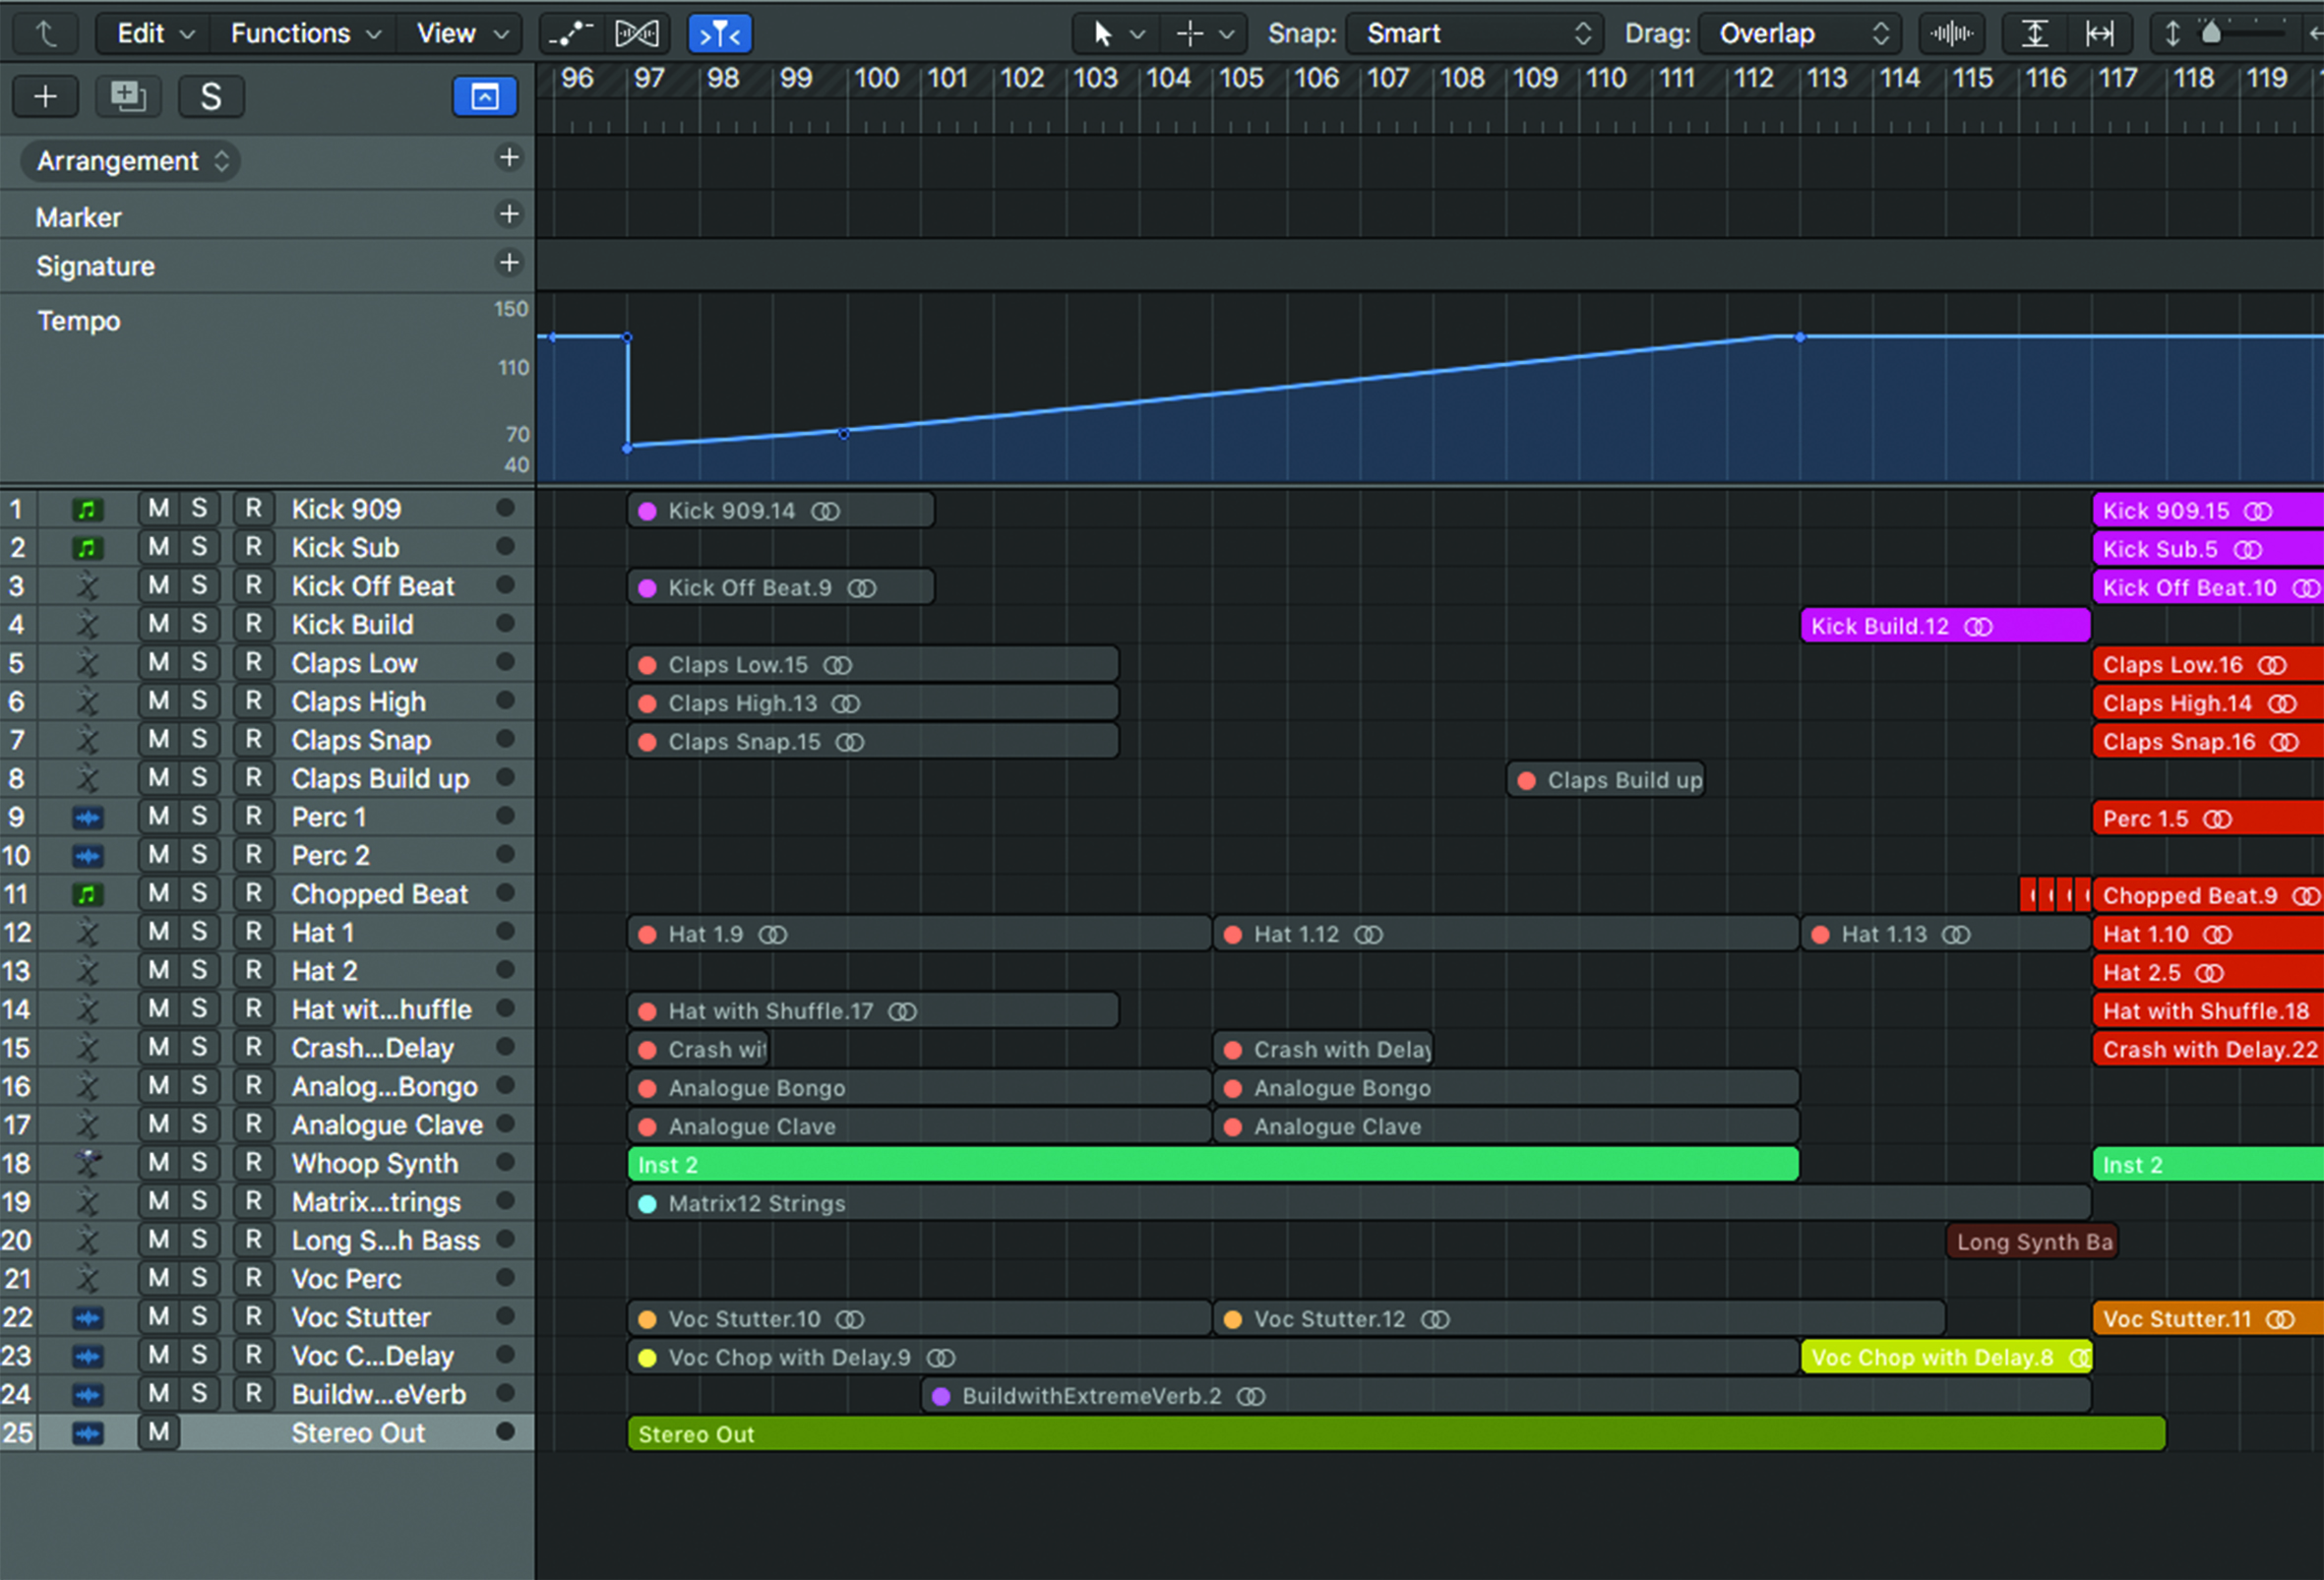
15. For an alternate version, let’s try adding a tempo change. Mute all the elements but the main synth to create some space, and draw in a smooth tempo rise. We’ve gone from 60 back up to 126bpm.
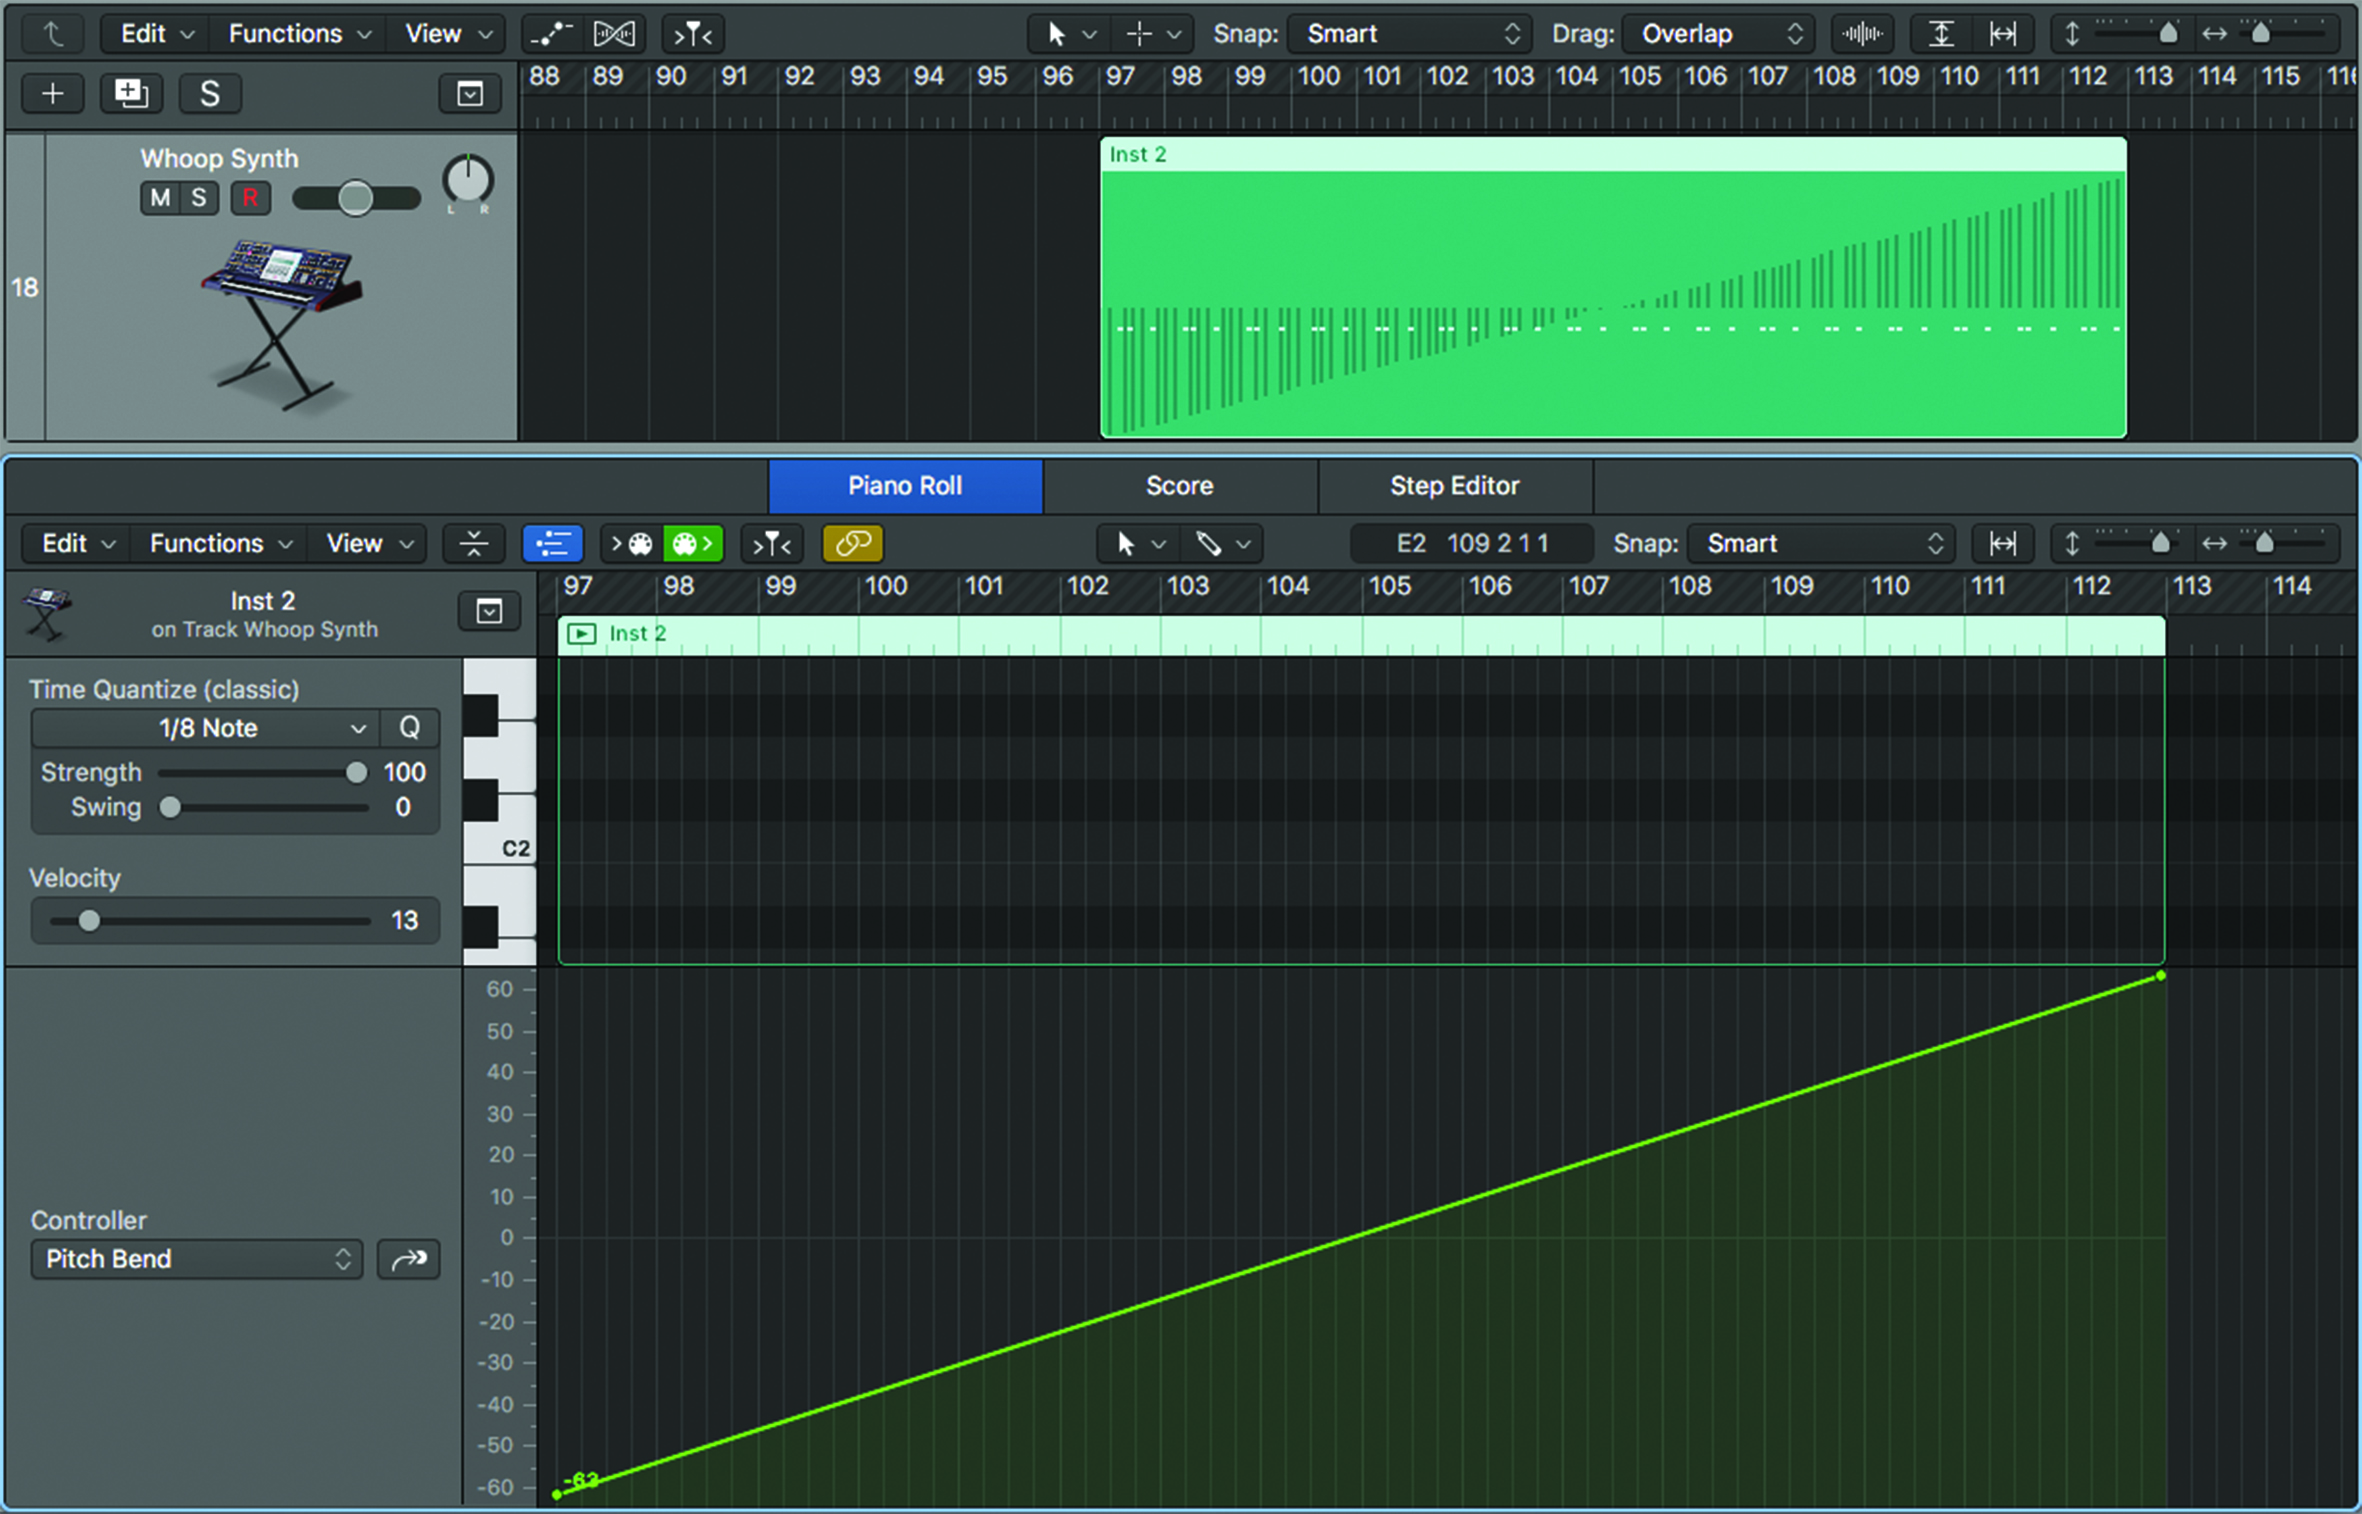
16. As you change the build-up’s style, you may need to adjust sounds or bits of automation. Here, we’ll change the main MIDI synth’s pitch rise to make it move smoothly with the tempo increase.
17. Now that we’ve got a feel for this new build-up, we need to add a few of the elements back in, to smooth over the transition. Try adding hi-hats, pads and FX and make any automation adjustments.
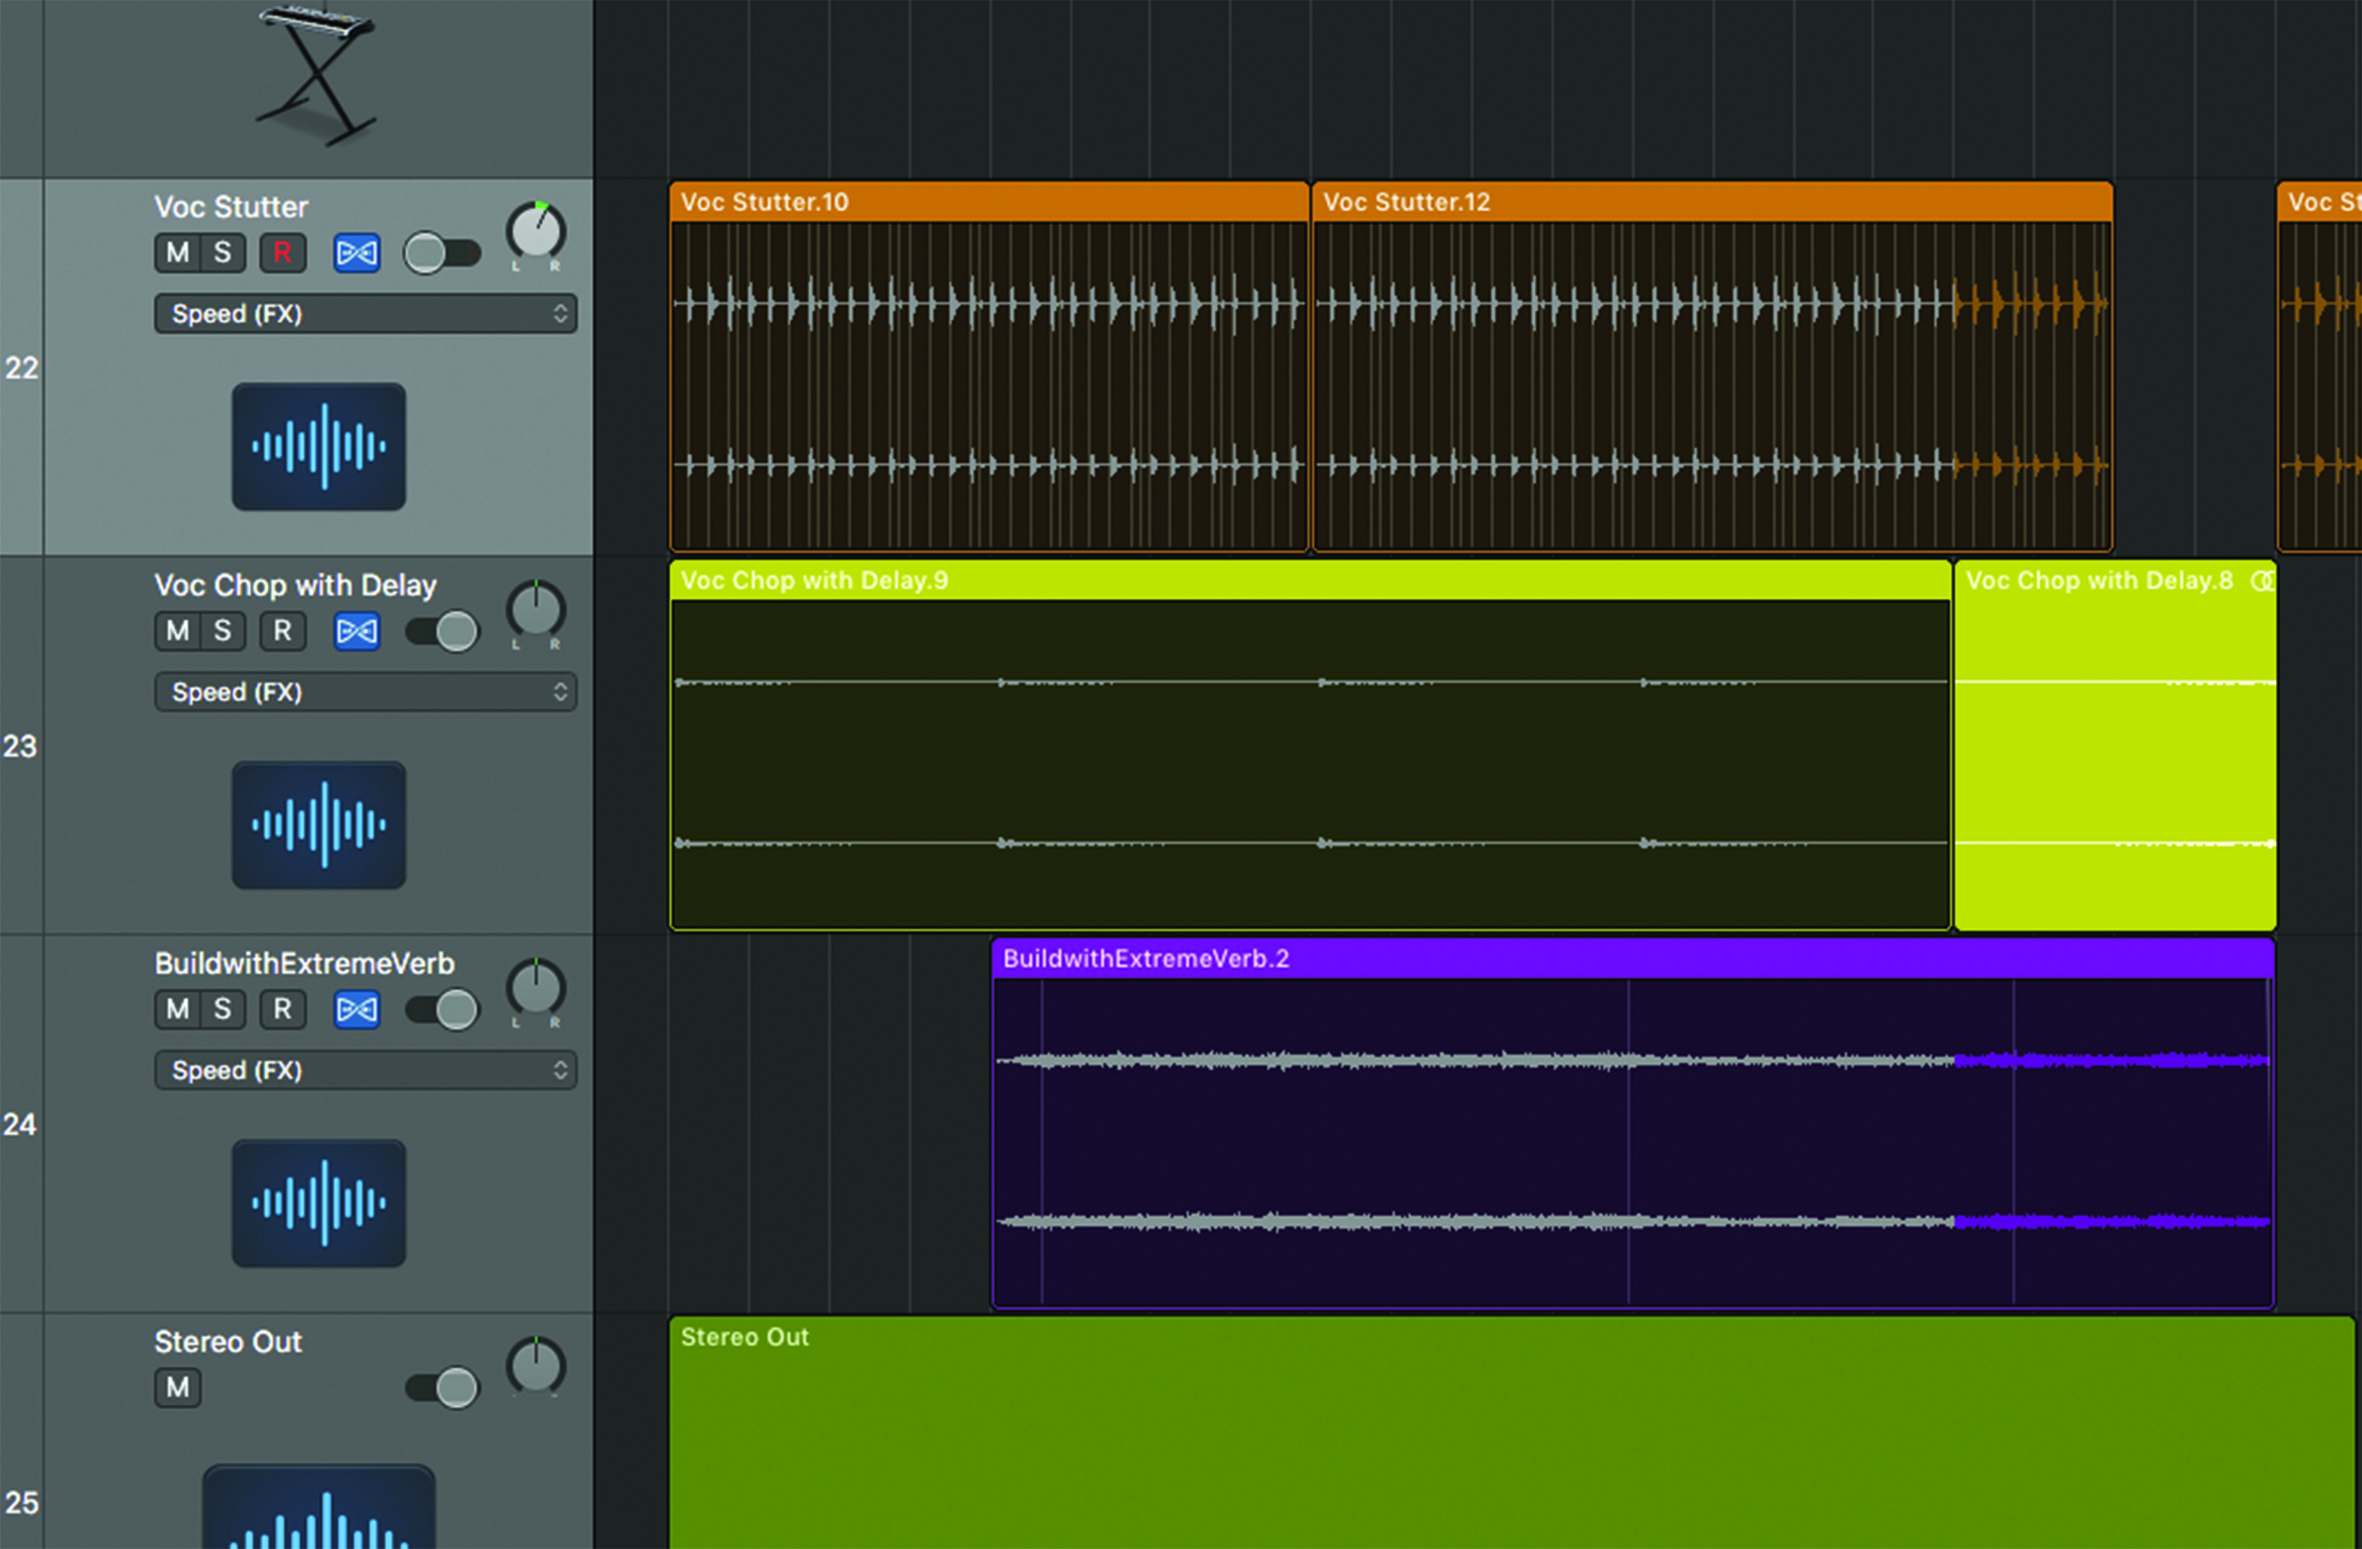
18. Try setting any audio parts to Speed Flex, which keeps them in time with the tempo progression, but raises the pitch as the tempo increases – this is especially dramatic on drums and vocals.
