Distortion In Logic Pro X: Step-By-Step (Continued)
Mark Cousins continues to guide us through the many distortion tools in Logic Pro X, starting with Bitcrusher… 7. One of my favourite distortion tools is Bitcrusher: it can be either subtle or extreme. For a touch of presence, use the 12-bit Resolution with around 6dB of Drive. The output has the edginess of a […]
Mark Cousins continues to guide us through the many distortion tools in Logic Pro X, starting with Bitcrusher…
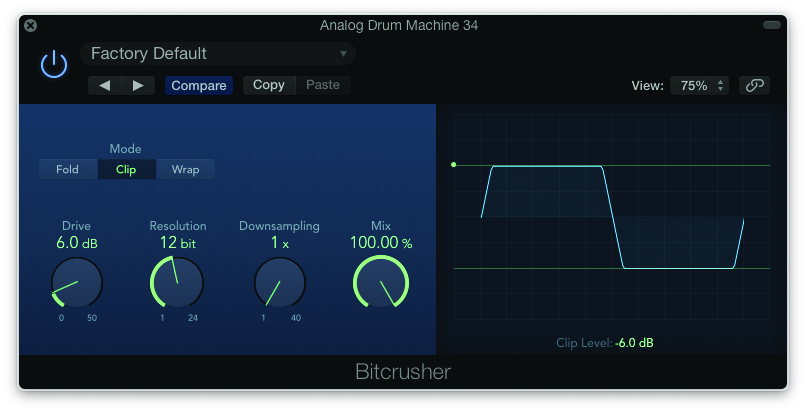
7. One of my favourite distortion tools is Bitcrusher: it can be either subtle or extreme. For a touch of presence, use the 12-bit Resolution with around 6dB of Drive. The output has the edginess of a vintage hardware sampler.
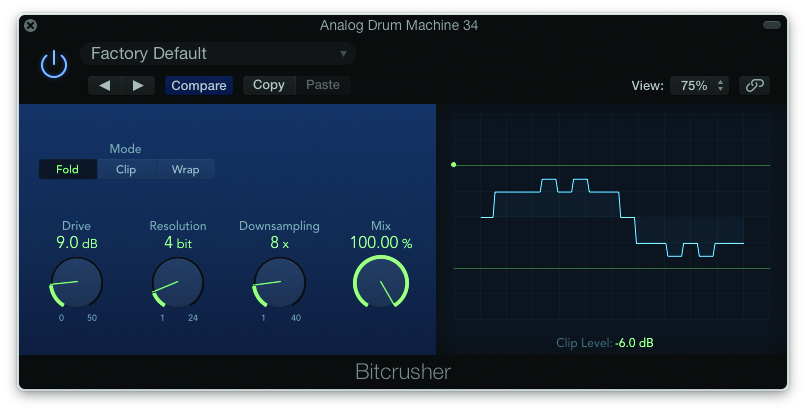
8. For a harder, Chiptune-like sound, try reducing both Resolution and Downsampling as well as adjusting the different clipping Modes. At this extreme, Bitcrusher makes a lo-fi digital sound, superb for electronic sources.

9. Two plug-ins that work well as front-ends to Distortion are compression and EQ. Try shuffling the distortion plug-ins we’ve created further down the insert path, leaving space for two additional plug-ins. Insert a Compressor.
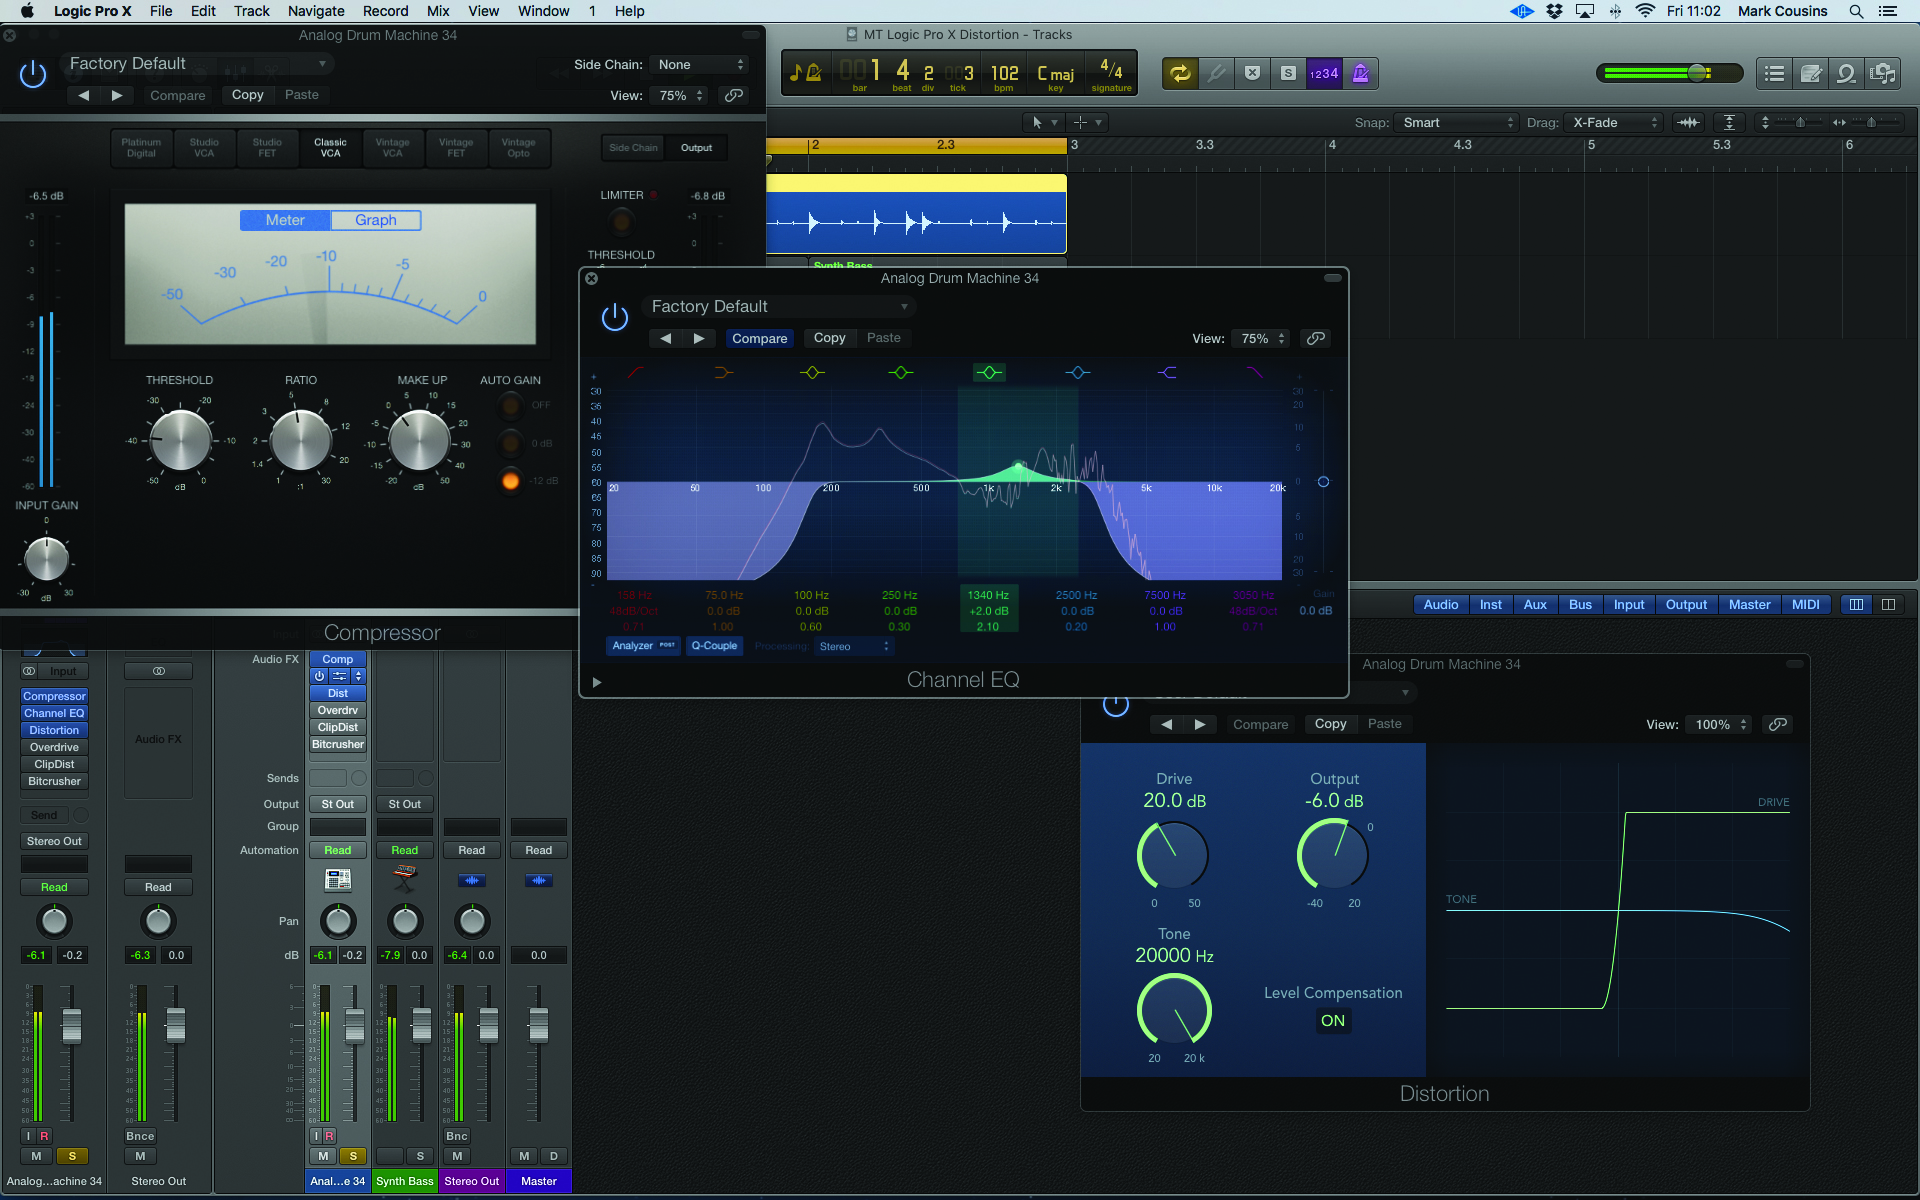
10. Follow the Compressor with an EQ unit, set to narrow band-pass using the HPF and LPF bands in unison. Compress the drums heavily (in this case using the classic VCA setting) and experiment with different distortions.
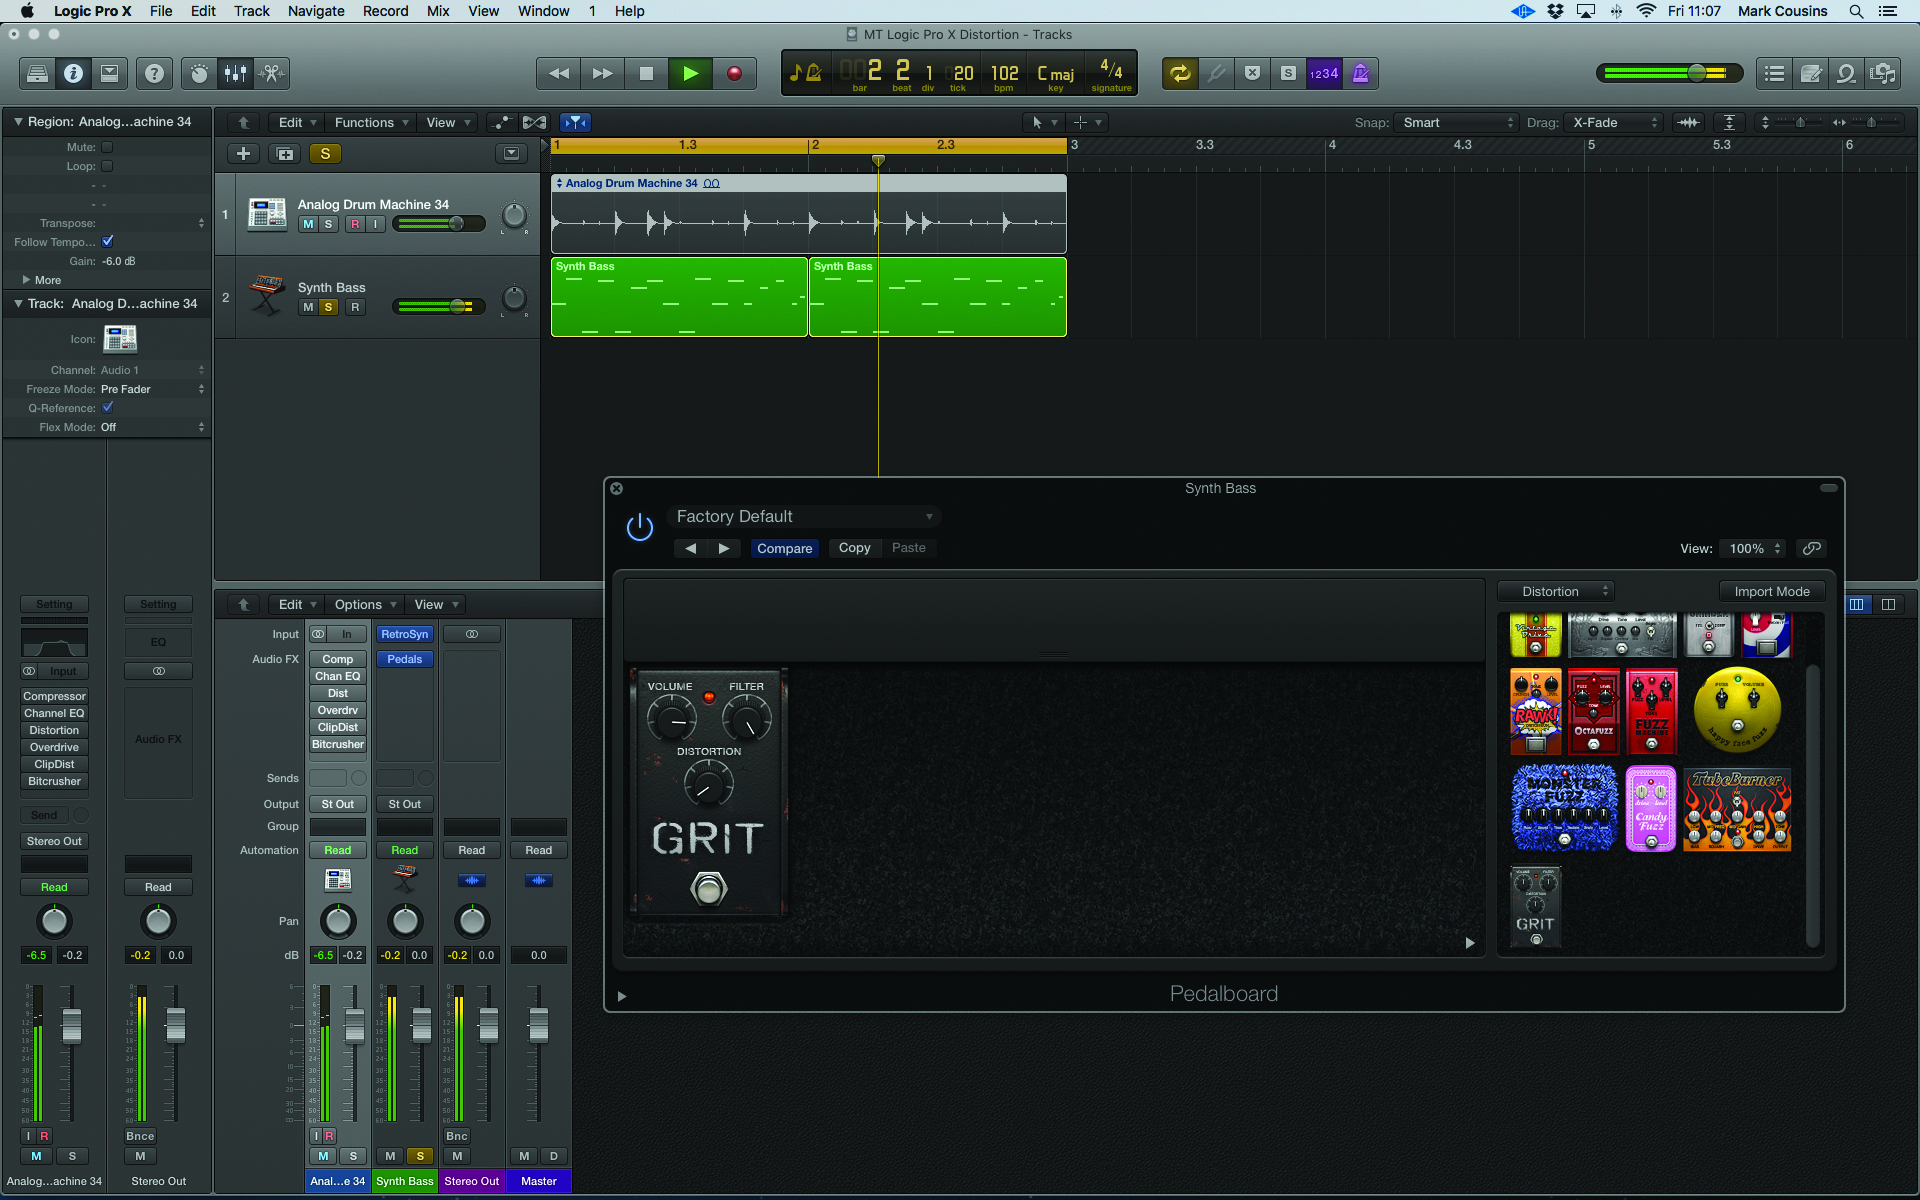
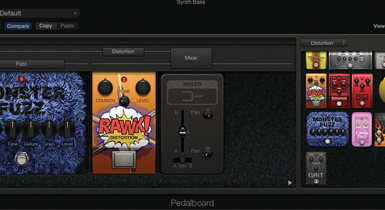
11. For more extreme distortion, I use Pedalboard’s array of distortion stompboxes. Try exploring the different distortion pedals using the synth bass on track 2. Note the different tone and drive characteristics of the pedals.
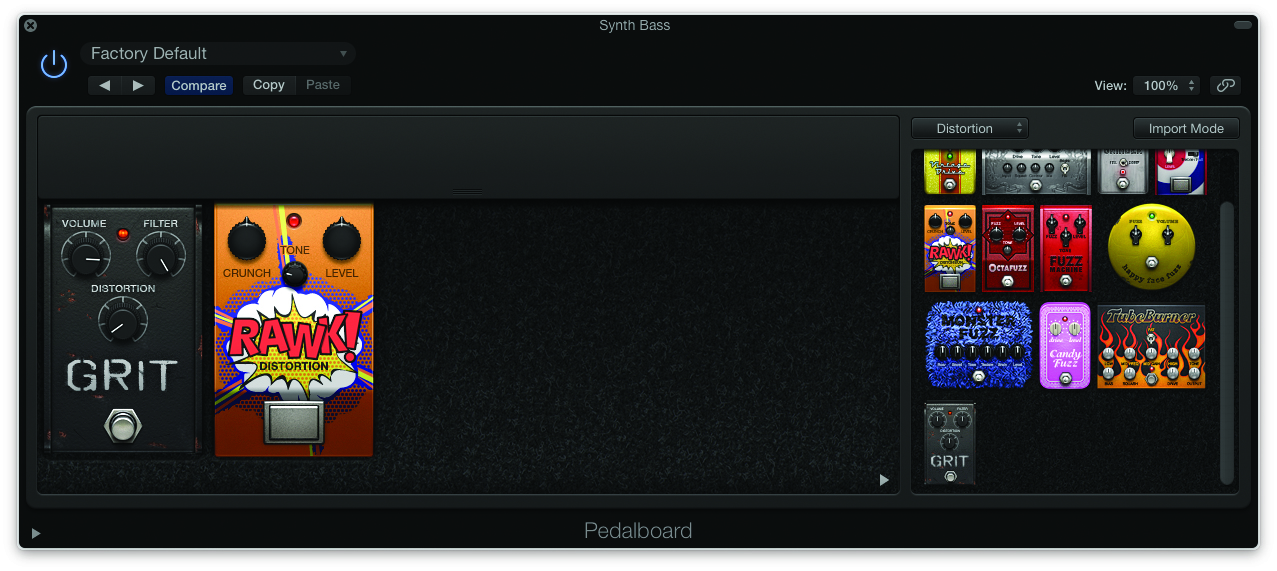
12. Try tone stacking, a technique used by guitarists whereby multiple distortion pedals are used. One quick-and-easy option is to place the pedals in series – maybe combining some ‘crunch’ with a heavier fuzz setting.

13. My favourite technique is parallel distortion. Open the panel above the pedals to reveal the routing. Click on the pedal name to move it to the lane above, then use the Mixer pedal to pan the two channels left and right.
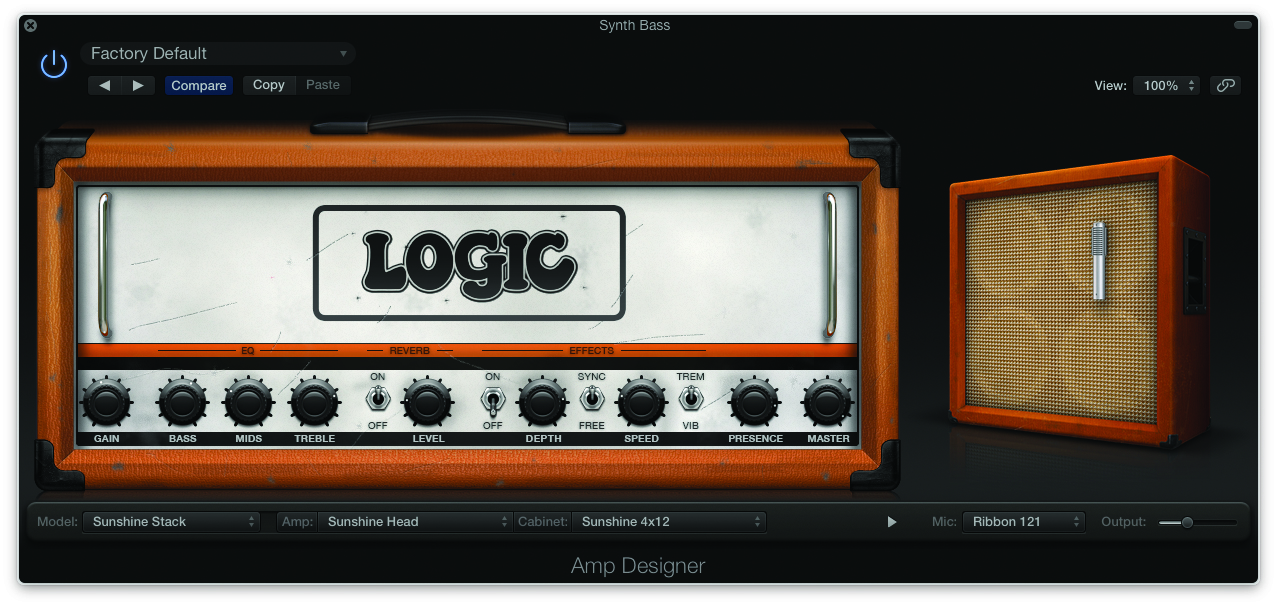
14. Bypass Pedalboard and try Amp Designer, which combines distortion with speaker simulation to soften the output. Start by auditioning the different models using the leftmost drop-down menu.
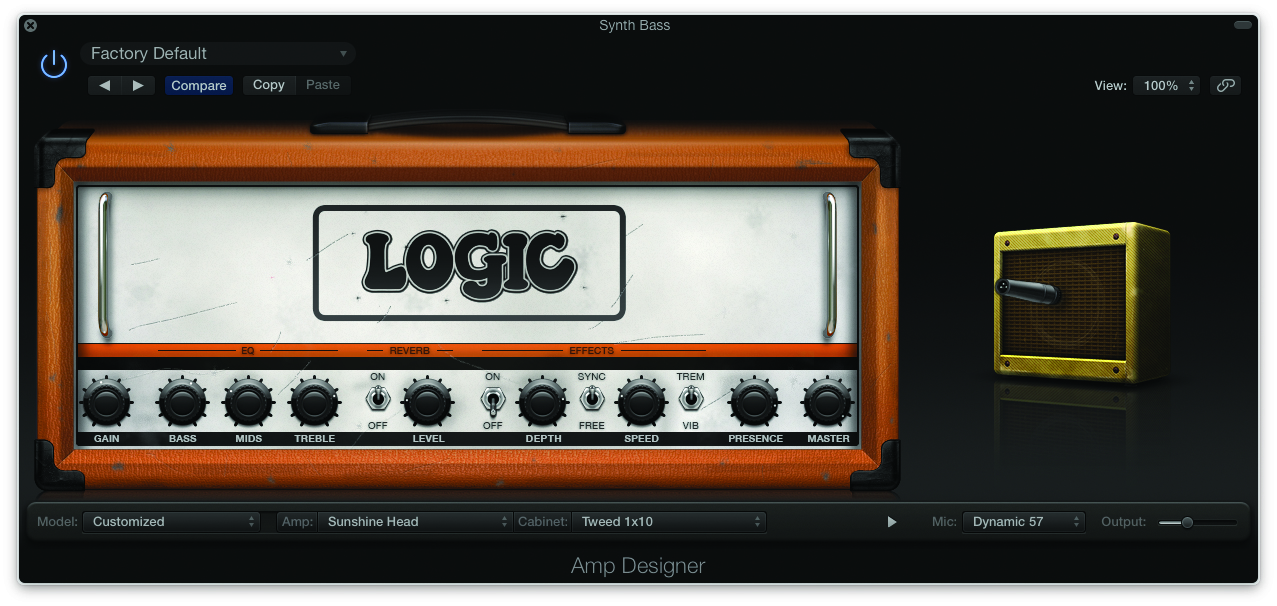
15. The ‘customisable’ aspect of Amp Designer lets you swap different cab and amp head combos. Start by exploring the different cabinet options.Smaller cabinets can ‘box in’ a sound, so it has a defined position in the mix.

16. You can bypass the cab altogether using the Direct option. This reveals the raw sound of the amp head, which shares the high-frequency-rich sound of the Distortion and Overdrive pedals, without the speaker colouration.
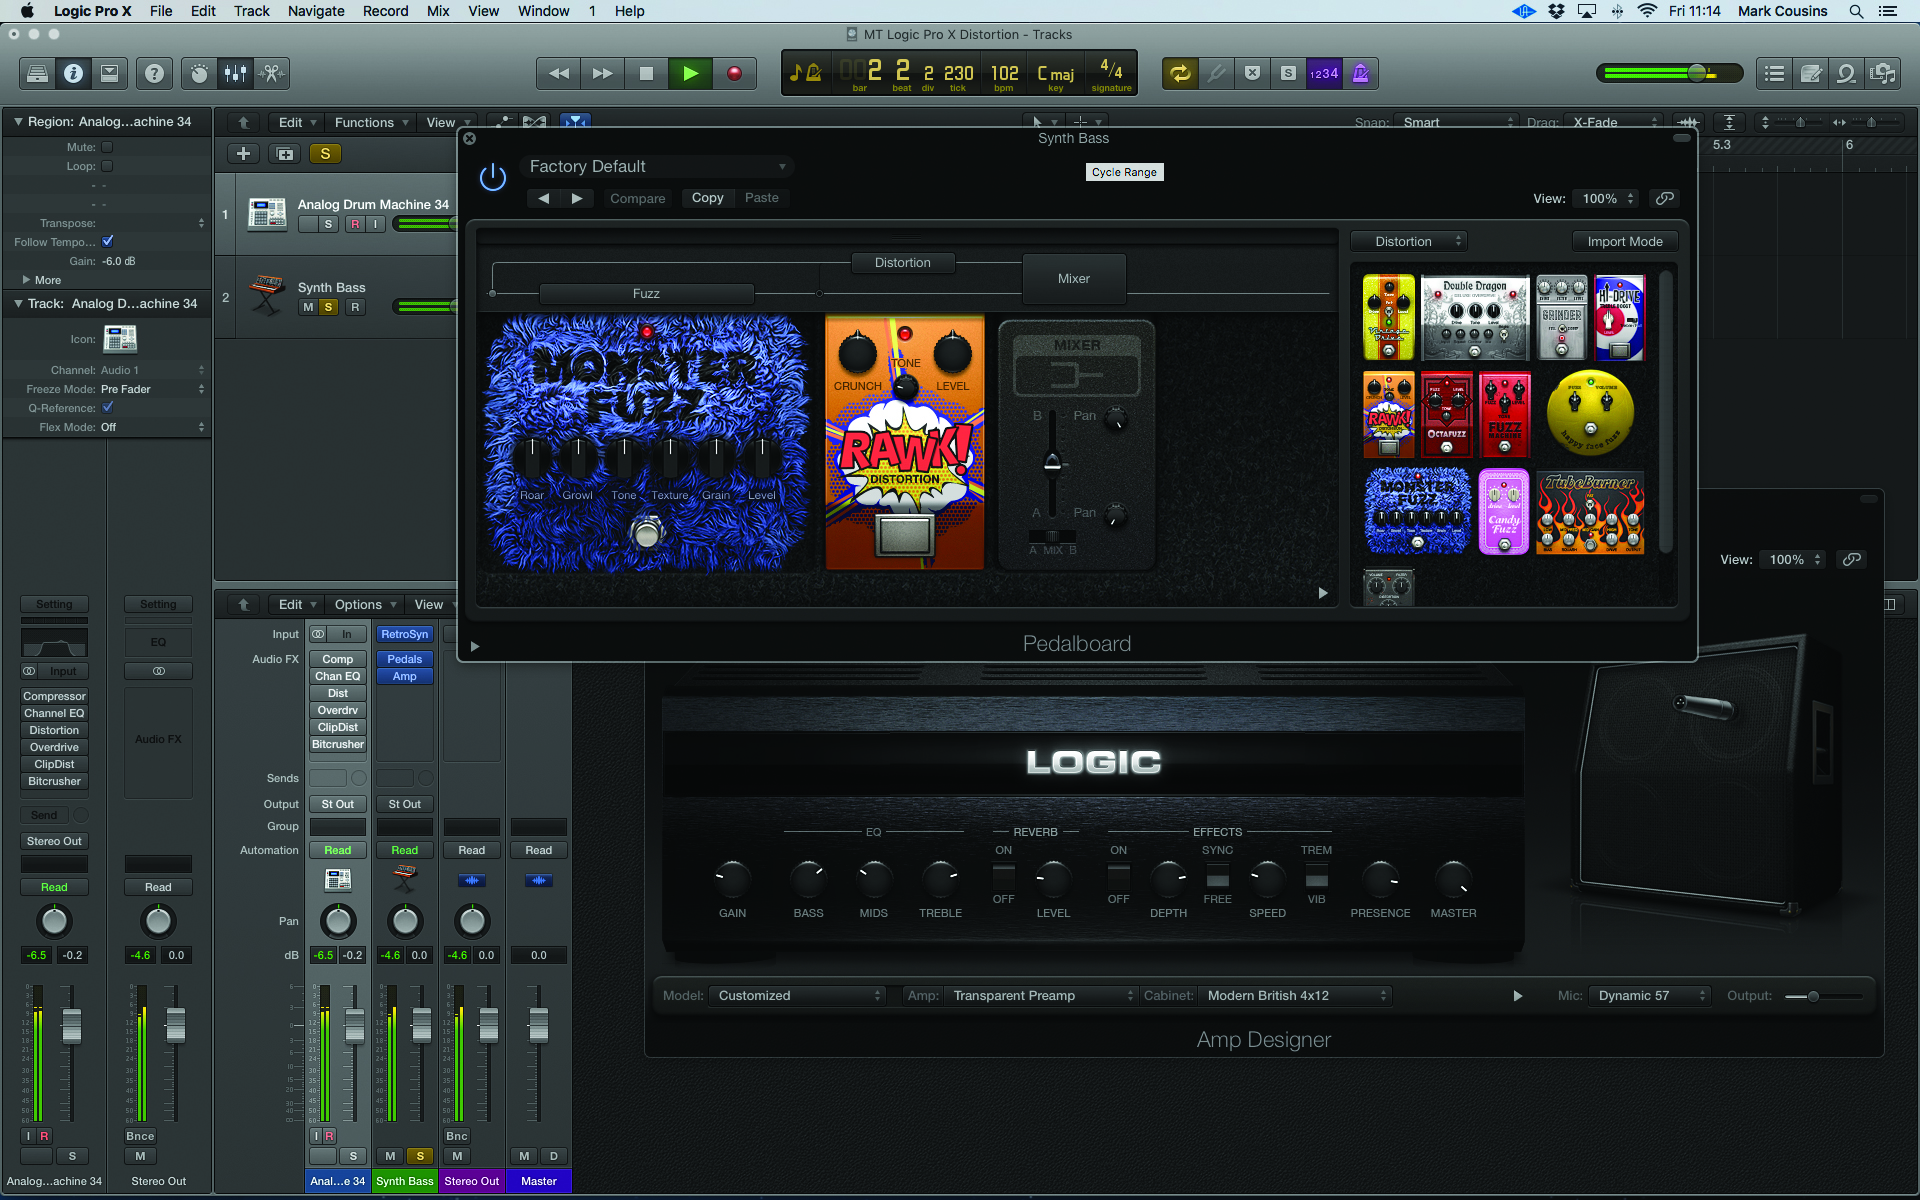
17. Instead of bypassing the cabinet, try using the Transparent Preamp option with Pedalboard. Here, you’re using Pedalboard for distortion (or indeed, any of the others) and Amp Designer solely for the speaker colouration.
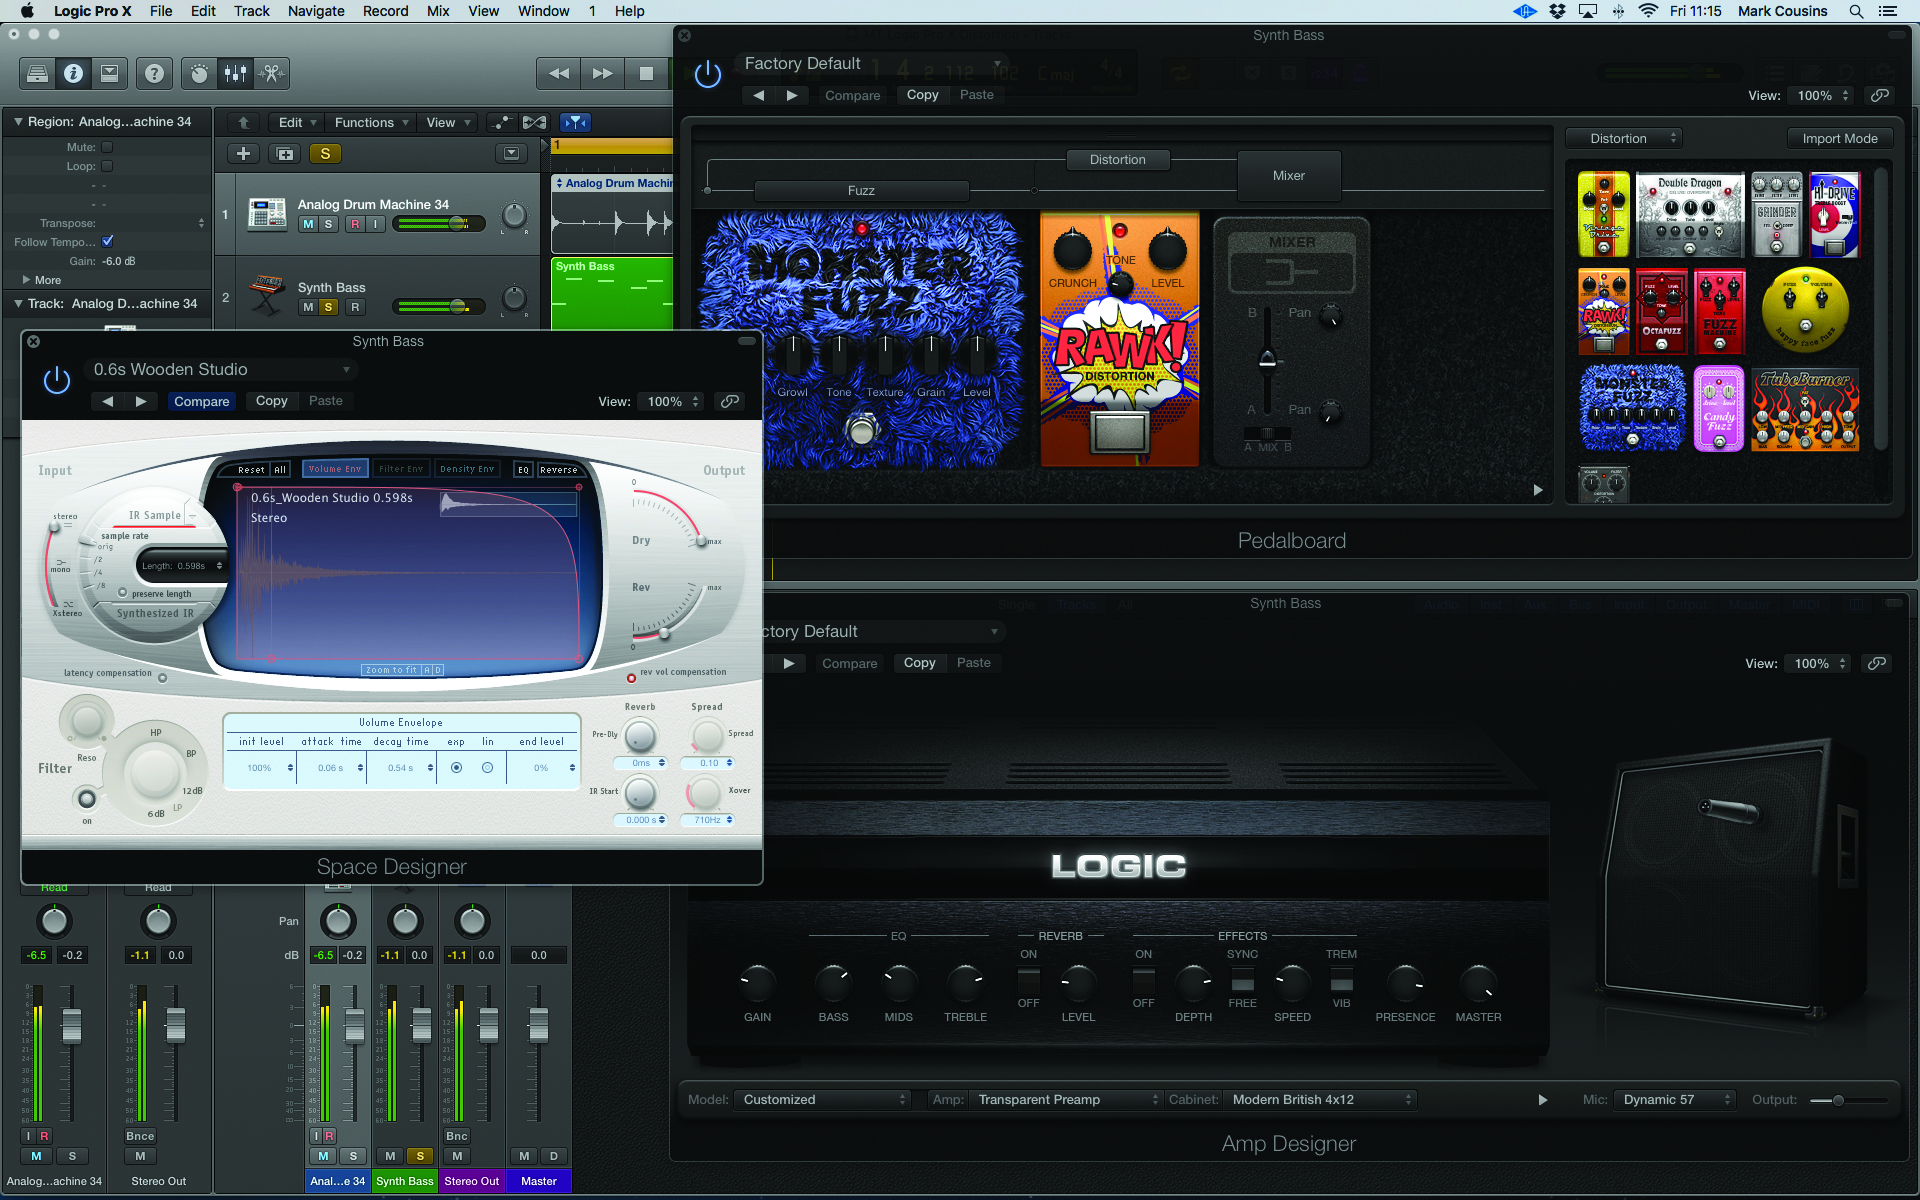
18. As well as pre-distortion effects like compression and EQ, experiment with post-distortion spatial plugs-ins, like reverb and delay – Space Designer can use reverb to set the virtual amplifier in an acoustic space.
