DIY Studio Acoustics Tutorial
Creating that pro studio acoustic experience at home is easier than you might think. Russ Hepworth-Sawyer offers some affordable DIY solutions to bring professional studio acoustics and aesthetics to your home setup… We’ve witnessed significant advances in music technology over the past 15 years or so which, combined with ever lowering costs, now mean that […]

Creating that pro studio acoustic experience at home is easier than you might think. Russ Hepworth-Sawyer offers some affordable DIY solutions to bring professional studio acoustics and aesthetics to your home setup…
We’ve witnessed significant advances in music technology over the past 15 years or so which, combined with ever lowering costs, now mean that many more of us can – and indeed choose to – record at home.
However, there are changes that you will need to make to your home environment in order to get the best sonic results. Fortunately it’s not as difficult – nor as costly – as you might think. Over the course of the following tutorial we’re going to detail some of the problems you might encounter and, of course, the solutions for a perfect mixing and monitoring environment.
The most immediate aspect – aside from annoying the neighbours (which is not covered here) – will undoubtedly be the acoustic performance of your listening environment. This is a subject that could see you tinkering with your setup until you’ve got it absolutely right, but a detailed and reliable-sounding room is perfectly possible with some simple tools and materials from your local DIY store.
As we start to improve our lot, we predominately have to address the negative results of sonic reflections. The reflection plays havoc not only with our desired flat frequency response and stereo imaging, but particularly the bass end, meaning that our mixes don’t translate to other systems. In this feature, therefore, we explore some budget-busting ways to create a fabulous and trustworthy sonic environment.
On Reflection
It all starts with the humble reflection. Surfaces, hard or soft, all reflect sound in one way or another. Harder surfaces will typically reflect sound clearly and accurately, whereas softer surfaces will soak up some of it. The problem is that reflections can later reconnect with direct sound from a monitor or instrument, blurring what we should be hearing via problems such as excessive reverb, comb filtering, flutter echoes and standing waves.
Given these problems, you’d be forgiven for thinking it best to place your monitors in a completely dead room – an anechoic chamber – where the only sound you hear is from your monitors. However, this would sound too artificial. Actually, what we need to do is maintain an even and low reverberation time across the whole frequency spectrum. There’s much debate around the precise value, but a reverb time of around 0.3 seconds (known as RT60) is an ideal to aim for.
Universal Acoustics’ Jupiter Bass Trap is a good example of a foam corner bass trap that also absorbs higher frequencies, too.
Standing Still
Standing waves are perhaps the first phenomena to deal with. These are caused by sound reflecting off and around your room’s surfaces and if the mathematics are right (see boxout), certain wavelengths either reinforce themselves or cancel each other out depending on where you sit in the room. You might be able to hear this most evidently in the bass end if you move around in your control room. These standing waves are known as room modes and, once calculated, can be treated.
At higher frequencies standing waves can present themselves as flutter echoes, sounding as though a space is resonating at certain frequencies – clapping your hands in a corridor should provide you with the effect if the conditions are right. These also need to be absorbed and managed.
Comb filtering occurs when reflections merge with the direct signal from your sound source. These small delays will cause phase shifts at certain frequencies and again make for an uneven frequency response. It is therefore important to ensure that you receive all the direct signal uninterrupted from the monitors. To tackle these issues we have some neat starter solutions.
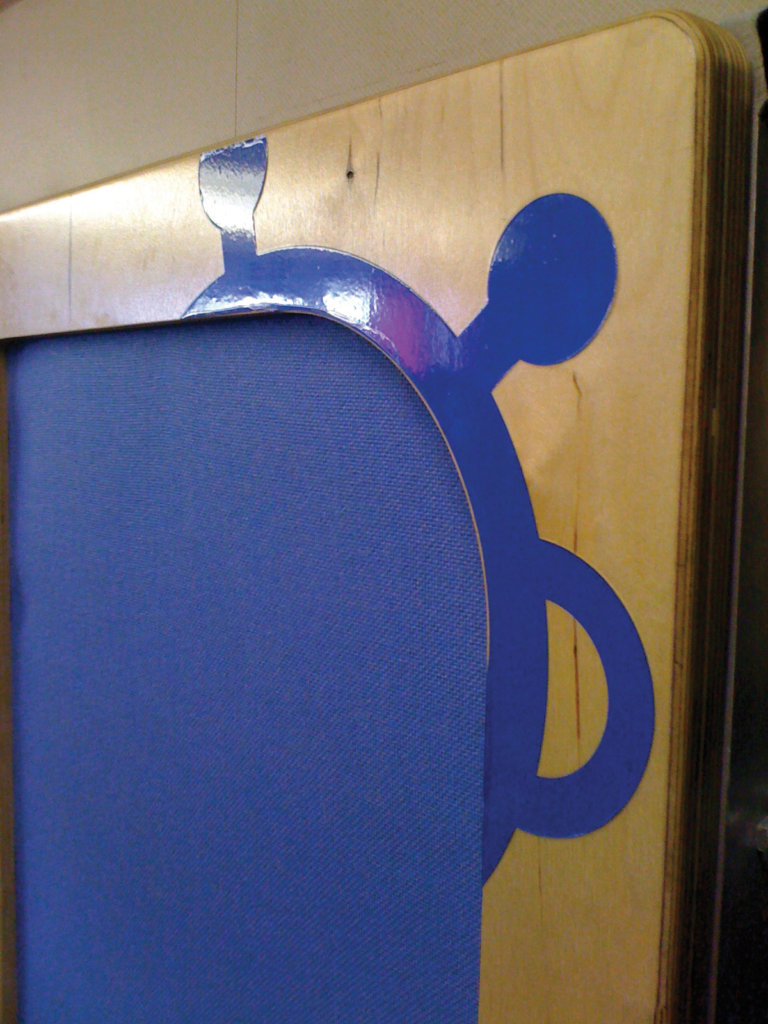
A custom frame design complete with corporate branding demonstrates the potential to personalise your studio.
Three Ways Forward
The first task is to assess your room. Accurately measure its dimensions to apply to one of the formulae or the free calculators discussed in the Measurements boxout. These should immediately inform you of the problem frequencies and direct you towards the treatment you need to apply to remedy them in your particular space.
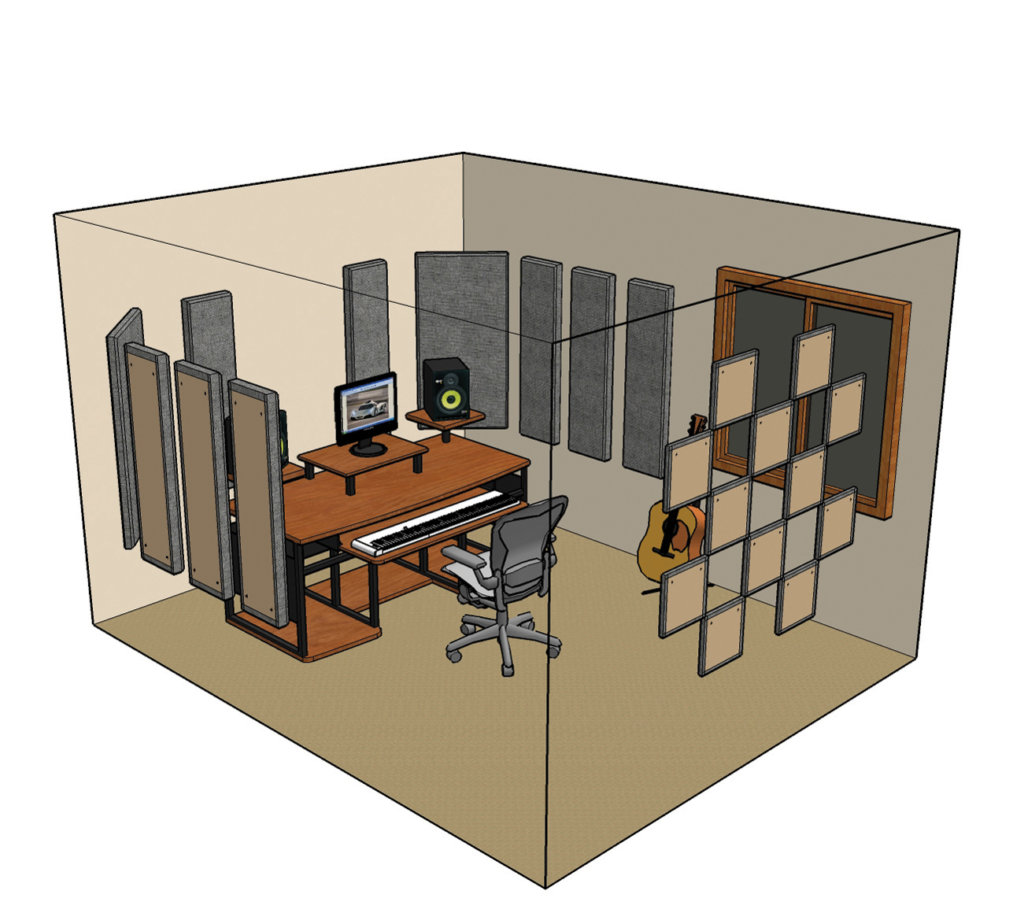
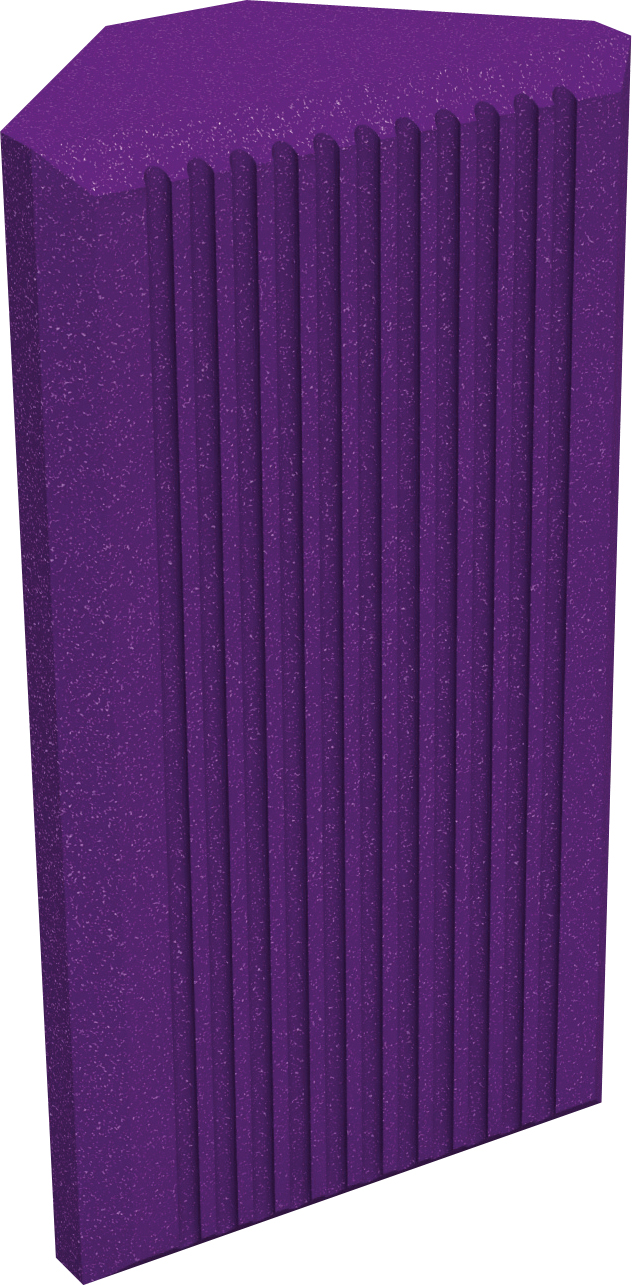
Treating the reflections is achieved using three typical key components. The foremost is the standard absorber that restricts reflections across a wide range of mid and upper frequencies. This could be one of the foam offerings made by, for example, Auralex (www.auralex.com) or EQ Acoustics (www.eqacoustics.com) or a DIY creation of timber and mineral wool fibre (Rockwool is the trade name to you and I, although I tend to use Knauf).
Bass traps, meanwhile, work on lower-frequency reflections. These can sometimes be tuned to a specific frequency to target a problematic room mode – something like Vicoustic’s Vari Bass (www.vicoustic.com) – or take the form of a broadband absorber, such as GIK’s244 Bass Trap (http://gikacoustics.co.uk). Commercial bass trap designs predominately adopt the foam-triangle or square-section (for corners) formats, but the options open to the DIY enthusiast are legion, from hanging heavy matting inside a much deeper than usual absorber to attractive and highly effective corner bass trapping.
Finally we come to the diffusor – the jewel in the acoustics crown – which provides a means of scattering sound away from its intended direction. Making your own diffusor takes a little more time than making either an absorber or a bass trap, but doing so offers both sonic excellence and visual appeal. Leading commercial manufacturers of diffusors include RealTraps (www.realtraps.com) and RPG RPG Diffusor Systems (www.rpginc.com), both of which offer a range of solutions.
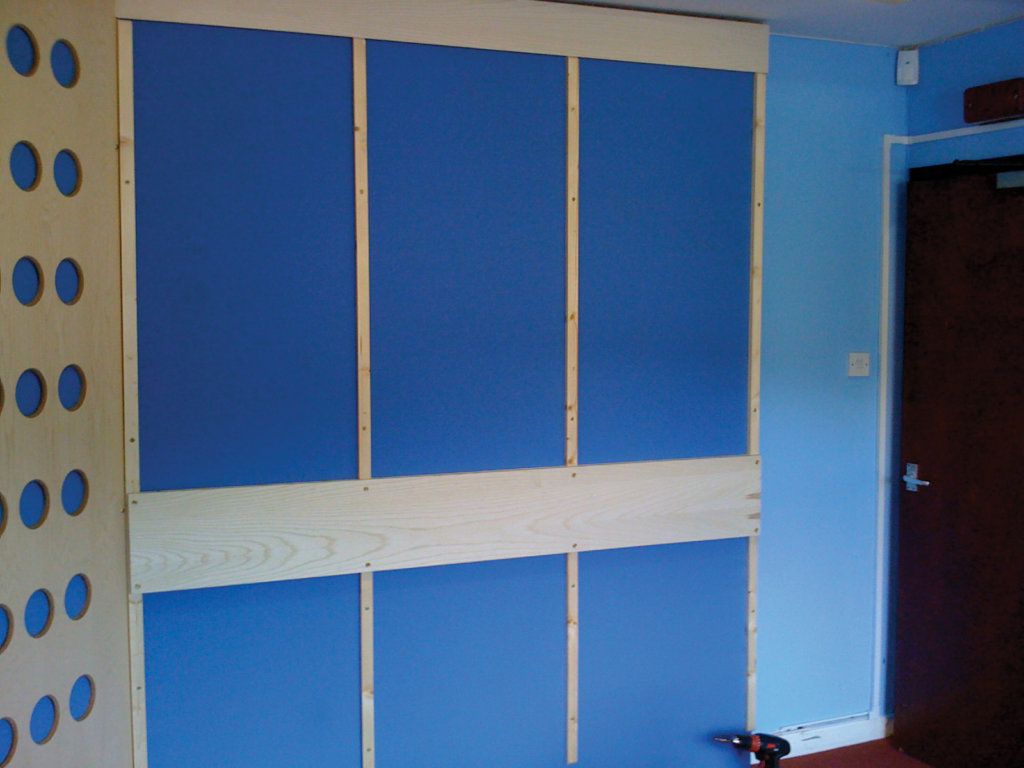
Taking things to extremes: full-wall studwork and rockwool covered with Cara fabric can provide tightly controlled results.
Absorbers
Absorption is the easiest course of treatment as it immediately improves your acoustics with only minimal installation. Essentially, an absorber is constructed using a soft porous material capable of dissipating sonic energy as it tries to pass through it. Absorbers such as these are known as broadband absorbers as they will absorb a wide range of frequencies. As previously mentioned, foam solutions from Auralex and other manufacturers are common sights in studios, but can quite easily be constructed at home from mineral wool fibre and a timber frame.
First, purchase some mineral wool fibre from your local DIY store. What you are looking for are the 1,200 x 600mm slabs (not loft insulation) with a density of at least 60kg/m3. These come in a range of depths, but somewhere between 60–100mm is ideal. From 3 x 2-inch timber you can construct a frame that will look very attractive hanging on your studio wall – we have included a walkthrough so you can have a go at building one yourself for less than £30 each if you build a few of them in one go (the slabs usually come in packs of five or six pieces).
Taking this frame principle a huge step further, you could line the whole of your room with a 3 x 2-inch timber framework. You could then place absorbers throughout your room, resulting in a more dead-sounding environment. This kind of broadband absorption will eliminate many potential problems within your room; however, key issues and problems in the bass end will remain
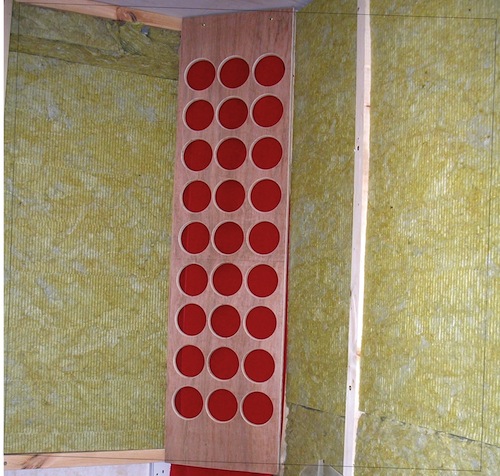
Although somewhat labour-intensive, the fully installed corner bass trap can be the most effective at dealing with extreme low frequencies. To satisfy aesthetic requirements, the trap can be faced with Cara fabric or an elaborate drilled-out wood panel.
Bass Traps
A basic bass traps is simply a deeper absorber. Low-frequency wavelengths are very long; in many cases, longer than the length or width of your room. For example, a 50Hz waveform has a wavelength of 6.8 metres. We cannot assume that a typical absorber, described above, with a shallow depth will soak up these wavelengths. To use absorption we need to gain depth, and as bass often lurks in the corners of your room, enter the corner bass trap.
Other forms of trap exist that are not based completely on the same static form of absorption but resonate, instead. The Helmholtz Resonator can be extremely effective at tackling many problematic frequencies, but it must be constructed and tuned with the room modes in mind. Some approaches blend both absorption and resonation by utilising barrier matting or another dense material suspended within a frame and with a layer of dense rockwool to the rear. It is the surface area that determines the frequency at which the trap works, but they cover a wider band than the tuned Helmholtz. There are many examples of these on the internet.
The most reliable solution I find – space permitting – is to build a corner bass trap. It’s arguably the most labour-intensive, but is effective, attractive and affordable (around £50). One of two approaches can be taken: one whereby an absorber (as described above) straddles the corner of a room with air behind it; the other employing deeply installed mineral wool fibre slabs. The second approach can be messy, but you can face the trap with either some Cara fabric that matches your absorbers or wood with holes cut into it. The wood covering looks good, but be warned: you’ll need a good holesaw and a drill (plus operator) with stamina.
Although a purchased full package is the minimal fuss solution (such as the London 12 Room Kit pictured here from Primacoustic), your room may benefit from the more custom treatment when building your own solution
Diffusors
Diffusion is an excellent way of ensuring that the direct signal from your monitors reaches your ears uninterrupted. The theory of diffusion is to scatter sound around the room as much as possible rather than reflecting sounds in the expected pattern. If you draw a bird’s eye view of your studio and plot the line from your monitors to the side walls reflecting to your ears you will find the point at which a diffusor would be best employed – what I’ll call the ‘mirror’ point. Placing a diffusor here will scatter the signal away from your ears and assist in clearing up the focus and stereo width of your mix.
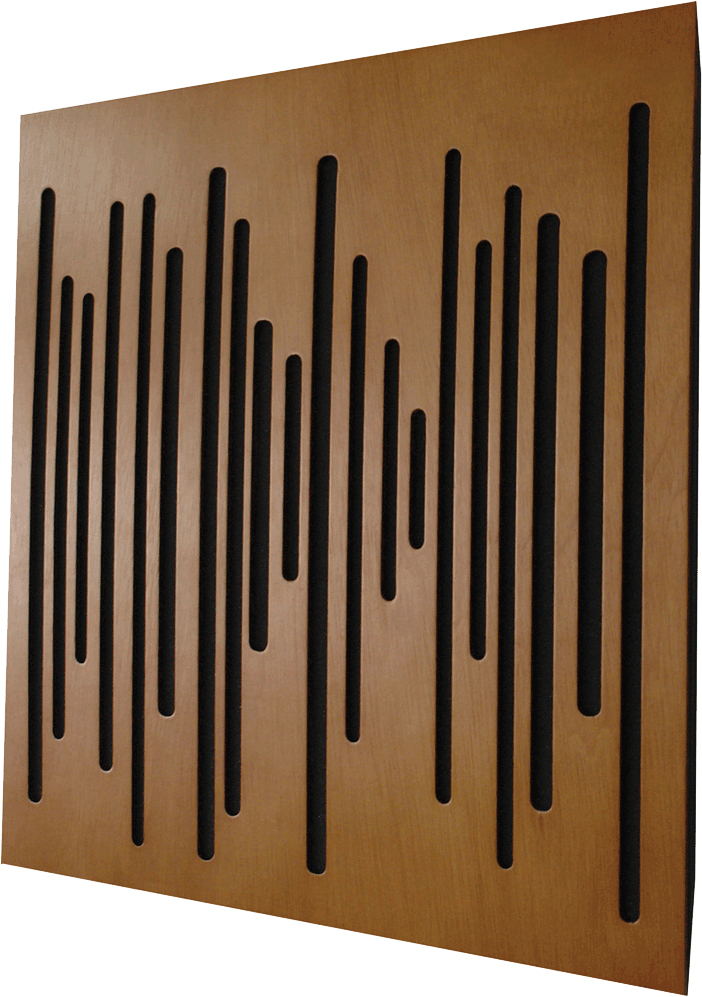
There are several types of diffusor you may want to have a go at building. Manfred Schroeder, a foremost acoustics researcher working at Bell Laboratories, developed much of our current diffusor thinking. The easiest diffusor to make is the Maximum Length Sequence Diffusor, whereby lengths of wood are arranged and spaced to scatter sound. However, more effective is the Quadratic Residue Diffusor (QRD). These follow a mathematical sequence to scatter the sound, which can be calculated using the online resources at www.mh-audio.nl/Diffusor.asp.
The most pretty, though, is the plain blockwork quadratic diffusor also known commercially as the Skyline Diffusor because of RPG’s old product. This comprises small lengths of wood connected to a back panel and arranged to a specific mathematic sequence. Online calculators can be found for these, too. Essentially, in both cases, the width of the flat surfaces – whether that be the blocks/planks or the wells – are calculated to the high frequency response, while the depth of the wells corresponds to the low frequencies. One of these can be made for under £30.
Sound Advice
Take time to experiment with your space and consider the sound you’re aiming to achieve. You can tailor the number and position of absorbers and the types of bass traps until you’re starting to hear that professional sound. Obviously, diffusors may take a little more time to build, so using the calculations is sensible for identifying what you need and where.
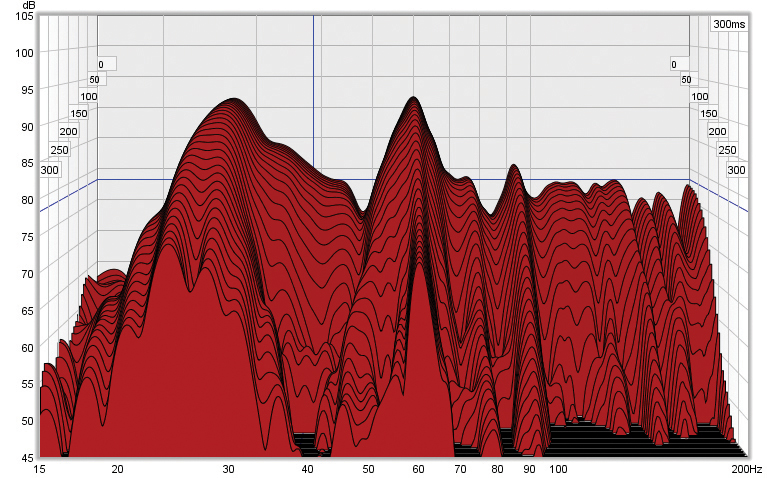
Waterfall plots can be extremely useful in identifying the problem frequencies that your DIY acoustic solution will need to address
Whichever route you choose, be warned: you may catch the DIY bug, so let us know how you get on!
There are some products that are difficult to DIY. Vicoustic’s products are both elegant and highly effective such as this WaveWood Bass Trap