Cubase Tutorial: Become a Power User 11 – Easier Mixing in Cubase
In the penultimate part of the Power User series, Tim Hallas looks at one of the most important processes in music production: mixing… Mixing is something that we often take for granted and it is sometimes assumed that we all know how to do it – possibly even that we are experts in the field. […]
In the penultimate part of the Power User series, Tim Hallas looks at one of the most important processes in music production: mixing…
Mixing is something that we often take for granted and it is sometimes assumed that we all know how to do it – possibly even that we are experts in the field. But with many of my students it has become very clear that they don’t have a clue. They know what the outcome should be, just not necessarily the process of getting there. In this article we will look at how to use Cubase to mix and the features that it has within it to make the whole process a lot smoother.

When mixing it’s very easy to forget that every process we do will have an impact on the level and the balance. Dynamics processors obviously adjust the volume (the clue is in the name) so in between each adjustment of compressors or other dynamics plug-ins, make sure you re-adjust the levels roughly to maintain the balance in the mix. This is also true of EQ as, when working with specific frequencies, the adjustments you make here will either boost or reduce the volume. Just changing the tone of sound can also affect the overall balance of the mix. Therefore within my teaching I maintain the mantra for my pupils of ‘Effect adjustment -> balance levels-> effect adjustment-> balance levels etc.’
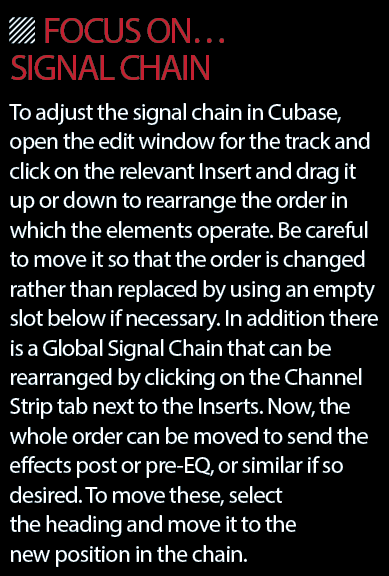
Signal chain is something that often gets ignored and I see so many projects with plug-ins in an order that doesn’t allow for the best optimisation of the devices. For example, a gate operates best when the difference between signal and noise is high. However, if a compressor is placed before the gate it reduces this difference and makes the margin for the gate to work within smaller. This needs to be given some thought, so don’t just place plug-ins in randomly – think about how each will affect the next.
Steinberg has made the process of mixing very easy since the update to Cubase version 7, including the new look MixConsole and the addition of channel strip processors and even more new plug-ins in version 7.5. In this article we will look at the process of operating all the different devices within the mix process, how to get them to operate to their optimum level, and how to automate any controls that might be needed.
Opening and operating the mixer
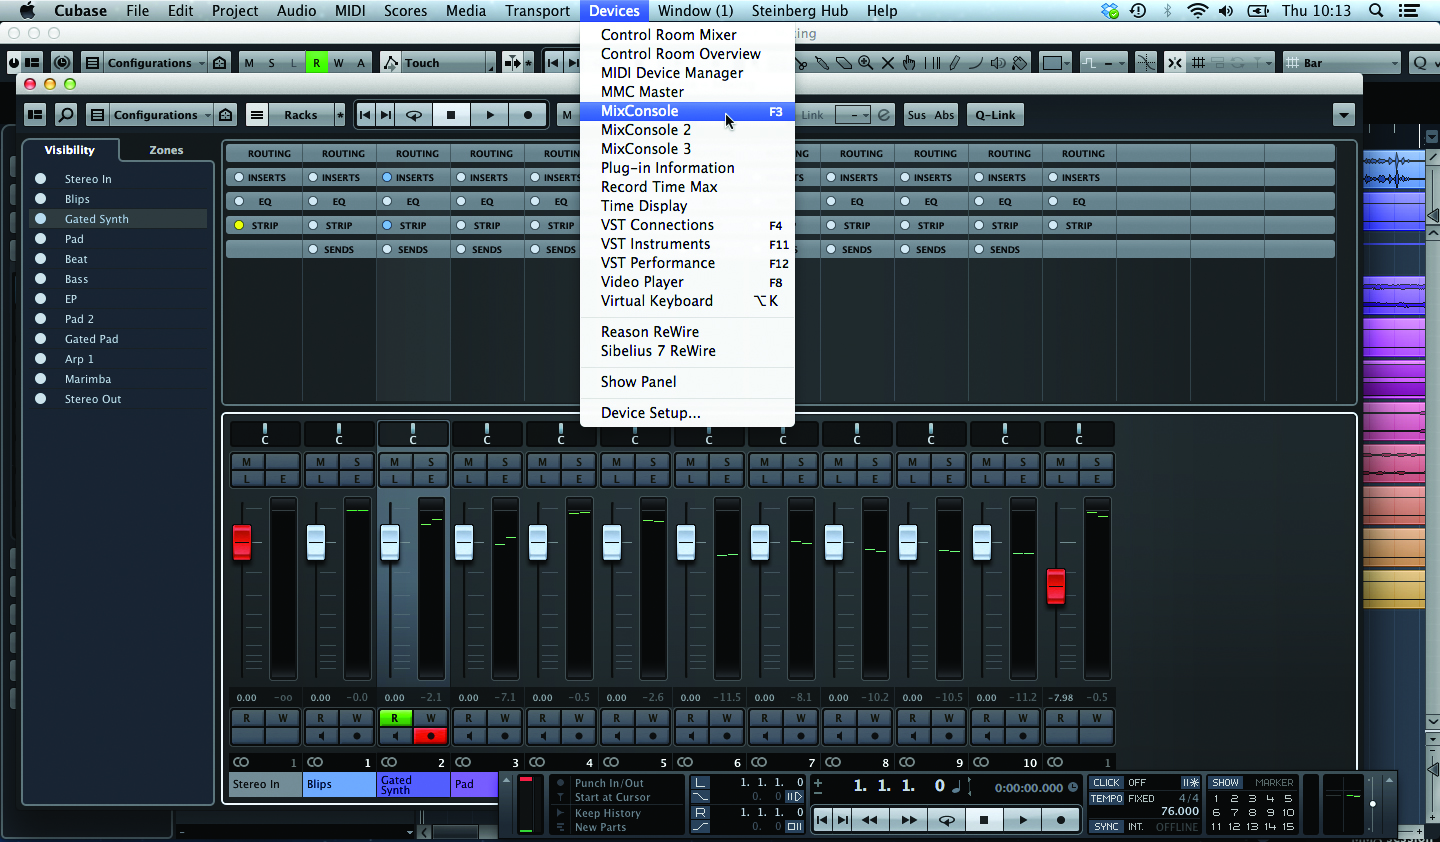
1: To open the mixer from within your project click on Devices> MixConsole or press F3. This will bring up the window floating above the Arrange window. To re-size it, move the cursor to the bottom right corner and drag it to an appropriate size for the inserts, sends and EQ being used.
2: To open the mixer from within your project click on Devices> MixConsole or press F3. This will bring up the window floating above the Arrange window. To re-size it, move the cursor to the bottom right corner and drag it to an appropriate size for the inserts, sends and EQ being used.
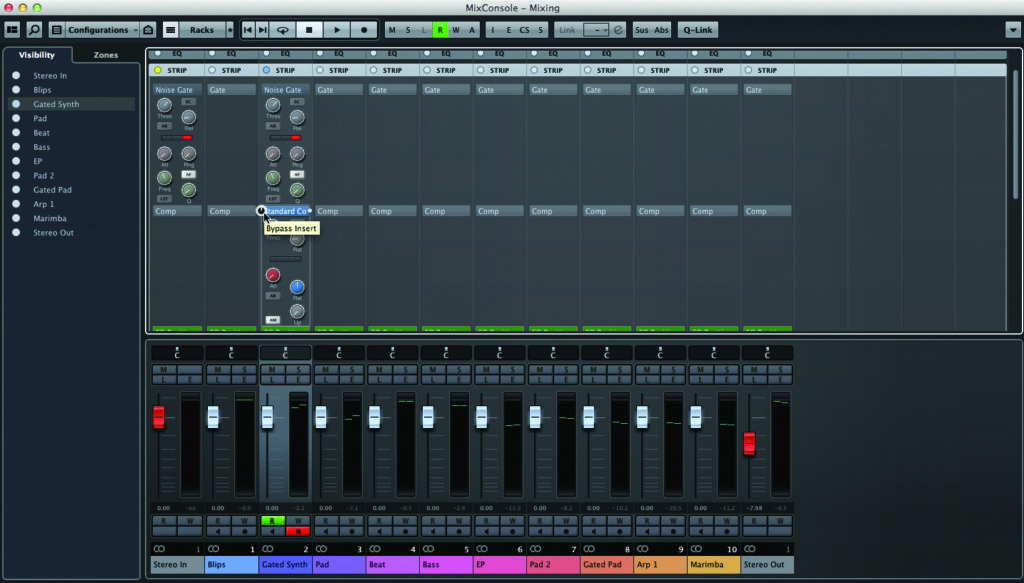
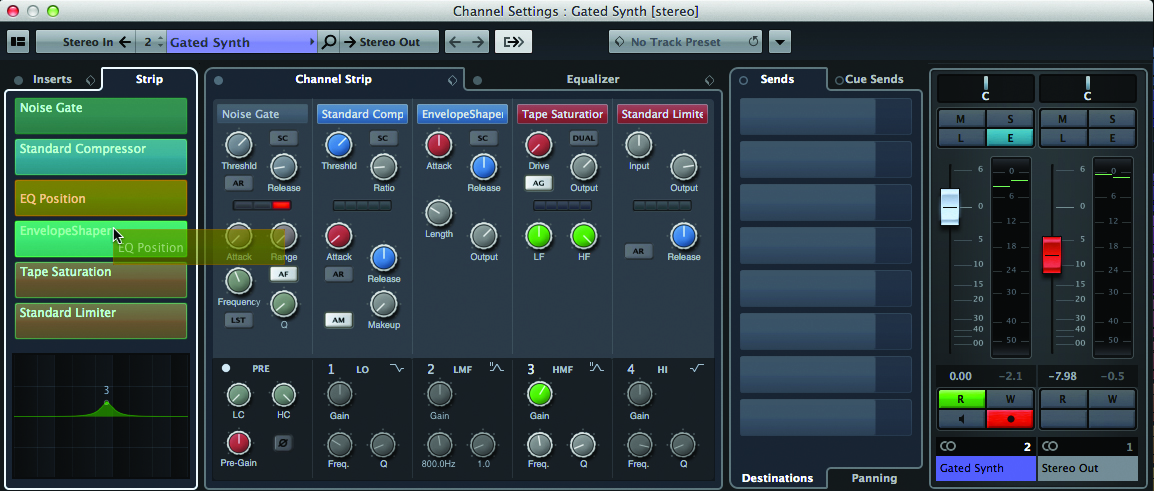
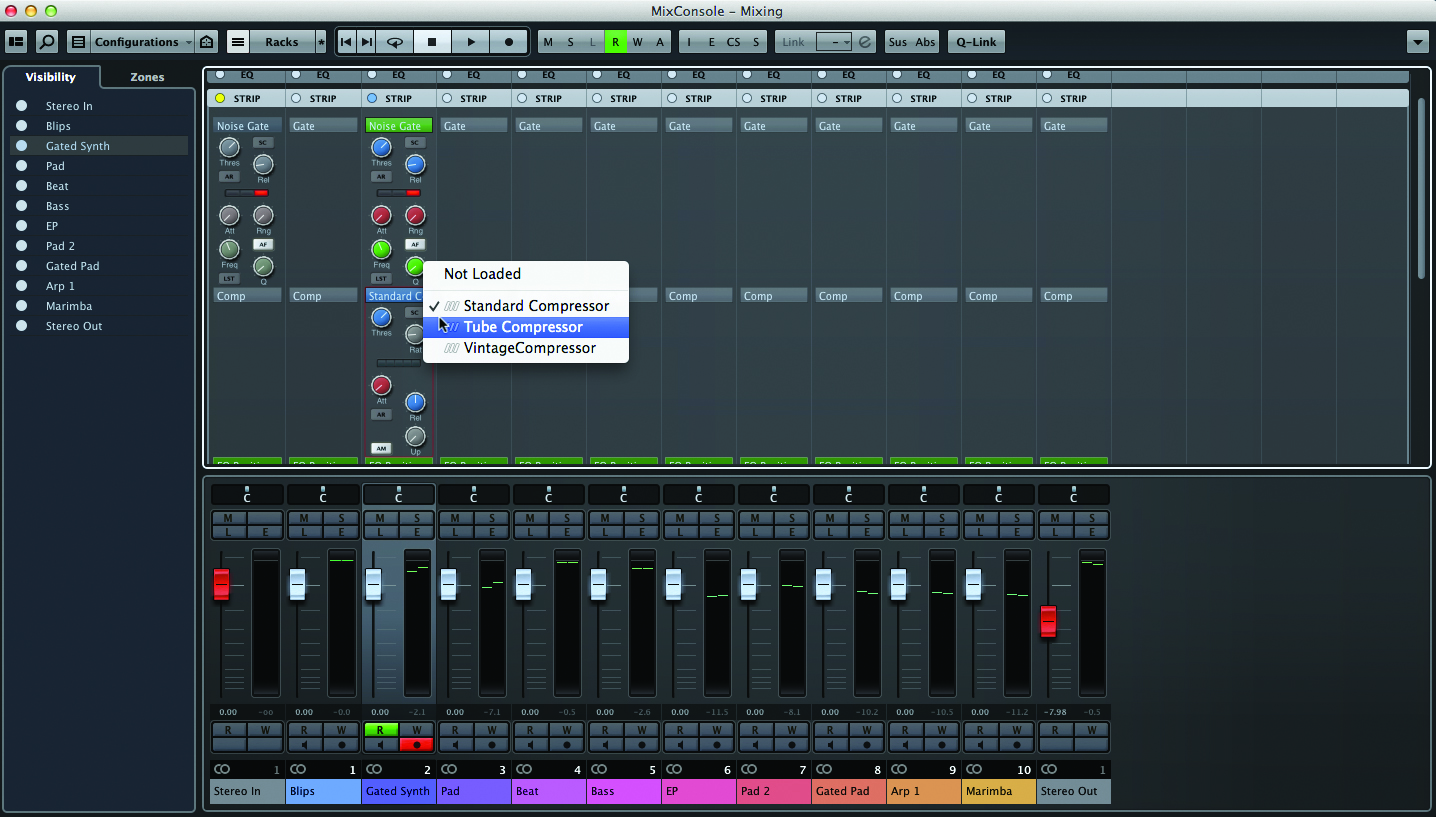
3: To activate or bypass a device, click on the left hand side of the header. A small power button will appear that allows the device to be activated or bypassed as required. Clicking on the right hand side is where the different models of processors can be loaded and changed.
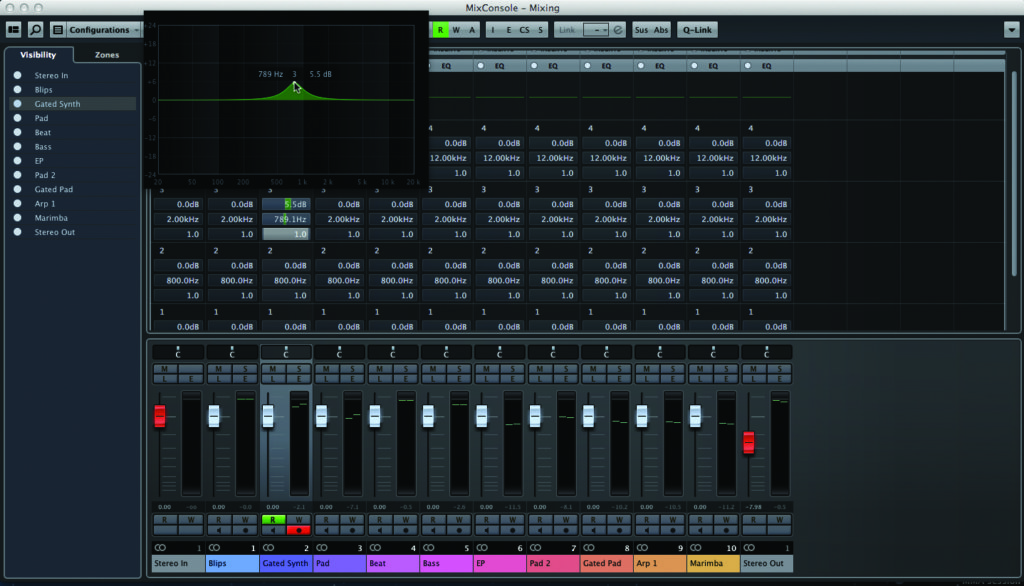
4: EQ can be edited by clicking on the header and adjusting the controls on the four channels of semi-parametric EQ available for each channel by altering the numbers. Alternatively, for those who like a more graphical representation of EQ curves, click on the black box below the header and the EQ can be adjusted with the cursor and the relevant bands will select automatically.
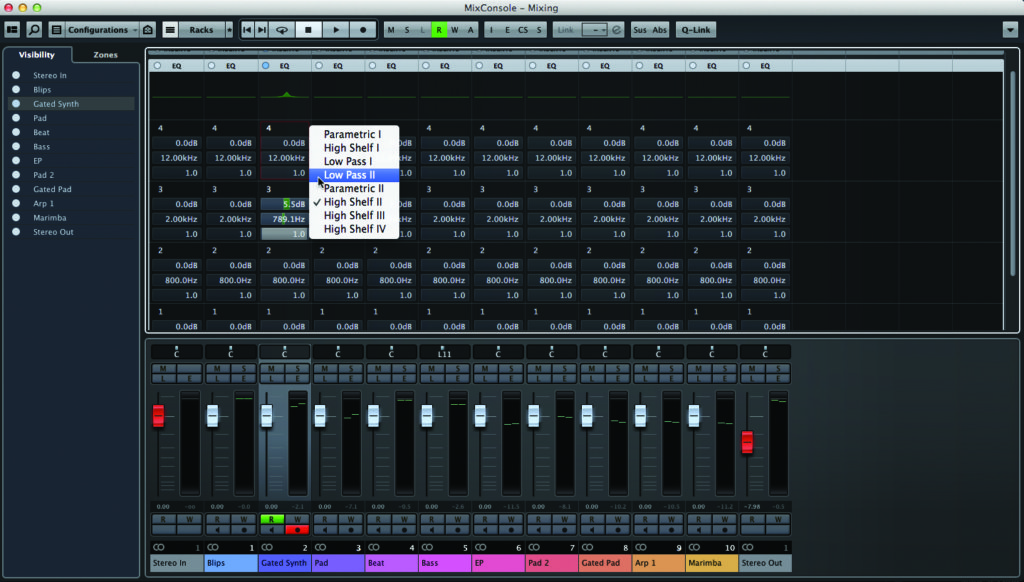
5: To change the type of EQ each band uses, click on the right hand side of the selected band and all the different options available for that band will appear. These include two types of parametric EQ as well as shelf EQs and cuts & passes for the high and low bands. To deactivate a band, click on the left-hand power button to bypass it.
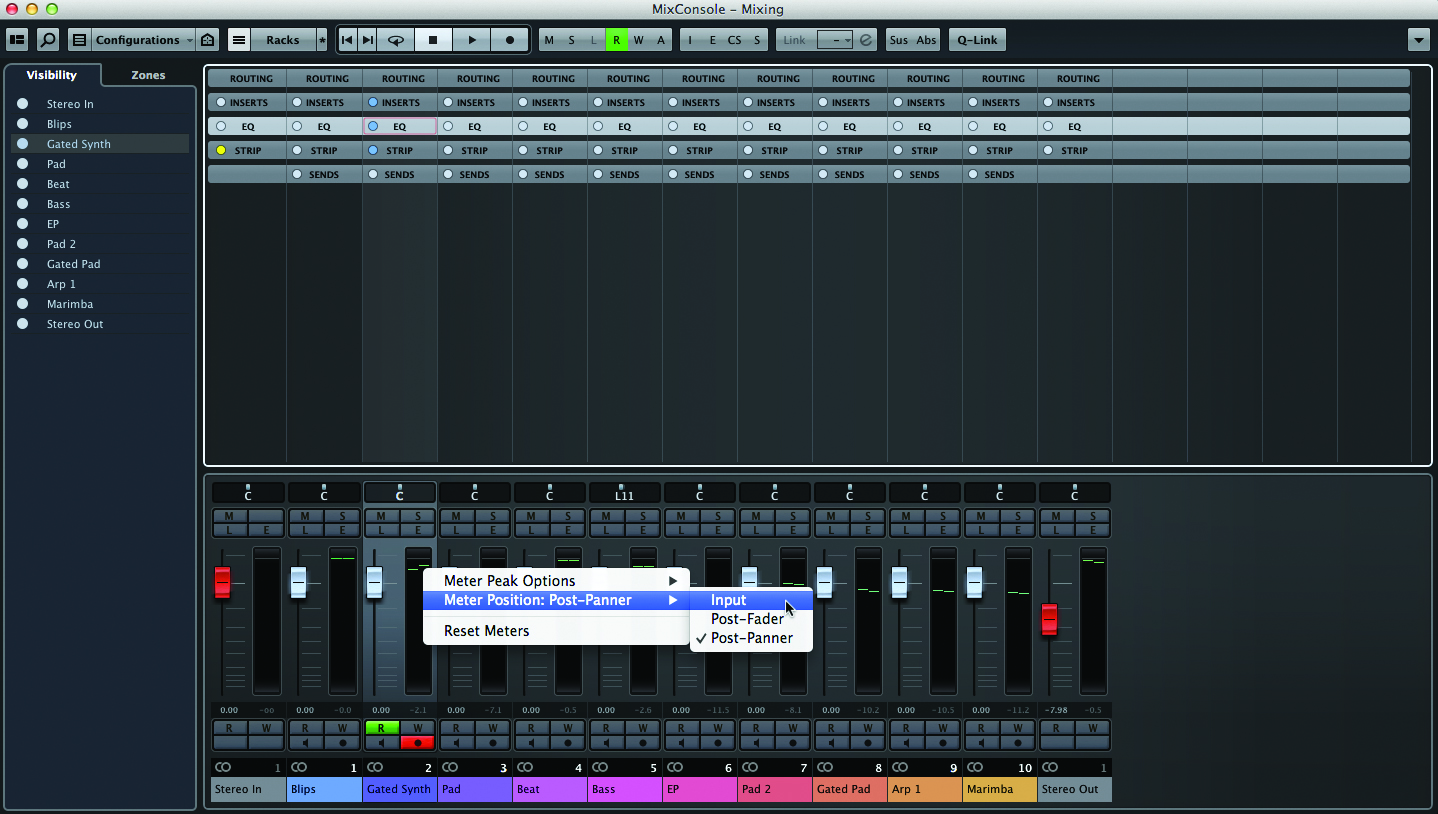
6: To adjust the volume and pan, as you would imagine they are simply moved with the cursor or an attached hardware controller. However, there are some options here that can be changed, including different panning options and different meter views that can be chosen by right/ctrl-clicking on the selected device. This allows you to view the meter post-fader or panning.
Edit window and automation
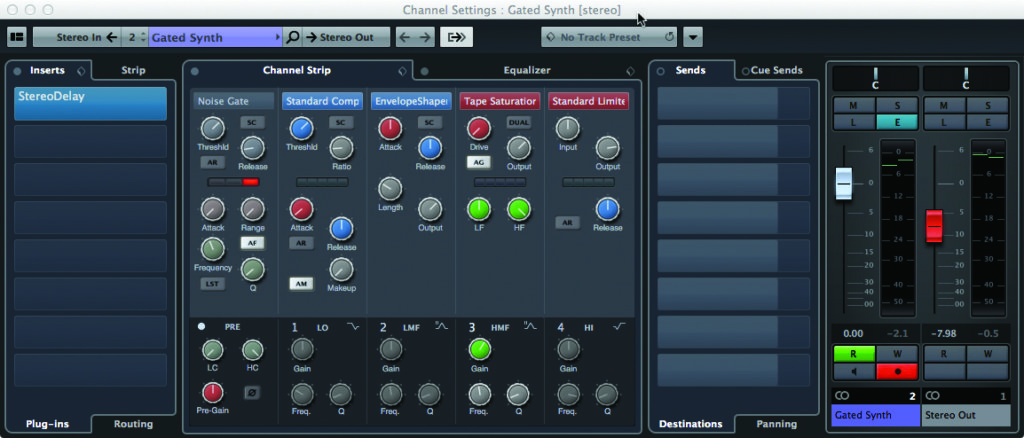
1: Many of the controls mentioned above can also be viewed and edited from the Channel Edit windows. These can be found by clicking on the ‘E’ button on the fader from the Mixer window or in the Inspector Panel for each channel in the Arrange window. This allows for a greater level of detail when looking at the controls for devices.
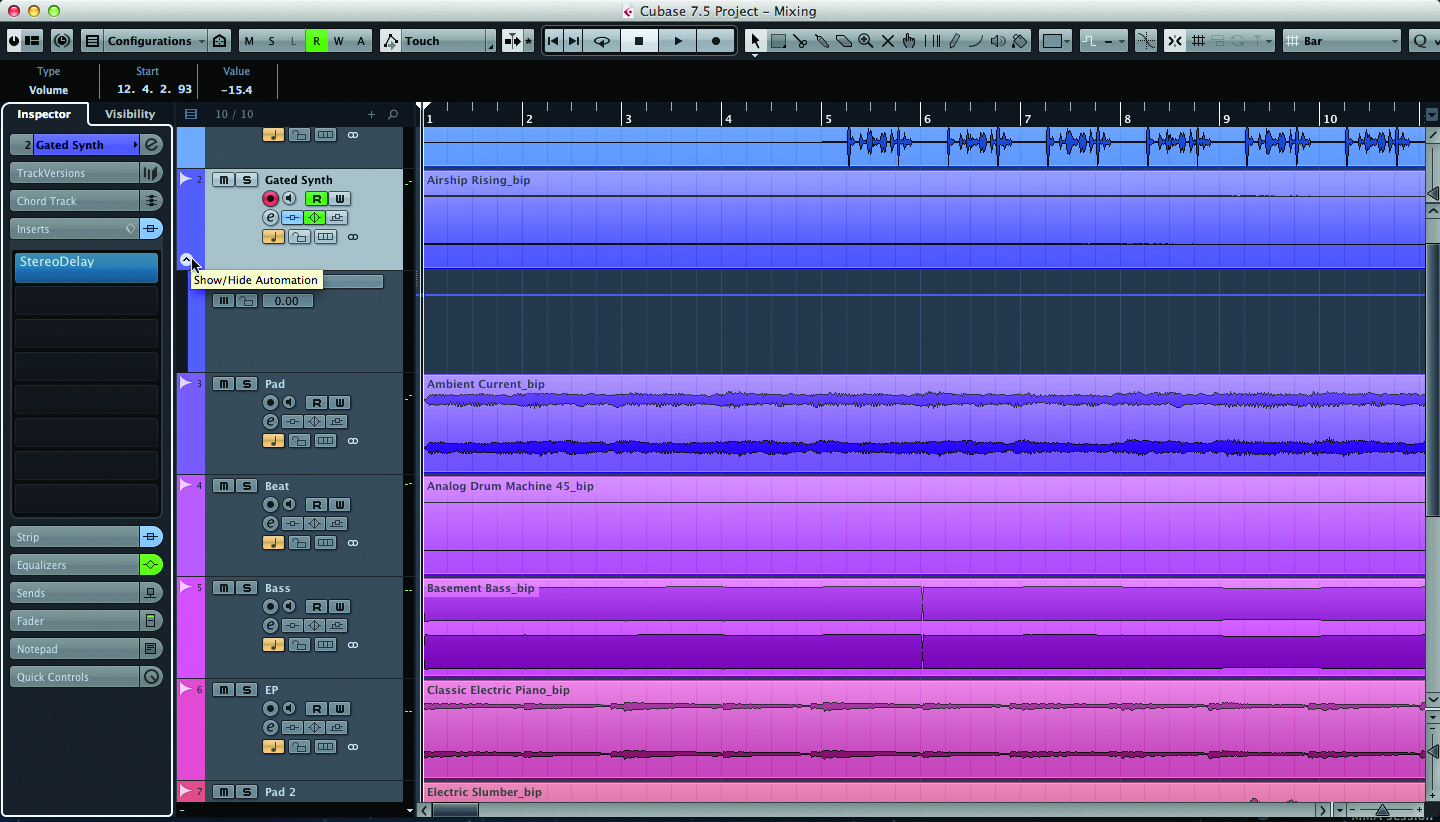
2: When balancing sound it is unlikely that all the volumes will stay the same throughout the project. Dynamics processors allow for a certain amount of control of volumes as they limit the range – but automation is needed for really detailed control. This can be found in the Arrange window by clicking on the down arrow in the bottom left corner of any channel header.
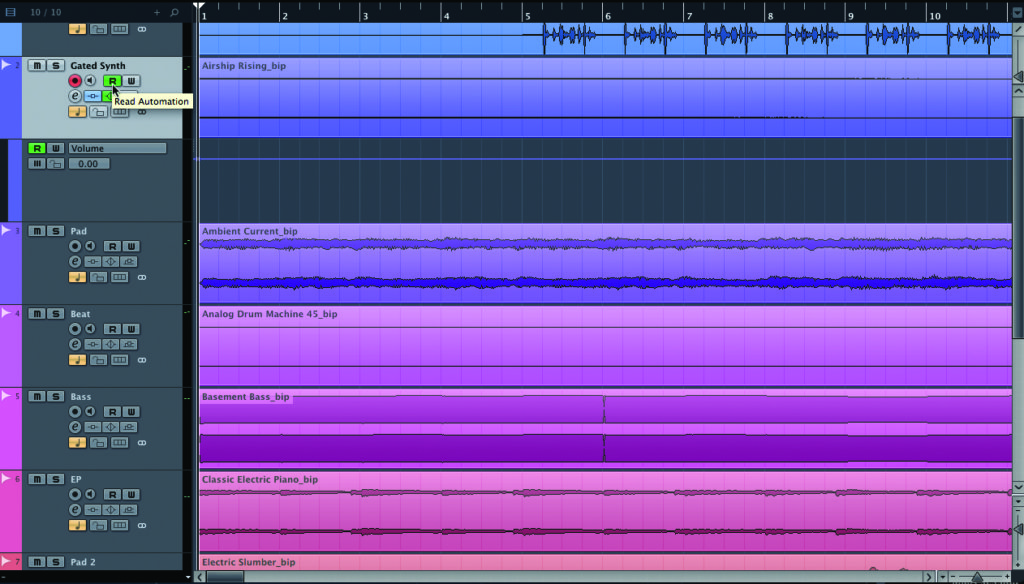
3: Once opened, the automation needs to be activated for that channel as the line won’t be adjustable to indicate that it is inactive. The quickest way to activate a channel’s automation is by clicking on the ‘R’ button on the track header to activate the automation ‘Read’ mode. At this point the line will become adjustable and Cubase will start reading the automation.
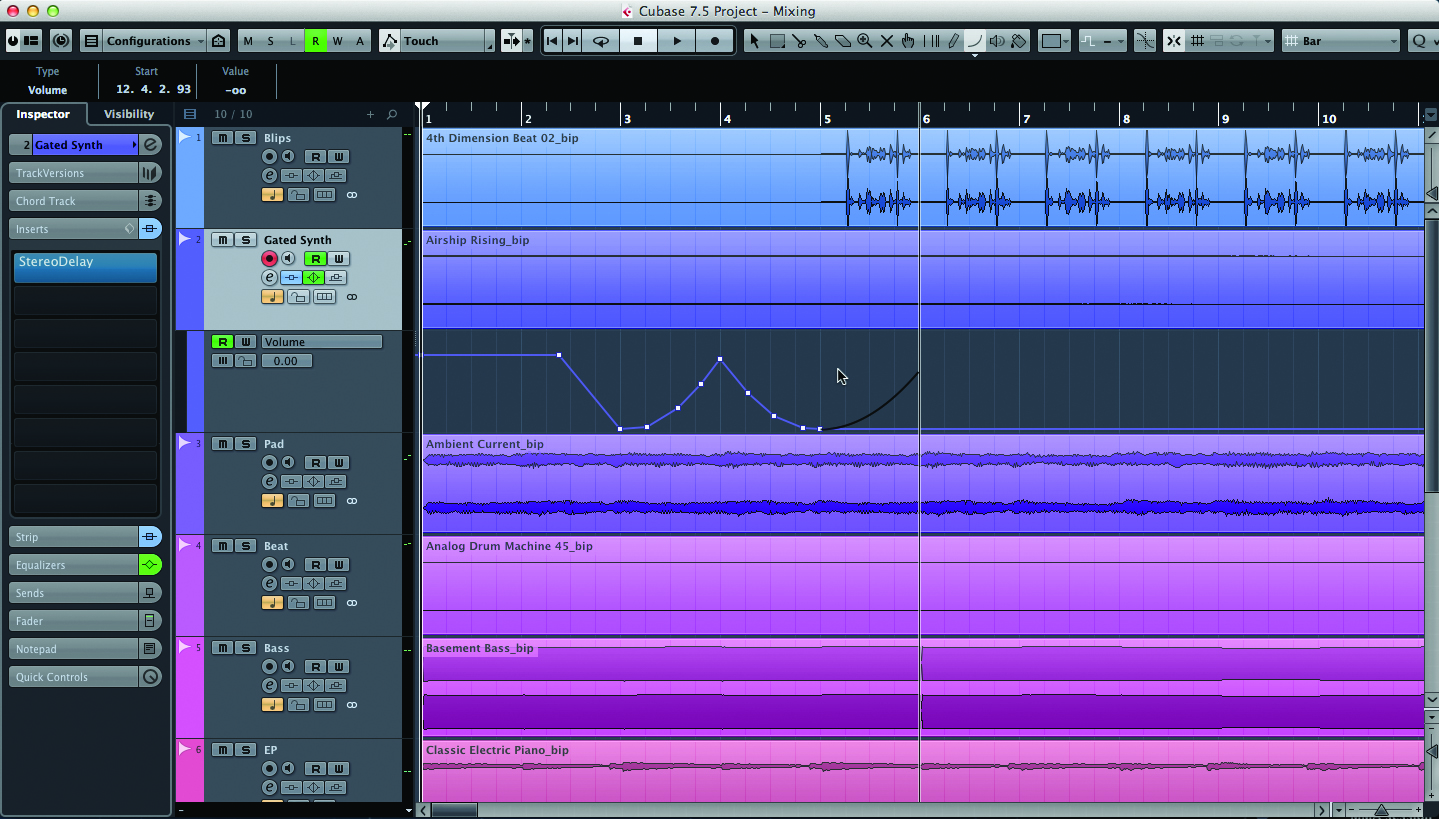
4: To edit the automation, click in edit points with the cursor and adjust the levels as necessary. To make more generic adjustments, select the pencil tool and simply draw in the shape that you want the automation to have. This also works with the line tool and there are other types of lines available including parabola for logarithmic fades.
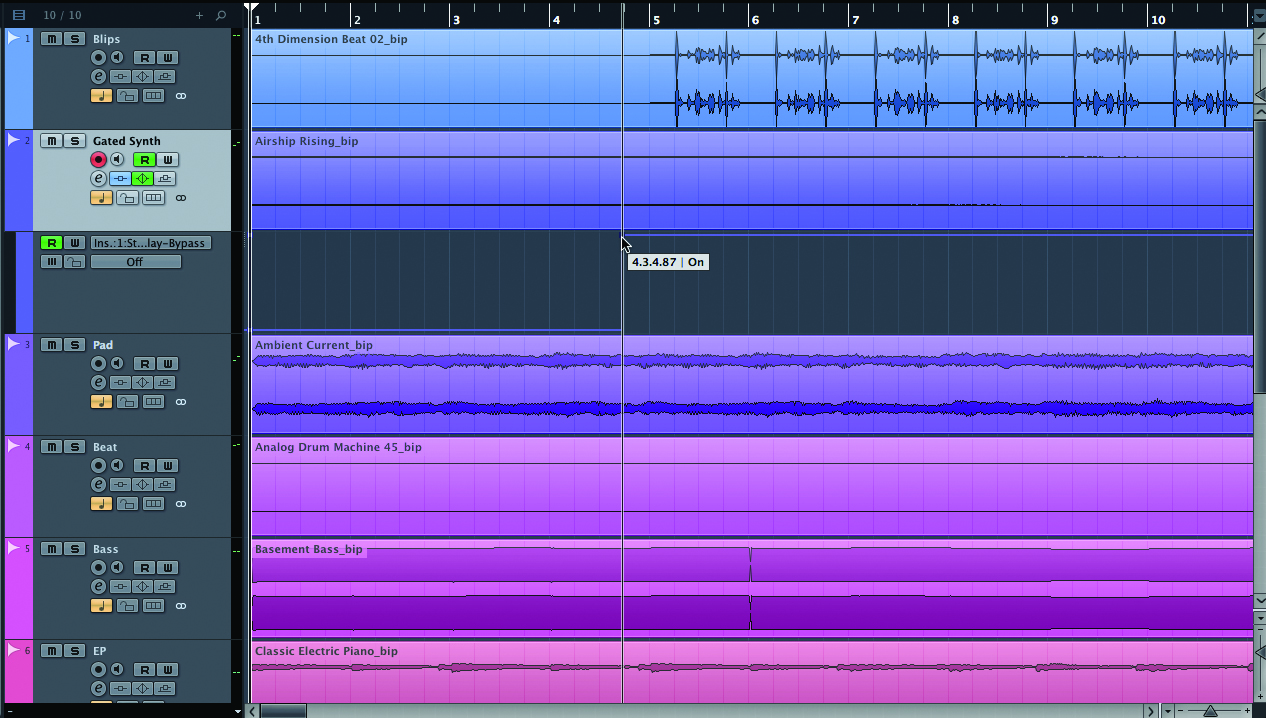
5: To change the automated control that you are adjusting, click on the box in the Automation Track Header and select an alternative control to automate. Cubase can automate any control, including the bypass controls of effects for bringing different inserts in and out. Perversely ‘Bypassed’ is at the top of the automation lane rather than the top representing the effect being active.

6: If you want to edit several pieces of automation simultaneously on one track (which is relatively common when adjusting controls that are linked) Cubase allows you to do this by simply clicking in the bottom left of the Automation Lane header in the Arrange window to Add Another Lane below, which can be assigned to any automated control.
