Equalisation In Logic Pro X – Step By Step Guide (Continued)
Mark Cousins continues to explore the different applications of Logic’s equalisation tools. Make sure to catch up on part 1 if you’ve yet to read it. 7. The snare’s fundamental at 200Hz is dominating. By positioning the frequency of band 3 and the amount and bandwidth of the cut, you can effectively reduce this specific […]
Mark Cousins continues to explore the different applications of Logic’s equalisation tools. Make sure to catch up on part 1 if you’ve yet to read it.
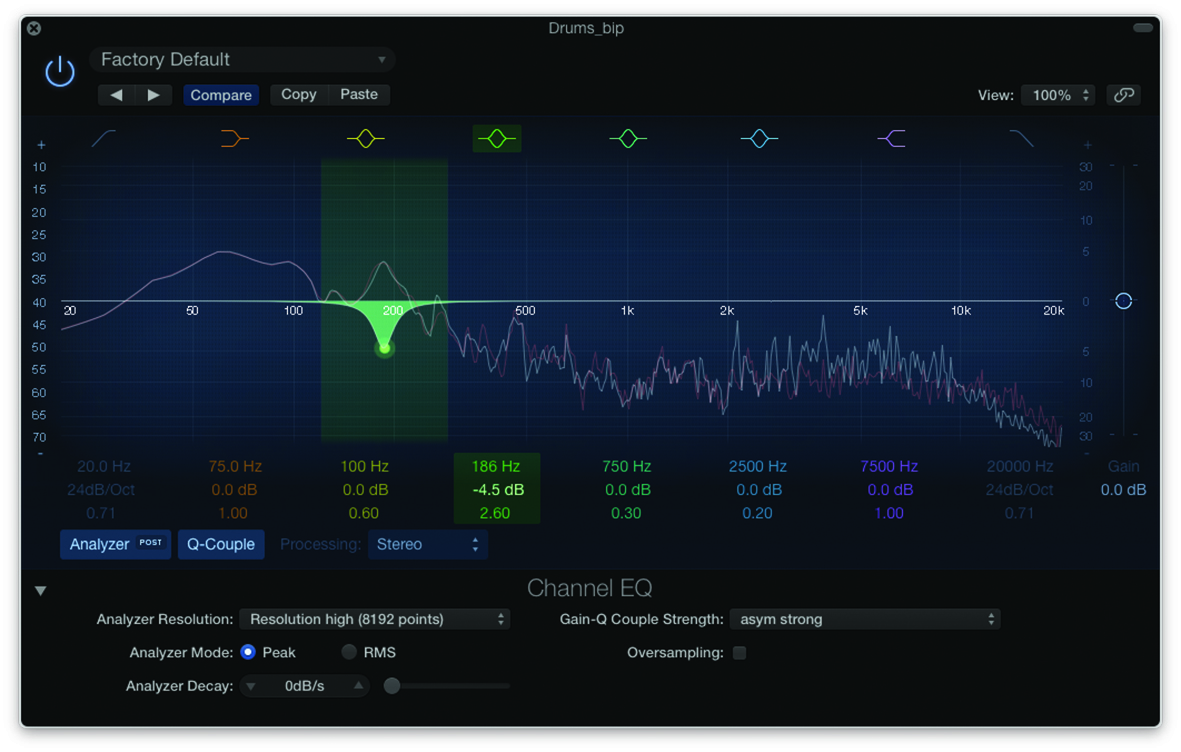
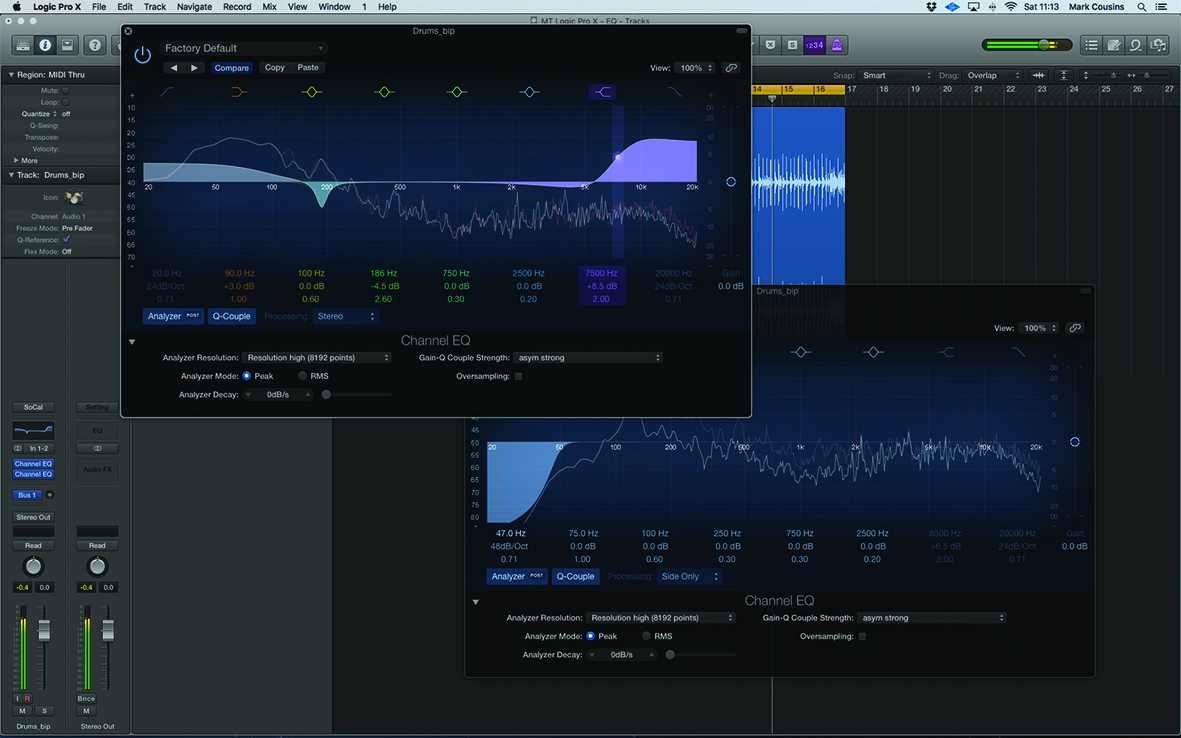
7. The snare’s fundamental at 200Hz is dominating. By positioning the frequency of band 3 and the amount and bandwidth of the cut, you can effectively reduce this specific harmonic.
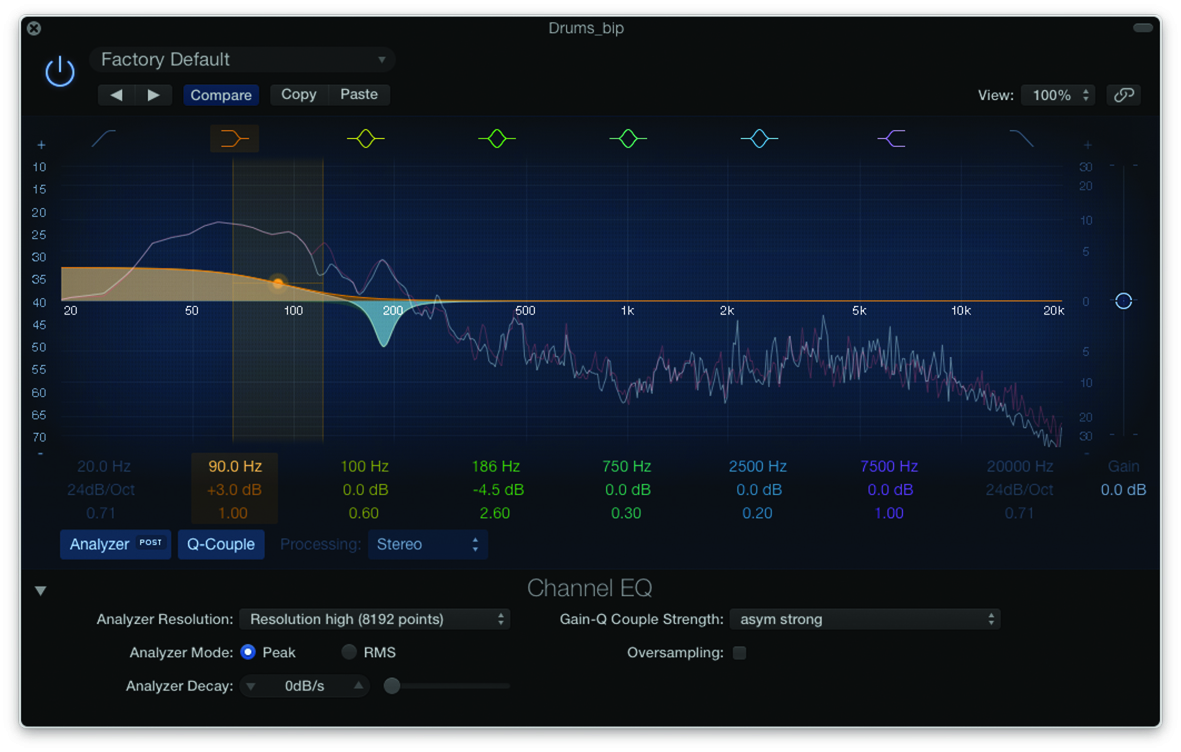
8. We can see the frequency area of the kick, which we can raise with the low shelving. As the Analyzer is post-EQ, we can see the effect; you’ll need to restart the song if you’re still on the 0dB/s decay.
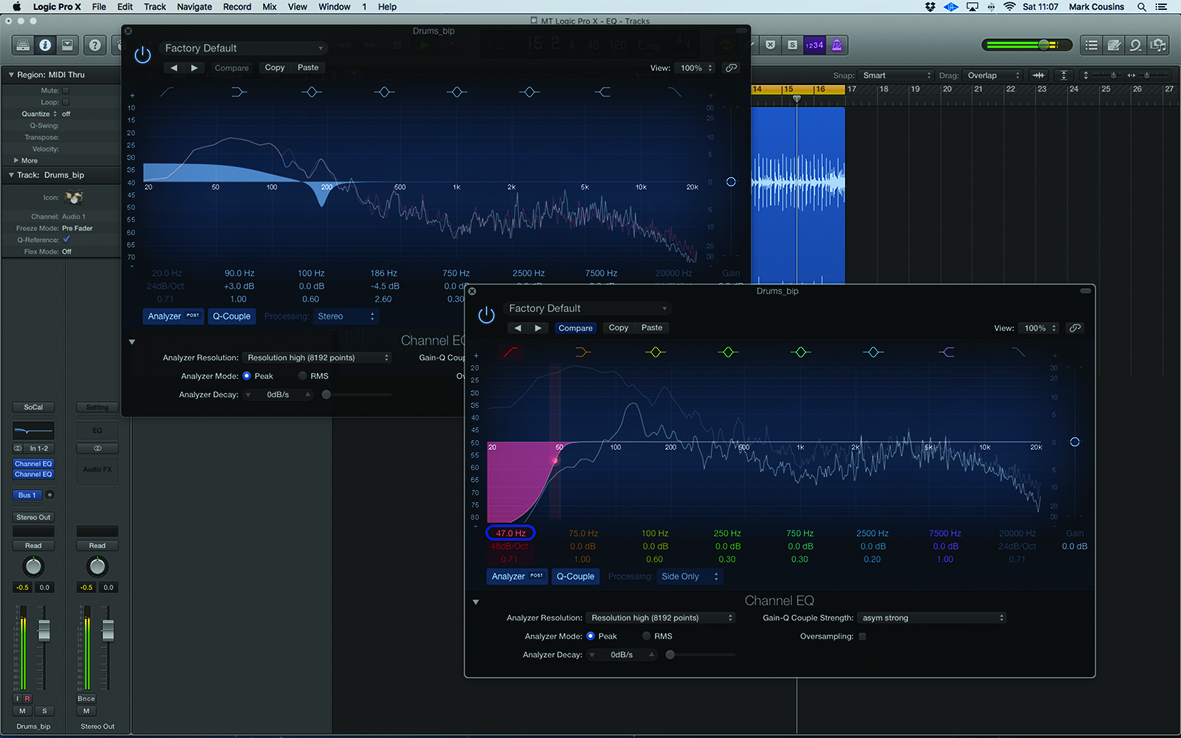
9. At either end of the EQ are low and high-pass filters. We’ve created a second instance of EQ and set it ‘Side Only’ processing. The result is a mono-focused low-end that stays planted in the centre.
10. Back with high shelving, note how Q affects the type of boost applied. A high Q setting creates a plateau-like sharp boost, preceded by a small amount of dip – for a more exaggerated boost.
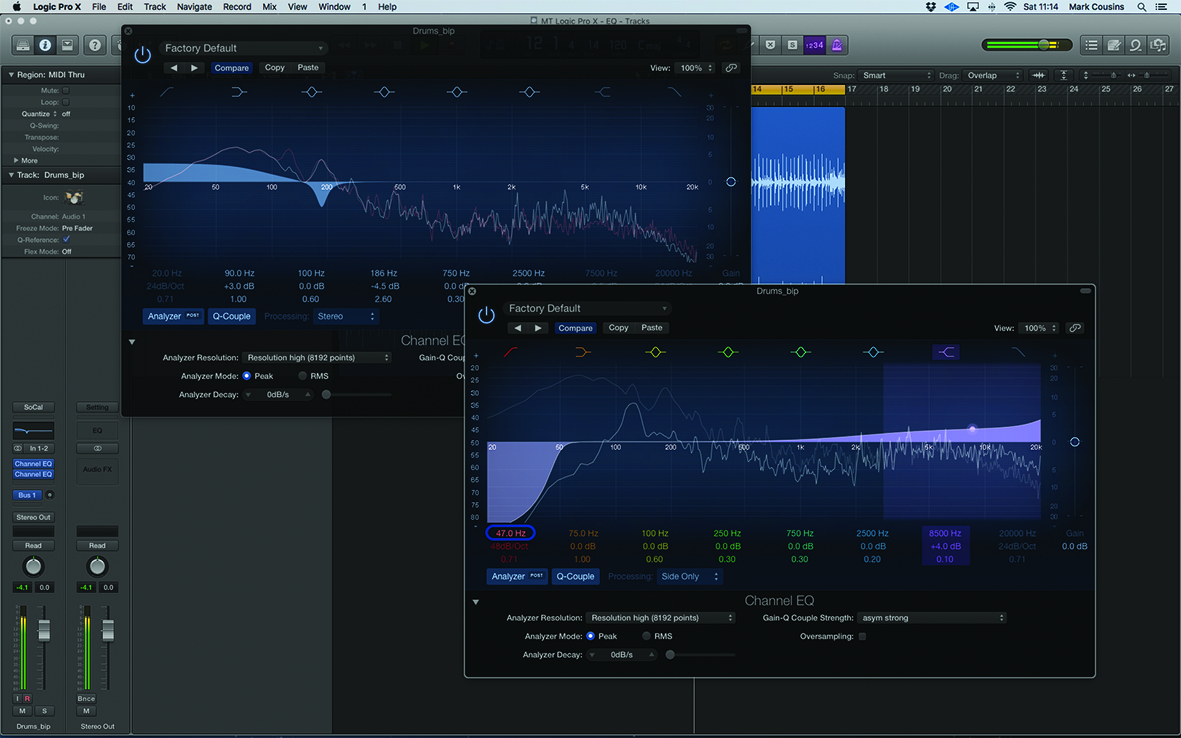
11. A low Q setting produces a broad, Baxandall-like EQ. On the side channel, this broad boost can help lift the air around the sides of the drums. A higher frequency avoids over-pronouncing the mids.
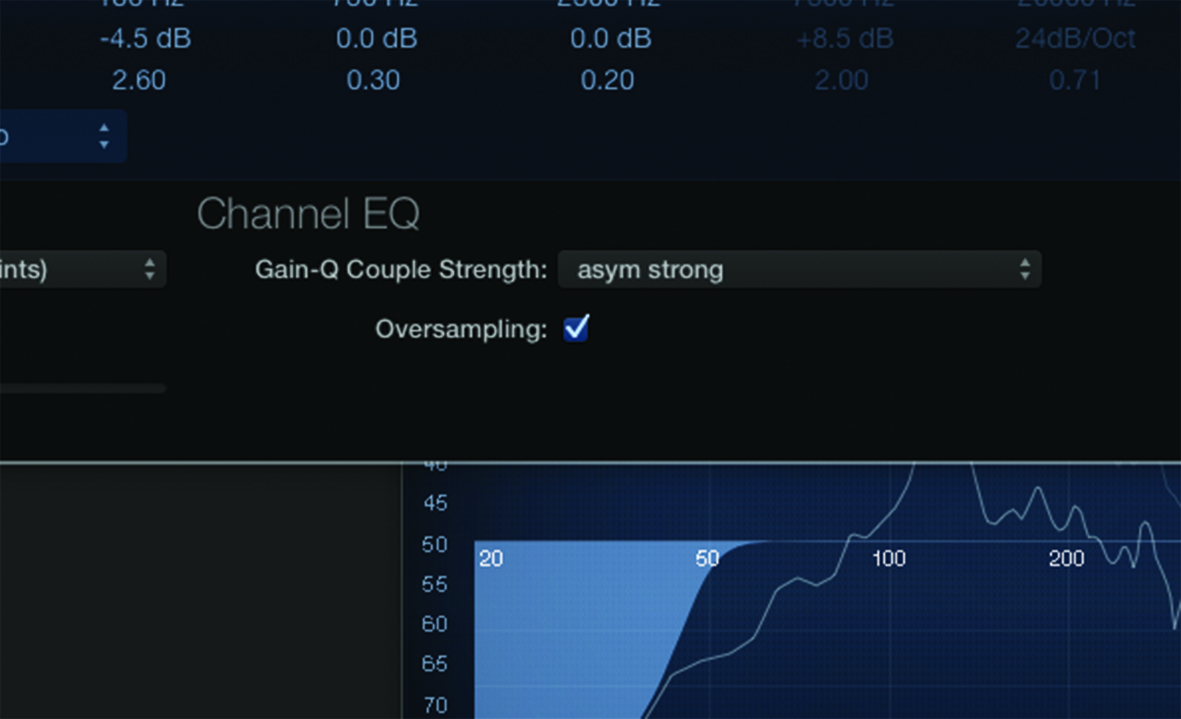
12. Remember to check the Oversampling option. Oversampled EQ will take an increased hit on your CPU, but means better handling of additional high frequencies created by the process of equalisation.
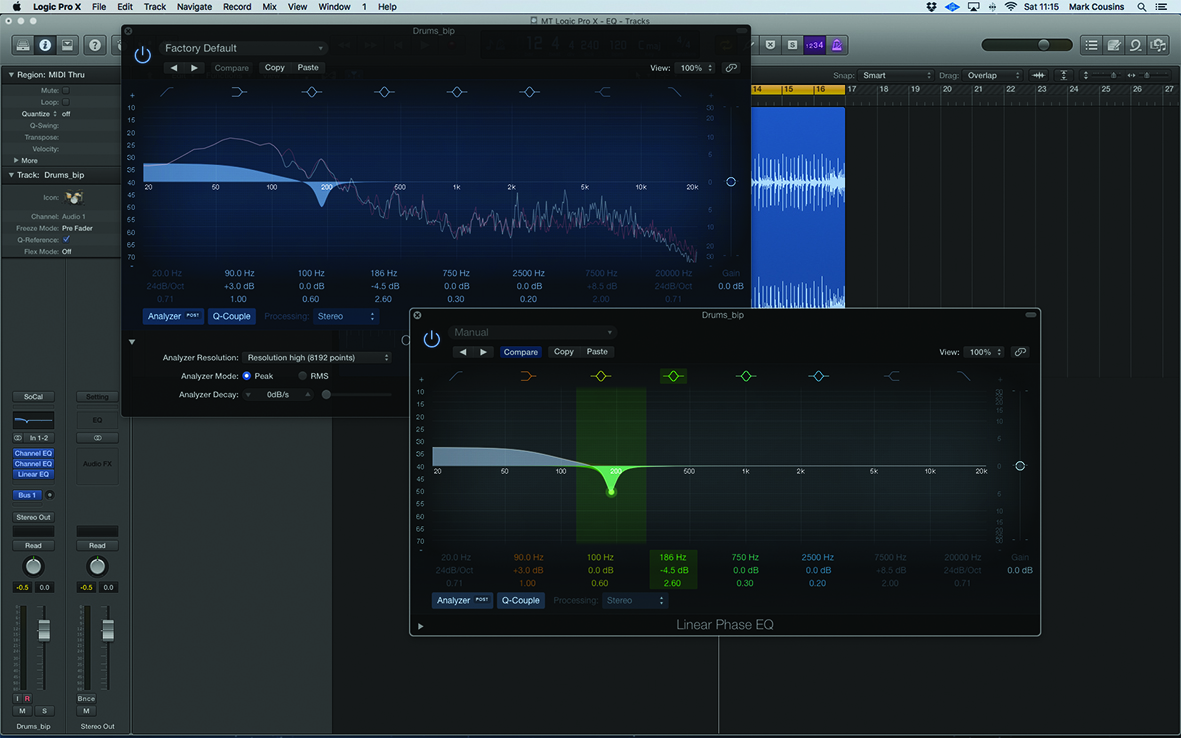
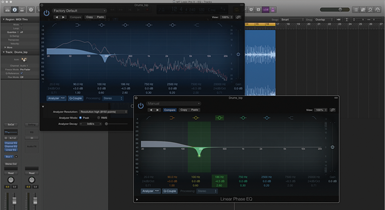
13. The Linear Phase EQ is a more transparent equaliser that doesn’t introduce any phase inconsistencies. Settings on either EQ can be moved between plug-ins using the copy-and-paste functionality.
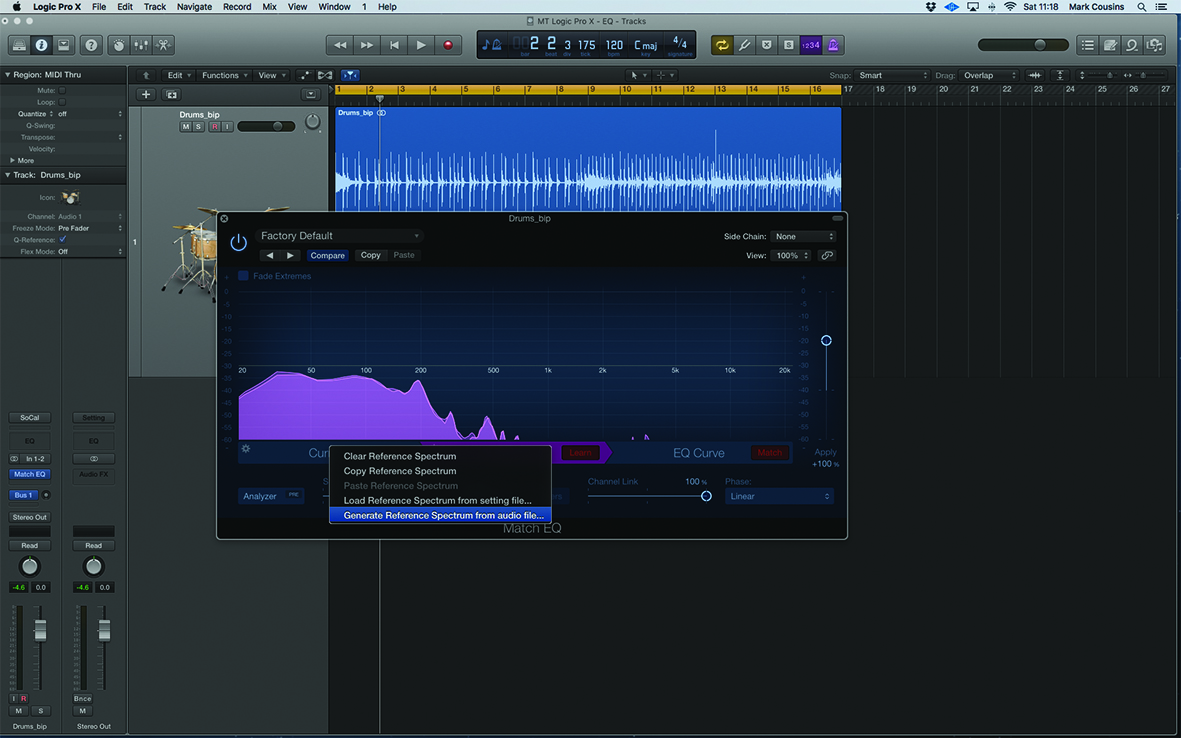
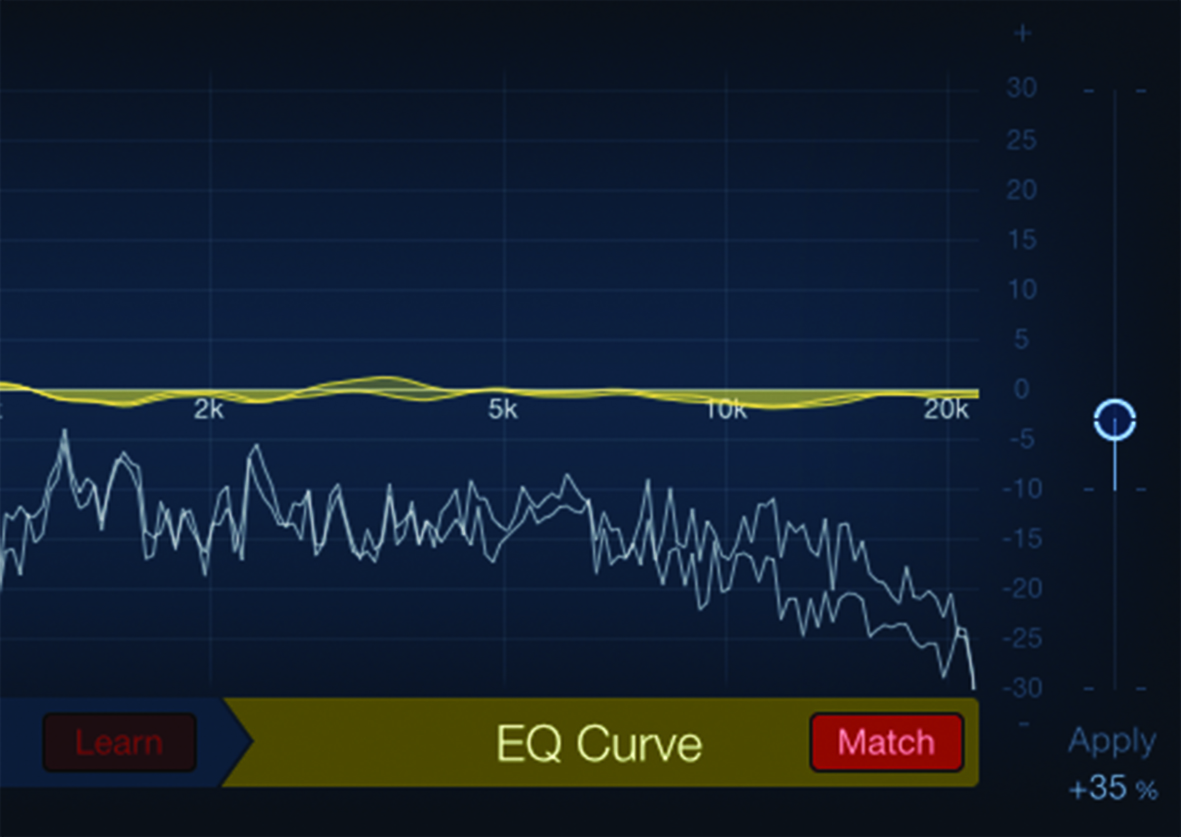
14. Rather than creating your own EQ curves, use Match EQ to make timbres match more closely. Start by creating a reference spectrum from the ‘Reference Drums’ audio file, using the drop-down.
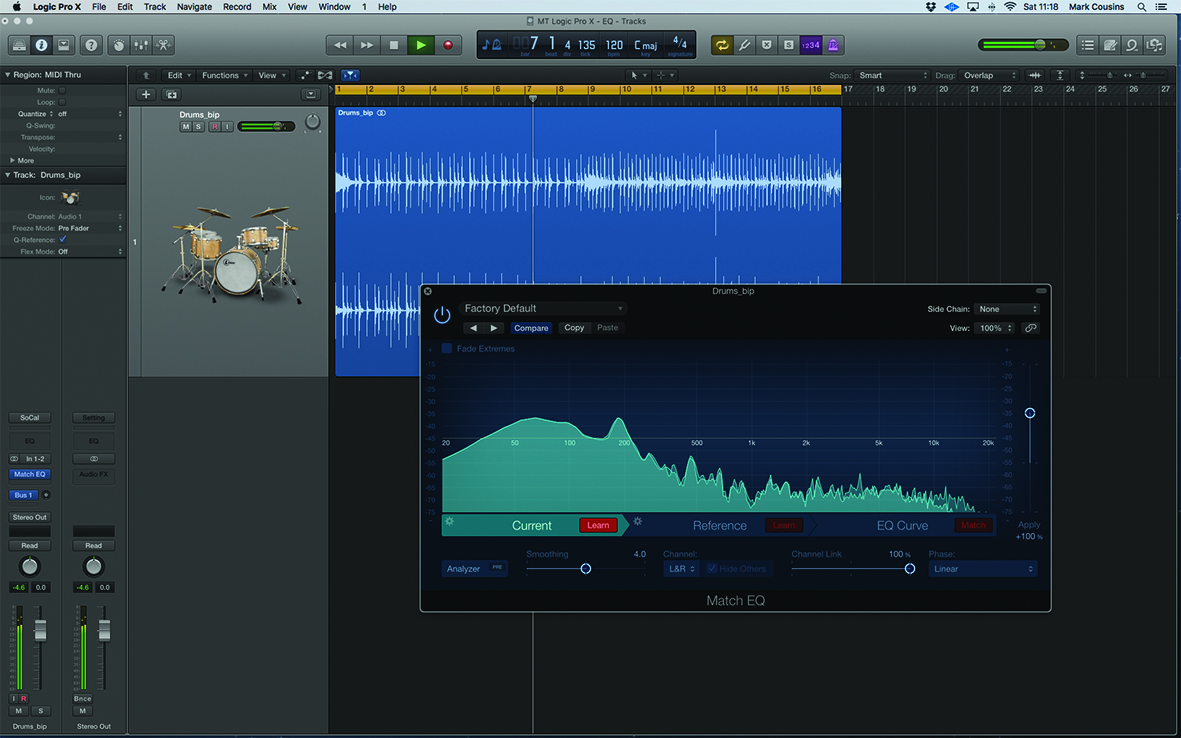
15. Move over to the Current Tab. Press Learn and play through eight bars of drums – just enough to build a profile. As before, you can slide up the scale to more clearly see the upper harmonic spectrum.
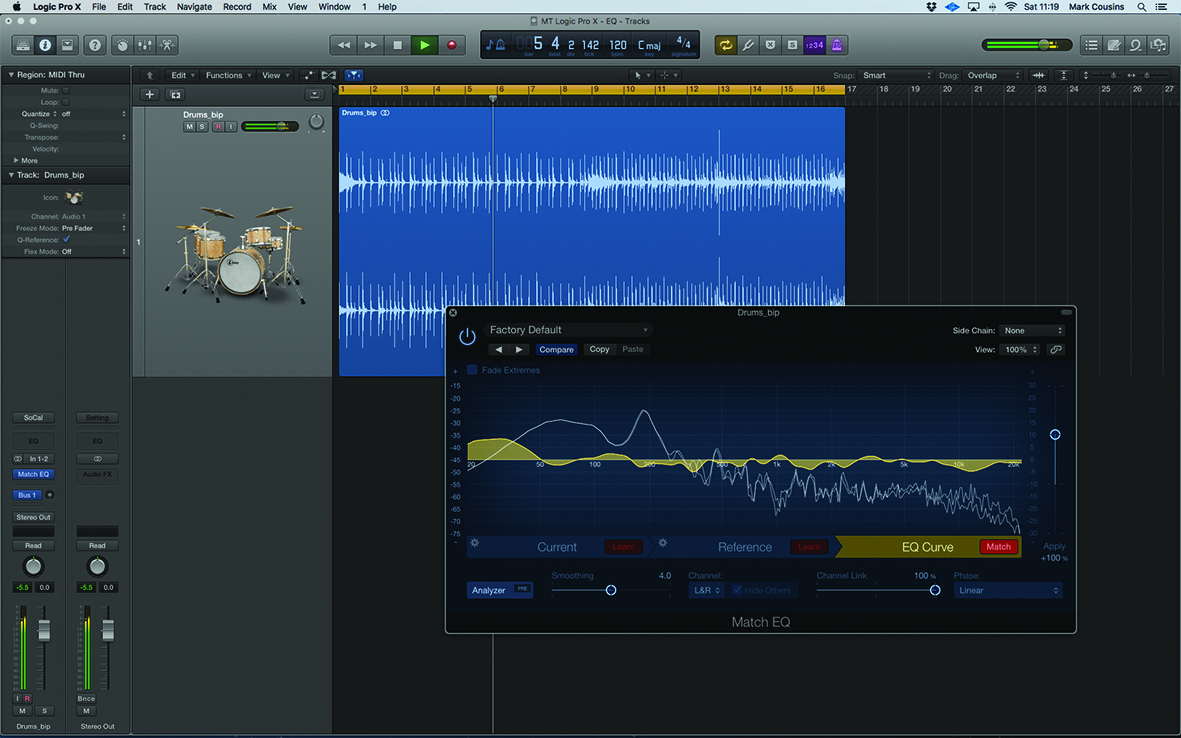
16. Pressing the Match curve will create a customised EQ Curve that imposes the frequency characteristics of your Reference file onto your source. Try to find sounds with similar frequency characteristics.
17. The Apply slider changes the amount of EQ. Sometimes, Match EQ can be too dramatic, so taming the amount can be a way of imparting the flavour without changing the taste.
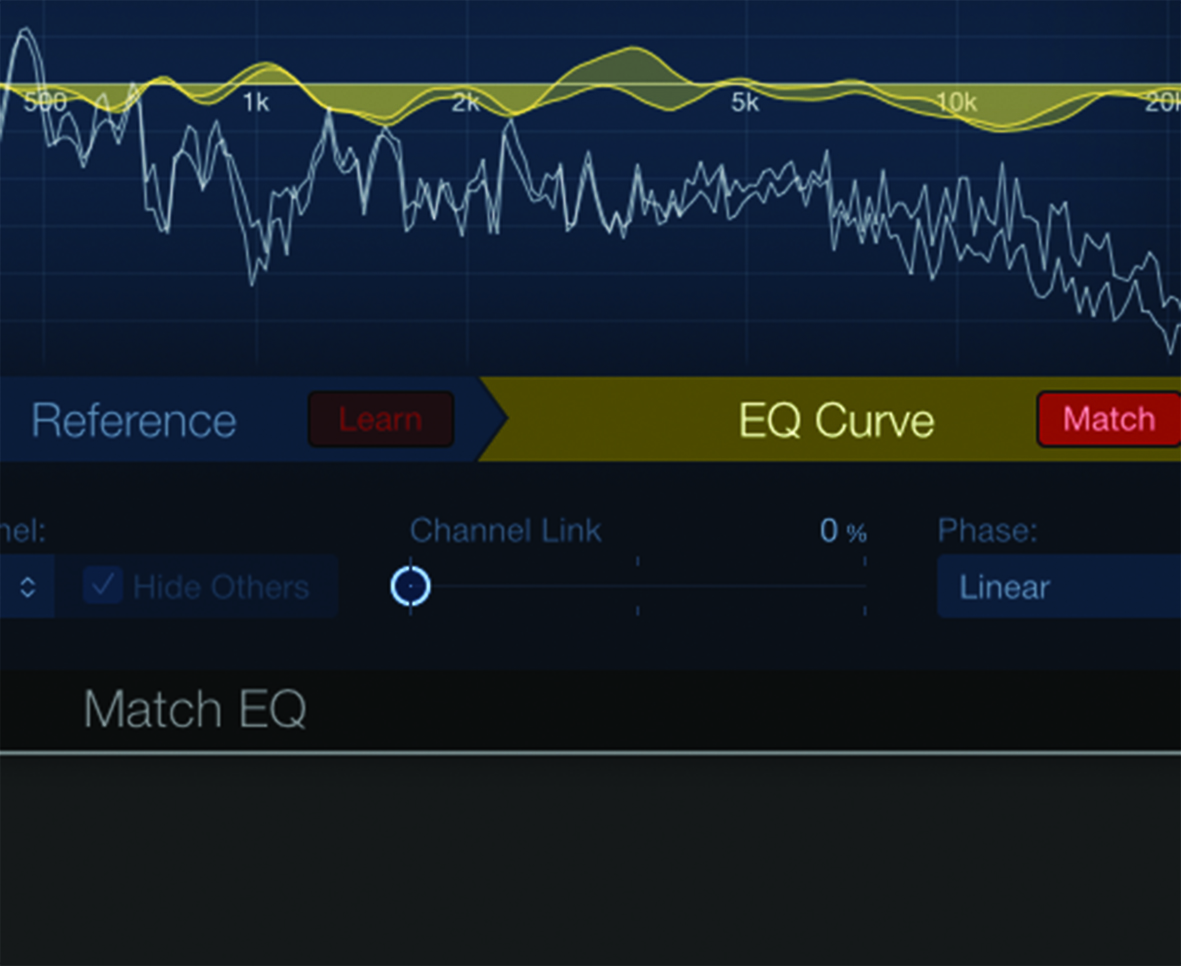
18. For stereo operation, try experimenting with channel link, which sets interdependency between channels. Linked applies the same profile to both channels; un-linked matches each exactly.
