Equalisation in Logic Pro X
Logic’s powerful and intuitive set of equalisation tools can transform the timbre and spectral effectiveness of your mix. Mark Cousins is the equaliser… Consider this – if you could produce a mix using only EQ or compression, but not both, which would you choose? I’d argue that while compression is beneficial to a good mix, […]
Logic’s powerful and intuitive set of equalisation tools can transform the timbre and spectral effectiveness of your mix. Mark Cousins is the equaliser…

Consider this – if you could produce a mix using only EQ or compression, but not both, which would you choose? I’d argue that while compression is beneficial to a good mix, equalisation is essential. Maybe two sounds are ‘fighting’ in the same part of sonic spectrum, or your DI’d bass needs extra kick around 80Hz – it’s hard to imagine creating a mix without turning to EQ throughout the process.
Logic includes fully featured equalisers. More than just treble and bass controls, these can unlock a wealth of sound-shaping potential, from M/S equalisation through to matching two differing sound spectrums.
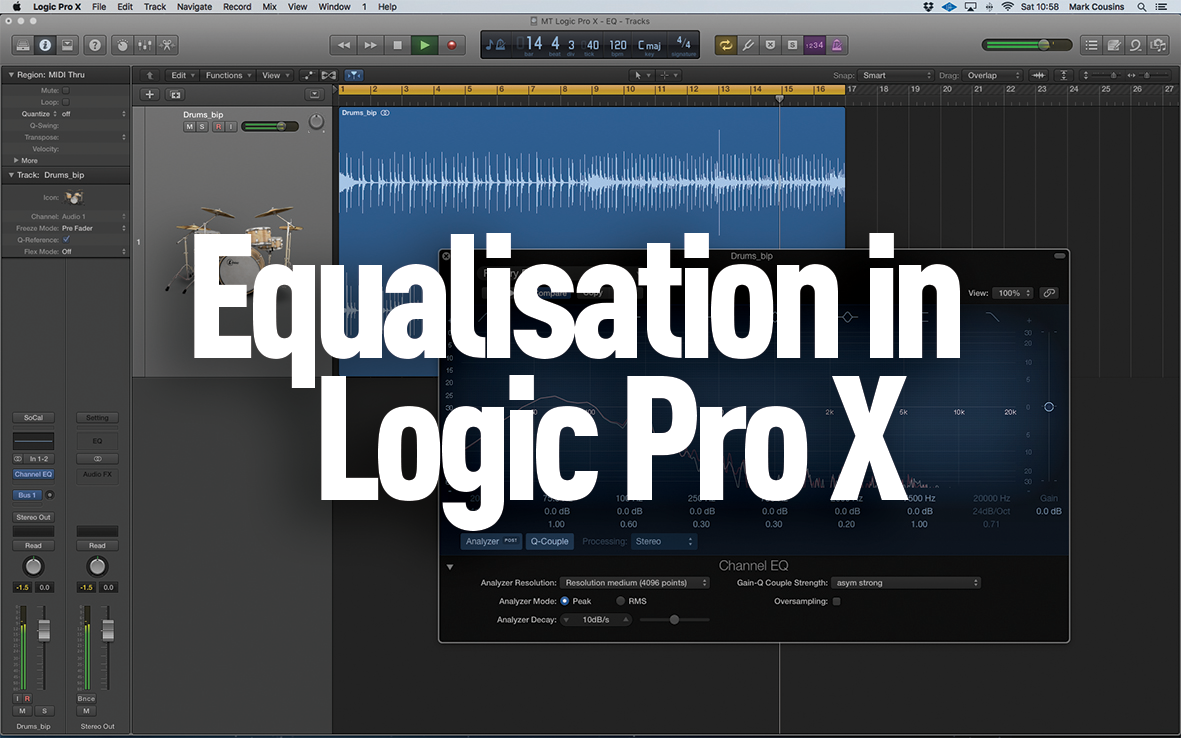
Equalisation in Logic comes in four principal forms – Channel EQ, Linear Phase EQ, Match EQ and Single Band EQ. The equaliser you’ll use most of the time is the Channel EQ, with its two filters, two shelving controls and four bands of fully parametric EQ. One significant advantage of using the Channel EQ is the clear and informative FFT display, which gives an accurate visual representation of the sound spectrum you’re trying to process. Tools like this can help you unlock your hearing’s true potential.
Gain-Q couple strength
Like all good EQs, Logic’s Channel EQ uses Gain-Q Coupling to ensure that there’s some proportionality between the bandwidth and the amount of boost/cut. Imagine a small boost of 1dB with a relatively wide Q – as you raise the boost, the wide bandwidth becomes increasingly disproportionate, raising a large part of the entirety of the sound spectrum.
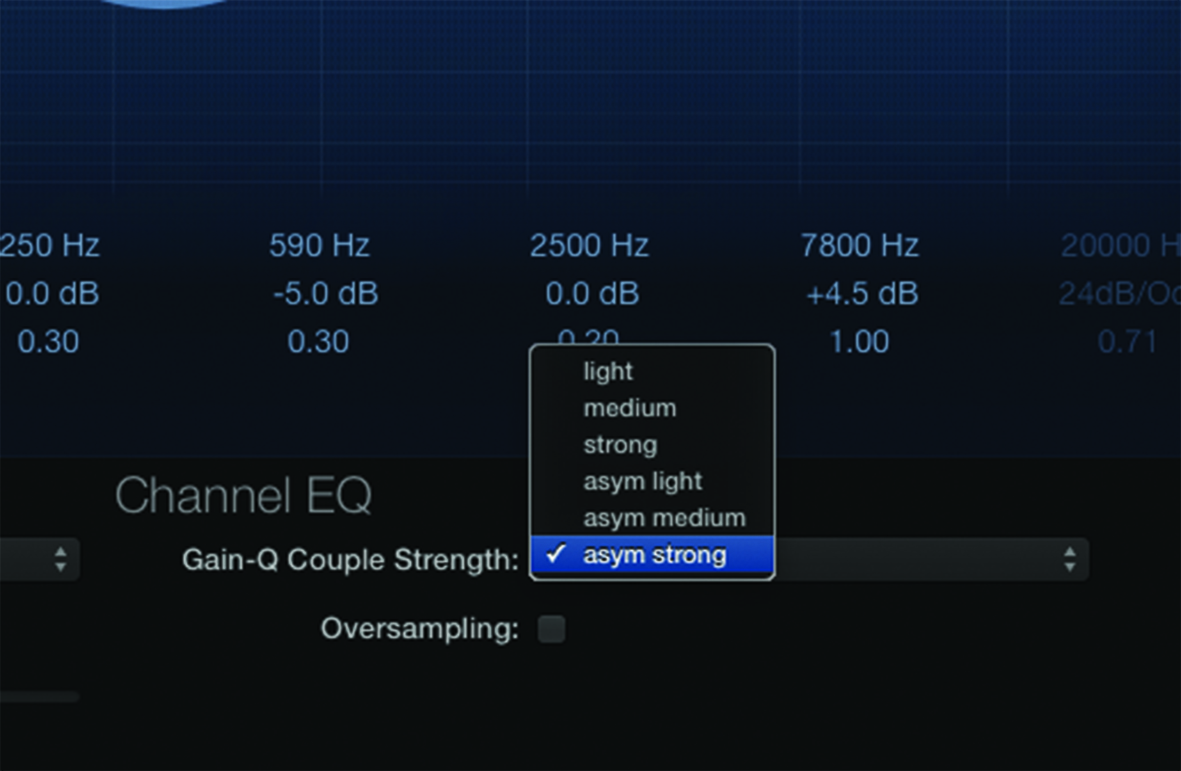
Gain-Q Coupling, though, creates a more focused bandwidth the more you cut or boost, maintaining the perceived bandwidth of the cut/boost. The result of Gain-Q Coupling is a more natural-sounding EQ. Note you can also adjust the Gain-Q Coupling – between Light, Medium and Strong, as well as three flavours of asymmetrical EQ – to suit your needs.
Looked at spectrally, you should start to see a few key points. Firstly, you should be able to spot the key fundamental frequencies – so, in the example included on the DVD, we can see strong fundamental frequency on the kick drum around 60-80Hz, the fundamental on the snare around 200Hz and a harmonic on top of that around 500Hz.
Above 1KHz, the sound spectrum gets increasingly complicated (with lots of extra harmonics) although these tend to be of a lesser amplitude than initial harmonics. This is where a sound’s ‘texture’ can be heard; a big part of its timbral characteristics.
ZX spectrum
The key to using EQ is understanding where these frequencies sit in relation to the harmonic spectrum and how we can exploit them to our best advantage. Cutting or boosting around the fundamental or second harmonic can help change the instrument’s presence in the mix, especially on low-end instrumentation like a kick drum or bass guitar. As you move up the sound spectrum, though, equalisation becomes more about broad ‘colouristic’ tones: so harshness and edginess might be tamed by a cut at 2kHz, while a boost about 10kHz can add a bright sheen.
For the six parametric bands, the parameters include the amount of cut or boost, the frequency, and the bandwidth or Q of the boost. The amount of boost tends to be subtler in the additive range (usually around 3-6dB or so), while cuts can be applied much harder (up to 10dB or more). The Q or bandwidth is also easy to see and adjust visually, often contrasting between broader sweeps of colour; with a wide Q, and more surgical adjustment using a narrower Q setting.
Another key area worth bearing in mind is the frequency area beneath the fundamental frequency. This is an area that’s easy to overlook, but this ‘top-and-tailing’ (especially in relation to the low end) can really help a mix remain uncluttered. A simple Low Cut – either using the lowest filtering band on the Channel EQ, or the Low Cut setting on the Single Band EQ plug-in – can really aid the clarity of your mix, arguably defining sounds that have no interest in the low-end of the mix – like an acoustic guitar, for example – against instruments that have a stake, such as the kick drum or bass.
Another interesting tool is the Match EQ plug-in, which is a way of imposing the spectral properties of one sound on another. Match EQ offers a unique insight into the differences between two signals, as well as an alternative means of applying an EQ. Using Match EQ, can be an interesting way of discovering the timbral differences between your mix and a commercial recording or for matching the tones of electric guitars.
For the most predictable results, it helps if there’s a degree of similarity between two sounds, rather than them being completely unrelated. Once Logic has analysed the Source and Reference, it will generate a new Match EQ profile that can be applied using various degrees of strength. Often a ‘hint’ of the matched EQ setting might be all that’s required. Understanding both how sounds work, and how equalisation can be used to modify the spectral balance, takes time and practice.
Logic’s equalisers are perfect tools to develop your hearing and refine your understanding. Take time to fully exploit the visual-analysis tools, and let them guide your ear in respect to improving your hearing.
Equalisation Step-by-step guide
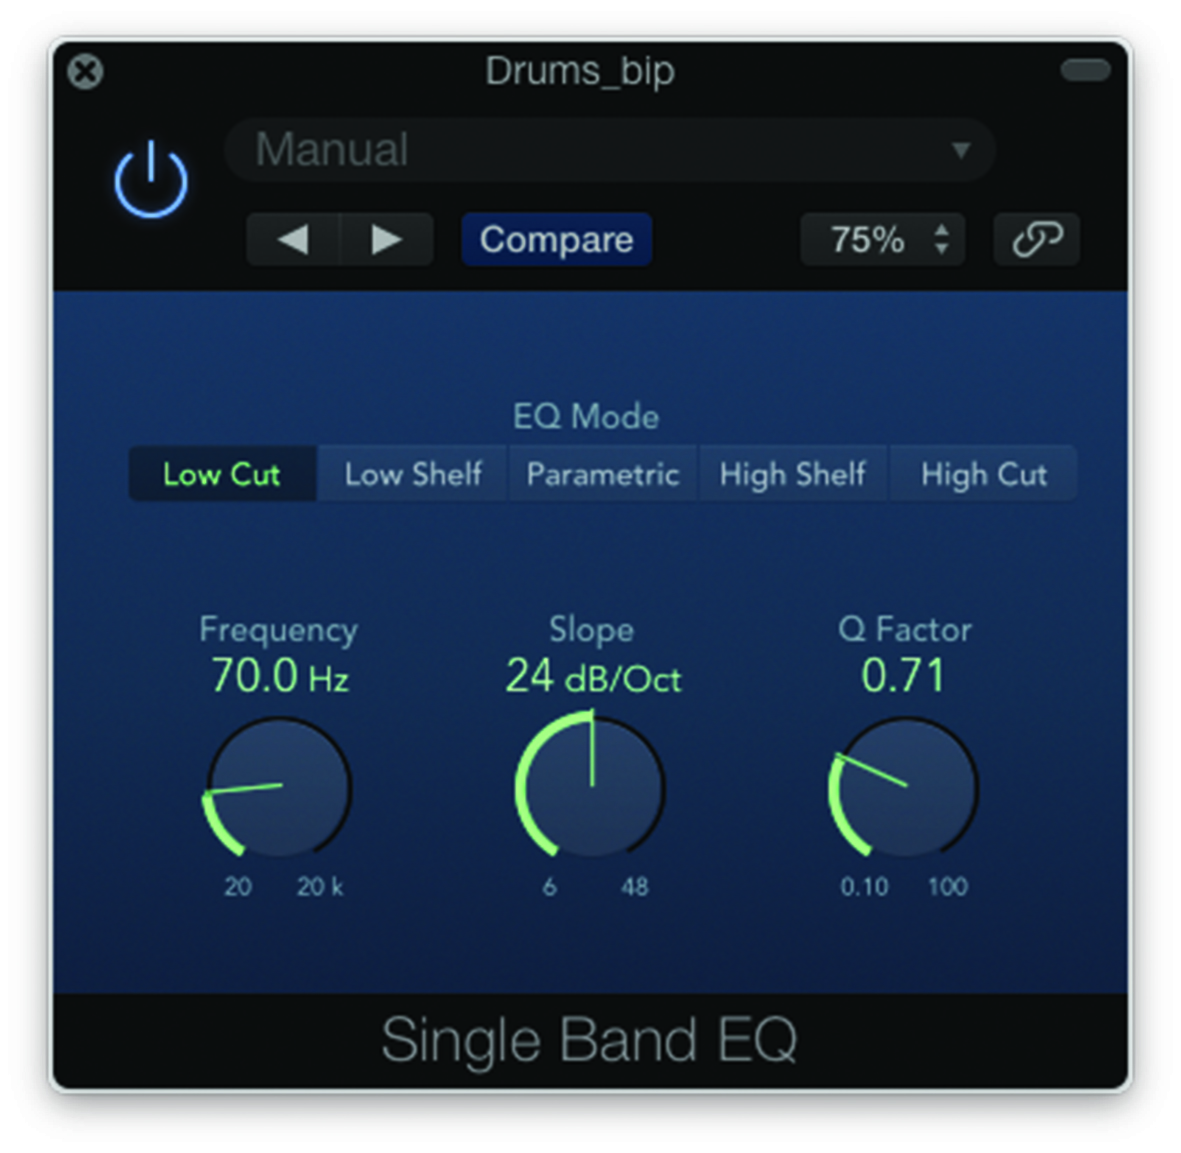
1. The simple yet useful subsonic Low Cut setting reduces unwanted low-end. If you’re not intending to apply other EQ on the same channel, the Single Band EQ is a good CPU-light option.
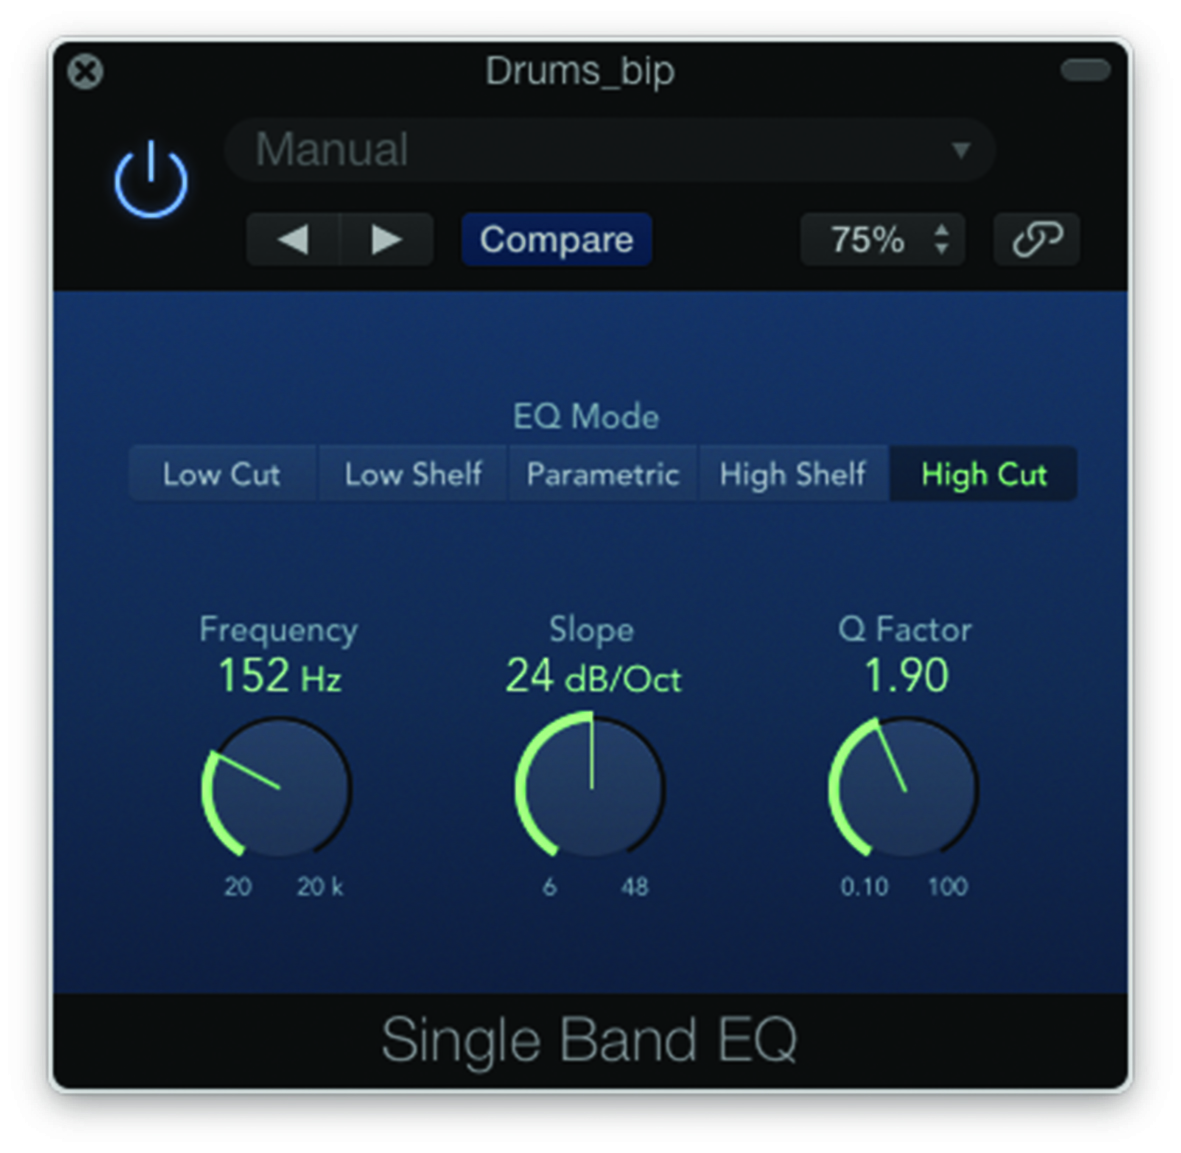
2. Single Band EQ has a range of creative applications. The High Cut setting can be used as a form of low-pass filtering, with the Slope setting the strength of filtering and Q Factor working as resonance.
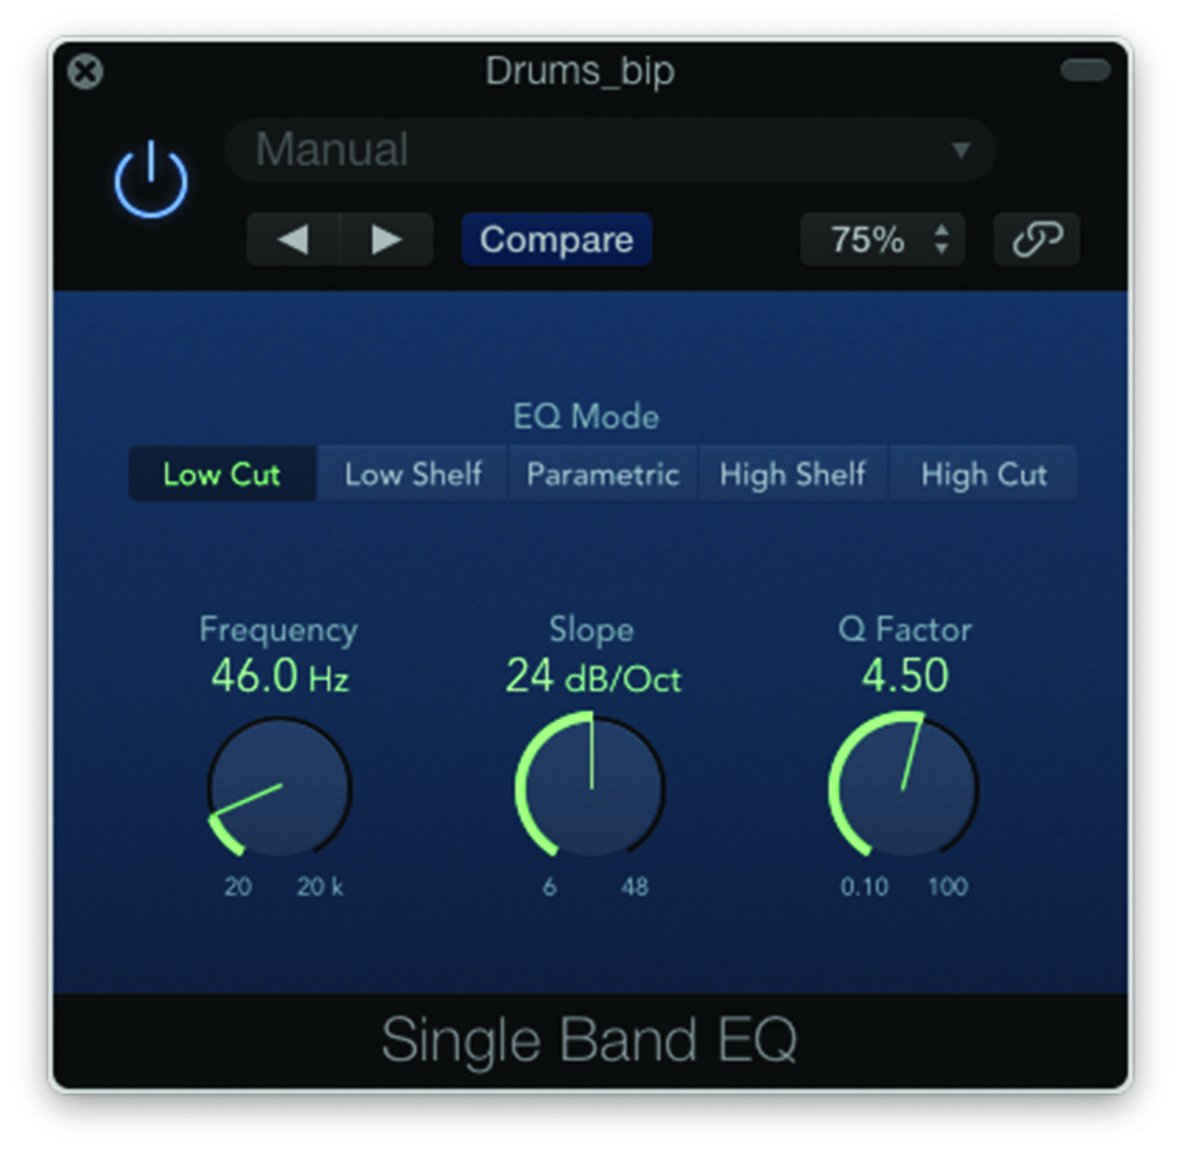
3. This setting is similar to Little Labs’ Voice Of God processor, which uses a resonant high-pass filter to increase bass energy. Set the Frequency to around 40-60Hz: increase Q Factor for added weight.
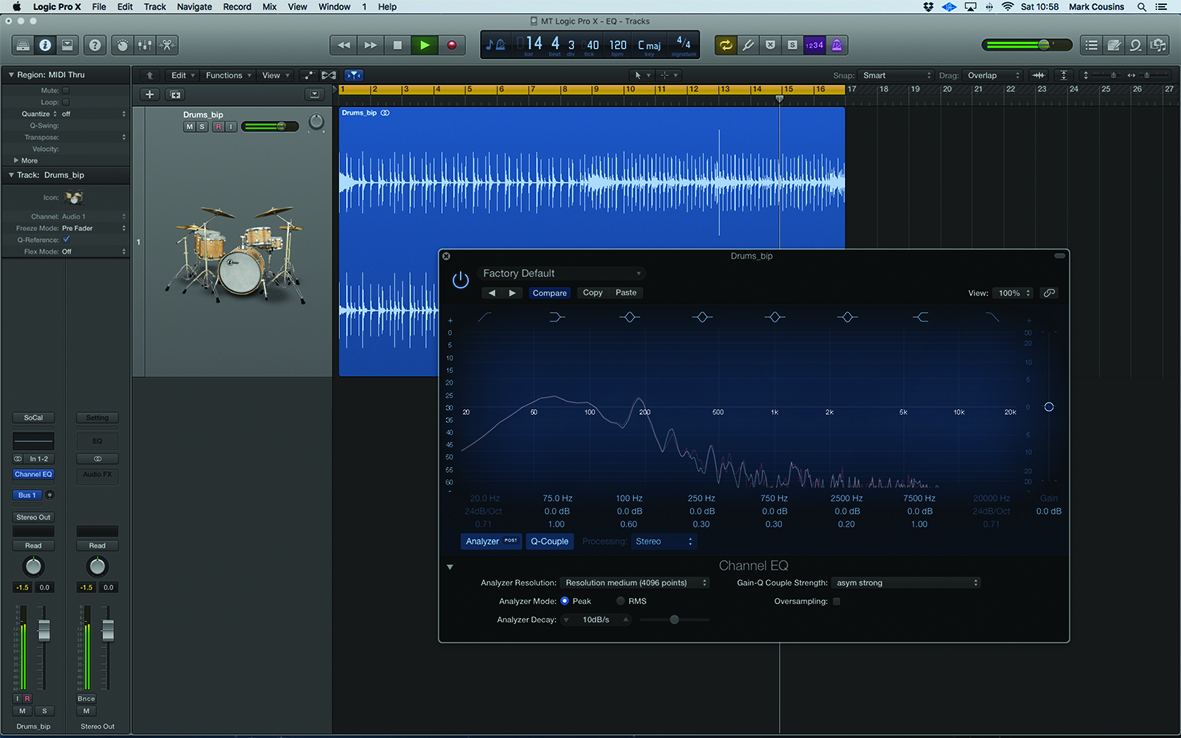
4. The Channel EQ is Logic’s main equaliser, with eight bands to play with. The Analyzer is also useful to guide your EQing, even if you’re clear about the principal frequency areas and how they sound.
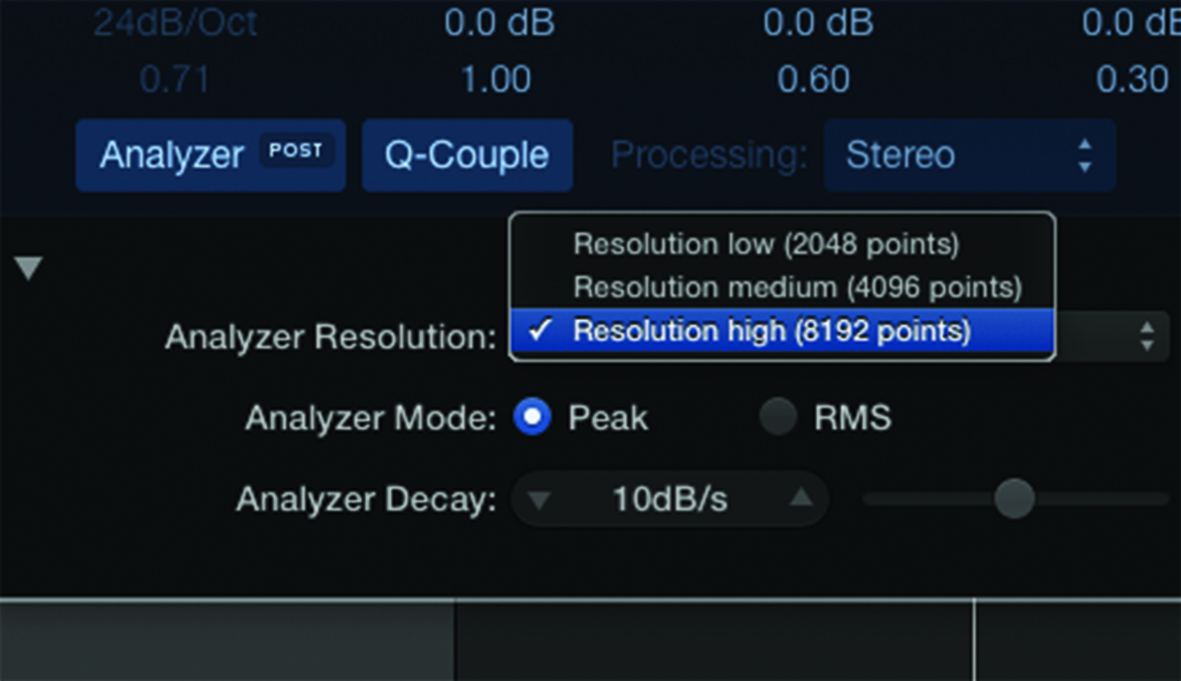
5. The Analyzer’s resolution can be sharpened to identify individual harmonics within the spectral profile. Click on the left axis to shift up or down, making the harmonic spectrum easier to see.
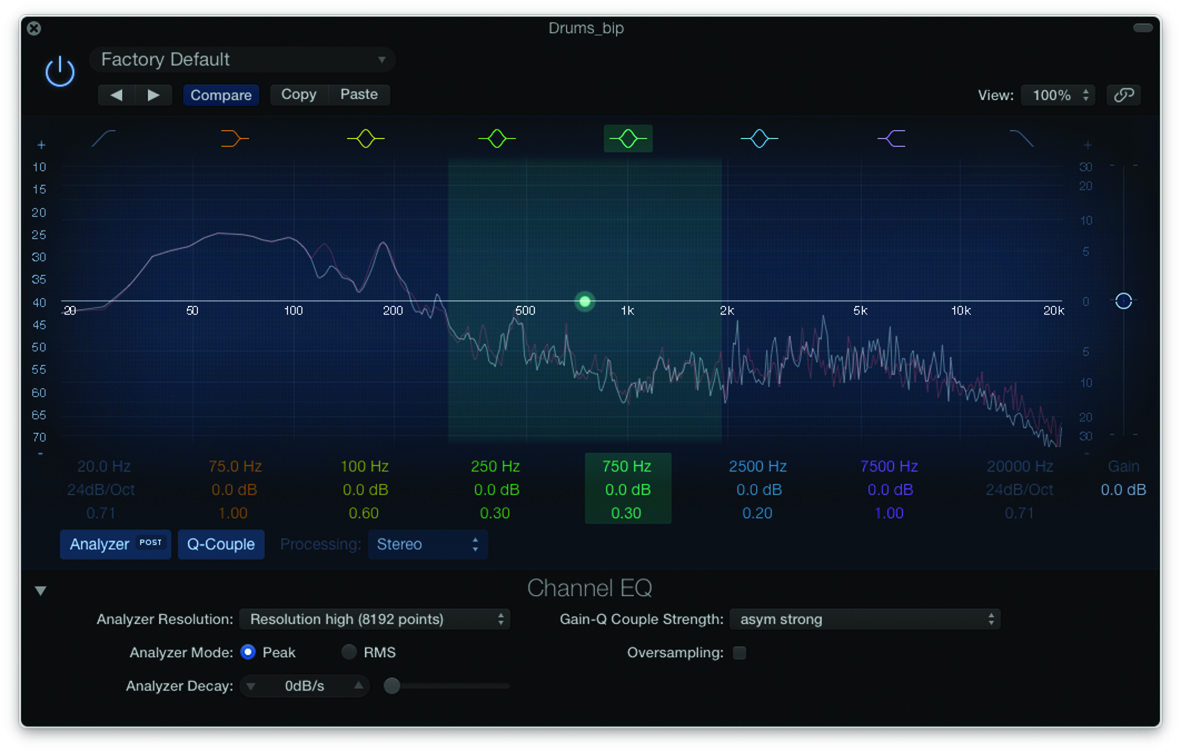
6. One useful trick with the Analyzer is to reduce decay to 0dB/s, so you’ll see the cumulative spectral display over time: which, again, makes harmonics and frequency peaks all the more noticeable.
