Pavement to Preset: Field Recording in Ableton Live
We have more ways than ever to capture the sounds of the world around us. The question then is, what to do with them? Martin Delaney explains how natural sounds can enhance your music making… Field recording is an art form in itself. It can be about capturing immersive, lengthy chunks of natural sounds – […]
We have more ways than ever to capture the sounds of the world around us. The question then is, what to do with them? Martin Delaney explains how natural sounds can enhance your music making…
Field recording is an art form in itself. It can be about capturing immersive, lengthy chunks of natural sounds – the ambience of a specific time and location – or grabbing raw material to recycle into short samples for your music productions.
I made a test recording in my local park for this story, and had to deal with noise from wind, aircraft, revving motorcycles, and a ride-on lawnmower. Try to record at best quality when you can, and consider your options regarding recording in stereo, though it’s arguably less important if you’re recording short samples.
The sound of the streets
We’re working with three copies of the same sample today, although I’ve included some other samples for you to play around with afterwards. Live’s the perfect tool to manipulate the resulting material, it’s fast and easy to import, crop, and quantise audio and manipulate it to get some kind of abstract rhythm going, and, to be honest, if you put a straight 808 or 909 under it, people will dance to the sound of your washing machine or dog barking, anything that loops in a recognisable pattern. The first creative decision is to select a useable region of the recording.
This is likely to be influenced by practical issues, like the need to avoid distortion, or wind noise, or if there are shorter, sharper transients, or longer, more subtle things happening. I’ve already cropped our example clips, to save time and make sure we’re all on the same page with what we’re hearing.
Quantise of solace
Quantising audio is the best! Cmd-U and your samples are locked to the grid. To refine the settings, type shift-Cmd-U and set grid/division options, as well as the Amount value which blends in the time adjustment, if you want to keep it semi-organic sounding. Any warp marker that doesn’t go where you want, just grab it and move it.
Remember you can click and drag to highlight a specific area of a waveform and quantise just that part, or use different values for different sections, without having to divide the clip first.
Live takes a shot at guessing what the original tempo was, and displaying it in the Seg BPM box. Assuming this sounds okay, and assuming you set your project tempo to the same value, you probably won’t hear the warp modes do anything as you change between them.
But if you raise or lower the BPM, you’ll discover each warp mode has a distinctive sound, and specific sets of controls that will accentuate those characteristics. As far as effects go, I try not to swamp the recordings – if I’ve recorded a sample, it’s because I liked the sound I was hearing, so why mess it up? This is an artistic choice though, and you’ll have your own opinion.
I do use stereo effects such as Utility, Gate, EQ Eight or EQ Three, and Auto Filter, to ‘sculpt’ the sound more than transform it. Live 10’s Drum Buss and Echo audio effects are amazing, and they’ve become a big part of my processing toolkit.
In Live it’s easy to stretch audio. If you need a recording to fit a precise length, like matching it to a movie clip, just click and drag the relevant warp markers, and it’ll fit perfectly, and (within reason) preserve audio quality as well.
Live presents so many options for audio manipulation it’s often a matter of ruling things out. It can help to have a set of self-imposed limitations, so you don’t disappear down the sample- rabbit hole and spend months working on a single two-bar loop.
You could flip the entire process on its head and use Live’s Convert Drums/Harmony/Melody to MIDI commands to extract the rhythm and notes from your recordings, and discard the original sounds altogether.
This can be enjoyably unpredictable with field recordings where there might be no identifiable pitch in the audio at all! In the same spirit you could load your field recordings into Max For Live’s Convolution Reverb – so they’re used as reverb sources instead of clips.
Unique character
I’ve produced entire pieces of music using these principles, but more commonly in real-world projects you’d be combining such sounds with more regular instrument sounds or recordings for richer textures. Making your own recordings is not like using pre-recorded libraries, they’ll have a unique character and texture. Even if they’re funky or not so slick in some way, I’d prefer to use original recordings.
Field recording in Ableton Live: step-by-step
1. We’ve provided an Ableton Live set called ‘field recording’ with some example recordings, so you can start playing straight away. Live 10 required – you can download the demo from www.ableton.com if necessary.
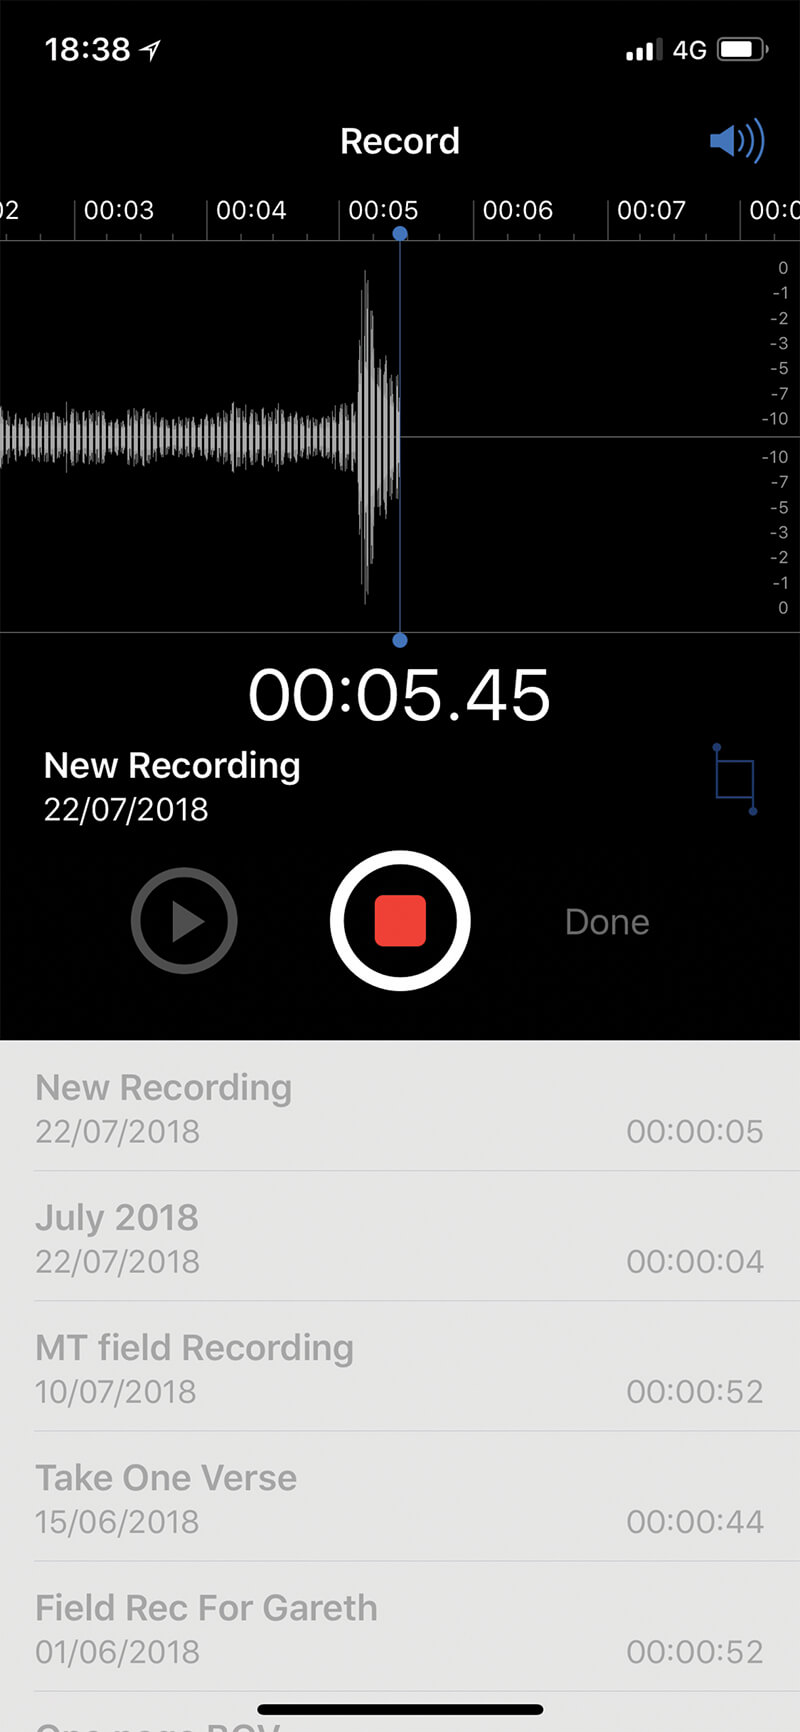
2. These recordings were captured with various recording devices, including iPhones and dedicated recorders from Zoom and Tascam. These days I often use the iPhone X and Voice Memos app for a quick result.
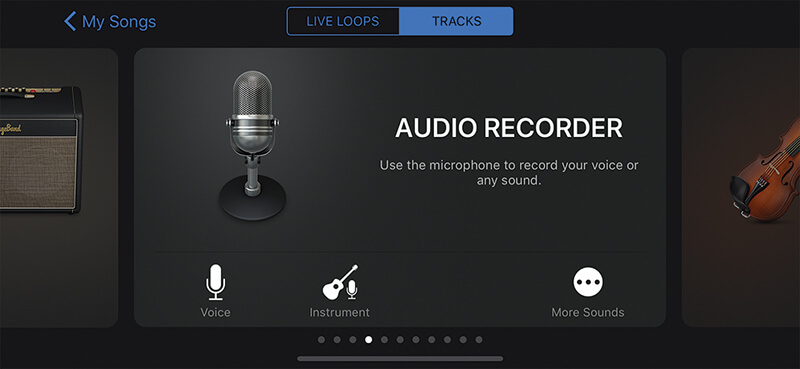
3. iOS 12, which is coming soon, adds record quality settings for the Voice Memos app, previous versions only record to AAC by default. Until then, you’ll need to get another app if that bothers you.
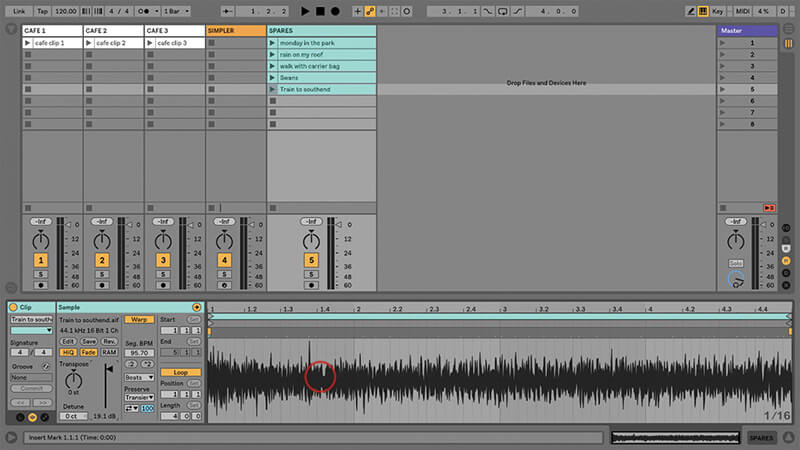
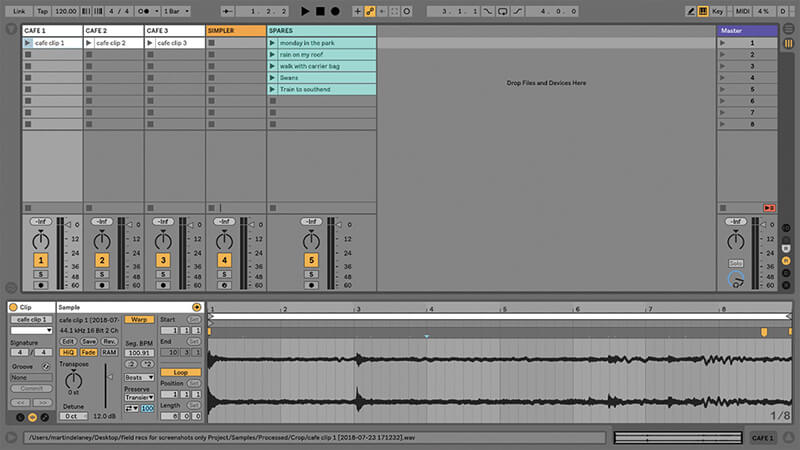
4. Our project contains three copies of the same clip from a cafe, and a few spares, including a park, rain on a roof, birds, and train sounds (I love using train sounds).
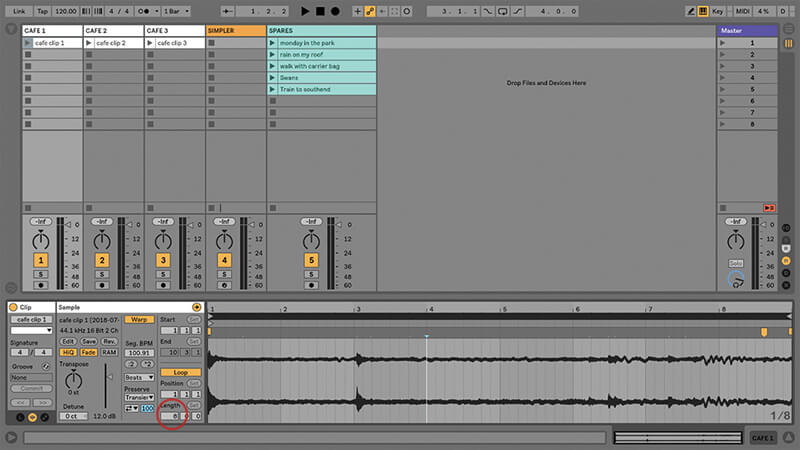
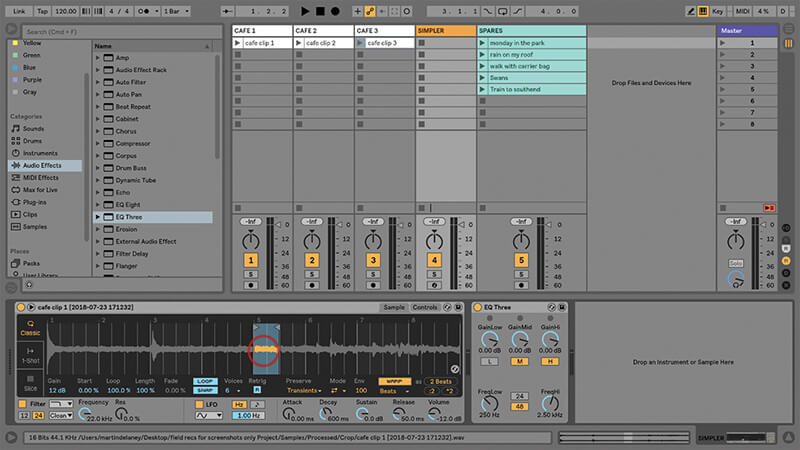
5. We’re working with the cafe clips today, the others are for you to experiment with. I’ve boosted the gain for each clip. Launch and listen to cafe clip 1, it’s currently cropped to eight bars.
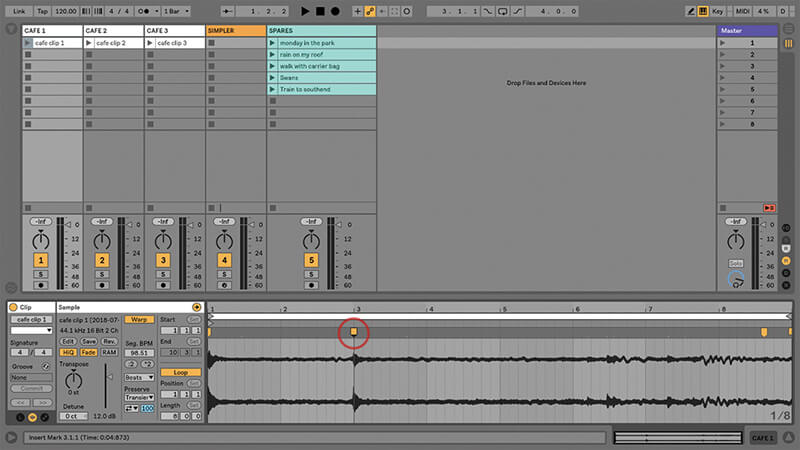
6. You’ll see and hear there are some obvious peaks in the waveform. Let’s try to make a beat from this. Double click above the peak near 3.1.1 and drag that so it snaps to 3.1.1 exactly.

Beware wind If you’re planning to record outdoors, one of the biggest challenges will be wind. Even the slightest breeze can trash your recordings as you can’t easily edit out wind noise. You absolutely must wear headphones if you’re making a critical recording outdoors, so you can check for wind.
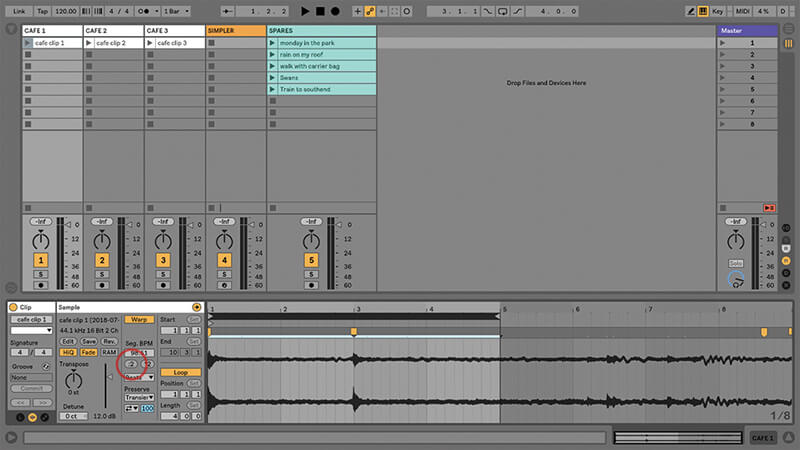
7. Let’s use the loop brace to highlight only bars 1-4, shortening the loop. This could be a beat, but it’s too slow. Click twice on the ‘Halve Original Tempo’ button to get something more usable.

8. Make sure the clip is set to Beats Warp Mode. Click on the little arrow pop-up below ‘Preserve Transients’ at the bottom of the sample box and choose the single, right-pointing, arrow.
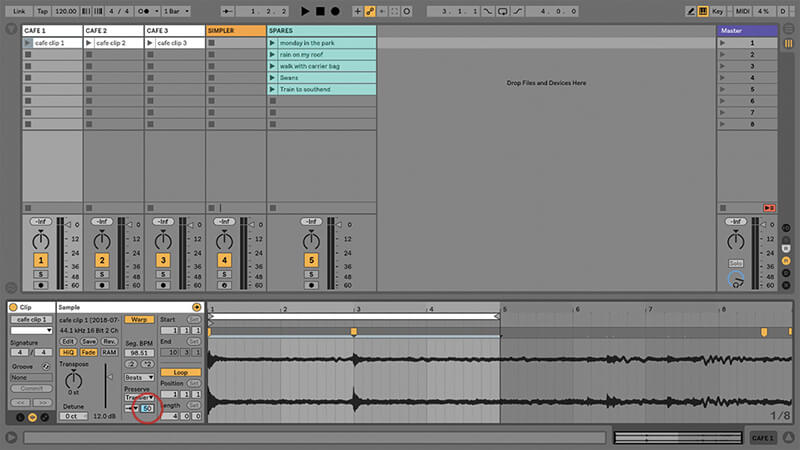
9. In the box next to that, set a value of 50. You’ll hear that we’ve gated the transients to get more of a percussive-type sound, with proper silence in-between. Now we have a ‘beat’.
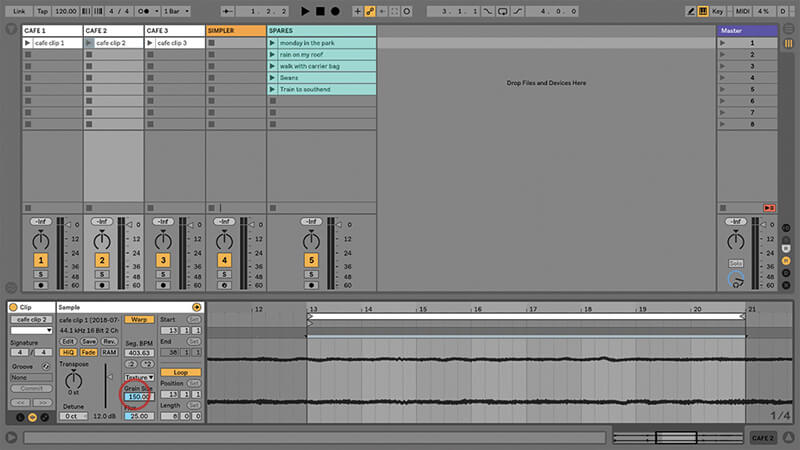
10. Go to clip 2 and set the loop brace around bars 4-6. Click the ‘Double Original Tempo’ button twice, making an eight-bar loop. Change the warp mode to Texture and set Grain Size to 150.
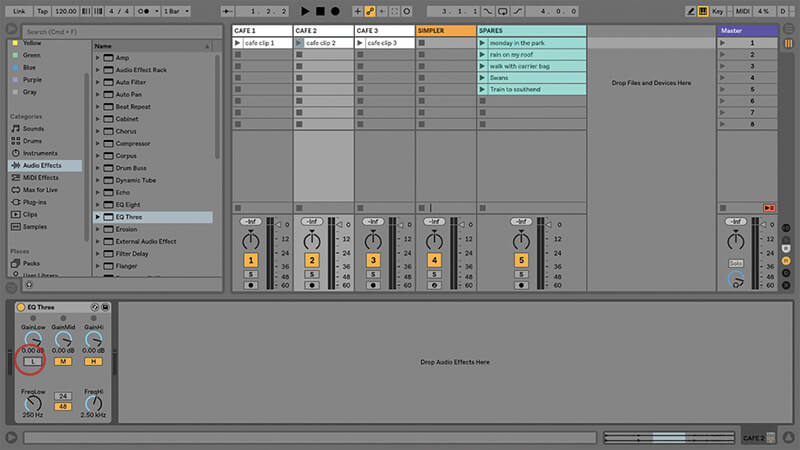
11. That’ll be our pad sound. Drop EQ Three onto the track and click the L kill switch, we want to cut the bass from this sound and thin out the pad.
12. Set clip 3 to loop from 5.1.1 for two beats. Drag it into the Simpler in track 4. Turn on Warp and Loop in Simpler, and play your keyboard from C3 and use it as a lead part.
Windshield The other thing you’re going to need is a windshield; one of those fluffy things that you see over video camera microphones. They look kind of funny, but nothing else works as well – a vital investment for any field recordist.
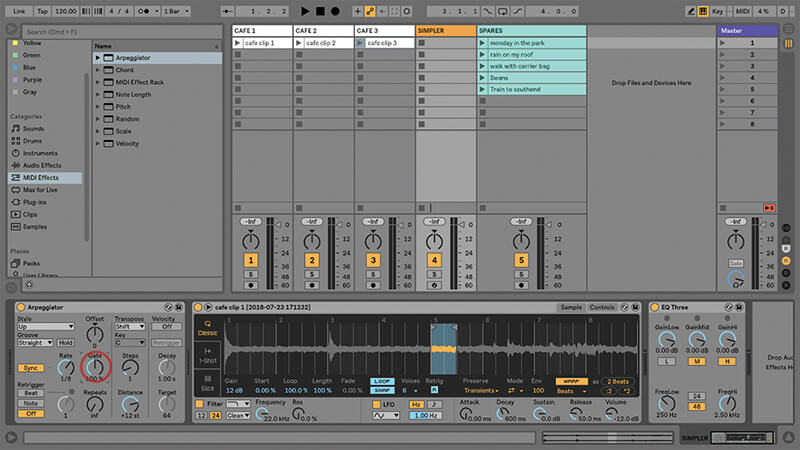
13. How well this works depends on the sample content you’re using. You can make it more interesting by adding MIDI effect devices like Arpeggiator. Try Steps to 1, Rate 1/8, and Gate 100%.
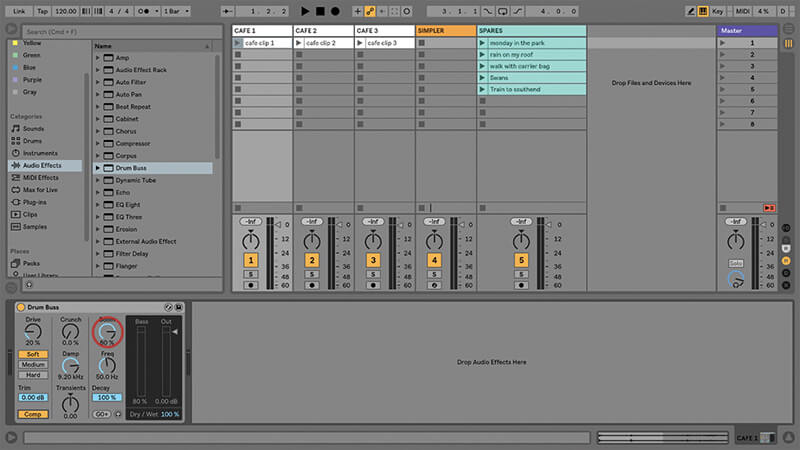
14. Try Drum Buss on clip 1, set Boom to 80%, and turn on Comp. Then add some reverb, and it’s going to feel more like a regular drum track, if that’s what you want.

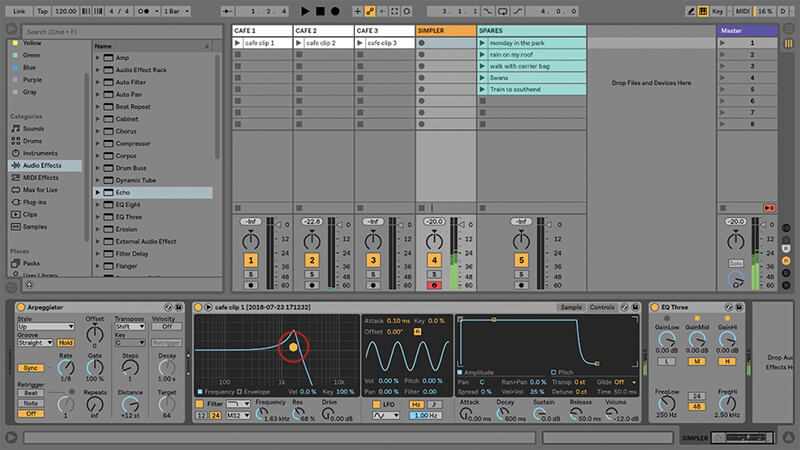
15. For clip 2, the pad sound, add some delay. Live 10’s new Echo tape delay style effect is great for this, especially if you mix in a bit of noise and tape wobble!
16. For clip 3, residing in Simpler – experiment with Simpler’s on-board filter, they’re all good, though I’m partial to the MS2 model. Click on the Controls tab so you can better visual what’s happening.
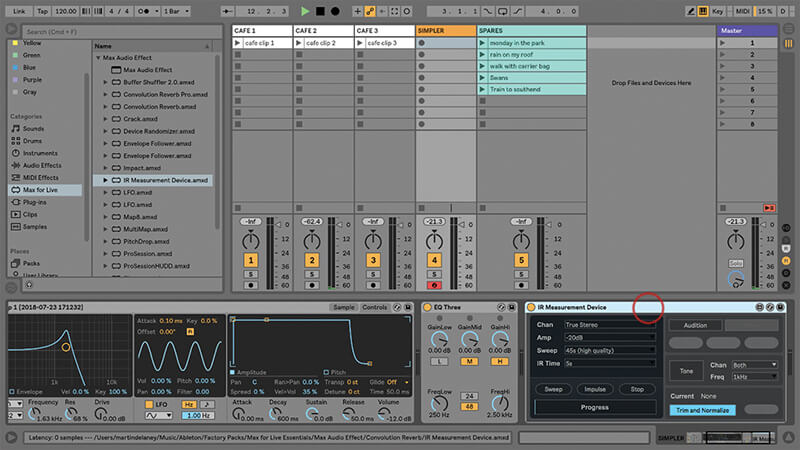
17. We must mention convolution reverbs – these are themselves based on ‘sampling’ real-world environments, so thematically they fit very well into this topic. You can create your own spaces using Live’s Measurement Tool device.
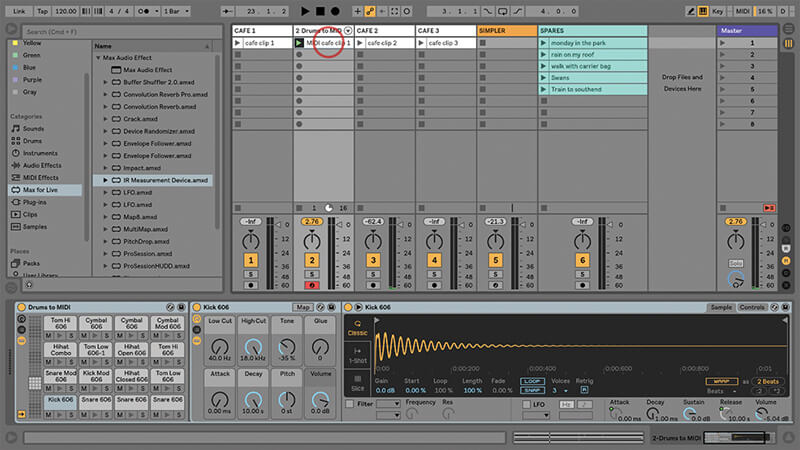
18. If you really, really want to branch out a bit more, you could try the Convert Drums/Harmony/Melody to MIDI commands to create new MIDI parts that you can assign different sounds to.