FL Studio Tutorial: Become A Power User 4 – Audio Recording in FL Studio
Our Power User series here at MusicTech.net continues with the fourth part of Hollin Jones’s in-depth look at the capabilities of FL Studio. This time we’re looking at Audio Recording in it’s various forms… FL Studio comes in a number of editions and the Producer Edition is the one that has full audio tracking and […]
Our Power User series here at MusicTech.net continues with the fourth part of Hollin Jones’s in-depth look at the capabilities of FL Studio. This time we’re looking at Audio Recording in it’s various forms…
FL Studio comes in a number of editions and the Producer Edition is the one that has full audio tracking and recording capabilities. As good a MIDI sequencer as FL Studio is, most users will find it incredibly useful to be able to capture audio parts into their projects, whether it’s a simple guitar line, a full vocal track or even multitracking a live drum kit or a band. It’s often in blending real and synthesized sounds that the most interesting end results are achieved, and you can of course process any audio you record using the many excellent audio effects in the software.
FL Studio Producer Edition has two main methods for recording audio, plus a third technique for printing audio internally. If you are working with one or just a couple of audio parts, or working with a loop, it’s recommended to use the Edison recorder module. This acts as a sort of mini wave recorded and editor and has a range of sample editing tools. It can then be triggered inside the Playlist, a bit like a very advanced version of a MIDI keyboard / hardware sampler setup. Naturally you can use as many instances of Edison as you like.
If you are recording longer parts or multitracking audio through a multi-input audio interface, perhaps a drum kit or several musicians at once, it can be a better idea to record arm mixer tracks in the Playlist and record directly into these. This is a more conventional, linear approach to recording and is preferred by some. Although it doesn’t have all the bells and whistles of Edison, it’s better for some kinds of audio recording tasks. Last but not least, using the software’s internal routing features you can “freeze” or print down audio tracks internally to new, simple audio parts. This is really useful for conserving CPU power on tracks where you might have lots of effects going, so that you can lower your buffer size for more latency-free recording of new parts. However you approach audio recording in FL Studio Producer Edition, there’s sure to be something for you to learn, so read on…
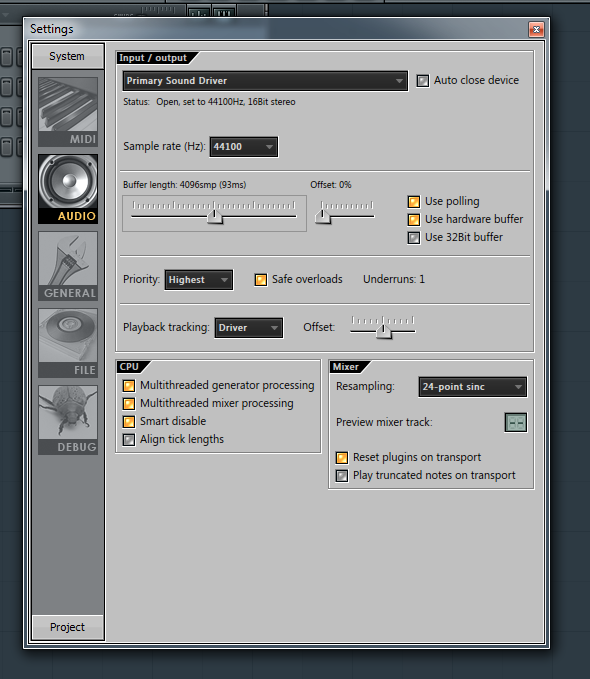
1: Although FL Studio should record from your computer’s built-in soundcard, you really need to use a dedicated audio interface for recording and playback, even if this is just a simple 2×2 USB device. To record multiple tracks at once you will need the corresponding number of physical inputs. Go to the Audio Preferences and check your device is set up.
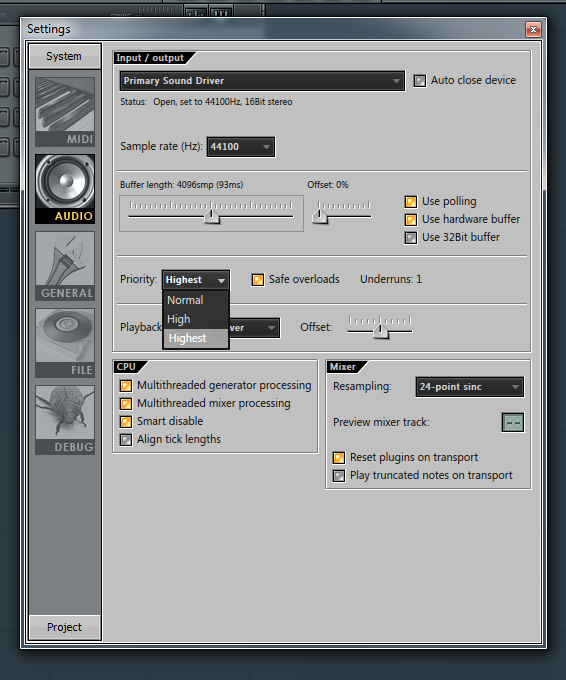
2: Set your buffer size so that you get as little latency as possible when playing a sound in from a mic or a guitar. Generally this means a smaller buffer. Remember that to avoid feedback you will need to switch off any speakers while recording and use headphones to monitor on. The exception is where you DI an instrument, say by plugging a guitar straight into the interface.
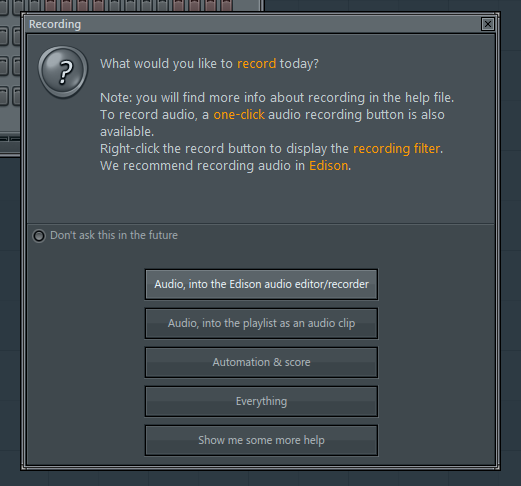
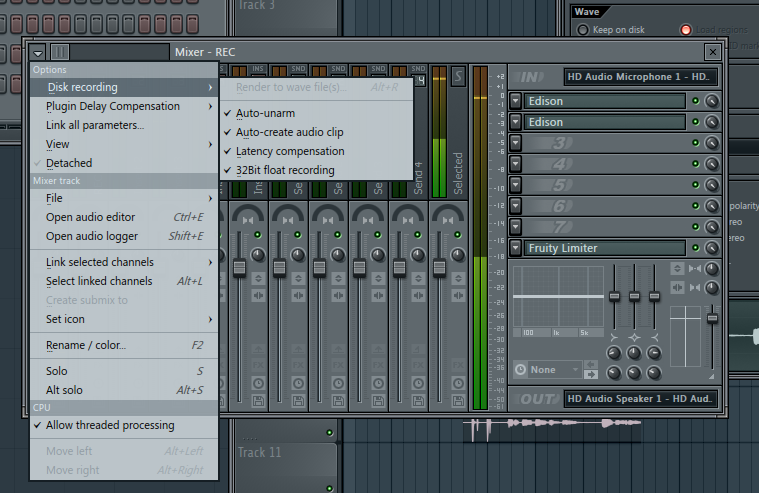
3: Unless you have customised your setup you should find Edison inside the “Misc” folder of your Plugin Database in the Browser. First we will look at recording into Edison, so create an instance by dragging it into your project. Or, click on the Record button on the Transport panel to be shown recording options.
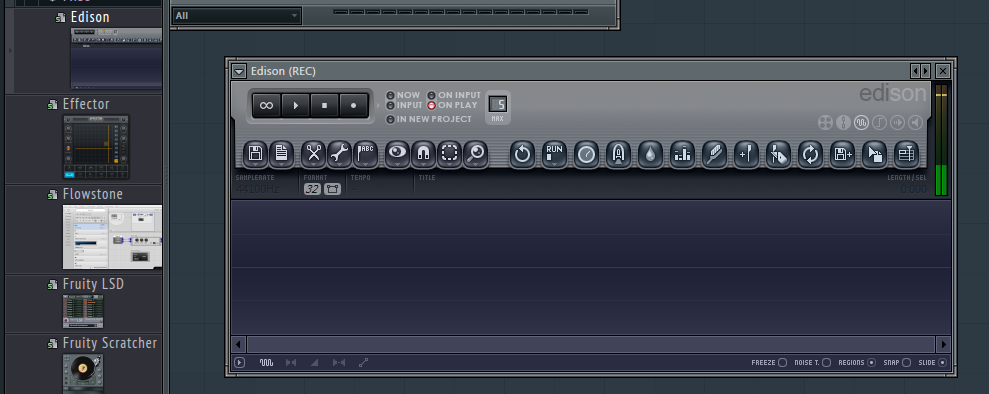
4: Click to choose to record into the Edison module and one will be created, if you haven’t already created one. FL Studio will show you audio input level at the top left and also in the mixer if you happen to have that open. Check your levels : you should be aiming for a decent signal, into the yellow but not hitting the red at the top.
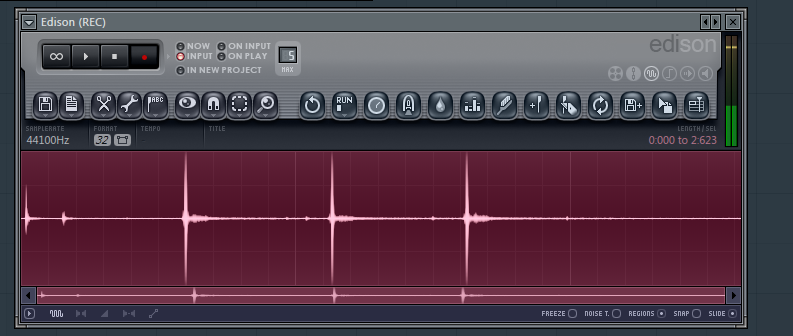
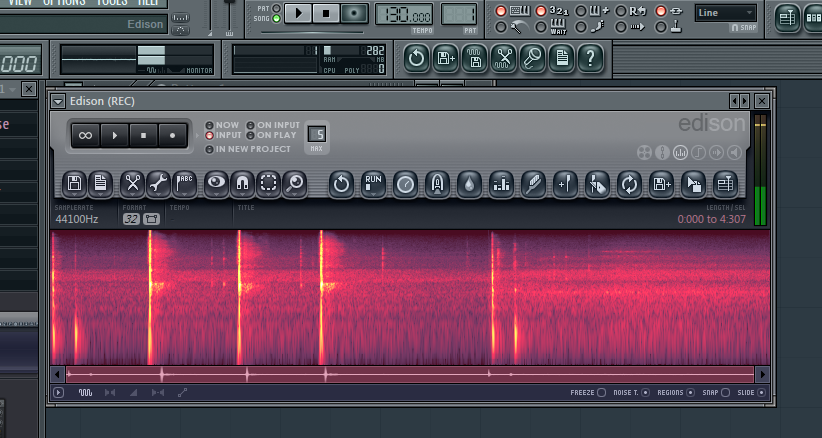
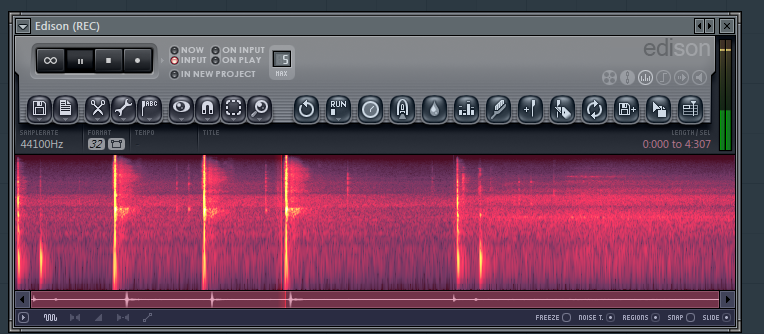
5: There are various options for how to record : on input, on playback or “now” being the main ones. To record along with a click, activate the metronome or have a beat playing in a track, then press the record button in Edison and perform. The sounds you make will be captured and you will see the waveform display update.
6: The other options can be useful to know about. “On input” allows you to set a threshold trigger level by ledt clicking on the peak meter and dragging up and down. You will see the level displayed in the Info area at the top left of the app. “On Play” will start recording when play is pressed on the transport : this mode is useful for recording multiple takes.
7: In the “Max” box in Edison you can set the maximum recording time. Since it operates in RAM, it’s better suited to working with shorter sections of audio than long takes. For that, use the Mixer recording mode. Activate the Loop button on Edison’s transport if you want to loop playback within the module.
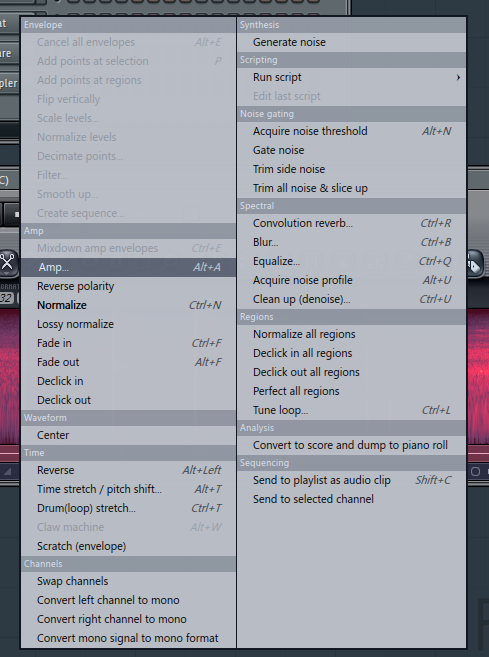
8: There are lots of tools onboard Edison to work with your audio. If you click on the button with the spanner icon you can access arange of functions including time and pitch stretching, normalization, noise gating and more. Interestingly, at the bottom of this list is the option to analyse the clip and send it to the Piano Roll as Score data.
9: Under the Sequencing section at the base of this menu is an option to send the audio clip to the playlist or to send it to the selected channel. These are both ways to take captured and edited audio clips and make them part of a project. Use Edison to work on audio clips prior to sending them elsewhere in a project.
Continue to Part 2 >
