FL Studio Tutorial: Become A Power User 4 – Audio Recording Part 2
Hollin Jones continues his investigation into the best methods of audio recording in FL Studio…. 10: At the bottom left corner of Edison is a tiny button that, when clicked, provides access to a File menu. As well as getting to the audio processing functions from the previous step, this allows you to import a […]
Hollin Jones continues his investigation into the best methods of audio recording in FL Studio….
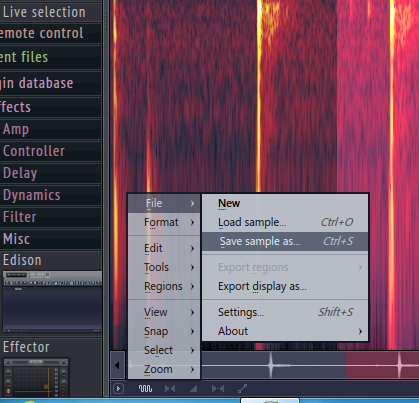
10: At the bottom left corner of Edison is a tiny button that, when clicked, provides access to a File menu. As well as getting to the audio processing functions from the previous step, this allows you to import a sample from your hard drive into Edison and also export the current sample as a file out to your desktop.
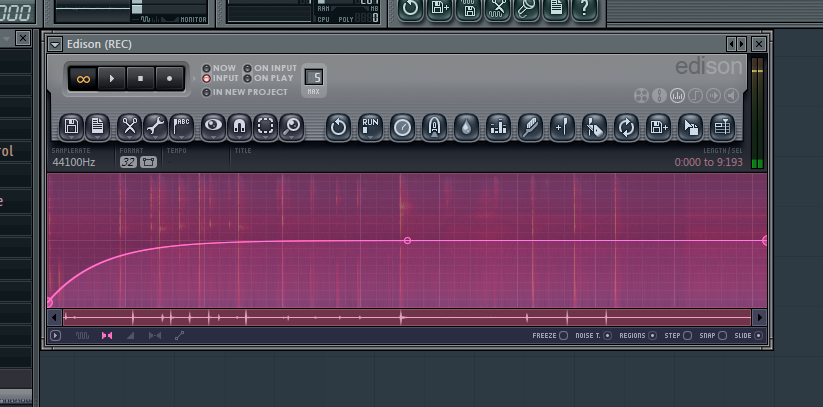
11: To edit other parameters of an audio part such as envelopes, use the tiny buttons running underneath the main waveform display. Here you can set things like paning, volume and stereo envelopes as well as an all-purpose envelope which can be assigned to different parameters. Use these for things like setting volume fades or pans within a clip independently of the main mixer.
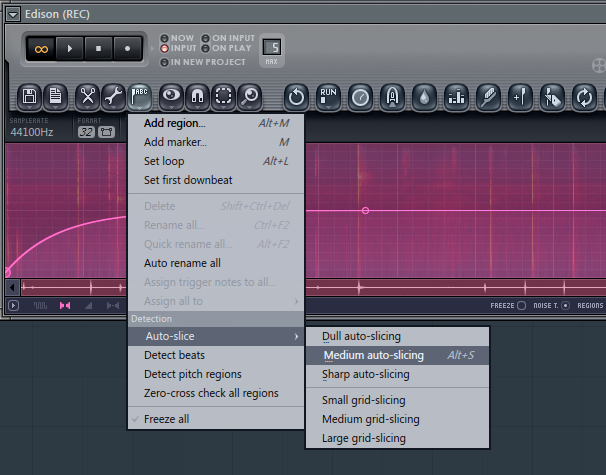
12: Use Region tools to slice and analyse audio clips so that they can be made more flexible within your project. In Edison’s toolbar, click the Regions button to reveal the options. These include audo slicing, loop selection and the ability to manually identify a downbeat. These will help Fl Studio more accurately incorporate rhythmic and other loops into a project.
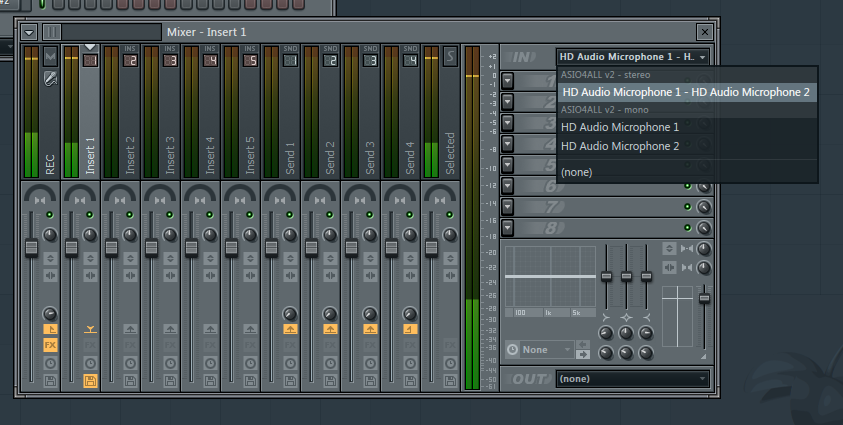
13: The second main way to record audio is to place it straight into a Mixer track. You can do this by using the shortcut of clicking on the Record icon in the Transport and choosing it, or opening the Mixer. For a given track, select it and then go to the Input menu at the top right of the mixer and choose the relevant input. To multitrack, assign each input to its own mixer track.
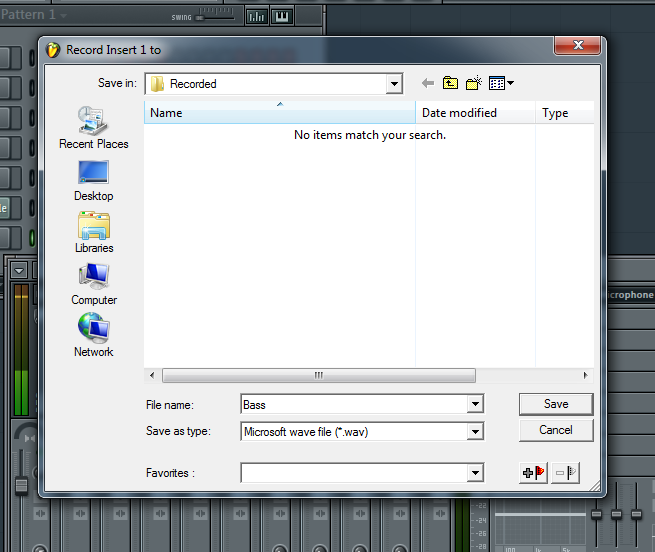
14: Click on the tiny disk icon at the base of an audio track and you will be prompted to set a record destination location for the audio that is captured to that track. This can be handy for sending different takes to different locations. All drums to one folder for example, all vocals to another and so on.
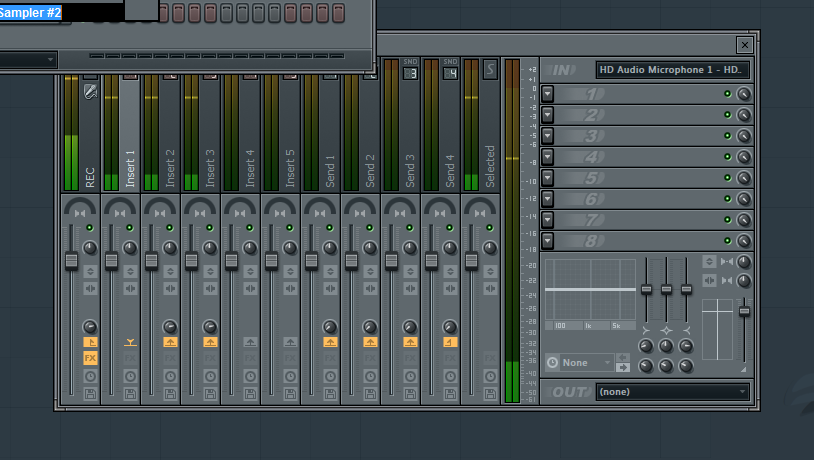
15: It’s possible to send the signal from one channel directly to another by using the Send button in the mixer. Using this trick you could for example record several versions of the same take, but process each one differently using effects. It would also be possible to set a separate record location for each one, giving you more control over your recordings.
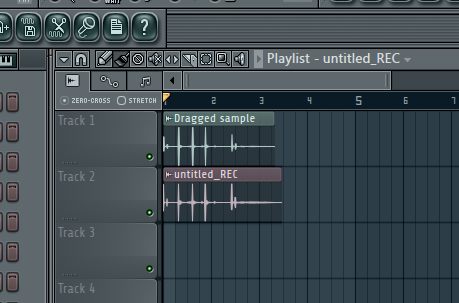
16: Now when you press Record in the transport your audio is captured directly as a clip into the Playlist. This is perfect for longer recordings since it records directly to disk. The tools that you use to edit MIDI clips in the playlist can also be used to manipulate the audio takes.
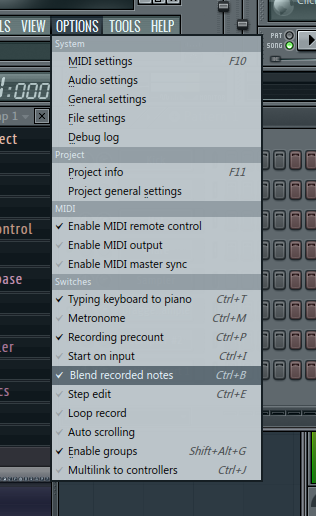
17: To record in a loop in the Playlist, do as follows. Go to the Recording Panel and select the button for Blend recording / Overdub. Select Song mode and then create a loop area using the markers in the Playlist. To toggle audibility of recorded parts as you loop, go to Options and turn Blend Recorded Notes on or off.
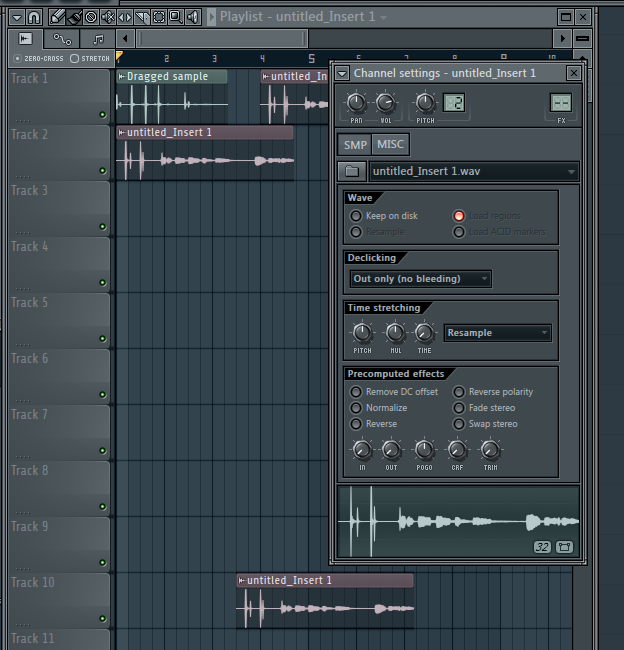
18:To edit a recorded audio clip in the Playlist, simply double click it and you will open its control panel from where you can change almost anything about it. From the waveform display at the base of this window you can drag and drop the clip anywhere into the Playlist area to duplicate it.
