FL Studio Tutorial: Become a Power User 7 – Working With Bass.
The power and energy of almost any piece of music comes primarily from the beats and the bass, and this is especially true of electronic music. Last time around we looked at beats so now Hollin Jones explores working with bottom end in FL Studio… Many of the synths that come bundled with the software […]

The power and energy of almost any piece of music comes primarily from the beats and the bass, and this is especially true of electronic music. Last time around we looked at beats so now Hollin Jones explores working with bottom end in FL Studio…
Many of the synths that come bundled with the software are great for making bass sounds, and of course it also supports any specialised third-party models you care to install. Synths tend to be particularly good at bass since they can easily generate low frequencies and as the sound remains virtual, there are no distortion issues to deal with. Even the more generic synths have bass patches and you can use them to start a sound from scratch, building your own basses as you go.
If you’re after a more realistic bass sound for your productions you could look at a specialised plug-in like Spectrasonics’ Trilian or one of the many Kontakt-based electric basses from Native Instruments, either of which would do a better job than the simple BooBass that comes with FL Studio. If you’re looking to record your own bass parts you can do that live as well of course, and whichever route you take, there are plenty of tools onboard to help you get a bigger, fuller bass sound. These include EQ and compression which are the two you will primarily use, but also things like amp simulation which can help to add realism and power to your tracks.
The key thing when mixing bass is to retain as much energy as possible but without either letting it overpower the rest of the rack or reining it in so much that you suck the life out of it. You might use the sidechain compression feature of a plug-in to selectively compress only certain parts of a bass signal, or indeed a multiband compressor to rein in certain elements of it while leaving others intact. However you approach bass in FL Studio, read on to unlock its secrets…
Bass Making
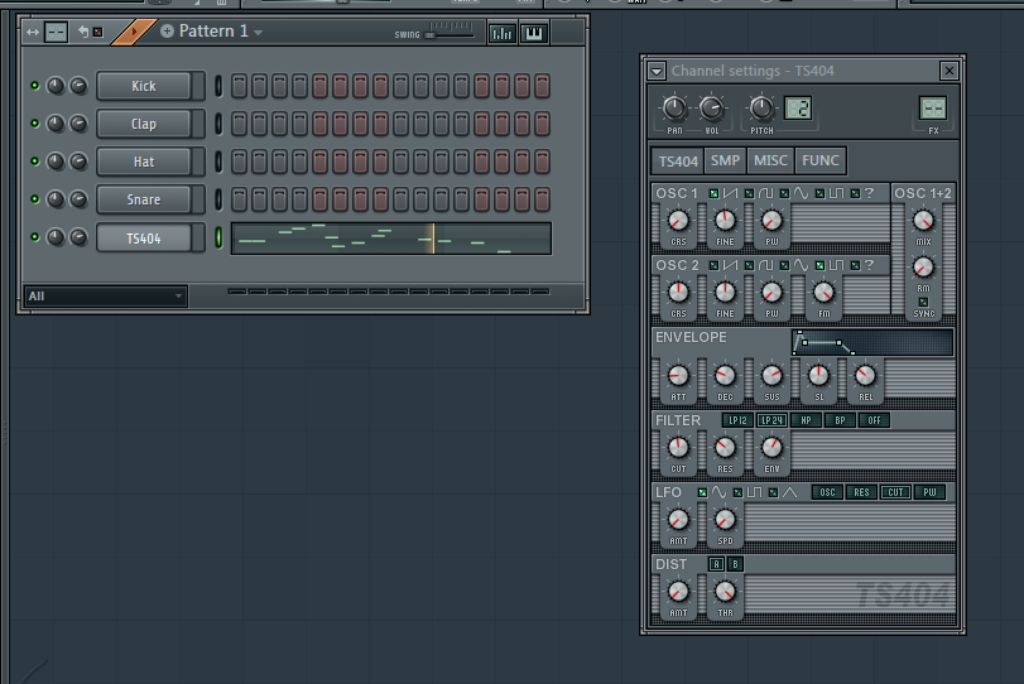
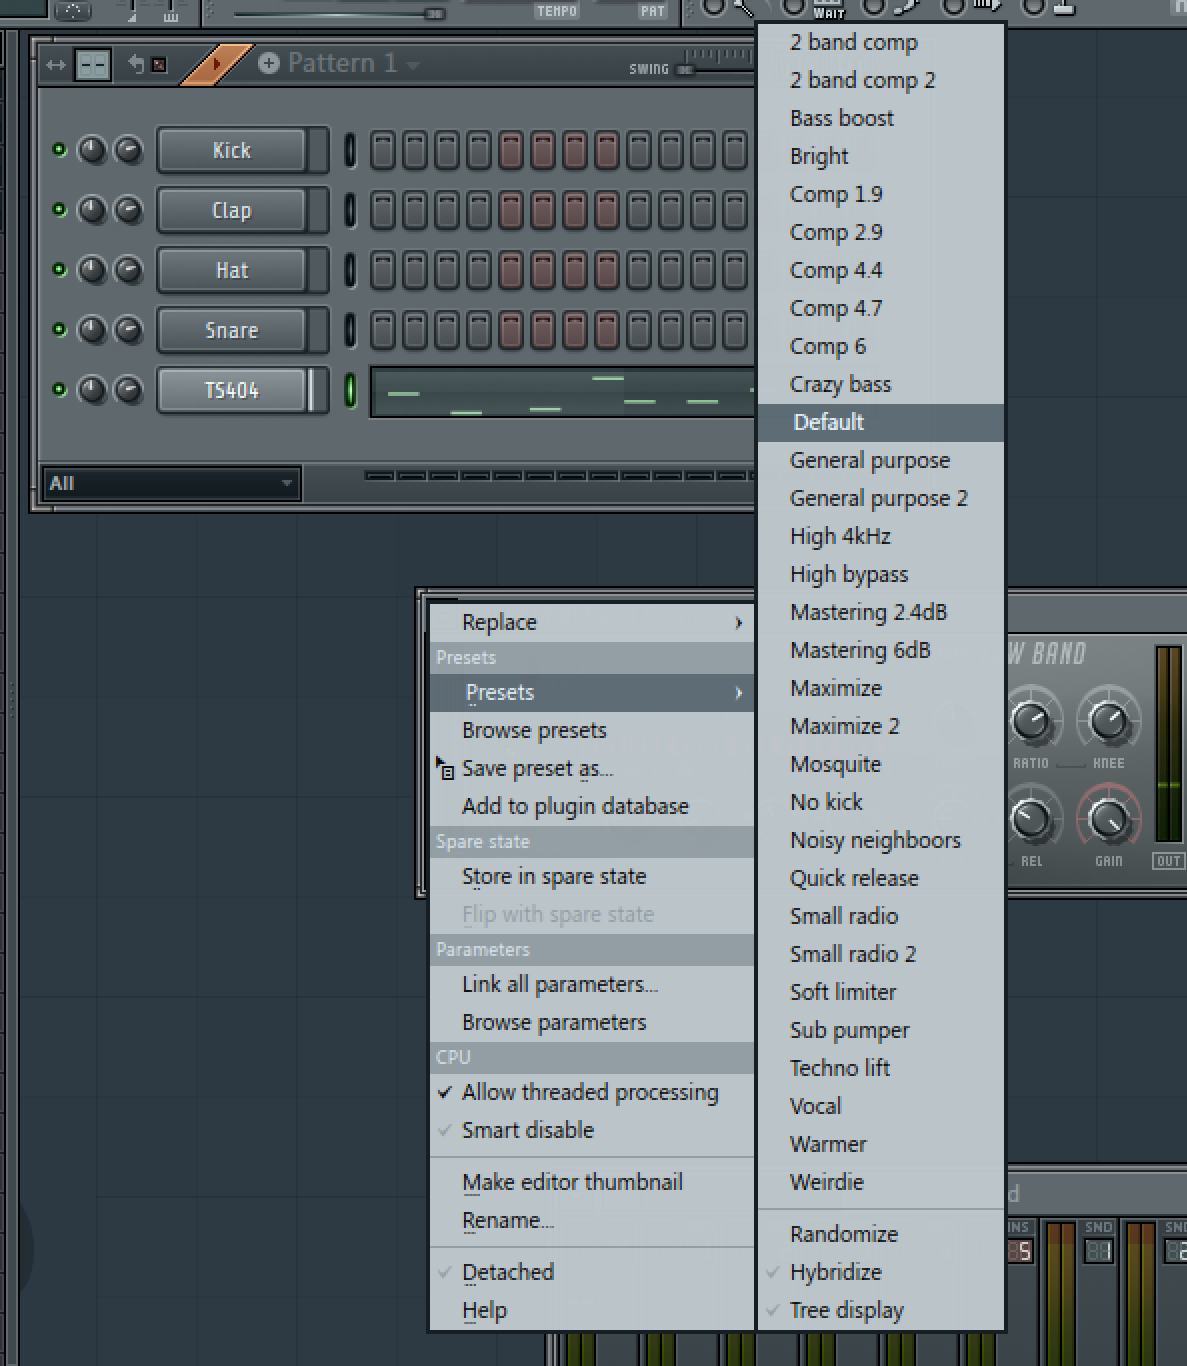
1: First off you’ll want to find a bass sound that works for you. Many of FL Studio’s bundled synths have bass patches or the ability to generate bass sounds. Here we have loaded an instance of the classic TS 404 bass synthesizer, chosen a patch and programmed in some notes so it plays back.
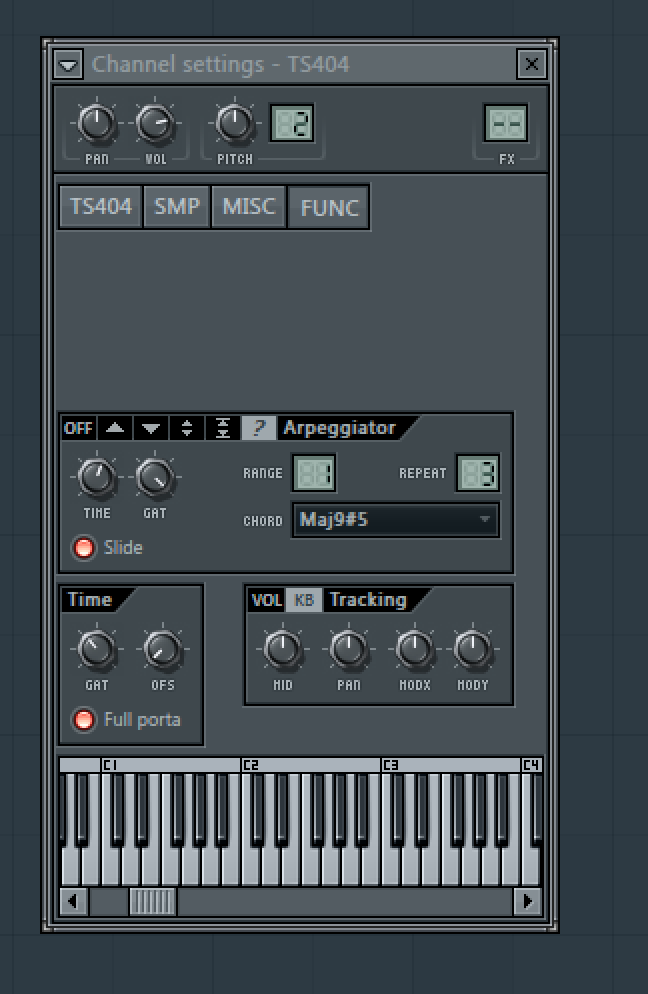
2: If you like your bass parts a little old school you can always open the Channel Settings window for this or any instrument and go to the Function tab. There you will find an arpeggiator section where you can activate and configure arpeggiation and repeats for the part, giving it a more classic effect.
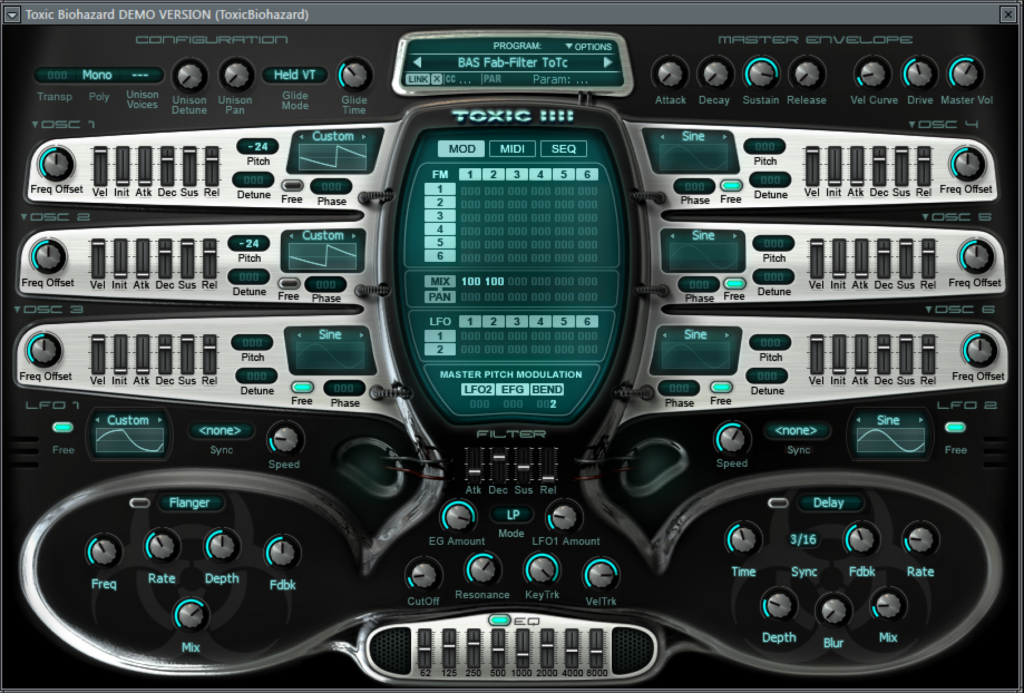
3: If you’re after something a bit more complex, try loading up an instance of the Toxic Biohazard synth and choosing a bass patch. This is rather more meaty and offers options like the ability to add multiple effects onboard and use up to six oscillators to create a truly enormous bass sound. There’s also a mod matrix for extra flexibility.
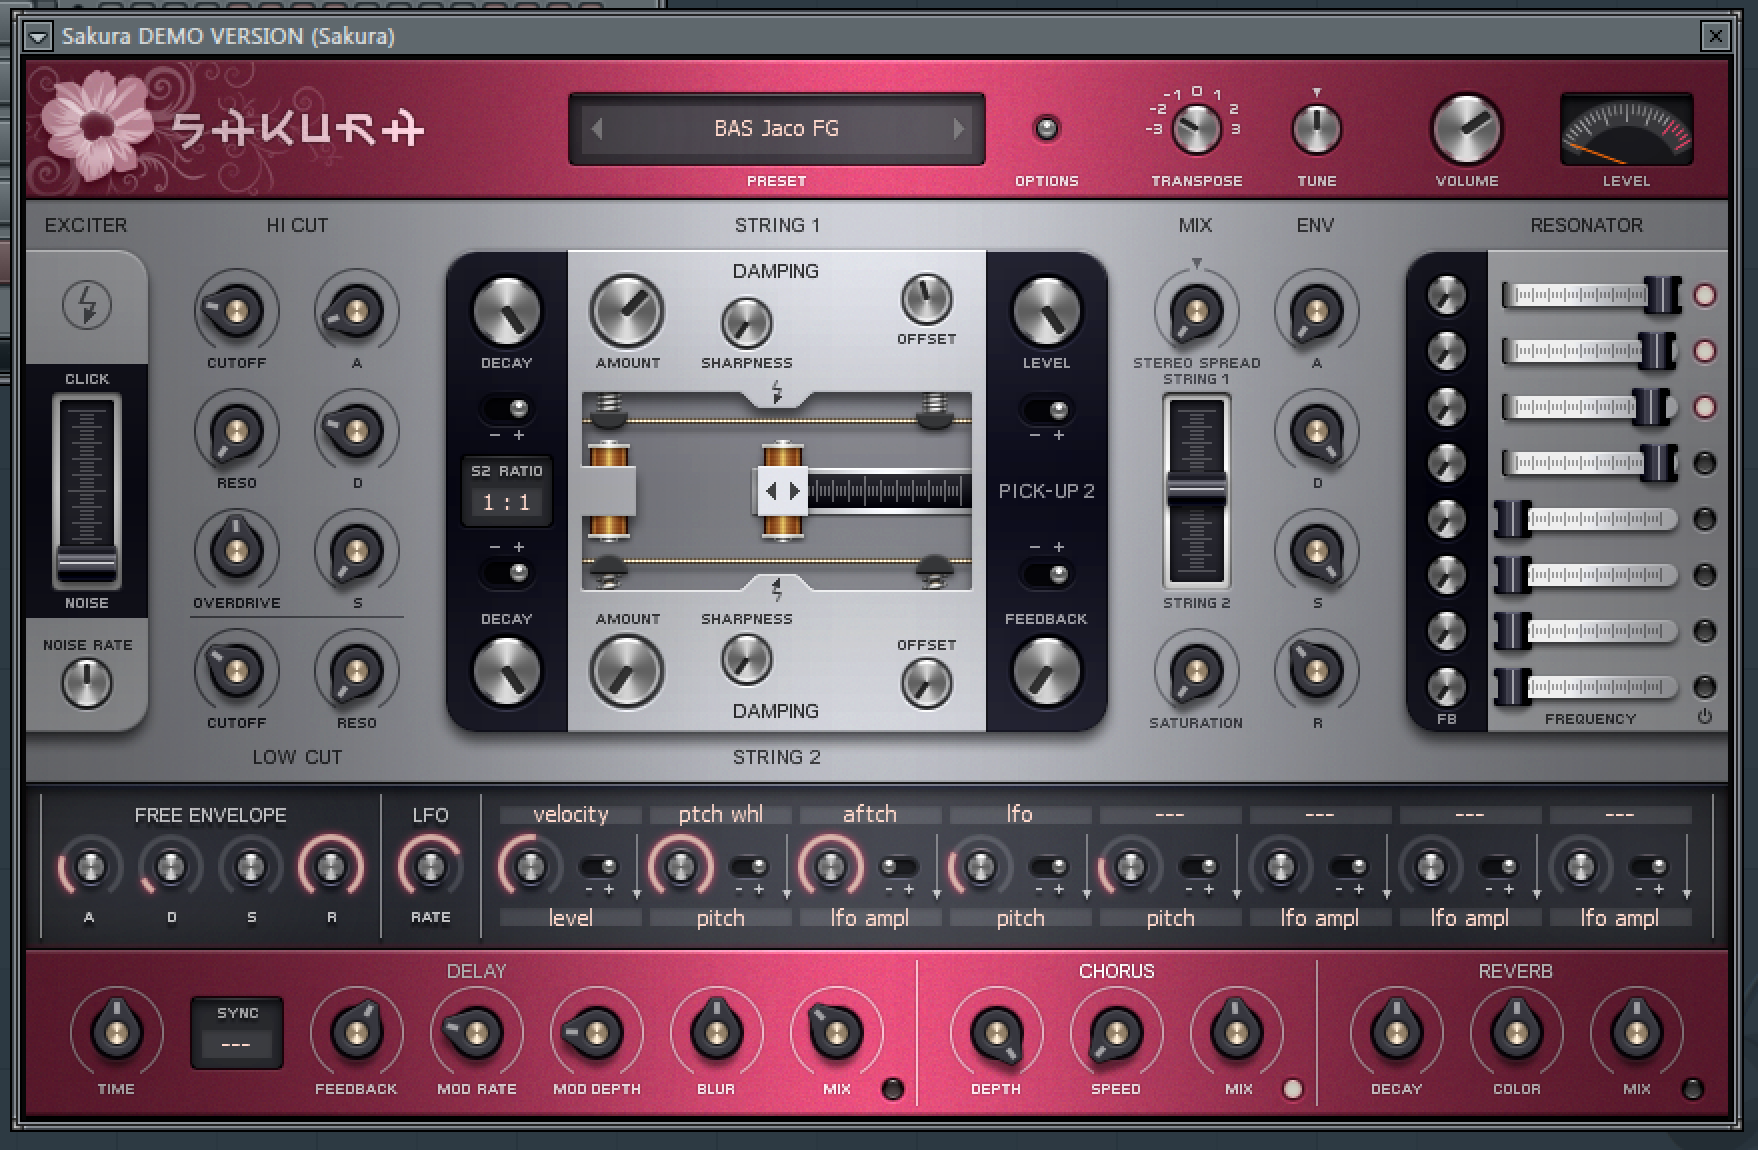
4: For a more realistic bass sound, investigate the Sakura bass plug-in. This has some excellent onboard controls for shaping your bass tone including a string damping section, resonator control, high and low cut and some built-in effects. It’s a good alternative to using a real bass guitar and you can program it using the MIDI tools supplied.
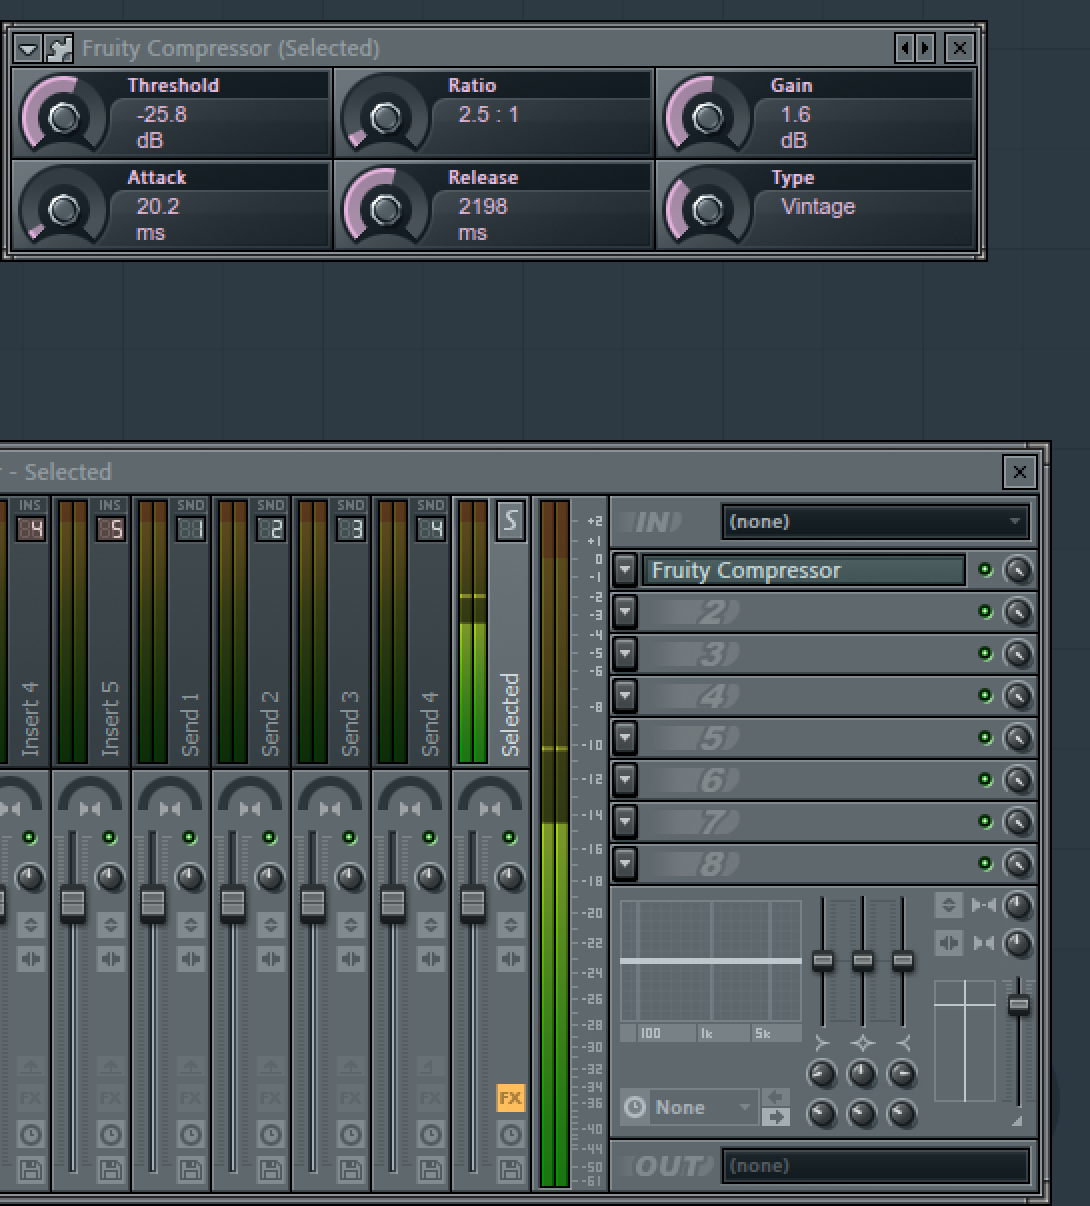
5: You can also record your own bass tracks as live audio, or use a third party plug-in. Once you have your part recorded you will want to start to shape the bass sound to make it fit into the track properly. Bass should be weighty but not too dominant. Start by going to the effect preset chooser and then open the mixer view. Locate a compressor of your choosing – we have chosen the Fruity Compressor – and drop it onto the instrument’s channel.
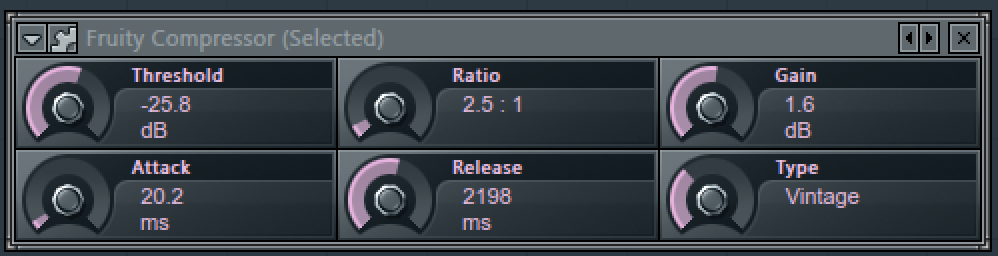
6: Your settings will depend entirely on the kind of bass sound you are working with but for this short, electronic house style bass we want to use some relatively gentle compression, say a ratio of around 2.5:1 and a fairly fast attack and release since the sound is short and sharp. For more acoustic sounds, use a slower release.
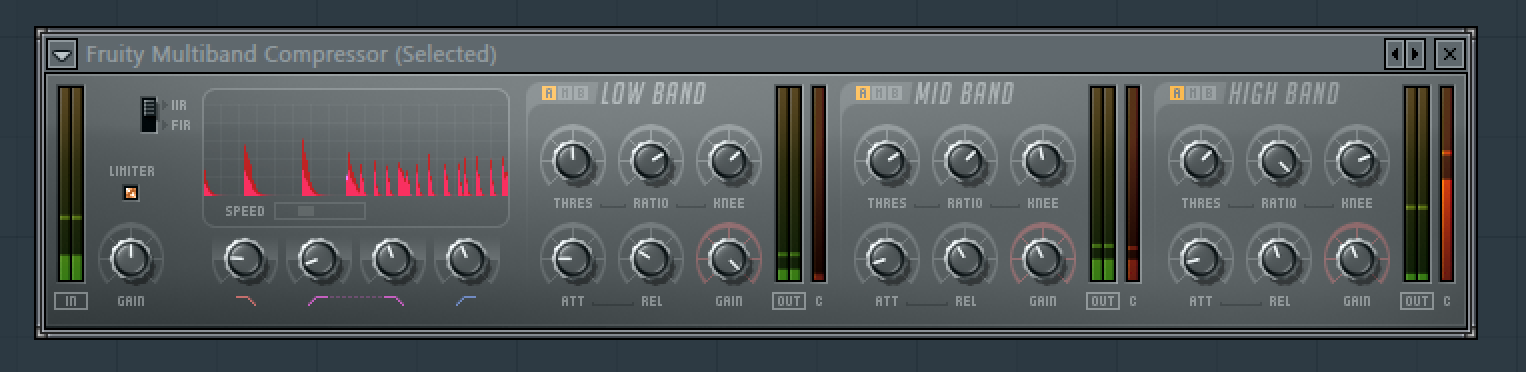
7: Your aim should be to rein the bass in a little but without sucking the life out of it. If a simple compressor isn’t working, try a multiband compressor like FL’s own Fruity model. This allows you to apply different levels of compression to the low, mid and high bands, taming unruly frequencies while letting others breathe more naturally.
8: There are a range of presets supplied, some of which are bass-specific. For synthesized basses you might find yourself compressing the very bottom end of the signal more heavily while leaving the mid and upper ranges more free to cut through into the mix. The nature of sub bass frequencies means that they can be tricky to tame, and sometimes special treatment is required.

9: As well as compression you will need to use EQ to process your bass parts in order to make them play nicely with the rest of the track. It’s advisable to use a proper EQ plug-in for this, so maybe try the Fruity Parametric EQ, or a third party model. There are lots of good free or inexpensive EQs around. Using one with at least five bands should ensure better control over the different frequencies.

10: To liven things up a bit, adding some crunch or warmth to a bass track is often a good idea. Use one of the bundled distortion or overdrive plug-ins, or a specialised model. You don’t have to go mad, just adding a little crunch can really sound great and remove the artificiality of computer-generated instrument parts.
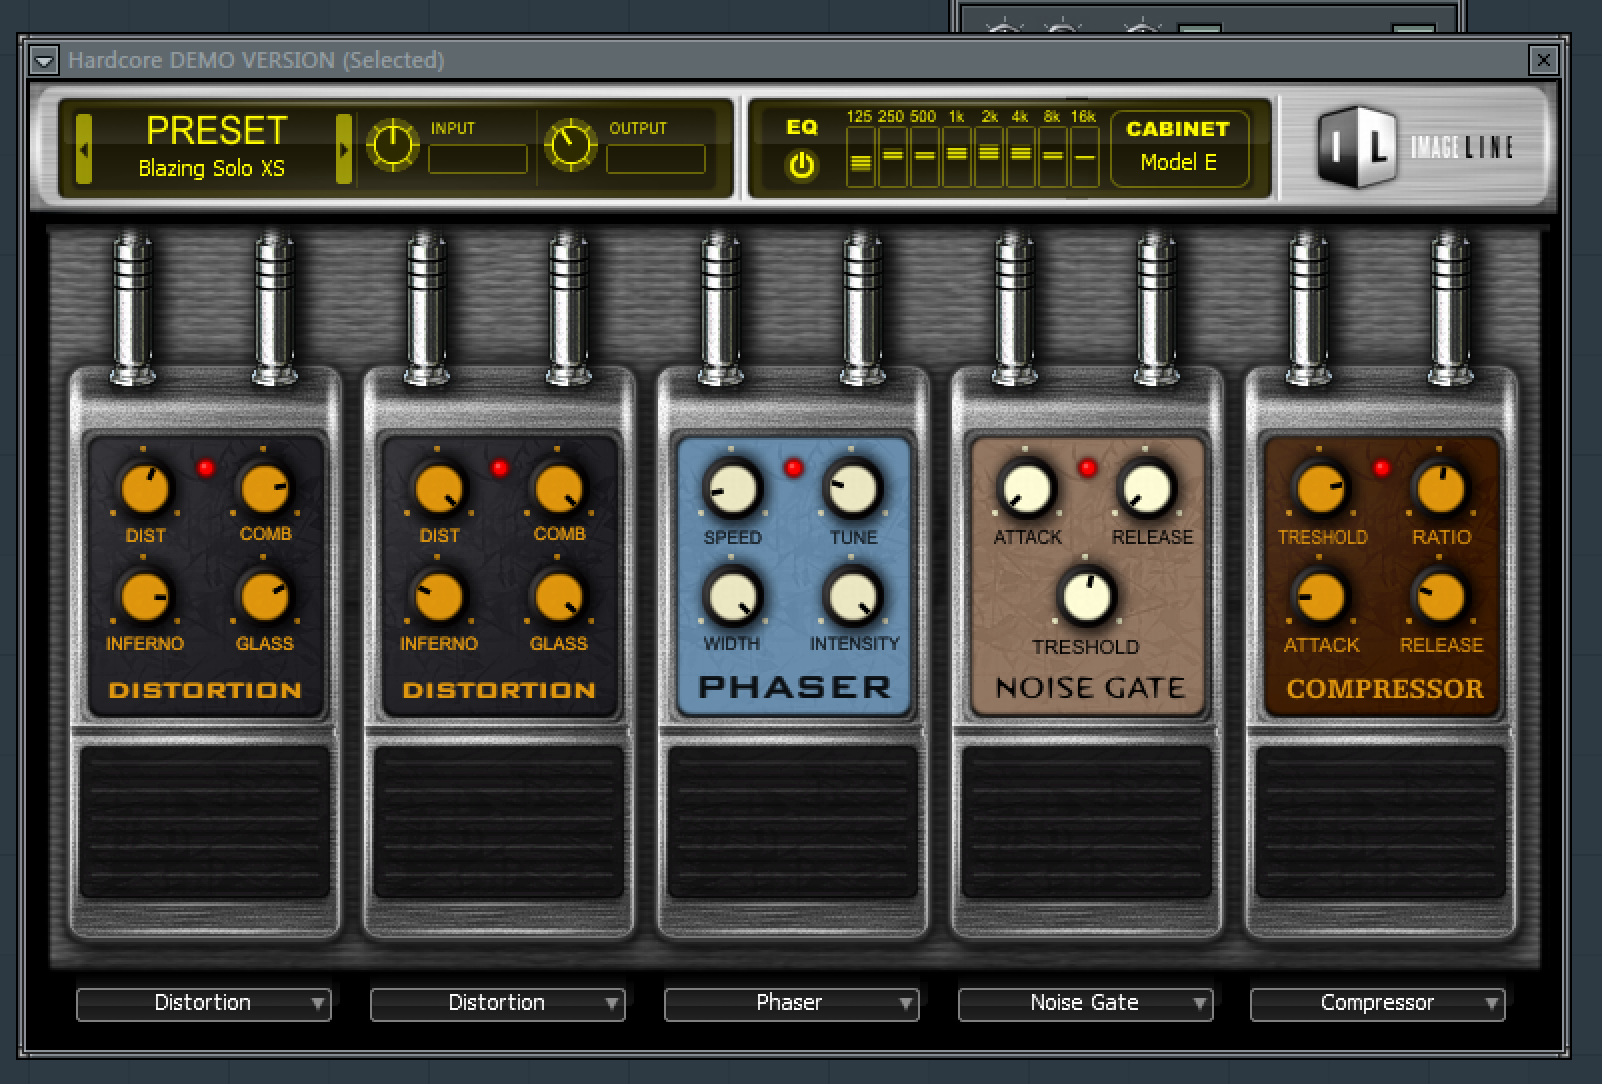
11: A multi effect can be good for dirtying up your bass parts. Here we have added an instance of Image Line’s Hardcore multi-stage guitar effect pedal plug-in and created a chain that adds range of effects to really spice things up. Native Instruments’ Guitar Rig is another good effect for achieving this.

12: Remember that you can also manage all the plug-ins associated with any track in the mixer by selecting the channel and then using the Inspector section to the right, which also lets you draw in a handy master EQ curve for the whole channel. Be aware of how many EQs you are using and try to limit them.
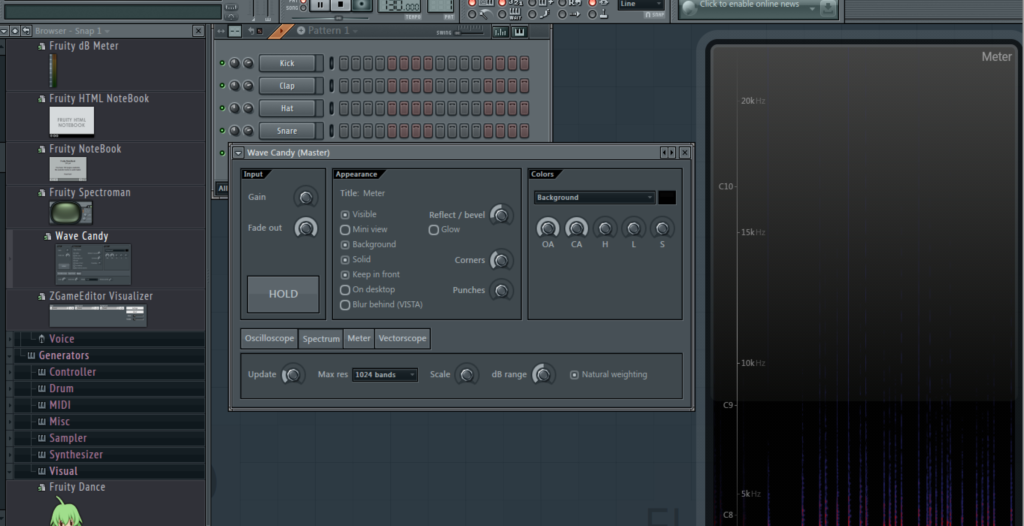
13: One of the most important ways to understand what’s going on in your mix, especially where bass is concerned, is to use some kind of spectral or visual anaylsis of the signal before it leaves the DAW and goes to your speakers. By applying a plug in like FL’s own Wave Candy across any channel or ideally across the master channel you can see how each part of the frequency spectrum of the track is behaving and whether you need to make any adjustments. Using your ears as a guide is also important of course, but the way you hear music will depend on your physical surroundings as well as the speakers you are listening on. Analysing the signal digitally in this way helps you understand it more fully and thus ensure it plays back more accurately on a range of different systems.