FL Studio Tutorial: Become a Power User 9 – Creative Use of Effects
Getting a handle on using effects properly can make the difference between a good track and a great one. Hollin Jones shows you why… FL Studio comes with a great selection of plug-ins for mangling, mashing up and otherwise changing the sound of your audio. These range from more conventional tracking and mixing tools like […]
Getting a handle on using effects properly can make the difference between a good track and a great one. Hollin Jones shows you why…

FL Studio comes with a great selection of plug-ins for mangling, mashing up and otherwise changing the sound of your audio. These range from more conventional tracking and mixing tools like compression, EQ and reverb to more outlandish stuff like the excellent Effector, Gross Beat and Fruity Scratcher. And it can see any third party VST effects loaded on your system as well, so you can add anything you like to your setup.
Understanding the audio processing effects available to you is at least as important as knowing which dial to turn on a synth to make it go from bleep to sweep. Standard, run of the mill samples or patches can be juiced up no end with the careful use of some choice plug-ins, and sometimes getting a really cool sound for a loop or a beat can define the sound of a track and inspire you to go off in other directions with it. Although it’s always good to get as much of the character of a sound as you can in place at the source, there’s nothing wrong with turning to effects post-recording to really spice things up and get a completely different flavour for your productions.
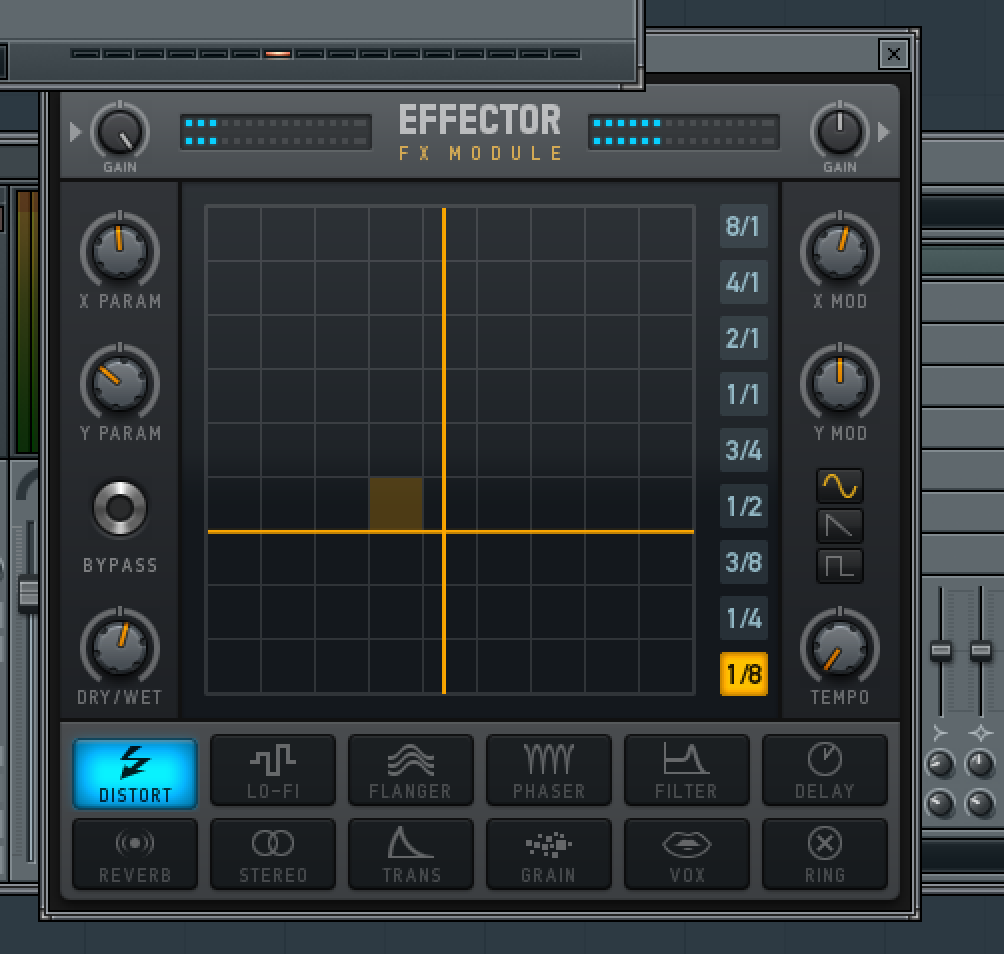
Effector is one of the most interesting effects that comes with FL Studio. It’s a multi effect, meaning you can choose between 12 different effects per instance, though only one at once can be active, and use the X/Y grid to morph the character of the effect. To use more than one instance of Effector, simply load them up into slots on the channel. Like many of the effects in FL Studio it can be synced to the host tempo so things like LFO and delay effects can be made to stay in time even as you switch between different resolutions to change the character of the effect. Your system will happily run lots of effects and you can freeze or bounce channels down to free up resources if you want even more. The sky is the limit!
Tip: Speed Up
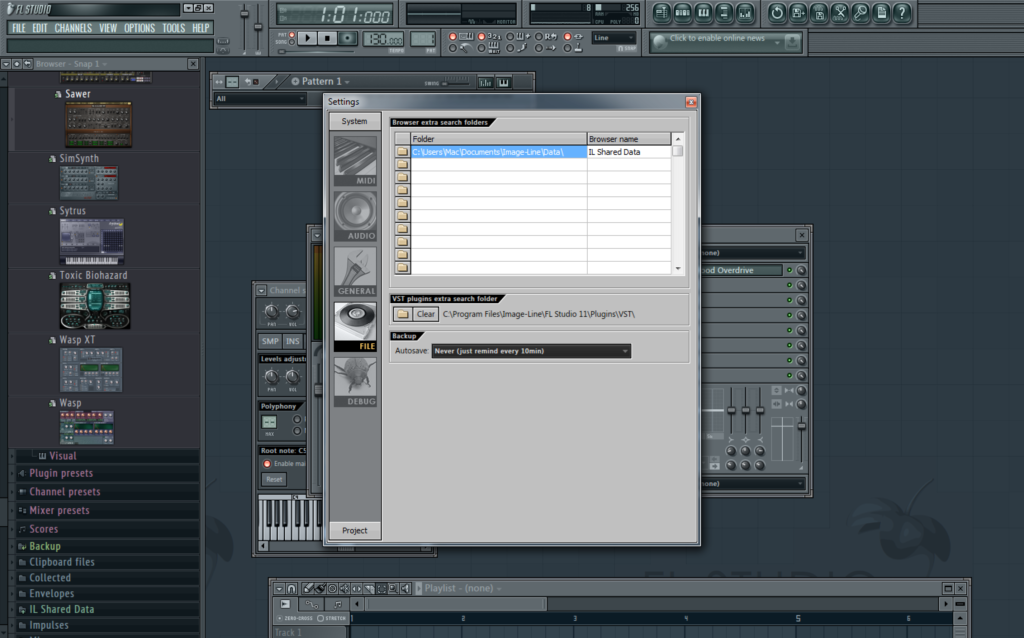
If you go into the Settings > File menu you will see the option to customise the search path that FL Studio uses to look for VST plug-ins. By adding a secondary plug-in folder here you can ensure that it correctly picks up all the additional models installed on your system – assuming of course they are inside this folder. Demo versions of some of the plug-ins that come with your FL Studio install will generally function fully for a limited period of time before inserting a period of silence into the audio signal. Purchasing the plug-in, depending on which version of FL Studio you have, should unlock them and make them fully functional.
Creative Effects
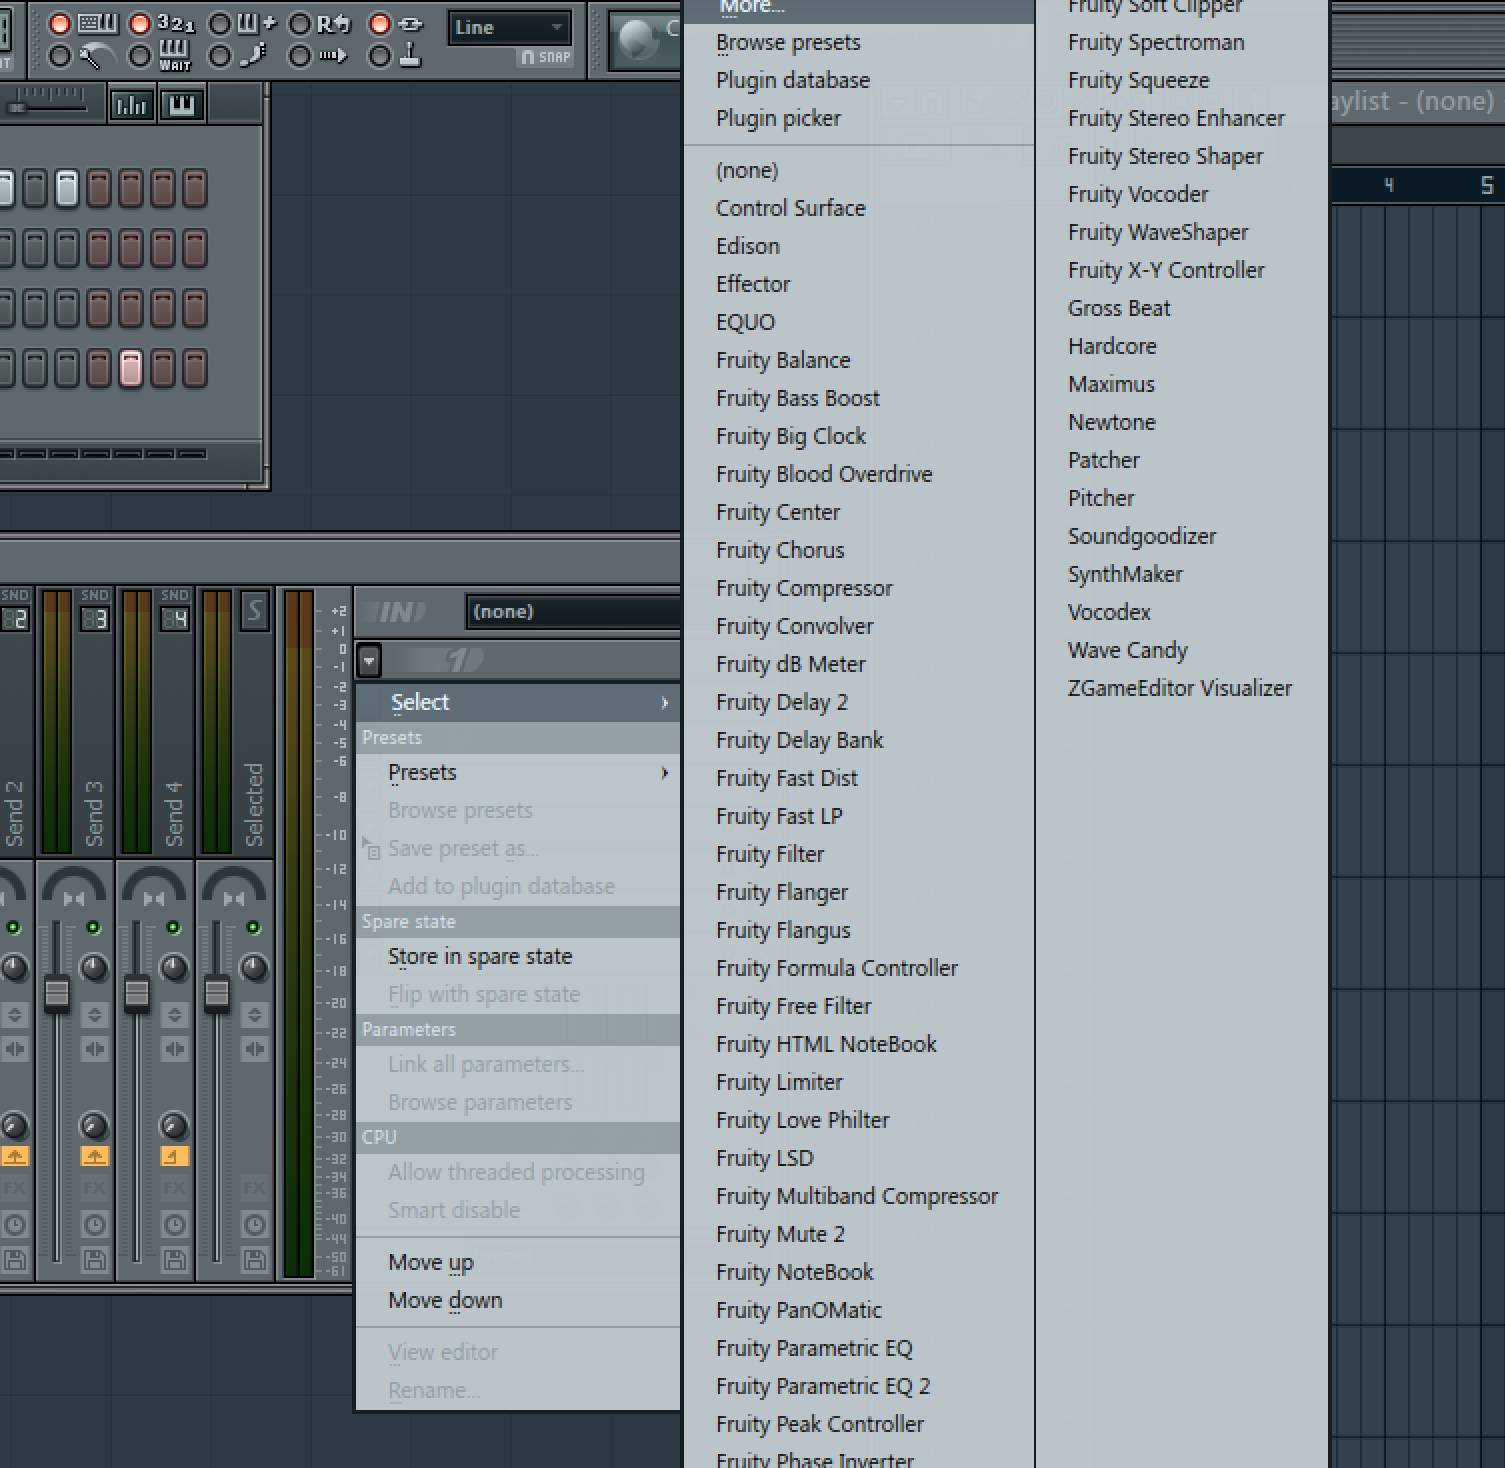
1: Locate your track in the mixer and go to the Inserts pane to the far right. Click on the picker arrow to reveal a list of all the plug-in effects installed and available on your system. In this example we have a beat and we are going to insert an instance of Effector, so choose this from the list.
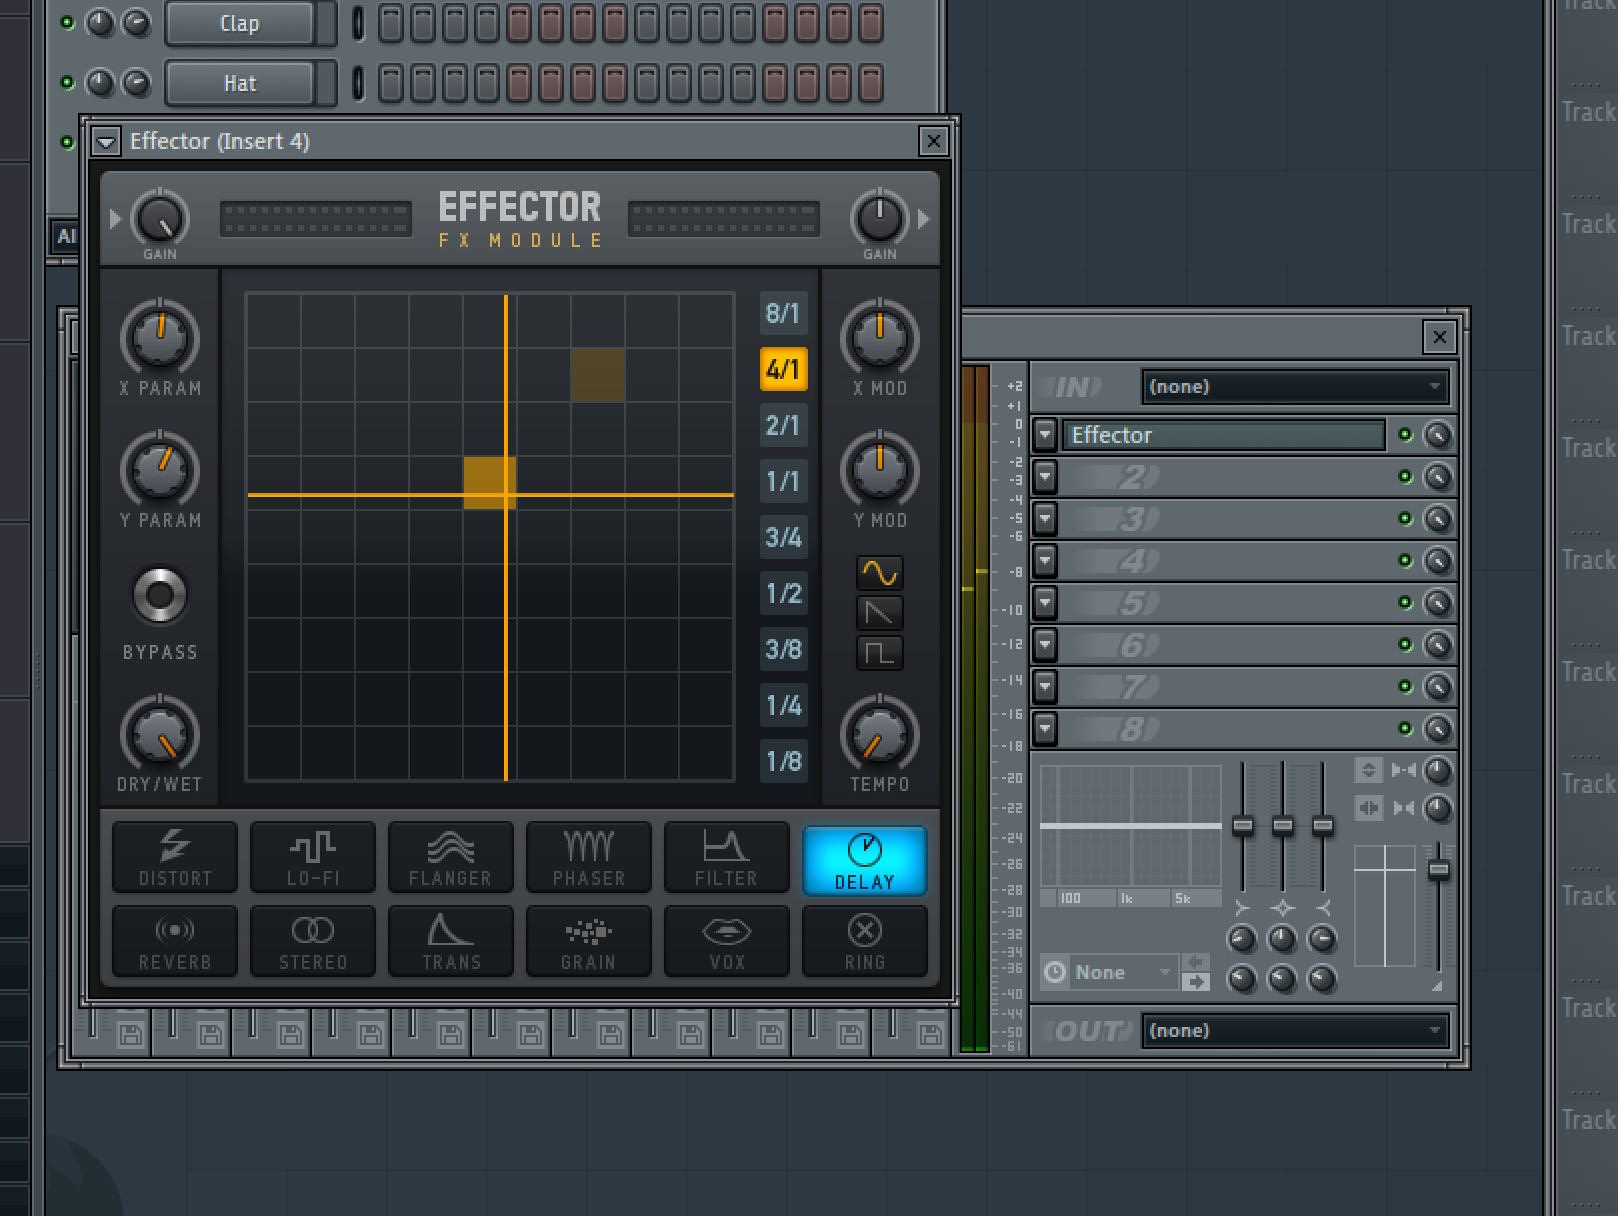
2: With the effect loaded on the snare channel of our drum kit, we choose the delay effect and then select a delay resolution using the numerical boxes along the right hand edge. By clicking in the grid you can change the way the effect behaves. Using the Bypass button you can make the effect stay on or only come on when clicked.
3: Switch to an alternative effect from the chooser at the vase of the plug-in window. Try Distortion for example, and then use the dry / wet control to vary the amount of effect that is blended with the dry signal. Flip between the other effects and you’ll find it’s easy to dial in some cool sounding sound mangling to liven up even dull sounds.
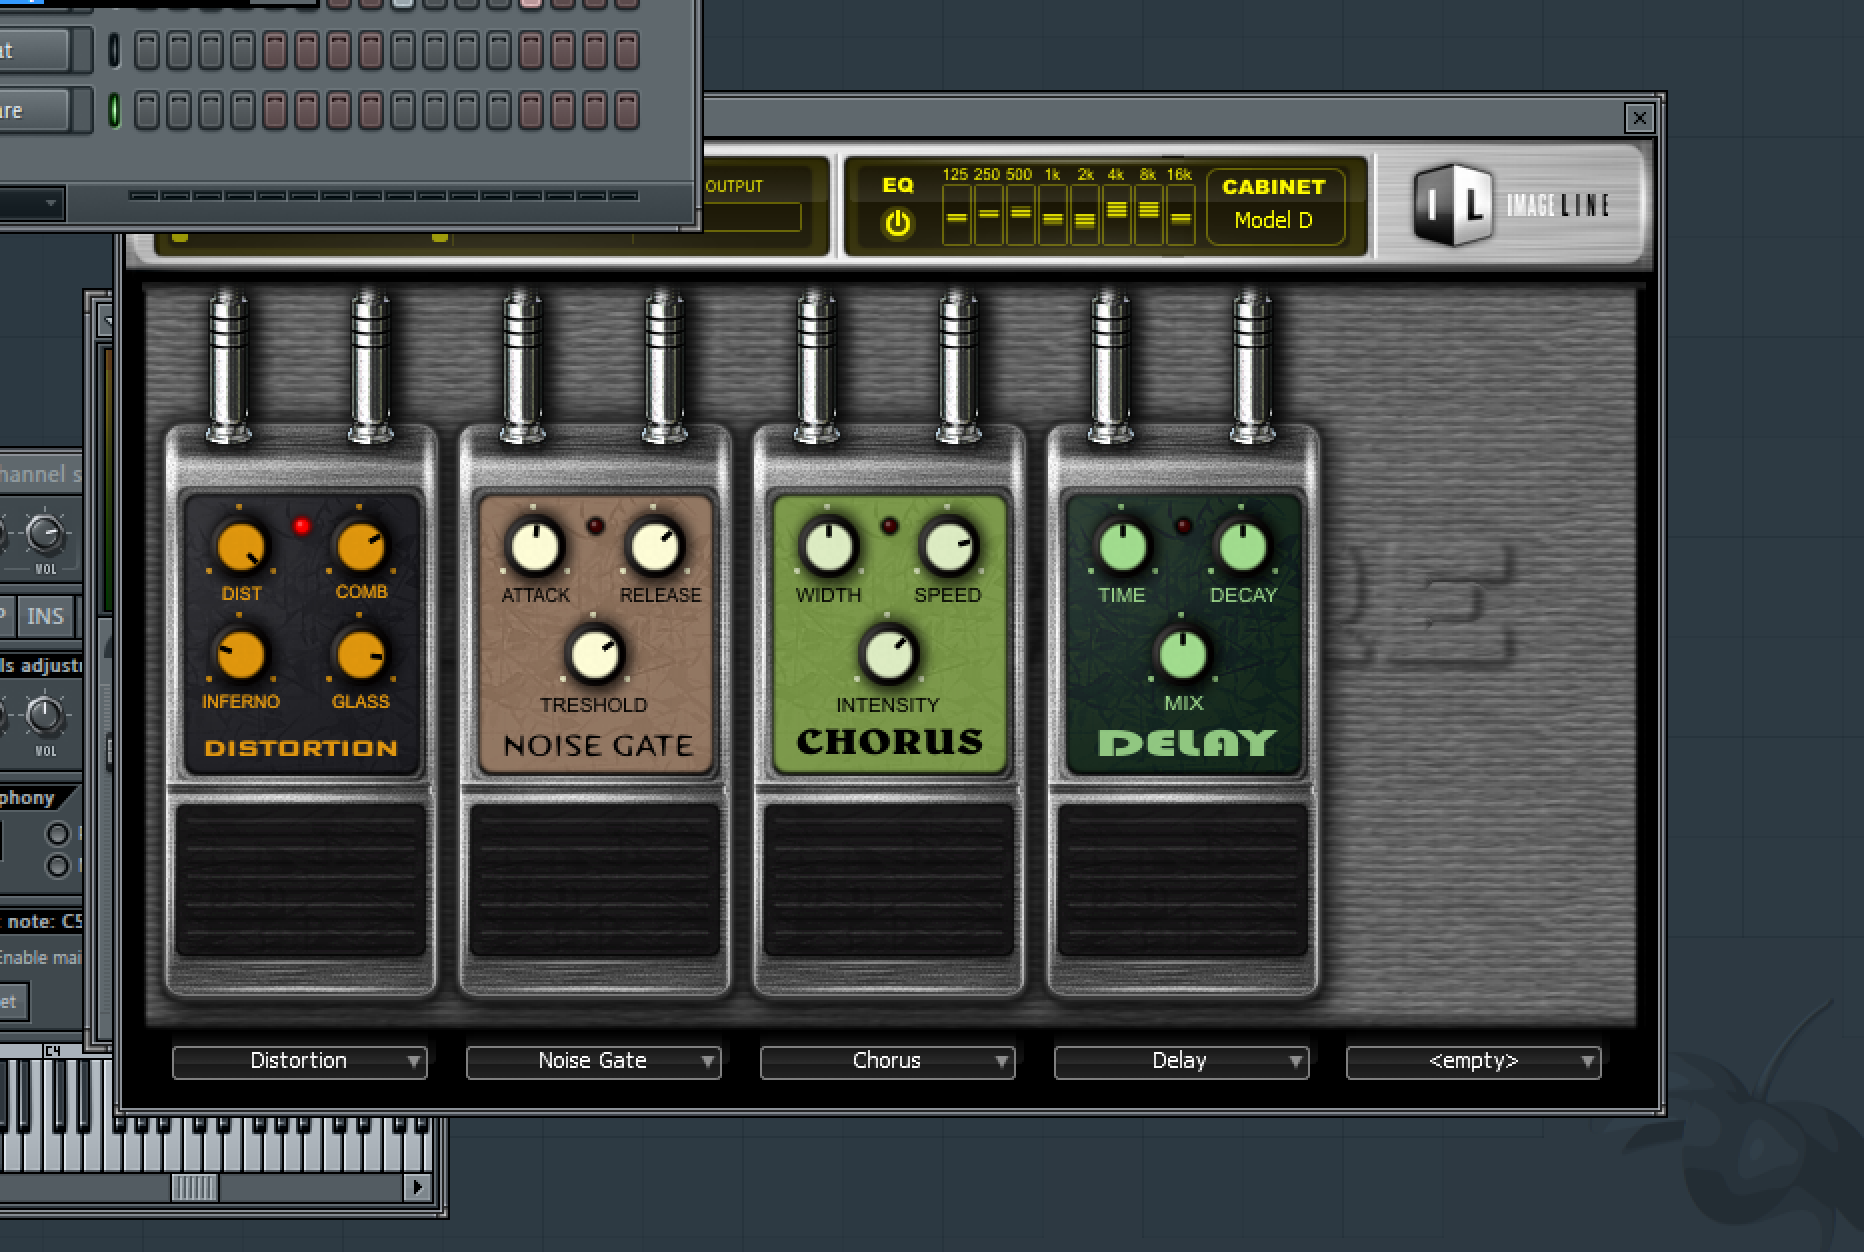
4: Now try loading up an instance of Hardcore on a channel. This guitar multi effect is capable of some really great crunch, warmth, overdrive and tone and is good for using not only on guitars and basses but on synths, beats, vocals and much more. It can even be good to record your guitars clean then add effects afterwards so they can be edited.
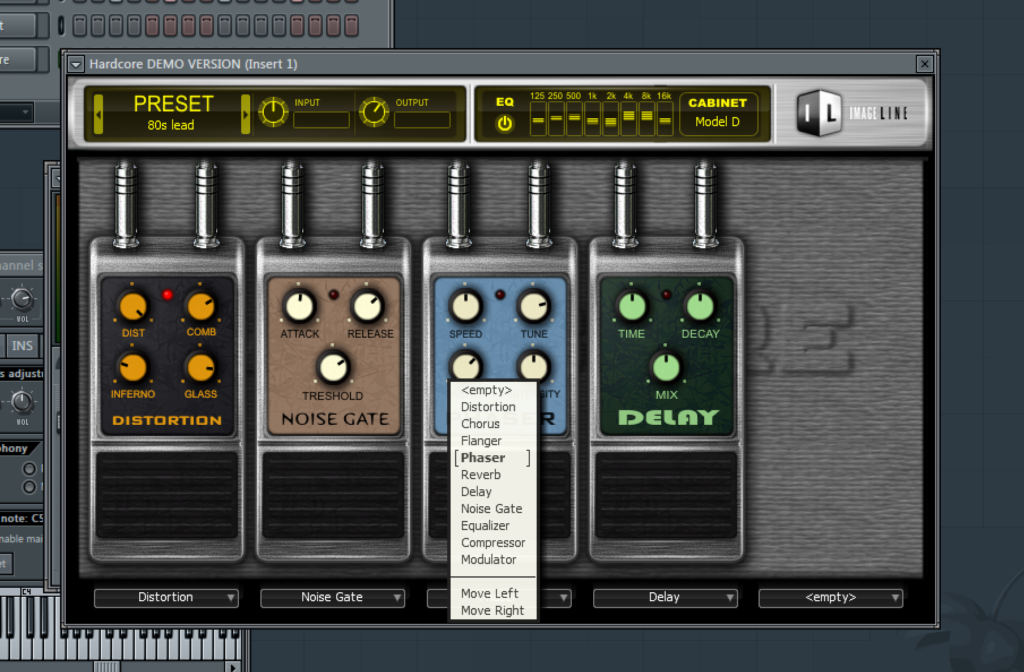
5: Click on the name of a pedal in an effect slot to swap it out for a different kind of effect. You can also click on the cabinet model to select a different sort of amp to change the sound, and edit EQ by using the eight band sliders located by the top of the effect window.
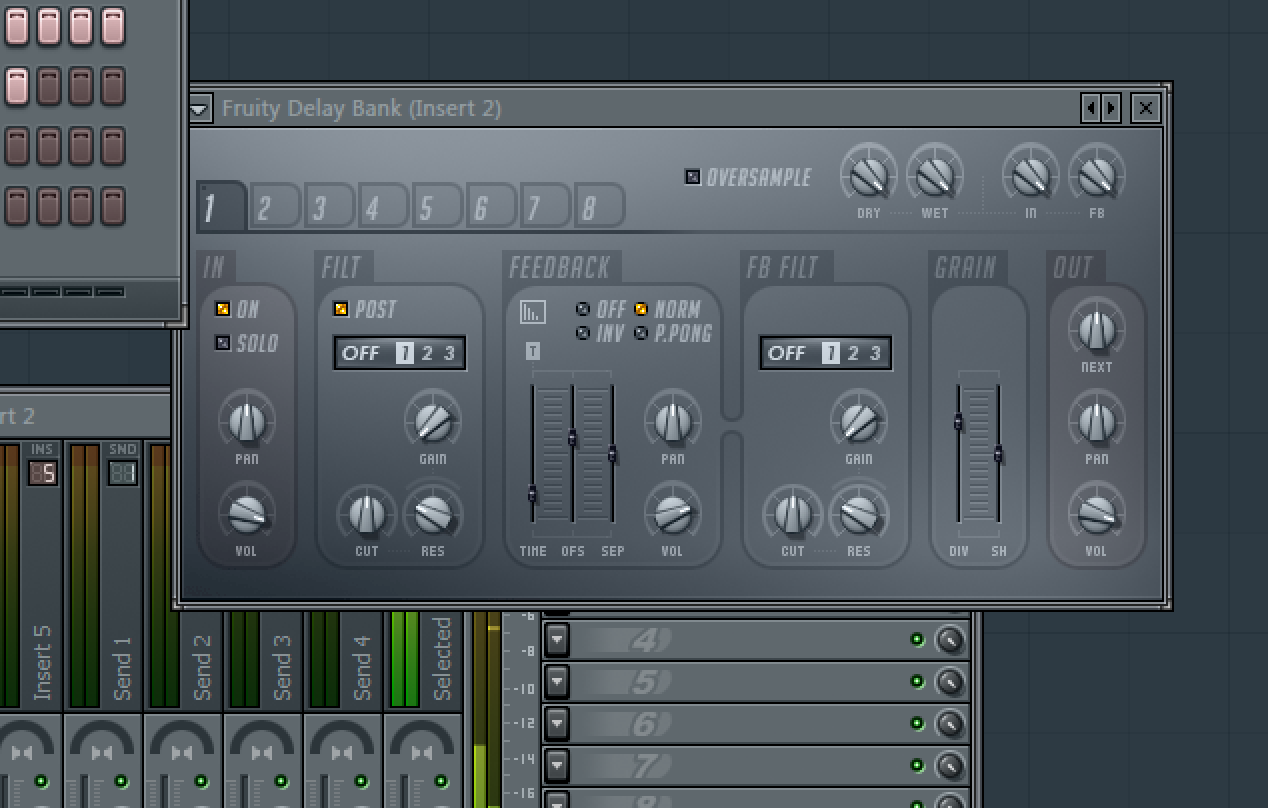
6: To try out some extreme delays, look at the Fruity Delay Bank effect. Dial this in and you are able to create complex multi delays with variable feedback and filtering to add depth, movement and interest to your sounds. It works well on almost anything and you can take advantage of its host tempo sync capabilities.
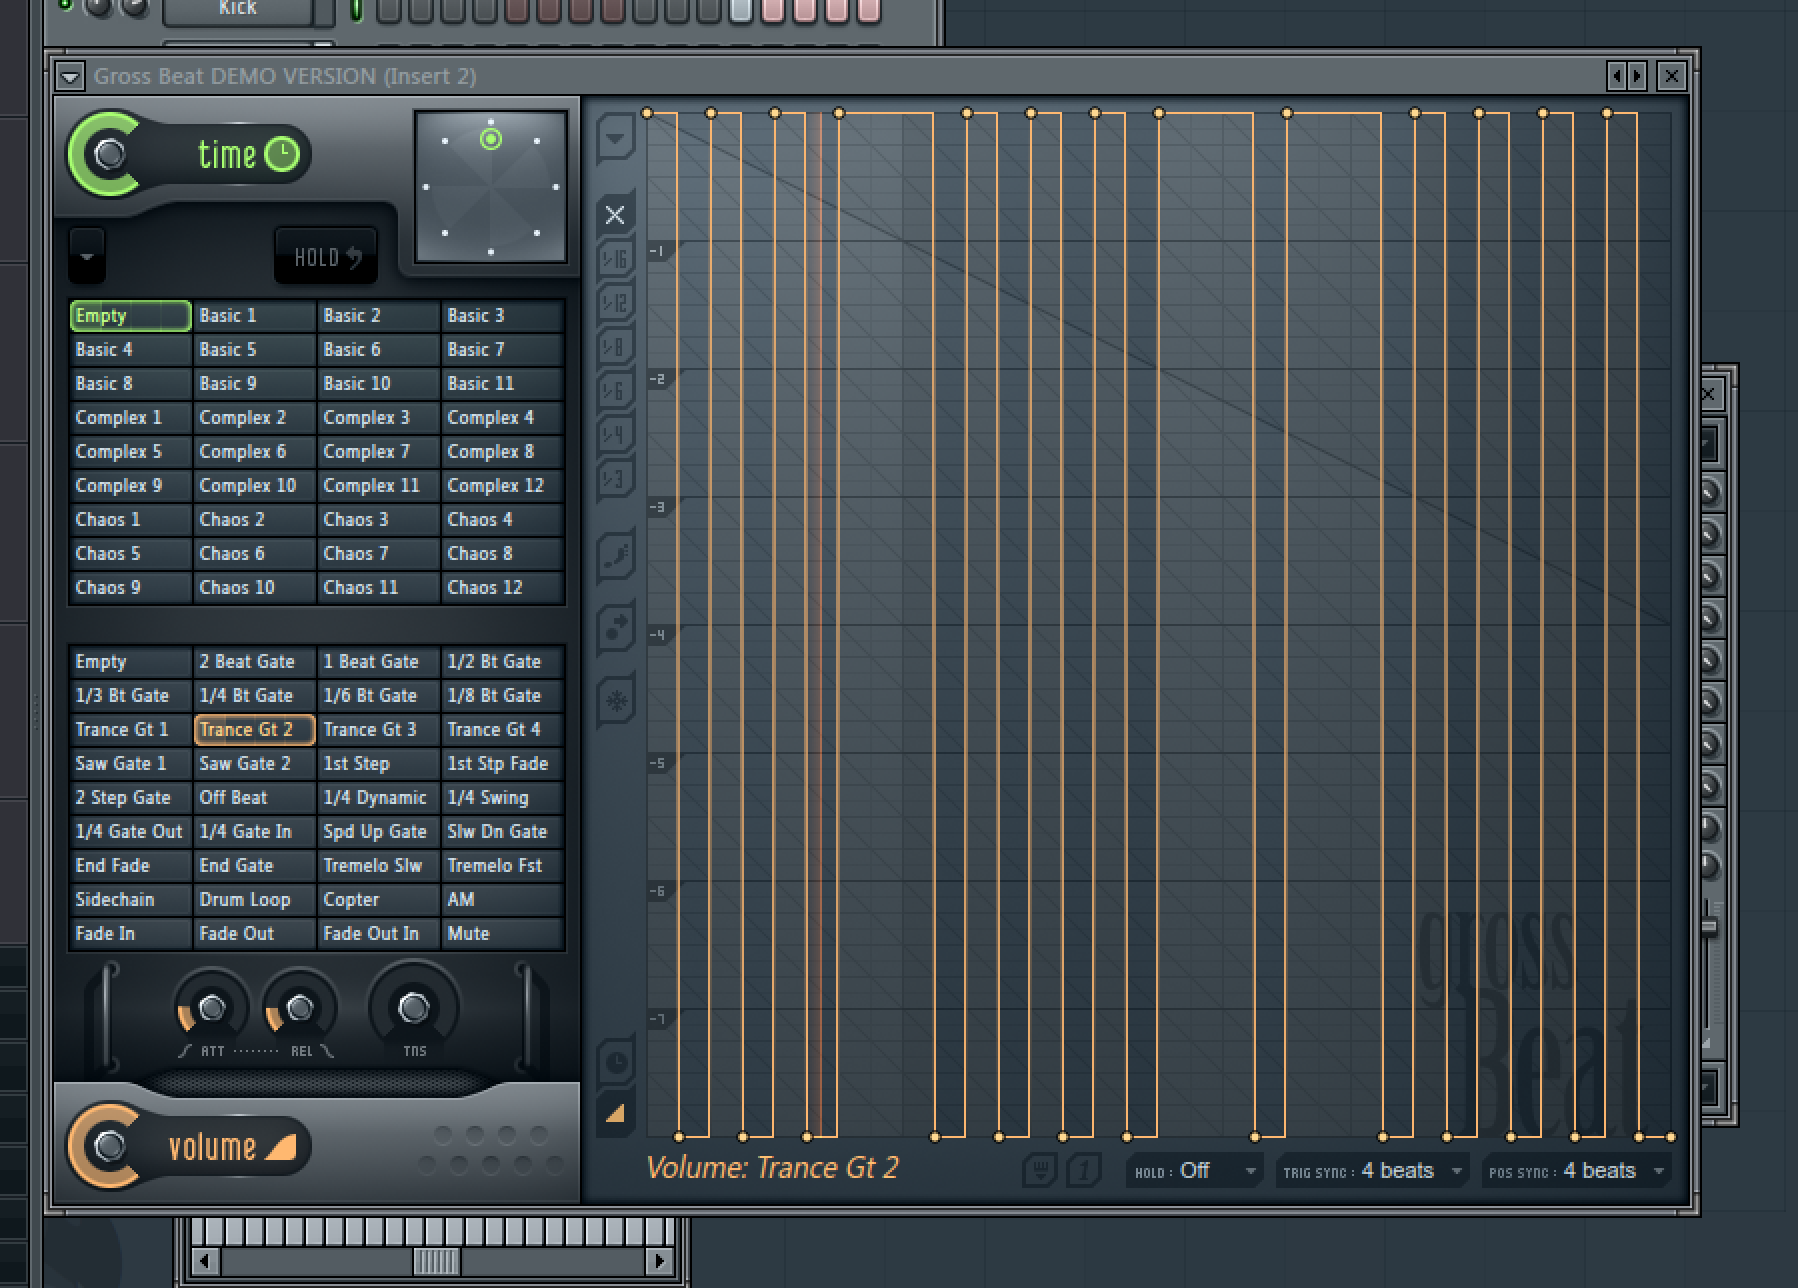
7: The Gross Beat plug-in, which like some others here comes as a demo version depending on which FL Studio package you have bought, is great for gating and other rhythmic effects. Use the grid to draw in some variations and from the area on the left, choose patterns and gating types to achieve something really cool sounding.
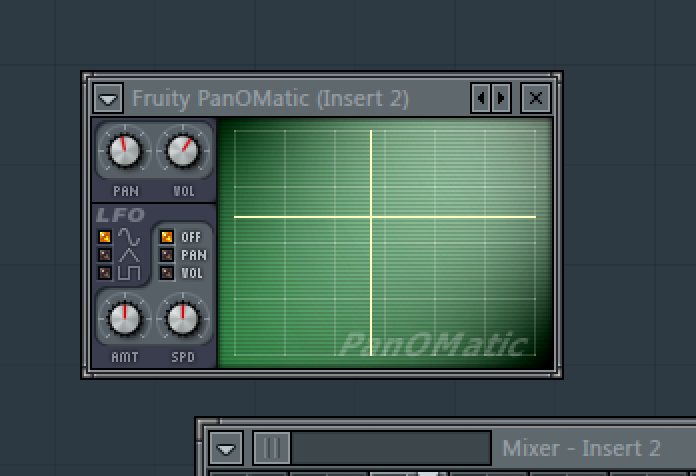
8: Effects don�’t have to look flashy to be useful. Take the Pan-O-Matic for example, which is able to place your sound precisely in the stereo field. Combined with using automation this can be useful for moving a sound around in relation to the listener for some interesting results.
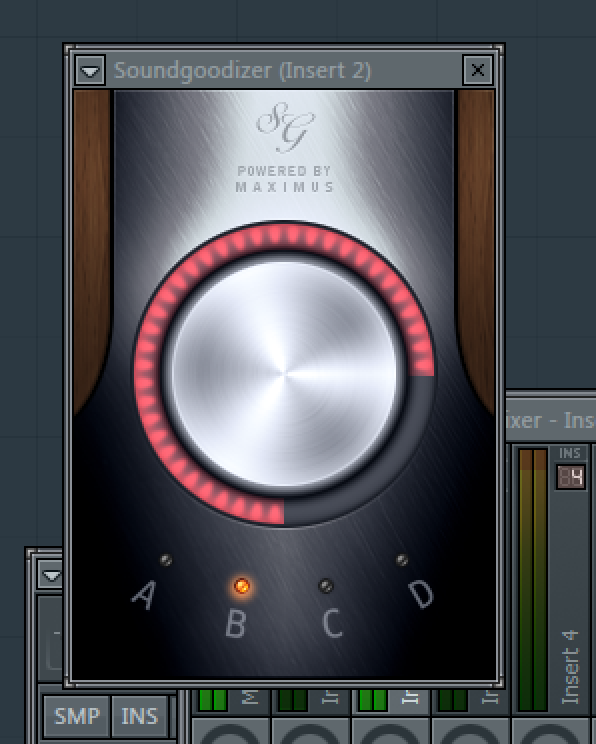
9: The “Soundgoodizer” is as good as it sounds and very simply adds maximization and enhancement with one of four presets and a large, variable amount knob. It’s subtle but effective and good to stick on all kinds of sources from drums and guitars to keyboards and vocals. Try using a moderate amount for the best results.

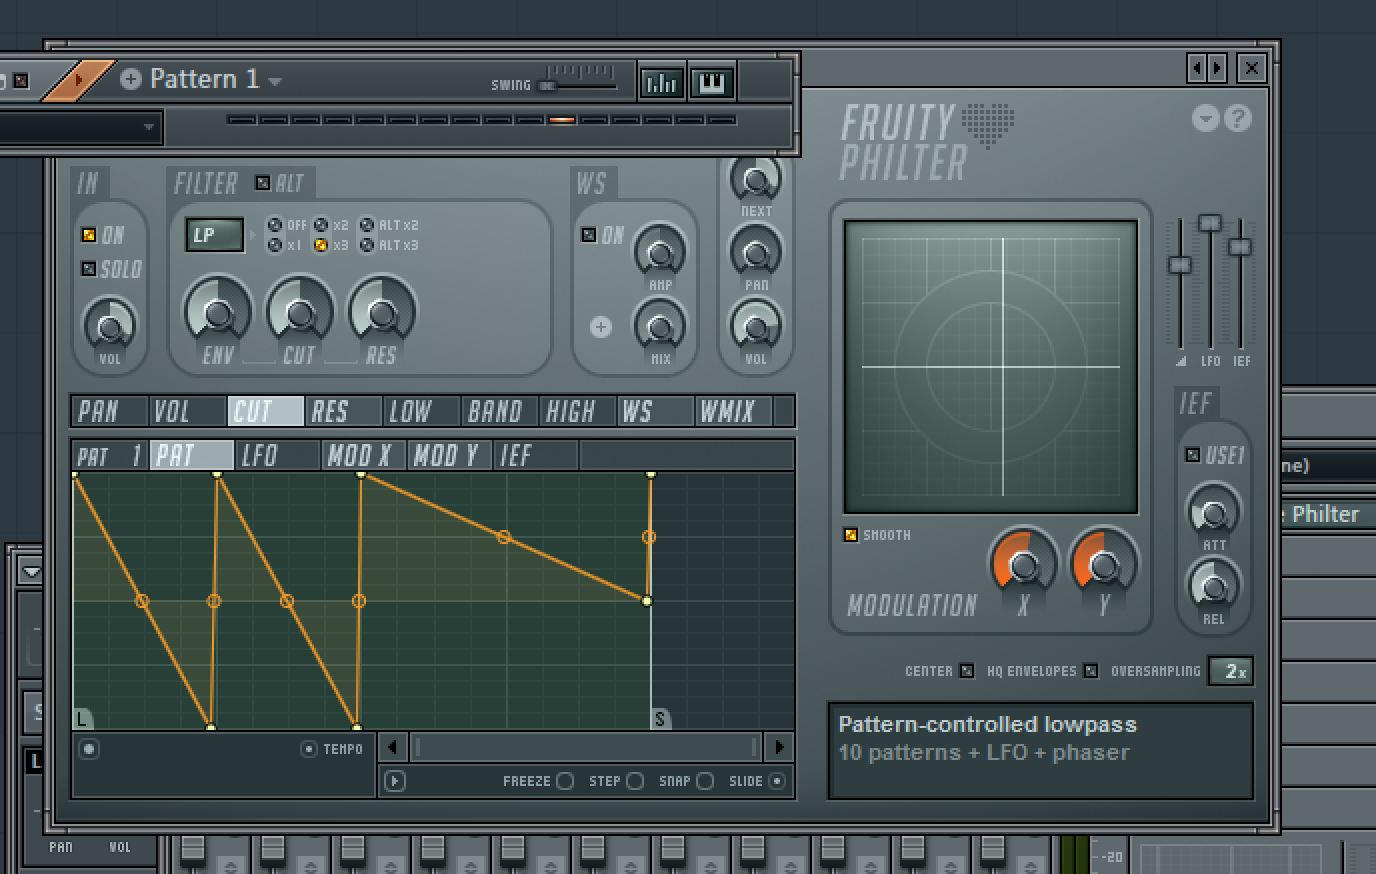
10: The Fruity Love Philter is a highly configurable filter plugin that you can use to morph your sounds. Using the different control sections at the bottom left you can use envelopes based on LFO, modulation and other parameters to change the sound dynamically in realtime. Try this on drum loops and vocals.
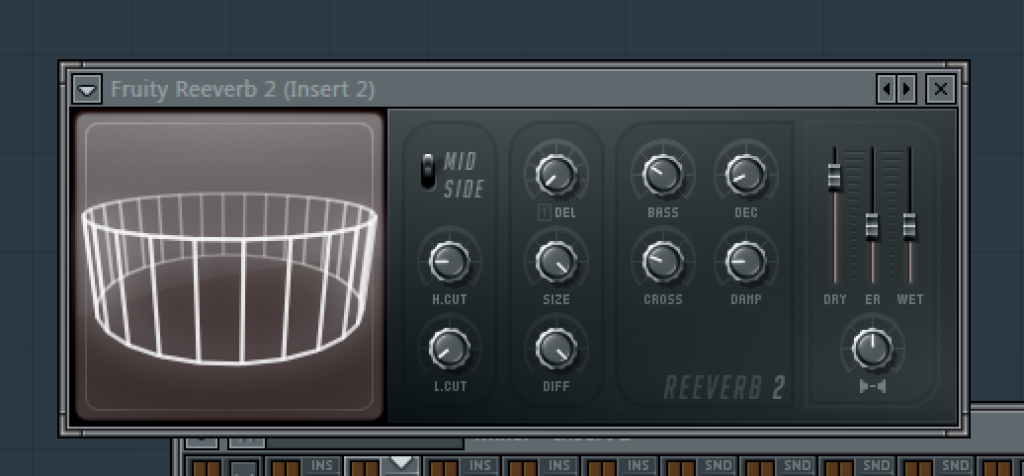
11: Reverb is a key mixing tool but it can be used as well as abused. Try the Fruity Reverb 2 and drag the rotating display to change the size and shape of the reverb effect. Try creating a really huge reverb and maybe even automating the dry / wet amount so that the amount of reverb applied varies over time.
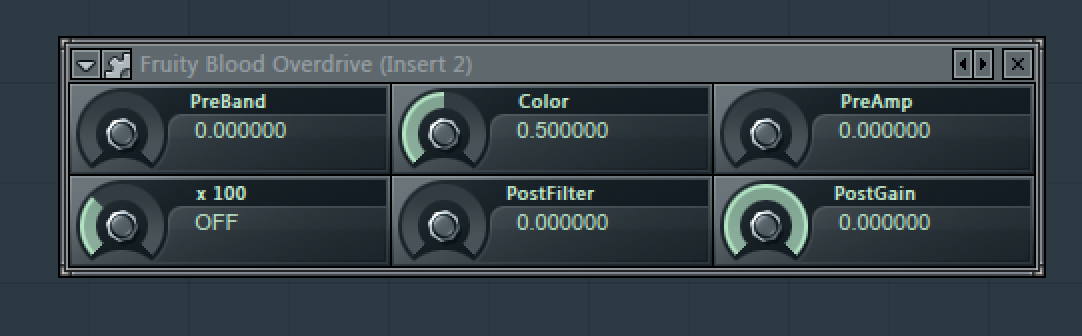
12: Last but not least, try the Fruity Blood Overdrive effect to add some bite and crunch to sounds like synths, guitars, drums and even vocals. Whack up the preamp amount and the colour control to create something really fierce sounding. This effect might look simple but it sounds huge.