FL Studio Tutorial: MIDI Recording in FL Studio
In the second part of our ‘Become a Power User of FL Studio’ series we reveal how getting MIDI into FL is much more flexible than simply pressing a keyboard, as Hollin Jones reveals in our latest FL Studio Tutorial FL Studio is at its heart a great MIDI recording and sequencing application. Even though […]
In the second part of our ‘Become a Power User of FL Studio’ series we reveal how getting MIDI into FL is much more flexible than simply pressing a keyboard, as Hollin Jones reveals in our latest FL Studio Tutorial
FL Studio is at its heart a great MIDI recording and sequencing application. Even though it also records audio, for much of its life it concentrated on MIDI and this is still the thing for which many people love it the most. Partly this is down to the fact that it comes with such an amazing selection of MIDI-triggered instruments, and has a range of tools for programming and inputting data. It helps to be a great player of course but it’s far from essential with FL Studio’s step input mode and arpeggiator amongst many other clever ways to input notes.
The great thing about basing a lot of your composition on MIDI tracks is that they are almost endlessy flexible, with none of the limitations of digital audio files. MIDI can be copied, pasted, altered, manipulated and re-routed easily. It’s weightless too, meaning that MIDI data uses virtually no space and no CPU power. In fact the only thing that uses resources is whatever yous end the MIDI to in order to make sound, typically a software instrument.
You can use MIDI tracks to trigger external hardware too of course, and route the audio signal from synths, drum machines and other MIDI hardware back into FL Studio for recording. This lets you incorporate older, more traditional hardware that might be fiddly to program into the much more user-friendly world of FL Studio where putting together complex parts is much easier than it ever was using outboard kit.
In terms of getting MIDI in you can use your computer’s keyboard, a regular MIDI keyboard or a more specialised MIDI control surface. FL Studio supports the connection of multiple devices, though to avoid conflicts it can be a good idea to assign each one a unique MIDI channel to work on. In fact there are a number of controller templates in the FL Studio installation directory (\Program Files\Image-Line\FL Studio\System\Hardware specific). These templates are loaded into the editor that came with your controller and will map it to FL Studio. So hook up your MIDI device and get recording parts right now!
Focus On – Speed Up 120:
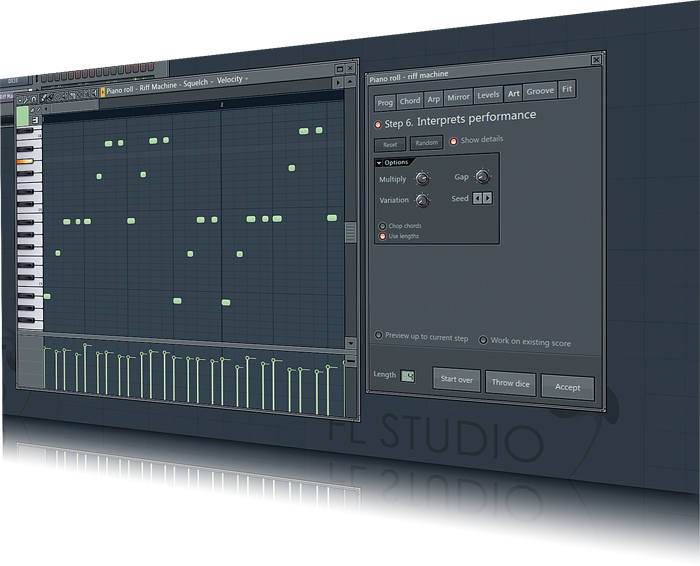
There’s a handy tool in FL Studio for generating MIDI parts called Riff Machine. Choose Tools > Riff Machine and a new window opens. With it, you can create randomized patterns for whatever generator or instrument you currently have selected. There are multiple options including chords, progressions, arpeggios, flips, humanization and interpretation. Each one has a set of tweakable controls and can be previewed. If you’re happy with the results, accept them, or start over to do something entirely new.
This is a great way to create complex and involving MIDI parts from only the most basic of input. It helps you to create music from nowhere, or to take the music you have already made and alter it easily.
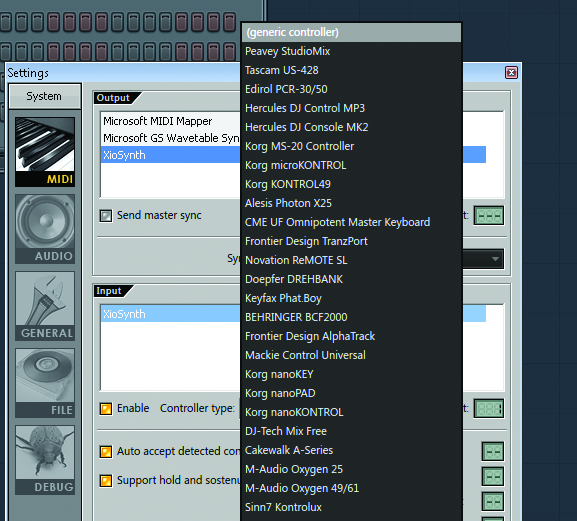
1: With your MIDI interface or device connected, go into FL Studio’s MIDI Settings section and make sure it is visible and selected. If you click on the Controller Type menu you will be able to assign it directly if it’s a device that has a template supplied. Otherwise, just choose Generic Controller from this menu.
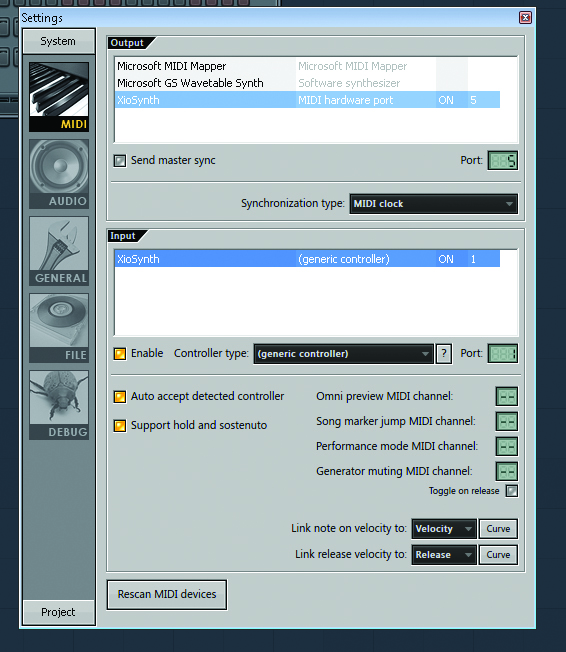
2: Set the MIDI channel of the device in the Port box by clicking and holding then dragging the mouse up or down. It’s also possible to set dedicated MIDI channels to control things like onmi preview, song marker jump, performance mode and generator mute in this window, if you have additional controllers connected for these purposes.
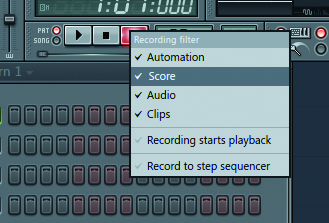
3: In the main window, go to the Transport panel and right click on the Record button to access the recording filter. Make sure that Score is selected so that notes will be captured. By default, recordings will go into the Piano Roll editor for a track. Here you can change this to send notes to the Step Sequencer if you like.
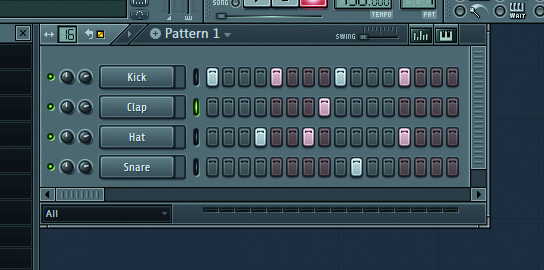
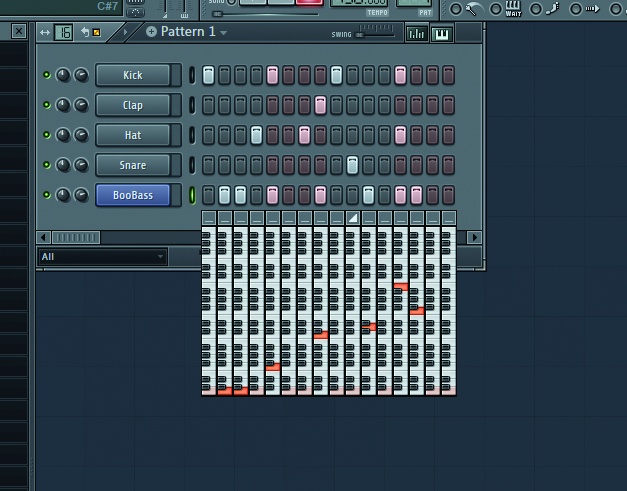
4: The simplest way of inputting MIDI doesn’t actually involve an input device at all, just the mouse. Go to the Step Sequencer and set the length of the pattern using the box at the top left, check the master tempo of the project and edit if necessary. Then click the buttons in each channel to trigger a note at a specific point.
5: That’s fine for beats but for anything melodic you will need to be a little more creative. Try creating a bass instrument for example and it will appear in the Step Sequencer window. Select it and then click on the Keyboard Editor button at the top right hand corner of the Pattern window. This then allows you to use the mouse to enter multiple chromatic notes easily.

6: This editor has a few more tricks up its sleeve, such as tiny portamento switches at the top of each note lane, denoted by triangles. You can also apply swing to the whole pattern using the tiny variable slider at the top of the window, and activate looping for the pattern with the loop button by the length box.
Continue to Page 2 of MIDI Recording in FL Studio >
