Fl Studio Tutorial: Become A Power User 3 – MIDI Editing
Getting control of your MIDI parts is the first step to making great music in FL Studio, as Hollin Jones explains in the latest part of our ‘Power up in FL Studio’ series… FL Studio is one of the most powerful DAWs around when it comes to working with MIDI. We have looked […]

Getting control of your MIDI parts is the first step to making great music in FL Studio, as Hollin Jones explains in the latest part of our ‘Power up in FL Studio’ series…
FL Studio is one of the most powerful DAWs around when it comes to working with MIDI. We have looked in a previous workshop at how to get MIDI data into the application using various techniques, and now we will explore the any ways in which you can work with that data once it is inside the Piano Roll editor. The great thing about MIDI is that it is virtually weightless and almost infinitely malleable. It can be copied, pasted, shifted, tweaked and reassigned with a few clicks, all the while taking up virtually no file space at all. And with the wealth of virtual instruments that FL Studio provides, you won’t be short of new ways to generate sound.
Once MIDI is inside the Piano Roll editor, you can work with it in many different ways. The Tools menu, accessible by clicking at the top left corner of the editor window, contains lots of handy features including articulations, quantizing and chopping, and shortcuts to create flam, strum and other effects as well as scaling levels and introducing randomization to a part. New notes can be drawn in of course, and along the base of this window you will find a controller lane. Right click on this and you reveal the different parameters that can be set here, including note pan, velocity and pitch, and channel volume, pitch and pan.
The Piano Roll editor has other talents too, letting you draw in slide and portamento data as well as slicing up notes in the grid. It’s also possible by clicking on a generator’s name in the step sequencer list to reassign any MIDI pattern to play any instrument, or indeed to clone it and duplicate the pattern using a second generator, perhaps tweaking the pattern to create some variation as you do so. Further tricks include using the LFO Tool to draw LFO shapes into the Event Editor of the Piano Roll window and using the Claw Machine to modify existing MIDI parts to create new variations easily. Working with MIDI in FL Studio is both fun and rewarding!
Steps
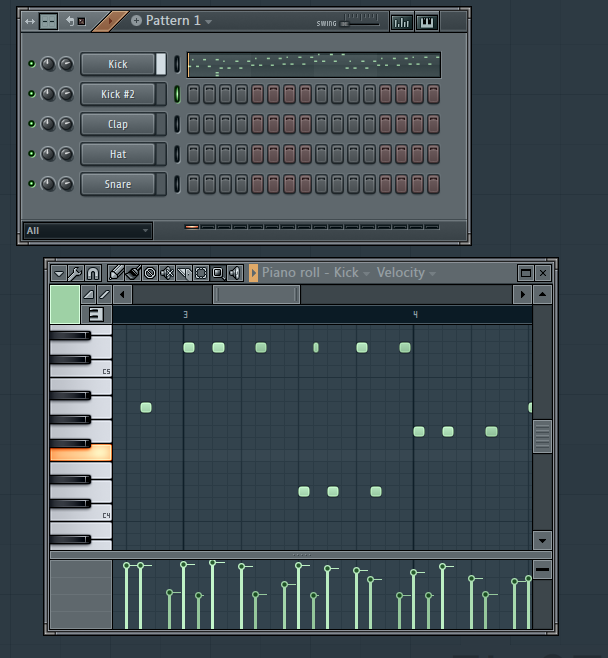
1: When you have programmed or recorded your MIDI part, open it in the Piano Roll editor by right clicking on the generator’s name and choosing Piano Roll. Use the Zoom tool to select a range and zoom in on it, or double click to zoom out to see the whole part. Now you’re ready to do some MIDI editing.
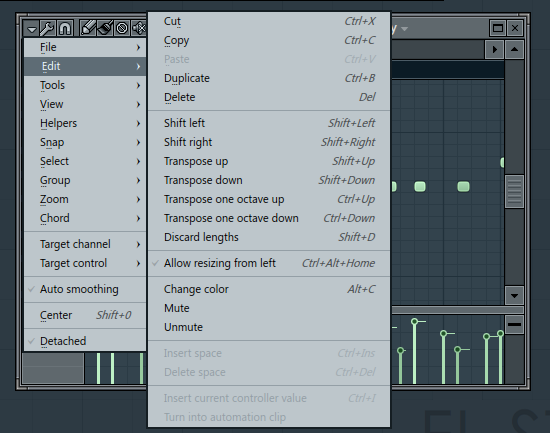
2: The majority of MIDI commands in FL Studio work on the selected notes, whether that’s one single MIDI note or he whole clip, and you can use the Select tool to choose which notes you work with. Select one or more notes and then go to the Options dropdown menu and the Edit section.
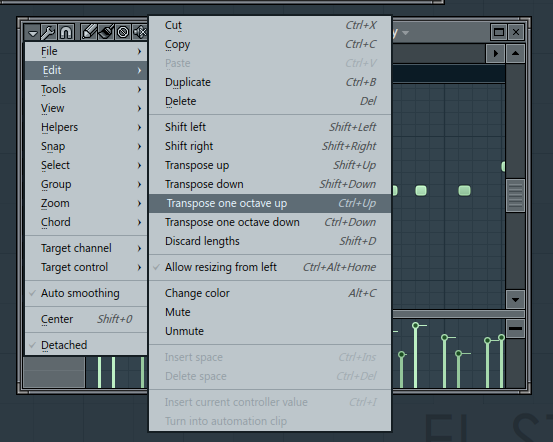
3: From this menu you can perform some useful tasks including transposing selected notes up or down, muting or unmuting them and shifting them left or right. You can also duplicate, delete, cut and copy selected notes. If you have selected the controller area you will also see the option to insert controller values in this menu.
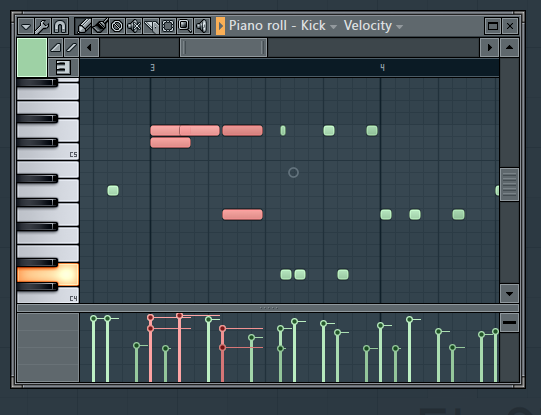
4: Mouse over any note and you get a four directional arrow tool that can be used to place the note on any other note lane. Mouse to the right hand edge of any note and you can drag it to the right to make it longer. If you grab multiple notes and perform any of these actions, all the notes are affected by the same amount.
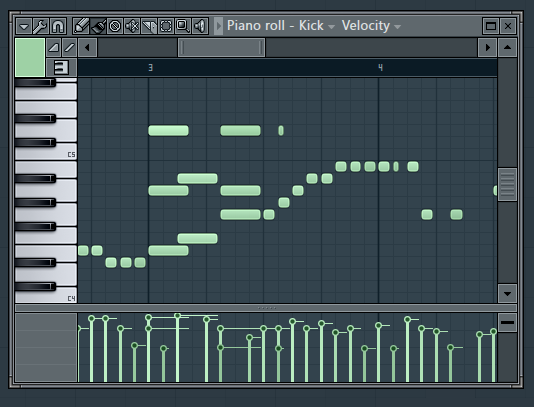
5: The Draw tool can be used to input individual new notes and the paint tool can be used to paint in a range of notes using a sweeping motion with the mouse. This is useful for quickly creating rapid successions of notes, say for example for making a repeated kick drum part. It’s also handy for monophonic bass parts.
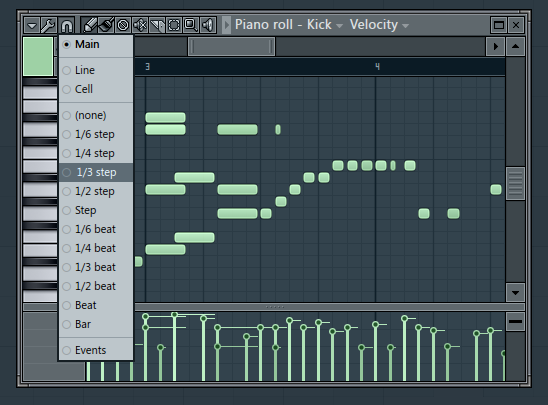
6: When drawing in new notes or moving existing ones, snap settings are important because they affect the way the timing of the notes is controlled. Click on the magnet icon at the top left corner of the Piano Roll editor and you can set how notes will snap, using a variety of subdivisions of a beat from a fine resolution all the way up to snapping to bar markers.
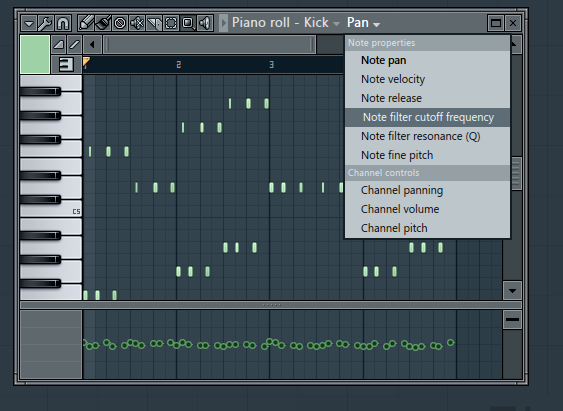
7: At the base of the Piano Roll editor window is the controller editor, where you can enter parameters to vary the way notes are generated. Right click on the bottom left hand corner of this window, or left click on the target control menu from the window’s title bar to reveal a list of available controller parameters.
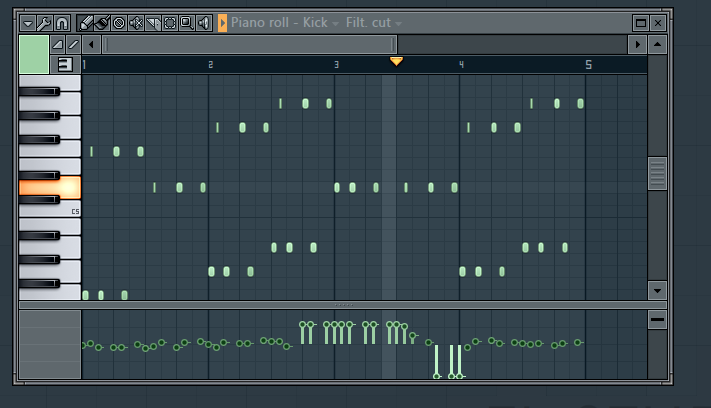
8: Here for example we have drawn in some filter cutoff modulation by selecting this parameter from the target menu then simply using the mouse to change the values at certain points in the pattern. The parameters available to you will depend on the generator you are working on, though things like channel controls are common to all generators.
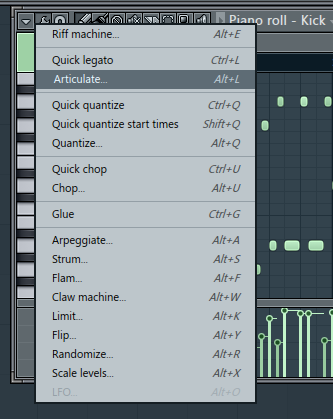
9: The Piano Roll window contains a Tools menu that can be revealed by clicking on the spanner icon at the top left corner. Here there are various options for manipulating your MIDI parts. The first options are Quick Legato and Articulate, which allow you to apply staccato, portato and legato to all selected notes in order to change their playing style.
Continue to Part 2 of our MIDI Editing in FL Studio Tutorial >
