FL Studio Tutorial: Powering Up With FL Studio
Understanding the fundamentals of how FL Studio works will help you to get up and running quickly, as well as boost your creativity. Hollin Jones goes back to basics in this FL Studio Tutorial FL Studio is one of the world’s most downloaded DAWs, and Image-Line’s policy of lifetime free updates to the […]
Understanding the fundamentals of how FL Studio works will help you to get up and running quickly, as well as boost your creativity. Hollin Jones goes back to basics in this FL Studio Tutorial
FL Studio is one of the world’s most downloaded DAWs, and Image-Line’s policy of lifetime free updates to the version you have bought is surely one of the most generous around. Quite apart from that, it’s a fully featured music programming and production environment complete with some nifty tools and features that help you to make the best music you can. But while it has literally thousands of different facets, you won’t get very far without understanding the basics – how to get audio and MIDI in and out of the software, and how to work with project templates. How, for example, do you set up a controller device? These are all things that need to be understood before you can get started. Once you have mastered them, of course, they become second-nature.
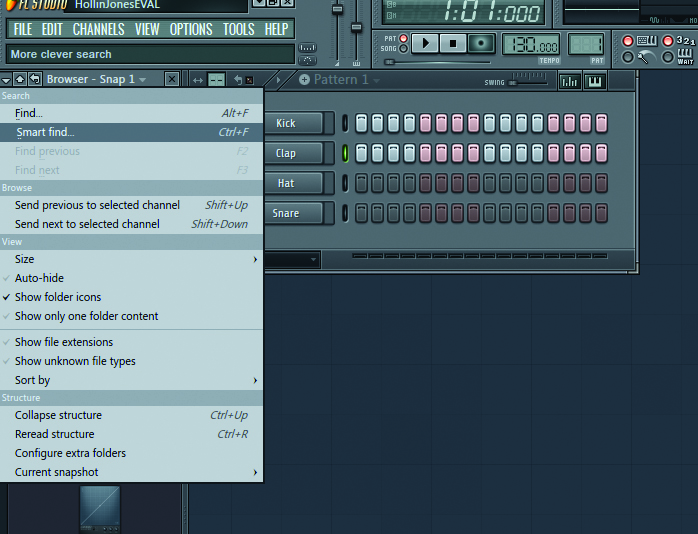
FL Studio is quite unique in that it gives you a comprehensive breakdown of all the material available to you – from FX presets right through to complete project templates – in the Browser that appears by default down the left-hand side of the main window. It’s also cleverly integrated with Windows as an operating system, so it’s possible to access Explorer-style commands from inside the Browser to locate and work with files without having to go back to the Desktop. You can define custom search folders, control the way the audio buffers behave, and enable all kinds of keyboard shortcuts to improve your workflow and make everything run more smoothly. You can also manage Window Sets and even arrange the layout to suit tablet view, if the device you are working on doubles as a Windows tablet.
Going further, there are remote control presets, smart searching of the Browser and many more features that will help you out if you know about them before you dive into music-making head-first. You can save out projects and audio files, of course, and even Zip a whole project on export for transfer or sharing. FL Studio is a fun and capable DAW, and by following a few simple guidelines you should be up and running in no time!
Setting Up FL Studio
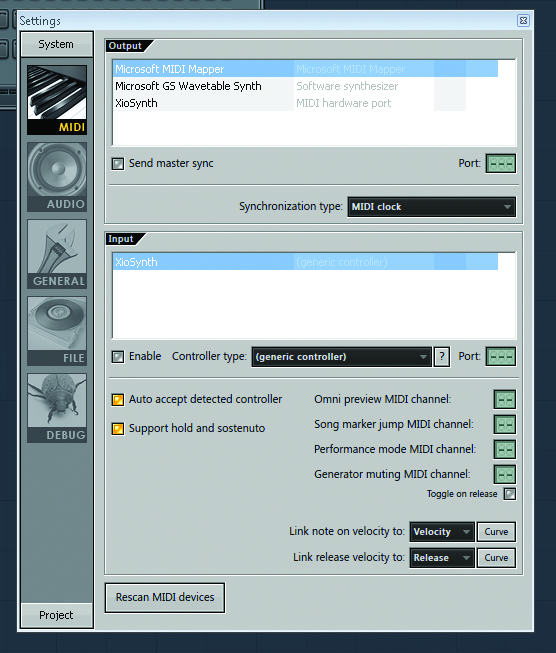
1: If you’ve just installed FL Studio, the first thing you will need to do is check your audio and MIDI in/out settings. To do this, go to the Options menu and select MIDI Settings (or press F10). This opens the Preferences dialogue, from where you manage all kinds of I/O and settings. Select the MIDI section.
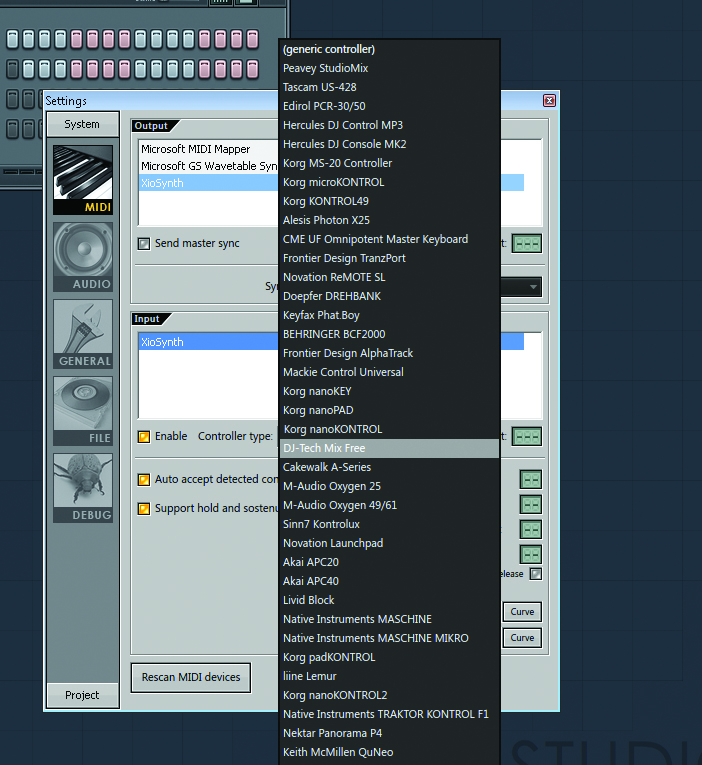
2: With your MIDI device connected, go to the MIDI Input section and click on the Enable button. Click on the Controller Type menu to reveal a dropdown list of natively supported controllers. If yours appears in the list, select it. If not, select Generic Controller.
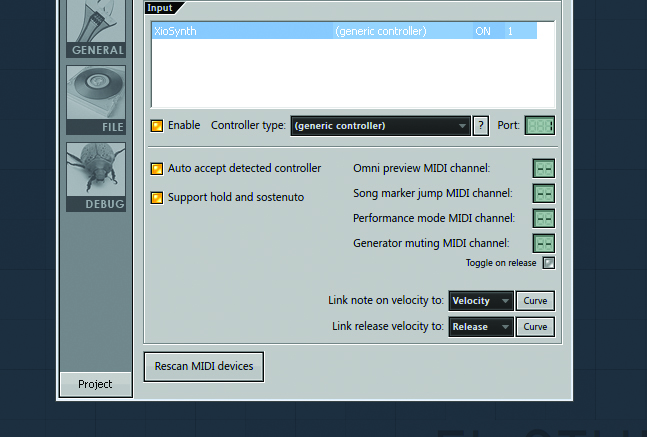
3: Select MIDI port 1 in the Port selection box (or a different port if your setup demands it). You can also specify individual MIDI channels to be used for other operations, such as the Omni preview, song marker jump and for working in Performance mode. These are handy for setting up your own controller maps.

4: Move down to the Audio tab and from the Device dropdown menu, look for your connected interface. If it doesn’t appear, select the ASIO4ALL device and then click on the Show ASIO Panel button to reveal the list of devices contained within. Your connected device should appear (ensure that your drivers are up-to-date).
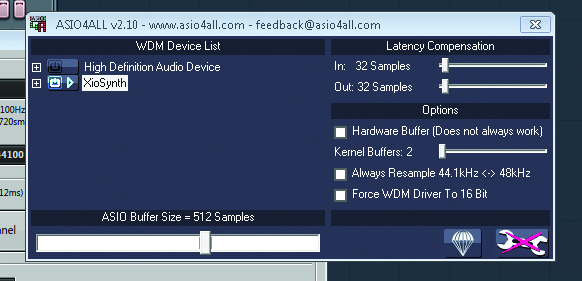
5: This view may differ depending on your hardware, but here you can see the option to select the XioSynth interface and to set the buffer size. Click on the Advanced menu and you get additional options, such as latency compensation, using the hardware buffer and forcing live resampling of audio streams. Leave these in their default states unless you definitely need them.

6:Under the CPU section of the Audio Driver control panel you should make sure that multi-threading is enabled where available for the generator and mixer processing sections. This will ensure maximum audio performance from your system. You can also tell the mixer to work at even higher resolutions – up to 512-point resampling, though this may be overkill.
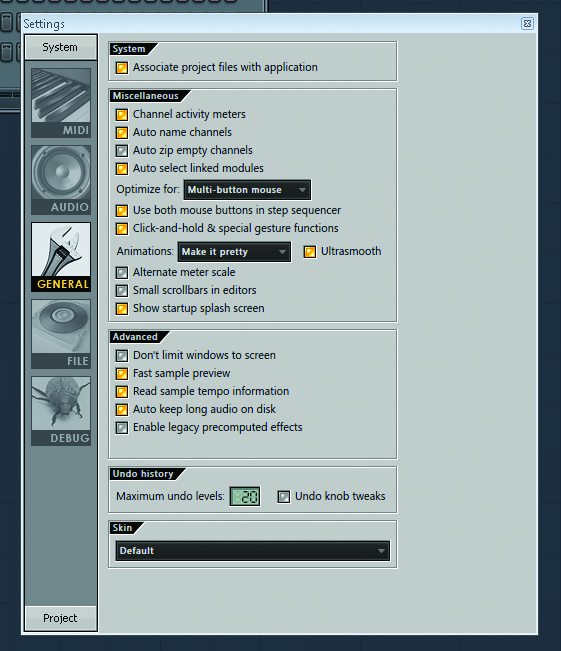
7: The General section determines how the application behaves and responds. Among the interesting stuff here is the option to change the levels of undo available, and to add the choice to undo knob tweaks as well as other actions. You can change the skin of the app too, to alter its appearance.
Continue to Part 2 of our Powering Up With FL Studio Tutorial >