How to record and edit vinyl samples in FL Studio
The days of relying solely on vinyl records for audio sampling are long gone. However, if you’re hankering for that authentic warmth and crackle, FL Studio has you covered.
Vinyl sampling originated in the 1970s and, with the rise of hip-hop, became extremely popular throughout the following decade. Bedroom-based sample-builders and professional producers alike took to relentless crate-digging, forever in search of that proverbial golden record.
Though there are easier ways to craft samples today, there are still plenty of producers slavishly devoted to the old-school charm and sonic qualities of vinyl sampling. But this isn’t a technique exclusive to hip-hop – you can find vinyl samples in any genre. So what is it about vinyl-sample crafting that’s so popular? And how do you get these samples in FL Studio?
Going for a spin
The act of sampling an existing record roughly equates to taking a portion of it and using that as the bedrock of an entirely new track, or blending it with other samples to create something akin to an audio montage. You might isolate a drum break and use it as your rhythm, or you could take a melody, vocal or any other part and chop it up as you see fit. Many hip-hop beats come courtesy of the percussion tracks on soul or jazz records but there truly is no limit to what you might want to sample. Wu-Tang Clan famously borrowed dialogue and sounds – as well as their name – from martial arts movies.
Sampling vinyl is still popular, favoured for the warmth and crackle that comes with playing a vinyl record. These sonic imperfections lend samples a certain old-school vibe, something you simply don’t get when you sample a digital version of a song or piece of audio. FL Studio allows you to add static or noise to your tracks with extra samples or audio plug-ins but it’s just not the same as the real thing. Authentic vinyl-based crackles and hisses are unique and influenced by many factors, such as the state of the record and the needle that’s hitting it. These tiny details can’t quite be replicated.
Best practice
One of the most enjoyable elements of sampling vinyl is the act of crate-digging, picking up interesting-looking records and exposing yourself to music you otherwise wouldn’t. The deeper you dig, the more wild and distinctive your tracks will be. Lately, we’ve used a few Dutch gospel songs from the 1970s and 1980s. But if you’re new to sampling, it might be wise to start with soul records to get familiar with the process.
The fun begins when you get your records home. What did you actually buy? How exactly are you going to use it? Since you’re restricted to the records you have to hand, these questions should challenge your creativity. But, in purely sonic terms, it’s possible that every single record and track has multiple parts that can be repurposed for use in any genre. Turning a Dutch gospel song into a banging hip-hop beat, for example, can be immensely satisfying – and surprising, even to yourself. Who would have thought that was possible? Not the Dutch choir who first laid down the vocals, that’s for sure.
Connecting two worlds
To get your vinyl records in FL Studio, you’ll need some important equipment. A turntable is essential. If used solely for sampling, there’s no need for a state-of-the-art player – perhaps your parents or grandparents still have an old one knocking around? If you’re going to buy one, we recommend a direct-drive. Most older models will need a preamp to boost the signal, otherwise you’ll barely be able to hear what it’s turning out, and even then it’ll be buried by nouse. If your audio interface doesn’t have a preamp, you’ll have to buy your own. The last piece of hardware required is a female RCA to male 6.3mm jack cable to connect your turntable to the inserts/line-in of your audio interface.
FL Studio provides a handful of native tools useful for chopping up and rearranging samples – Edison, FPC, and Slicex, for example. There are also many third-party plug-ins and even more ways to use and combine these within your workflow. For this tutorial, we’re using FL Studio’s Edison and FPC.
Recording and editing vinyl samples in FL Studio: step-by-step

1. Get some records. Visit your local thrift shop or record dealer and dive into the discount crates. Alternatively, many people have records gathering dust in attics, basements and cupboards, so why not ask your friends and family members to borrow some?
2. Just as you would with a microphone or instrument, hook up your turntable to the insert(s) of your audio interface, which will take the audio signal to your computer. If the signal is weak, you’ll need a preamp to boost it.
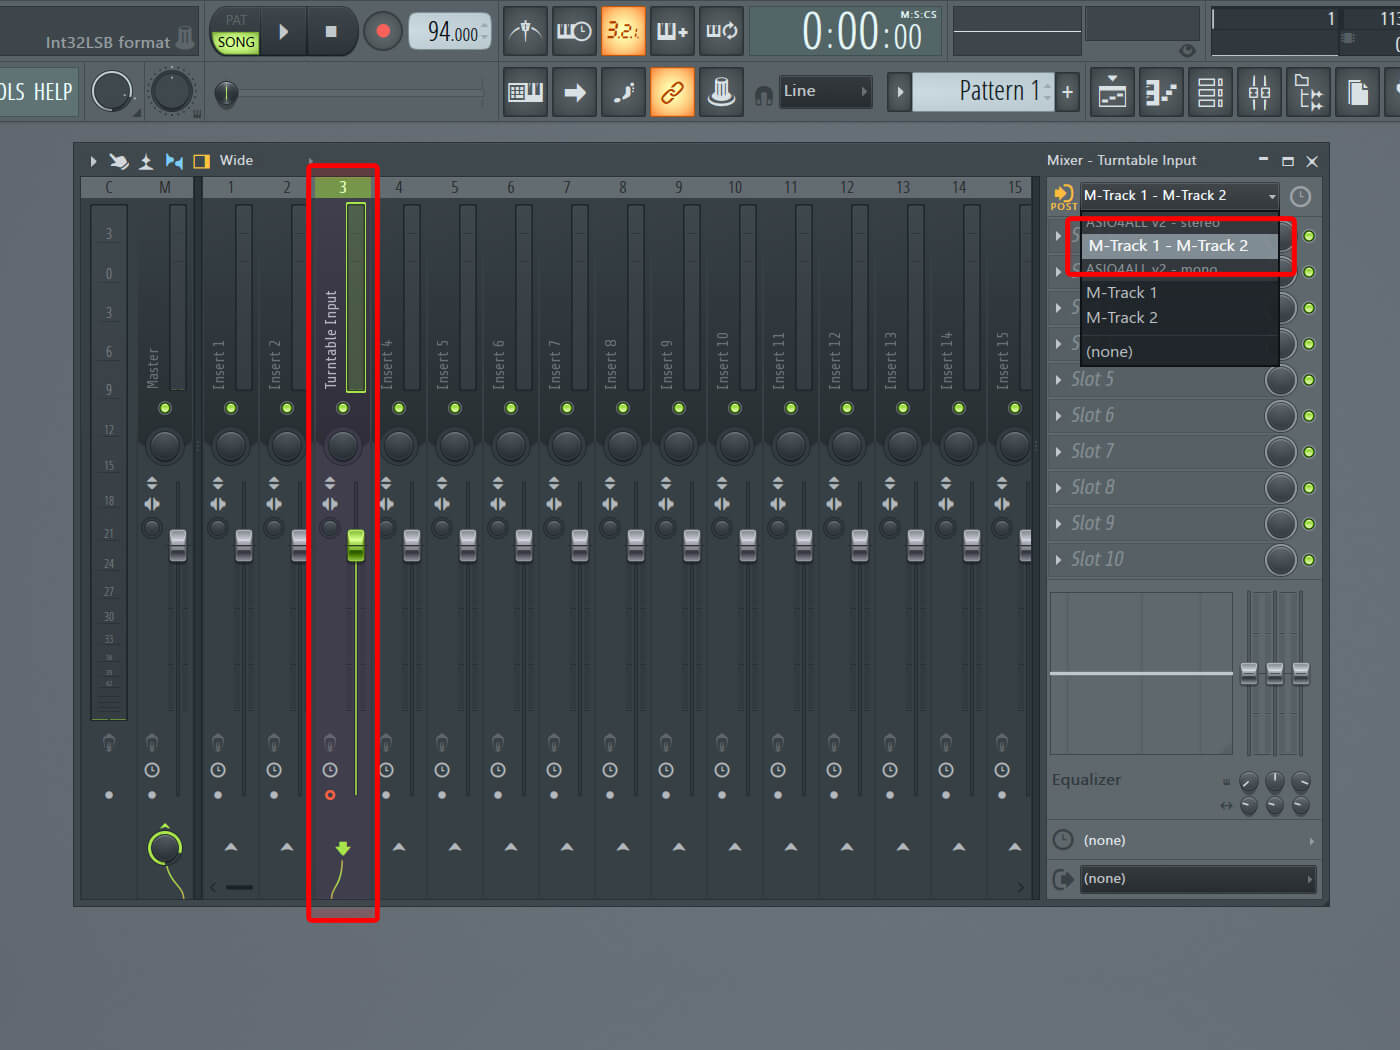
3. Start a new FL Studio project and set a Mixer Track to the input of your audio interface. Select both of the inputs, otherwise you’ll only hear the left or right signal through both your speakers.
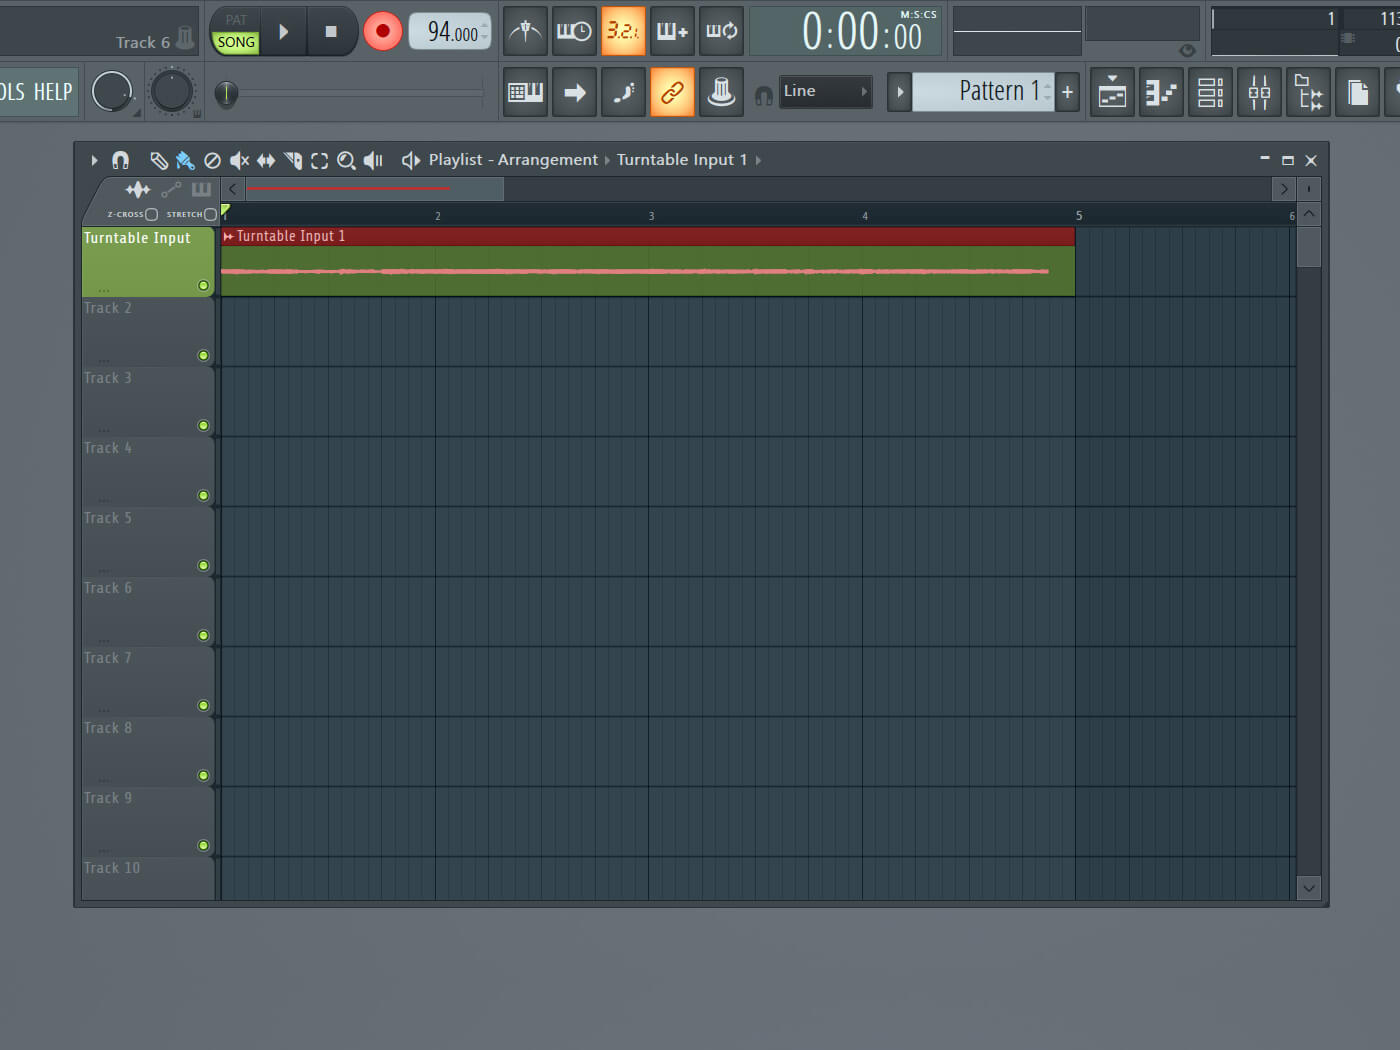
4. Find the area of your record that you want to sample, then hit record and play in FL Studio before pressing play on your turntable. This will insert the audio clip into your song view. Here you can edit it as you would any audio file.
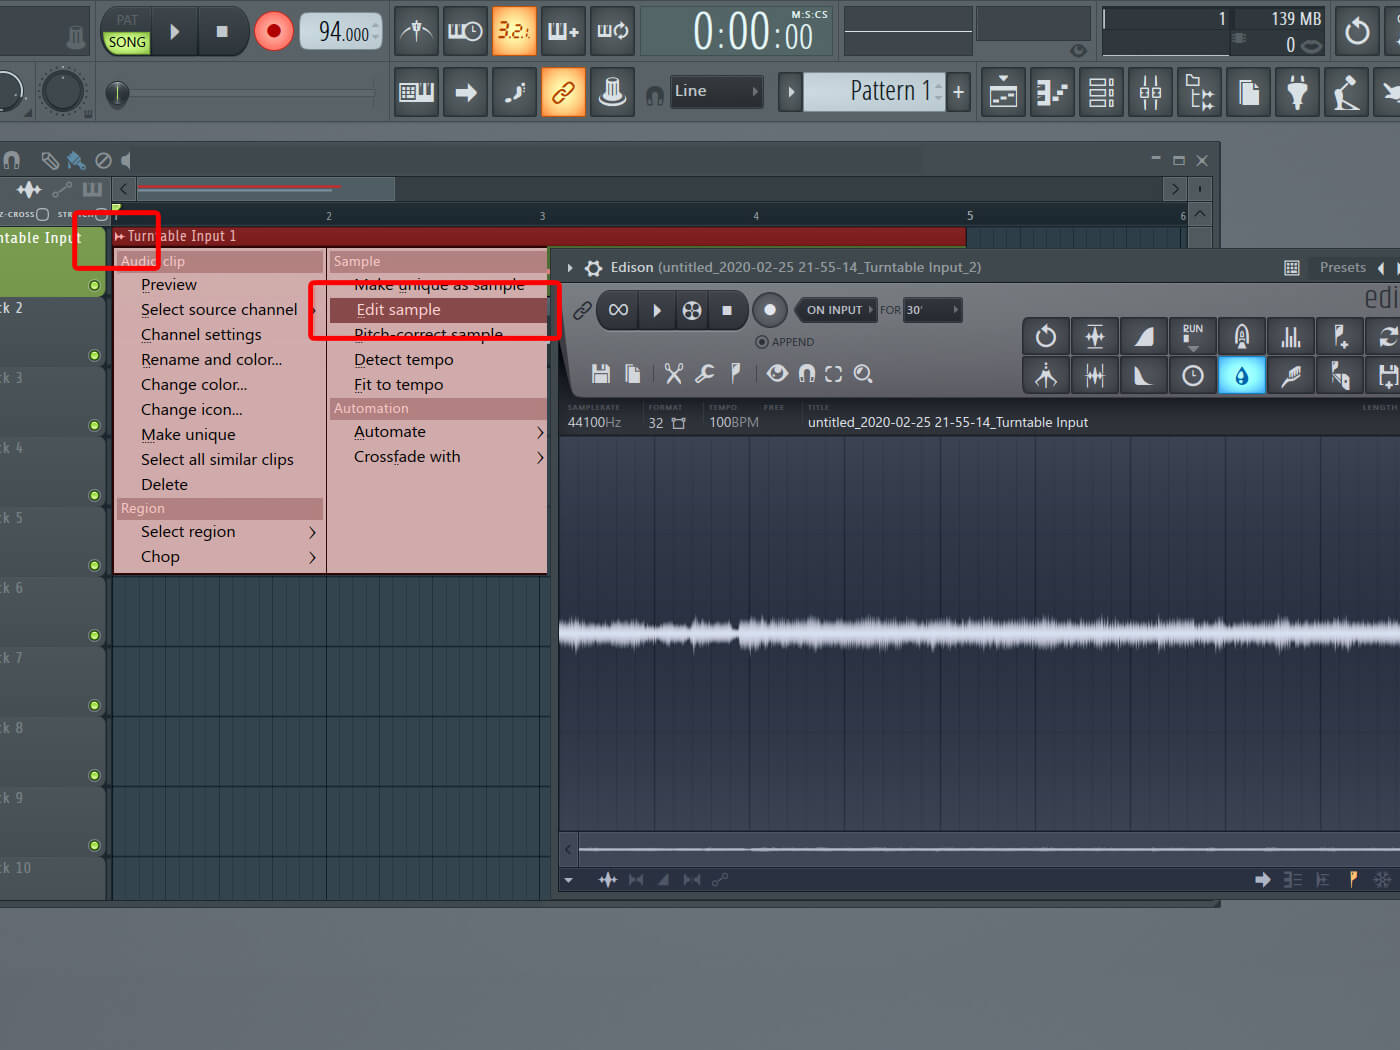
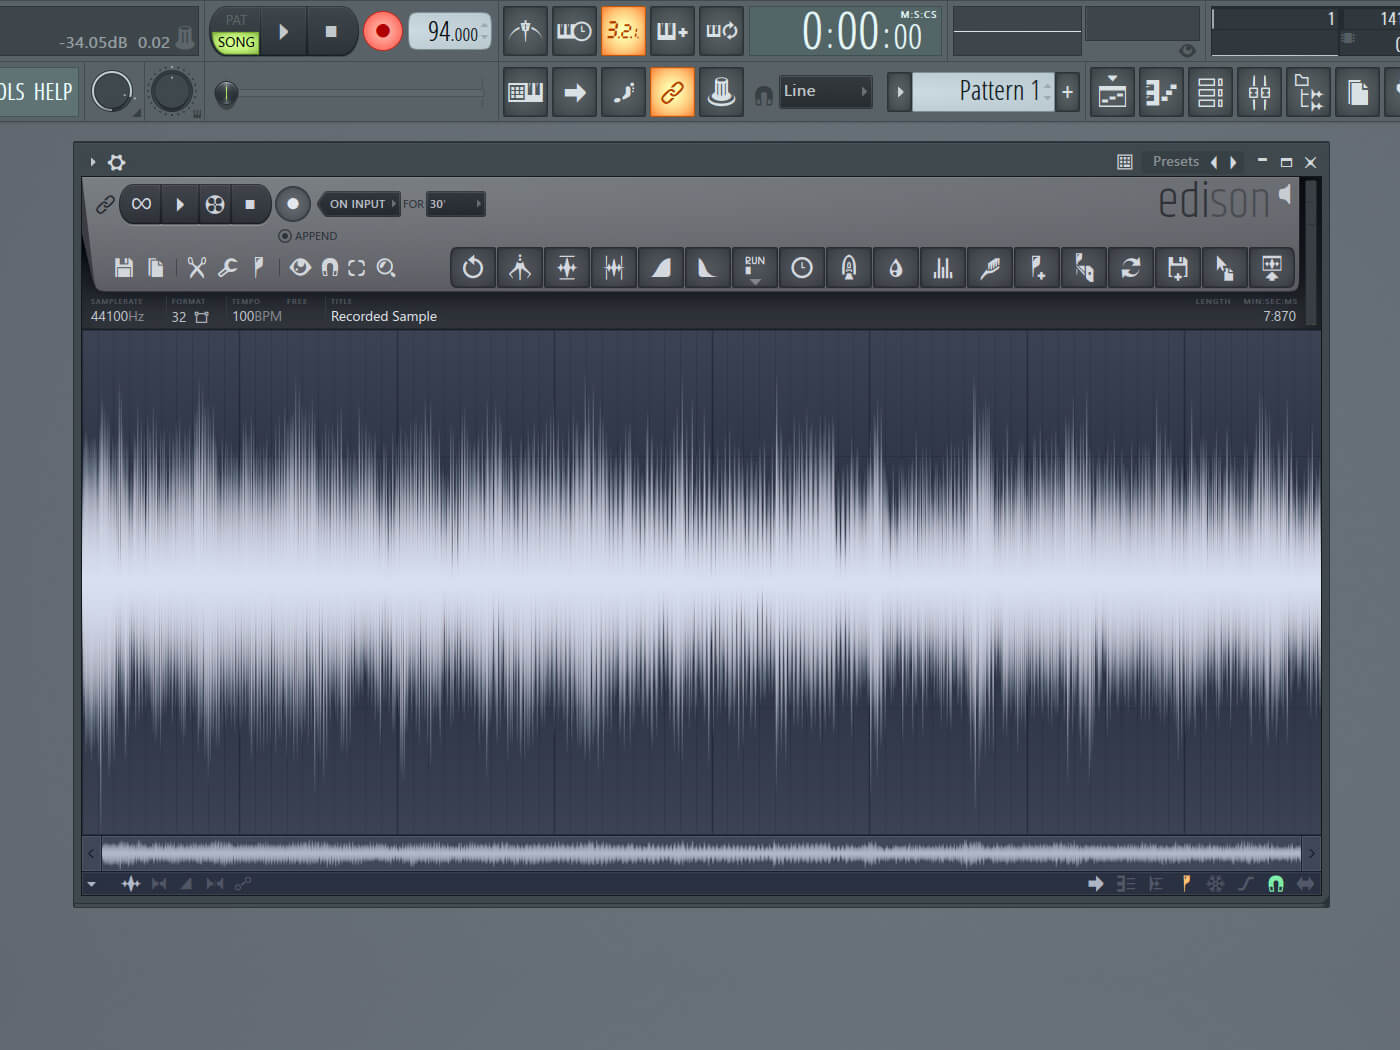
5. If you need more possibilities for editing (and you probably do), click on the top-left corner of the audio clip and hit Edit Sample. This will open Edison and import the sample there.
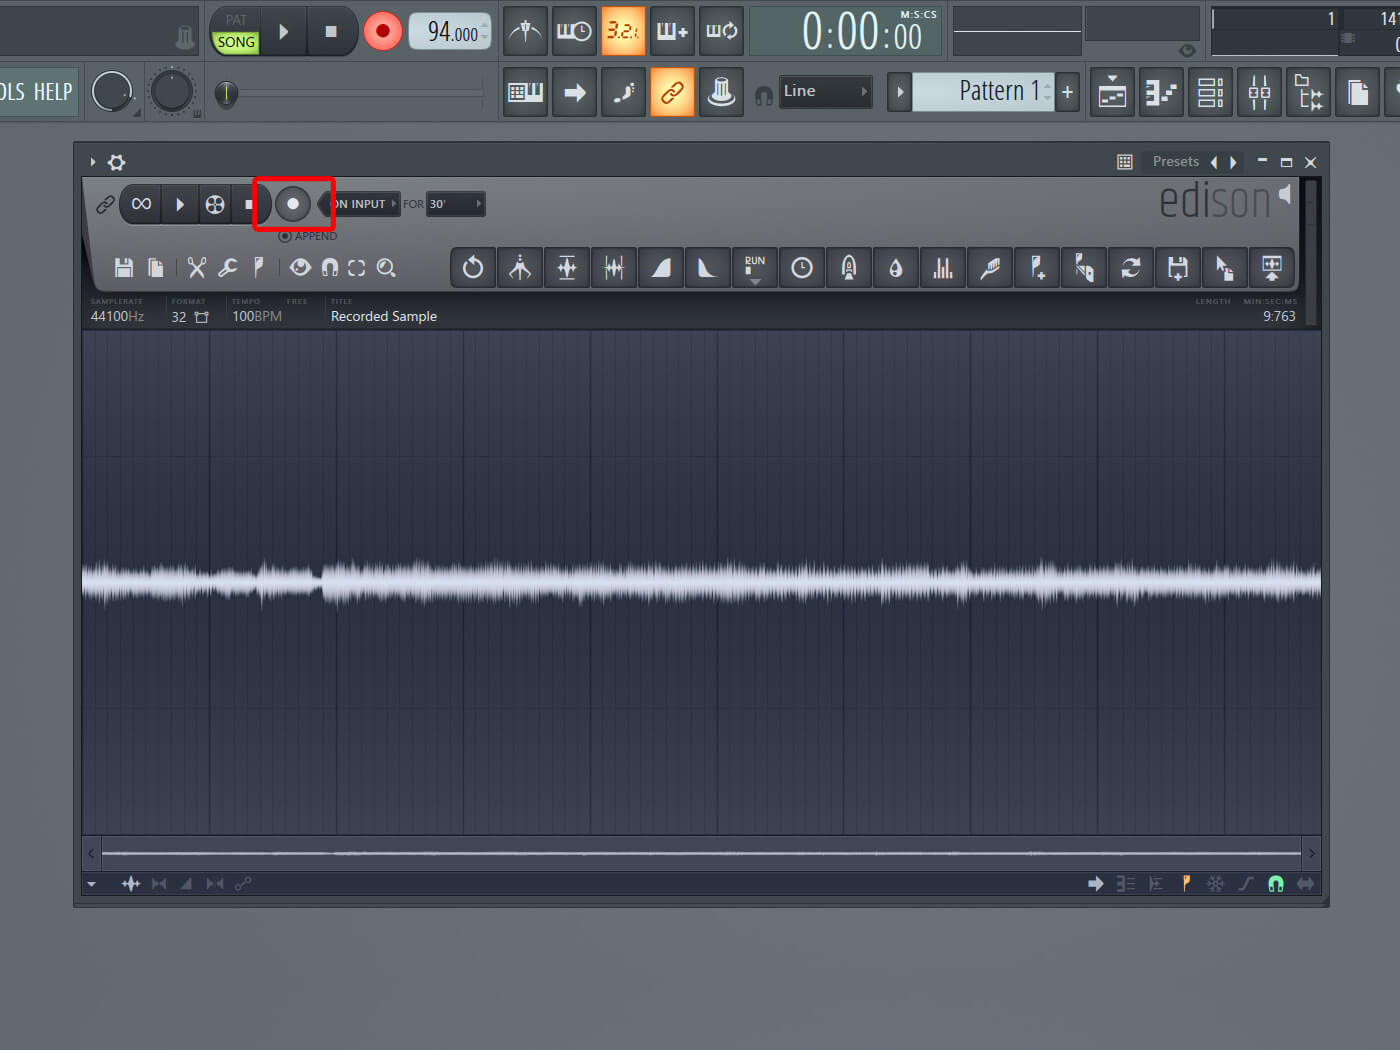
6. Tip: record samples directly into Edison using its own record button. Make sure you’ve opened Edison in the same track in which you set the turntable input in step 3.
![]()
EDISON A versatile tool bundled with FL Studio, Edison is a dexterous audio editor perfect for sampler usage. You can load as many instances of Edison as you require across any number of tracks or effects locations.
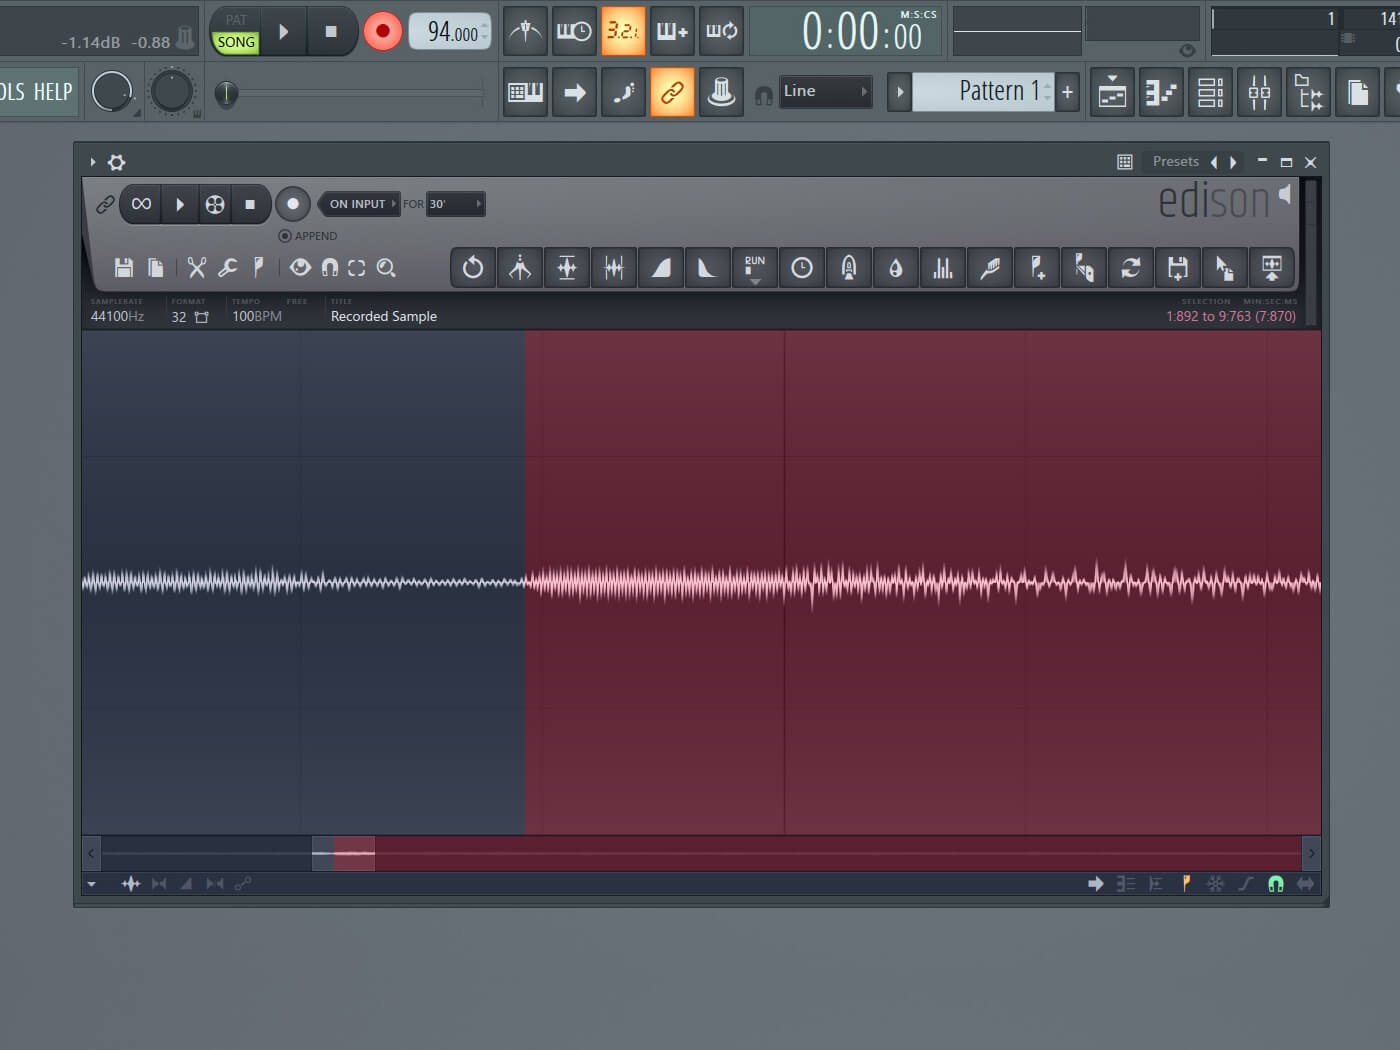
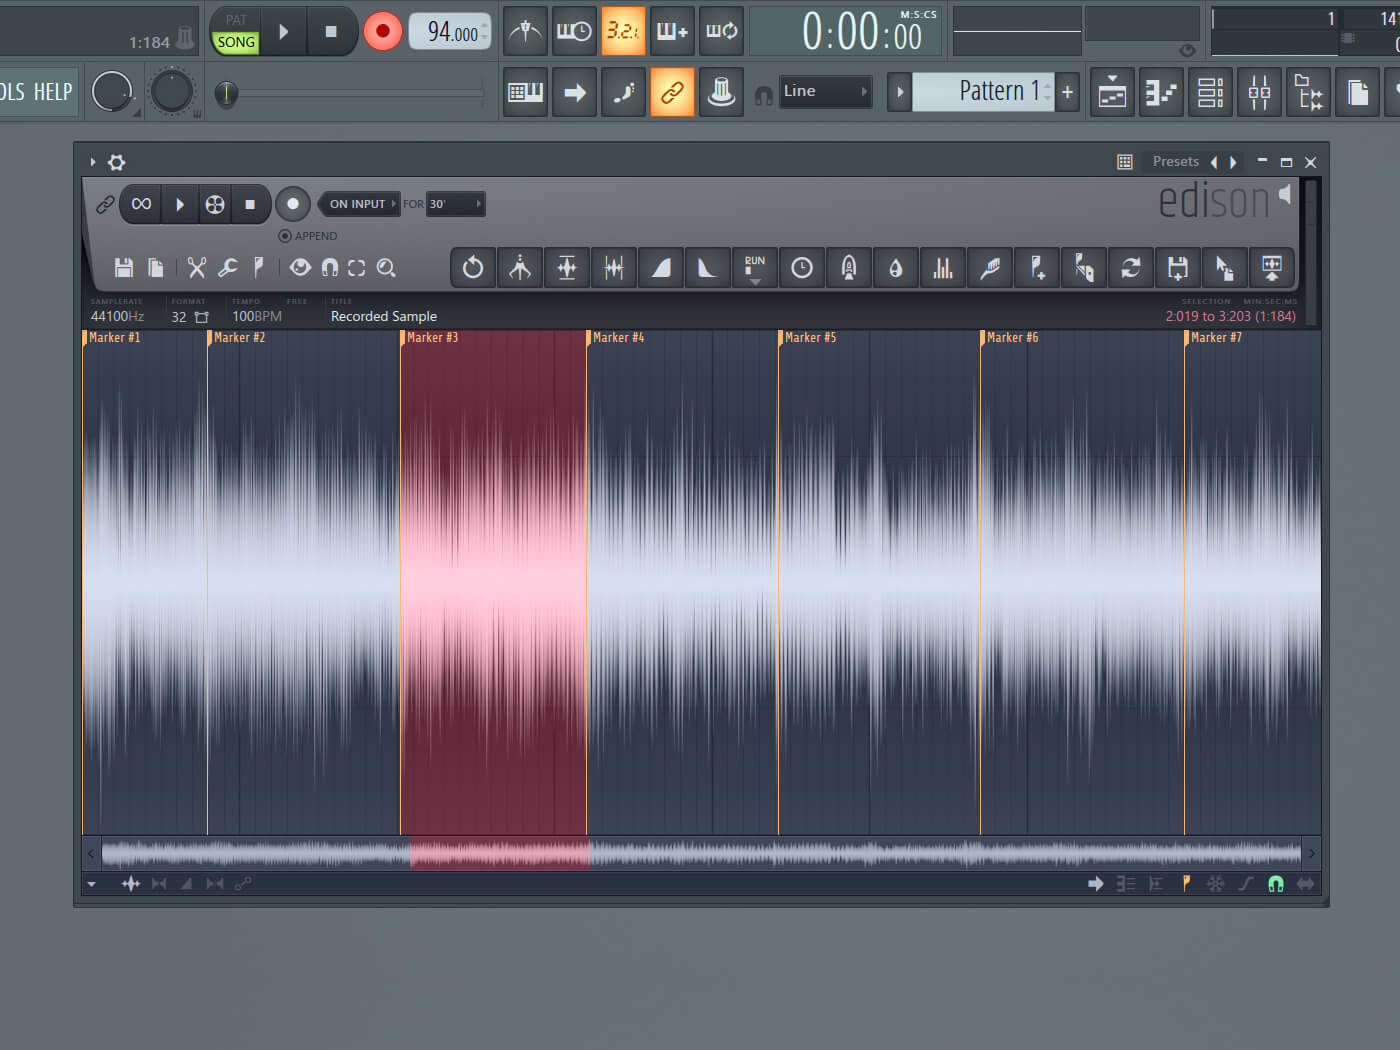
7. Isolate the audio you want by highlighting it and hitting Ctrl+Delete to remove everything except the selected part. Make your selection precise by zooming in and out – hold Ctrl and use the scroll wheel.
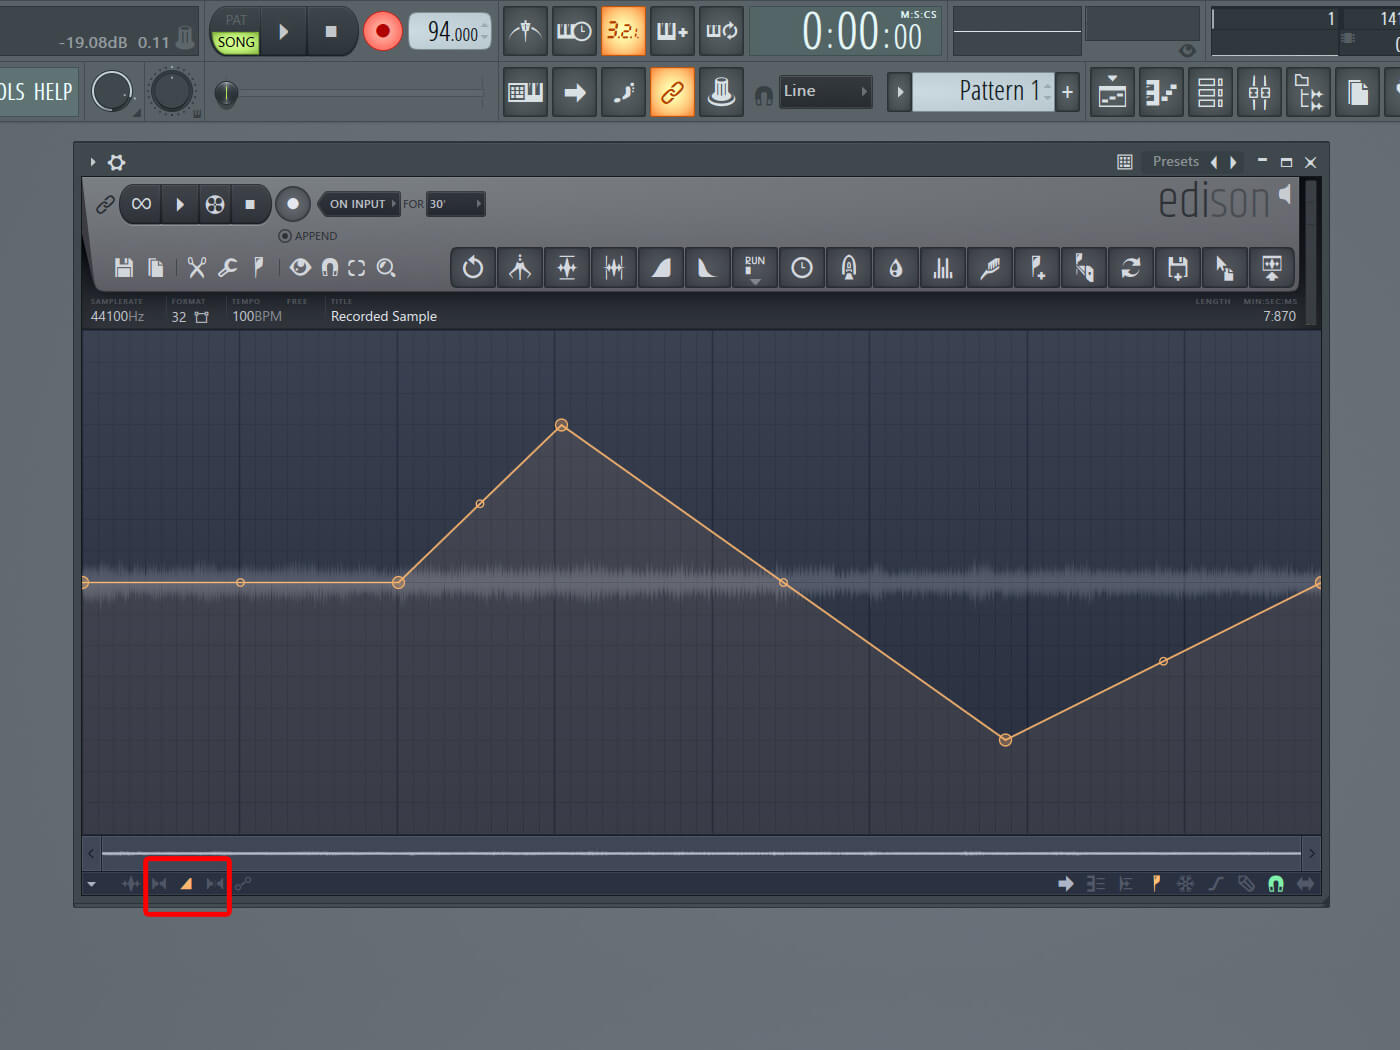
8. To edit the volume of the sample, click on the triangle on the bottom-left. The yellow line is the volume. Shape this as you like by adding extra points – right-click to add points, holding left-click to move them.
9. To boost the entire sample at once, hit Ctrl+N, which normalises the audio. If you detect any loud spikes in volume, use the volume editor described in step 8 to dip it.
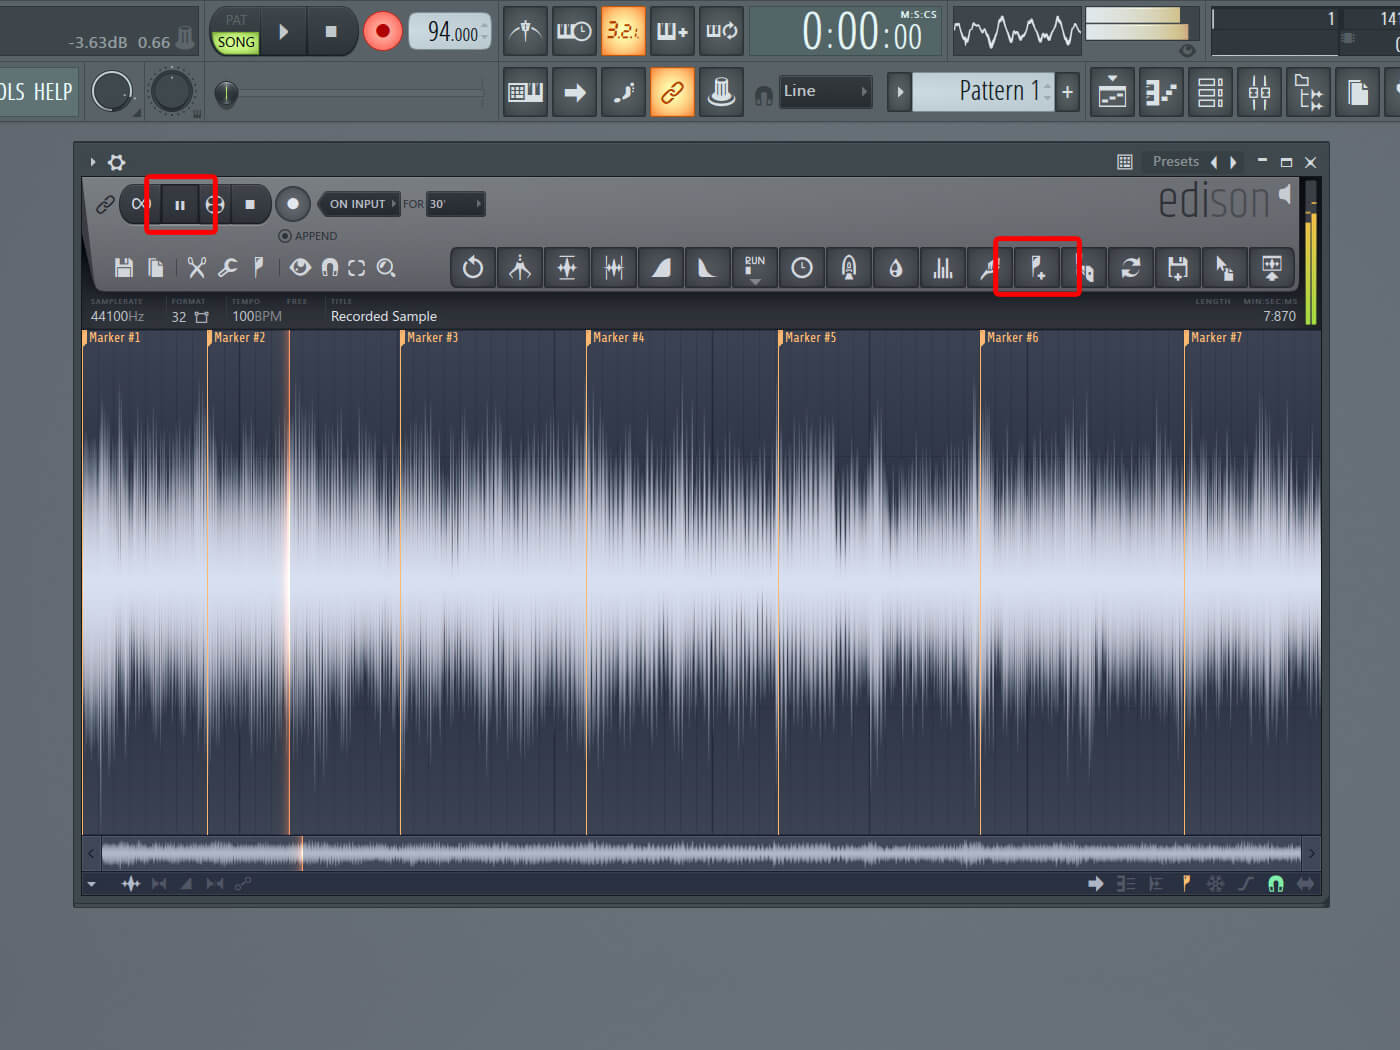
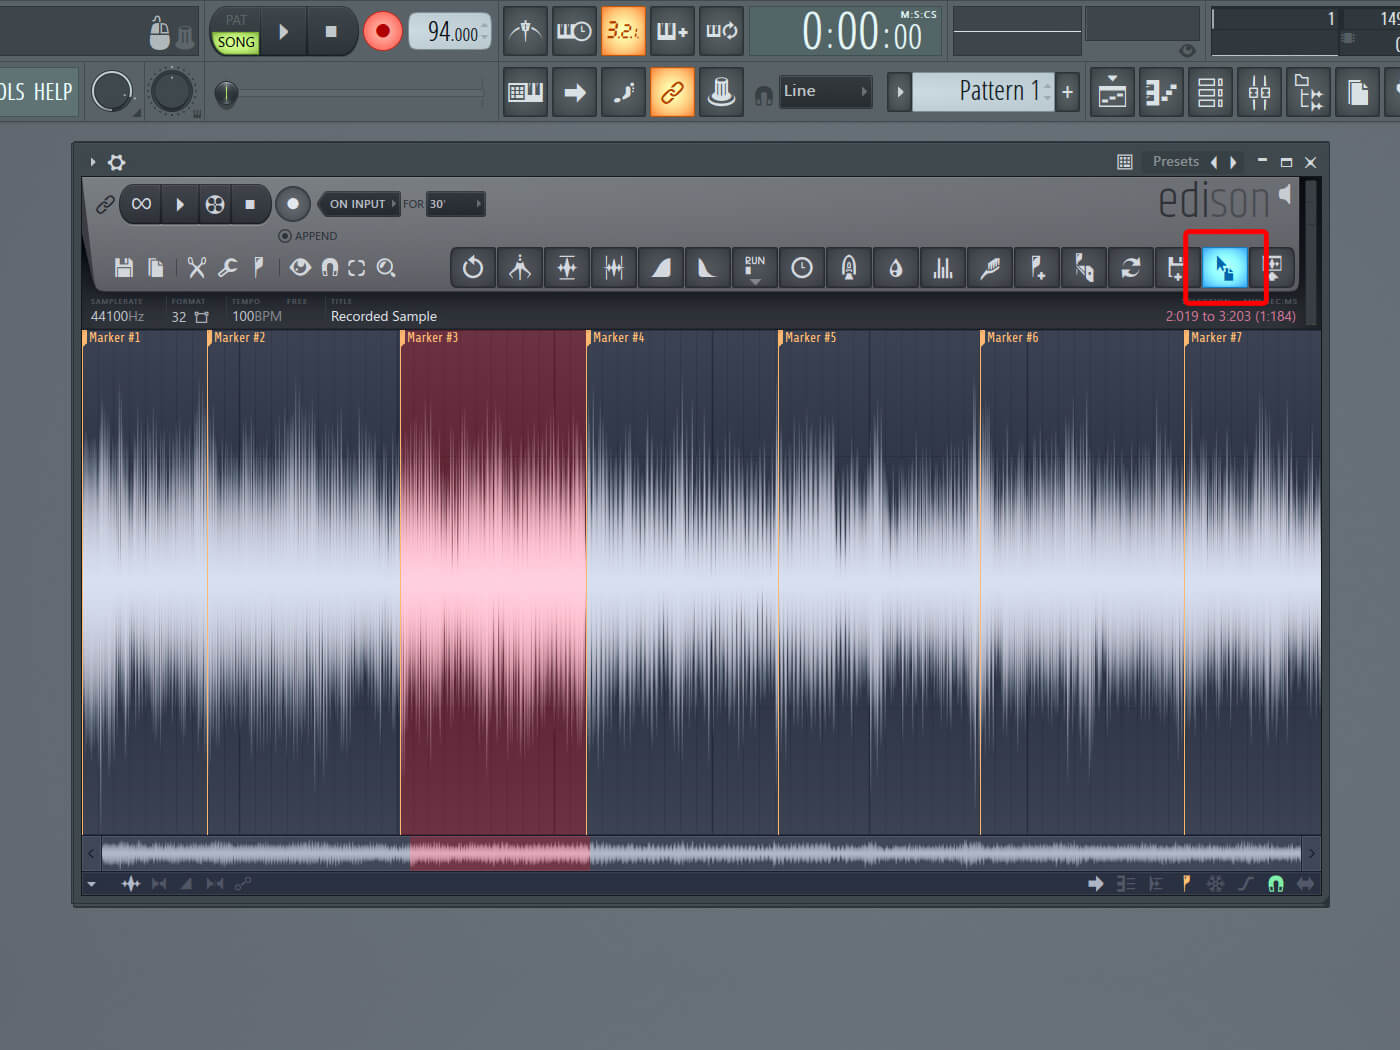
10. Chop up your sample by adding markers, or start and end points. You can play the sample and add them directly by clicking on the marker icon when it plays.
11. Markers make it possible to play your samples using your keyboard. Browse your chopped sections with the left and right keys, and play them with the space bar.

12. The markers make hard cuts, which might mean you hear a clicking sound at the start or end of your samples. To fix this, right-click on the Fade In and/or Out buttons to Declick In or Declick Out your selected chop.
![]()
FRUITY PAD CONTROLLER The Fruity Pad Controller (or FPC) is a simple pad-based drum machine and sample trigger. Import sounds and patterns into the Controller and each pad can contain multi-layer samples, which means you can modify each layer to respond to specific velocity ranges.

13. Tip: When you have edited the sample, bounce it directly to a wav file for later use. FL Studio will also save your markers. Hit the save icon on the top-left and save your sample as a 24-bit wav file.
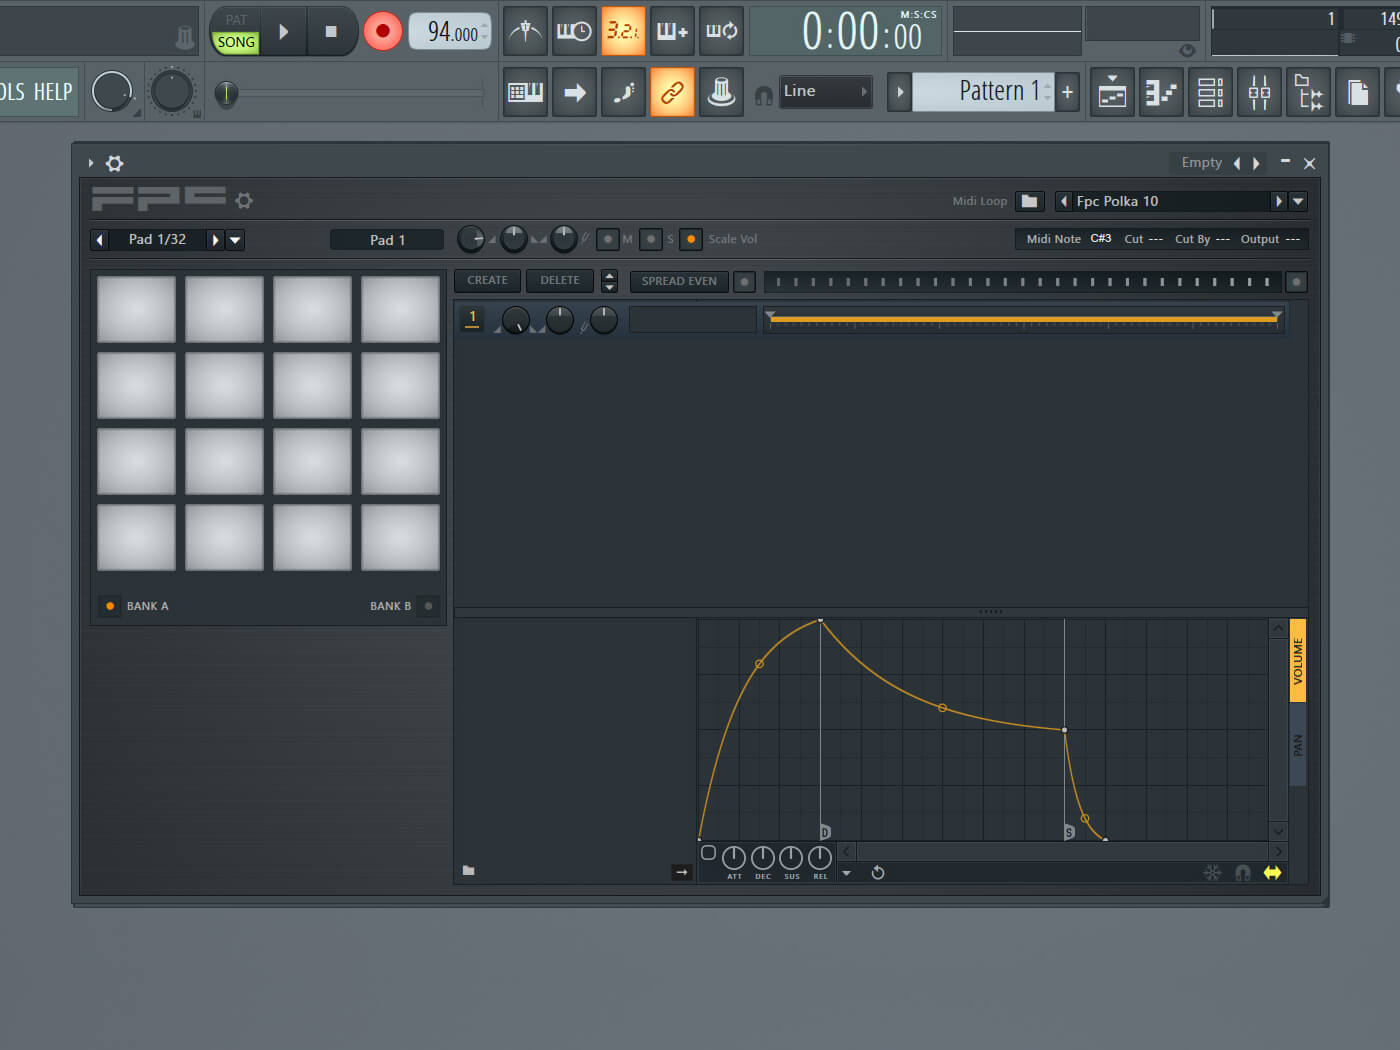
14. With your slices ready, send them to FPC or Slicex. Here, we use FPC since it resembles a drum machine and has similar options. Go to Add and select FPC.
15. To add the chop(s) you want, click on the marker and drag them onto the desired pad by clicking and holding the mouse icon on the top-right.
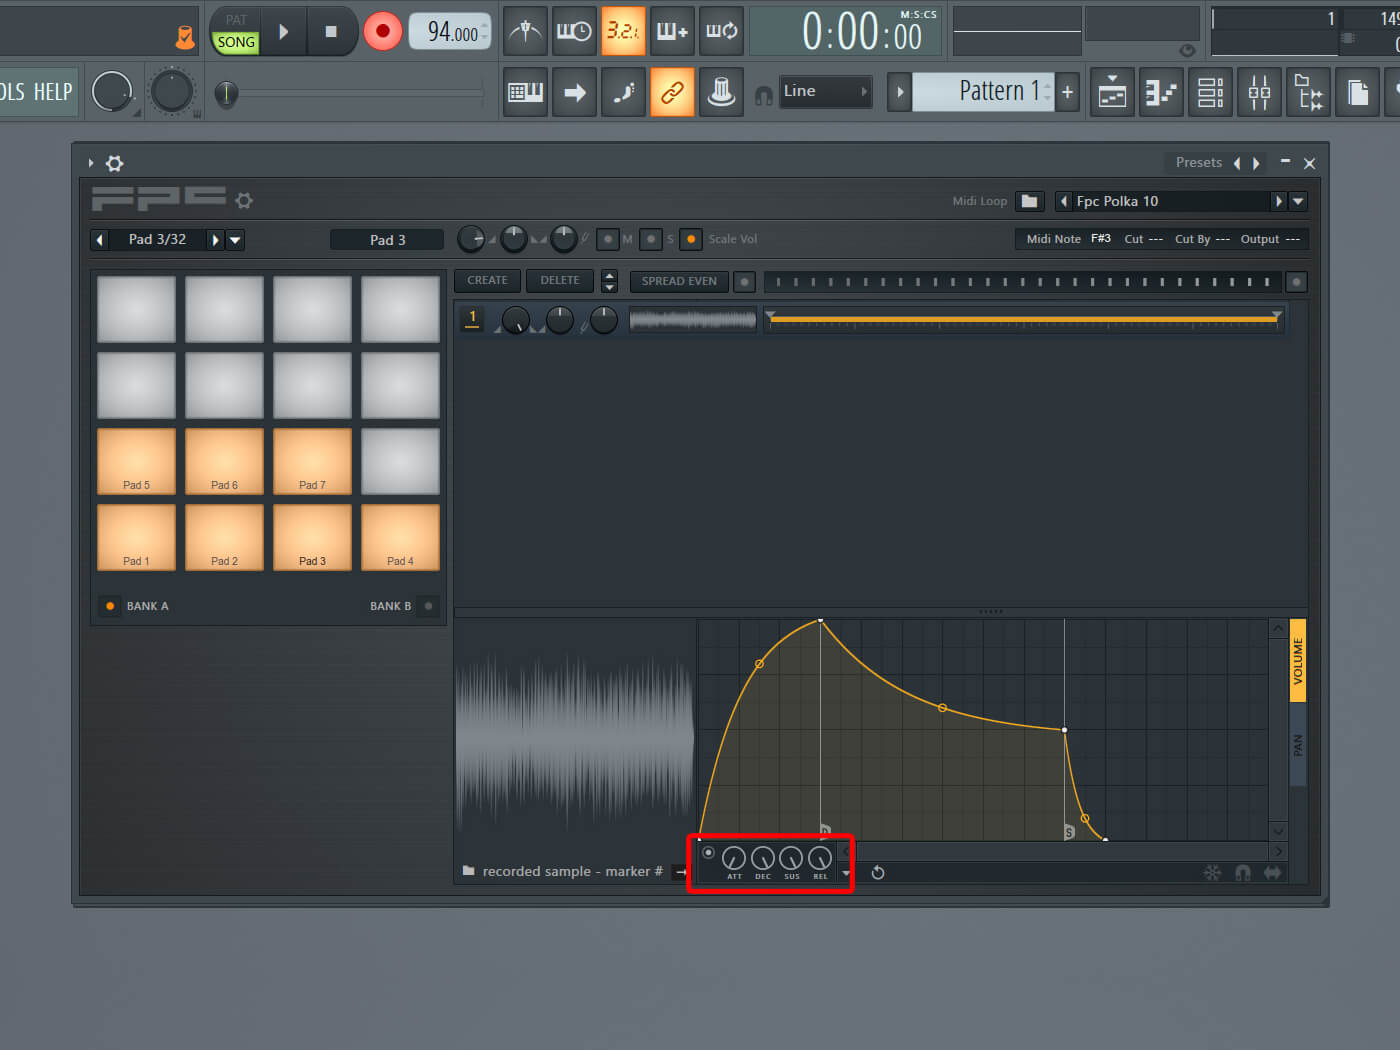
16. One of the advantages of FL Studio’s FPC plug-in is that it has the option to adjust the ASDR settings of every pad. This gives you complete control over the behaviour of your sample when you hit or hold a pad (key).
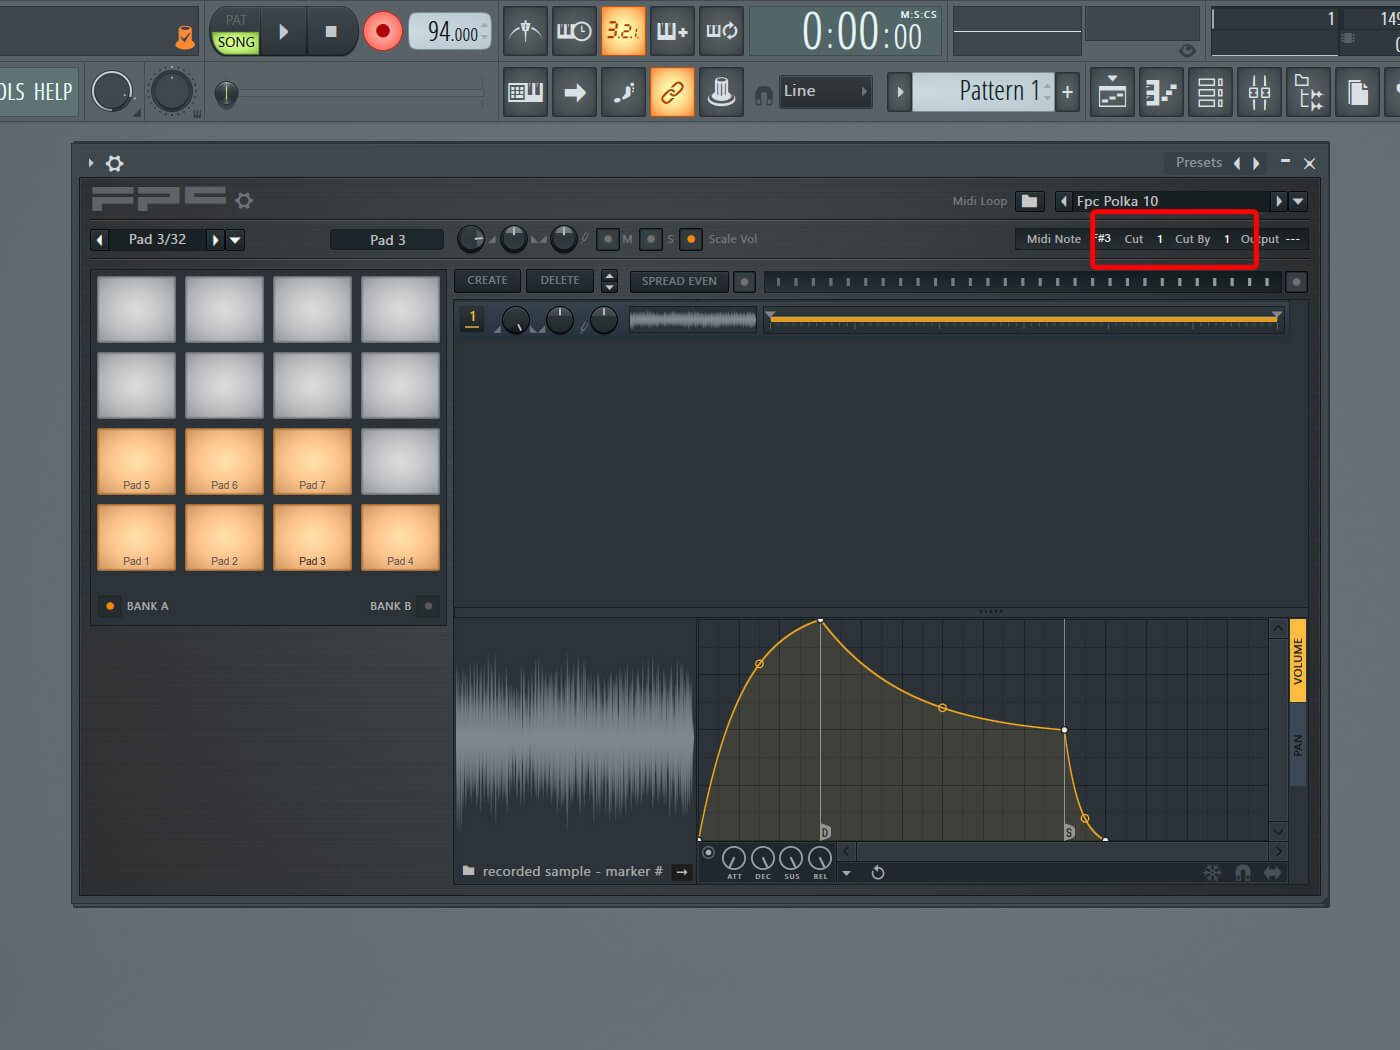
17. Make the chops/pads cut themselves and each other off by using the Cut and Cut By setting, found in the top-right. Give all the pads the same number or create groups by using different numbers.
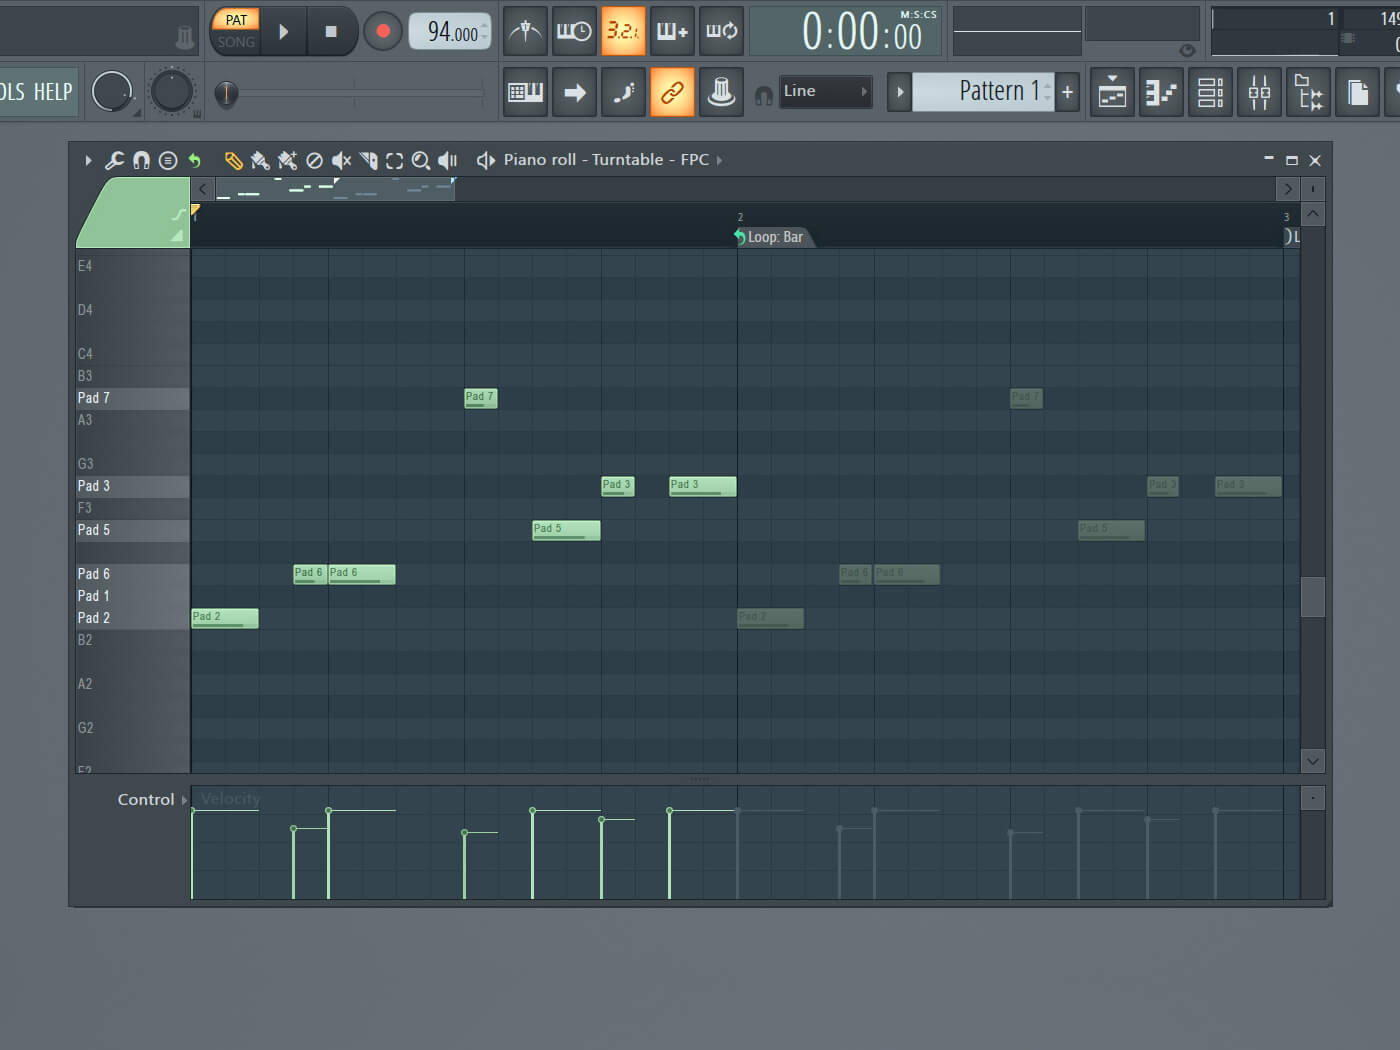
18. Record your chops into the piano roll by hitting record in the FL Studio interface or simply draw in the MIDI notes by hand. Now you can begin using your samples in your tracks.
For more FL Studio tutorials and workshops, check here.