Using the latest effects and plug-ins to finalise your mix
In the second tutorial of our Future Effects feature, Alex Holmes shows us how several different plugins can help finalise your mix. Don’t forget to check out our guide to making creative beats. 1. Here we have a track that’s been mixed to a near finished state and bounced down to stems. Let’s see if […]
In the second tutorial of our Future Effects feature, Alex Holmes shows us how several different plugins can help finalise your mix. Don’t forget to check out our guide to making creative beats.
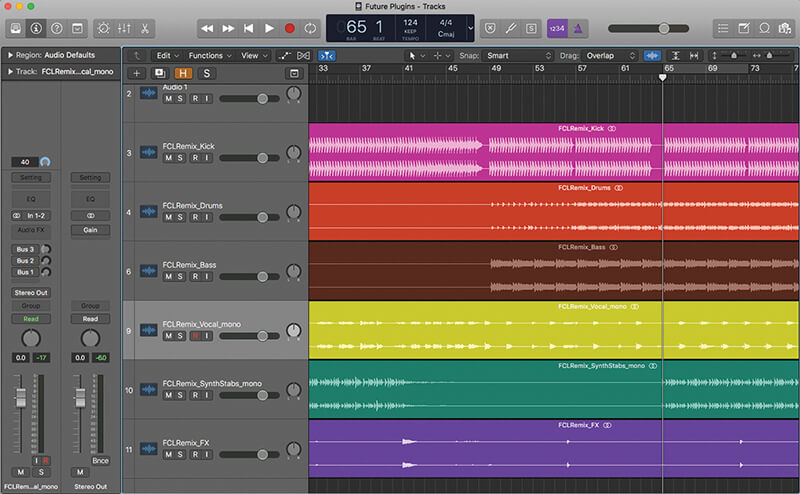
1. Here we have a track that’s been mixed to a near finished state and bounced down to stems. Let’s see if we can use some new plug-ins to help tidy up a few final errors and try and gain that elusive last couple of percent.
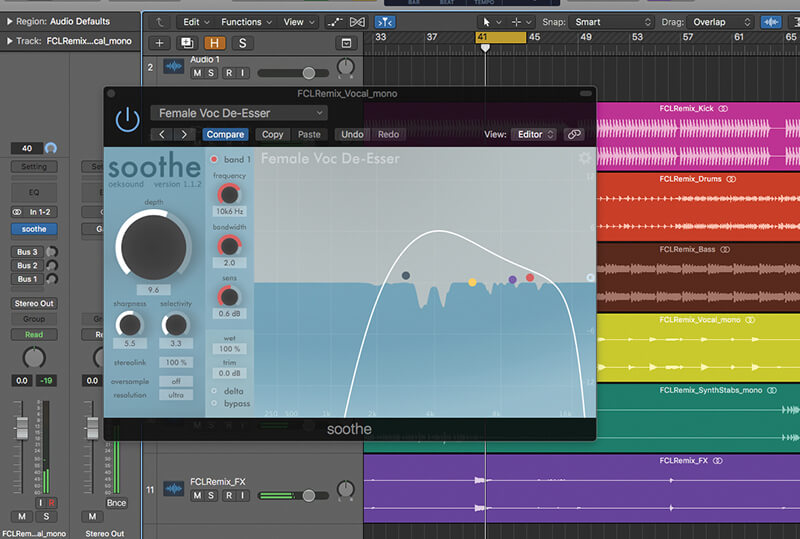
2. The vocal is a little sibilant in places so we can use and tweak the Female Voc DeEsser preset on oeksound’s Soothe. This will target and reduce just the specific resonant frequencies that poke out so it can give incredibly transparent results.
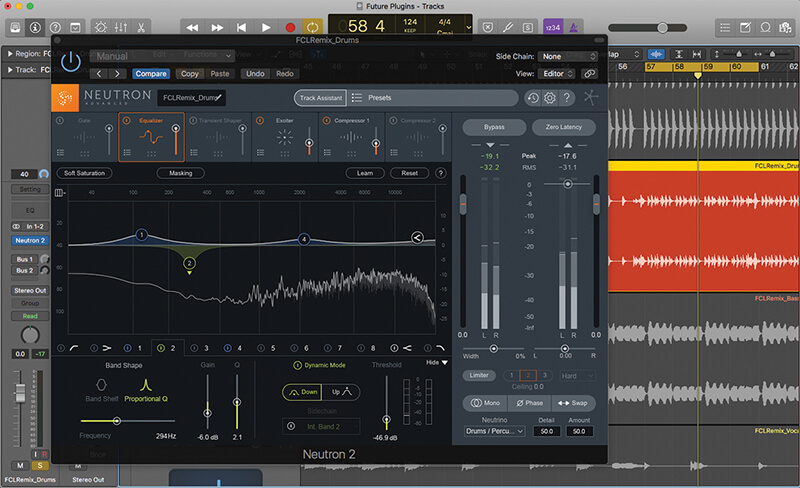
3. Let’s use the Upfront and Medium strength settings on Neutron 2’s Track Assistant to give a bit more life to the drum stem. We like what it’s done to the EQ, but the Exciter and Compressor are a little too pushed, so we can dial them back for a more open sound.
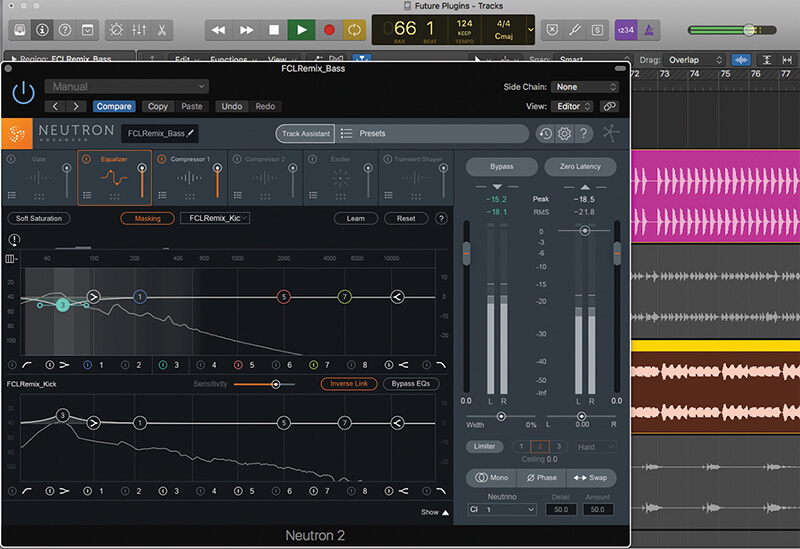
4. Sticking with Neutron 2, we can use the Masking Meter to identify clashes between the kick and bass. With the EQ set to Inverse Link, we can take a notch out of the bass, whilst simultaneously boosting the kick, but be sure to fine tune using your ears.
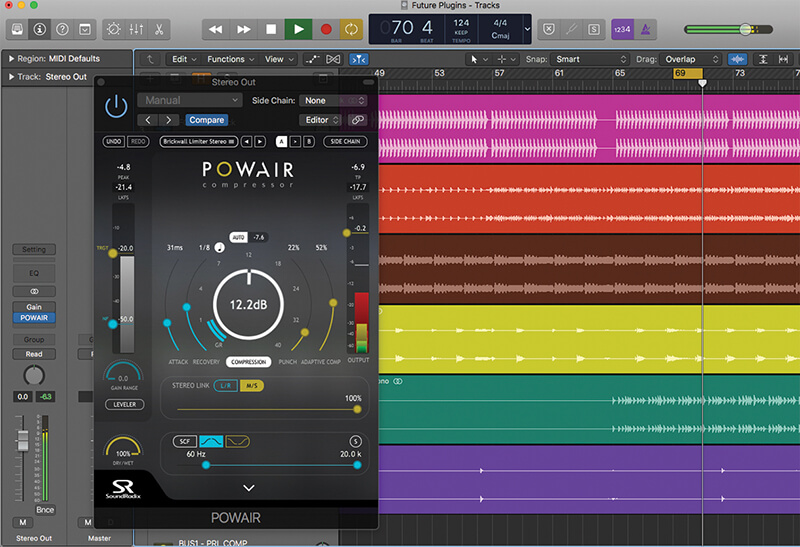
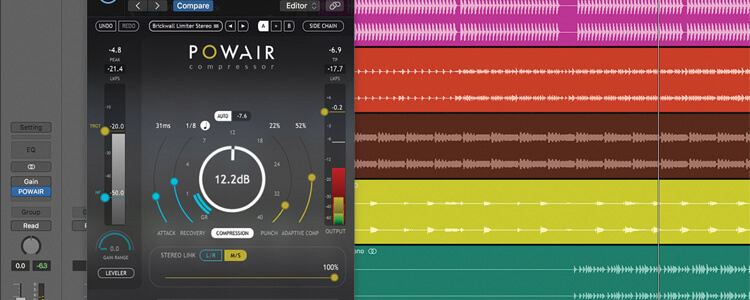
5. Turning our attentions to the master, we’ll add an instance of Sound Radix’s POWAIR. We can use the Auto gain function to help quickly set a tasteful amount of compression, and set the release to 8th notes to get it perfectly synced to the pumping kick drum.
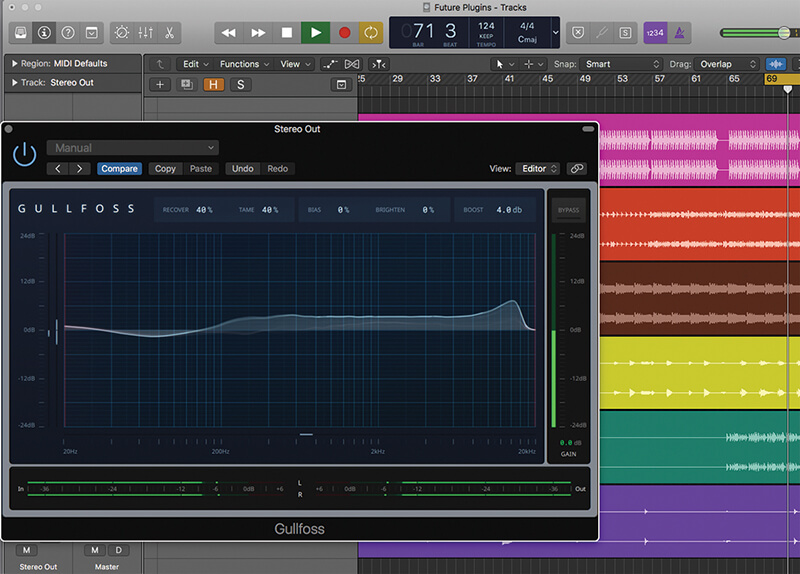
6. Next, we can help even out the frequencies using Soundtheory’s Gullfoss. We’ve set both Tame and Recover to 40%, which reins in the low end and gives more air to the top, then we’ve increased the Boost control by 4dB to add a little sub back in.
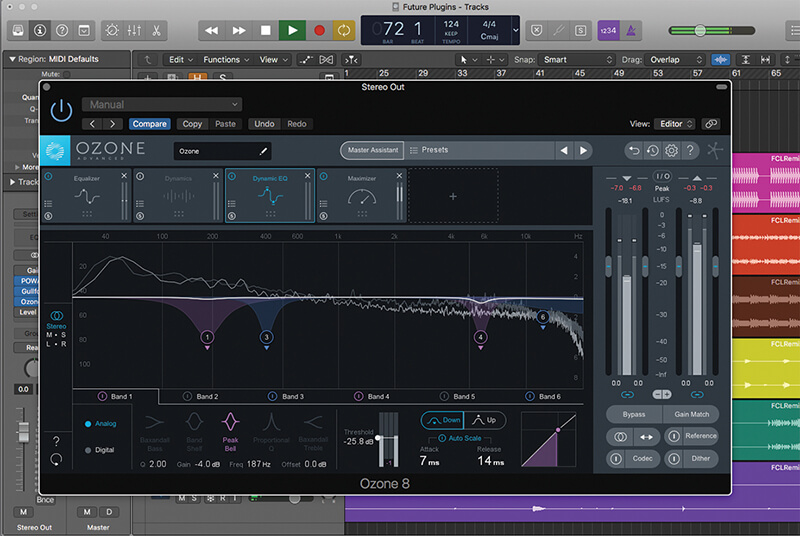
7. Now we have a nice solid mix, we can give Ozone 8’s Mastering Assistant a spin to create a rough master to test on different systems. With minimal clicks, we’ve created a bespoke preset based on a Reference track, and made a few EQ tweaks.
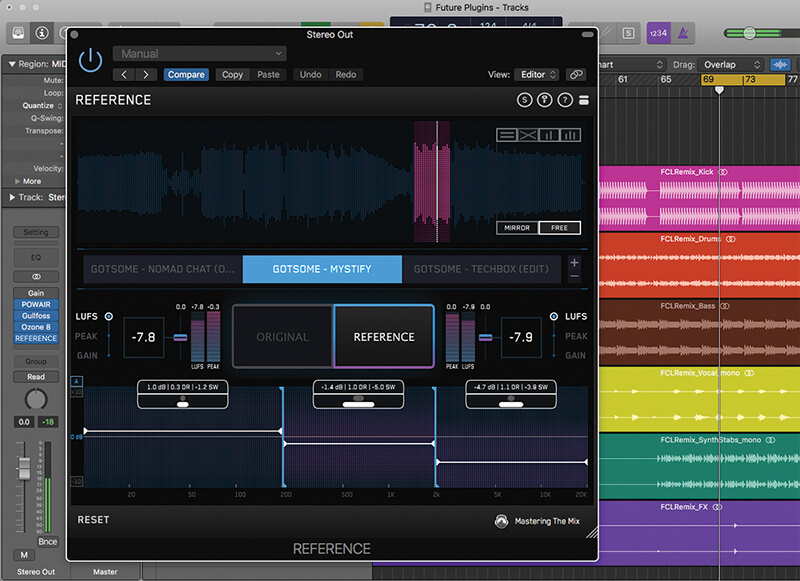
8. Finally, we load up Mastering The Mix’s REFERENCE, which allows us to compare our mix to other tracks. The meters tell us that the overall volume is similar, but that our mix has less top end, less stereo width and more dynamic range. Now we can make final tweaks in Ozone to compensate.