Genre Focus Tutorial: Producing Techno Part 1
A genre that has influenced so many others over the years, techno is still the vibrant tech-based genre it has always been. Liam O’Mullane gets you started on writing your own in the first part of our guide… From its infancy in the late 80s right through to the present day, techno has maintained the […]
A genre that has influenced so many others over the years, techno is still the vibrant tech-based genre it has always been. Liam O’Mullane gets you started on writing your own in the first part of our guide…
From its infancy in the late 80s right through to the present day, techno has maintained the two key aspects that make it easy to define: a driving heartbeat-like pulse that’s provided by a pounding kick drum; and an almost futuristic sound sculpted through sampling, synthesis and other sound-design techniques. Techno is a fascinating genre as it manages to simultaneously paint vivid imagery in the listener’s mind, while also engaging the body through hypnotic hooks.
The thing that makes these hooks unique to most other genres is a lack of traditional musical content. In techno, hooks are usually created from sounds and pitches that work well together, rather than using the traditional western scale. It’s therefore the sounds and rhythms that we’ll be focusing on in this first instalment of the series.

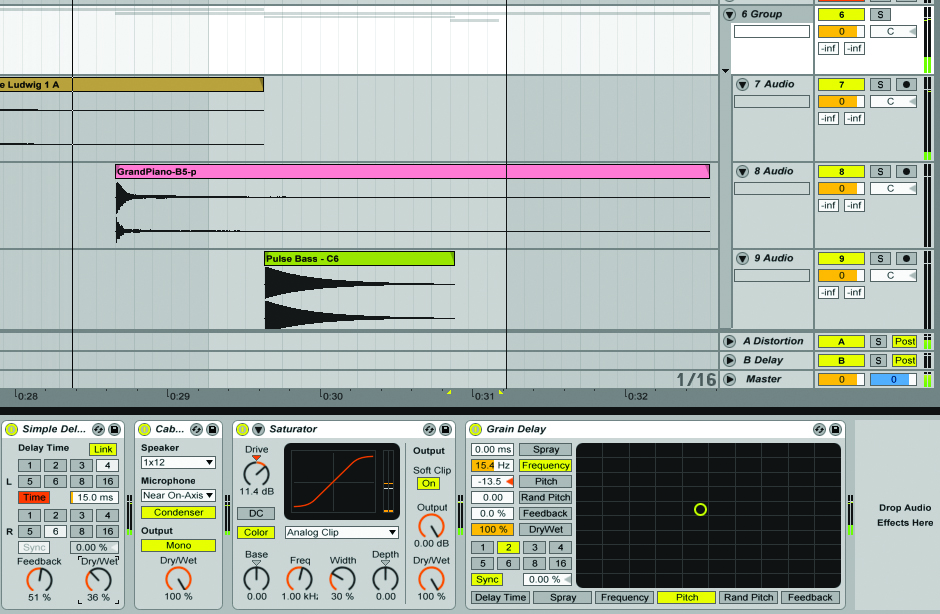
When writing a techno track, it’s important to understand that technology isn’t merely the means by which we create and finish the music – in techno, the technology is the instrument! Effects such as delay are used to create interesting rhythms from short blasts of sound, which are then experimented with to create a song’s main elements. It’s this creative and progressive use of effects processing that forms the ‘non-human’ aspect of the genre that’s so engaging, resulting in sounds that the real world cannot emulate.
Although techno started life in hardware samplers, synths, mixers and drum machines, today it’s commonplace to create a track by working completely in-the-box within your software of choice. Although I’m describing techniques using my preferred software – Ableton Live – each technique can be replicated in all of the major DAWs around today. Audio examples are provided on the DVD to give you an idea of how these techniques can be applied, but asides from the core aspects of song design that makes techno the genre it is, the application of these techniques is open to interpretation.
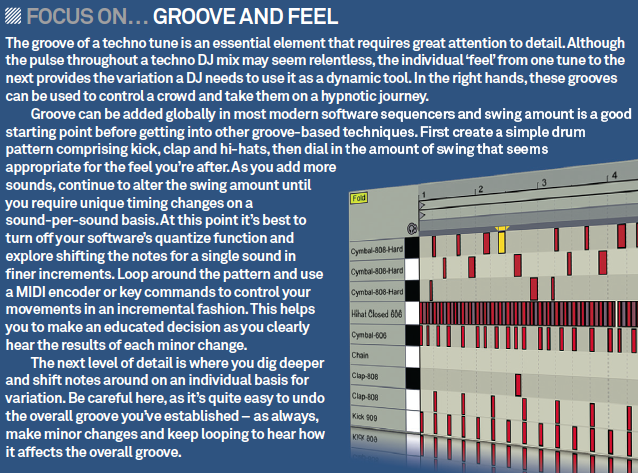
Your first consideration should be to focus on the timing of your parts, creating a groove that your listeners can lock in to. Although there are also many sound-design aspects to focus on as we move forward in future instalments, after reading the following techniques for groove, drums and decorative sounds, you should be in a position to get the feel of your initial ideas right. Next time, we’ll look at taking your sound-design further, working sections into an arrangement and finishing a mix to complete a track. So set your BPM to 120 or more and let’s get started..
Drums and Rhythmic Editing
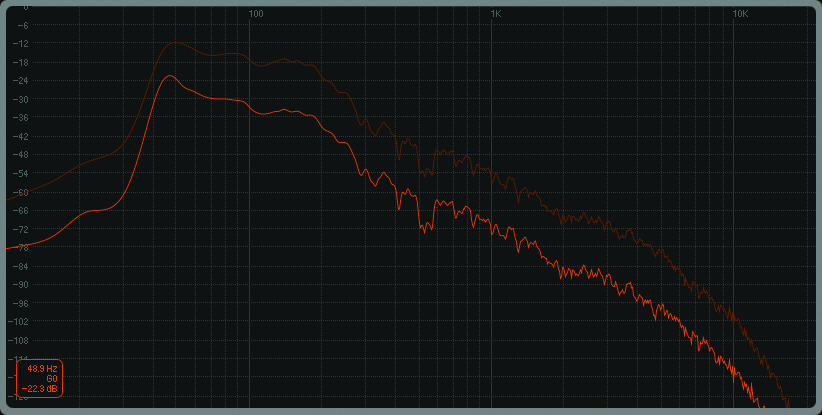
1: As in many genres, your choice of kick tone is dictated by the nature of your bass instrument. If the bass sounds only on the off-beat, when the kick doesn’t play, you’re free to choose any kick you like as frequency conflict is not a concern. If they sound at the same time, you’ll need a kick with its main energy below around 50Hz so a bass can sit above it (or vice versa).

2: The clap is generally used to reinforce the 2nd and 4th beat of the bar while the kick plays on every beat (this can be quite open in terms of its sonic character). Use the pitch of the clap to tune it to your existing drum sound as you work. Either create a close and punchy sound with a small amount of reverb, or EQ-out the lower end and add a long reverb for a larger, cinematic-type sound.
3: Reverb is a handy tool for creating interesting and dynamic backdrops in your mix when used as an insert effect on a single sound. The simplest technique is to automate between the dry/wet amount – mostly dry for light ambience; mostly wet for dominating a mix. Either do this gradually throughout a longer 16–32 bar phrase for a gradual crescendo, or quickly over the last few bars as a fill technique.
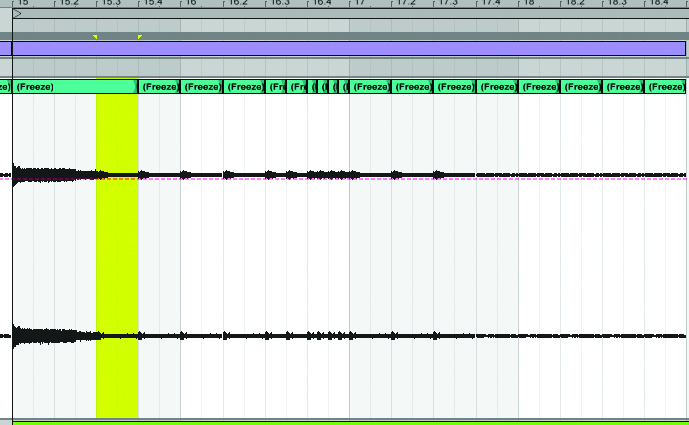
4: A more complex reverb technique involves rendering a mostly wet, long reverb as audio. You can then edit it creatively as you would any other sample. This can involve simple looping to retain the density of the reverb as a constant backdrop, or in-depth, rhythmic programming of the audio for interesting changes behind your sounds in the foreground.
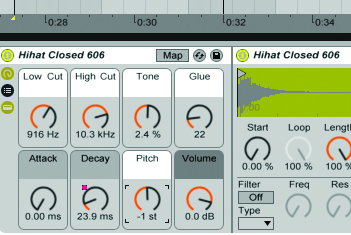
5: Decorative rhythm sounds are usually minor elements in a mix, but in techno they are often treated like a lead instrument. That being said, a 16th hi-hat pattern is usually used to glue the drums together, create a feeling of momentum and help to drive a track. They will need to be clearly heard throughout, so use a combination of sound source, pitch and EQ to find a sweet spot in the mix.
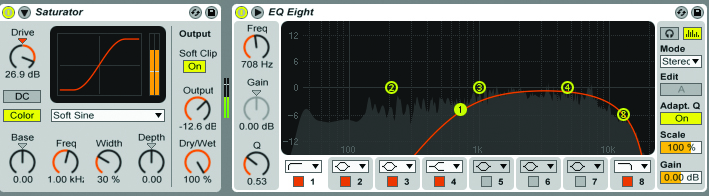
6: Although parallel compression is a good way to achieve a higher sense of energy, parallel distortion can be used to create a dense wall of frequencies; you can then use EQ to tune it into an available space in your mix. This is great for a high-octane, fizzy-sounding mix. Generally speaking, the higher the gain, the lower the distortion’s output needs to be as it becomes less dynamic and more noise-like.
Decorative Sounds and Control
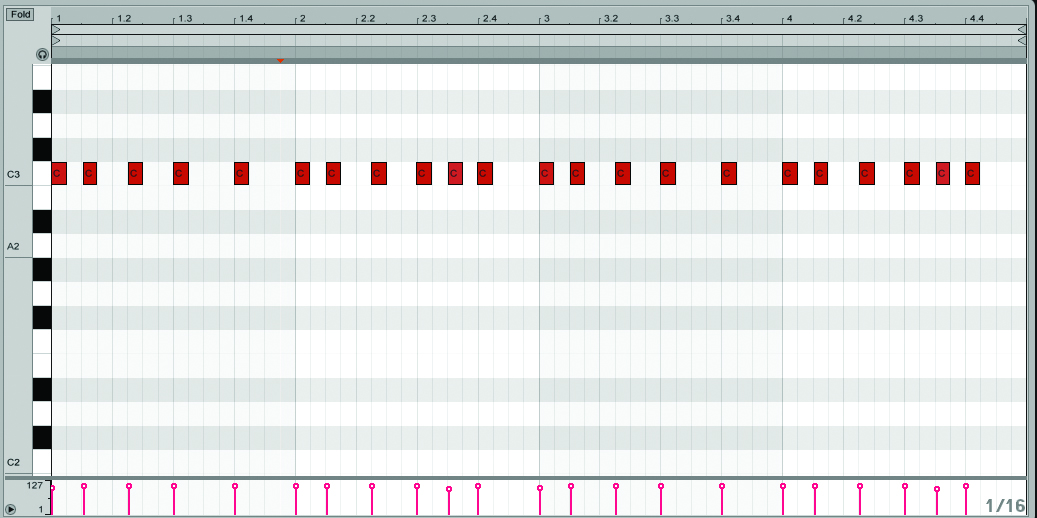
1: There’s no fixed approach to finding the right sounds to base your track around, but we’d recommend focusing on the rhythm first before spending time exploring sonic possibilities. For simple variation as you work – and to help your programming – duplicate the sound a few times and change the start point of each copy.
2: When you’ve created a sequence you’re happy with, experiment with either a single sound or a combination of contrasting tones. A single sound can be given sonic variation over time to add interest, which can be as simple as a slight, fine pitch change. We’ve used the cents control on a sampler for our tuning change, which is hard to notice at first but can be heard when removed.
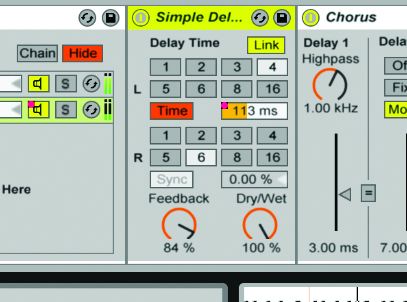
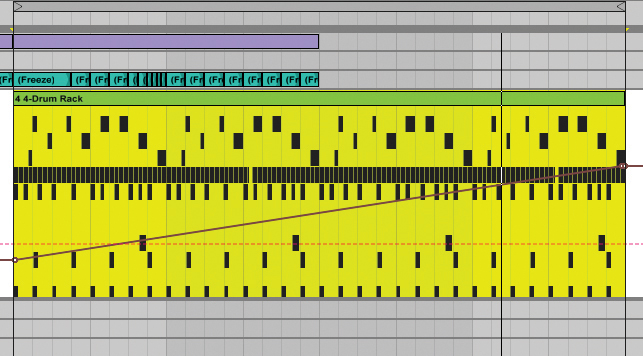
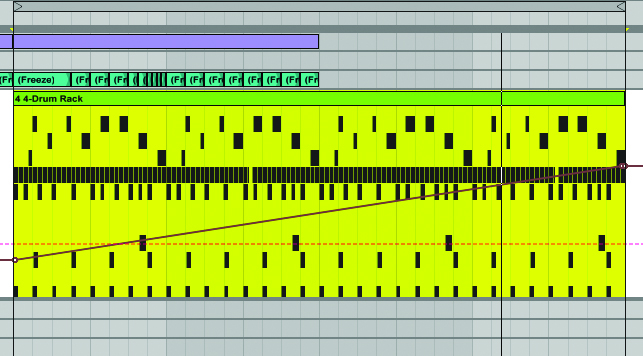
3: Delay is a good way to add a further level of variation to your sound, but be sure to leave gaps in your sequence so the effect has space to be heard. Work in milliseconds rather than sync amounts as M/S offers a much finer level of control in terms of time (and therefore groove). When automated, changes to delay time are also smoother to listen to as you move from one groove to another.
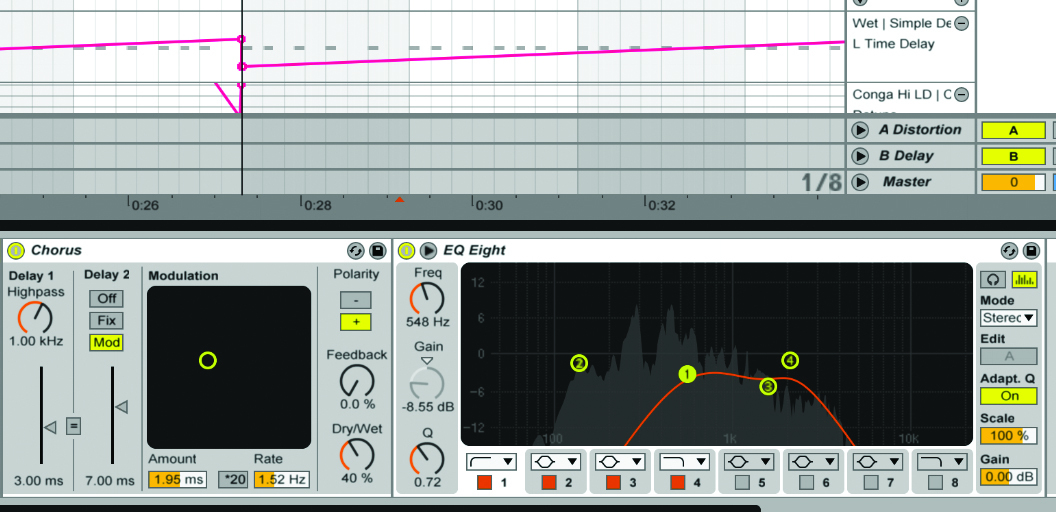
4: Delays can be coloured with mix processing just like any other sound. We’ve added chorus to ours to smooth out transients as well as give them a wider stereo spread. Like parallel distortion, we’re bracketing the delays with EQ to tune them to a suitable space within our mix. All of this processing helps to give the delays a unique character, making them a feature of the mix.
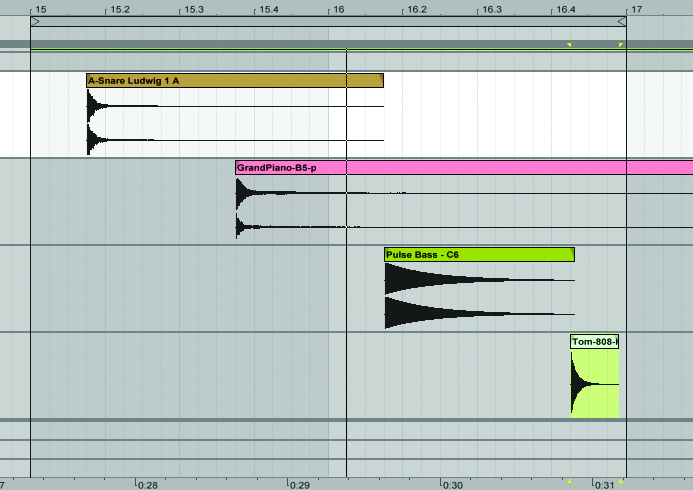
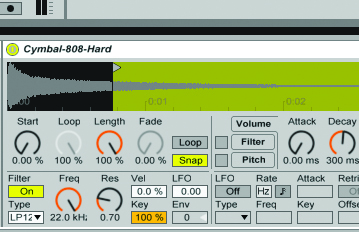
5: If you want to explore different sounds within your sequence, there are no rules as to what they should be. Instrument stabs, drums, foley samples, SFX or recordings made from the objects around you are all fair game. The main requirement is to find a group of sounds that contrast with each other, while helping to accent the dynamics of your rhythm.
6: When using different sounds for a sequence, it can be difficult to create a sense of equal power and clarity. These sounds are one of your lead instruments, and in turn they need to sound unified. This is where group processing is useful, bringing an element of similarity to each sound. Vintage EQ, compression, distortion and modulation effects are all good starting points for achieving a consistent tone.