Genre Focus Tutorial: Producing Trance – Part 1
This month the nuts and bolts of creating music entirely in the digital domain come under scrutiny as Rob Boffard deconstructs a trance track. For this tutorial you will need the project files – Download Here Making music in a digital environment requires knowing certain things about music in the digital format. The problem is […]

This month the nuts and bolts of creating music entirely in the digital domain come under scrutiny as Rob Boffard deconstructs a trance track.
For this tutorial you will need the project files – Download Here
Making music in a digital environment requires knowing certain things about music in the digital format. The problem is that while those things are relatively straightforward once you’ve got a handle on them, they can often be a little mystifying at first –especially if you’ve never encountered them before.
In this tutorial we’re going to analyse a trance track in Pro Tools, and in doing so we’ll deal with some of these concepts.
We’ve put together a trance track because it perfectly illustrates some of the things you’ll need to deal with as a producer – things like MIDI data, watching your levels, putting effects into play and cleaning up your sound. What’s more, breaking down tracks in this way and seeing what makes them tick can be extremely useful for understanding how to mix them properly.
The first component of digital music that we’re going to show you how to deal with and manipulate is MIDI data (Musical Instrument Digital Interface) – the language, of course, that enables your computer to communicate with instruments, be they hardware or software varieties. While you’ll get a much better handle on how it works by following our step-by-step guides and physically doing it for yourself, the easiest way to visualise MIDI data is as sheet music: it tells your orchestra (the instruments you have lined up) what to play and how to play it. This will all make a lot more sense very shortly.
We’ll also be dealing with effects, levels and meters. Effects are relatively easy to understand but applying them effectively is a different story, but, as with MIDI, we’ll get to that. By breaking down how effects can change and enhance an element of our trance tune, you’ll be able to see just how powerful they can be.
Knowing how to read levels and meters is crucial to getting a good mix. Using a couple of dedicated plug-ins, we’ll take a close look at just how loud our trance beat is – and whether this is a good thing. It might not be!
Finally, as a bonus, we’ll go through dealing with artefacts in sound. Even with a software instrument being played using MIDI data, you risk some gremlins and glitches in your audio. Learning how to spot these and deal with them is absolutely crucial, as nothing will scream ‘amateur’ louder than a poorly edited track! So this month we’re very much setting the scene and in the next tutorial we’ll look more at the compositional side of the genre.
Notes and FX
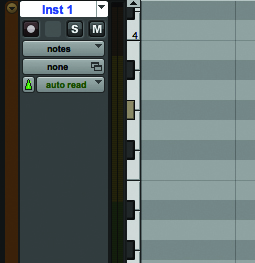
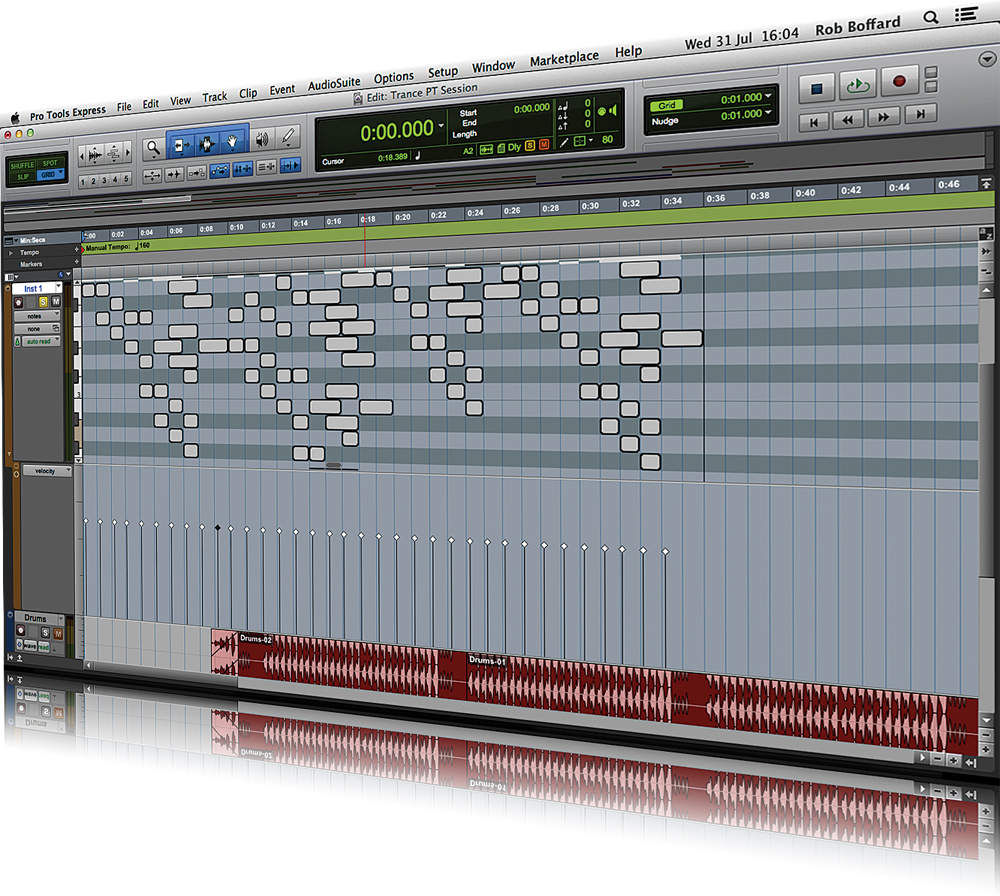
1: Let’s start by taking a look at the lead sound of our trance track. We’ve created it using MIDI, and to demonstrate how the language works, we’re going to draw in a few additional notes. Massive, from Native Instruments, is our synth here, and we’re going to input the notes into the area using the piano keyboard running down the left.
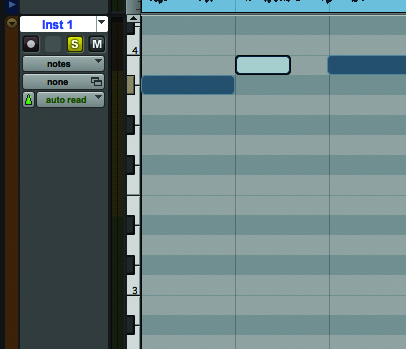
2: Select the Pencil tool and start to draw in notes. Each note has a default Size and Velocity (we’ll deal with that in a moment) and we can extend or shorten notes by dragging on either side, as if it were a chunk of audio. Notes can be auditioned by clicking on the keyboard – even if you don’t have Pro Tools, most DAWs should allow this.
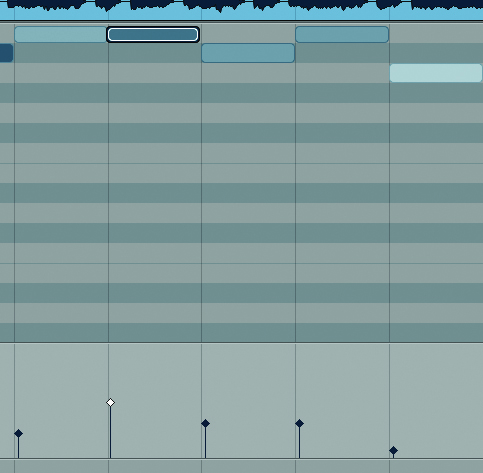
3: Press play and we can hear Massive perform the notes. But like keys on a piano, we can tell Massive how hard or soft to hit each note. This velocity can be edited for each note by clicking the little down arrow on the bottom of the Track Inspector. The lower the line, the ‘softer’ each note will be hit.

4: Like audio, everything in MIDI can be automated. This makes it easy, for example, to have the velocity increase or decrease automatically as the track plays. And by the way, even if we have multiple notes stacked on top of each other, we can still edit their velocity – as per the picture above.
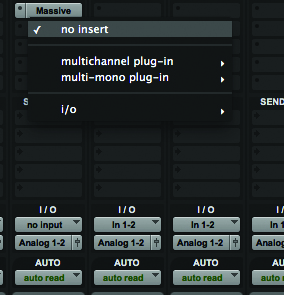
5: Now we’ve got a good, solid trance lead. But it sounds a little flat – especially when paired with our drums and bass line. Time to add some basic effects to sweeten it. We do this by switching to the Mix window and clicking-and-holding in the Inserts tab of our track.
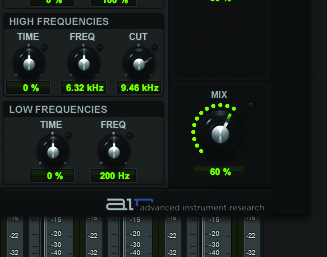
6: Insert Effects are the easiest way to colour a sound. Let’s add a touch of delay and reverb to start. Effect settings are down to personal preference, but remember that a little goes a long way, so we’ll keep an eye on that Wet/Dry knob (labelled Mix here), which will control how much of the effect is applied.
FX and Metering
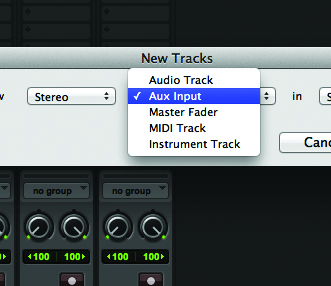
7: Effects such as compression and EQ will help to make a sound easier to manage – and make it easier to fit into the mix. This is a perfect opportunity for us to use a Send Effect – instead of dropping an effect right onto the sound, we mix an effected signal in with the original. We’re going to do it with a compressor using parallel compression.
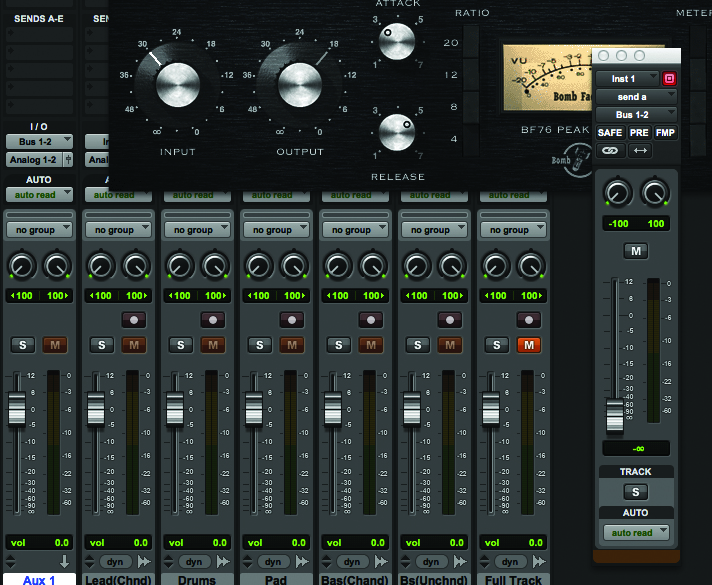
8: It’s as simple as creating a stereo aux track, dropping a compressor onto it, then routing our original audio to it. We can then use the fader that pops up to control how much of our original, uneffected audio gets sent to the aux track. Raise the fader until you can hear a nice level of compression happening.
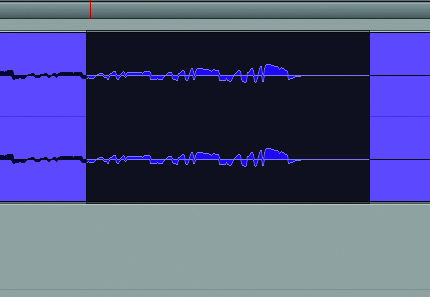
9: One of the things that any track will need doing to it is cleaning up artefacts. In our case, we’ve got a drum loop with a few glitches in it that could do with removing. Using the editing tools in Pro Tools is easy, and if we look closely at our drum line, we can see that there are quite a few breaths to get rid of.
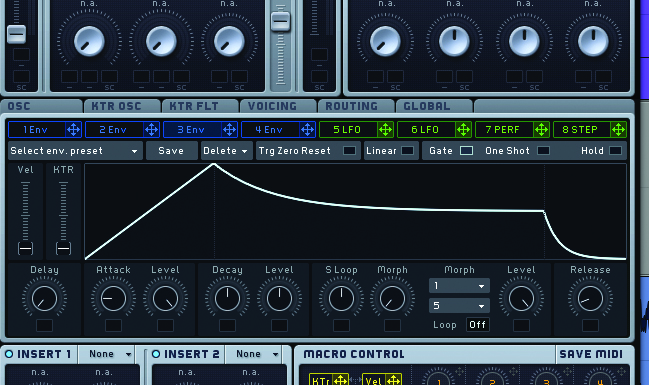
10: When you listen to any audio, you should also be checking to see whether it fades in and out smoothly – failure to deal with this could mean nasty clicks in your audio. For example, our MIDI notes come in very sharply, so we need to dial that down. The easiest way to do this is to adjust the Envelope Attack value in Massive.
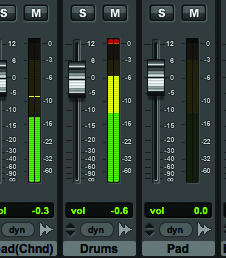
11: Finally, let’s take a look at metering. Open the mixer and play the mix. Right away we can see that some of our elements are too loud – they’re clipping (above 0dB) and show it by going into the red. The best way to start any mix is to drop everything right down, including the master fader, which we’ve dropped to -12dB.
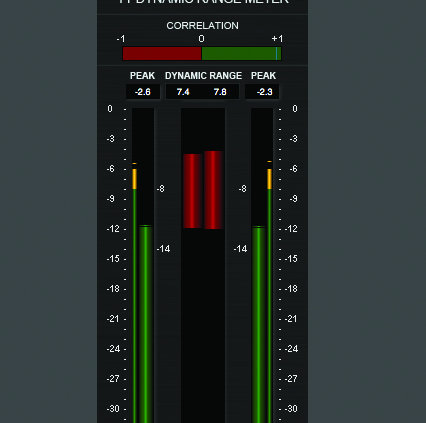
12: A track’s output can be measured in Peak (how loud it is at any given point) or RMS (which gives you an average of the track’s loudness). Bottom line: you want RMS, and your final master output shouldn’t be much higher than -3dB. And if you’re wondering: yes, there is a complicated mathematical explanation for why loudness is measured in negative decibels, which we won’t go into here…