Getting up and running in PreSonus Studio One 3
Master the basics of Presonus’ incredible DAW recorder in minutes with the first in a series of MusicTech guides to Studio One 3. We’ll have you ready to make a tune in 12 easy steps! Welcome to a brand new series of tutorials on Studio One 3, the flagship Digital Audio Workstation (or DAW) from […]

Master the basics of Presonus’ incredible DAW recorder in minutes with the first in a series of MusicTech guides to Studio One 3. We’ll have you ready to make a tune in 12 easy steps!
Welcome to a brand new series of tutorials on Studio One 3, the flagship Digital Audio Workstation (or DAW) from Presonus. This incredible music production software is available for both Mac and Windows and comes in three versions: Studio One Prime, Artist and Professional. Prime is free, Artist around £80/$120 and Prime around £340/$480.
Understandably, the more you pay, the more features you get so, for example, the Prime and Artist versions lack many of the virtual instruments and effects that you get with Professional. You also get more options to mix your music in different ways with Professional, plus more direct connectivity with music websites like Soundcloud.
Professional also has a lot more content to download and use – some 14GB of sounds, loops, hits and beats compared to just 1.5GB for Prime and Artist – so you really do get a lot more bang for your buck.
While Professional might offer you pretty much everything you will ever need, Artist is also a very good DAW option and you can often get it bundled free with Presonus hardware such as the company’s great audio interface range. In our workshop we’ll quickly discover that, as you might expect, Studio One works very well with this Presonus hardware and using the two together often allows you to perform certain hardware and software functions not available in other DAW set-ups.
These special dedicated Studio One tutorials will cover all three versions of the software but, occasionally, we might feature some functions only available in the Professional version just to showcase some of the most up to date and top-flight features.
Getting up and running
We’re starting right at the beginning with this workshop and assuming that you have downloaded and installed the software on your machine. If not, head over to www.presonus.com, register and download – you’ll need a Mac running OSX 10.5 or a PC running at least Windows 7, 30GB hard drive space and at least 4GB of memory (although 8GB of RAM is recommended).
So, in this workshop we’ll show you what you need to know when you first boot up Studio One 3. We’ll run through the first steps of getting the software working with your plug-ins (virtual instruments and effects) should you already have some installed on your system. We’ll also make sure that the software is playing sound out via to your hardware audio interface (or, if you don’t have one, your computer speakers), and then show you how to prepare for song creation.
It’s all in the tracks
Like most other DAWs, Studio One allows you to put songs together with different tracks – that is beats, vocals, guitars and so on. Tracks within DAWs and Studio One are either audio or MIDI/instrument type tracks.
With audio tracks you can load in and play regular sounds – drum loops, guitars, anything in fact. These could be the audio files that come with the software like those loops and hits we that mentioned earlier which come with the bundled download content. Audio tracks can also be made with sound from the outside world – an acoustic guitar, someone singing or playing piano – all recorded via an audio interface or built-in Mac microphone.
MIDI/instrument tracks are used to play and record virtual instruments within the DAW – like virtual pianos, drum kits and guitars – or trigger external electronic keyboards and modules like hardware synthesisers. MIDI/instrument tracks might trigger virtual instruments like the Mai Tai synth or Impact Drum Sampler (neither available in the free Prime version, sadly). Ideally you’ll need a MIDI keyboard to play and record the notes using these instruments, but you can play these sounds via your computer keyboard which we’ll show you how to do later in this workshop.
We’ll finish by getting both types of track up and running so you’ll be ready to play and record anything you like and, next time around, we’ll start creating a tune In Studio One. Be sure to come back and check Part 2 and, in the meanwhile, happy music making with Presonus Studio One!
Presonus Studio One Workshop – Getting up and running: Step-by-step

1. When you first run Studio One 3, it might take a while as it scans your system for plug-in instruments and effects. Keep an eye on this as you might be asked to skip corrupted or missing ones.
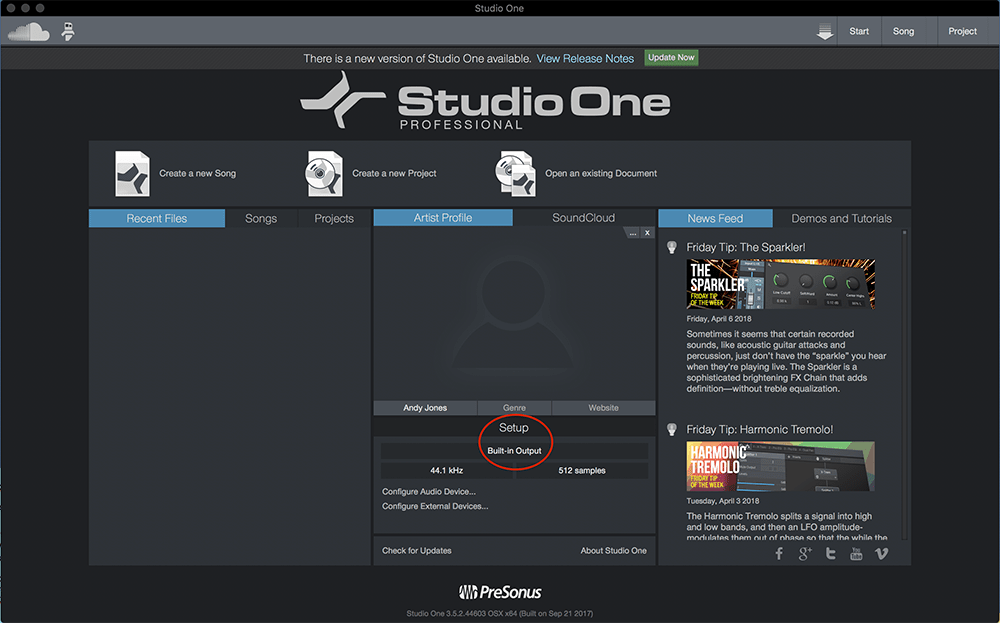
2. Then you get the start-up screen with options to load an existing Song, create a new one or a new Project. You can and should configure your audio device now – click the tab below the Setup button.
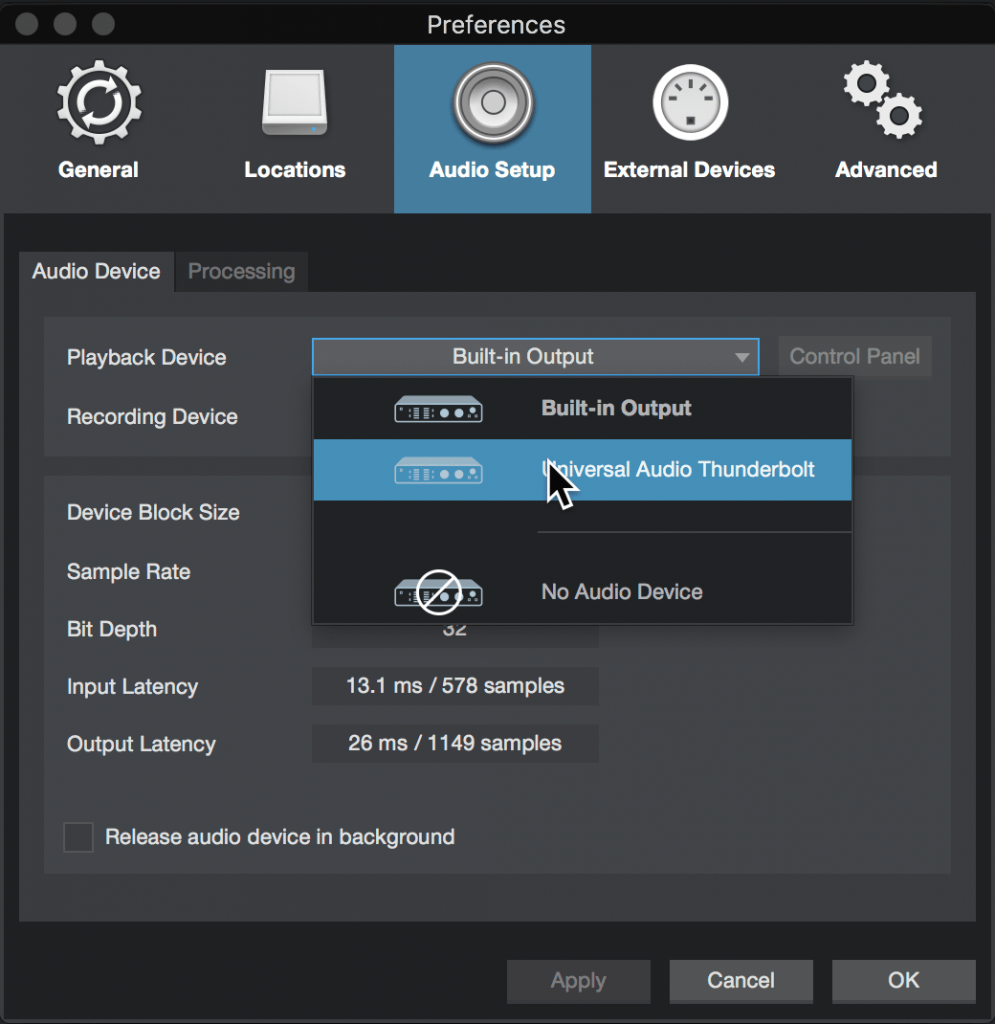
3. Select whatever audio interface you have connected from the drop down Playback Device and Recording Device menus. If you don’t have one you can have the sound play through your computer speaker or record with your built-in mic.
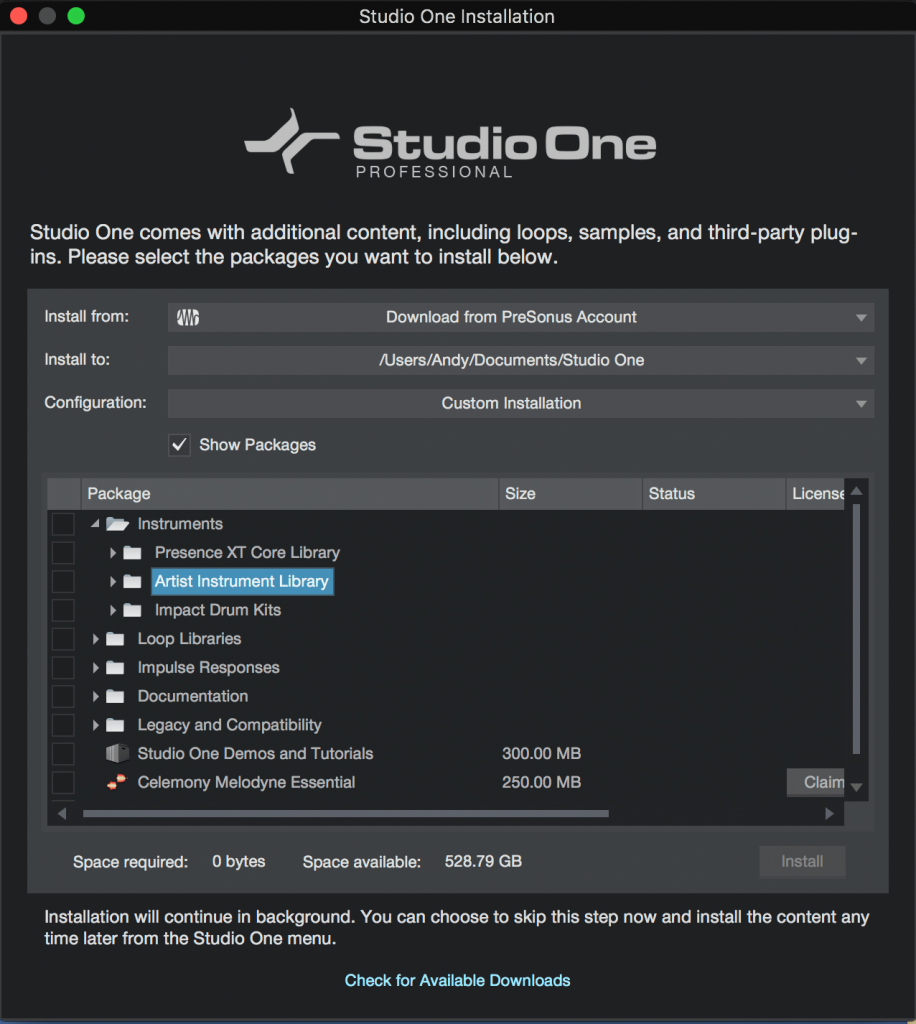
4. At this stage you’ll probably be asked if you want to download whatever content comes with your version of Studio One. You select this via the Presonus website. You can come back to download this later.
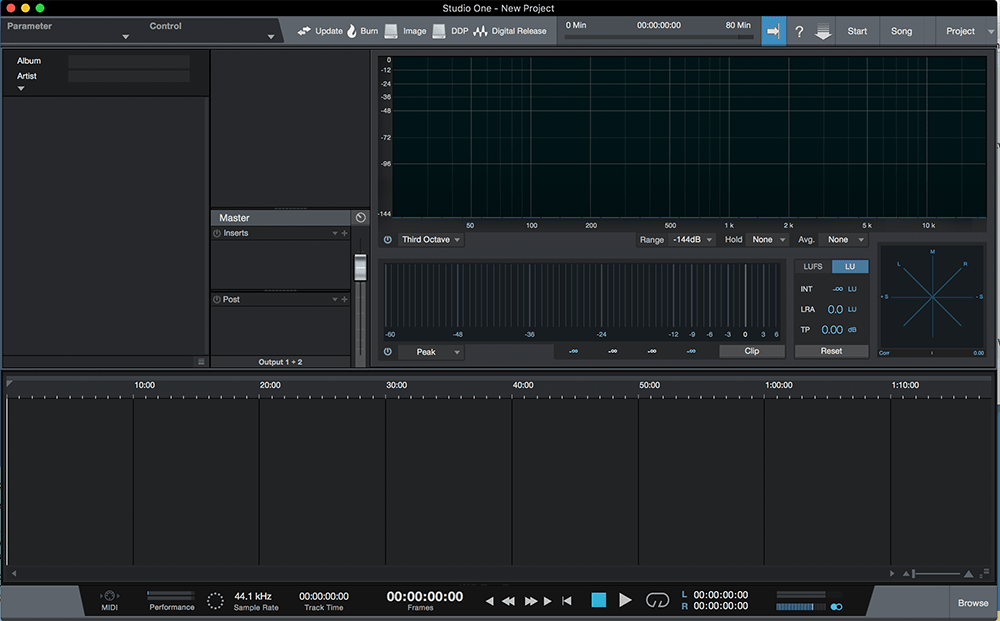
5. Back at the main screen, create a new Project or Song. The Presonus Project area is used to put multiple finished songs together to export to CD or streaming, or used to master audio (make it sound more pro-end).
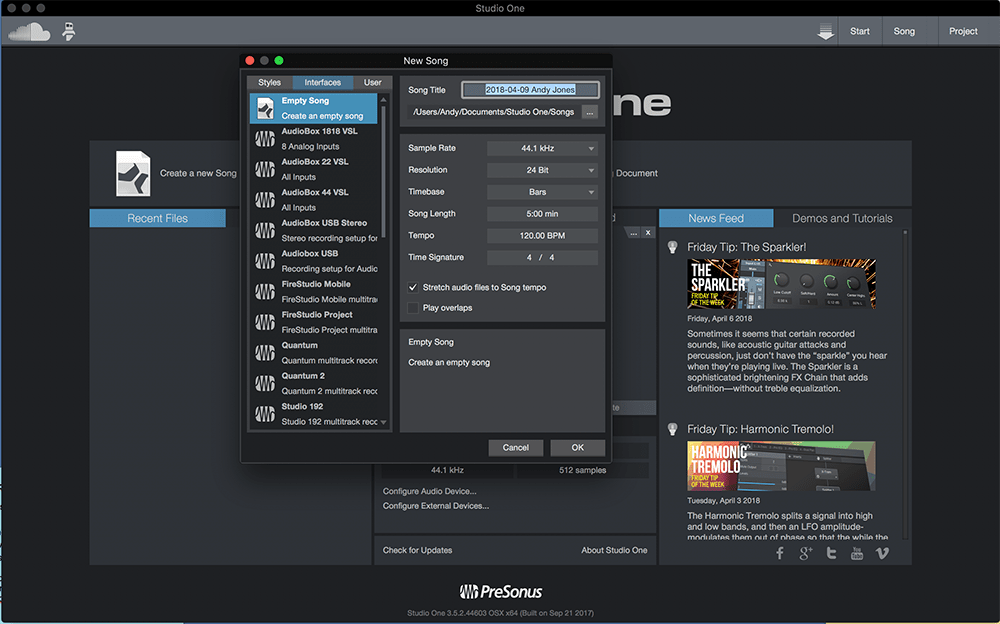
6. Click Create a new Song. You can choose from templates of songs created for certain pieces of Presonus hardware, where the number of inputs and outputs within the software matches those on that hardware.
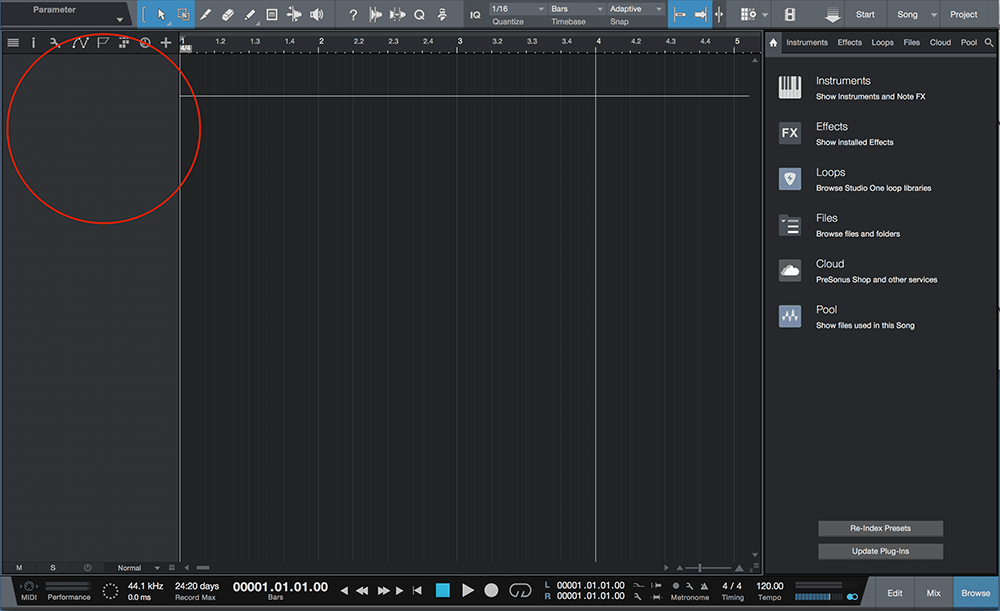
7. For now though we’ll just create an empty Song (first option). The area to the left (circled) is where we will add tracks, the middle where our song comes together, the right is where we can add instruments and audio.
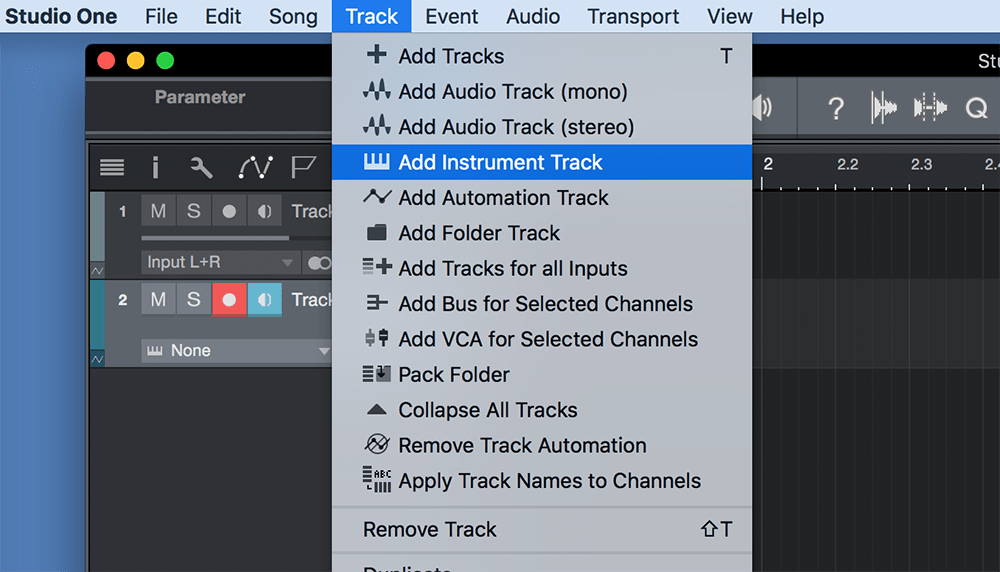
8. Add tracks for your song via the drop down Tracks menu and Add Audio or Instrument Track options. Audio tracks are for recording external sounds or adding audio on your computer, Instrument tracks are for playing virtual instruments.
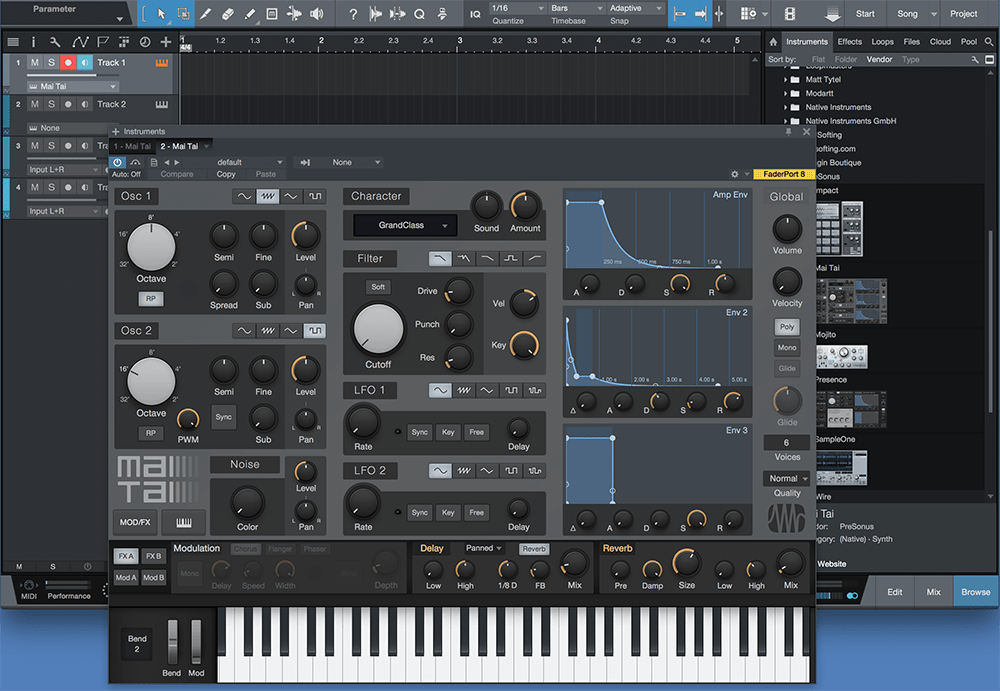
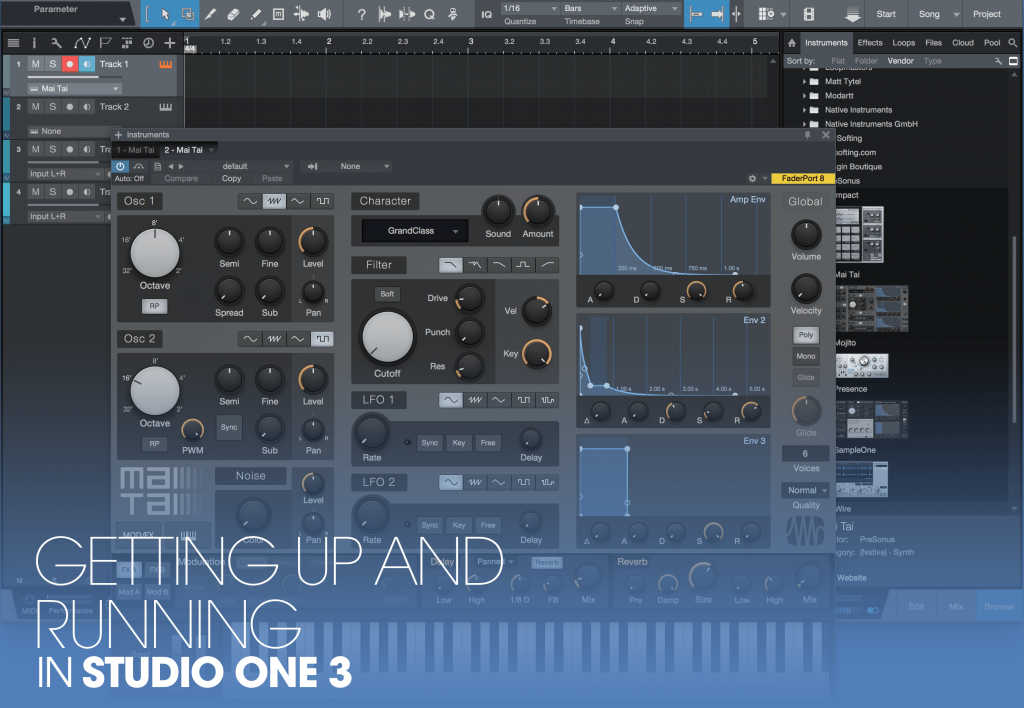
9. We’ve created both types of track. Select the Instruments tab in the Browser which shows the instruments you have installed. Drag the Presonus Mai Tai synth onto track one. It is now dedicated to play and record that synth.
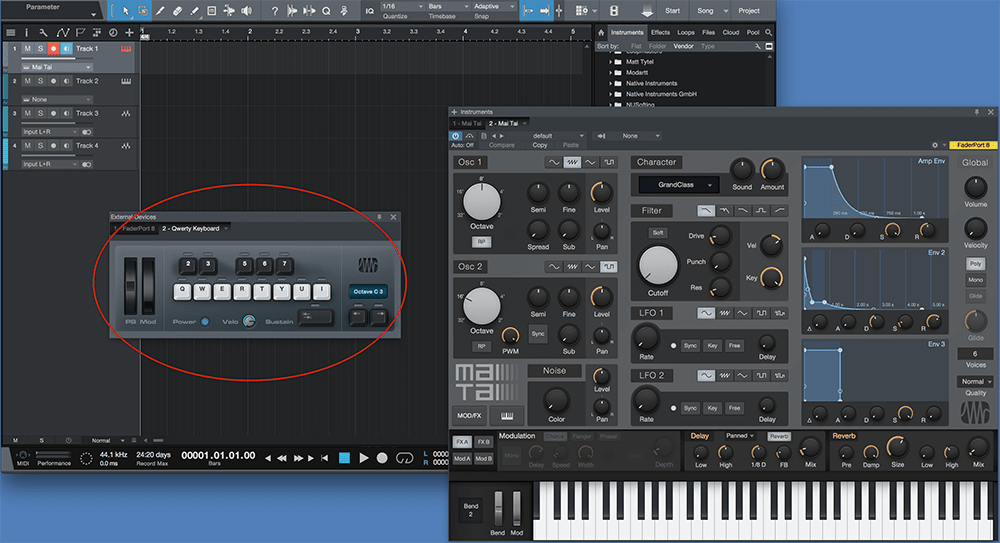
10. If you don’t have a MIDI keyboard connected to play this synth, don’t worry. Simply hit the Caps Lock button and a mini keyboard appears that allows you to trigger the synth via your QWERTY keyboard. Very cool!
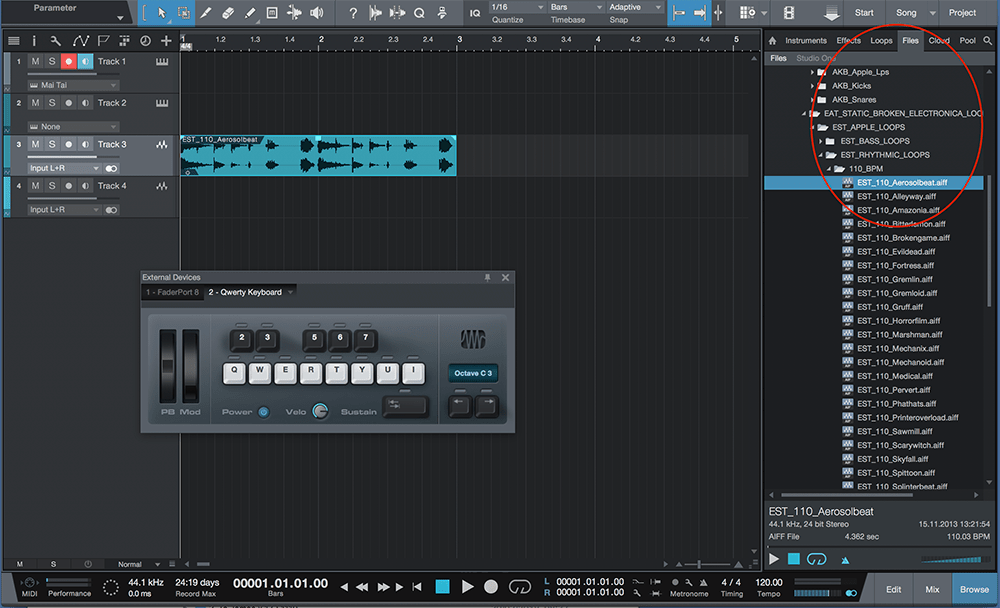
11. Now we’ll add some audio. We haven’t downloaded our extras yet but have some audio on our computer already which the browser shows us, so we’ll drag that – a drum loop – to the first audio track we created.
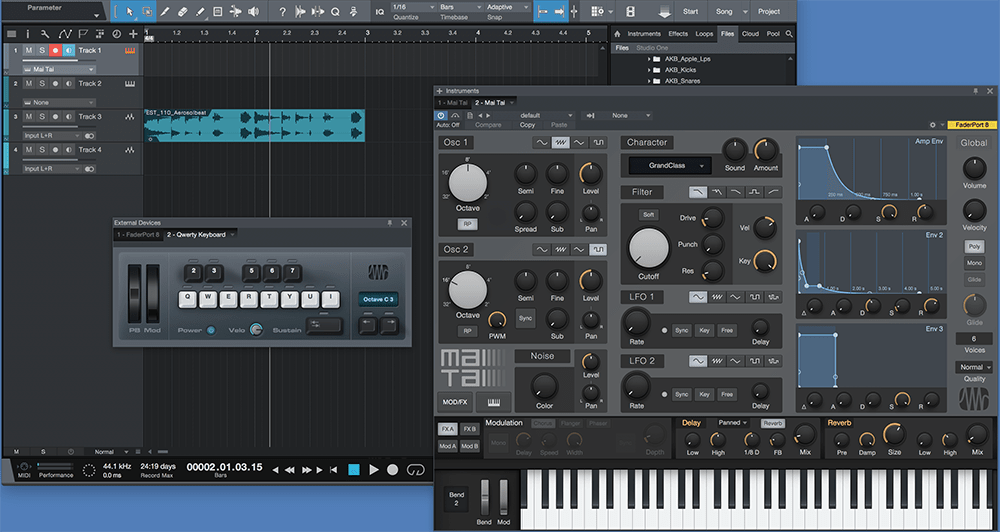
12. Now simply click on Track 1 and the white Keyboard tab (which turns orange) and you can now play the Mai Tai synth along with the drum loop (press space bar to play). Now you’re ready to make a tune!