Integrating Hardware Synths In Logic Pro X: Step-By-Step (Continued)
Mark Cousins continues his guide to integrating hardware synths into your Logic setup. Be sure to read part 1 before continuing. 7. Subsequent additional tracks can then be created either by duplicating the audio track or MIDI track. From just one hardware synth, therefore, you can create a project full of imaginative, authentic-sounding synth lines. […]
Mark Cousins continues his guide to integrating hardware synths into your Logic setup. Be sure to read part 1 before continuing.
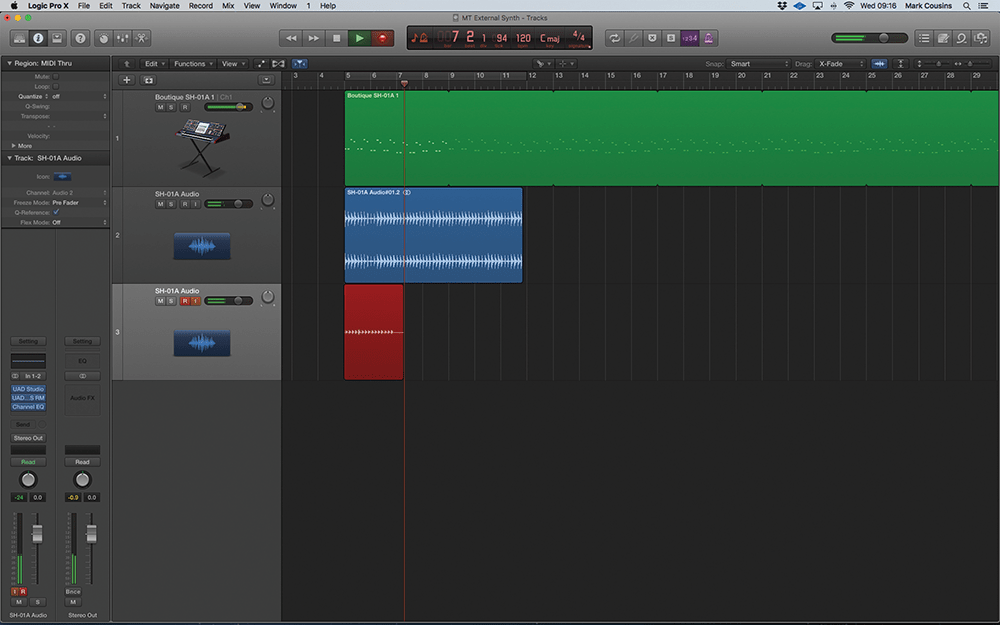
7. Subsequent additional tracks can then be created either by duplicating the audio track or MIDI track. From just one hardware synth, therefore, you can create a project full of imaginative, authentic-sounding synth lines.
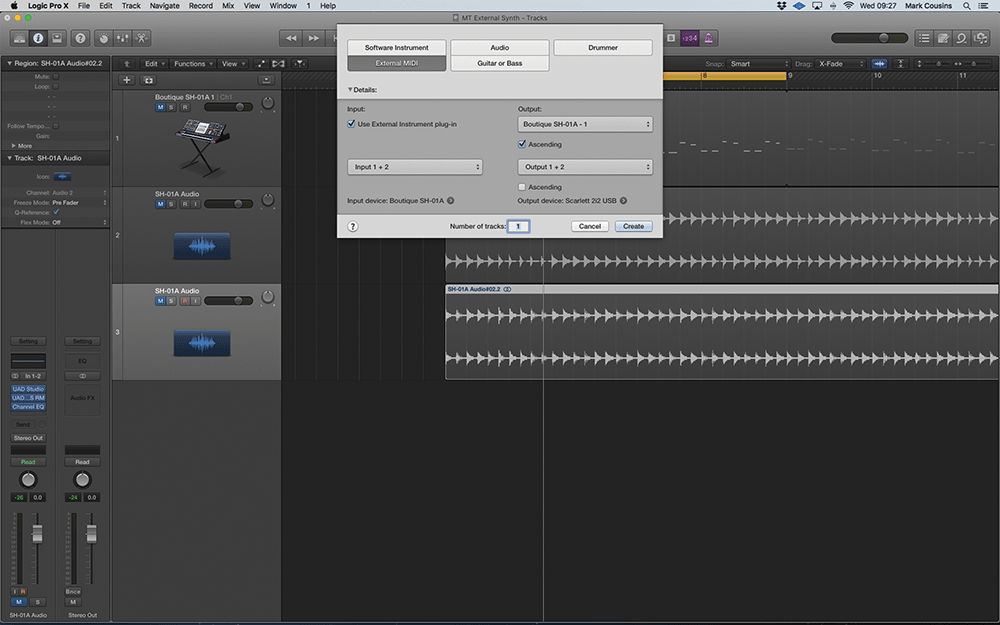
8. The alternative approach is to create an External Instrument by checking the ‘Use External Instrument plug-in’ option. Select the physical MIDI output for your synthesiser and audio input, as in the first example.
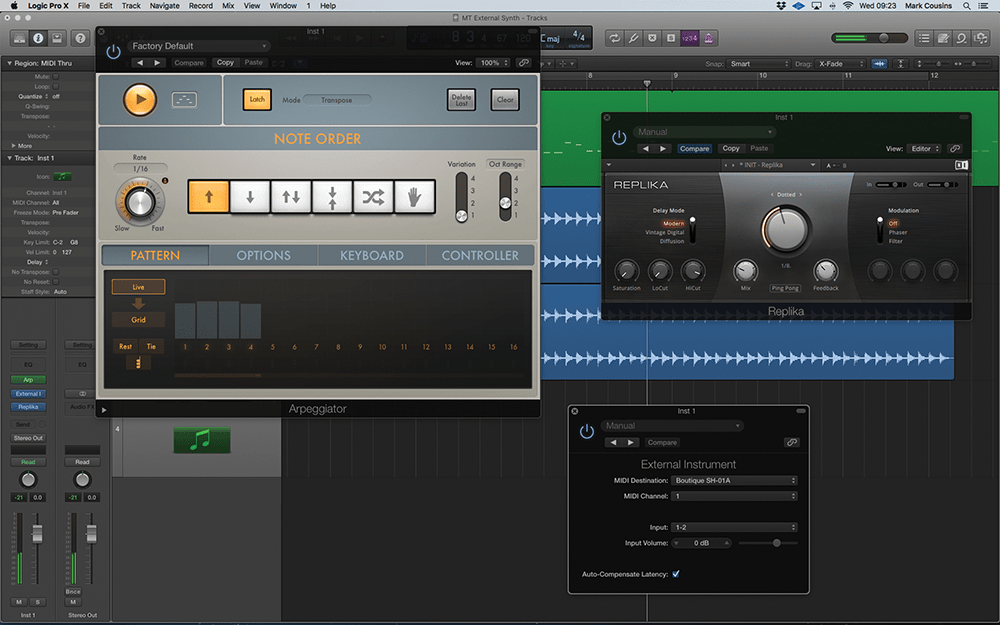
9. The External Instrument plug-in makes your hardware synth like a virtual instrument. MIDI can be recorded and MIDI and audio plug-ins added to the signal path, effectively creating a hybrid of the previous two-track approach.
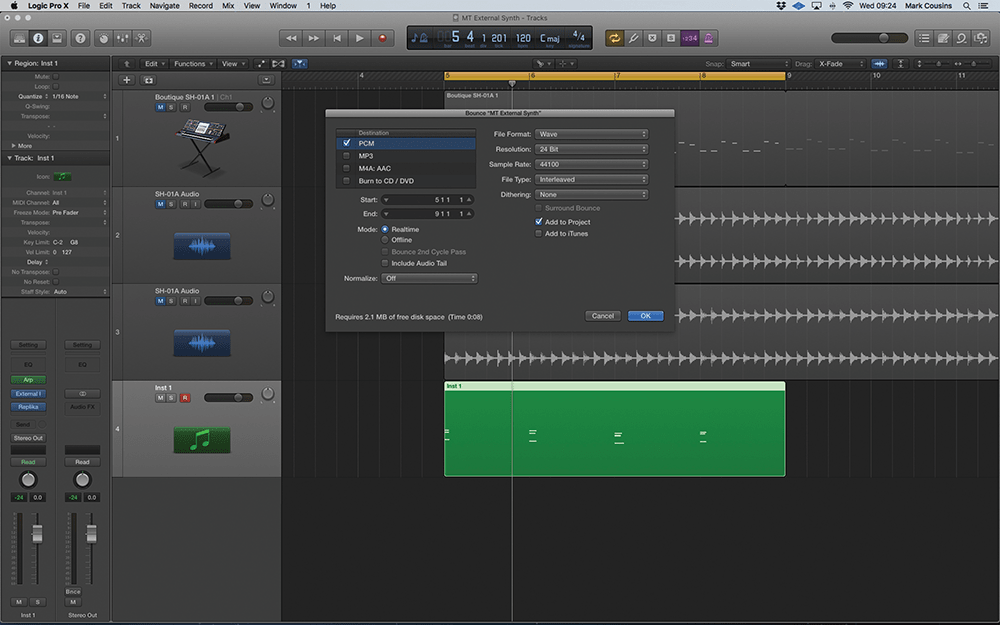
10. The only catch with the External Instrument plug-in solution is recording. You’ll either need to perform a Realtime Bounce, or alternatively, create a new Audio Track set to the same inputs as the synth, and record as before.
11. The next level of integration is to add some software-based controls for your instrument. This is particularly useful for hardware like the Roland Boutique series that can occasionally have small controls, or hidden features.
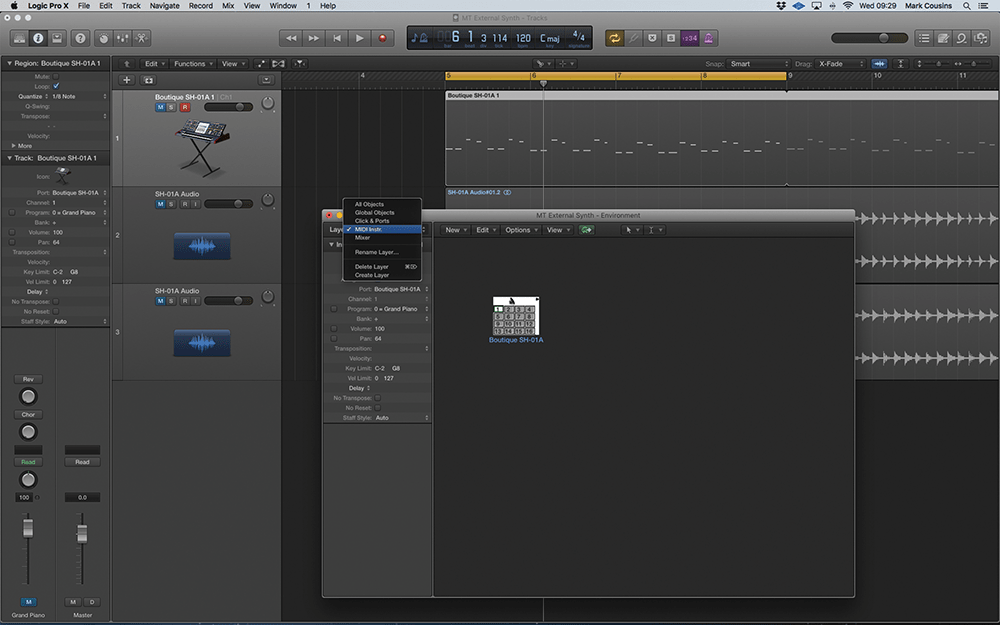
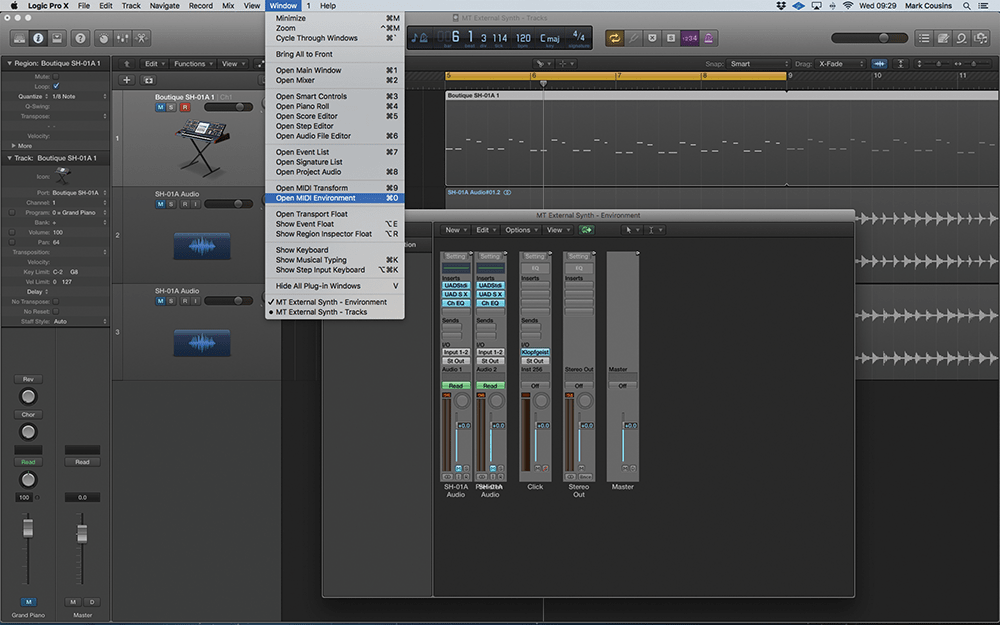
12. Open Logic’s Environment (Window > Open MIDI Environment) and navigate to the MIDI Instr layer via the menu in the top left-hand corner. Here, you should find the instrument object for the track you created earlier.
![]()
Better template than never If all this seems like a lot of work for one project, it’s worth remembering once you’ve set up your hardware synth – with corresponding MIDI tracks, audio returns, MIDI editors and clock settings – you can save this as part of a Template project.
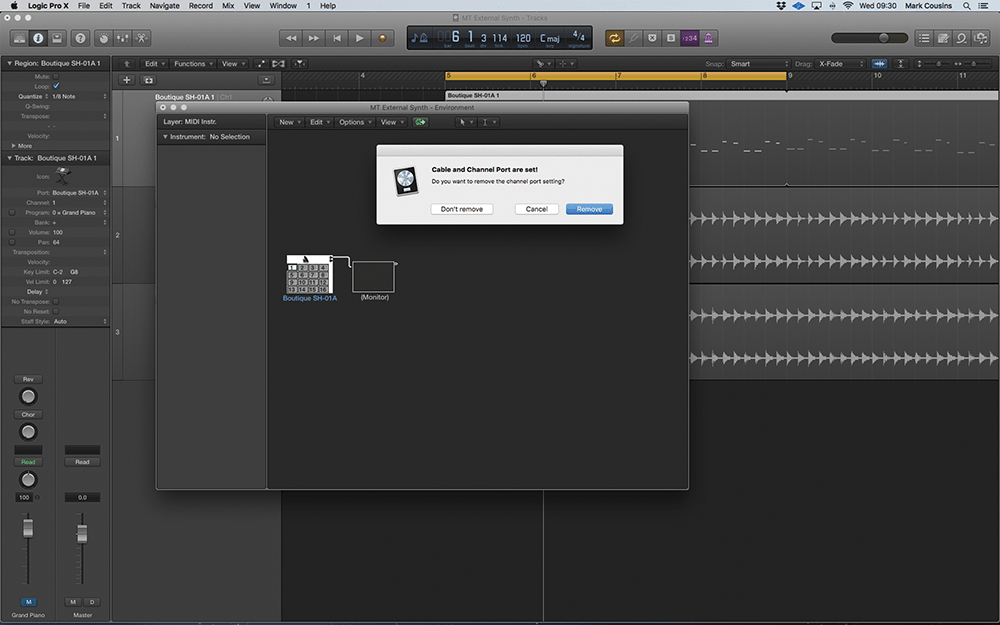
13. Patch in a new Monitor object after the instrument object (New>Monitor). Logic will ask you if you want to remove the channel-port assignment, click Remove to okay this. You should still see the MIDI data, however.
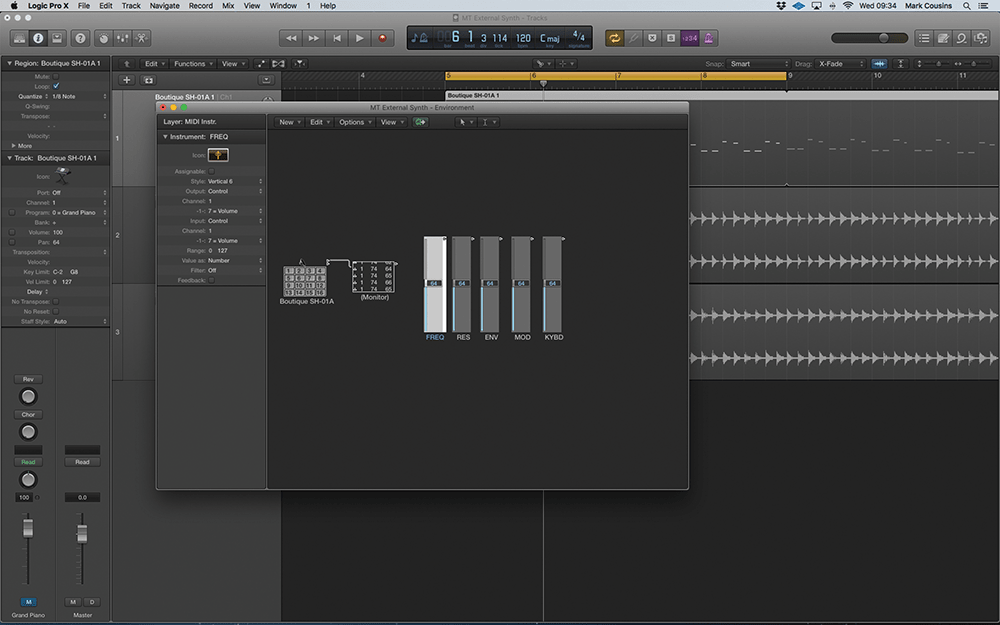
14. Create a series of faders for the corresponding controls on your hardware synthesiser (New>Fader>Vertical 6). Moving the fader on your synth should highlight its controller assignment in the Monitor object.
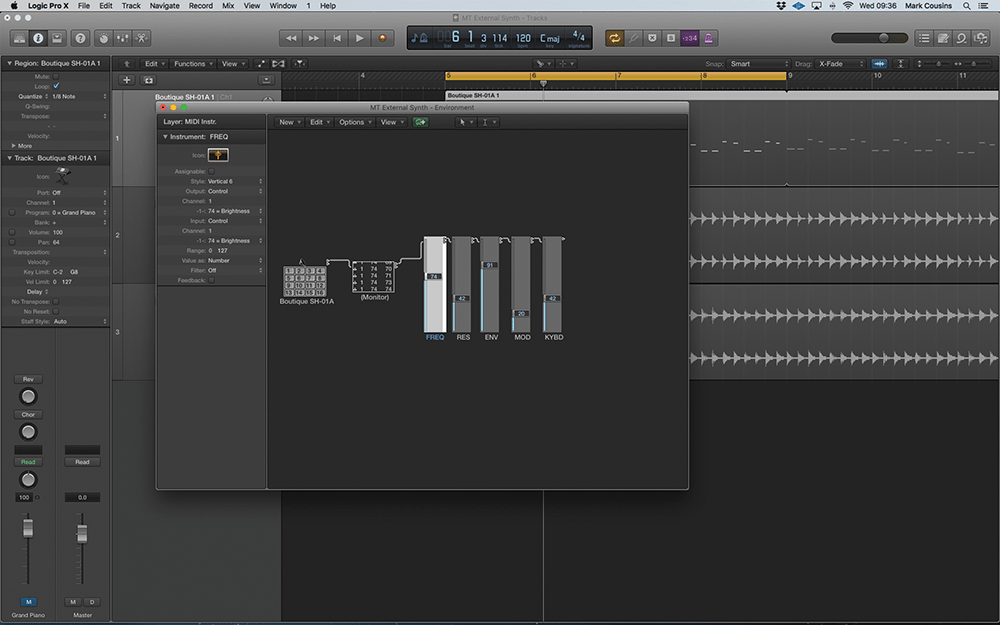
15. Cable the faders serially, starting from the output of the Monitor object and ending with the last fader. Change their controller assignment (for Input and Output) to match the controller message transmitted from your synth.
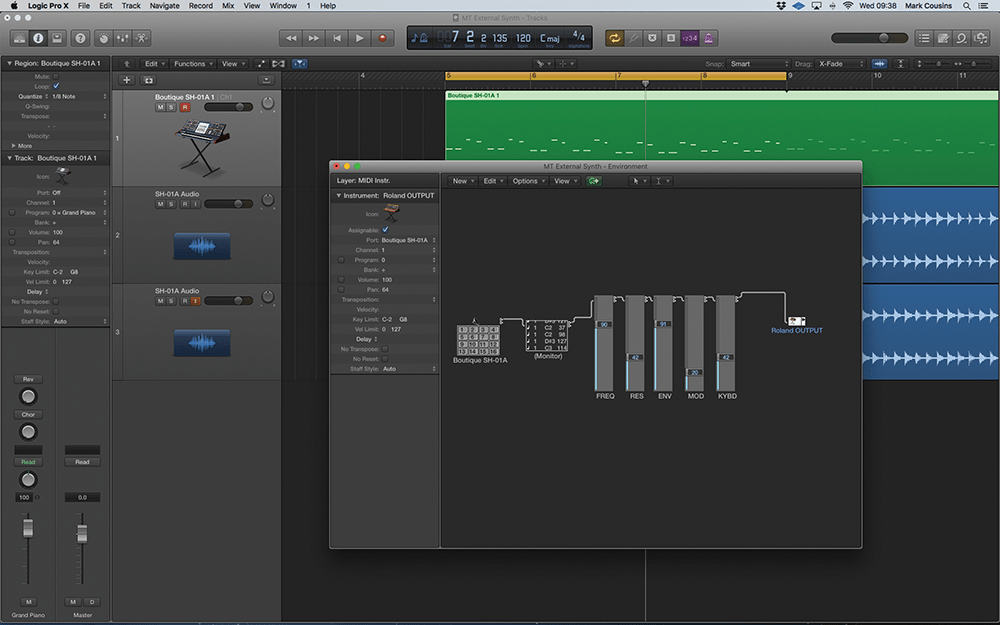
16. Create a new instrument to act as the output from the editor (New>MIDI Instrument). Cable the object at the end of the chain of faders, and set its output assignment to correspond to the MIDI output for the synthesiser.
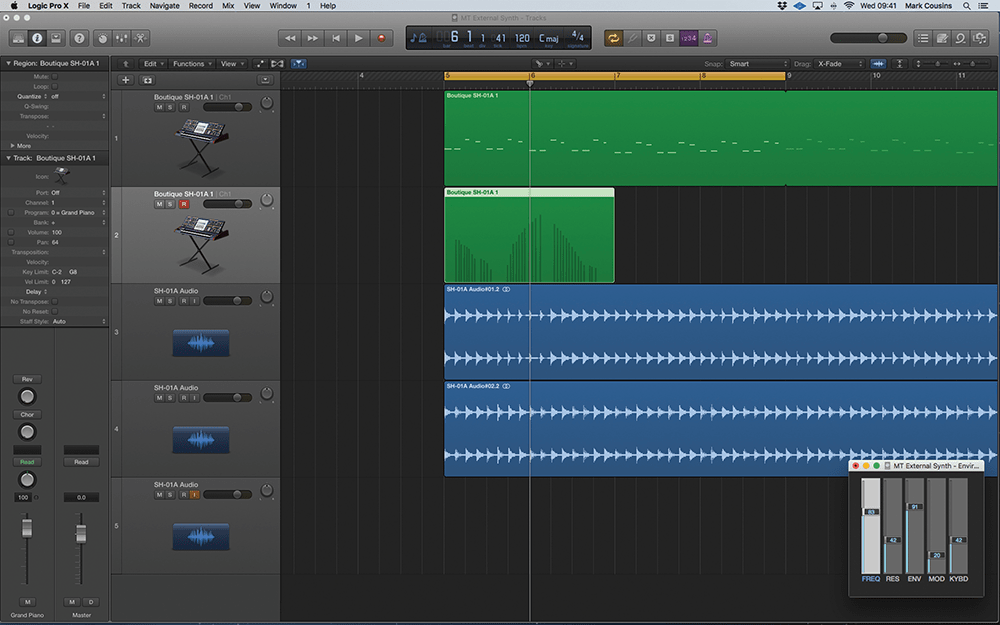
17. The mini onscreen editor accesses your chosen parameters. Dynamic parameter changes can be recorded, with the movements visualised using the onscreen faders, or you can store sounds as part of the project.
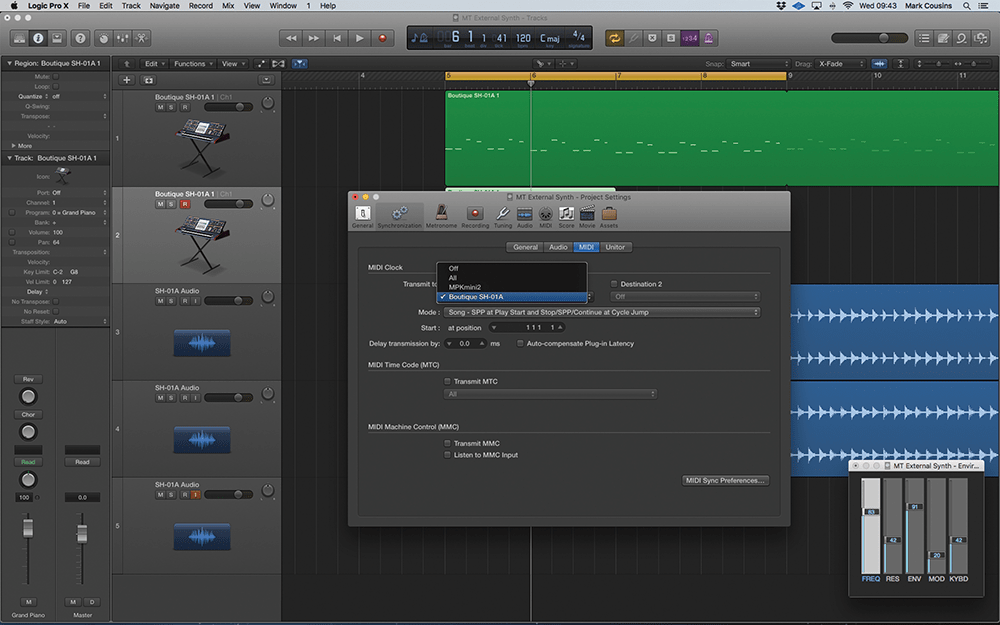
18. One final point worth mentioning is the ability to lock sequencers or LFOs on your hardware synth. Use the MIDI tab under the Project’s Synchronisation settings to transmit MIDI Clock to the chosen MIDI output.
