How to make synth bass sit in your mix
Bass shouldn’t be an afterthought, something subservient to melody and percussion. Wrap your head around the frequency range and adopt a creative approach, and you too can build basslines that bolster your tracks and transform damp squibs into all-out bangers. Here, we dig down into the low end to help you unleash its power

Image: Shutterstock
Why is it so difficult to make bass sounds feel right? We all know the impact that a powerful and well-mixed bassline can have – but we’re aware that one or two missteps can make the difference between a solid structure and a track ruined by muddy low end too. There’s always pressure on basslines to sit in the mix and boast the appropriate level of punch. But why? There are a few core reasons why mixing bass demands serious thought.
Firstly, the bottom end of your track is literally the foundation on which your mix is built. Without wanting to stretch an analogy to breaking point, if your foundations aren’t strong, they won’t be able to adequately hold up the structure of your track. Secondly, because those bass frequencies are so dominant, there’s always a subtle balance to be struck between basslines themselves and the other significant bottom-end elements present in most tracks, chiefly a solid and dependable kick drum.
Record producers have countless tricks that help them balance these two elements and prevent the all-out sonic war that can occur between them if not produced properly. In this feature, it’s these tricks that we’ll be exploring. But we’ll also explore harmonics – the building blocks of sound – to understand why particular combinations produce such distinctive tones at the bottom end of a mix, and help you design the perfect bedrock for your tracks.
Blinded by science
Clearly, to understand why some bass sounds work better than others, we need to get forensic. Putting sound itself under the microscope can help you to understand the layers of its component-level blocks. Every single sound, bass or otherwise, is made up of a combination of harmonics. At the bottom of each harmonic group is a single pure tone, which we call the fundamental frequency. In musical terms, this fundamental is referred to by its pitch name. C, A, and F♯ are three such examples.
What exactly are the harmonics? With any musical instrument, there’s a series of additional pitches that resonate whenever a fundamental frequency is played. In resonating, these pitches too produce pitches. We refer to these additional, usually higher-frequency notes triggered directly as a result of the fundamental frequency, as overtones.
To understand this in scientific terms, we need to appreciate that any isolated single pitch produces a sine wave, which is a smooth oscillating shape that’s often described as sounding pure or hollow. As soon as you begin to add additional overtones, each of these produces a sine wave of its own, modulating and complicating the original waveform so that it stops looking like a pure undulating shape and starts to take on new sonic characteristics.
Many of the waveforms that we know well as synth programmers – such as sawtooth waves and square waves – come from the shapes that we see when specific groups of harmonics are added to a fundamental frequency. For instance, if you add the odd-numbered harmonics to a sine wave, its shape will start to resemble a square wave. The more odd-numbered harmonics you add, the more square the shape will become. Harmonics are very important, so it would be wise to understand exactly what each one is relative to the fundamental frequency.
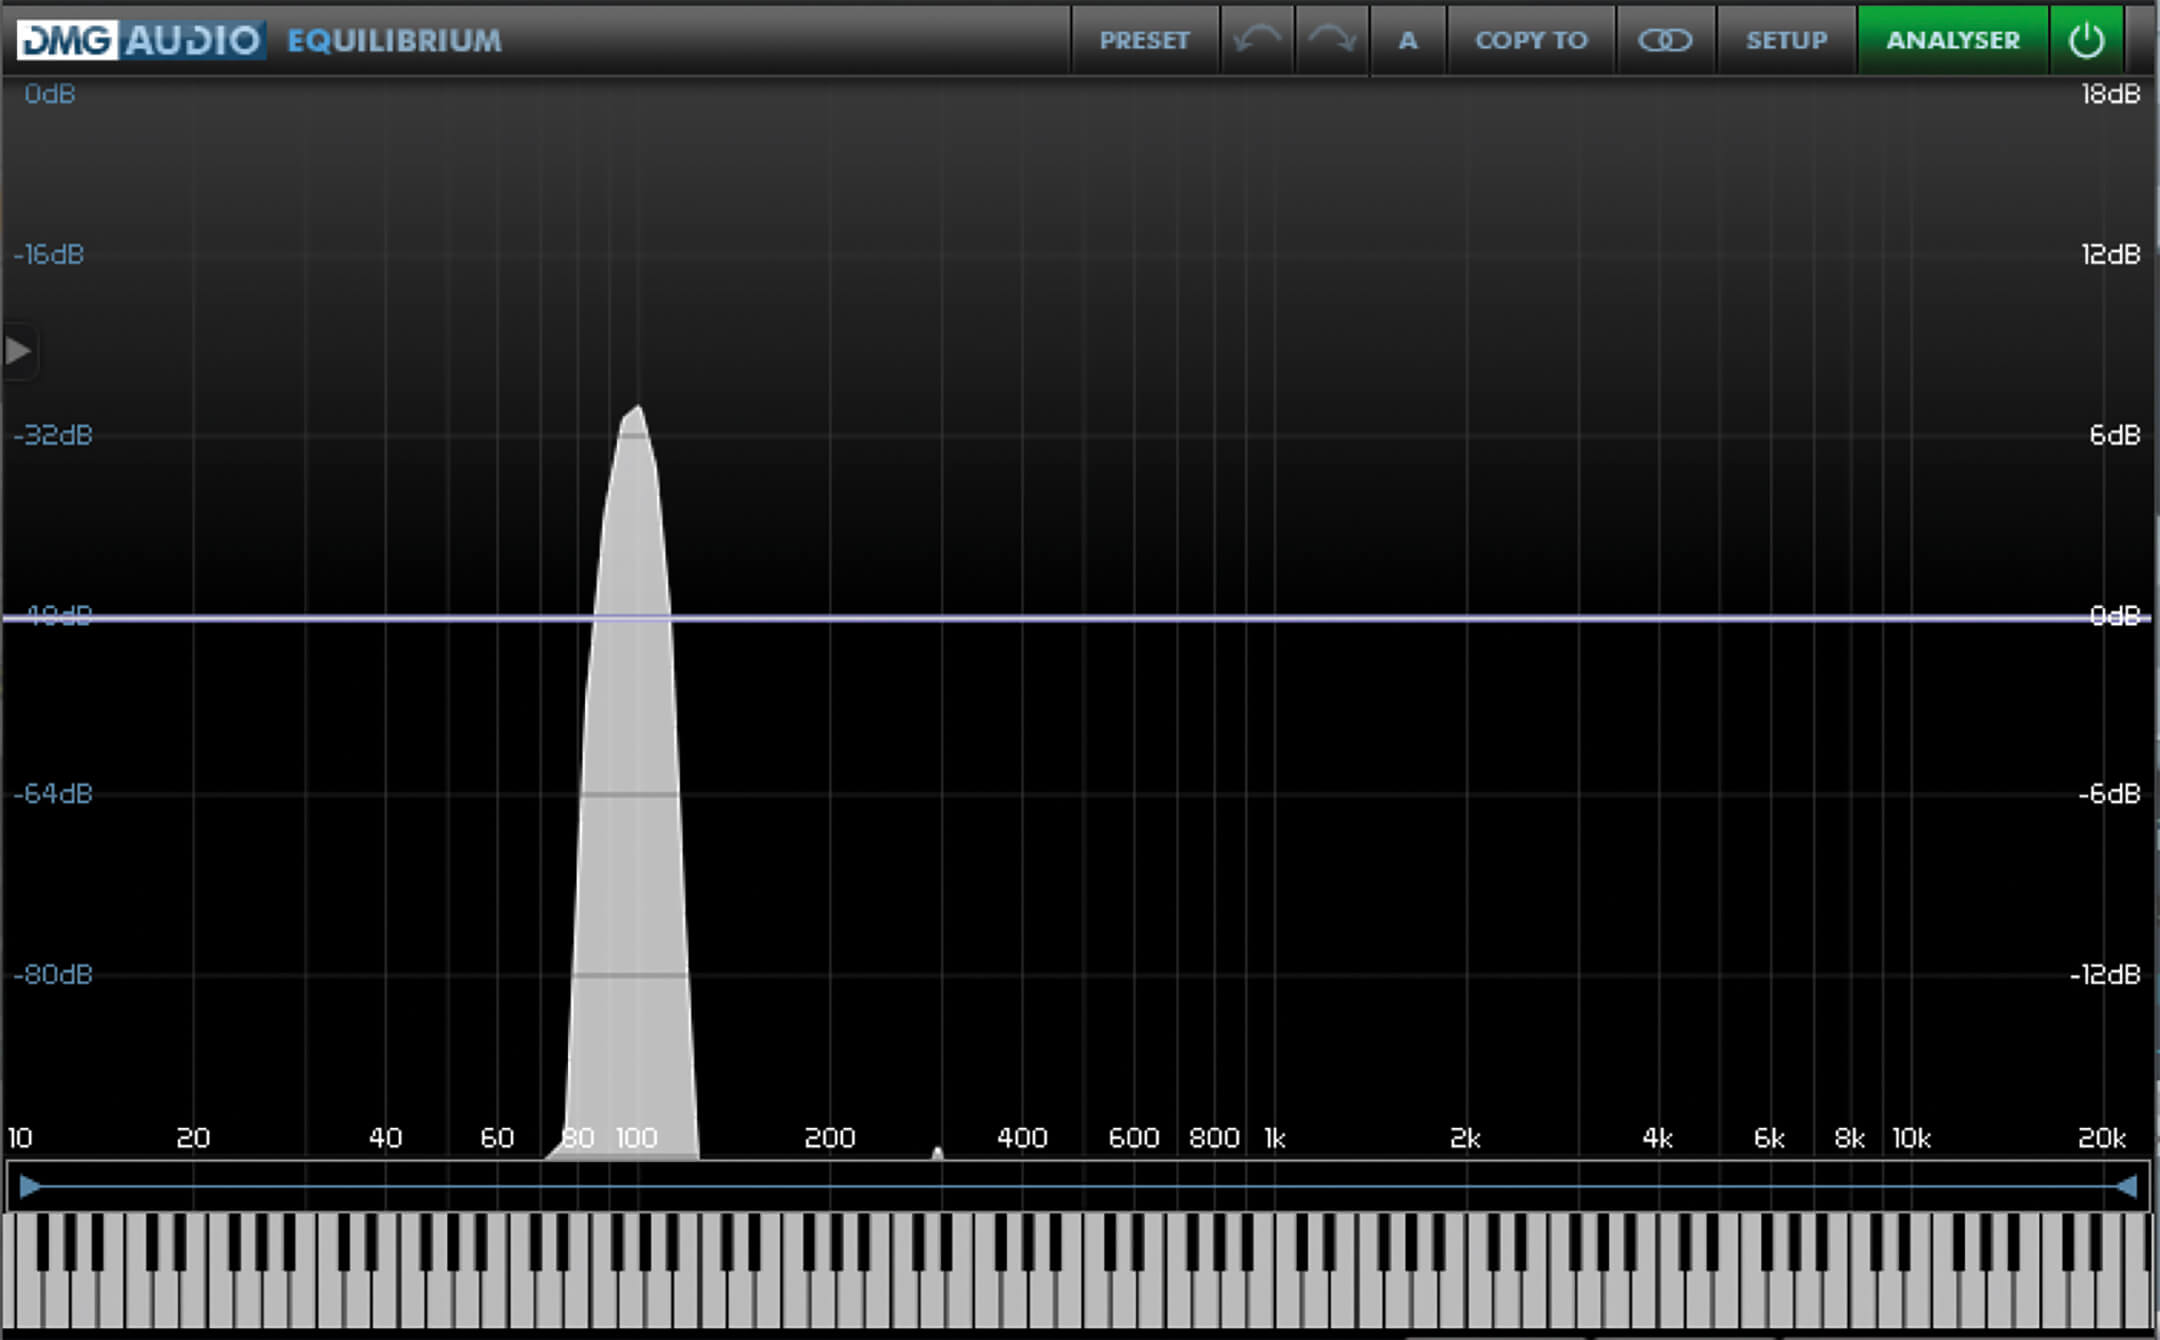
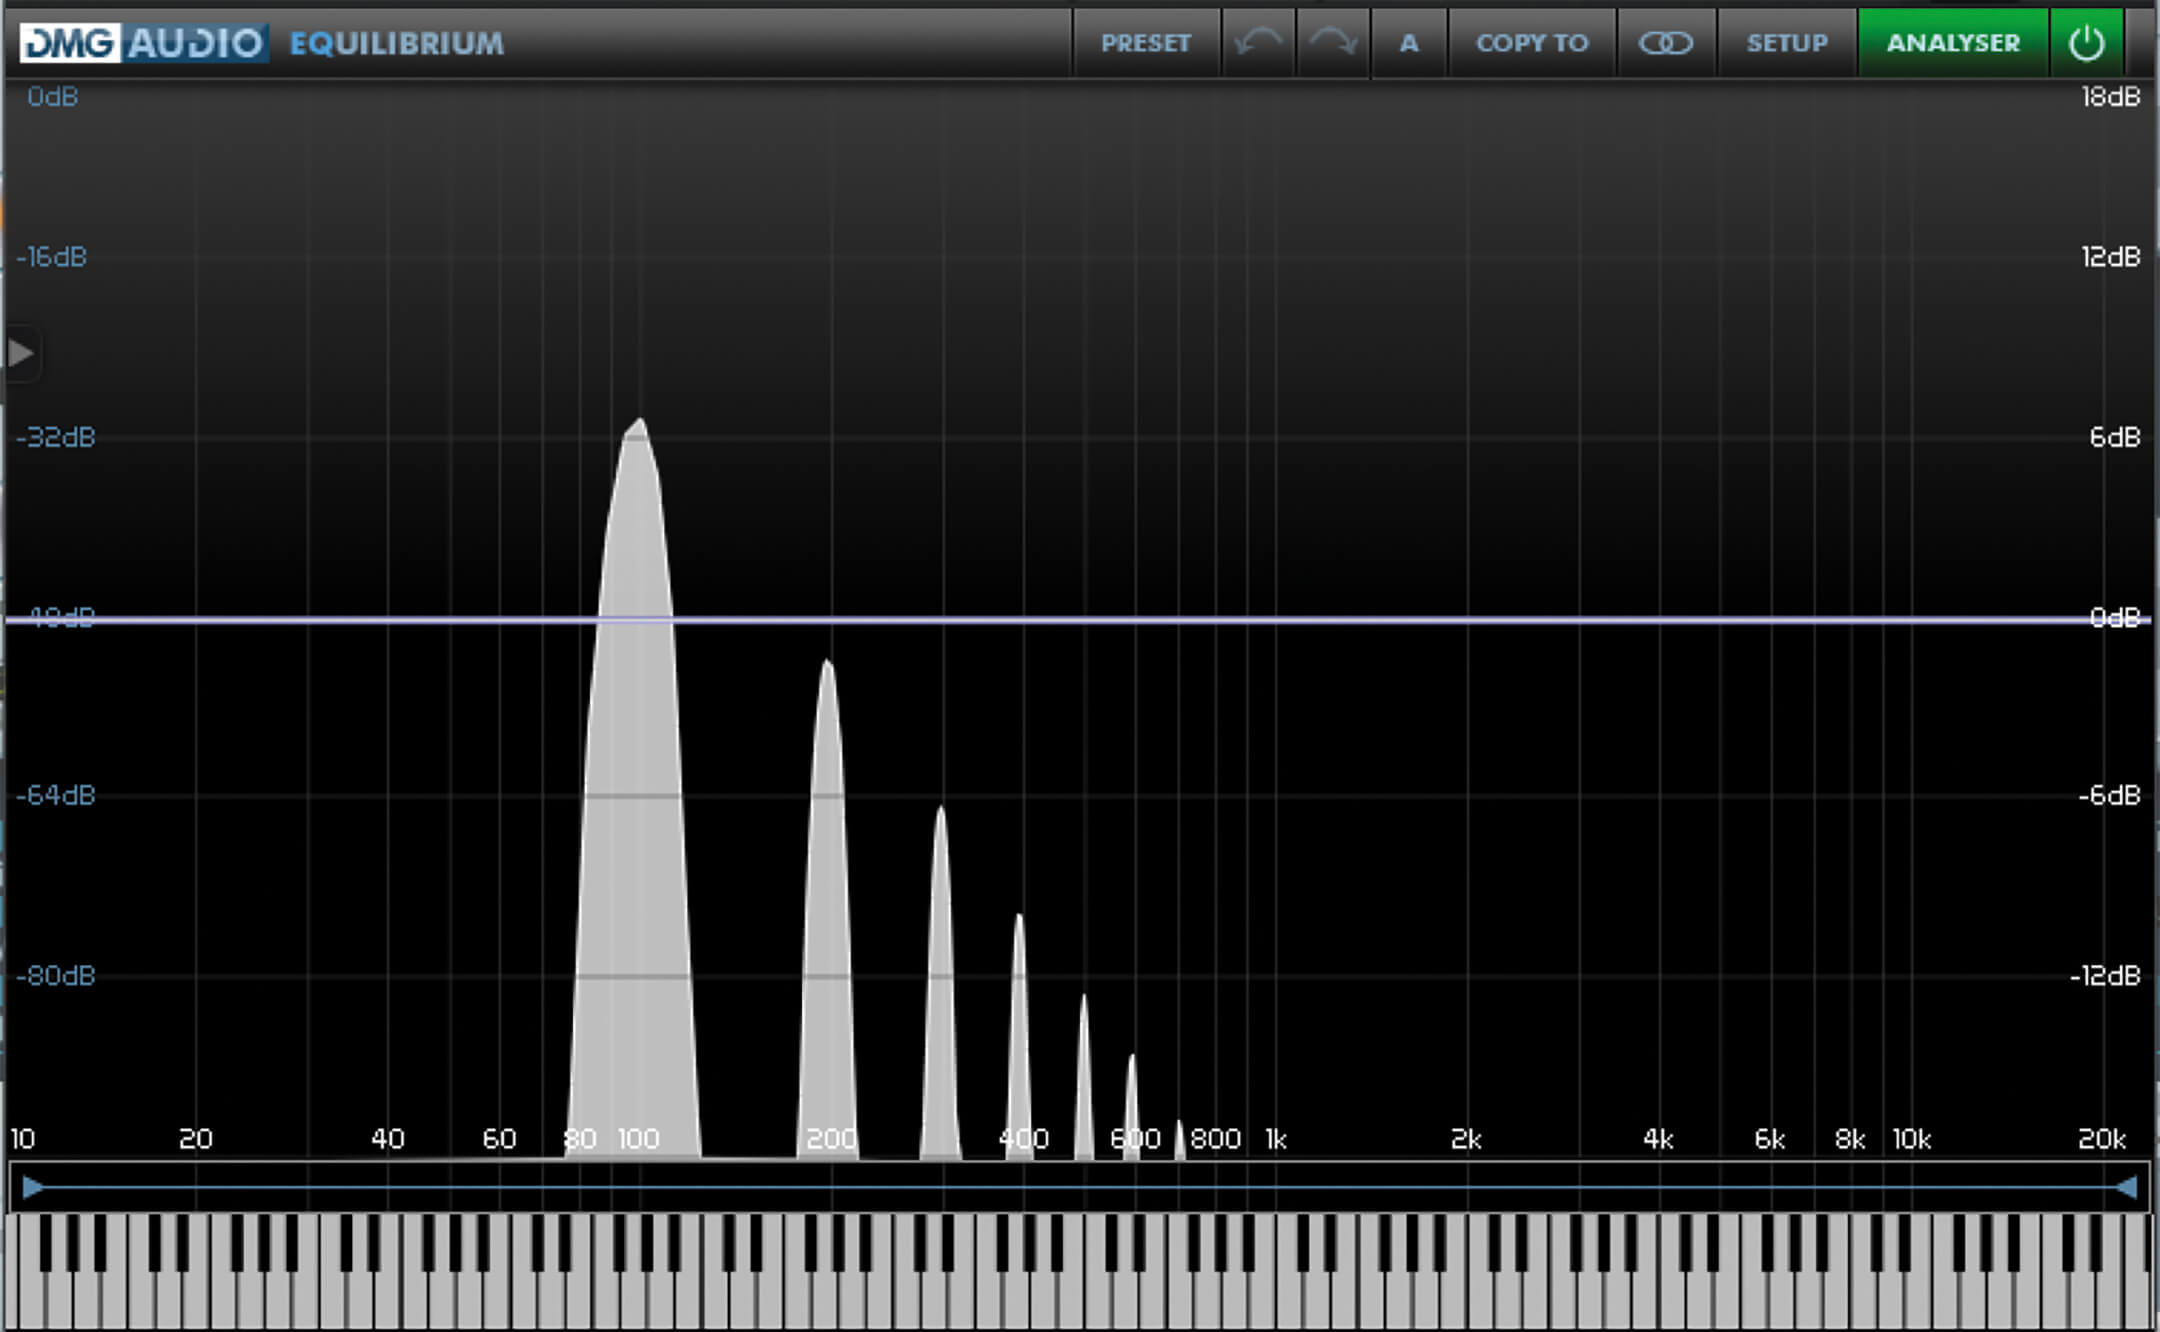
Imagine, for the sake of easy maths, a note with a frequency of 100Hz whose pitch we’ll call G (in truth, 100Hz is about halfway between G and G♯). The first harmonic occurs when the original frequency doubles, so we’d get that harmonic at 200Hz and, as each octave jump doubles the frequency, that first harmonic will be a G too, only an octave above.
That means that a frequency of 400Hz would also be a G, only another octave higher. But what about 300Hz? That’s a multiple of 100Hz but it must occur somewhere between the two Gs at one and two octaves above the original. Indeed it does, close to D, in fact. If we keep going up, that must mean that there’s another G another octave higher, at 800Hz, leaving the harmonics at 500Hz, 600Hz and 700Hz in that third octave. That means that 600Hz must be another D, as it’s double 300Hz. Therefore, 500Hz is (more or less) a B, while 700Hz is close to an F.
Above our original G, we now have harmonics of G, D, G, B, D, F and then G again. If you’ve ever wondered why a major chord sounds so natural, you will now know why – play a single G and, ringing as overtones, you’ll hear the notes of that chord already sounding, only quietly and in different combinations. We’ll stop counting frequencies, harmonics and pitches at this point but you may notice that the notes of this harmonic series (as we call it) are getting closer and closer together.
We started with an octave and, by the time we’ve got to the note F at 700Hz, we’re only a single tone away from another G at 800Hz. As we keep adding harmonics, they get closer and closer together. Remember, the more they warp the purity of the original fundamental frequency, the more they complicate the waveform and its corresponding sound. So why does all of this matter when it comes to synth bass sounds?
Throwing shapes
Have you ever tried to get a sine wave bassline to sit properly in a mix? Maybe you produce drum ‘n’ bass and you’re drawn to the purity of sine basses? If that’s the case, you probably know that this isn’t always an easy balance. Limited to one note, these sounds can be pure, rich and powerful. Sometimes, however, a change in pitch can see the note’s volume either drop away entirely or leap right out at you, having perhaps even doubled.
To understand why this happens, we need to think about the word ‘frequency’. It’s a bit like ‘frequently’, isn’t it? That’s a word that refers to how often things happens. A waveform’s shape has a starting point. If you measure it from that moment all the way through its undulating cycle and back to the point at which it begins again, you can measure its frequency and therefore the length of its wave.
You’ll notice that 100Hz means 100 cycles per second, meaning that the G we’ve used in the example above has a shape whose waveform occurs 100 times per second. This means that, if you solo the bassline playing that note, it will make your speaker cone vibrate 100 times per second and, therefore, the natural acoustics of your studio space will vibrate 100 times per second and so will your ear canal and eardrum.
Drop that 100Hz note down an octave to 50Hz and all those numbers will be halved, meaning your ear will perceive a significant change in volume. Your speakers are unlikely to produce the same volume at 50Hz that they do at 100Hz – and that’s to say nothing of the acoustic properties of your room enhancing or cancelling frequency content depending on its dimensions and acoustic treatment.
It’s easier to mix bass sounds that have more harmonic content because each of those harmonics represents a pitch in its own right. If the volume of the fundamental frequency at the heart of a waveform is unpredictable, then strengthening that shape with additional harmonics can often offset the issue.
To help illustrate this solution, let’s use a practical example. Fire up a pure sine wave synth patch using your choice of plug-in, play a low note and whack a high-pass filter on it. Turn up the frequency dial until the fundamental is filtered out – the dial won’t need to be that high before the tone disappears completely. Now swap that patch for a bass sound that’s richer in harmonic content, such as a square or sawtooth waveform. While using the high-pass filter, you’ll still be totally reducing the volume of the fundamental but, because there are now other harmonics present, you’ll still hear the note you’re playing. Clearly, when it comes to basslines that feature harmonics, there is something to be said for strength in numbers.
Tone it down
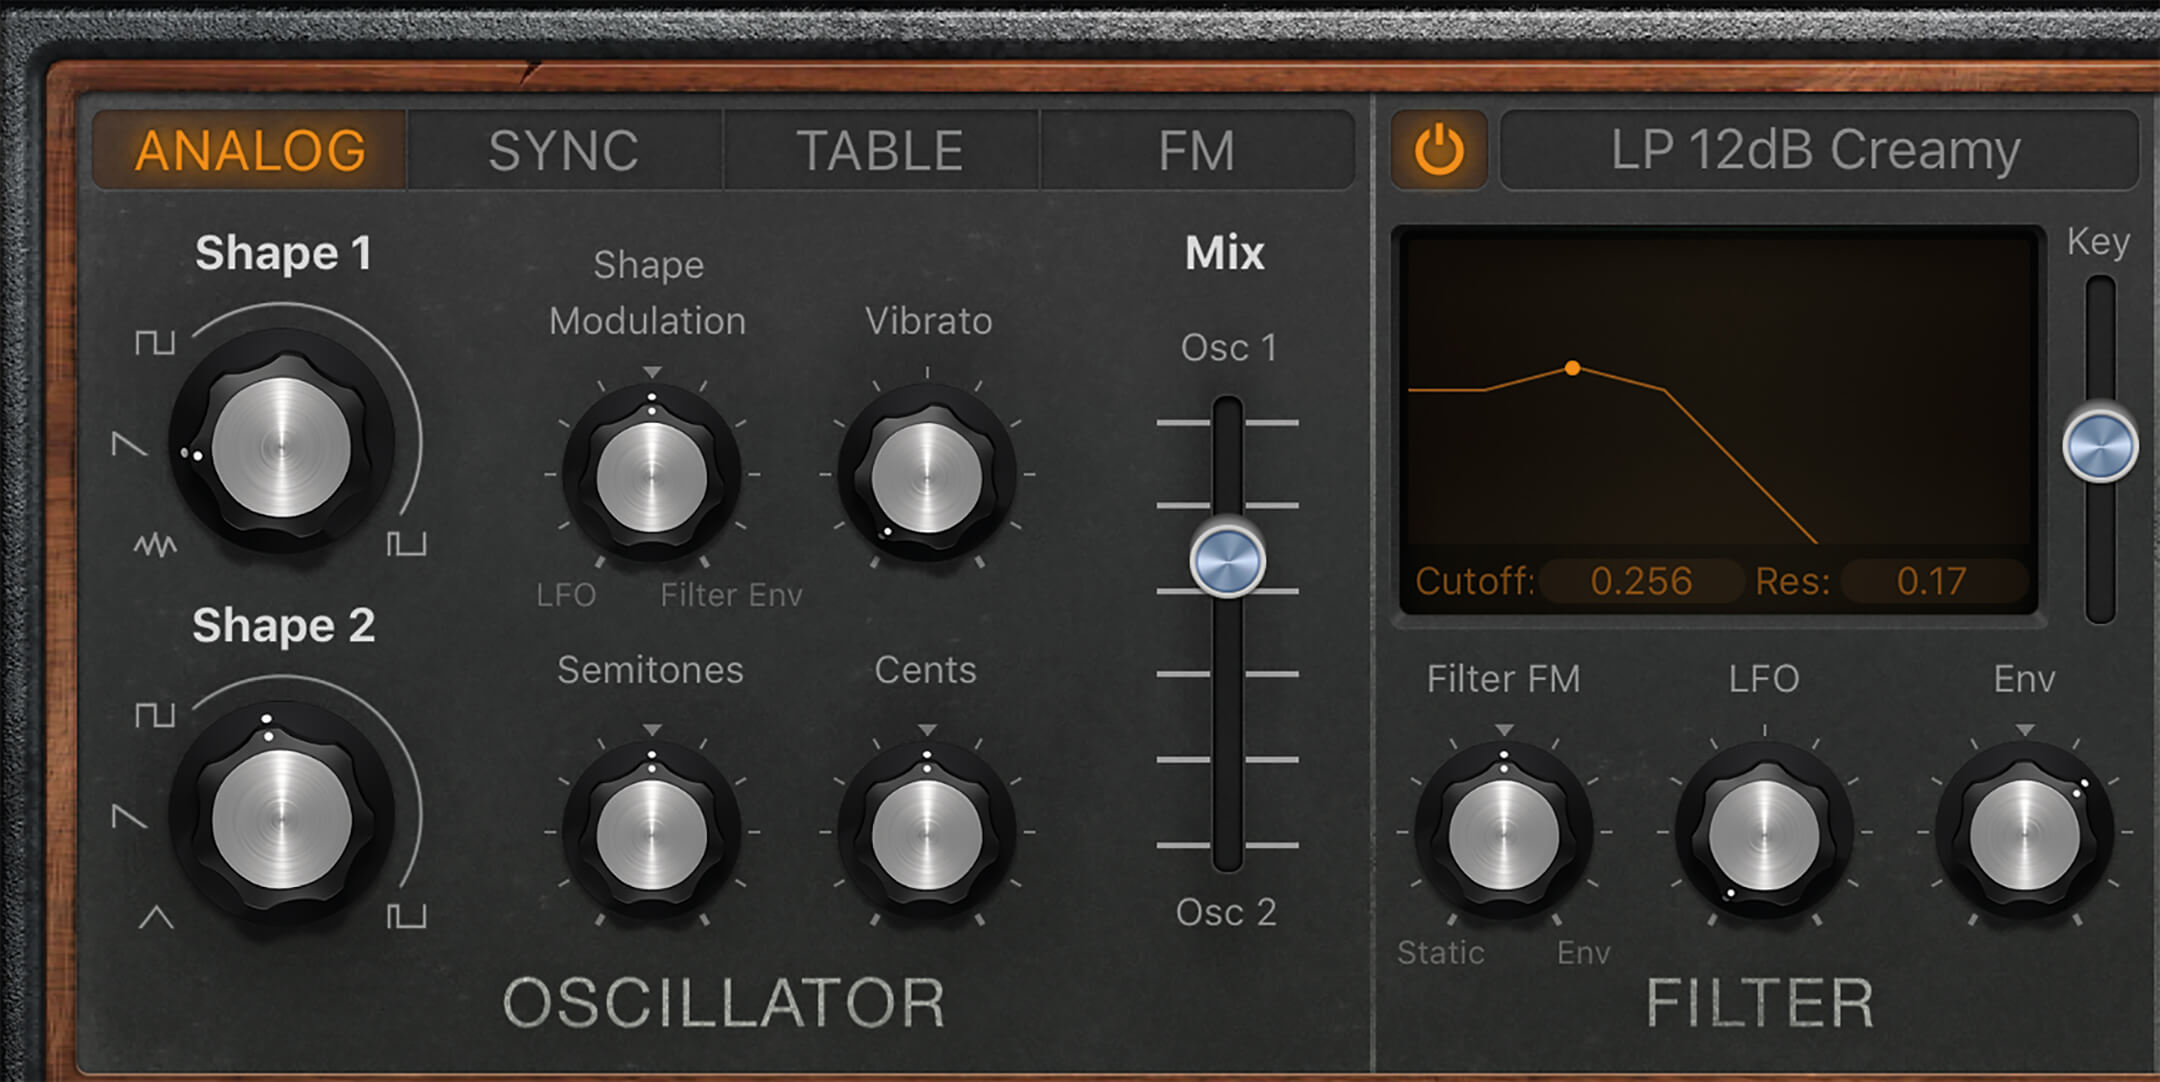
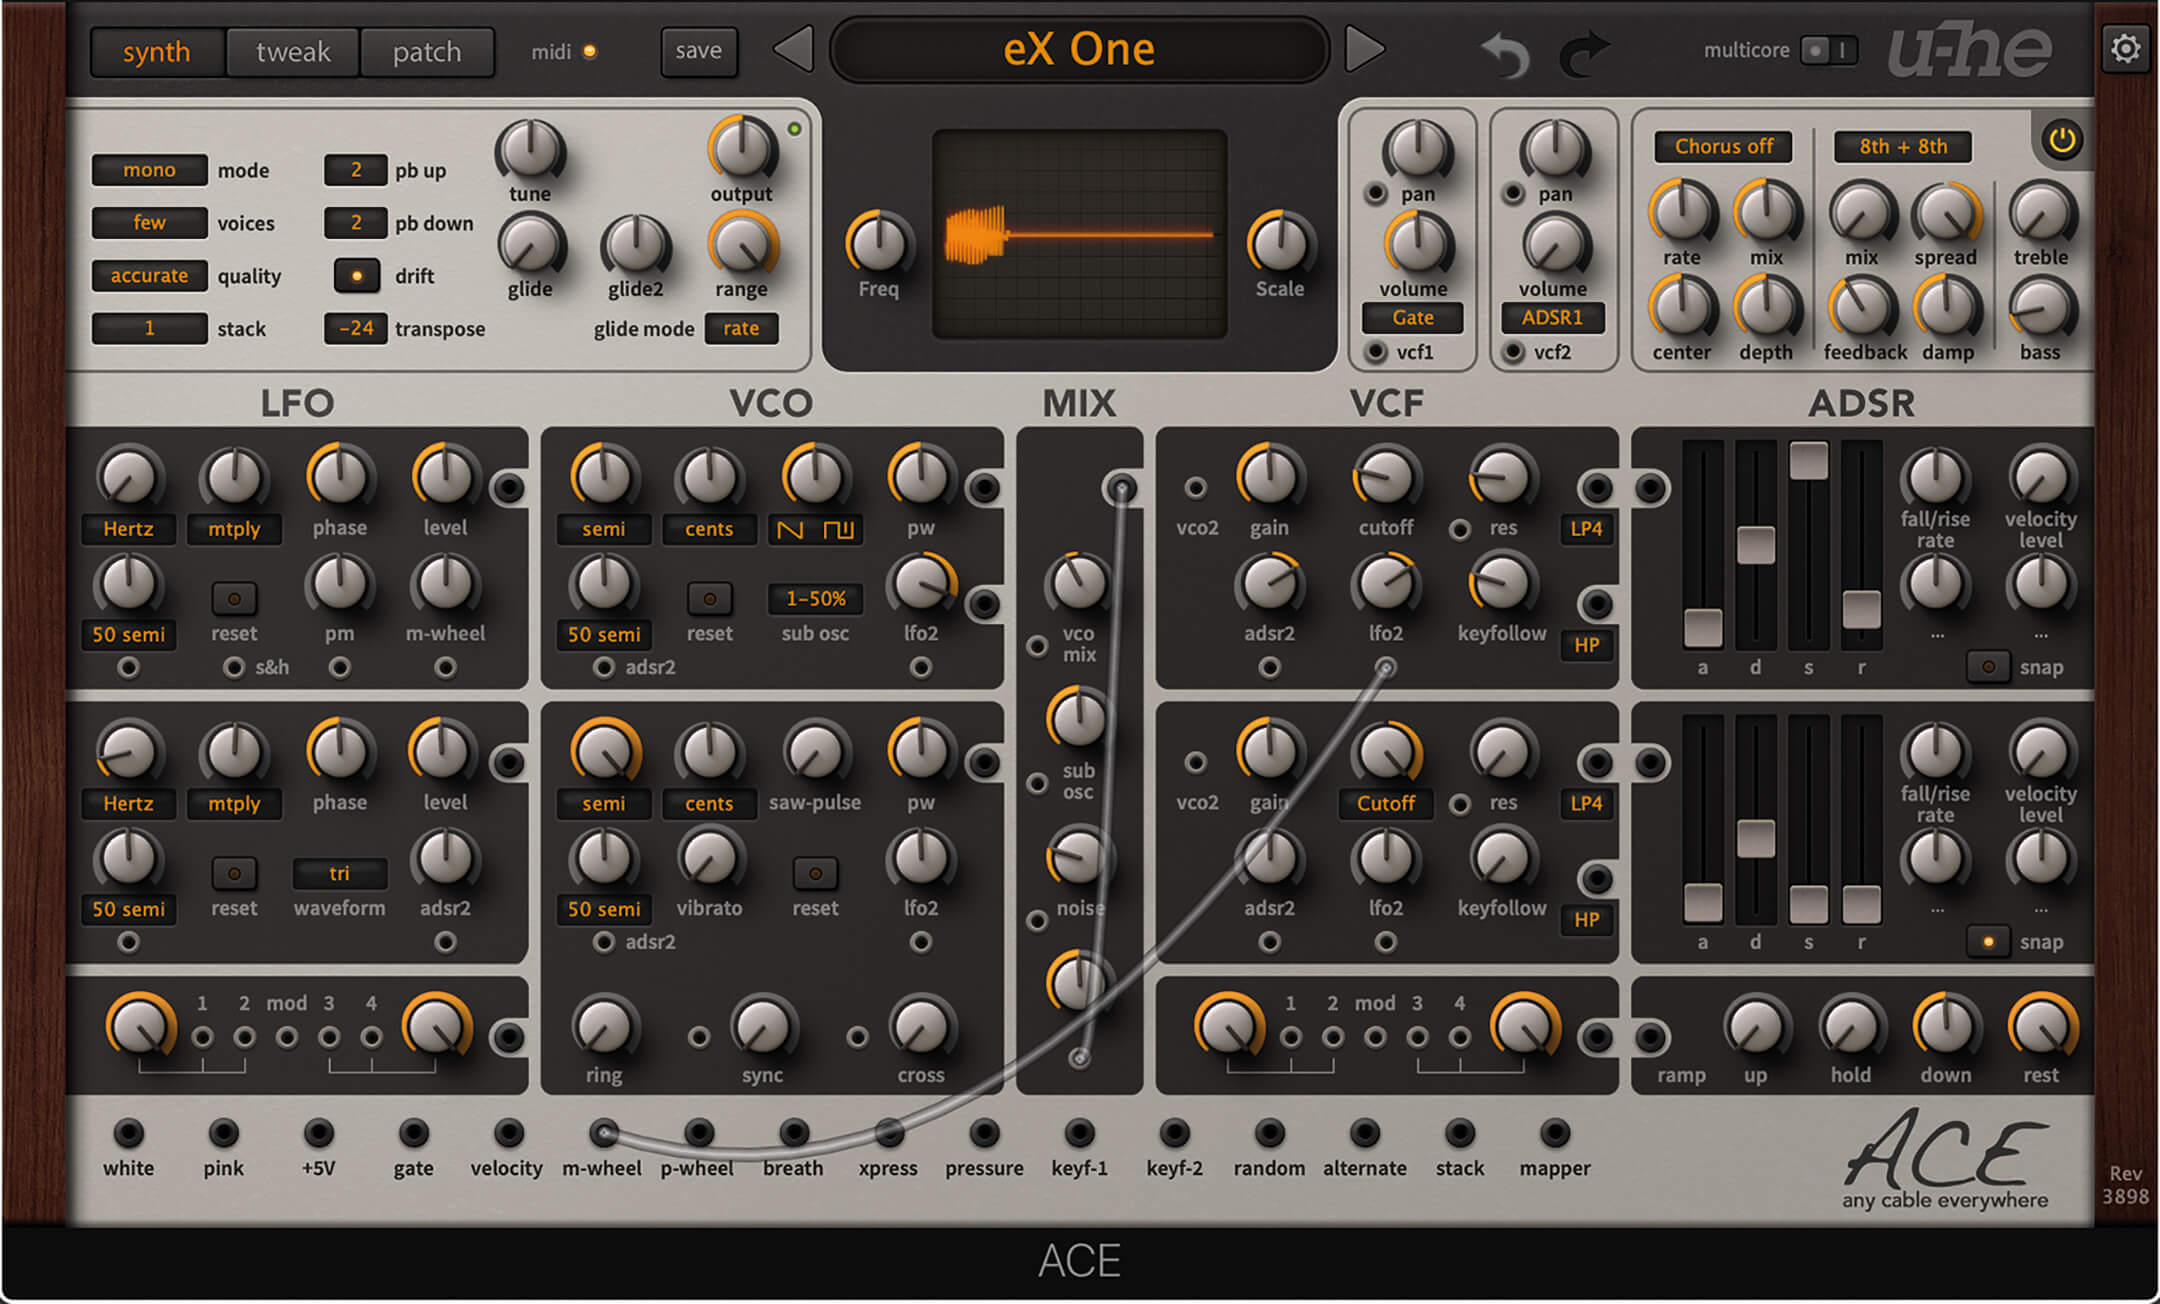
But hang on. Does this mean that, for a bassline to work, it must be a massive synth sound rich in harmonics and that doesn’t just contain low bass frequencies but also midrange and even treble harmonics too? That description doesn’t sound much like a bass sound, does it? In synthesis terms, everything we’ve looked at here is handled first by the oscillator stage.
That’s the area where you get to select and combine waveforms to build the foundation of
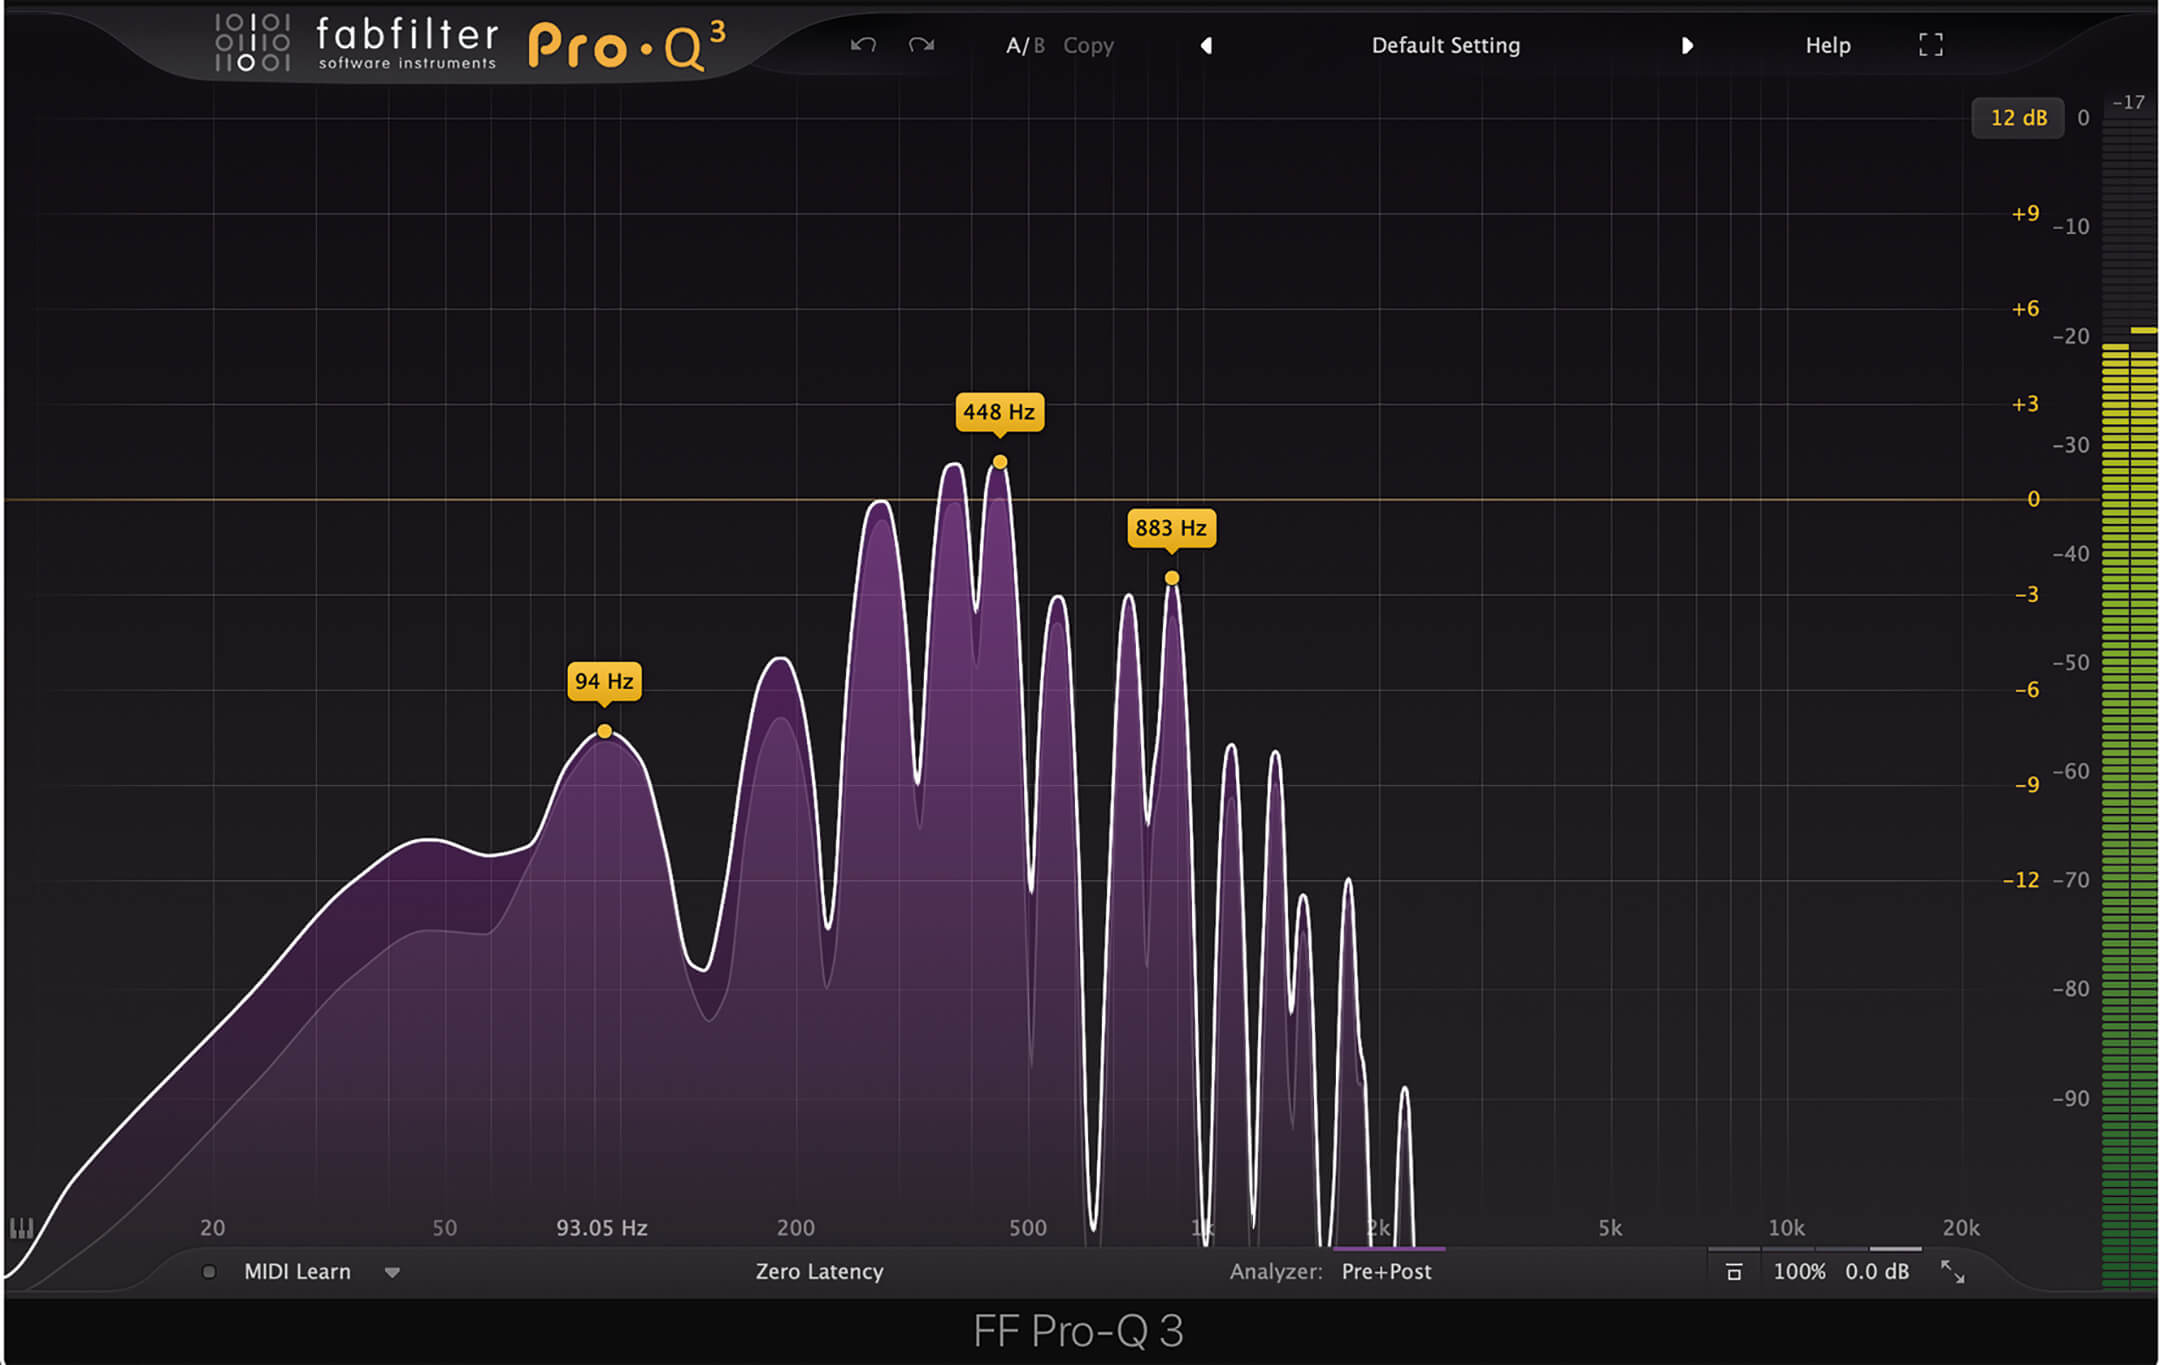
your bass and, yes, if you were to plug that raw mass of harmonics directly into the output stage of your synth, you might well find that it sounds more like a raspy, fruity lead sound than a traditional bassline. This is where the filter comes in. The way filters work is that they reduce the volume of harmonic content within a sound.
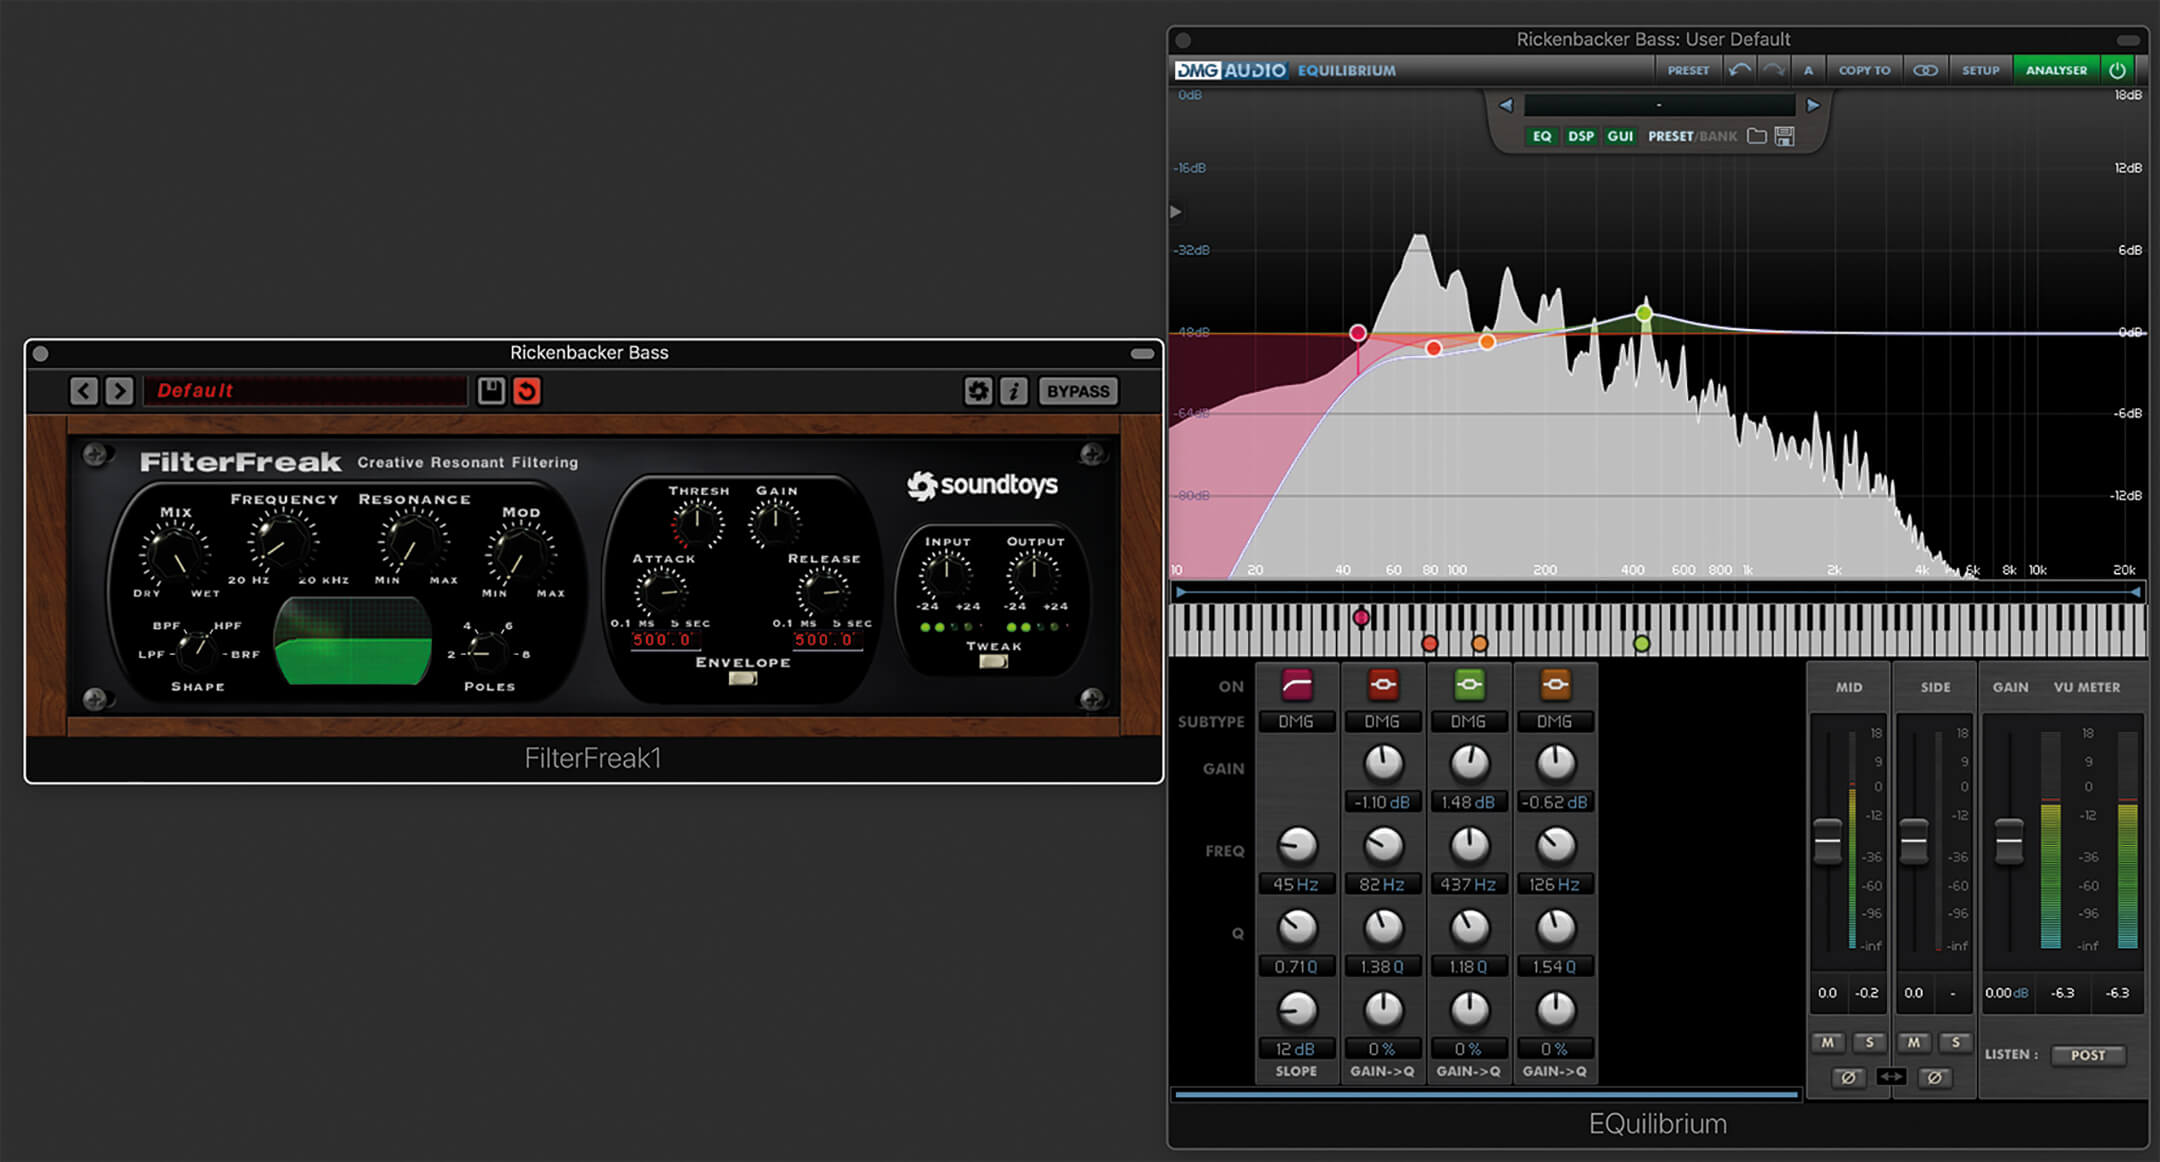
For example, if you put a low-pass filter on a rich slab of combined frequencies, any overtones above the cutoff frequency will begin to have their volume attenuated (reduced). The amount these overtones’ volumes is attenuated by is dictated by the slope of the filter. For example, a 6dB-per-octave slope would turn each group of harmonics within the next octave down by 6dB. A 24dB-per-octave shape would do the same but apply four times the amount of volume reduction, producing a stronger result.
So filters are important to shaping bass sounds, as they allow you to scoop out the volume of higher-frequency content, leaving only the lows. But if you’re going to filter out those high harmonics, why bother designing a sound that contains them back at the oscillator stage? The short answer: filter envelopes. The longer explanation goes something like this…
If you use an envelope routed into the filter section of a synth, you can allow a burst of higher harmonic content to bite right at the start, before the envelope closes the filter to create a deeper, more muted tone. You’ll only get that bite – which allows notes to attack and make their presence felt – if the sound has the potential to be open and full of harmonics.
The filter envelope, then, plays an important role in the sculpting of bass sounds, allowing plucky, biting initial impacts to become ‘true’ bass sounds as the note evolves. You’ll require quick attack and decay times and a low sustain level to hear this in action, and both the severity of the filter’s slope and resonance amount will make a huge difference to the resulting tone. Resonance boosts the volume of frequencies around the cutoff point, producing an exciting lift and bite in whichever harmonics are present just before the filter cuts their volume. One of the most famous bass synths of all time, Roland’s TB-303, owes most of its enduring popularity to the acidic, iconic squelch of its resonant filter, which produces searing overtones when pushed to high levels.
Lock it up
Now that you have a better understanding of harmonics, frequencies and filters, what about those bassline patterns? These days, referring to programmed bass parts and drum patterns as ‘the rhythm section’ seems somehow archaic. Yet, of course, in rock acts, that’s exactly the term given to the players of those instruments, whose shared role is to provide a sense of groove upon which the songs are built. Without this, things would fall apart.
But you won’t often hear drummers playing complicated swung grooves with bass players emphasising notes in a different, much straighter pattern over the top, for example. Instead, both players usually take their cues from each other to provide a rock-solid bottom end. There’s a lot we can learn from the traditional rock rhythm section,
by thinking carefully about the patterns we play and how kick drums and bass lock together, and by ensuring that one of these parts does most of the hard work while the other provides a repeating pattern and effectively stays out of the way.
Working with drum loops brings this issue to light pretty quickly, particularly if you’re trying to program a synth bass pattern to a loop that’s slightly swung or feels live because its drum hits don’t hit every single 16th note precisely in time. If you try to put a bassline on the grid against loops with either of these qualities, you’ll hear just how out of place a kick and bassline combination can be when they are not operating in sync.
Study the records you love. Focus on the low end and on the relationship between the drum pattern (particularly the kick) and the bass. Pick apart both the patterns and their tone to unlock the mystery of what makes the good ones work so well. The kick and bass patterns associated with popular genres rise and fall in popularity but the management of low-end content will always need special care, particularly when kicks and bass notes play at the same time.
When they go low
It might sound counter-intuitive but sometimes the punch and power of the bottom end of your mix can be tightened and improved by reducing the volume of ultra-low frequencies. That’s right, to make better bass, sometimes you need less of it. The reason for this is that your speakers vibrate in sympathy with the frequency content in your mixes, so if you have frequencies present that get down to the lowest frequencies our ears can detect, your speakers have to do their best to produce these, alongside all of the higher ones too. You can get a much tighter sonic footprint if you roll out some of those deep and flabby frequencies that might be inadvertently scooping power out of your mixes.
There’s an easy test you can try: put a high-pass filter across the bass elements in your mix (or an EQ with a low cut), with a gentle slope (try 2-pole or 6dB/octave) that’s able to roll out frequencies below about 50Hz. How does this sound on the drums, the bass or both? Are you hearing more punch and power or does the mix sound too lacking in foundation? If it’s the latter, move the filter’s cutoff point downwards, listening carefully to whether or not it’s actually any better when the lowest frequencies are reintroduced.
Playing nice
Be careful when introducing other track elements. Conflicting bass frequencies can creep into other mix elements, depending on the kind of music you’re making. Be on high alert for the lowest frequencies in your pads, for instance, as well as those of floor toms, and even the bottom end of fat snares, punchy synth plucks and any other elements that may contain more low end than you’d first anticipated.
Many mix engineers consider some form of high-pass filter (or low-end cut) a significant part of EQ’ing a substantial number of individual track elements in a mix, in order to carve out space and inject clarity into the sounds that truly benefit from it. This is true in pop and dance music but it’s also in music-for-picture productions, where a staggering number of instruments in the now well-established hybrid orchestra can contribute significantly to low-end frequency build-up.
Cellos, double basses, tuba and low horns have a tendency to conflate the low end – and that’s before you’ve added percussion instruments such as orchestral bass drums, timpani and taikos. Indeed, be on particularly high alert when using some of the latest percussion libraries designed for maximum impact, such as Heavyocity’s Damage 2 and East West’s StormDrum 3. The multi-sampled instruments in these collections sound absolutely gorgeous but be careful – sometimes the decay phases for these drums can be several seconds long, with the tail of the sound often getting purer and more like sub-bass throughout. Use the envelope controls within such libraries to ensure that each hit is no longer than it needs to be, otherwise you’ll have a near-constant low-end noise floor that’ll drain energy from your mix
Mythbusters
Finally, let’s take the opportunity to address a few of the biggest myths around ‘the right way’ to mix bass. Firstly, there is no right way. As always, the best-sounding records are mixed by well-attuned ears rather than rulebooks, so appraising the attributes of the sounds you’ve designed or chosen and giving them space to work their magic is all that’s required.
Secondly, you’ll hear it said that you simply cannot add spatial effects such as reverb and delay to bass sounds without ending up with soupy, swampy audio. This isn’t necessarily true. Despite our warnings about bass frequencies creeping into other mix elements, the reverb and delay treatments you add to bass sounds don’t have to contain any real bass if you don’t want them to. You can easily filter out the low end of a spatial effect, either using the reverb or delay’s onboard parameters or by using a dedicated filter or EQ plug-in afterwards to ensure that only the desired frequencies are affected.
If your bassline needs a short reverb, a dash of overdrive, some extra compression, a focused delay line or any of the other limitless options that might take it from so-so to main floor-filler, try out the above tactics and use your ears to appraise the results. We’ll let you take it from here. Hopefully, your understanding of bass design has been fattened by this guide. Keep this feature handy when smoothing out your low end and before long your tracks will be rumbling with the best of ’em.

Starting from scratch
Creating punchy synth bass sounds relies heavily on the combination of harmonics you create at the oscillator stage and on how you shape those timbrally at the filter stage. If you want to build a bass sound from scratch, begin by programming a pattern you like without focusing much on the sound. Ideally, design a sound that lets you work with at least two oscillators.
Start by choosing different waveforms for these, listening carefully to how the tone changes in character as you combine saw and square waves, for example. If there are volume controls for each oscillator, experiment with these too, setting a balance between them. Set up a low-pass filter and set the cutoff point so that it reduces the volume of the upper overtones. Route an envelope to this cutoff point so that, as every note plays, the cutoff jumps a little to let through a few of the upper harmonics. Dial in some resonance to make these bite and then experiment with the envelope’s controls, particularly the attack and decay times, to perfect the behaviour at the start of each note.
For more features, check here.