Genre Focus Tutorial – Producing Techno Part 4
It’s finally time to put our techno tune to bed. Liam O’Mullane fine-tunes the mix, getting it up to scratch and ready for commercial release. Well, it has taken a while and our track has moved in various directions, but we’re now going through the final stage of our journey through the art of producing […]
It’s finally time to put our techno tune to bed. Liam O’Mullane fine-tunes the mix, getting it up to scratch and ready for commercial release.
Well, it has taken a while and our track has moved in various directions, but we’re now going through the final stage of our journey through the art of producing techno in-the-box. Last time, we had the full arrangement laid-out and a fairly respectable-sounding mix – now it’s time to finalise our mix and call our track finished.
Although we classed our arrangement as ‘finished’ in the last instalment of this series, following a subjective listen a few weeks later, we identified a few things that we could do to enhance the arrangement throughout the mix. These are less about editing the musical aspects of the track; more about making decisions as to what is and isn’t the main focus within our mix at any given moment.

For instance, the pitched-down vocal plays only a few times in the track, but it’s alongside the atmospheres and other sound FX that appear more often than not. So to make the vocal more of a feature when present, we’ve used the vocal to sidechain a compressor placed on our atmos sounds, so they’re ducked out of the way. Another example of where we’ve had to enhance the arrangement is the off-beat percussion part. This has a parallel layer of filtered, distorted reverb that creeps up in intensity during its first musical section. It gets more present through the filter being raised in the next section to make it more of a feature. It turns out that this effect sounded even better in the second section when we muted the original dry percussion part. It draws focus to the distorted reverb as well as removing the sharp percussive element of the dry signal for the new section, so it has a greater contrast to the section before.
A final decision we made was to put work into the clap sound as the mix was lacking midrange punch. The clap is a repetitive, pulsing element and it wasn’t getting through the mix clearly. With some EQ exploration, layering, re-balancing and a reverb for ambience, we found a space in the mix where it could cut through a lot more clearly.

It’s been a couple of weeks since we last worked on our project and we can now clearly hear various aspects of the mix that need tightening up. This tutorial will focus on selling the arrangement that’s already in place using a range of mix tools, some of which are very simple, like volume automation, and others which are a bit more complex.
We’ll be explaining various applications for sidechain compression so you’ll need a sidechain-capable compressor (most DAWs have these). Simply set it to listen to the external key-input; this is used to trigger the compressor. For instance, you could use a kick drum to trigger a compressor through its key-input that’s actually processing other sounds. Just place it over an individual sound or a group and those sounds will duck in volume whenever the kick sounds.
We also use mid-and-side processing quite a bit, so you need to understand what this is. The ‘mid’ is the signal that has the same information on the left- and the right-hand channels of a stereo sound. So to your ears, this is the centre of the stereo signal. The sides are the elements of the left and right signal that differ; as a result, you hear these as the stereo elements of the sound. For an enhanced element of mix processing, we’re splitting these into separate components to apply different treatments to.
Separating mid and side is simple in some DAWs; for instance, in Live you can split a signal into two copies using Chains in Audio Racks. You can then drag a Utility device to each one and have the width set to 0% on one and 200% on the other, creating mid and side signals respectively. Other DAWs may require a different approach, but the simplest way is two make two channels for one sound source and add a mid and side splitting plug-in. The Brainworx bx_solo plug-in is one of a few free options to use for this task.
Some words on good practice when mixing. First, make sure you use well produced tracks as reference material. Second, it can be useful to occasionally add a basic mastering chain to give you a sense of how your mix could sound after professional mastering is applied. Reference material is important throughout the song-making process, but even more so when mixing to keep you focused on creating a mix that sits well with your peers. When using mastering processing, be careful not to check your reference material through the same chain, otherwise you’ll be chasing your tail, trying to match material that has been mastered twice – once by the label, then by your own chain.
Tightening-up the Mix

1: The kick sounds far too forward and out of character with the rest of the elements in the mix, so we’ve decided to locate the lower-mid knock sound that lives around 200Hz and the midrange click at around 600Hz and pull them back with subtractive EQ. The sub-bass and its decay feel a little low in volume, so we’ve gone for a broad EQ boost to enhance the existing sub content.

2: To give the kick a sense of impact we’ve added some pretty heavy compression, blended in with the original using a dry-wet control. This is the simplest approach to achieving parallel compression and with a short attack and release, the compressed signal performs a quick down-then-up volume movement. Don’t set the attack too short or you’ll dip the volume too early and lose the transient.

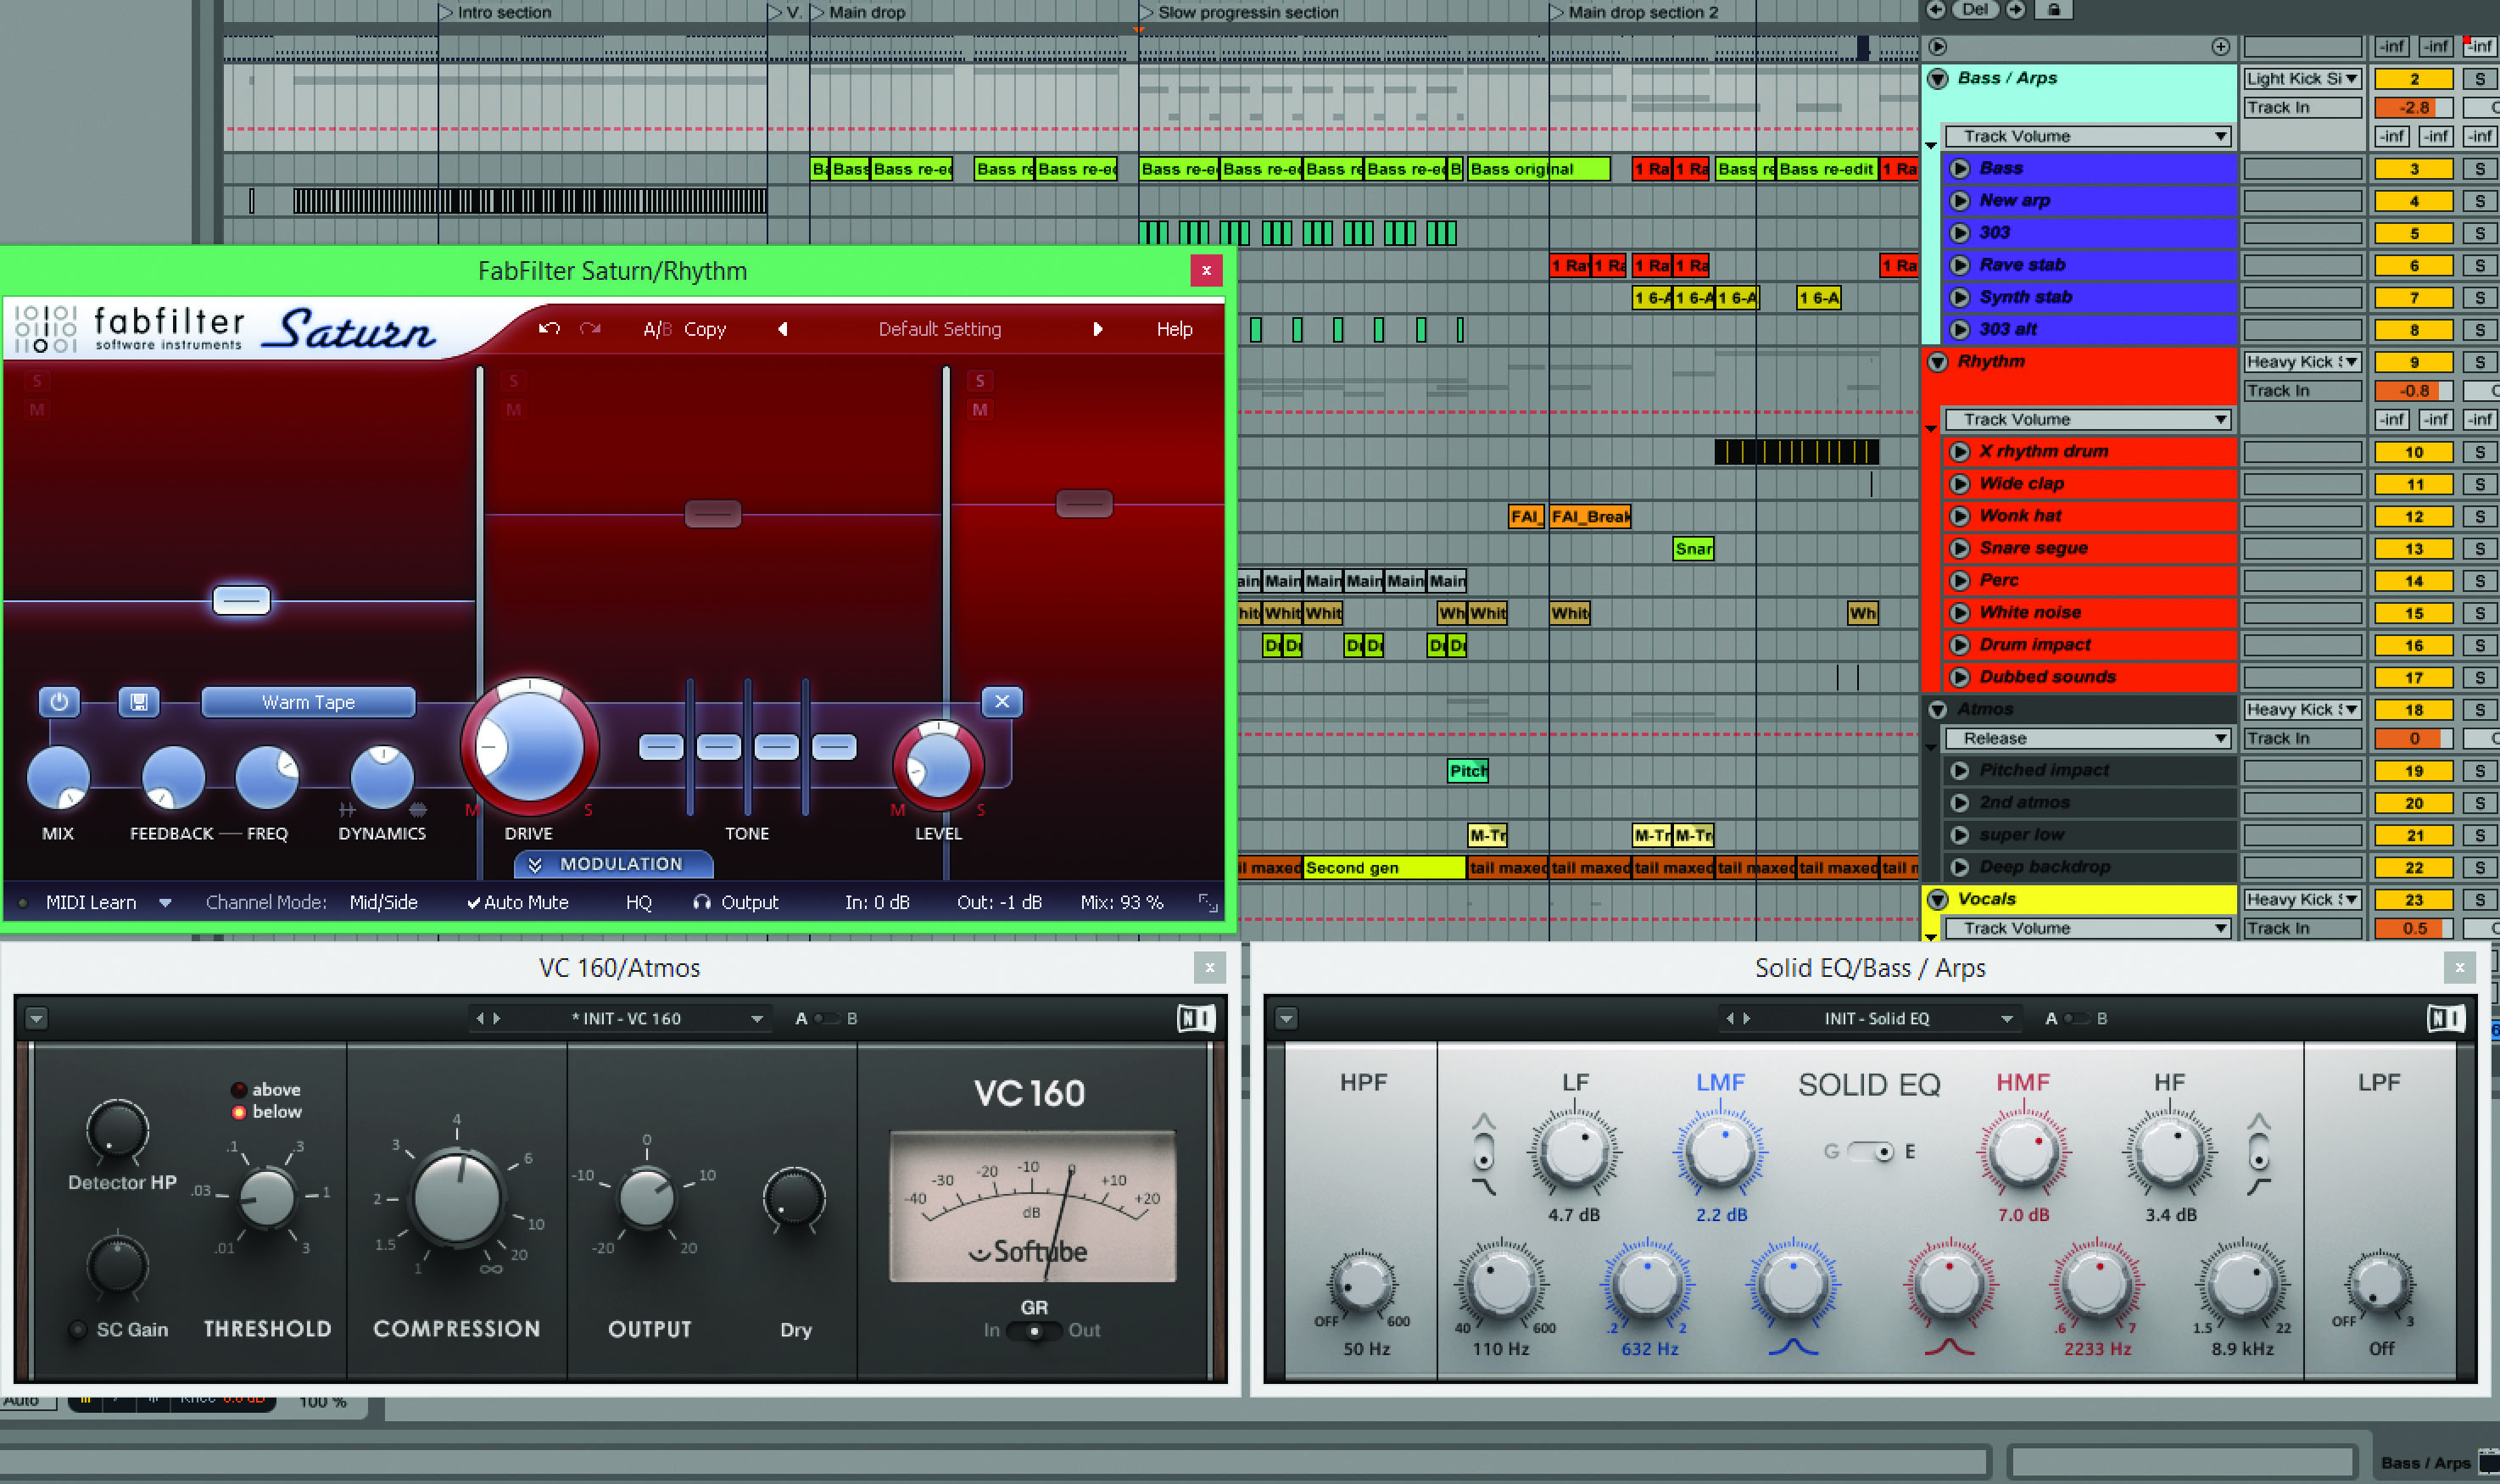
3: With so many layers in this track, it’s time to get things organised. This will let us know what’s going on between the sounds and allow us to apply further processing to give them more separation. The categories have been divided into groups and labelled as bass/arps, drums, rhythm (excluding main drums), atmos and vocals. Now it’s time for some character-processing.

4: When you’ve got sounds into their respective groups, experiment with tonal processing to add individual character per group. This can be a variety of processing types, but vintage emulation is our first choice. It will impart additional harmonics through saturation, so if you choose a different flavour per group, it’s easy to achieve contrast in a mix. EQs, compressors, saturators and so on are all worth exploring.

5: The key rhythmic aspect is the kick, so we’ve grouped other mix elements into two categories. One is for key sounds that are the melodic content, the other is for decorative sounds. Add a compressor to each group and have them listen to the kick via the sidechain. Decorative sounds will duck the most when the kick plays and we’ll use light compression on the key sounds so the movement is less obvious.

6: Our main sounds now have a sense of movement, but the ambience effects also need rhythmic control. We’ve grouped our effect return tracks to one new group and added a compressor. Like the group sidechaining, this compressor will make ambience effects duck when the kick plays. We’ve gone for quite a lot of gain reduction so that the ambience really moves up and down in time with the track.
Enhancing Stereo Field and Depth

1: There are two sections that scream out to be ‘stereoised’. These are the 303-type parts and the 16th hi-hats. The 303 is mono, so we’ve used a separate EQ shape on the left and right audio channels to create stereo spread. The EQ originally swept around the midrange of the 303 to create movement, so we’ve duplicated this for both channels while keeping them unique on either side so the stereo effect is not lost.

2: The hi-hats consist of two layers: one is constant, playing 16ths, the other is used occasionally as an accenting sound. We’ve left the accenting hat as it is and created a left and right channel for the constant hi-hat to process independently. There are many ways to process a signal for stereo spread, but we’ve chosen to use different flavours of saturation for the left and right channels.

3: For stereo control we’ve enhanced a section where our rave riff comes into the mix for the first time. It already has a stereo sound and along with fading-in its volume, we’ve added a stereo width control to automate over time. Now the riff fades in and goes from mono to wider-than-normal stereo towards the end. This wider sound loses its power, so we’ve also raised the track’s volume to compensate.

4: To create contrast, it’s worth looking at where you can clear up layers of sounds or effects to strip-down parts of a mix. We have a snare sequence that plays a roll while rising in pitch to go from one section to another. But with so many effects being used by other sounds at the same time, we’ve chosen to manually duck the ambience effects so the new section is established with a much dryer, cleaner sound.

5: Another trick to create movement is to make either the mid or the side of a stereo signal pump in time with the track. Our drums and atmos tracks are the only stereo mix elements that run throughout the track, so we’ve set up a compressor on the side signal of our atmos track and set that to pump to the kick drum. Again, this will orientate more aspects of the mix around the pivotal pulse of the kick drum.

6: A final trick to immediately widen a mix is to reverse the channels of your ambient effects. This will make ambience panning oppose that of the source instruments, so there are two positions per panned sound in the mix. Because we’ve already grouped our send effects, we can just swap the channels over on the group either using pan controls or, in this case, a left and right channel-swapping plug-in.
