From Studio To Release: How To Record A Band – Recording Instrumentation
Our series on the process of recording, mixing and mastering a band continues with the challenges of recording various instruments. Mike Hillier offers a selection of hands-on tips and advice on how to make the most of recording guitars and other band instruments, with a view to the final mix. Check out our guide to […]
Our series on the process of recording, mixing and mastering a band continues with the challenges of recording various instruments. Mike Hillier offers a selection of hands-on tips and advice on how to make the most of recording guitars and other band instruments, with a view to the final mix. Check out our guide to recording drums in part 1.
In this feature, we’re continuing our look into the recording phase of two songs: Fade Out by Lock, a modern-sounding electro-rock track combining electronic and acoustic drums with synths and guitars – and Shore by Reptile, which is a more traditional rock song but with a progressive arrangement driven by acoustic drums, electric guitars, electric bass and organ.
In the first part of this series, in MT164, we looked in-depth at the drum tracking for both songs, delving into the minutiae of the drum positioning, microphone choice and placement, preamp, EQ and compression choices made while tracking. But with the drums now recorded, it’s time to move on to the instrumentation, before we finally end up tracking the vocals.
Steady As She Goes
The reason we start by tracking the drums (and occasionally other parts of the rhythm section) before overdubbing is that it provides a bedrock for the additional musicians to play along to, locking themselves into the groove as it’s laid down. Occasionally, the groove won’t be provided by the drums and you’ll need to plan the tracking around whichever instrument(s) do provide the groove. However, assuming we’re working on something with a standard drum-based groove – as I am on both of these tracks – once the drums are tracked, it’s important to tidy up any edits, perform any drum alignment you might want to do, and essentially commit to the drum recording at least in terms of timing. If you leave the drums loose, with the intention of tightening them up later and then layer on guitars, bass and keys, these additional instruments will have followed the groove and timing set by the drummer – meaning any edits you make will now most likely need to be applied to these new recordings as well as the drum tracks.
This isn’t to say you can’t make any drum edits after the event, as there’s always the possibility that you, or the band, might want to change the structure or performance later in the mix. But getting this in early does help to speed things along.
We’re going to focus on editing later in the series, covering the editing of not only drums, but also comping vocal takes and any other edits we end up making before getting stuck into the mix. But for now, we’re going to take a look at the next stage of our recording process.
“Before setting up the guitars, it’s important to set up a ‘basic mix’ of drums and pre-recorded parts”
Recording Guitars
Lock’s track Fade Out was performed to a click and a prerecorded backing track and, as covered in Part 1 of this feature, the drums were recorded one section at a time, with an additional percussion overdub tapped out on the leg of the snare stand. The pre-recorded parts provide much of the song’s instrumentation, but the band also had a number of electric-guitar parts they wanted to add in.
Before setting up the guitars, though, it’s important to set up a quick ‘basic mix’ of the drums and pre-recorded parts so we can figure out what the guitars are going to add. The tracks we already have are a monosynth bass, played on a microKORG synthesiser – this was actually provided in stereo, but as it was clearly a mono sound, I immediately split it and kept only one channel. Then there’s a synth pad, which carries a rhythmic element to it, and has a bright, wide attack at the start of each bar. There’s a Mellotron cello part which doubles the synth bass in the chorus – again, this was provided in stereo, but was actually a mono part, so I have kept only one of the two channels. There’s a synth lead part, which plays out the main hook in the chorus. And finally, there’s an acoustic upright piano, which plays big open chords on mostly only the first beat of each bar during the verses, and then more frequently during the choruses and middle 8. I was also given a rough recording of the vocal, to help aid my understanding of the track’s direction.
Even without the guitars, the mix is already quite busy, with a quiet-verse/loud-chorus structure. There is a lot of energy being filled by the synth bass, but the only real movement into the chorus is being provided by the piano. Edie and Gita from the band had guitar parts which would add only simple lead elements to the verses, leaving plenty of room for the vocal, doubling the synth lead in the chorus, and adding a rhythmic riff to the chorus to bring more movement into this section.
Guitar choice can be crucial, and the studio has a wide selection of guitars ready for use, including an ’82 Fender Stratocaster, an ’06 Fender Telecaster, and an ’01 Gibson Les Paul Standard; plus Edie and Gita had each brought their own. It can be tempting to spend some time trialling all the guitars with all of the amps on offer, but unless the artist’s own guitar is unsuitable for the part, my first instinct is always to use that one – it’s the guitar they know, the guitar they’ve written the part for and have practised it on. For Gita’s lead part, this was a solidbody Gretsch Duo Jet. In addition to the studio’s guitar collection, we had a variety of amps on offer, including several Fender amps, a Marshall JCM800 and a Vox AC30.
“Having a DI version of the signal makes editing guitar easier, as there’s no transient smearing”
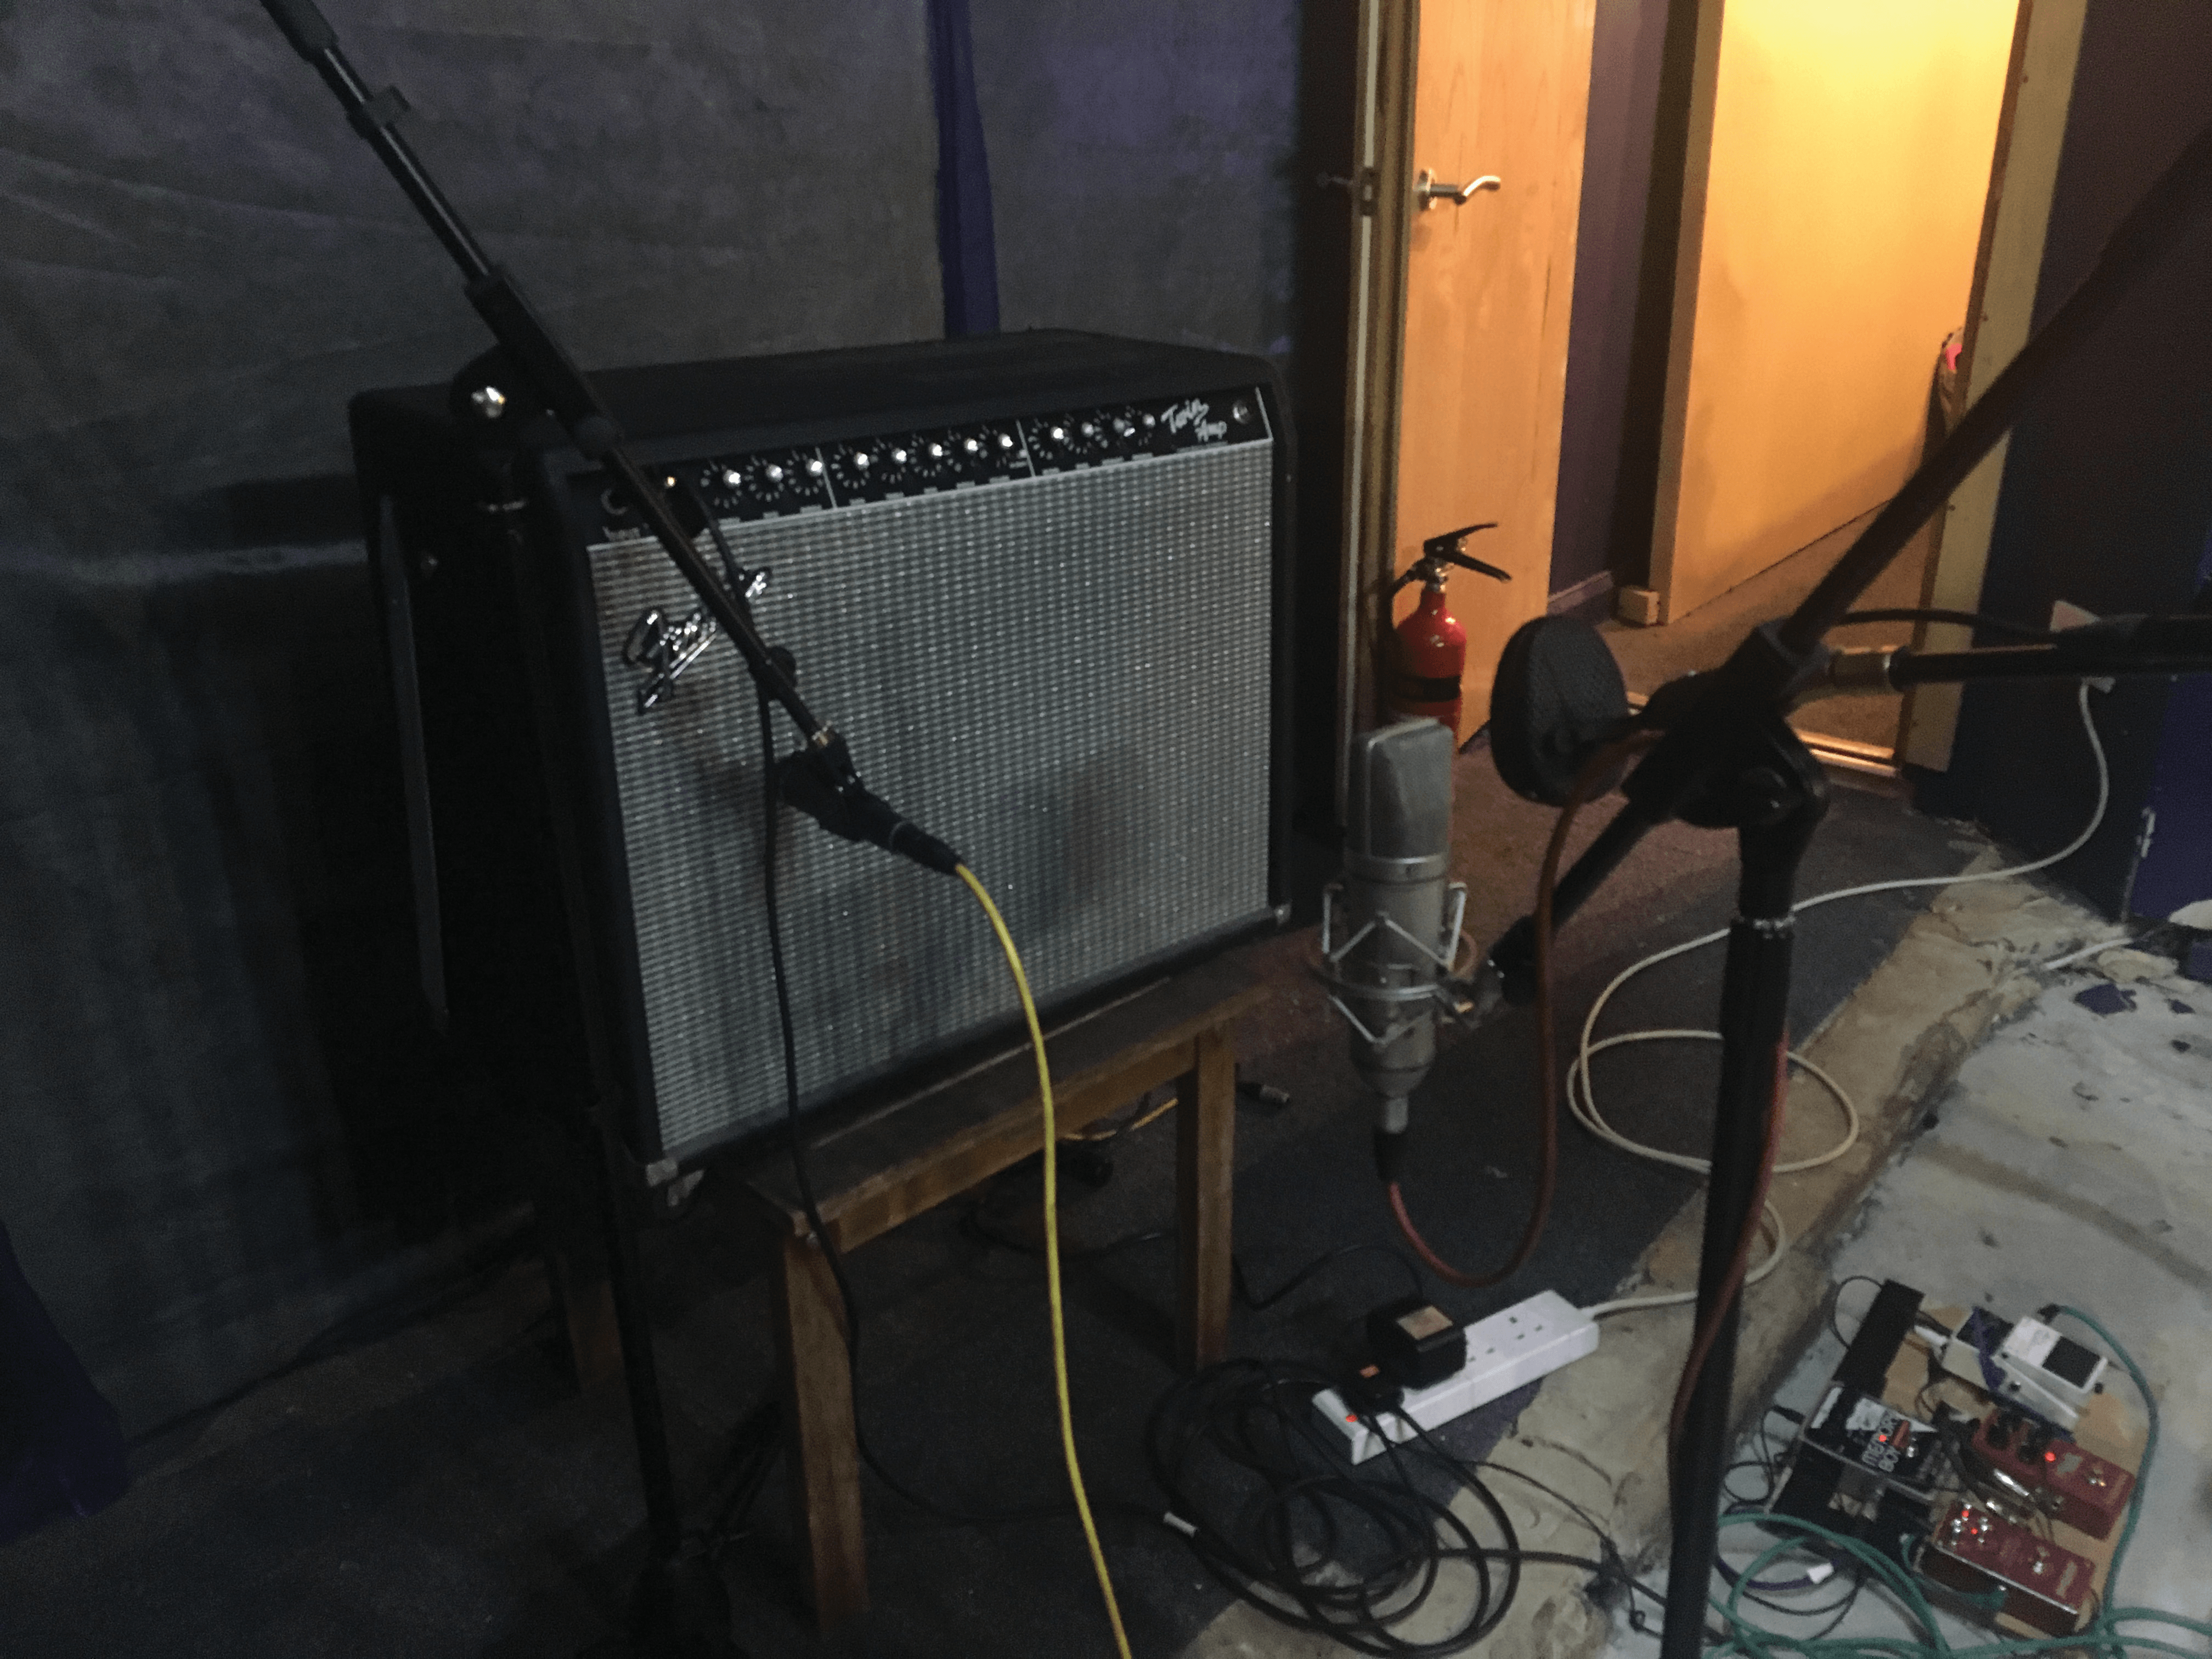
I had my assistant, Indi, set up a couple of amps on stools – a Fender Twin Reverb and a Vox AC30 – and we spent a little time experimenting with different sounds before settling on the Fender Twin Reverb, using a TC Electronic Hall Of Fame Reverb and an Electro-Harmonix Memory Man pedal in the chain. I also added a DI – the recently reviewed Bumblebee DI box – to the chain. This was not so much so that we could re-amp and change the tone of the guitar later (although that is always an option), but instead because having a DI version of the signal makes editing the guitar much easier, as there’s no transient smearing from the amp.
Getting the guitar to sound great in the room is key to getting a great guitar recording. Every part of the signal has to be considered, from pickup selection through pedal settings – removing any pedals not in use – through to the amp itself and even the placement of the guitarist. For the cleanest recording, it can be advantageous to place the guitarist in the control room, with the amp out in the live room or booth, on its own. This way, you won’t pick up any movement from the guitarist, and you’re also much less likely to get any feedback, as the guitar and amp are no longer in the same space. However, being in the control room doesn’t suit all musicians, and I often find that I can get a better performance from a musician who is in the room with the amp, as they’ll have a physical reaction to the sound coming from the amp. Also, there are usually fewer eyes in the live room staring at the musician as they perform, which reduces the tension for most players. Of course, in the end, you should do whatever’s necessary to make the artist comfortable in order to get the best possible performance.
“We already had the room mics up from the drum tracking, and I decided to leave them up”
When it comes to mic’ing the cabinet, I’ll usually throw up a couple of options quickly. These are most often a dynamic and a ribbon, right up on the grille. Sometimes, it can be useful to have a little more of the room sound, in which case, I’ll either add an extra room mic, or pull the ribbon mic further out from the cabinet. For these recordings, we already had the room mics up from the drum tracking, and I decided to leave them up to capture a room vibe, which would place the guitars in the same space as the drums.
For the close mics, I put up a Shure SM57, a Neumann U 87 and a Coles 4038. This meant that, in addition to the DI track, we had three close mics and a stereo pair of room mics. I wouldn’t usually use as many mics as this on a single guitar cabinet, but by doing so on this occasion, I was able to offer the opportunity to hear the difference each mic makes to the signal; and I can mute the channels I won’t be using when it comes to the mix.
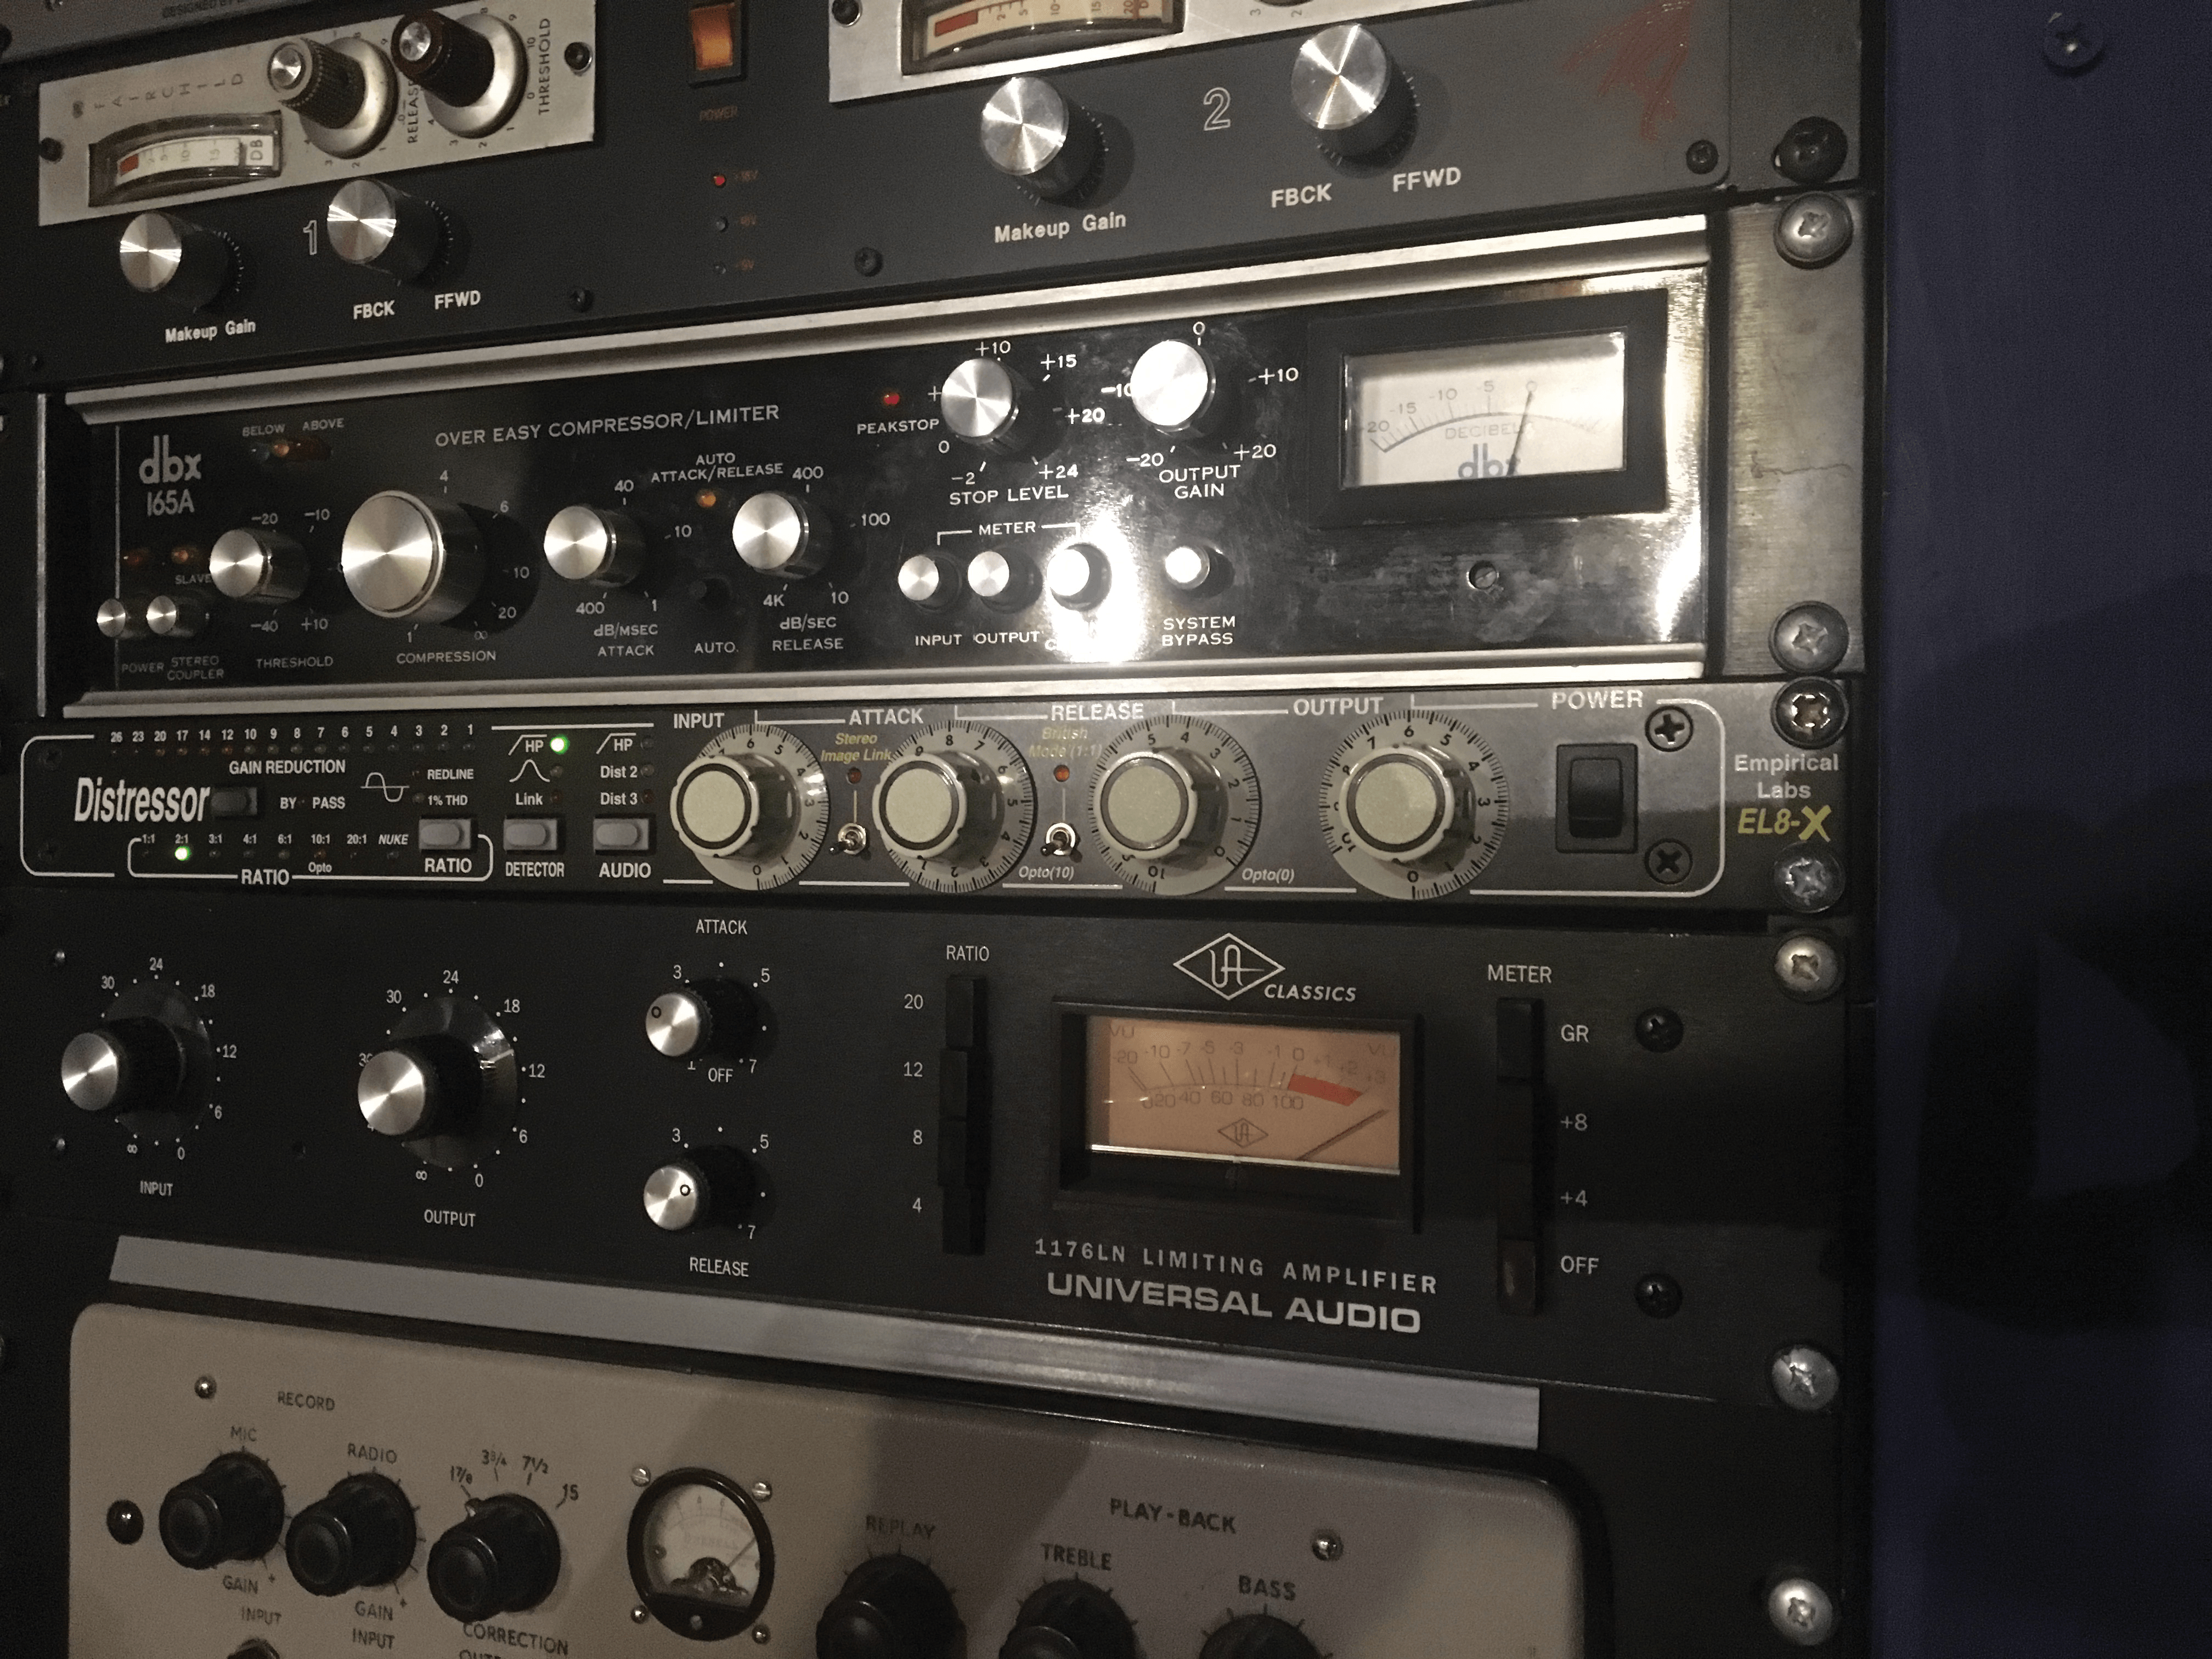
For all five channels, I’m using just the desk preamps, and no EQ/compression. I’d often use API preamps and perhaps even a touch of API EQ/compression, or the dbx 165 compressor in the studio on electric guitar, as I’m fond of the aggressive forward punch these combinations give me; but we don’t have enough channels for all the mics we’re using, which would render any comparisons unfair.
Gita’s guitar part is called Guitar 1 on the Lock Pro Tools project (download from www.musictech.net). You can listen to each of the different mics, and even try different combinations. I’m particularly fond of the Coles 4038 on this guitar sound – it isn’t quite as ample-sounding as the U 87, but the top-end roll off seems entirely natural and helps to position the guitar in the mix a little better, with less scratchy top end. The SM57 is a polar opposite in comparison, with a very forward, almost nasal twang to it. It doesn’t suit the dark-electro-rock vibe the mix is heading towards, but on a poppier sounding mix, the SM57 or U 87 might have been ideal.
Amps On Stools
Lifting a guitar cabinet off the floor is one of the simplest ways of improving the recorded signal. The floor acts as a reflective surface for audio coming from the speaker and if the floor is close to the speaker, these reflections will occur after only a very short delay, creating a comb-filtering effect in the signal which will be picked up by the microphone. Lifting the speaker cabinet off the floor – or using the top speakers in a 4×10 cabinet places a greater distance between the floor and the signal source, and thus a longer delay before the reflections hit the microphone. The longer delay presents less of a problem for comb filtering, as there are fewer cancellation frequencies… and furthermore, this signal will be quieter as it loses energy over distance, so any cancellation will be smaller.
Fresh ideas
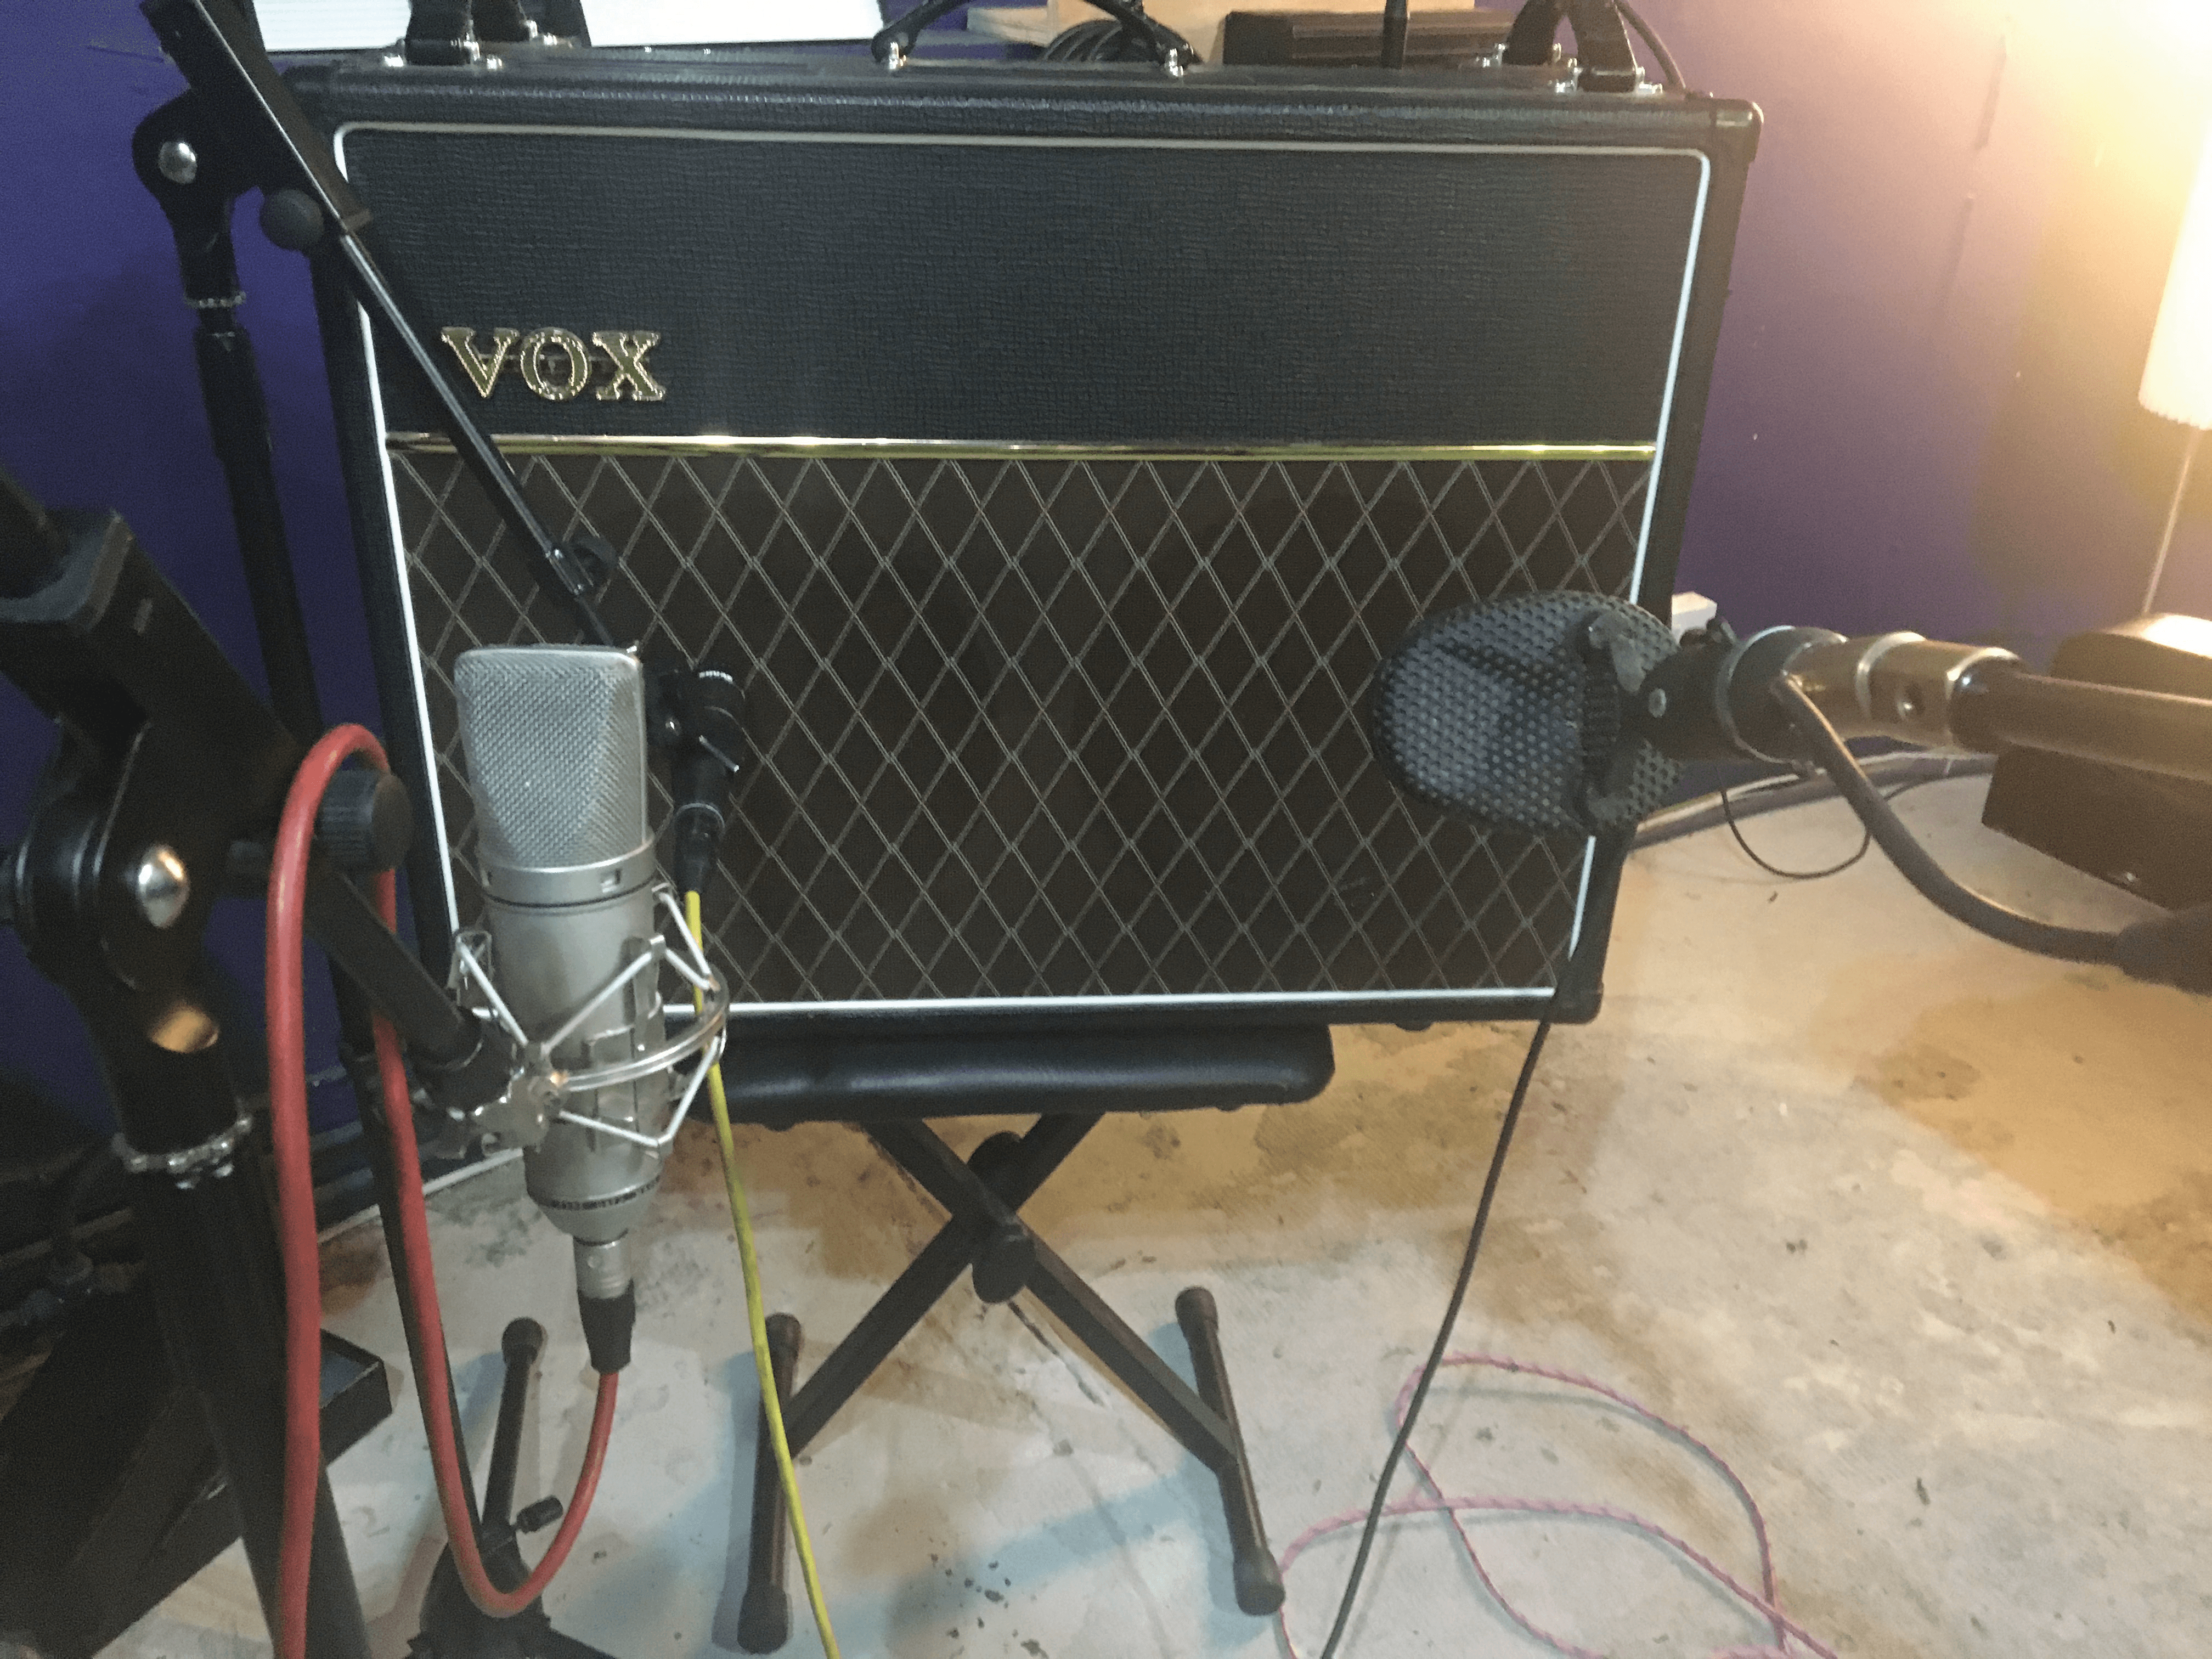
With Gita’s guitar parts down, we set up again for Edie to layer some rhythmic parts over the chorus. We’re looking to add extra dimension to the choruses and conjure up an aggressive, organic edge to the synths. Edie was playing a Fender Jazzmaster, which we again set up into both the Fender Twin Reverb and the Vox AC30. On this occasion, we went with the clean channel of the AC30, with a touch of reverb from an Electro-Harmonix Holy Grail pedal. Again, I’ve recorded a DI signal alongside the three close mics (Shure SM57, Neumann U 87 and Coles 4038) and two room mics (Coles 4040).
Because Edie’s guitar part only comes in on the first chorus, and drops out again for the start of the second verse, I had her double-track the parts, so the option is there in the mix to wide-pan the two parts against each other. These parts are labelled Guitar 2 and Guitar 3 in the project.
Edie also had another part in mind for the song’s middle 8, but we wanted to capture a slightly different tone for this section using an MXR Phase 45 pedal as part of the chain and switching to the AC30’s Top Boost channel. This guitar part can be found in the Pro Tools project, labelled as Guitar 4.
“The guitarists were told to play whatever felt right to them, throw caution to the wind… do anything”
The final guitar part we tracked for Fade Out is a wild track. For this, I asked both Edie and Gita to go into the live room with their guitars and pedalboards; Gita into the Fender Twin Reverb, and Edie into the Vox AC30. They were instructed to play whatever felt right to them, throw caution to the wind and do anything for a pass – whether that was musical, or simply beating or scratching at the guitars. I mic’d this with only the room mics at the back of the room.
This can be a very creative way of getting musicians to come up with ideas or sounds in the studio that they might not otherwise have thought of during writing. Sometimes, you’ll get something that works; other times, you’ll get nothing. But so long as you already have all the basic tracks, it doesn’t matter. This can be used or ignored, or – as is often the case – referred back to, in order to refine a part that would not otherwise have been part of the song.
The ‘live band’ approach
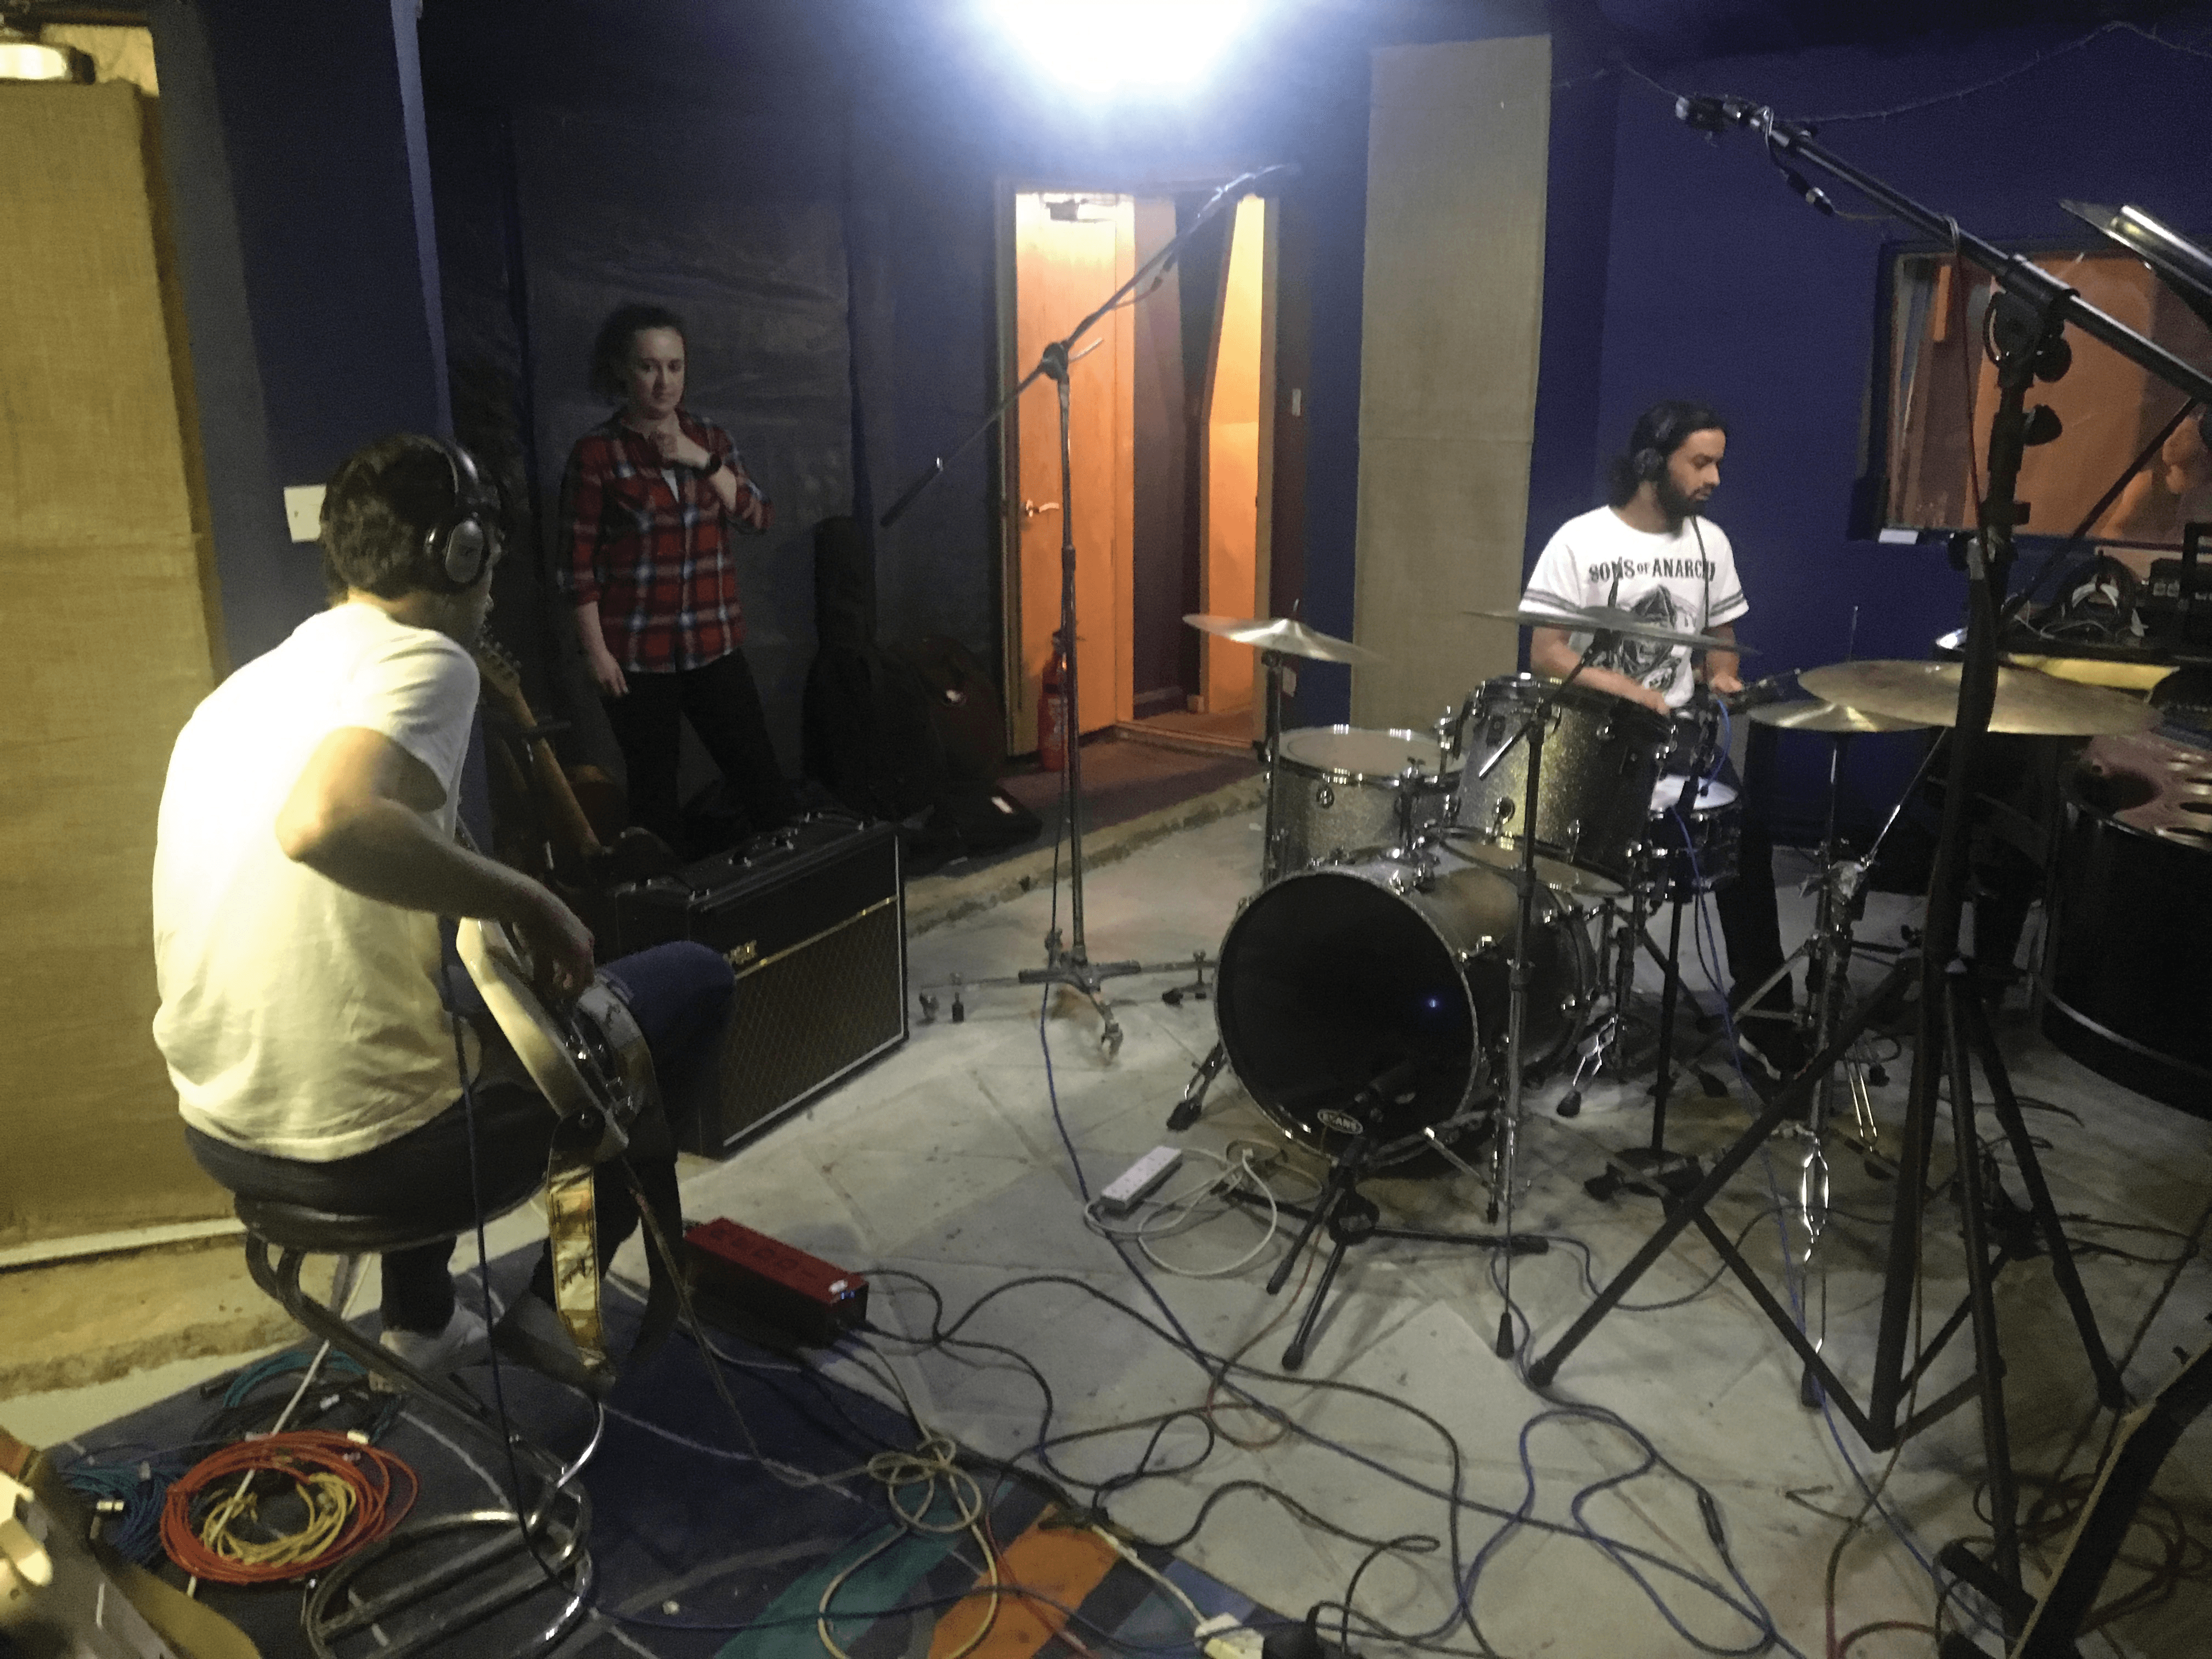
The essential parts for Reptile’s track, Shore, were all recorded live at the same time as the drums. This is because, without a click, I wanted the musicians to lock in with each other. However, this does mean that any mistake by one musician can spoil the take for the other musicians. In this instance, that wasn’t a problem, as we were using a DI for the bass recording, and a virtual instrument for the organ. So there was no bleed in the drum microphones, other than what may have been coming from Shez the drummer’s headphone mix.
The key here is to ensure that all musicians can clearly hear each other and that there’s as little latency as possible. Not much of the drum signal was needed in the headphones – they’re loud enough in the room as it is – but for the organ, we were using a simple TDM synth plug-in as the source. This didn’t sound great, but did have near zero-latency, so provided the best ‘feel’ for the musicians to work with. Once the takes were finalised, I swapped out the synth for a better organ sound and then bounced it to a spare audio file for the rest of the session. This allowed me to disable the virtual instrument and keep the project to audio-only for the rest of the tracking session. When I get to the mixing stage, I’ll still have the MIDI and can change the part as I see fit, bringing my own choice of virtual instrument from my own collection.
“With the live approach, ensure everyone can hear each other and there’s as little latency as possible”
For the bass guitar, we used the studio’s own Music Man StingRay bass through an A-Designs REDDI DI. I recorded this clean, but added a little grit to the headphone mix with an instance of the SansAmp PSA-1. This helped give the bass player a better idea of what the bass was going to sound like, while keeping latency down, and not colouring the mix. I was pretty certain I was going to end up re-amping this signal, but with no particularly inspiring bass amps in the studio, I felt it was better to keep this clean at this stage and re-amp it later.
As was mentioned in Part 1, I also set up an SM58 in the live room for the vocalist, who was able to sing along with the three musicians as they performed. I wasn’t the least bit bothered about spill here coming from the studio monitors, as in all likelihood, I wasn’t going to use this part, but if the microphone is plugged in, you’d be a fool not to record it – you never know when you’re going to hear that killer take. I’d rather have an imperfect recording of a great take than a great recording of an imperfect take, so I tracked this part to a spare channel – which, as I predicted, was not used.
Accidental discoveries
With the basic tracks all done in one take, we now had to flesh out the song with some additional overdubs to build up the instrumentation. The band had some guitar parts written, and I wanted to add an acoustic guitar layer and some piano, to provide some additional colours for the mix.
Luke tracked the main rhythm-guitar part first, using a Fender Stratocaster straight into the studio’s Fender Twin Reverb, mic’d up using a Shure SM57 and a Coles 4038. As I had done with Lock, I left the room mics up from the drum recording. However, I didn’t set up any large-diaphragm condensers, as I knew that wasn’t going to be the sound I wanted to push towards.
During the first pass of the guitar take it became very apparent that we’d left the snare wires on the snare drum, and that these were resonating with the sound coming from the guitar amp. However, rather than go out and fix it, we opted to leave them up for the whole of this part. The sympathetic resonance of the snare with the guitar part had a very ‘live’ vibe to it, bringing something unexpected and exciting in particular to the first guitar chord. This added to the straight-up rock ’n’ roll edge I was trying to get from the track. This main riff was split into two sections, the first recorded clean and the second requiring a bigger, more distorted tone. We set up the second channel on the Fender Twin Reverb with the gain cranked all the way up, and we had a channel-switch pedal available. But rather than have Luke stomp on the pedal mid-take, I recorded these two sections as two separate takes. This will give me the opportunity to let the last clean chord die out cleanly, and ensure the overdrive doesn’t colour the tail, or get engaged a fraction too early. It will also make any editing and even mixing easier, should I decide I want to EQ the overdrive independently from the clean tone.
As soon as Luke had finished tracking this first guitar part I had the snare wires taken off – as much as I was enjoying this unexpected mistake, I didn’t want it on all of the guitar parts.
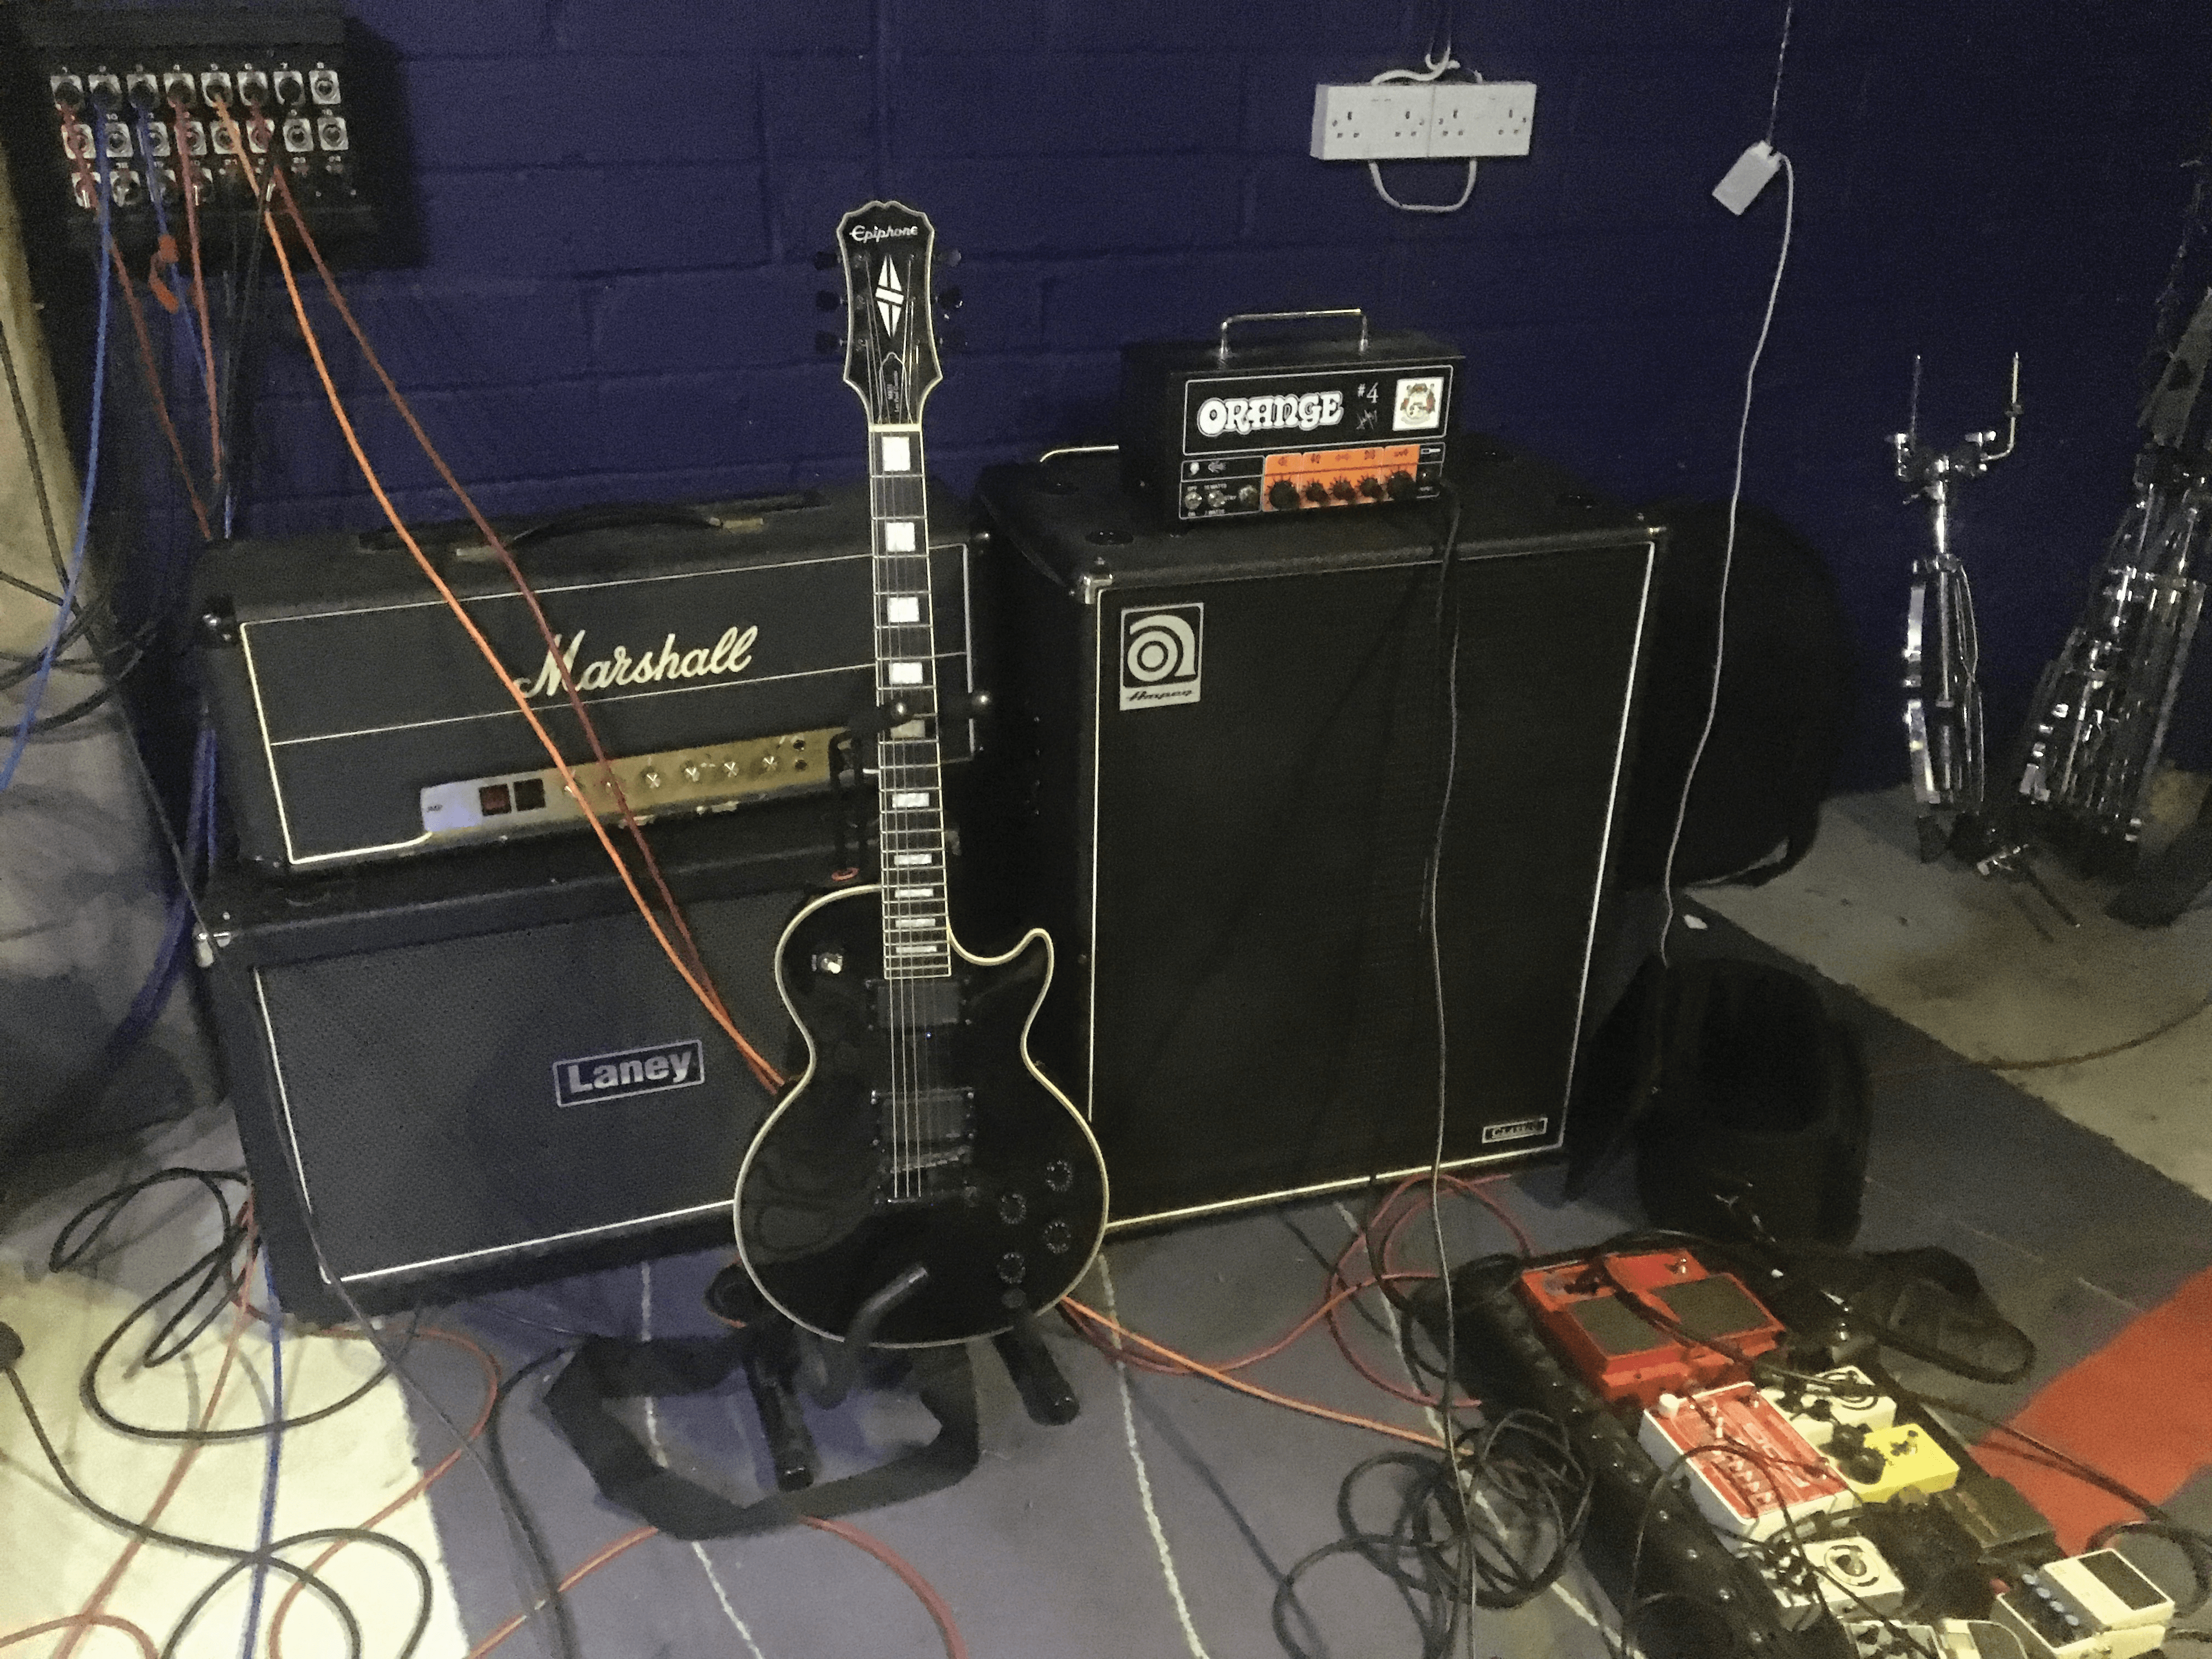
The next guitar part, played by Bill Gough, was a rising lick in what I’m calling the ‘B section’, since this track doesn’t have an obvious verse/chorus structure. Bill plays an Epiphone Les Paul Custom into his own Orange #4 Jim Root Terror signature-amp head and the studio’s Laney 2×12-inch cabinet. This part then changes to big, downstroke power chords to the end.
“Better an imperfect recording of a great take than a great recording of an imperfect take”
We tracked the first part of this clean into the amp, again using the Shure SM57 and Coles 4038 on the cabinet and the pair of Coles 4040 room microphones. For the end section, Bill used an MXR Distortion+, added to the chain to impart a dirtier, heavier tone to the power chords. Rather than simply double the overdrive section, I asked Bill if he could do a second take holding the chords, rather than rhythmically playing every downstroke. This helped to emphasise the chord sequence and played well with the bass riff without muddying up the mix.
Amp Mic’ing
Mic’ing a guitar cabinet isn’t quite just a case of pointing the mic at the speaker. Even once you’ve decided which mic to use, and even which speaker to use, you still have to consider whether to position the mic near the centre or the edge of the cone, and at what angle. The closer you position the mic to the cone, the more this positioning will matter. Once you back away from the cabinet, even by as little as six inches, then the differences between the angles and the centre/edge of the cone become less important. However, I’ll usually place the mic right up on the grille, experimenting a little with positioning.
Putting the mic closer to the edge will produce a softer tone, as will angling the mic away from the centre of the cone; whereas for brighter, more aggressive tones, placing the mic front-and-centre can be the way to go.
Backing off from the cone will reduce the proximity effect, pulling some low-end out of the tone. So combining this with the angle and position relative to the centre gives you control over both the top and bottom end of the signal. Who needs EQ?
One More Solo
The final electric-guitar part for Shore was a guitar solo over the outro section of the song. Bill was going to be playing this one again, with the same guitar-and-amp combination, but this time with a few more pedals added into the mix, including his Boss Digital Delay.
Guitar solos aren’t particularly in fashion at the moment and even in rock music, the solo seems to have made way: so it’s refreshing to work with a musician who can not only play a solo, but for the most part, had one written in advance. It took Bill a few passes to get the tone and structure, but each pass wasn’t wildly different from the last.
“It’s refreshing to work with a player who can not only play a solo, but had one written in advance”
Previously, I’ve spent hours in the studio coaxing a solo from musicians who have turned up wanting a ‘solo’ with no real idea of what to play. This method inevitably involves a lot of stitching together of various parts of various takes to make one final solo. By comparison, this was much easier. We tracked a number of passes of the solo to playlists in Pro Tools, with the intention of picking the best full take.
Groups In Pro Tools
When tracking multiple microphones on a single source in Pro Tools, I find it easiest to create groups in Pro Tools for each source as well as to route each audio channel to an Aux. This way, I can quickly pull up/down, solo/mute, or record-arm all the channels in the group at once. This also makes it easier to use playlists as creating a new playlist on one channel will create a new channel on all grouped channels.
Less Is More
It can be very tempting in the studio to want to spend hours setting up and trying every conceivable option, but this is unlikely to produce a great take, as the band will soon tire of your suggestions, and if they’re paying for the time, they won’t appreciate you wasting it with a dozen different microphone-and-preamp combinations. Because of this, it’s important to test your mics and preamps in downtime, and work quickly when the band is in the studio with you.
Remember also that sometimes, the best microphone is simply the one that’s already up and armed!
Working Beyond The Demo
With all of the electric guitars tracked, it was time to convince the band that the song needed more parts. We started with the acoustic-guitar part. Since this part wasn’t planned prior to the tracking, we only had the studio guitar on hand, a Gibson J-200. This of course, isn’t a problem – the J-200 records really well and the part wasn’t going to be a massive feature in the final mix, just an extra option.
I used a spaced pair of mics on the guitar itself – a Shure SM57 on the neck, and a Coles 4038 on the body. The Shure has a nasty, scratchy tonality to it, which sounds awful in solo – but I can hear already how that’s going to help it cut through the mix, while the Coles has a warm, deep body, which will help to give the guitar character. As I had with everything else, I also left the room mics up.
My intention was for the acoustic guitar to closely follow the bass guitar, at least at the start of the track, where the sparse arrangement was leaving a lot of room at the upper end of the spectrum. Once the electric guitars kick in, the acoustic-guitar part becomes less important. It might still be kept in to add a little sizzle to the top end and if not, I could always cut, mute or automate the part out in some way. But for the introduction section, it would help to increase both rhythmic and harmonic interest.
The final piece of the puzzle was the acoustic piano. I had no clear picture of what I wanted here, and being only a rudimentary pianist myself, I wasn’t convinced this was going to work, but I felt that if we could get it right, the colour the piano would provide would sit really well with the rest of the instrumentation and add to the general vibe of the song. Thankfully, it turns out that, as well as being pretty handy on the guitar, Bill is more than capable of filling in on piano. Within a few minutes, he’d come up with a part which suited the track.
The studio piano is a Blüthner Aliquot Grand, which has an additional set of floating strings that enhance the piano’s bright, colourful character. As with everything else, though, getting the mic choice and positioning right will be a key factor in subsequently getting this to sit well in the mix.
“With pianos, there are a number of ways of mic’ing and each is very dependent on the context”
With pianos, there are a number of ways of mic’ing and each is very dependent on the context. Close mic’ing the strings can give an artificially bright, poppy sound. Placed fairly close together, you can focus on a couple of octaves but outside of this range, the level starts to drop off. Placed a little wider, you’ll end up with a more balanced spread across the full range, but a slight hole in the middle, with less focus. Backing off the strings a little can help to eradicate this issue.
I’ve used a pair of Neumann KM 84 small-diaphragm condenser mics up close on the piano, with a fairly narrow spacing, about six inches from the strings. Then, just outside the lid, I’ve placed a pair of Coles 4038 ribbon microphones as a spaced pair. These microphones will give a more natural piano sound, with less attack and focus, and more space. Finally, as before in the sessions, I’ve used the Coles 4040 ribbon microphones, which I’ve kept up for every instrument. I’m a big fan of room mics on acoustic pianos, often preferring them to the close- or even medium-distance mics on the instrument itself… especially when the instrument is not being used as a focal part of the mix.
All of the files for the instruments we recorded for both songs will be available at www.musictech.net, so you can go in and hear the differences between the various mic options I’ve put up, and the colours that each one will bring to the final mix.
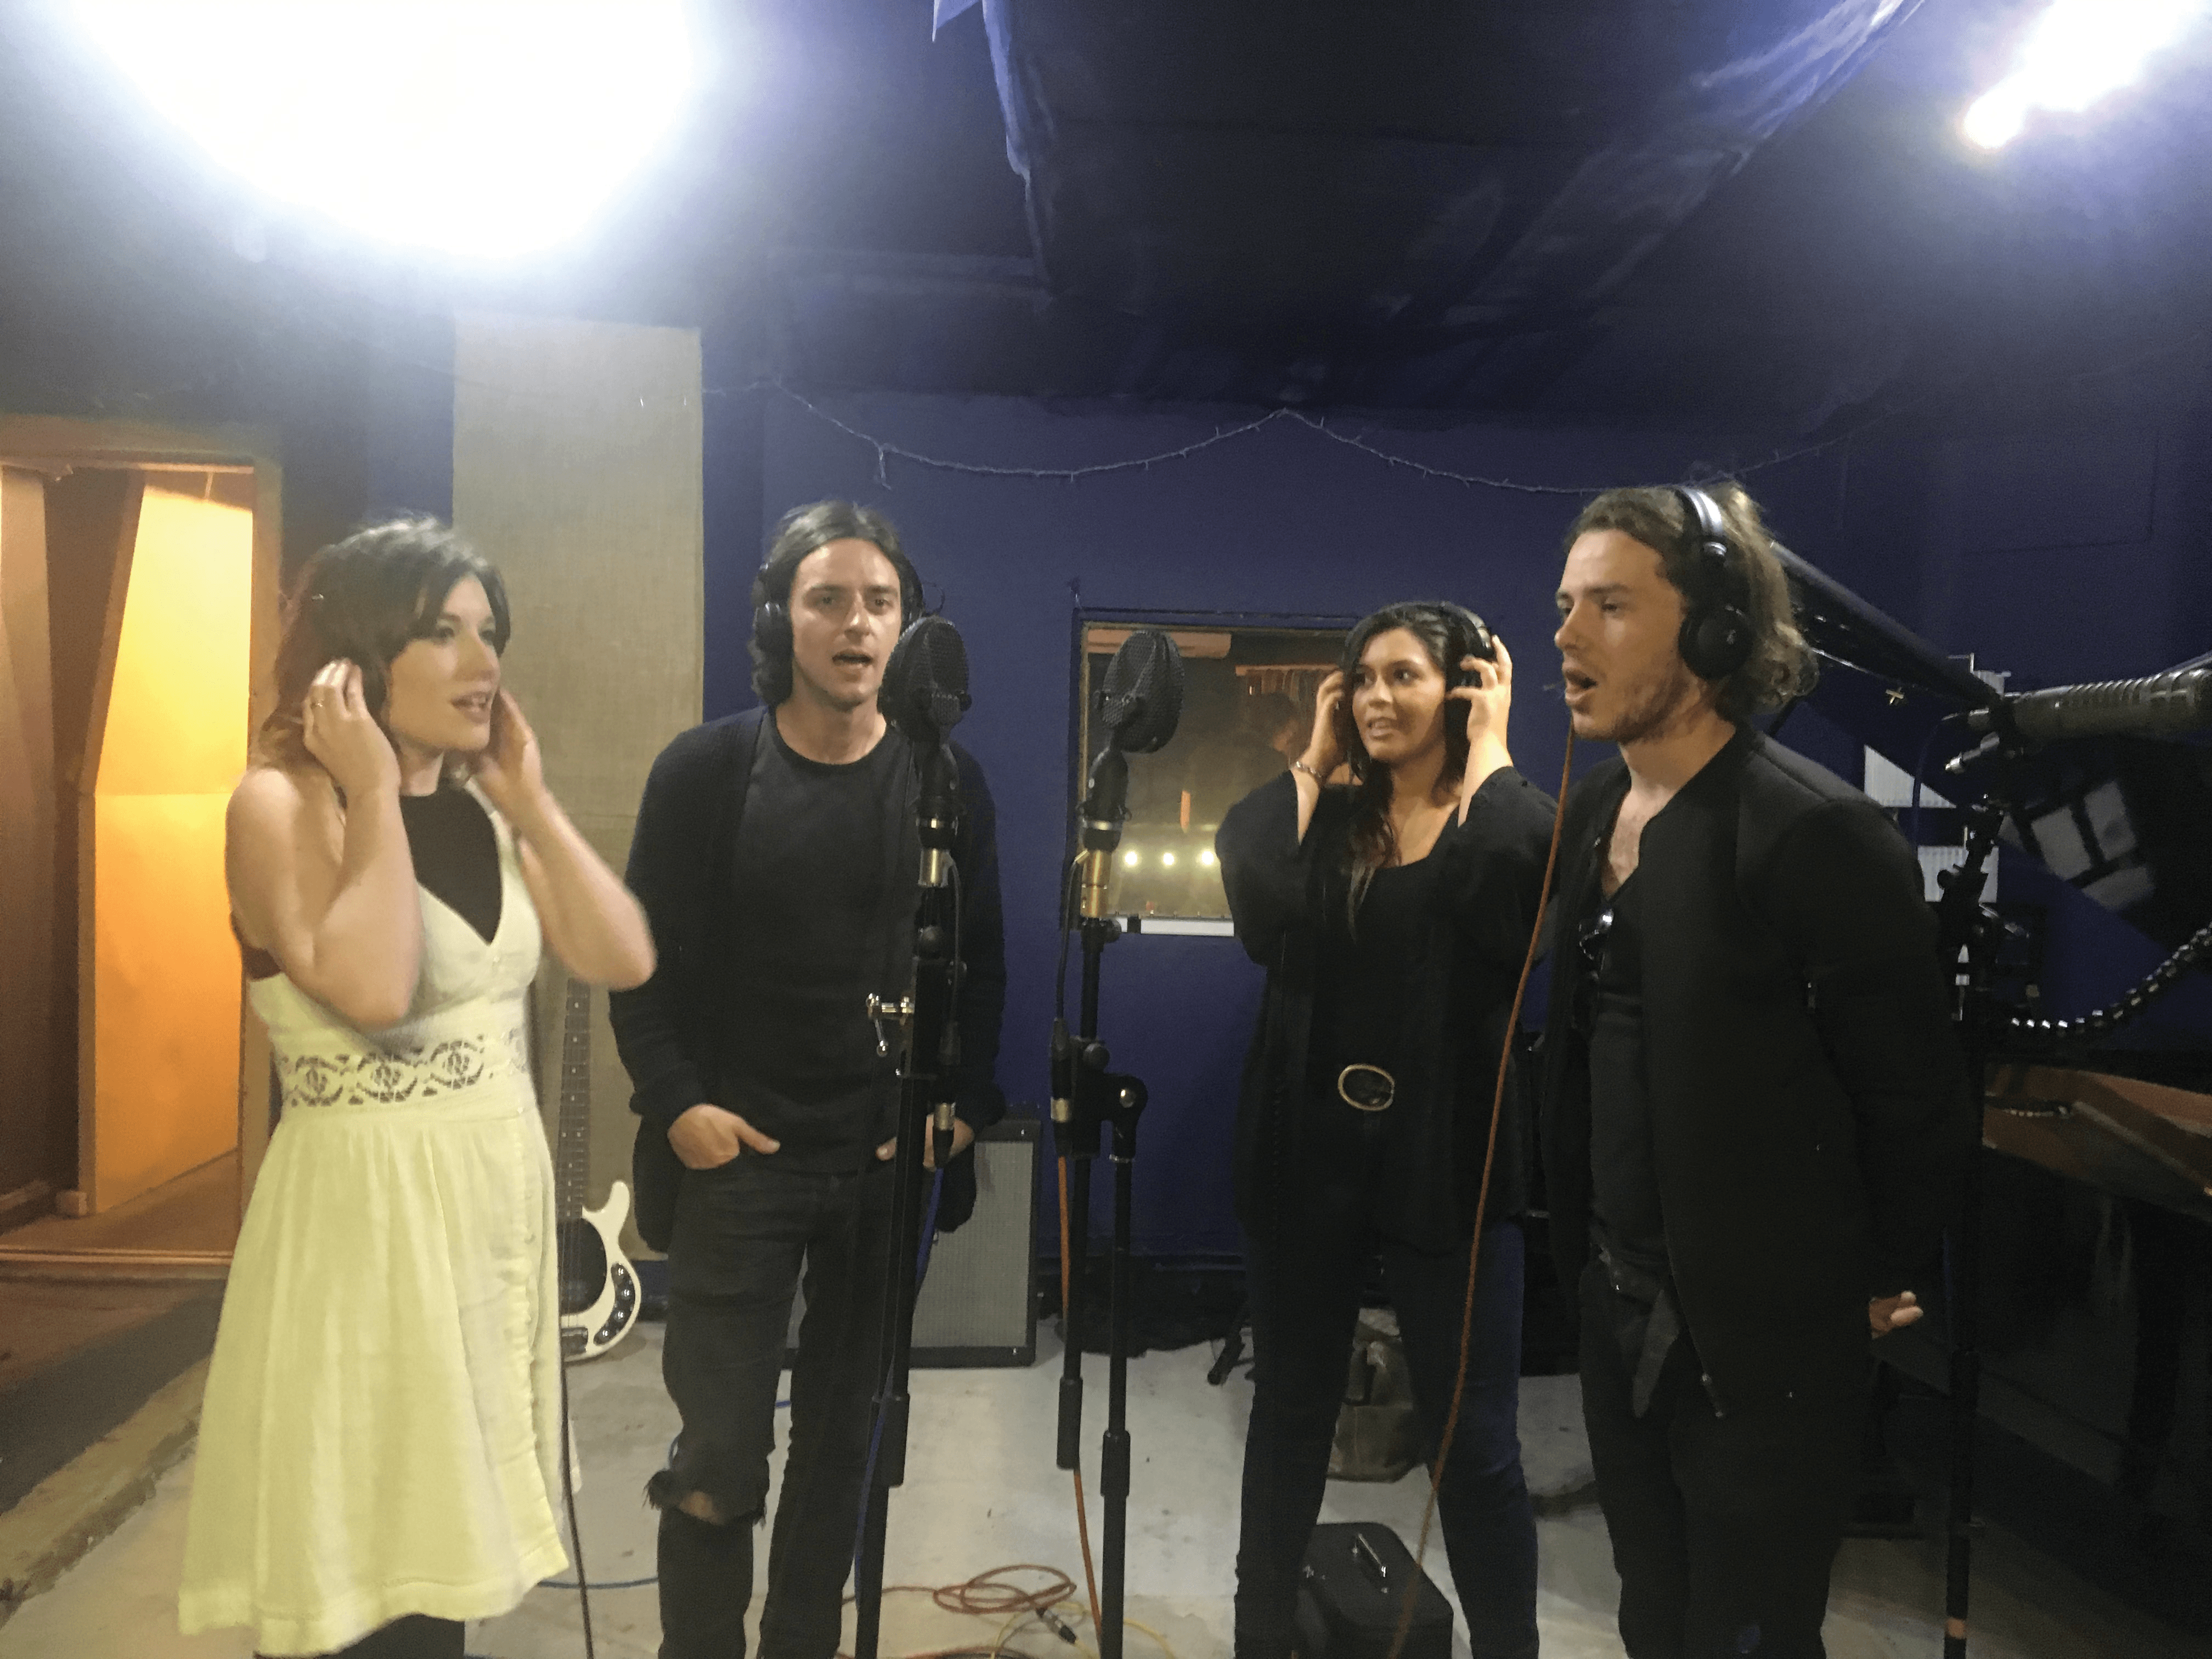
In the next part, we’ll be looking at the final stage of the recording phase for both of these tracks – namely the vocal tracking. We’ll be covering mic selection for different vocalists, preamp, EQ and compression settings, and also taking an in-depth look at some of the challenges that typically arise from recording group vocals.