How To Record: Bass Drums
John Pickford continues his recording series with advice on how to record that backbone of the beat: the kick drum… A great kick drum sound is, of course, the foundation of any modern drum kit recording. Getting it right will help give your track the right feel, whether you’re after a killer funky groove or […]

John Pickford continues his recording series with advice on how to record that backbone of the beat: the kick drum…
A great kick drum sound is, of course, the foundation of any modern drum kit recording. Getting it right will help give your track the right feel, whether you’re after a killer funky groove or a hard-rocking, driving beat. The first thing to address is the drum itself; no number of fancy mics or techniques will rescue a poor-sounding drum.
Before you begin mic’ing, make sure that the drum is nicely tuned and free of rattles, and have some lubricant handy to deal with squeaky bass drum pedals. Bear in mind that drums are sensitive to changes in room temperature, so leave it to settle before evaluating the sound if the drum has come from a cold storage room into a warm studio.
Bass drums come in various sizes, both in terms of diameter and depth, and this has an enormous impact on the type of sound they will produce.
The most common sizes are 20–22 inches in diameter with a depth of between 14 and 16 inches. These are usually best for most recordings, although great results can be had from smaller drums, often found with jazz kits. Larger kick drums are capable of delivering a deep low-end, but often lack the tightness and punch of standard sizes.

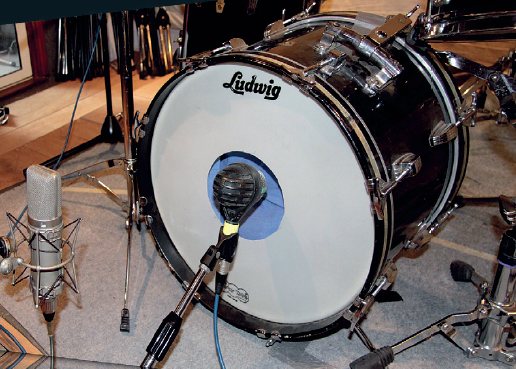
The AKG D112 is a microphone designed specifically for bass drum recording
A common problem with bass drums is excessive boom and ringing. Although much of this can be carefully tuned out, it’s often necessary to use some dampening material, such as a blanket or pillow, inside the drum. Depending on the amount of damping required, the material can be placed touching either or both the batter head and resonant (front) head.
Some engineers like to remove the resonant head for recording, enabling easy placement of mics inside the drum. However, this will completely alter the tone of the drum and can result in rattling lugs if the rim is left off. A better compromise is to cut a hole in the resonant head, and these days many heads are available with a pre-cut hole.
Another major contributor to the sound is the type of beater used – a wooden or plastic beater will create a harder sound with more attack than a felt-covered one. Similarly, if a pad is used on the batter head where the beater strikes, a harder material will produce a sound with more click. Once you have got the drum sounding good at source, you can think about microphone types and mic’ing techniques.
There are numerous microphones available designed specifically for bass drum recording, the most famous being the AKG D112. Dedicated bass drum mics are usually voiced to accentuate the desirable tonal aspects of the drum while scooping out some of the less useful lower-mid frequencies.
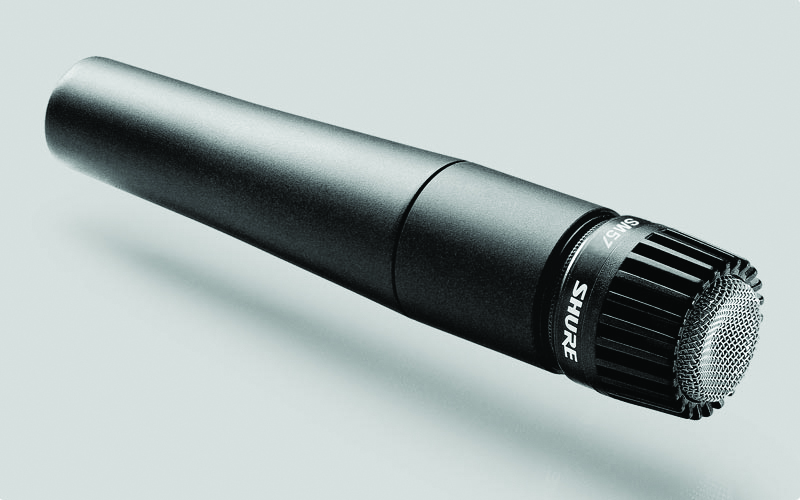
Dynamic mics are often the first choice for bass drum recording, especially when close-mic’ing techniques are employed, as they can withstand high SPLs. Classic dynamic mics such as the Sennheiser MD 421 and Electro-Voice RE20 are popular choices for recording bass drums, and many great bass drum sounds have been achieved with that brilliant all-rounder, the Shure SM57. Large diaphragm condenser mics are also good for capturing a good low-end response with plenty of weight, and many engineers like to use one in conjunction with a dynamic mic; the Neumann U47 FET is highly regarded as a bass drum mic.
Mic Positioning
There are no hard and fast rules when finding the best mic’ing position, however it’s useful to know a few basic techniques and how different locations will accentuate differing aspects of the drum’s sound.
If the drum you are recording is fitted with a resonant head without a hole, and presuming that the drummer doesn’t want a hole to be cut or the drum head removed, you will be mic’ing externally. It’s usually a good idea to angle the mic downwards slightly to get good separation between the bass drum and the rest of the kit.
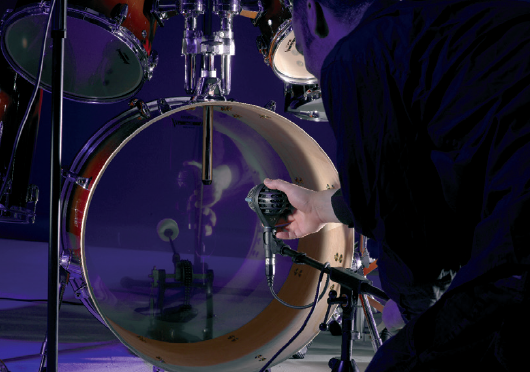
Of course, if you are recording just the bass drum in isolation – to build a sample library, for example – spillage won’t be an issue. When you have access to the inside of the drum, you can experiment with the proximity of the mic in relation to the beater.
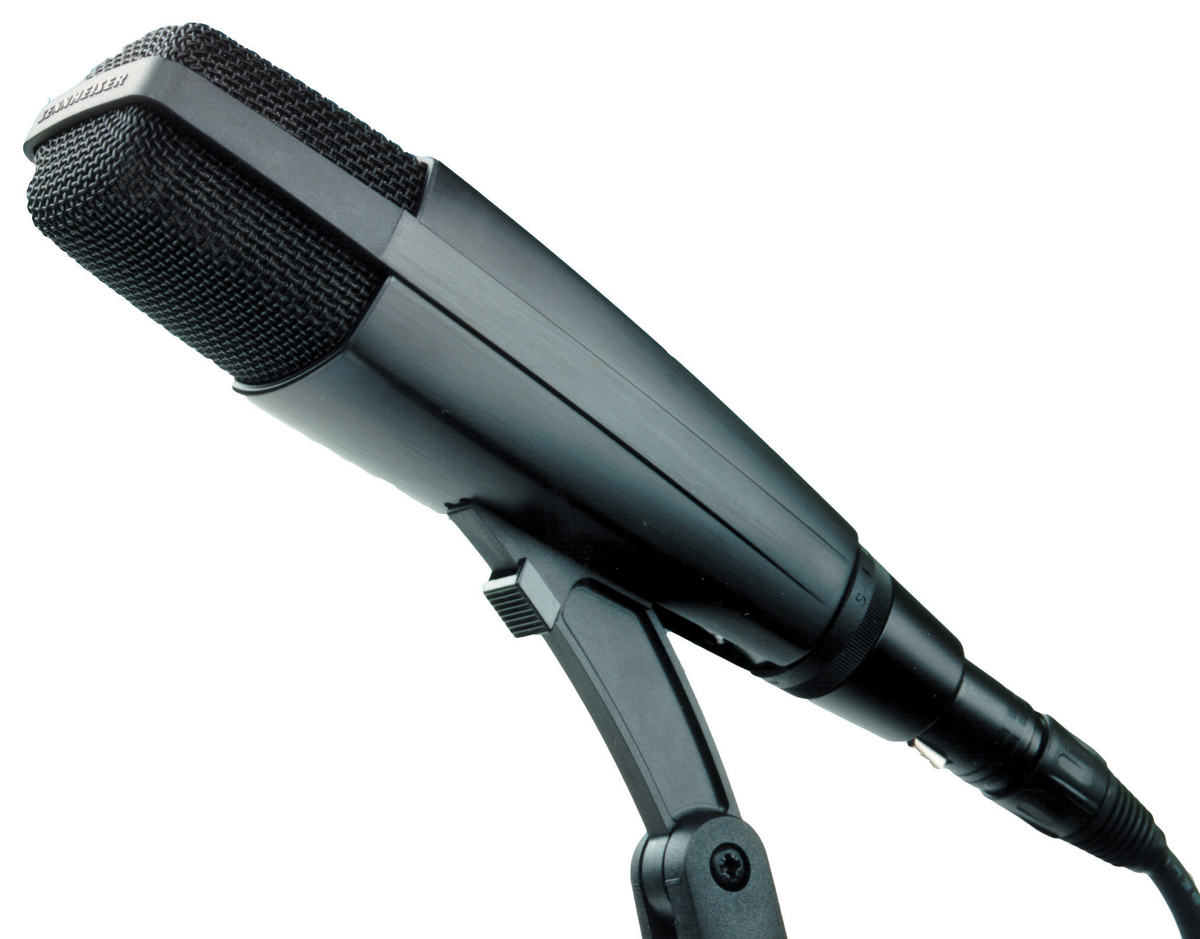
Great mics for recording kicks include classic dynamics, such as the Sennheiser MD 421 and Electro-Voice RE20
![]()
Positioning the mic close to the beater and on-axis will produce a sound with lots of attack, often at the expense of tone. A good starting point is to place the mic just inside the drum and slightly off-axis, moving in closer if more beater definition is desired.
It’s also worth experimenting with the direction of the mic within the drum, as it doesn’t necessarily have to point directly towards the batter head. Try pointing the mic towards the drum shell for a sound that is rounder and mellower than pointing straight ahead.
When more than one mic is employed, you can use each one to bring out specific qualities of the drum’s tone. A common two-mic method is to have a dynamic mic deep inside the drum to pick up the beater click, with another mic outside the drum to capture a fuller, deeper tone.
Some engineers like to place an external mic several feet away from the drum, an approach that can work well as long as spillage from other instruments – guitar amps for instance – doesn’t make this technique problematic. You don’t have to limit yourself to mic’ing the drum from the front, though.
Placing a mic at the batter head, pointing towards the beater, can add definition and punch, though not much in the way of low-end heft.
This position wouldn’t be ideal as the only bass drum mic, but can really help the drum cut through a mix when used in conjunction with a front mic, especially if the resonant head does not allow for internal mic’ing.
Spending a little time getting the sound right with good mic’ing techniques will go a long way to achieving a great bass drum sound; however, a little EQ is sometimes needed to help the sound along the way. If the drum sounds a bit boxy – a common problem with bass drums – try cutting some low-mids between 300–700Hz. A boost somewhere in the region of 3–5kHz will help bring out the beater click if more bass drum presence is required.
At the top end of the frequency spectrum, the sound can be fine-tuned by rolling off some high frequencies from around 10kHz, as there is little useful information here; this will help minimise any cymbal spillage, as well as creating space for genuine high-frequency sounds in the mix.
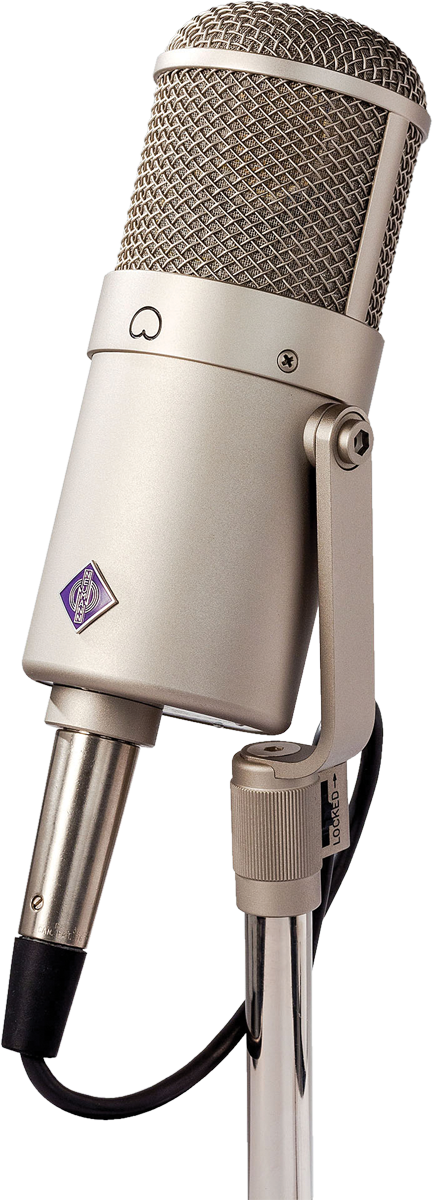
One of our recent favourites for drum mic’ing is the Neumann U47 FET remake
A low-end boost around 60–80Hz can add some body to a thin-sounding bass drum if it lacks some low-end weight, but avoid shelving boosts in the 100Hz region, as this can dial in muddiness.
Compressing the bass drum to even out the sound is often useful; try using a medium attack time with a fast release and a ratio between 2:1 and 4:1, aiming for 2–3dB of gain reduction.
Higher ratios and levels of gain reduction can work with highly dynamic drum recordings. For a really driving, rhythmic sound, compress the whole kit and push the bass drum to make the compressor pump in time with the track. Experimenting with the release control is key here to get the pumping rhythm just right. Alternatively, leave the bass drum out of the drum-kit mix-buss to avoid unwanted pumping artefacts.
When mixing the bass drum as part of a whole kit recording, remember that other mics, such as the overheads, will inevitably pick up some bass drum sound, so make sure you make your EQ and compression processes within the context of the kit and not just in isolation. And, as always in any multi-mic situation, check the phase relationship between microphones.
Before reaching for the EQ when trying to rescue a weak-sounding bass drum, invert the phase – you may well find that the sound suddenly becomes more solid and focused.
Finally, unless wacky 1960s-style stereo effects are desired, the bass drum should not be panned to the left or right of the stereo picture. Leave it in the centre, along with the snare drum track and other low-frequency instruments to produce the best foundation for your track.
Step by Step – Single & Double Mic’ing
1: The best starting position for a single-mic technique is to place the mic close to the resonant head, slightly off-axis and angled downwards to achieve some separation. If the drum has a hole cut into it, position the mic just inside the hole for a good balance of attack from the beater and body from the drum itself. This distance also works well when the front head is removed. For more beater definition, move the mic further inside the drum.
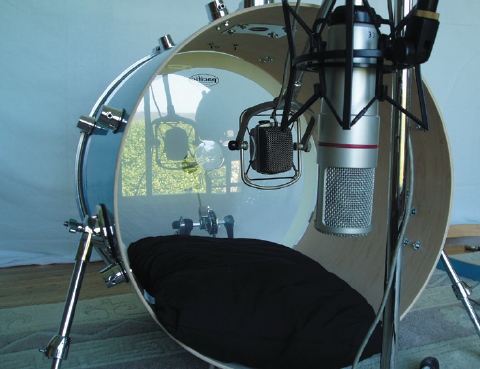
2: Double mic’ing will enable a useful blend of beater click and low-end weight. With this set-up, the first mic – preferably a rugged dynamic type – can be placed further inside the drum and aimed at where the beater strikes. The second mic can be placed outside the drum to capture a rounder, full-bodied tone. Large diaphragm condensers are often employed in this role; however, any mic with
a good low-end response can be used.
3: Sometimes, placing a mic inside the drum is not an option. In this case, use the first mic on the resonant head with a second mic positioned at the batter head, aiming towards the beater. Common dynamic mics, such as the Shure SM57, work well in this position and allow the first mic to be used further away from the resonant head if desired. Try inverting the phase of one or both of the mics to achieve the most solid sound in the mix.
Step By Step – Isolating the Bass Drum
1: It’s a good idea to try to achieve good separation on the bass drum channel, especially if heavy processing is to be carried out. Using a microphone with a cardioid pick-up pattern is the best way to proceed. Position the mic close to the resonant head, pointing slightly downwards to reject sounds from the snare drum, tom toms and cymbals. If the mic can be placed just inside the drum, this will provide a good deal of separation.
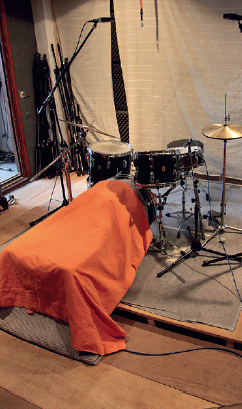
2: Consider constructing a drum tunnel. This can be done by draping a thick blanket or duvet over the top of the bass drum, with a couple of small mic stands or other objects of a similar height to the bass drum providing support several feet away. This should be done once the microphones have been suitably positioned. Producer Butch Vig famously built a drum tunnel from several bass drum shells when recording Nirvana’s classic Nevermind album.
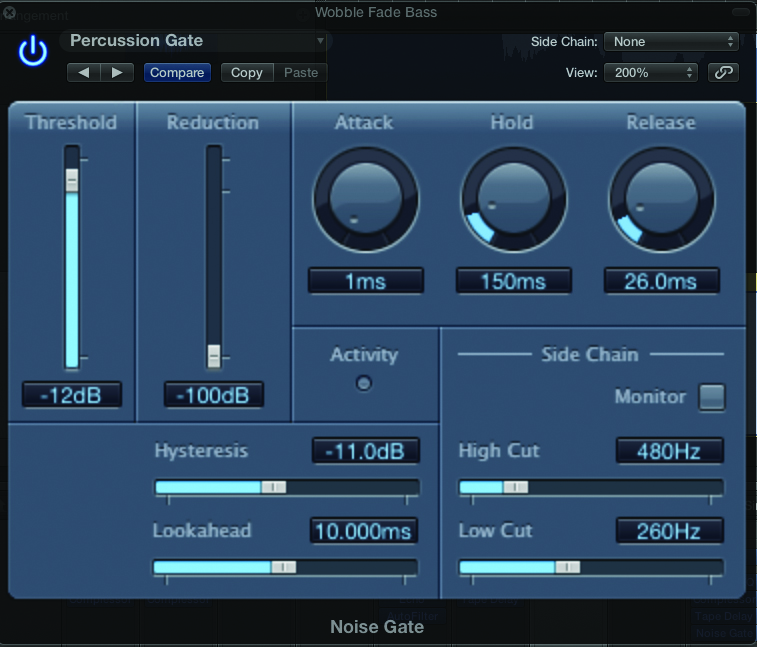
3: Once your drum track has been recorded, the bass drum can be tightened up and isolated from other sounds by making use of a noise gate. Setting up noise gates can be tricky, so it’s usually best to record the track without a gate, in case a weak bass drum strike fails to open the gate and is not recorded. Leave gating until mixing. Once the bass drum track is separated, EQ and dynamic processing will not affect other elements of the drum track.