How to simulate hardware setups in Ableton Live 10
There’s nothing like the vibe of hardware music setups, but they’re not always practical or portable – sometimes you have to fake one instead. We explore Live 10’s instruments and effects to show you how…
As electronic musicians, we have the best of all possible worlds. We can work with the limitless possibilities of computers and software, and we have the restrictive but engrossing workflows of hardware synthesisers and other devices. Hardware’s enjoyed a huge resurgence in recent times, but there’s a downside – it’s bulky.
A full-blown hardware rig with synths, samplers, drum machines, effects and a mixer, isn’t something you can easily pick up and go with, and travelling overseas to gigs becomes more complicated and expensive. So why not have it all? Keep that dream hardware rig, but maintain a reasonable software clone of it as well.
The aim is to employ those limitless possibilities I mentioned earlier, to replicate your hardware, rather than to explore open-ended sound design. You’ll need to look at the elements in your setup, and think about how Ableton Live can recreate them. We’ll stick to Live Devices; that’ll rule out the complications of moving projects that feature third-party plug-ins between computers.
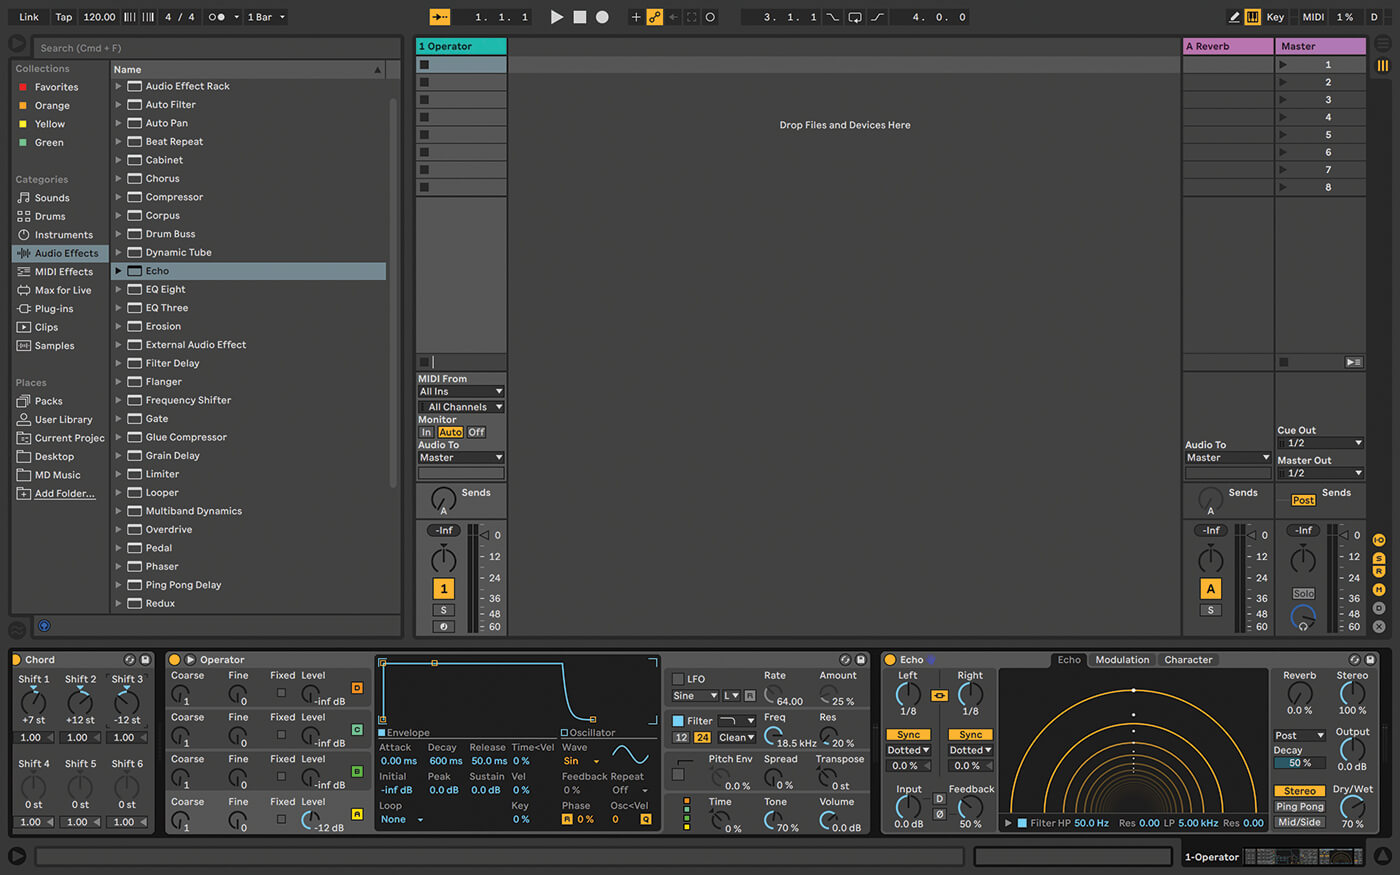
Live has a wide range of instruments and effects, especially as Live 10 adds the Wavetable synth, and Pedal, Echo, and Drum Buss audio effects. Furthermore, the Live 10 demo includes Max For Live, so you can access all of that content if you need to use demo mode on a borrowed computer in emergencies.
Starting with beats, I located a sample pack of the sounds from my drum machine, and loaded them into a drum rack. My beats are sparse, so I simply drew the patterns into MIDI clips. Synths can be more involved. As with the drums, if you can’t find a preset that does the trick, you can sample – sometimes you can get away with sampling a single note and using it across the whole keyboard, otherwise you’ll need to take a few samples and lay them out in an instrument rack so they trigger as you play different pitches, and for more complex sounds, you might need the Sampler instrument for multisampling. In my set, I’m using long sampled drones, which are quite easy to work with – I send short MIDI notes, then tweak the release in real-time to shorten or lengthen the notes.
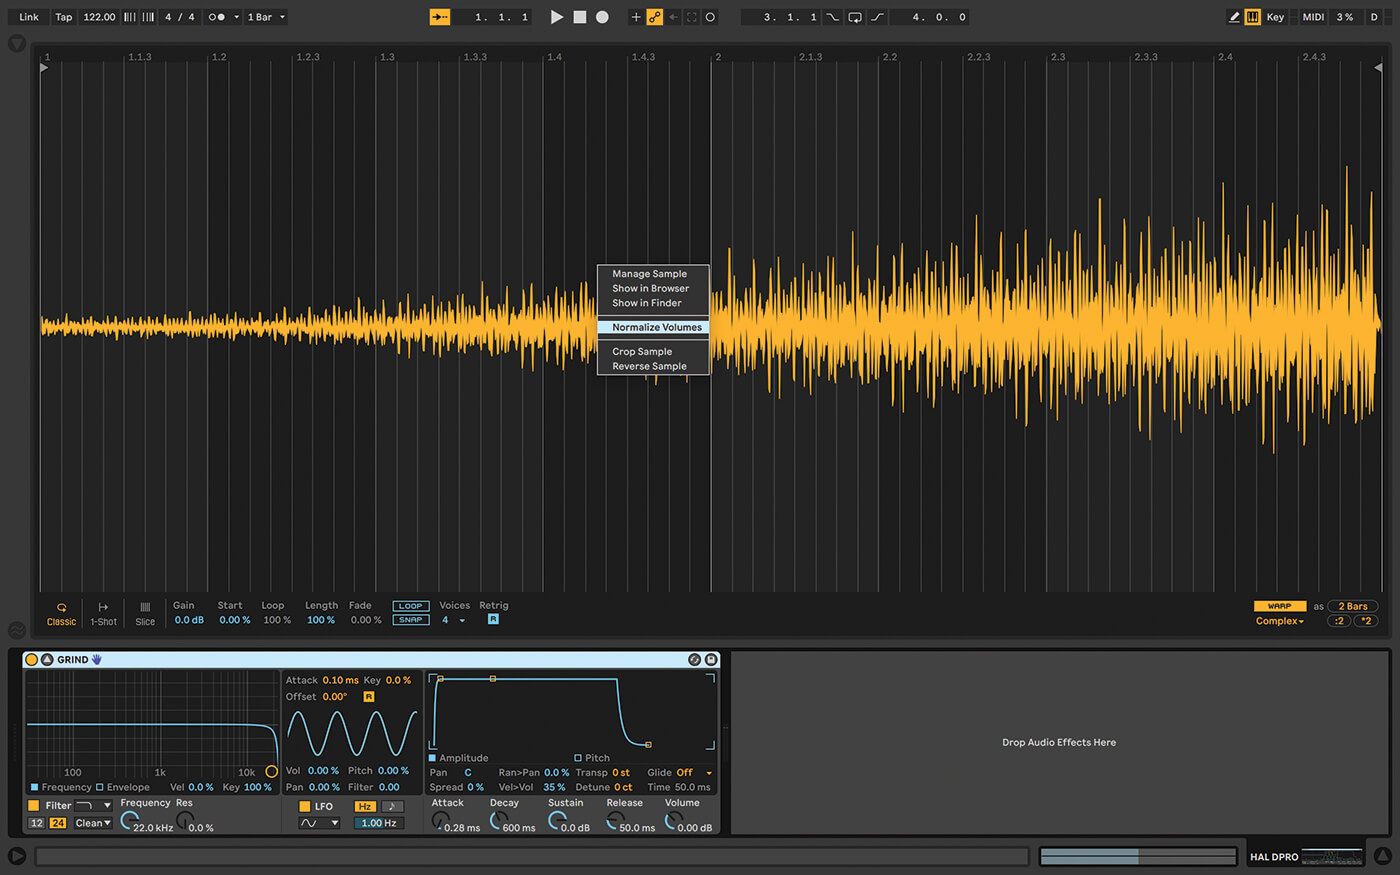
You can work with shorter samples by defining a loop on the waveform in Simpler, editing the start/end points, and perhaps using the fade control, so that when you trigger a note, it plays from the beginning, then goes into a smooth loop, and then release determines what happens when the note ends.
For my set, I also needed something to behave like a crude hardware sampler, firing long one-shots containing effects or speech samples; easy to do in a Live audio track. If you want the long samples to continue playing as you switch Scenes, use Cmd+E to remove the clip stop buttons in empty slots. Audio effects complete the signal chain, and they can be a challenge if your hardware instruments or effect units sound distinctive.
Stack to the future
Matching the filters wasn’t a problem in this case, but the distortions took longer to pin down. Once you get all that wrapped up in an instrument rack, you’ll be able to use the macros and chain-select tools, which are really valuable on this kind of project.
Macros give top-level access to single or multiple parameters mapped to one control, and external hardware MIDI controllers can hook up to these very easily. I just wish there were more than eight of them! Chain selection lets us stack several sets of instruments and effects in one track, and use MIDI commands or clip automation to transition between them… great for handling a number of songs and presets in just a few Session view tracks.
Here’s an example of how I used them – I added Live’s Chord MIDI effect to create harmonies before a Simpler, and used a macro to cycle between chains containing different chords. If you want to specifically recreate a modular rig, Max For Live helps, thanks to instruments like OSCiLLOT by Max For Cats. You’ll do well to keep it all in-the-box, without too many compromises; the only outboard you should need is a controller, and an audio interface.
The aim of this project is not to build a set of loops, or to migrate arrangements into Session view, but to create a more organic travel version of your hardware-synth setup, and Live can get you there. A fringe benefit of doing this is that you get to second-guess what you’re doing with your performances, and how the hardware limitations affect your sound, for better or worse.
Recreate a hardware setup in Live: step-by-step
1. I’m using Ableton Live 10 for this one, but any recent version of Live will do. The main thing about 10 is that it includes useful new devices such as Wavetable and Echo.
2. Let’s assume your rig has a some kind of sequencer, beats, synths, a sampler, and audio effects. The goal is to reproduce the sounds, routing, and interaction, between you and all of these…
3. …so you can perform or ‘play’ a set with instrument parts and dynamic effects, instead of playing it back as a bunch of loops or a stereo mix, DJ-style. Let’s start with those beats.
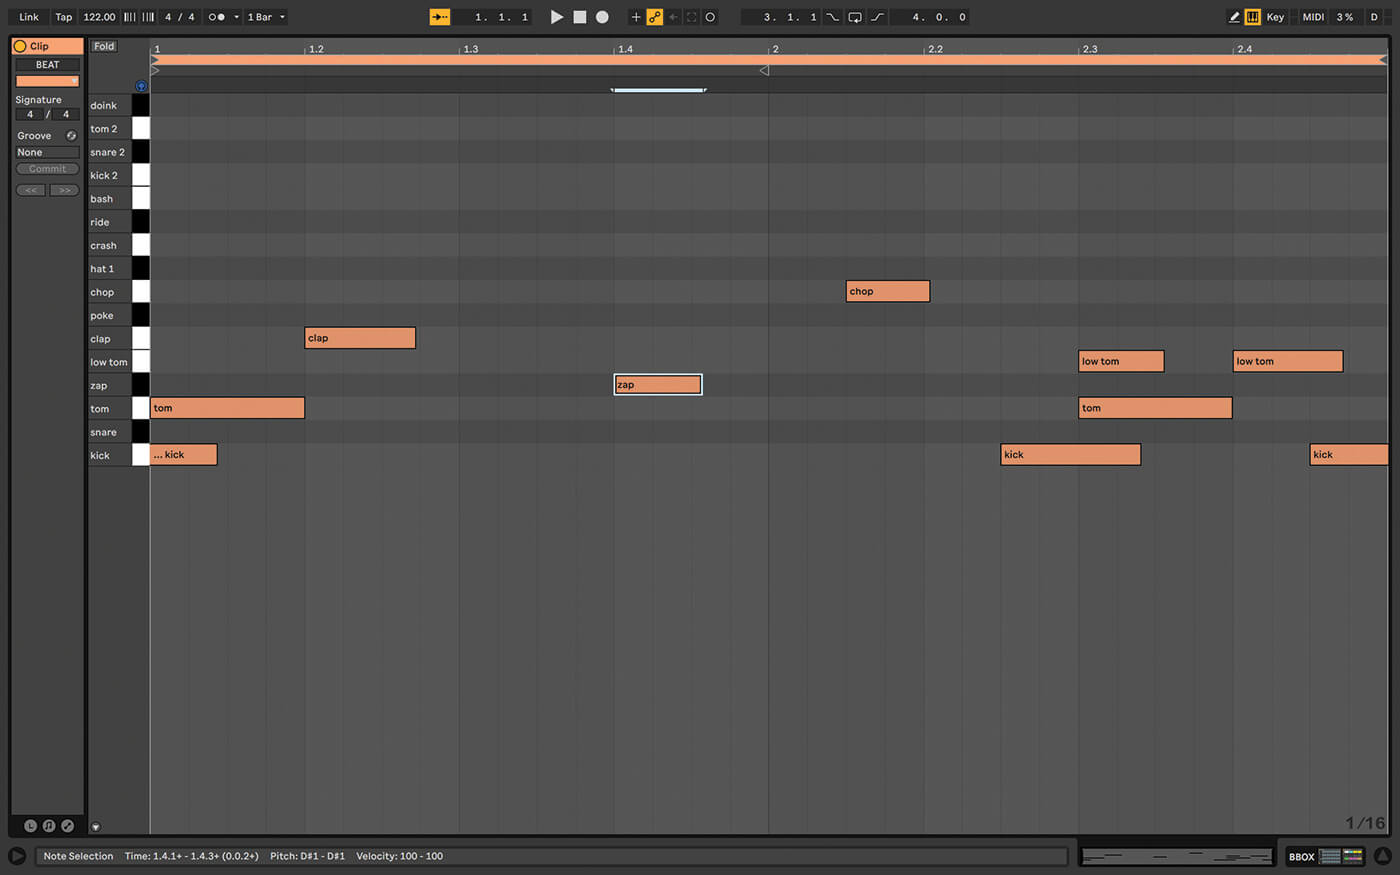
4. Record the MIDI pattern from your drum machine into Live, or draw the notes, if they’re simple parts – sometimes that’s faster, depending on your gear and how it connects (USB vs audio/MIDI cables, for example).
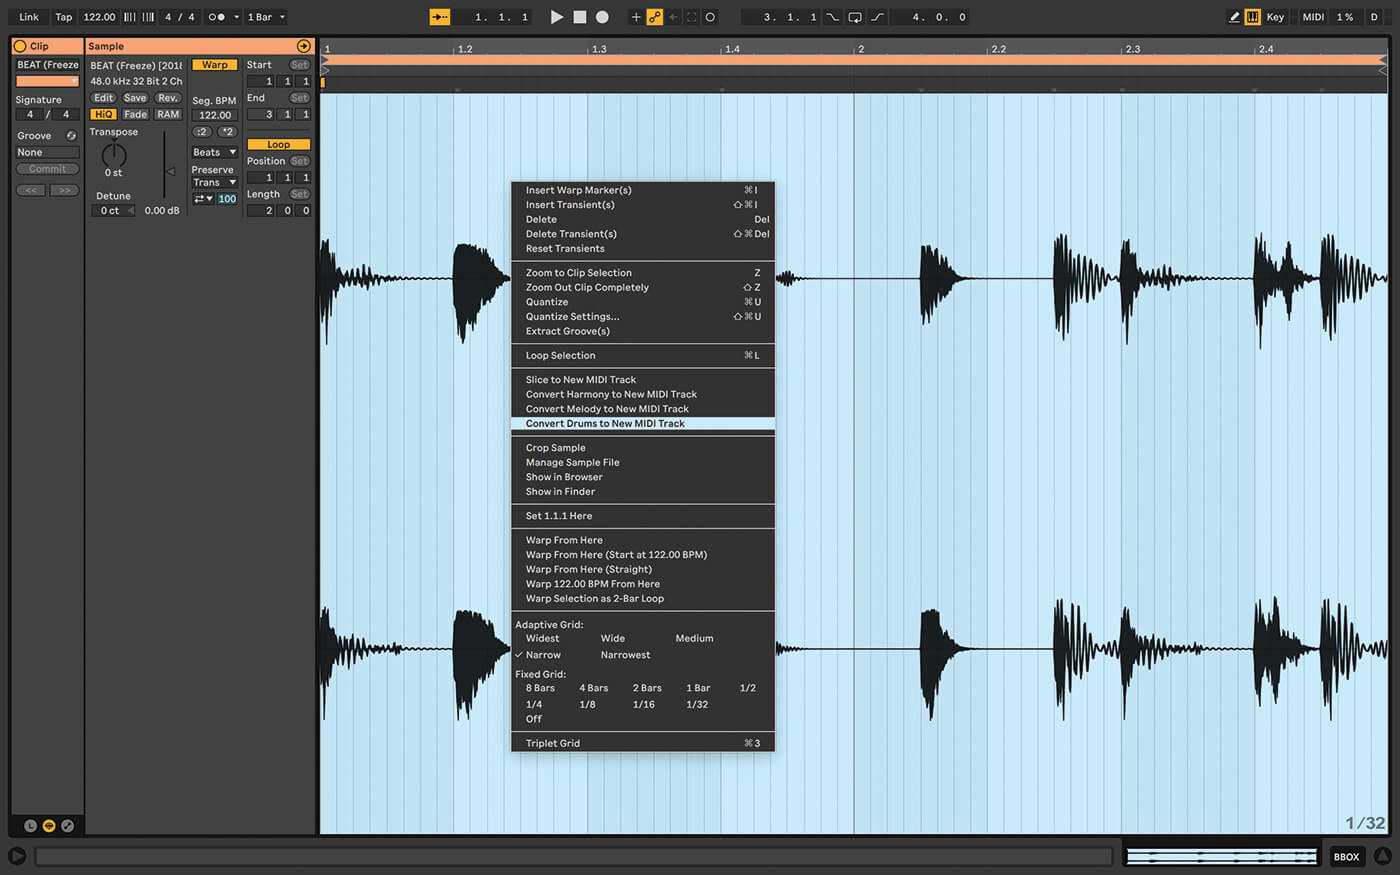
5. Alternatively, you can record each beat as an audio clip, then use Live’s ‘Convert Drums to New MIDI Track’ feature to quickly make a MIDI clip. This method works if you can locate samples of your drum machine online.
6. I should mention here that one of our goals is to use Ableton Devices as much as possible, keeping third-party plug-ins to a minimum. This makes our project more portable between machines.
![]()
ALL-IN-ONE HARDWARE If abandoning your precious boxes for a computer is a no-no, there’s hardware that’ll work as a compromise. Two options are Elektron’s Octatrack, with sequencing, sampling, and effects. Then there’s Akai’s MPC Live, more-or-less a full DAW in a box; it can even run off a battery.
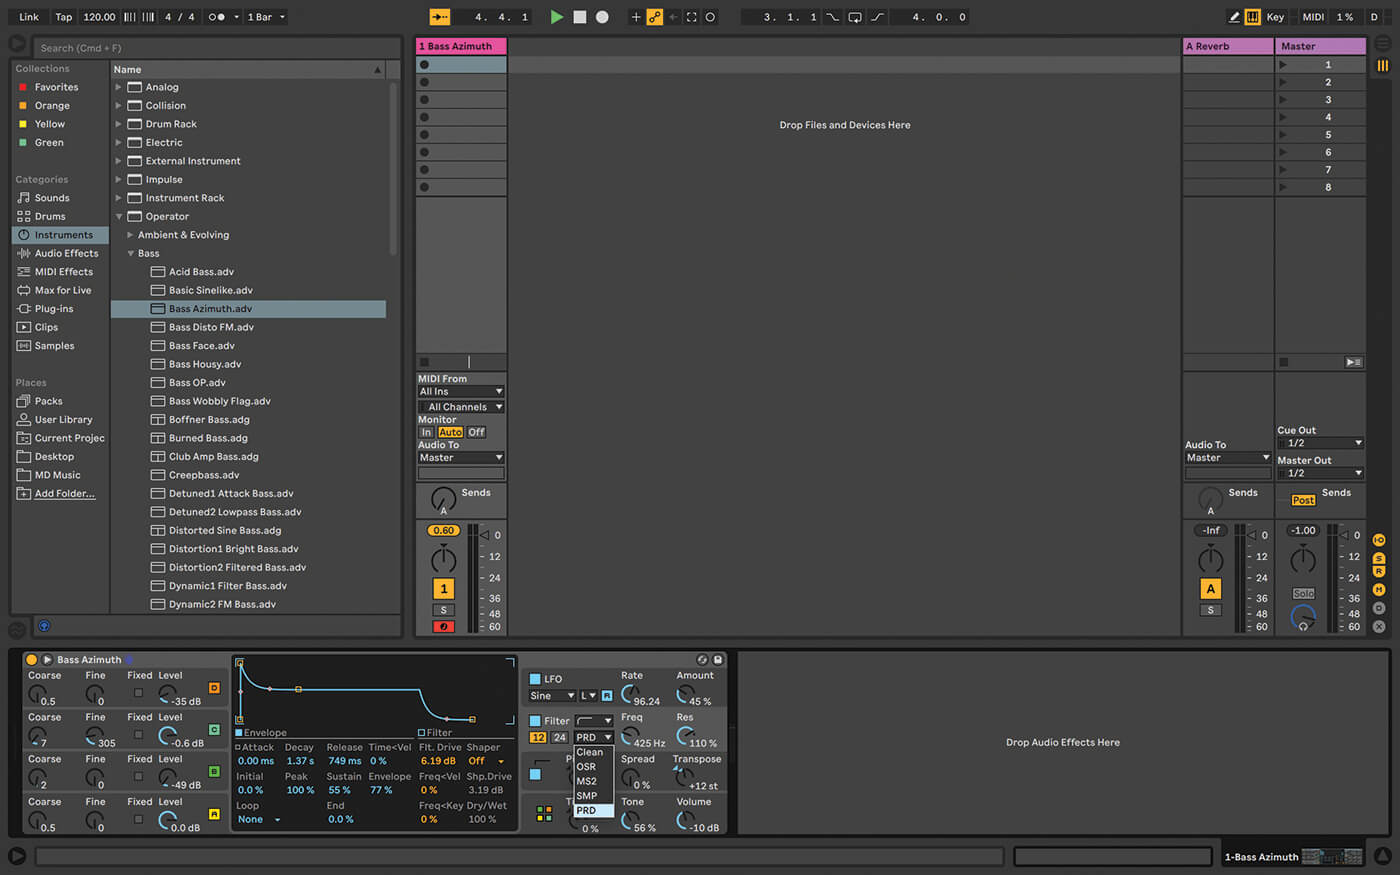
7. Then it’s the same deal with synthesiser sounds. Maybe you can find a plug-in that emulates the original instrument, or Live already has a Device that approximates it. Otherwise, it’s sample time again!
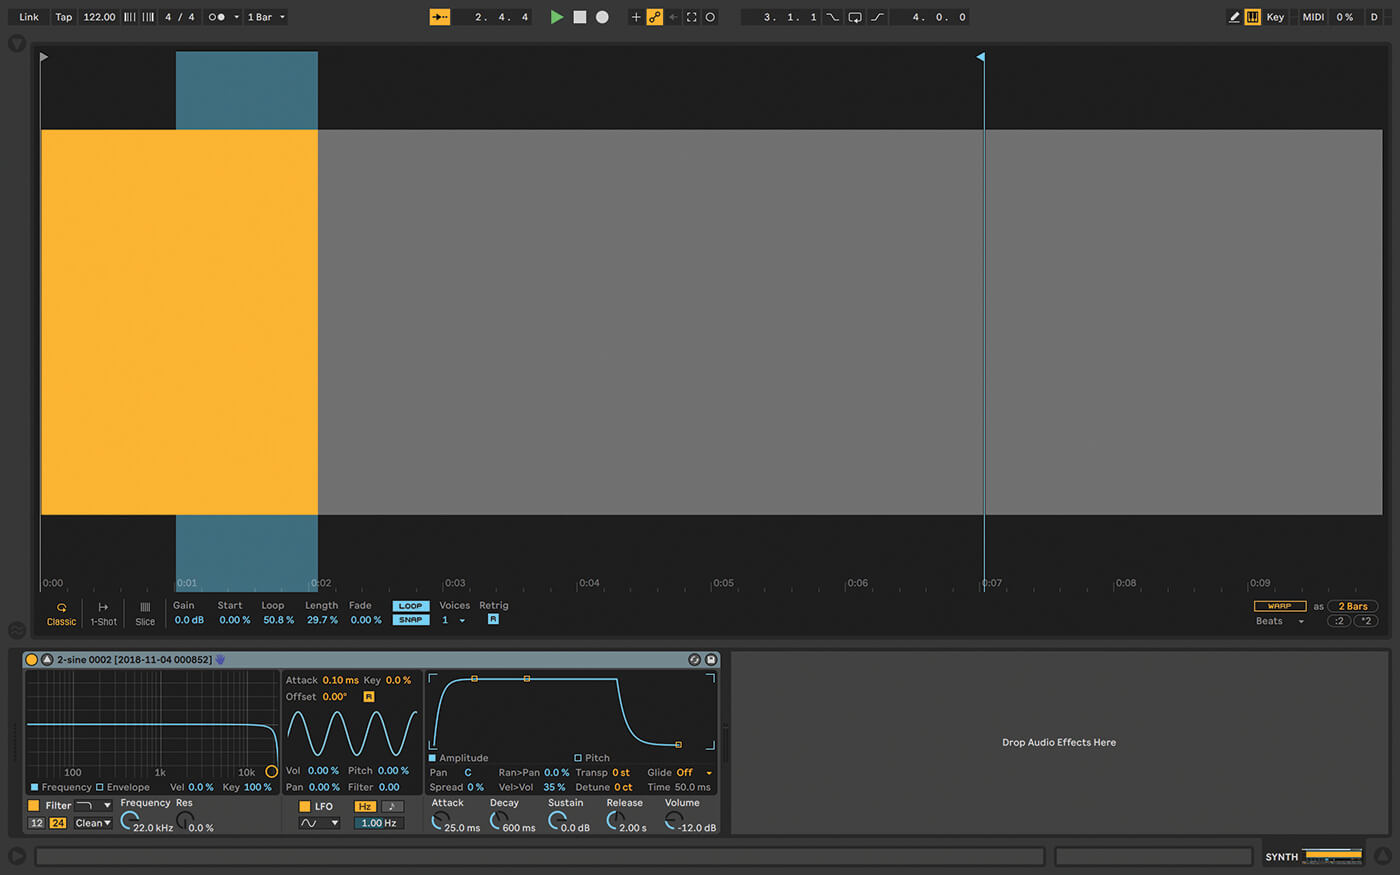
8. Depending on the instrument, and the parts you’ve created, you could record individual notes into Simpler, which can perform mono- or polyphonically, or for more detailed multi samples, use Sampler instead.
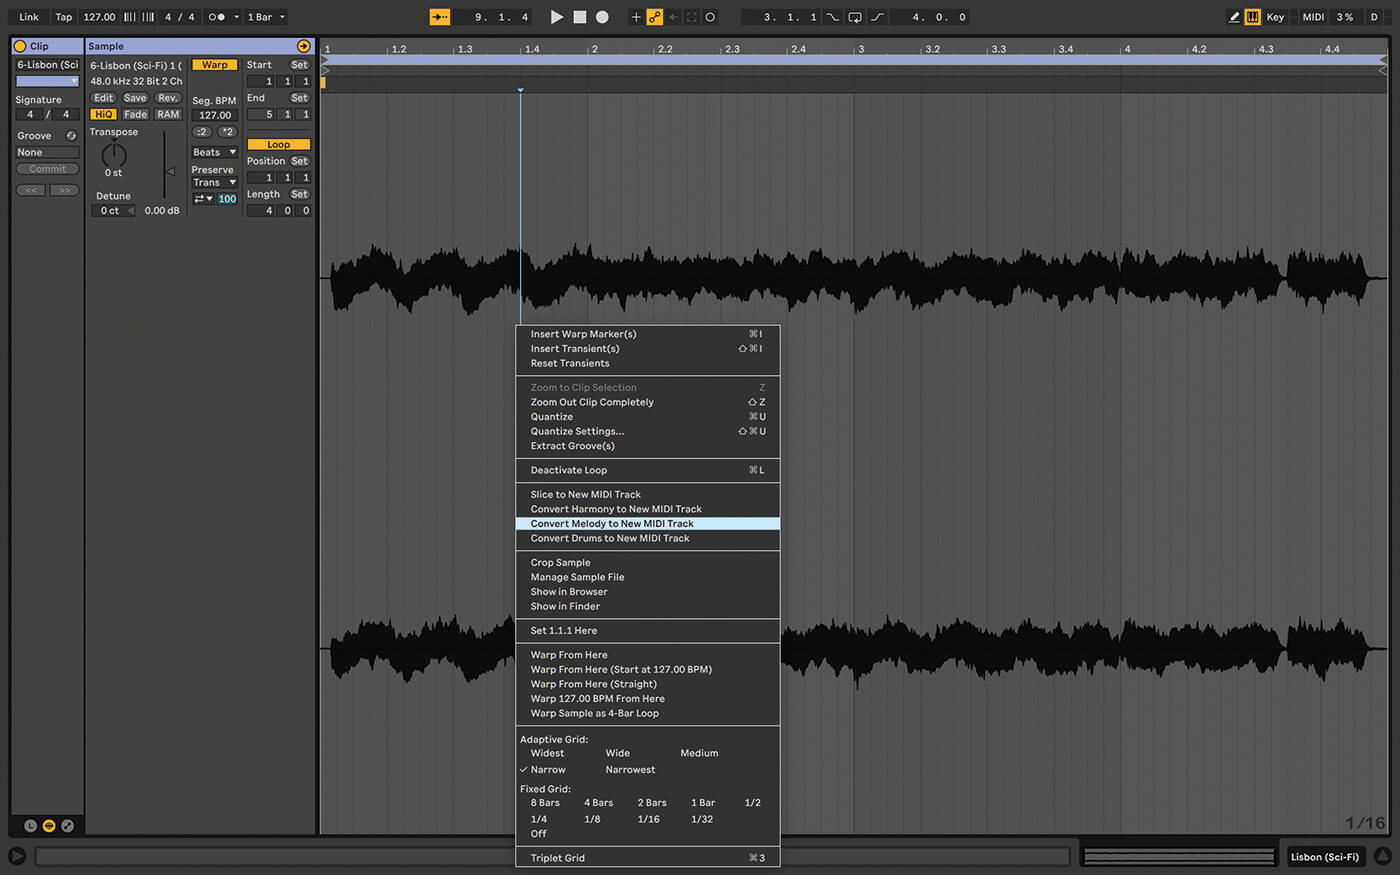
9. Recently, I used a combination of techniques, sampling single notes then triggering Simpler with MIDI clips, recording specific patterns and using Convert Melody to New MIDI Track, then applying the same sampled sounds.
10. Getting a sample to behave the way you want is a combination of how you send notes to Simpler, and adjusting the values, starting with the classic volume-envelope parameters – good old ADSR!
11. I usually record long tones, then use release time to get the note length I want. It’s also possible to set up loops within the sample; helpful if you need really long sustained notes.
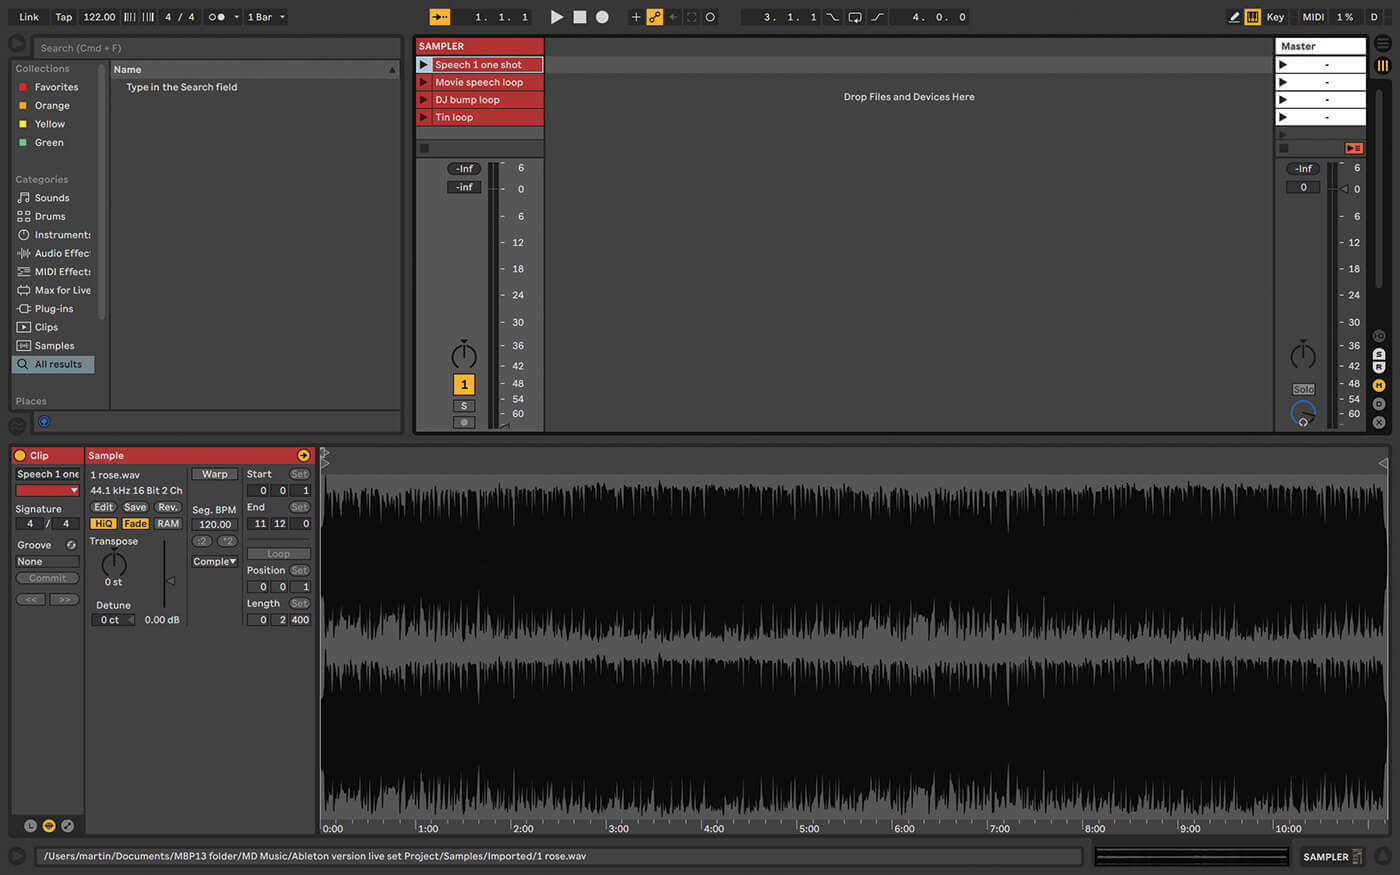
12. I use a very basic hardware sampler to play long one-shots, so that part is quite easy – just import those samples into Live and organise a track called something like Samples, and turn off warping.
![]()
TRAVEL LIGHT For lightweight, functional control, try touchAble Pro on an iPad, and to use a small audio interface rather than one that has many inputs or outputs, or breakout cables. Apogee, Focusrite and MOTU all have quality, interfaces that are totally stageworthy. Look for one that’s USB buss-powered.
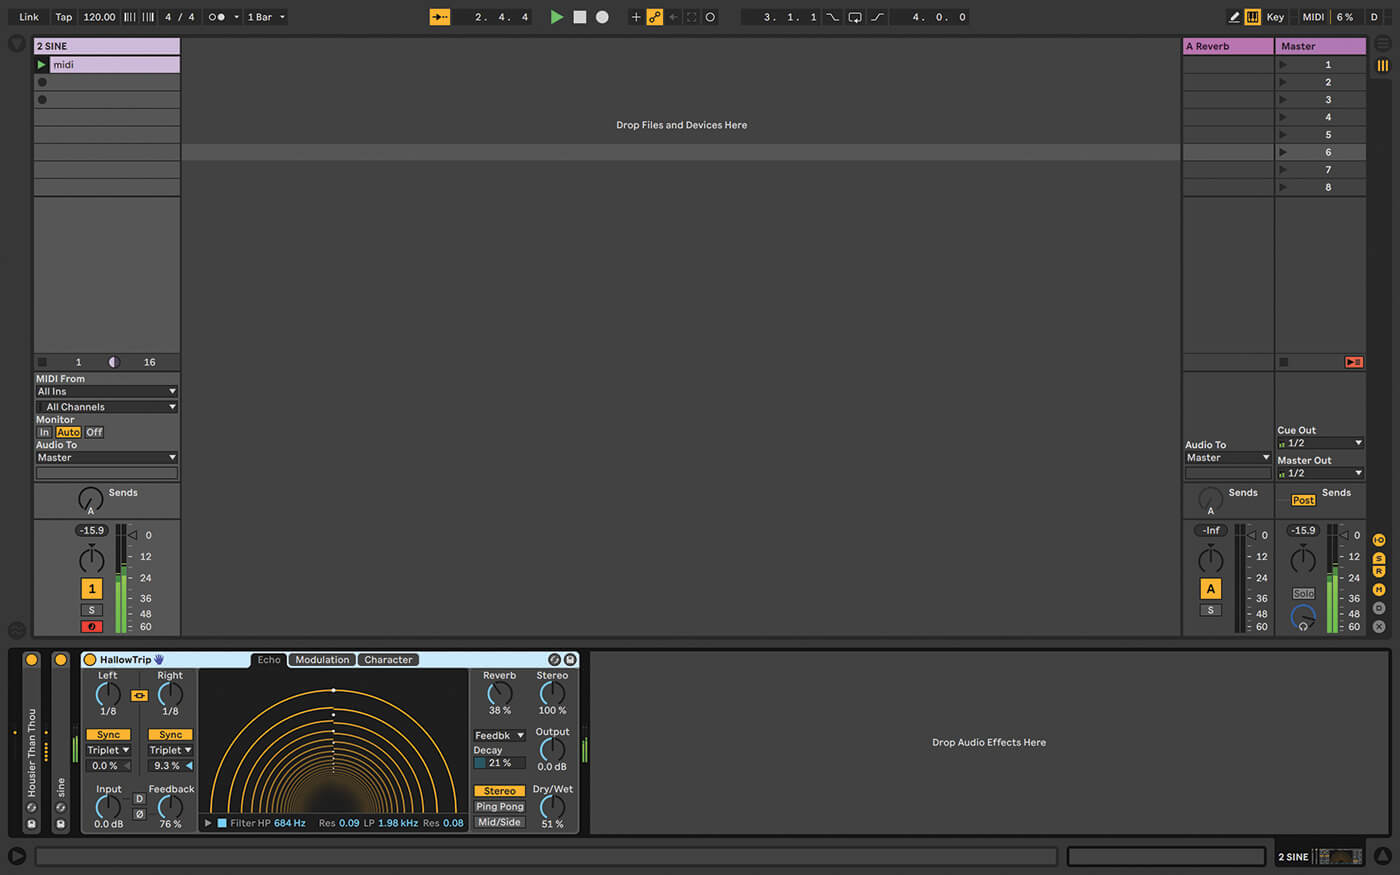
13. Audio effects can be a problem if your hardware includes something distinctive, like a juicy analogue filter. However, Live’s effects have really improved and thanks to Max For Live, there are more native solutions than ever.
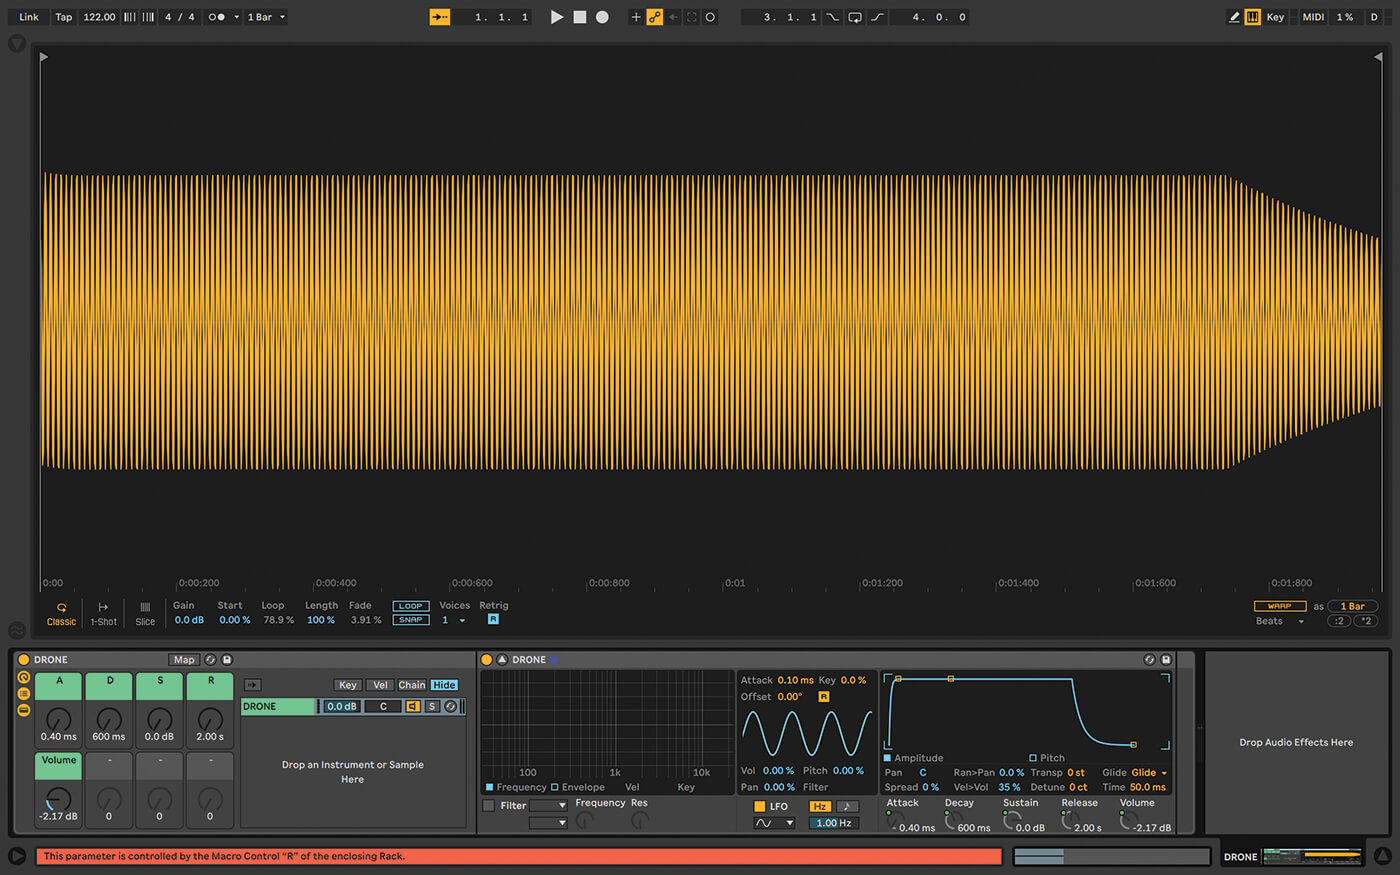
14. The next stage is to save each combination of instruments and audio (and MIDI) effects as an instrument rack, so it’s easy to save and recall as a preset, and to transfer between projects.
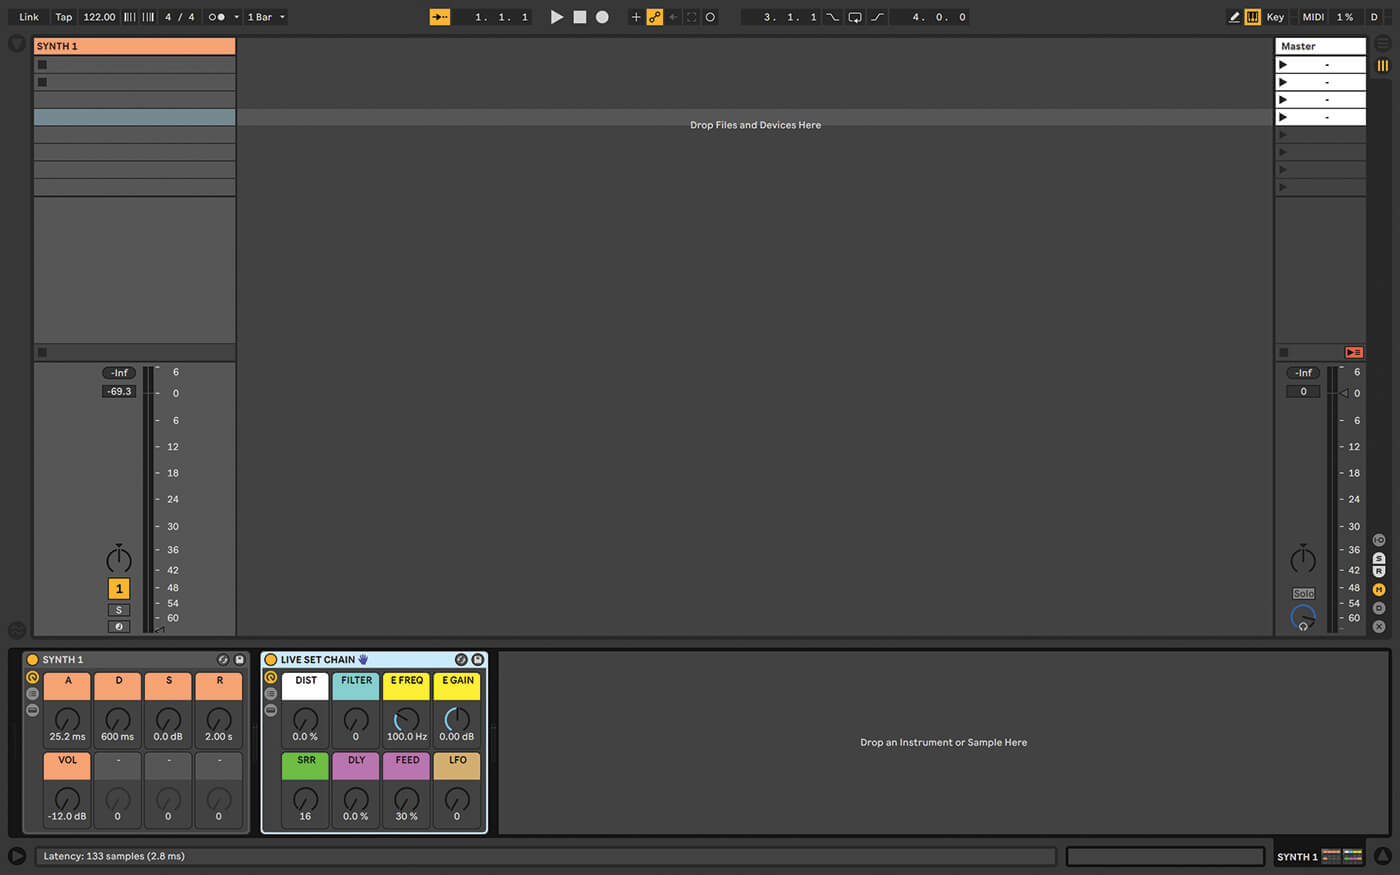
15. Another advantage of instrument racks is that they include macros – eight knobs which can be assigned to any controls deeper in the rack, so you have an easy top-level set of your most-used controls.
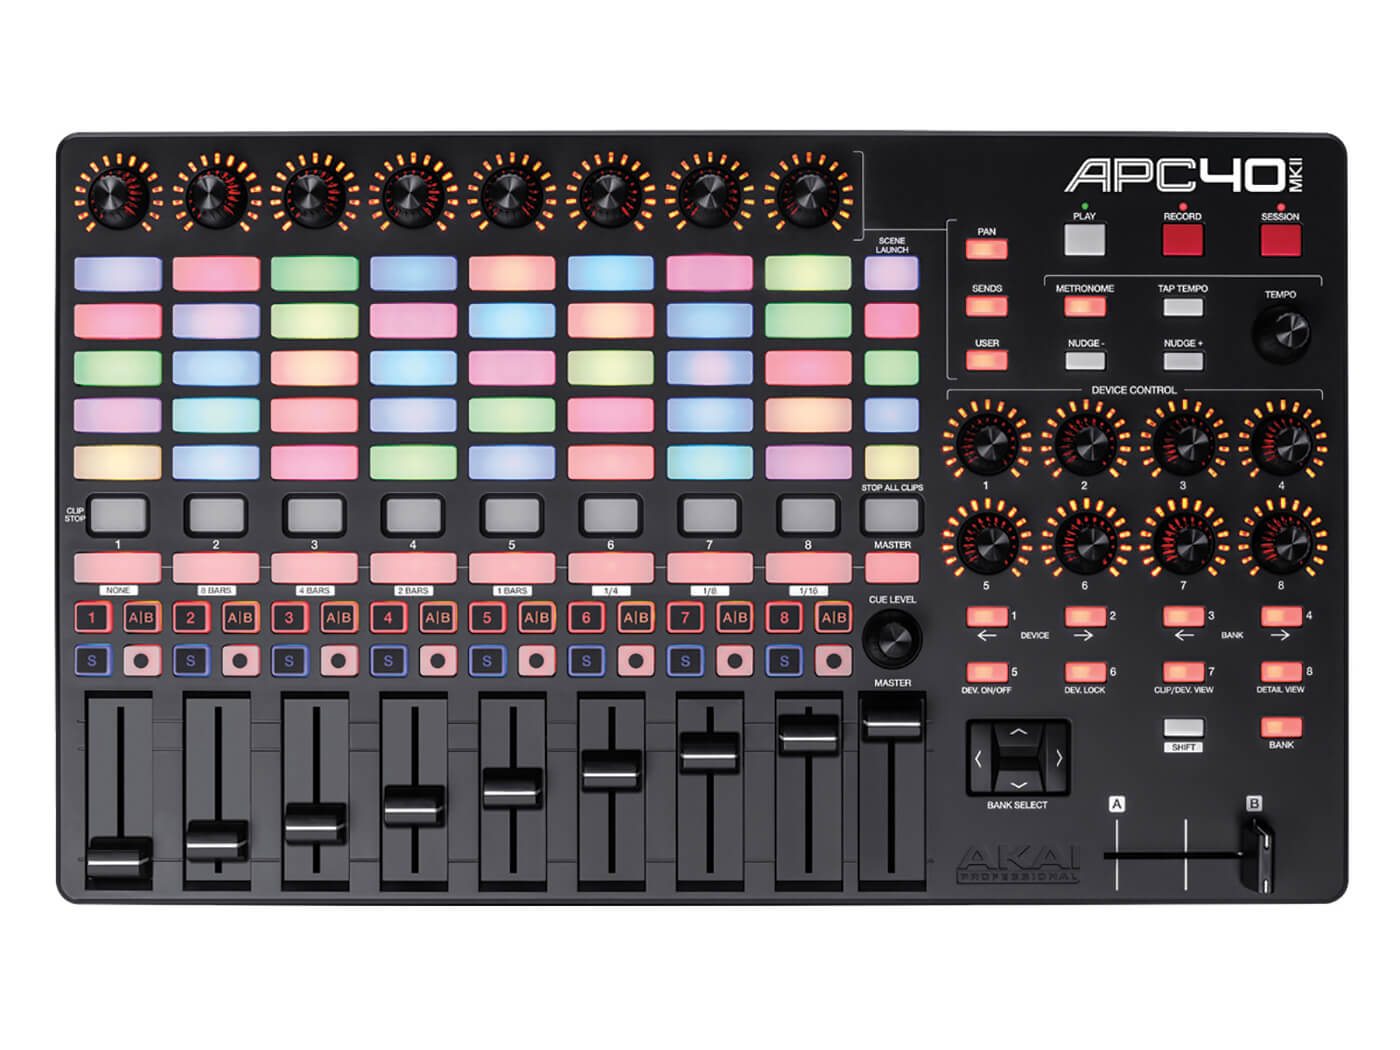
16. These macros can be MIDI-mapped to your hardware controller, so you have an immediate tactile command centre. Many controllers provide instant support for macros, so you might not even have to map them.
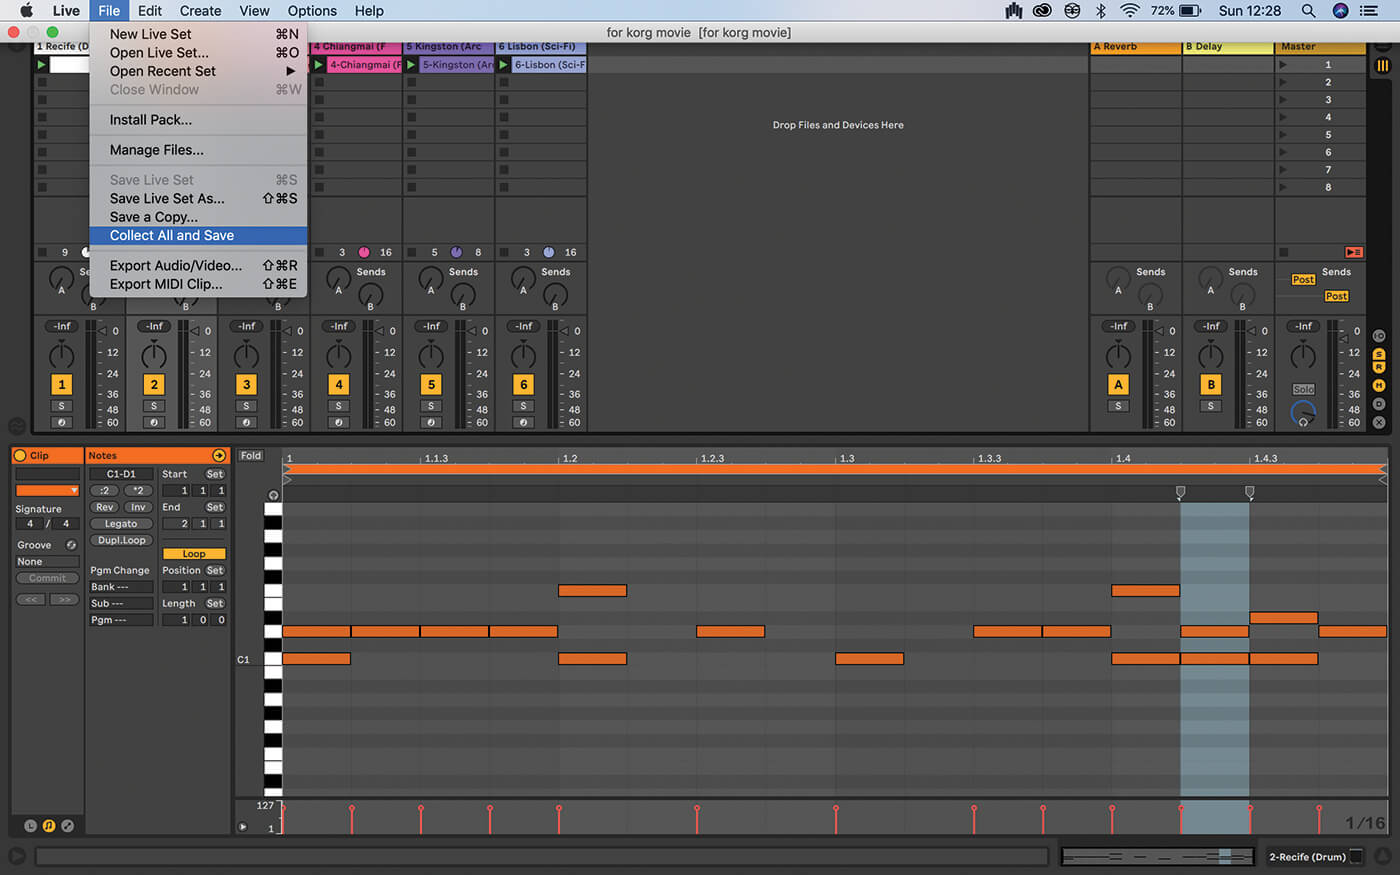
17. The final step with a sample-heavy Live set is to use File/Collect All and Save, gathering all of the samples used into the project folder so you can move between computers more easily.
18. Get yourself a handy little audio interface – ideally, one that’s USB buss-powered. Because we’re working with this in-the-box project, you should opt for higher audio quality over more inputs and extra features.