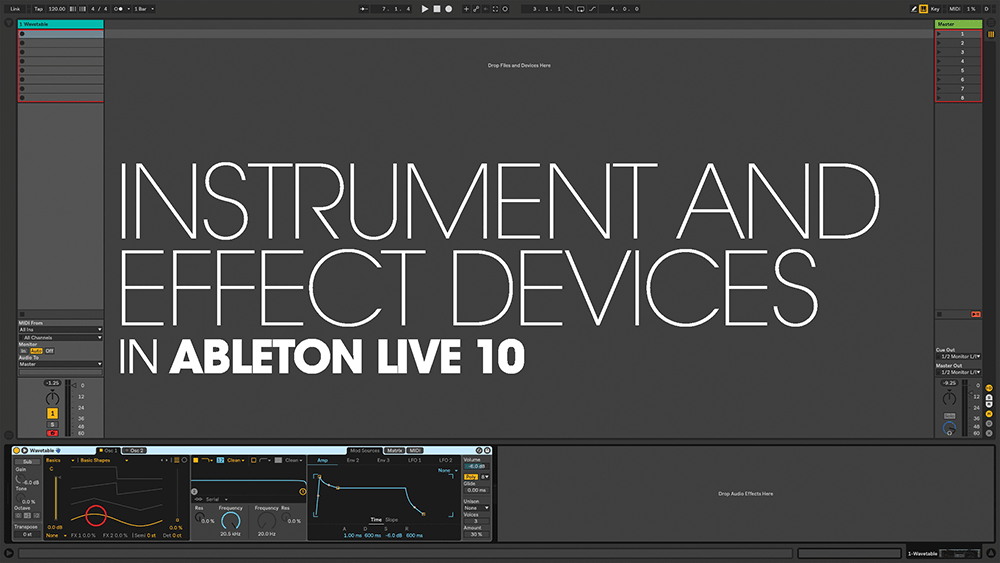
Exploring The New Instrument And Effect Devices In Ableton Live 10
Ableton Live goes from strength to strength with each update. Martin Delaney explores the new and updated devices in Live 10 – download the beta version, or download the demo to follow along… Download a 30 day free trial By now, we all know that Live 10 is on the way. Maybe by the time […]
Ableton Live goes from strength to strength with each update. Martin Delaney explores the new and updated devices in Live 10 – download the beta version, or download the demo to follow along…
By now, we all know that Live 10 is on the way. Maybe by the time you read this, it’ll be in open public beta, or maybe – just maybe – in full release. Either way, we’re too excited to wait, so let’s jump in and explore the new and updated devices.
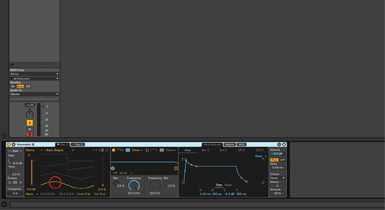
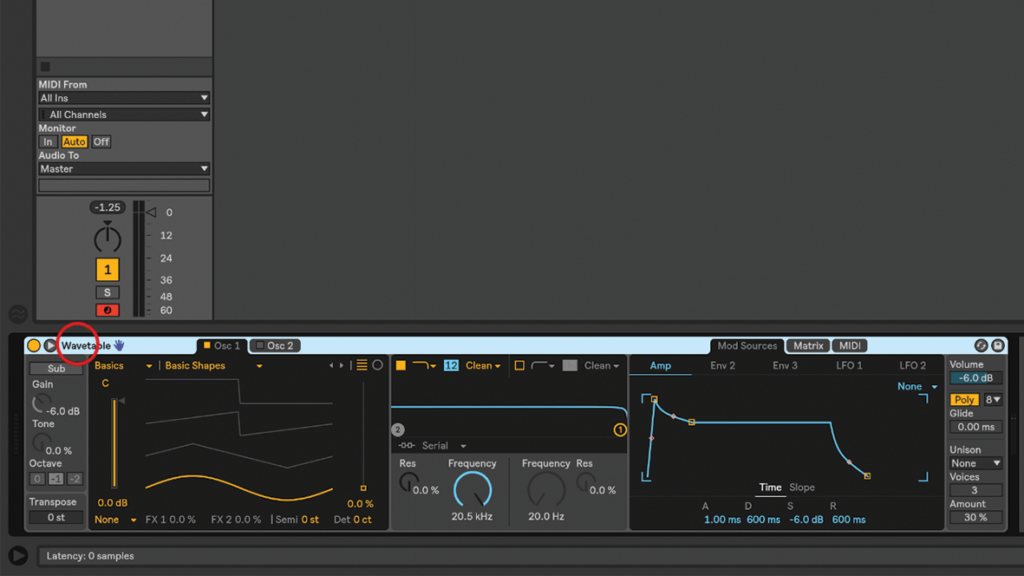
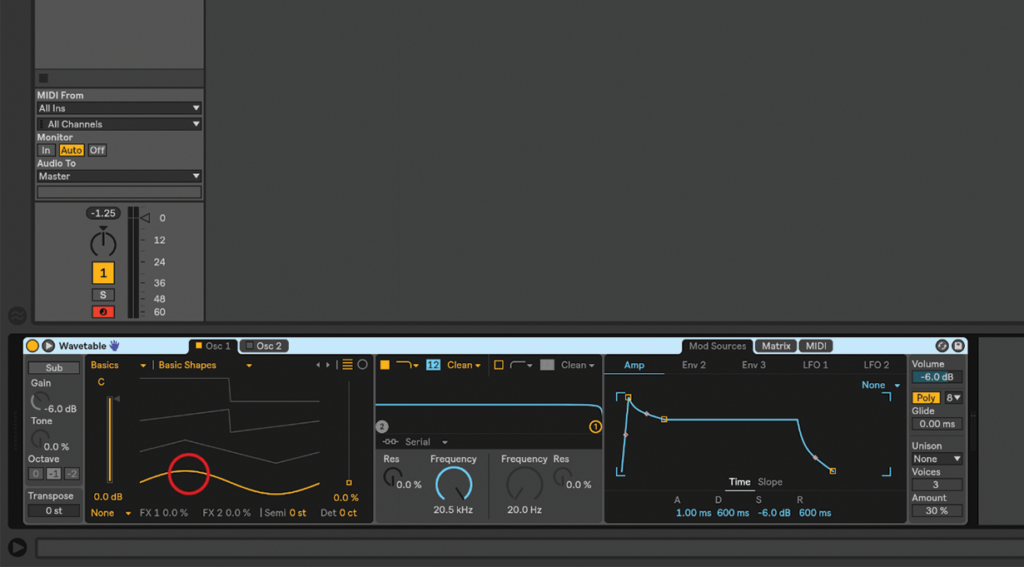
In the walkthrough, I’ve focused on the Wavetable synth, which is an obvious one to talk about, being so fully-featured. Wavetable synths have a quite unique sound, so it’s a handy addition alongside the virtual analogue experience of, er, Analog, and the FM-based creative monster that is Operator.
If you preview any single individual sound from Wavetable you could be underwhelmed, but as soon as you begin to use the Modulation Matrix, and manipulate the Osc positions, it becomes incredibly lively and organic.
I’d encourage you to dig in and explore this instrument – go through the presets, understand what the controls do, how the Matrix works, and to build your own sounds.
If you’re using a MIDI keyboard, or Push, velocity is a great way to let your playing dynamics affect the sound in real-time. The two filters, combined with the Matrix, are critical – they can be run in series, parallel, or split – one per oscillator.
Wavetable is the only new instrument in Live 10, but there are other new devices. Echo is Live’s third delay effect, but one that’s intentionally more ‘characterful/coloured/dirty’ than the others, aimed primarily at recreating tape delay type sounds, with all the sonic imperfections that are part of that.
It has the distinctive ‘echo tunnel’ graphic (representing left/right delay times and feedback), a filter, and an LFO. There’s also a built-in reverb, but the most fun stuff resides in the Character tab, with the Gate, Ducking, Noise and Wobble controls.
Gate basically determines whether Echo works or not – if an incoming signal doesn’t exceed the Threshold, it passes through without any effect being heard, so you can get some nice dynamic effect responses if using a MIDI keyboard or Push.
Ducking works in a similar way, listening to and reacting to incoming audio – you can set the degree by which the processed version of the input ducks to make way for the original signal. The Noise control adds some noise/hiss to the output, and can even morph between different types of noise, which sounds pretty cool.
Wobble is the one that really gets you into the tape zone, emulating the classic wonky sound of old tape delays. Once again, there’s a morph control, and I found the easiest way to check what’s going on is to set the amount value really high while you’re experimenting, then dial it back once you’ve got something you like.
The Drum Buss device includes drive, distortion, compression, transient shaping, and a great low-end boost called ‘Boom’, which can be tuned to the correct pitch for your song. This could potentially replace an entire chain of other devices, another example of Ableton embracing dirt!
![]()
Widescreen wavetable Live’s new synth has an interface that will usefully open up into a full-on, full-screen mode, something which is particularly suited to Push 2’s display. Experiment with automating Wavetable’s waveform selection with the LFO and the synth’s mod matrix.
Furthermore, the low end generated by Boom can be soloed, which is great for checking on your bass frequencies, but also as a sound-design thing – you could resample or freeze/flatten the solo’d output.
Finally, on the new device front, is Pedal – adding yet more distortion and dirt, and some sub, too. It’s like with Echo – supplementing existing effects (in this case Overdrive and Distortion) with more flexible, dirtier, versions.
If you’ve previously written off using Live as a guitar tool, Pedal could make you think again – it adds a far more organic quality to Live’s Amp and Cabinet devices, which at times can sound quite plasticky without outside help.
The Sub switch boosts the low end – something you won’t always want when mixing guitars, but it’s certainly a useful option, and let’s face it, not everybody will be using Pedal for guitars anyway… it works with any source. Crank the gain up to maximum with this on a kick drum, using either overdrive, distortion, or fuzz, and it sounds good.
Less exotic but definitely very useful, the Utility device has had an update, which includes among other things a dedicated mono switch and a bass mono switch and a control which lets you set the frequency below which your track (usually a stereo master) will be mono rather than stereo – this can be really effective for fixing live takes from field recorders, and for venue-proofing live sets, gigs where you really need the low end to be solid and heard everywhere in the room. That’s it for now – I’m sure we’ll return to these devices in the near future following Live 10’s release!
Instrument and effect devices: Step-by-step
1. Let’s explore Live’s new Wavetable synth. Follow along if you’ve got the Live 10 beta, or just look forward to the demo and full release in early 2018. Check the Ableton website for the latest status…
2. Wavetable has some great presets, but of course we like to build our own, so load the default Wavetable preset – it’s just a Sine wave, but Wavetable has many waveforms for us to choose from.
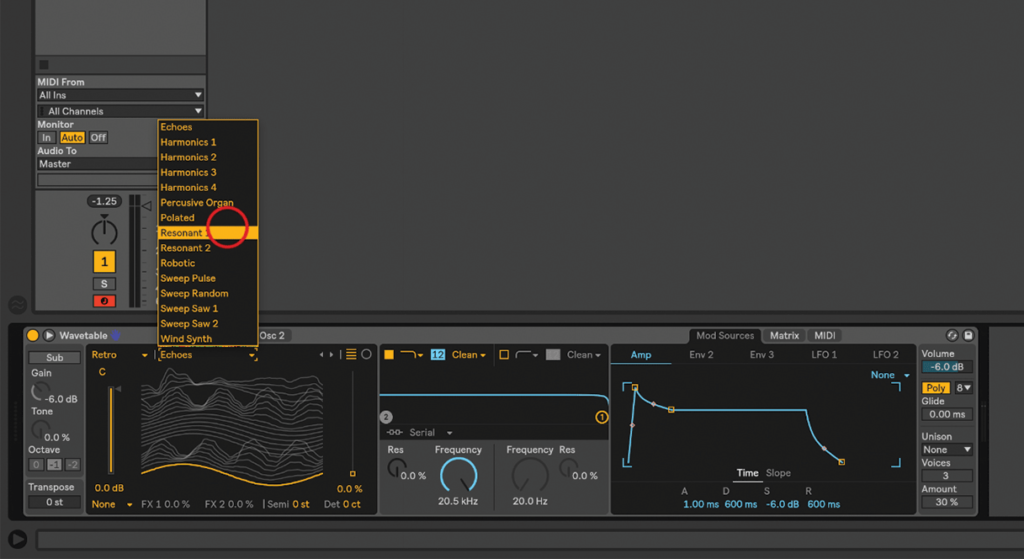
3. Use the menus at top-left to choose a category of wavetable, then a specific one from the ensuing list. Let’s choose Retro, then Resonant 1. Move the wave position control while you trigger some notes.
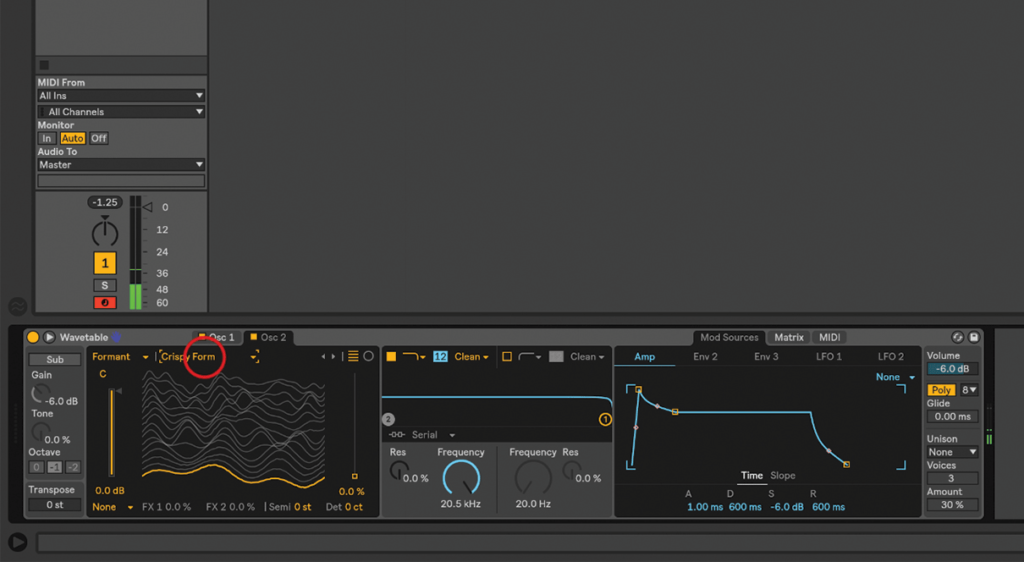
4. Wavetable has two oscillators, so let’s activate the second, and choose a sound for that one, too. Let’s try Format/Crispy Form. Sweep through that one as well, to hear it change as you move through the wavetable.
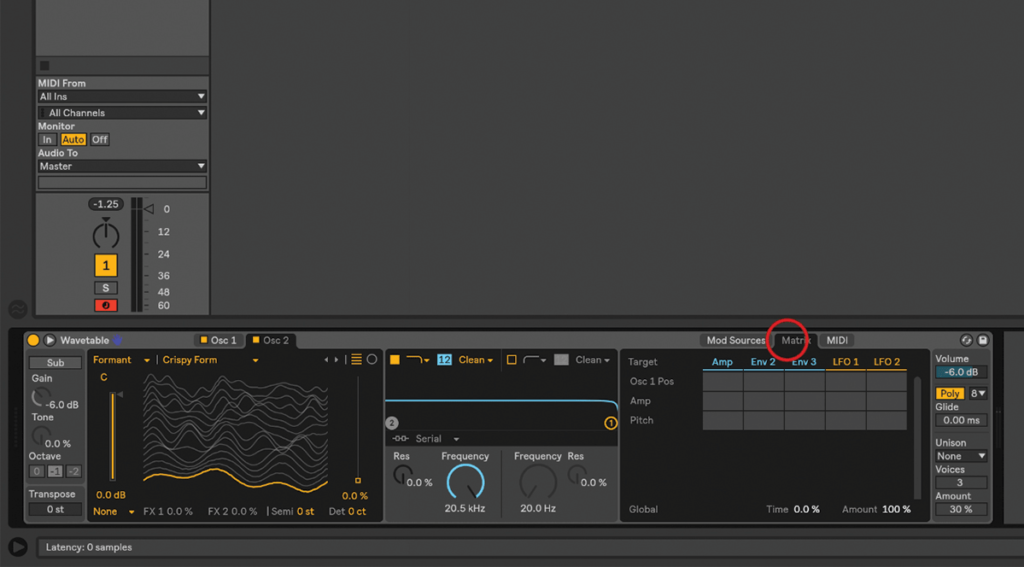
5. So far so good, but very static… and that’s not what wavetables are about! Click on the Matrix tab near the top right of the device. Wavetable controls are added to this as you click them.
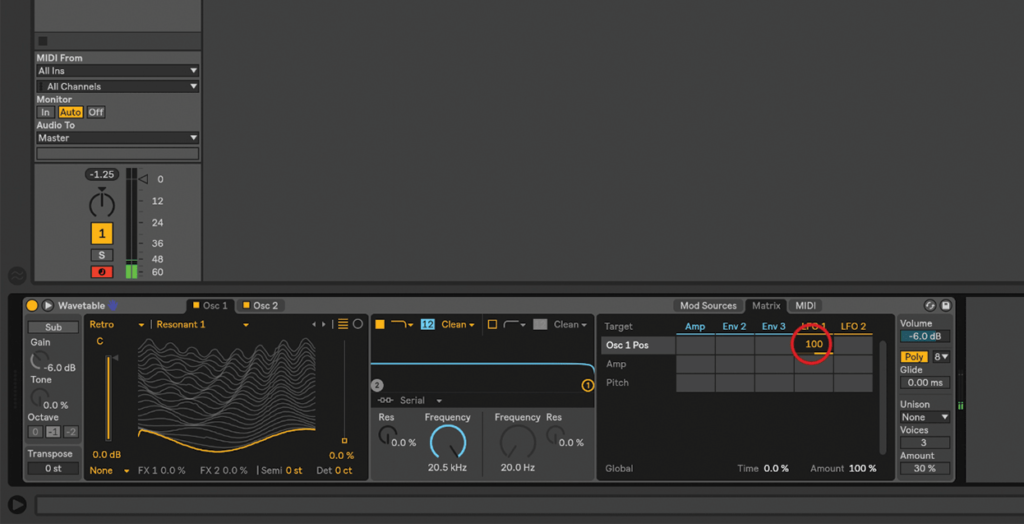
6. In the row next to Osc 1 Pos, bring LFO 1 up to 100%. Now go to Mod Sources/LFO 1. Set the Sync switch to song tempo, and check the Rate is at 1/8.