Logic Tutorial: VA Synthesis with Alchemy – Step-by-Step
Mark Cousins continues his look at VA Synthesis in Alchemy in this step-by-step… 1: Load an instance of Alchemy and start by initializing a blank patch using the Alchemy menu item File > Clear. You should now have a vanilla ‘Sawtooth’ patch. Now, move over to the Advanced tab to begin refining the sound. 2: […]
Mark Cousins continues his look at VA Synthesis in Alchemy in this step-by-step…
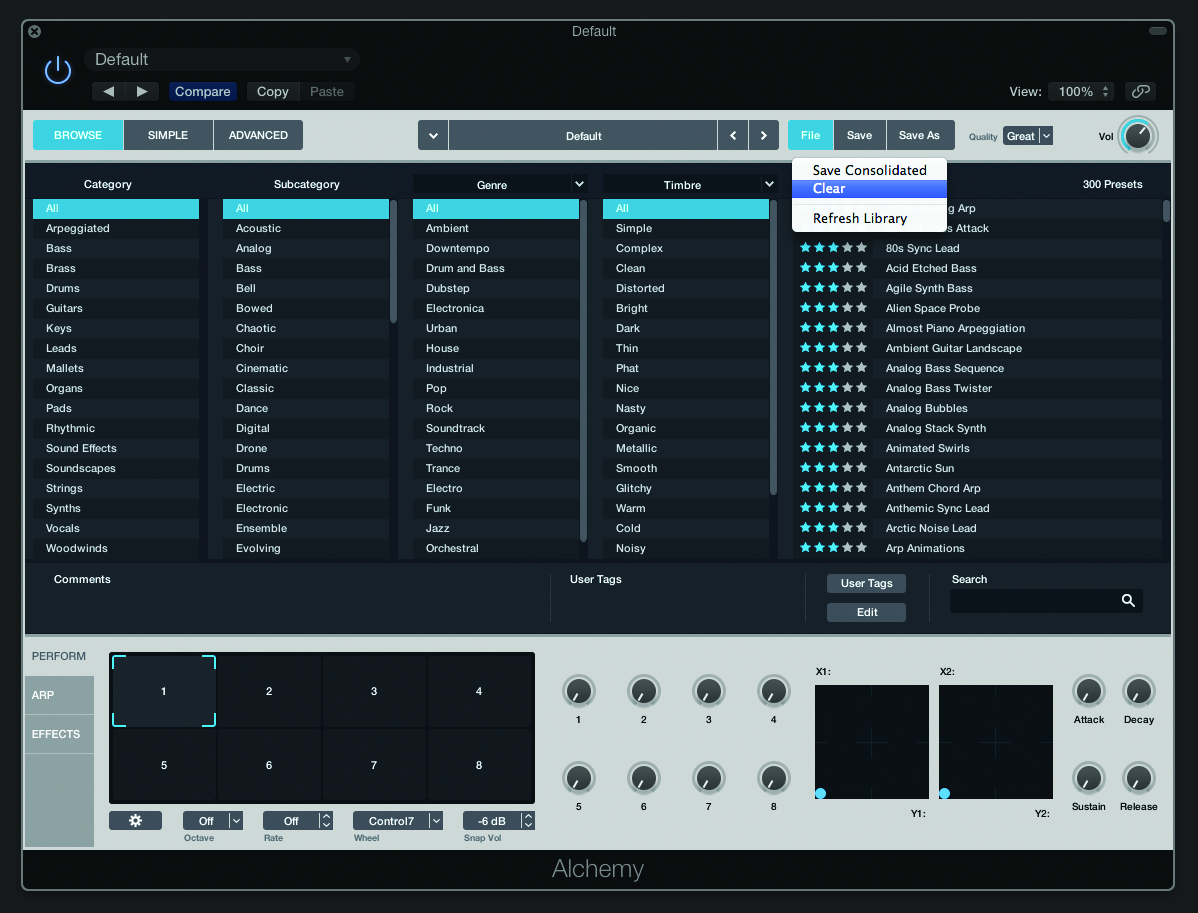
1: Load an instance of Alchemy and start by initializing a blank patch using the Alchemy menu item File > Clear. You should now have a vanilla ‘Sawtooth’ patch. Now, move over to the Advanced tab to begin refining the sound.
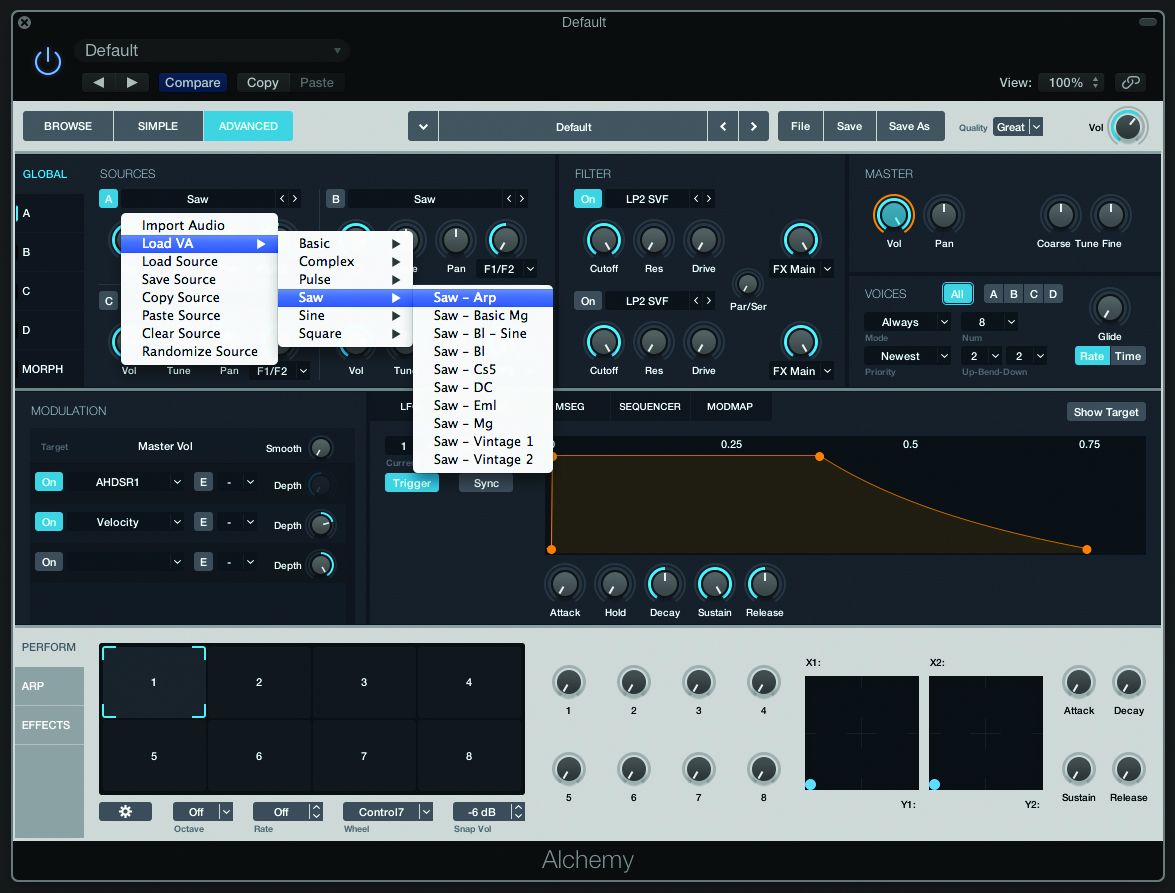
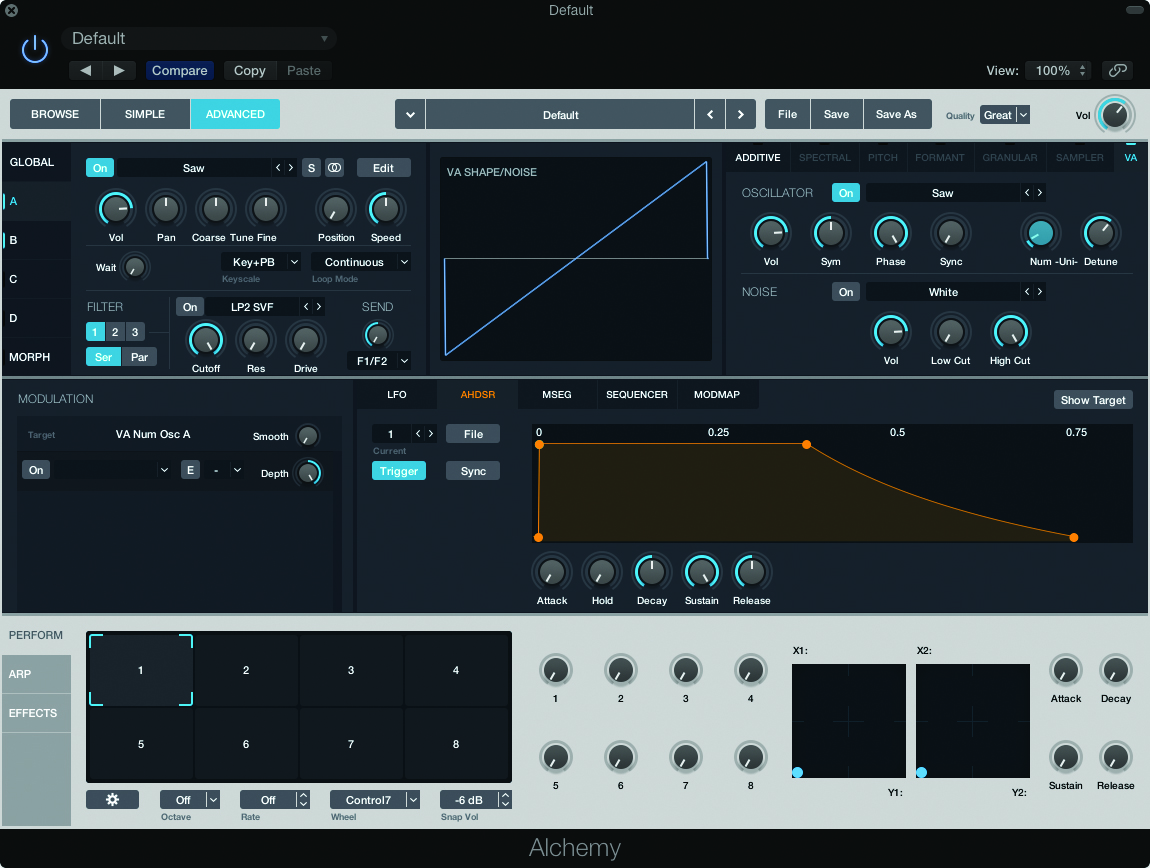
2: Under the Advanced tab we can see a global overview of the current patch, moving between the four oscillators (A, B, C and D) at the top, through to the filter and amplifier. Click on the waveform name to select a new VA waveform.
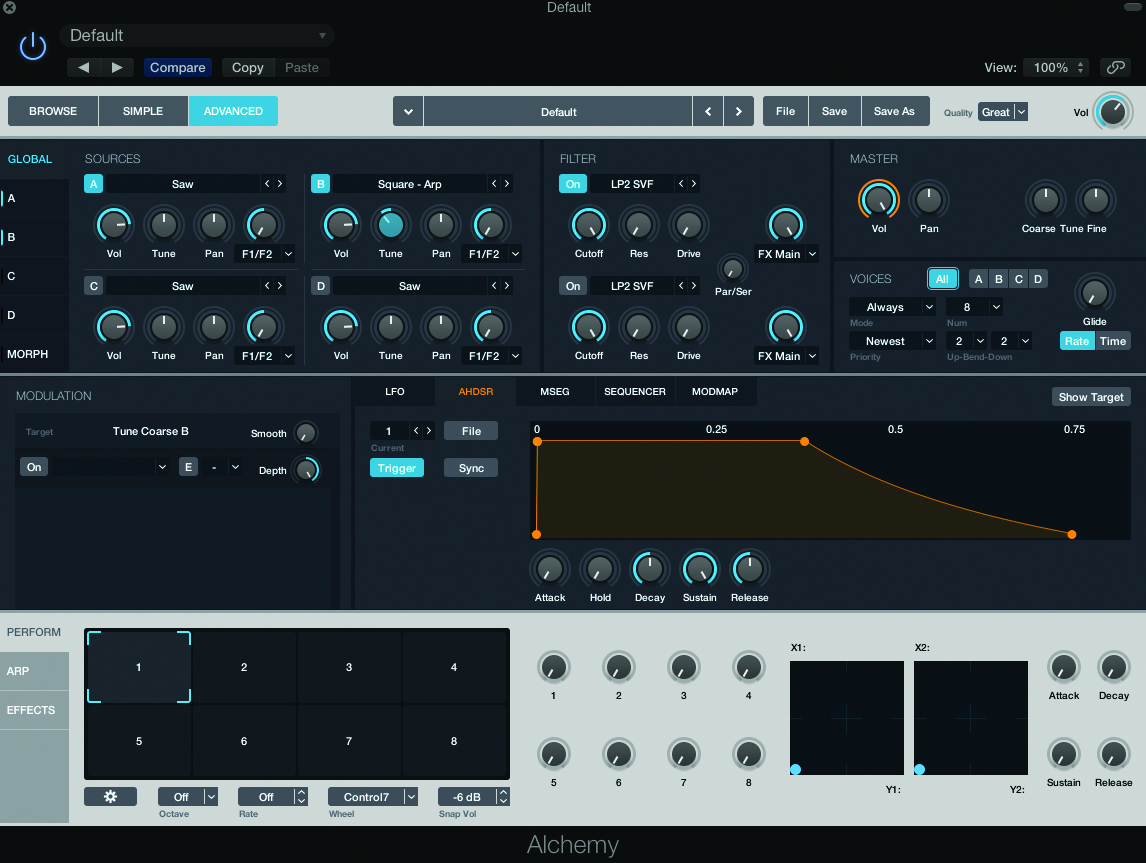
3: Activate the second oscillator by clicking on the small B icon. Change the waveform assignment to Square – Arp and use the Tune control to shift the oscillator down 12 semitones from Oscillator A. This forms the sound of the sub oscillator.
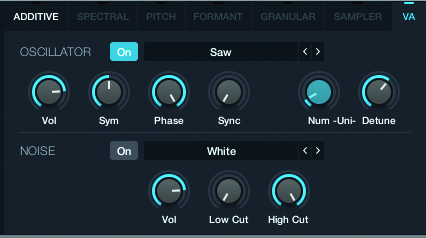
4: Each oscillator has an expanded selection of controls, which you can see by clicking off the Global tab (in the top left-hand corner) and selecting A, B, C or D. Over the right-hand side we can increase the unison (Uni) voices and the amount of detune.
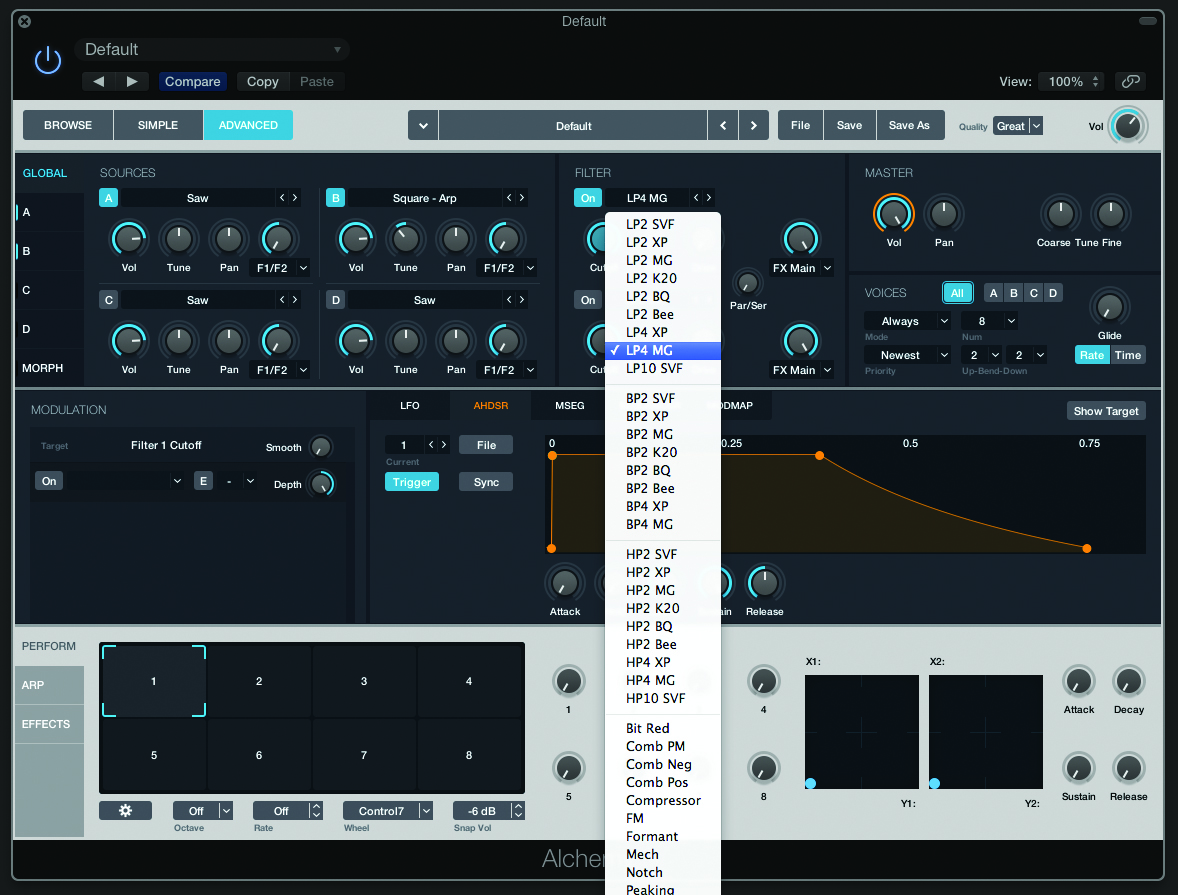
5: Once we’ve established the starting timbre it then gets passed through the filter. Using the drop-down menu you can select your filter type, which can include low-pass, band-pass and high-pass operation as well as various filter types like notch and formant.
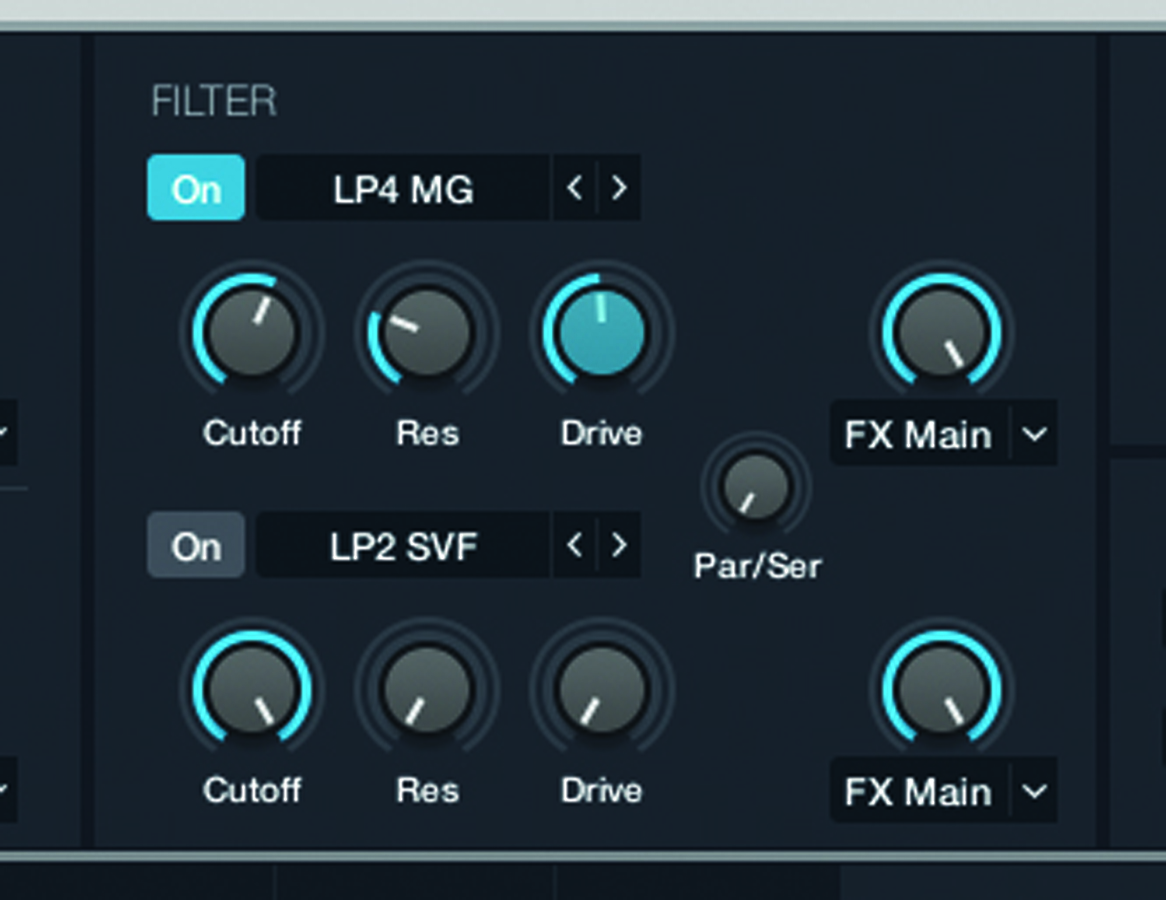
6: We’re working with the 4-pole, Low-pass LP4 MG filter. Try reducing the cutoff and increasing the resonance to hear its sound. For a real Moog-like sound, try increasing the drive to add extra body and grit to the filter’s operation.
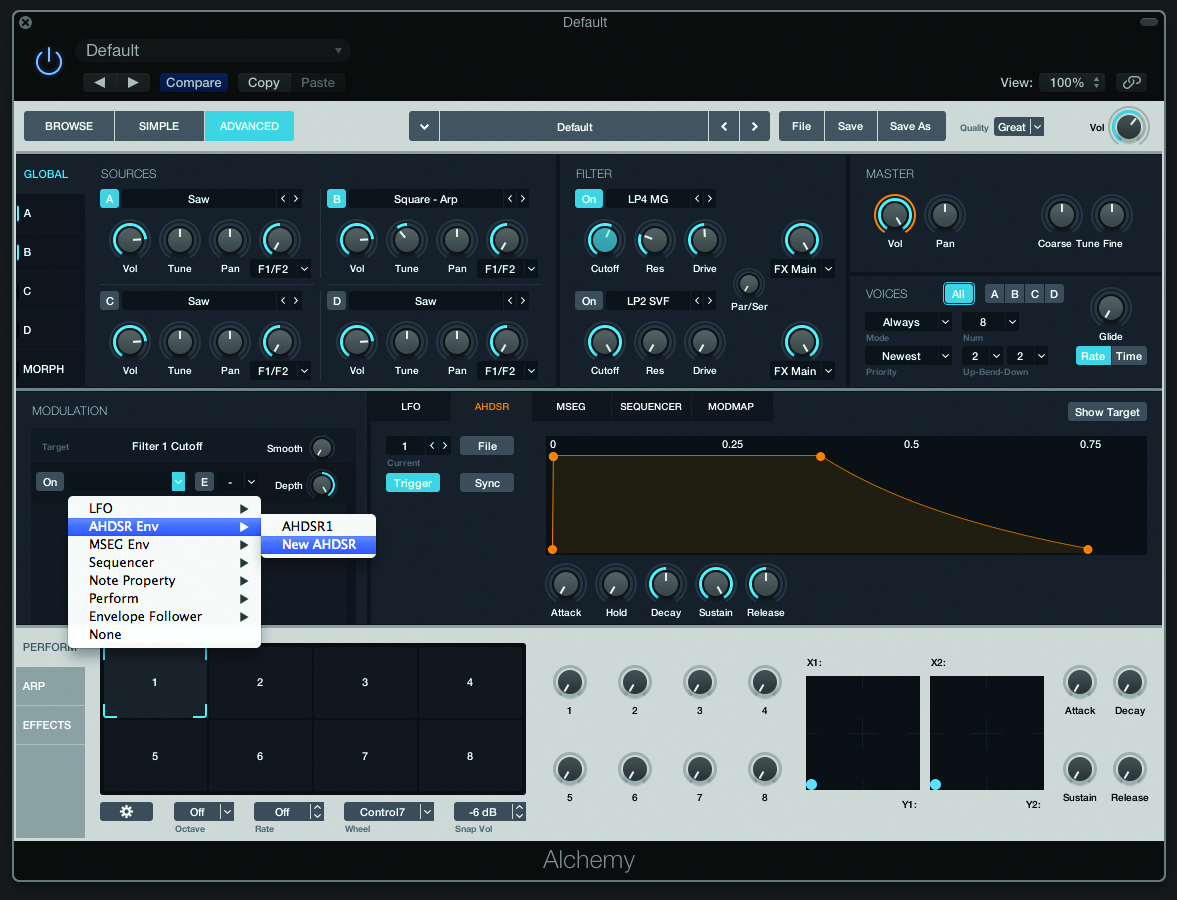
7: Adding filter modulation is easy. First make a few movements to cutoff and notice how the Modulation routing window (just beneath the oscillators) updates to include Filter 1 Cutoff as the Target. From the drop-down menu select AHDSR Env > New AHDSR.
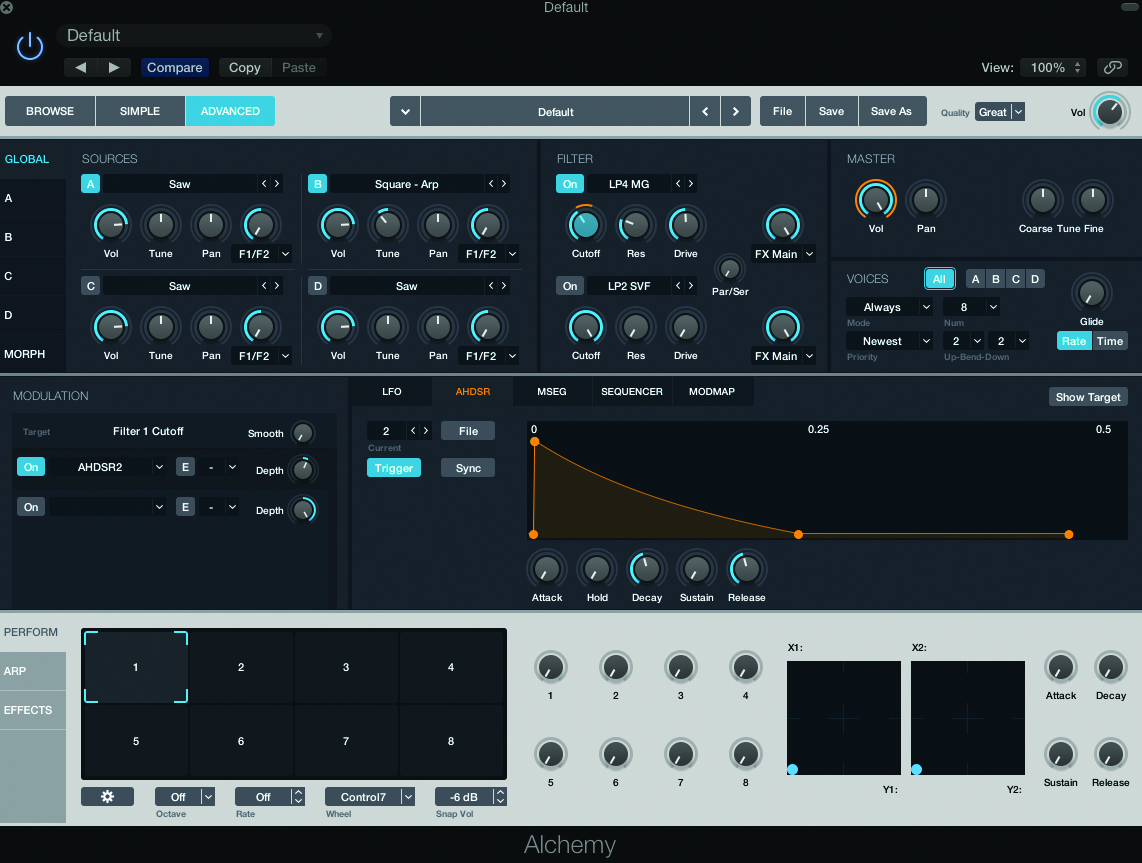
8: With our routing established, the modulation area should have updated to display AHDSR 2. Set sustain to zero and program a fast decay and release. Notice the orange banding to illustrate the filter movements, which can be reduced using the depth control.
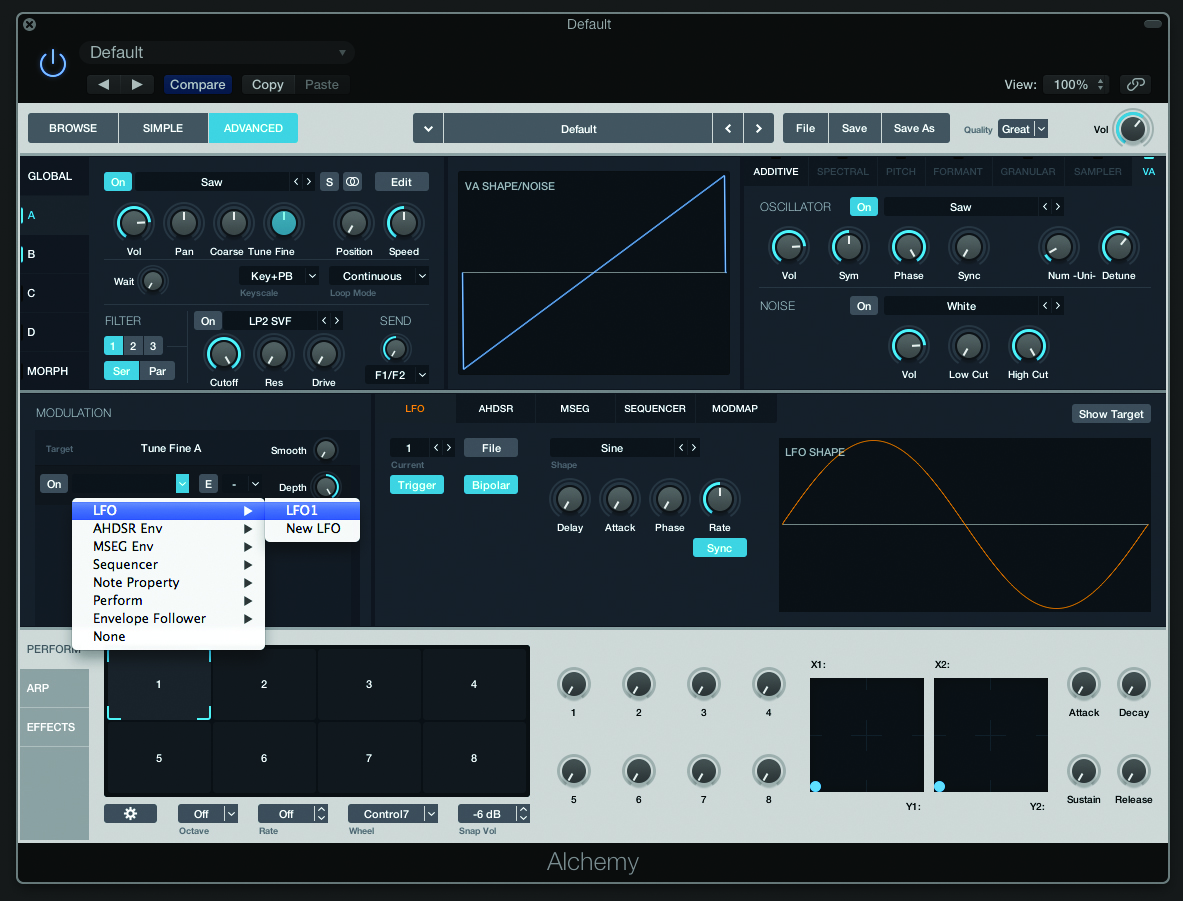
9: Now let’s add some vibrato via LFO1. Go to the expanded view of Oscillator A and wiggle the Fine-tuning control. As with filter, the Modulation routing window updates to show Tune Fine A as the target. Select LFO1 as the source.

10: Now adjust the LFO setting to fine tune the vibrato. Take the Sync control off and adjust the rate to your taste. You can also try experimenting with the Shape selection. There are some useful chaotic waveshapes like ‘Disrupted Cycle’.
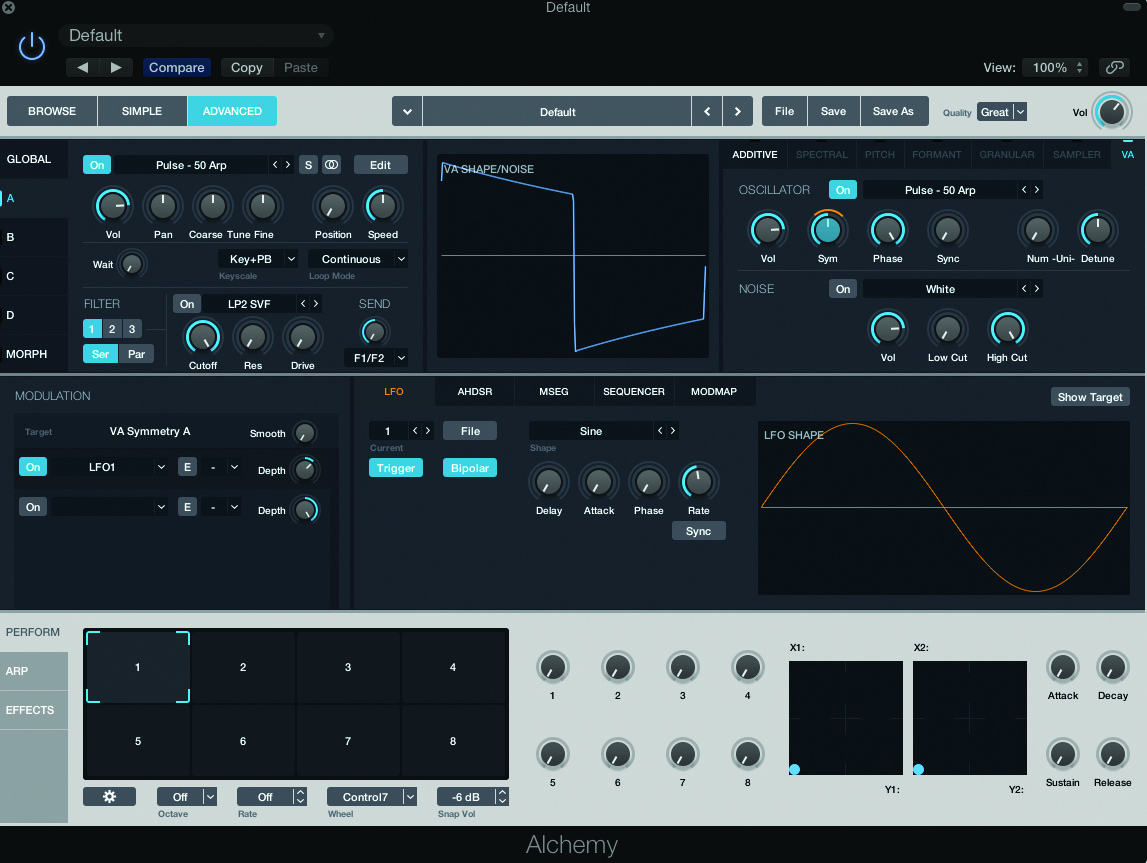
11: To demonstrate the parallel filters, let’s create a basic PWM pad sound. From a reset patch setting, select the Pulse 50 – Arp waveform for Oscillator 1. Modulate the Sym control using LFO1, with rate around 12 o’clock and depth at 2 o’clock.
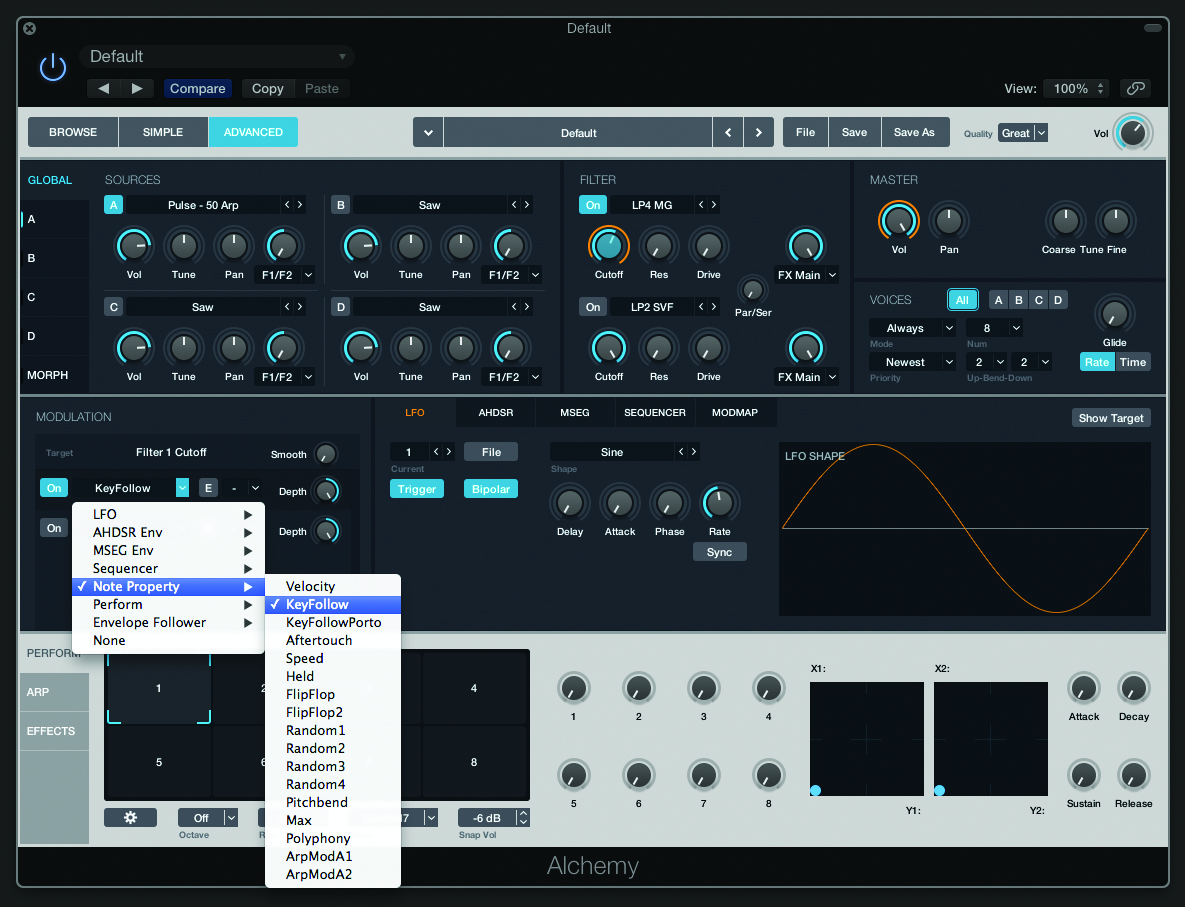
12: Setup a soft LP4 MG setting on the filter. Modulate filter cutoff so that it tracks the keyboard, using Note Property > Key Follow as the modulation source. As you move up the keyboard note how the filter also opens up.
Click Here to Continue
