Logic Pro X Tutorial: Complex Envelopes & Step Sequencing – Step-by-Step
As our tutorial looking at movement sounds in Alchemy continues, Mark Cousins analyses complex envelopes and step sequencing… Complex Envelopes 1: In this next example, we’re going to see how Alchemy’s multi-segment envelopes go above and beyond what you can achieve with LFOs. In this case, we’re using two sawtooth oscillators an octave apart, which […]
As our tutorial looking at movement sounds in Alchemy continues, Mark Cousins analyses complex envelopes and step sequencing…
Complex Envelopes

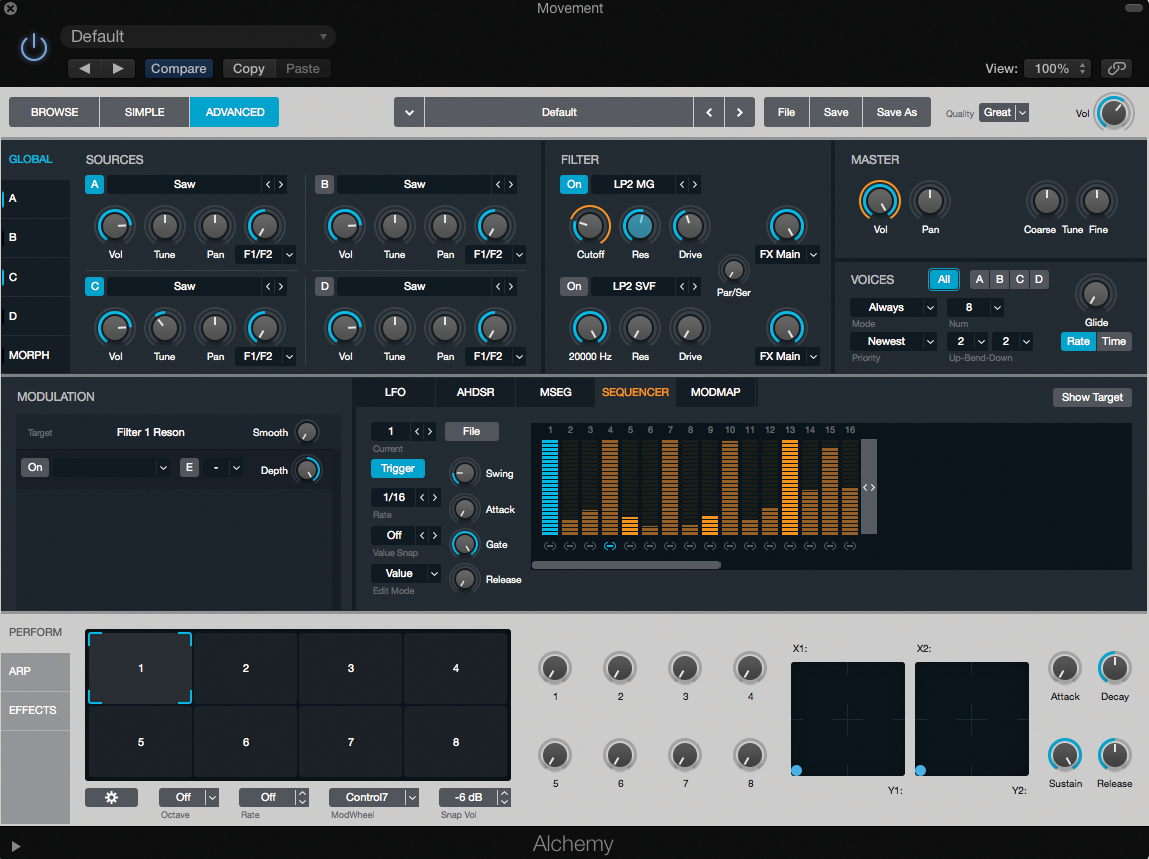
1: In this next example, we’re going to see how Alchemy’s multi-segment envelopes go above and beyond what you can achieve with LFOs. In this case, we’re using two sawtooth oscillators an octave apart, which are then being passed through a resonant LP2 MG filter.
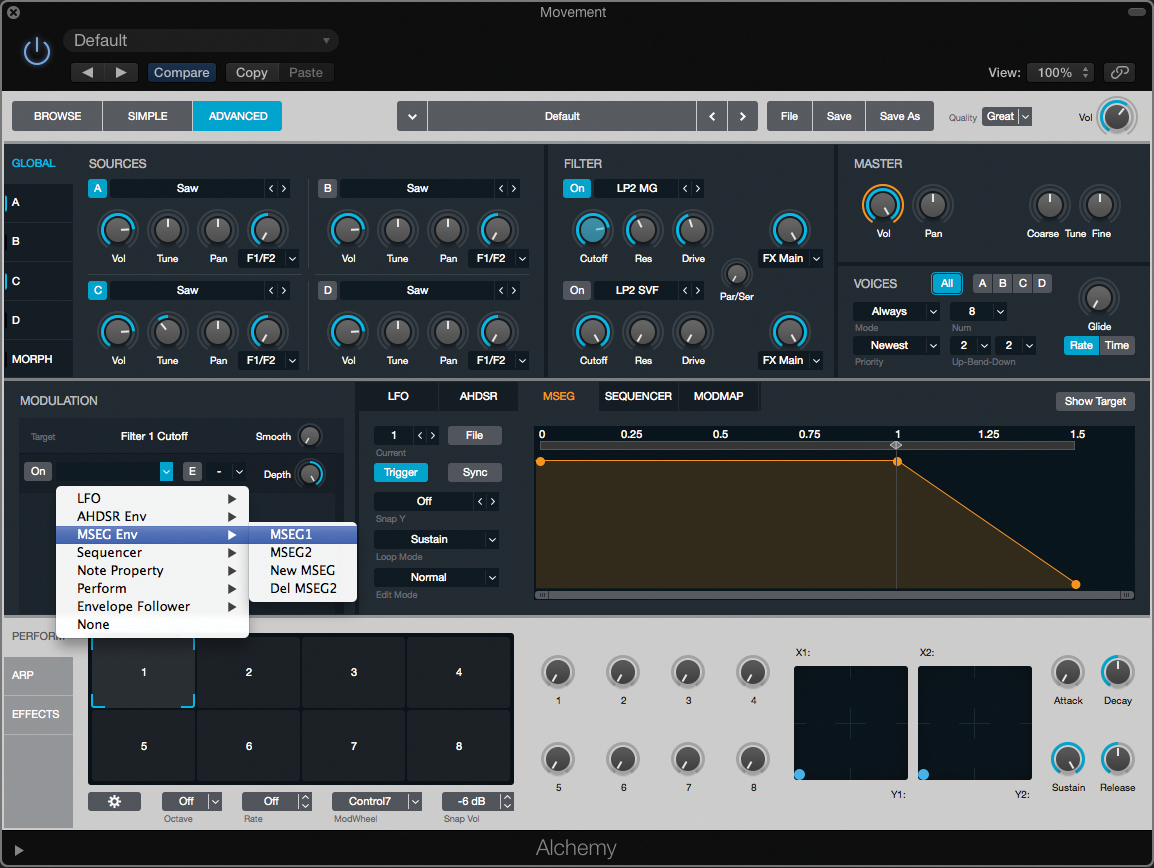
2: As before, click on the filter’s cutoff control to make it the active target in the modulation area. From the drop-down menu, select MSEG1 as the source. Set the depth to around three o’clock and lower the cutoff setting to around 10 o’clock.
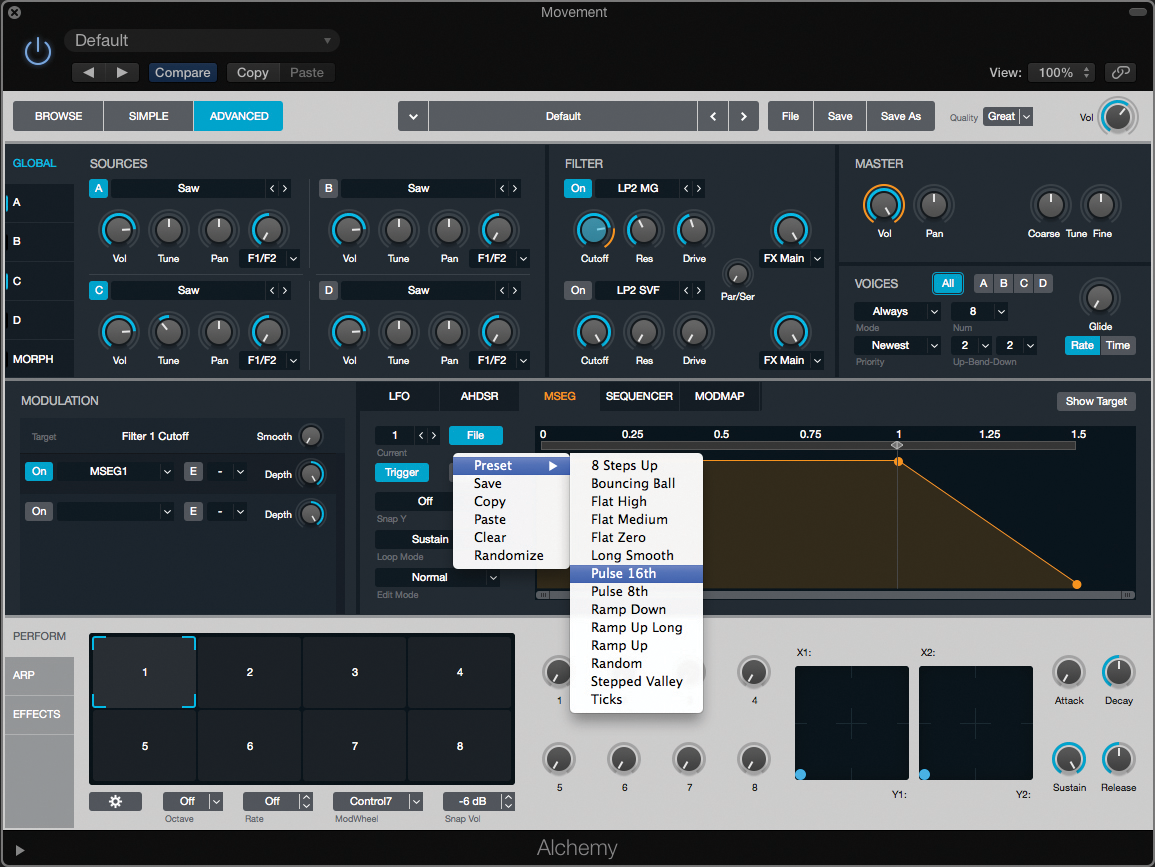
3: The MSEG section lets you draw complex tempo-synced envelopes from scratch, although if you want to save some time, consider using the one of the preset starting options (like Pulse 16th) from the MSEG’s drop-down File menu.
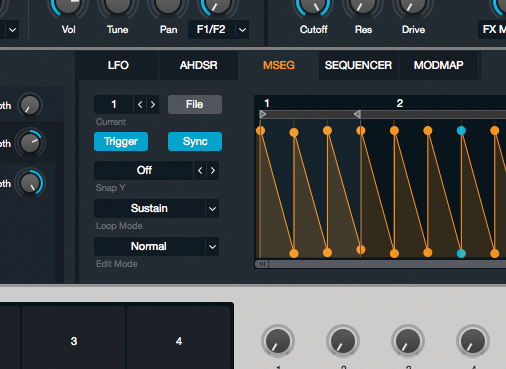
4: On the MSEG display we can now see a unique AR envelope for each 1/16 step (as sync is active). The grey line also sets the envelope’s loop point. Move this back so that the MSEG envelope only works over 3/16ths.
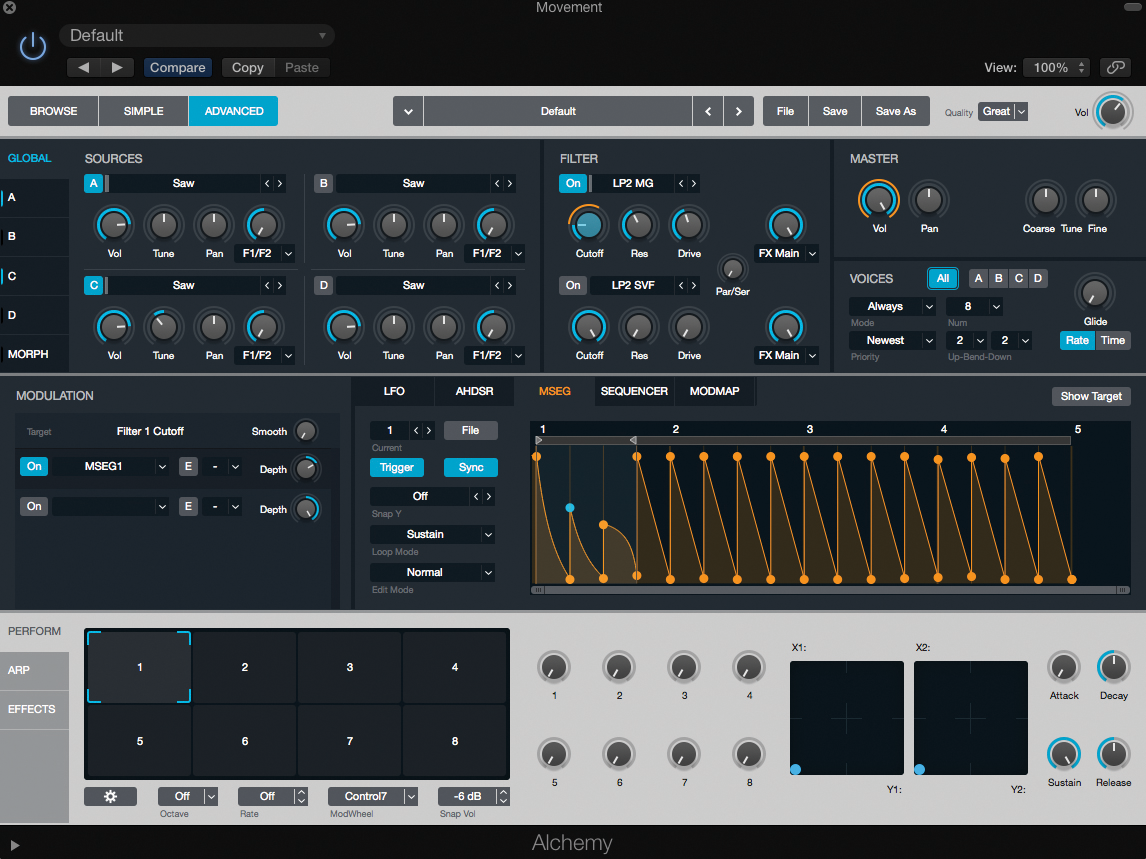
5: For each step, we can adjust the height of the node as well as the shape between each envelope points. Set the node lower on each successive 16th and adjust the curve to be faster on nodes 1 and 2 and slower on node 3.
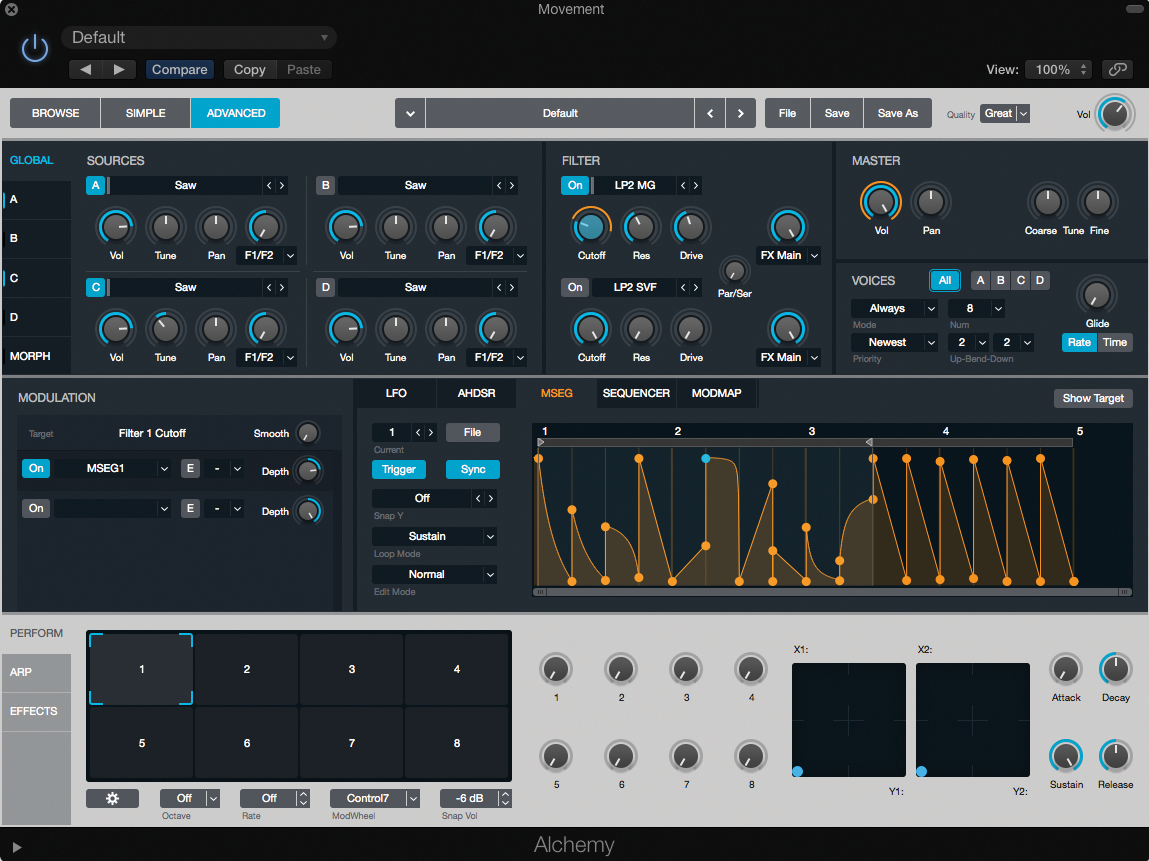
6: MSEG envelopes can be a simple or as complex as you like. Although our simple three-step solution works well, you can also consider using more steps, often with radically different curves and with some points sustaining, or even reversing.
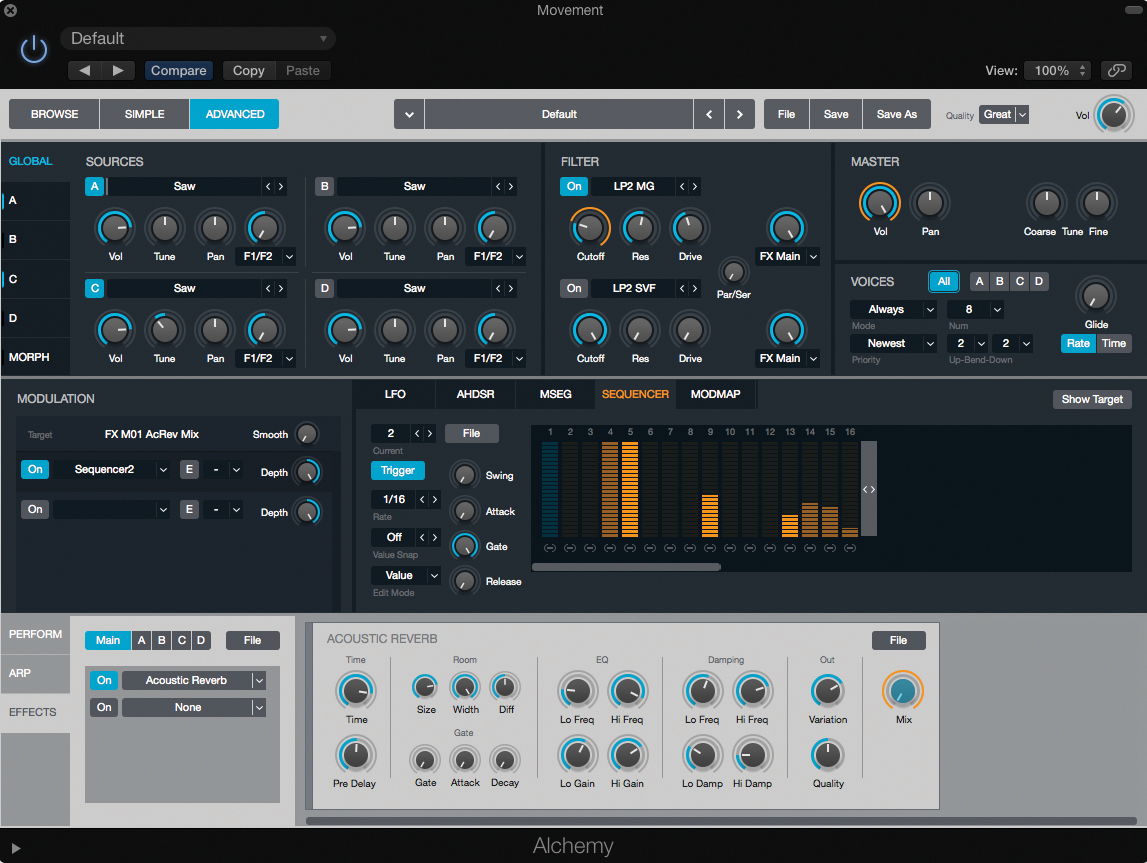
Step Sequencing

1: Using the same two-oscillator bass patch as before, let’s now explore the step sequencer as an alternative source of modulation. In the modulation area, route Sequencer 1 through to Filter 1 cutoff, with plenty of modulation depth.
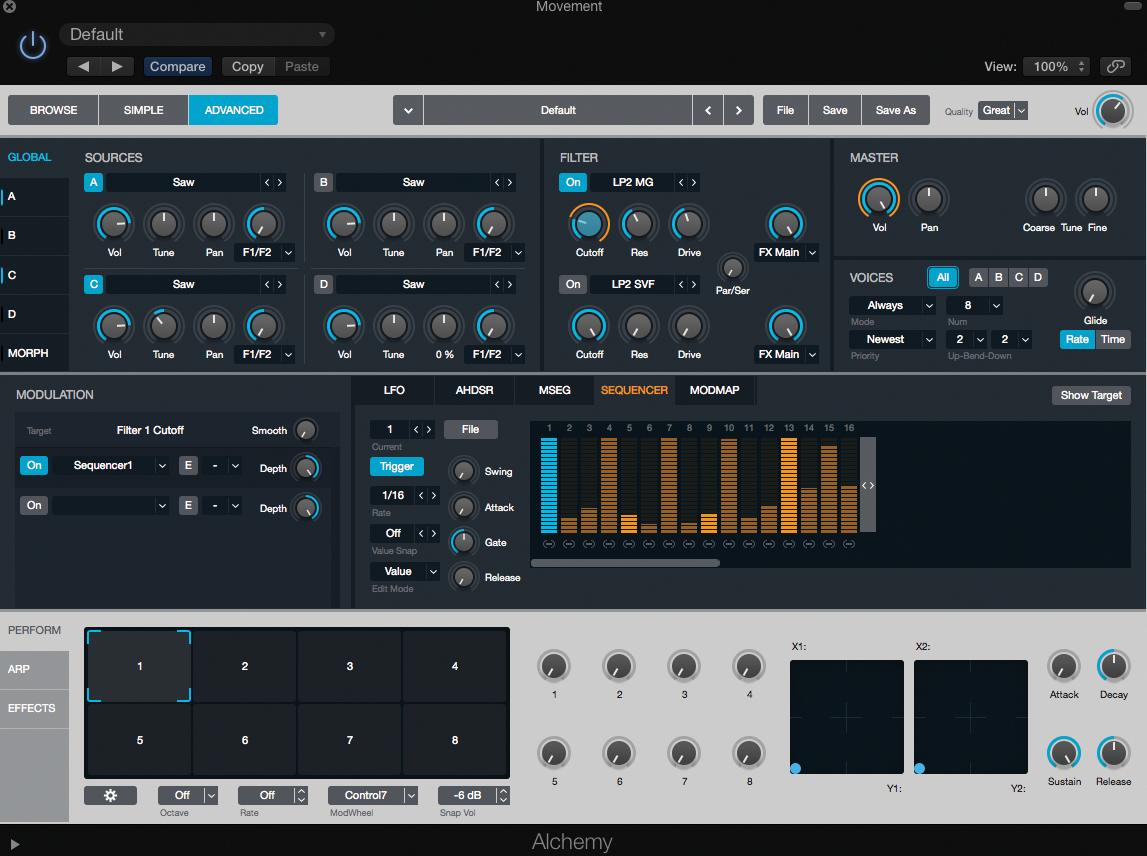
2: Try adjusting each of the bars on the sequencer to create a repetitive pattern that can be applied to the filter. To make things interesting, we’ve created syncopated accents on steps 4, 7, 10, 13, and 15 that lend a ‘driving’ quality to the sequence.
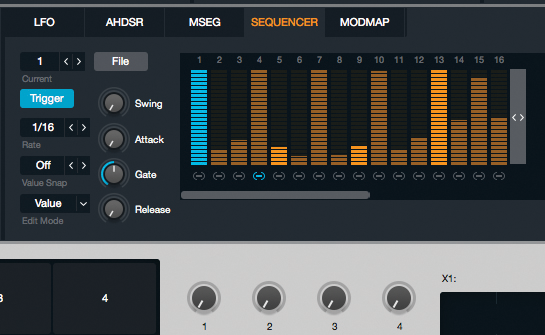
3: The icon towards the bottom of each bar can be used to tie one step to the next, resulting in an output that’s twice the usual length. We’ve placed the tie on an accent, therefore adding more emphasis to that note.
4: Experiment with the attack, gate and release parameters to hear different transitions between the steps. Increasing gate to maximum, for example, will produce the same ‘stepped’ output as the graphic display, or you could add a touch of swing.
5: Try using the sequencer on other parameters – in this case, using it to modulate the wet/dry ratio of the reverb. Create an addition sequencer (Sequencer > New Sequencer) in the modulation area for a unique pattern.
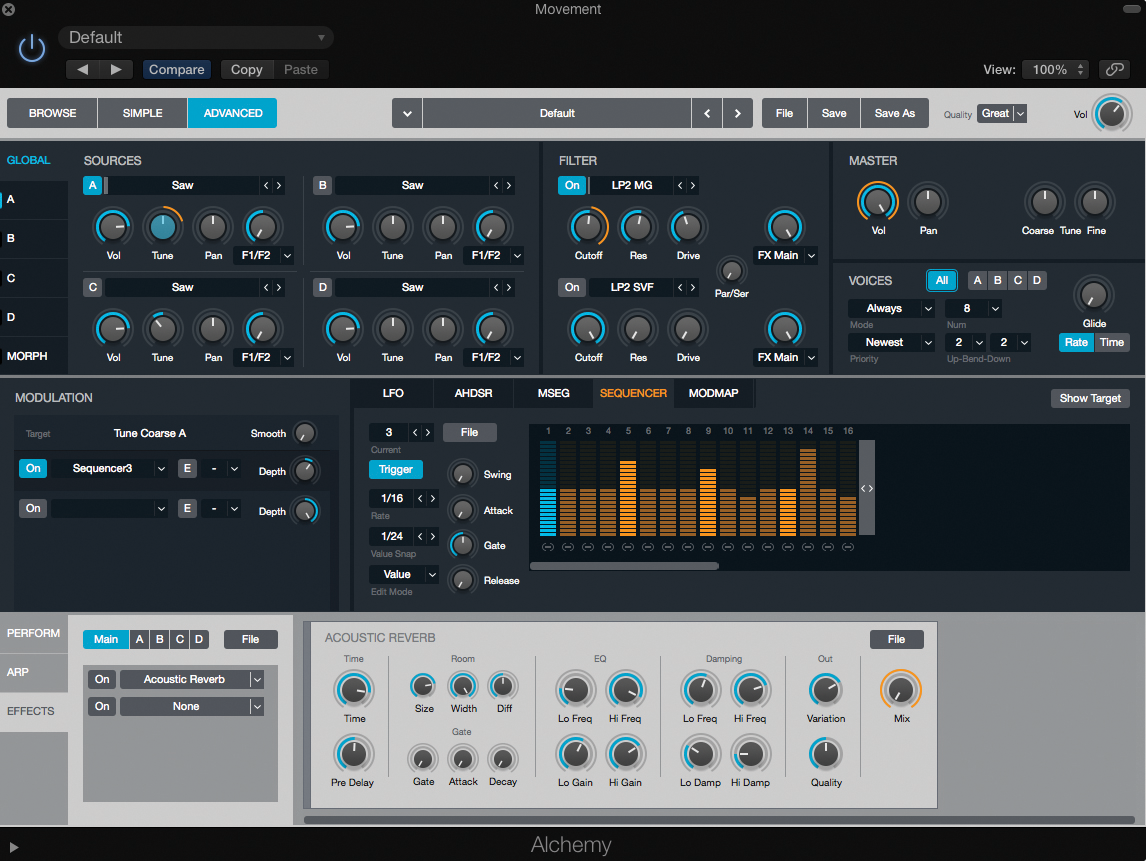
6: You can also use the sequencer to create melodic lines by mapping it to the source’s tune parameter. To achieve this, set the depth to 24.0 st and the value snap (as part of the sequencer) to 1/24th, creating a sequence over +/-1 octave.
This tutorial is endorsed by Point Blank. With courses in London, online and now in LA, Point Blank is the Global Music School. You can study sound to picture on their Music Production Diploma courses, with pro industry tutors.
