Logic Pro X Tutorial – Advanced Use Of The Logic Compressor
Delve deeper and you’ll find that the Logic Compressor plug-in has a long list of tricks up its sleeve. Mark Cousins digs in and gets squashed For this tutorial you will need the project file – download here We first took a look at the revised Logic Compressor a while back exploring the key processes […]
Delve deeper and you’ll find that the Logic Compressor plug-in has a long list of tricks up its sleeve. Mark Cousins digs in and gets squashed

For this tutorial you will need the project file – download here
We first took a look at the revised Logic Compressor a while back exploring the key processes involved in setting up and using the plug-in. However, given the inherent flexibility of Logic Pro X’s Compressor (which is as good as any third-party alternative you could care to mention) combined with the fact the engineers use compressors in some fiendishly inventive ways, it’s well worth a closer exploration of the plug-in’s deeper features. We’re going to look at three techniques: frequency-conscious compression, New York compression and EDM Side Chaining. Together, these show just what a versatile performer the Compressor plug-in is…
The Logic Compressor – Frequency-Conscious
If you’ve mastered the basic parameters of compression – ratio, threshold, attack and release – you’ll soon start to appreciate that a compressor’s response can vary between different types of input signal, as well as variables like the model of the compressor. True mastery of compression, therefore, is about fine-tuning this performance – whether it’s picking the right model type, for example, to flatter the sound you’re processing, or making the compressor more or less sensitive to characteristics of the input.
One key facet of a compressor’s response is frequency, or more specifically, how different frequencies can push a compressor into applying gain reduction. This is often particularly evident on drum compression, where the kick drum dictates the movements of the compressor more than any other part of the kit.
The reason for this behaviour is that the kick is supplying a disproportionate amount of sound energy, largely because our ears are much less sensitive in that part of the frequency spectrum. While the effect is interesting, the resultant pumping sound might not be the result you want to achieve.
Focus On De-essing
De-essing is another form of frequency-conscious compression – in this case, making a compressor particularly sensitive to sibilant sounds in the human voice. You could use the dedicated DeEsser plug-in, of course, but there’s a lot to be said for the simplicity and visual clarity of the Compressor for simple de-essing tasks.
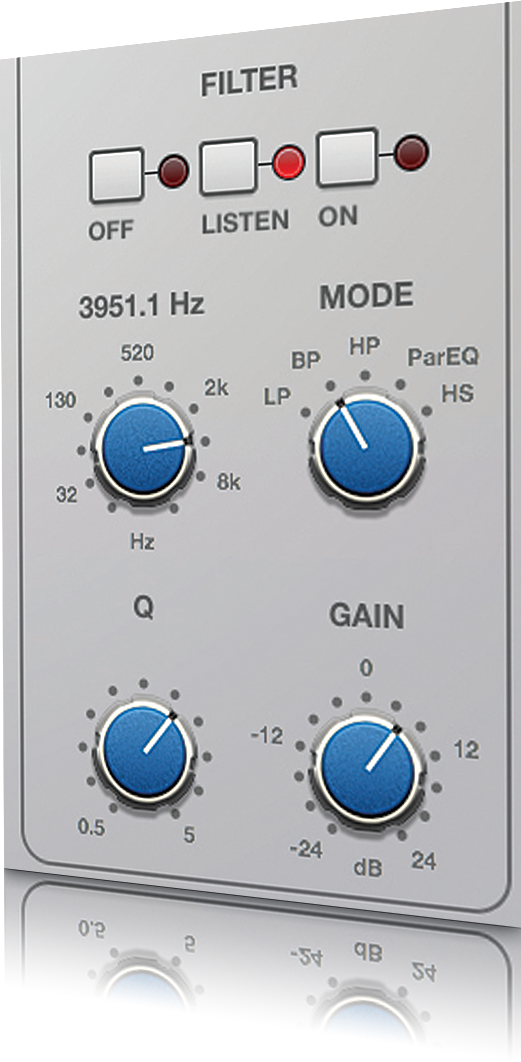
To make the Compressor sensitive to sibilance, activate the Filter section, using the BP (band-pass) mode and tuning the frequency to where the sibilance is most prominent (usually around 3kHz). Now fine-tune the threshold and ratio so that the gain reduction is only triggered when the sibilance occurs, using ratio to define the amount of sibilance reduction you want
to achieve.
Chain Gang
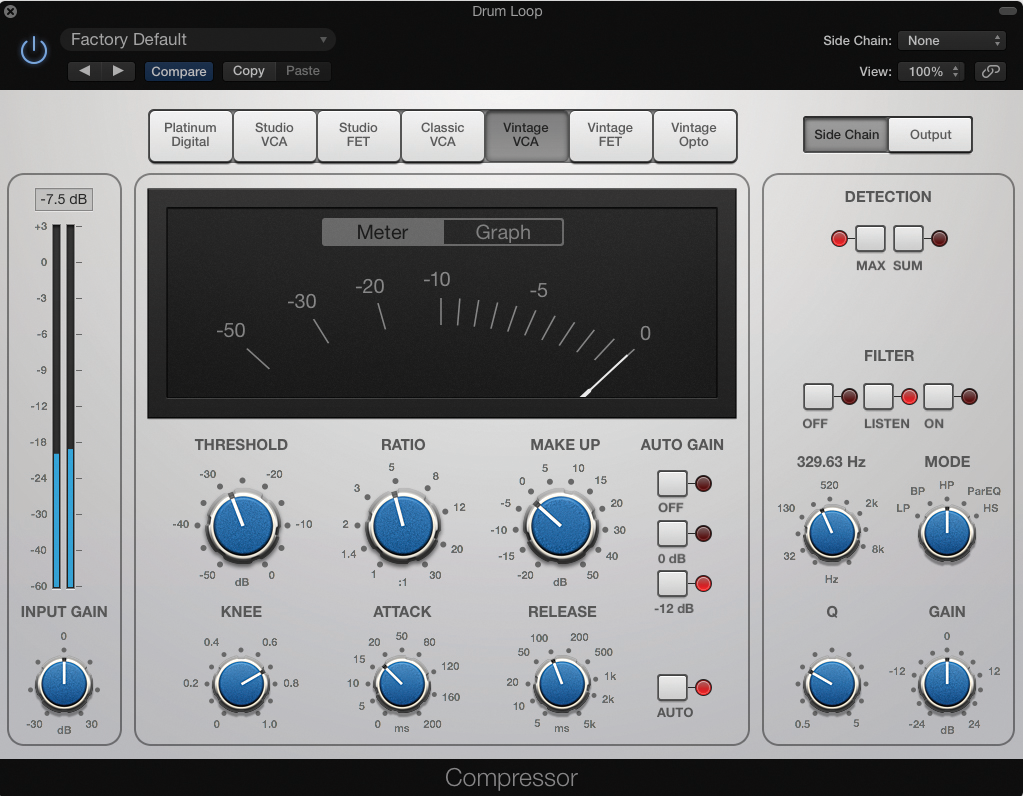
To have more control in relation to frequency, we make use of the compressor’s Side Chain section. The concept to grasp here is that there’s a distinction between the sound present at the input of the compressor, and the signal being used to ‘drive’ the compressor.
The Side Chain section of the Logic Compressor, therefore, looks not entirely dissimilar to an equaliser, but in this case, it’s not applying equalisation that we’ll hear in the output stage, but instead an equalised version of the Side Chain being used to feed the Logic Compressor.
In the previous example of a kick-heavy compression, the solution would be a high-pass filter (HP) set just above the frequency of the kick drum (around 100Hz). To fine-tine the Side Chain, use the Listen button, which will allow you to audition the Side Chain directly in the output of the plug-in, remembering to put filter back to On when you’re finished. Once active, the kick drum’s input on the Gain Reduction should be far less severe, resulting in a more natural, transparent-sounding compression. What we’ve created here, therefore, is frequency-conscious compression, where the Compressor’s response has been tailored to be more or less sensitive to specific frequencies.

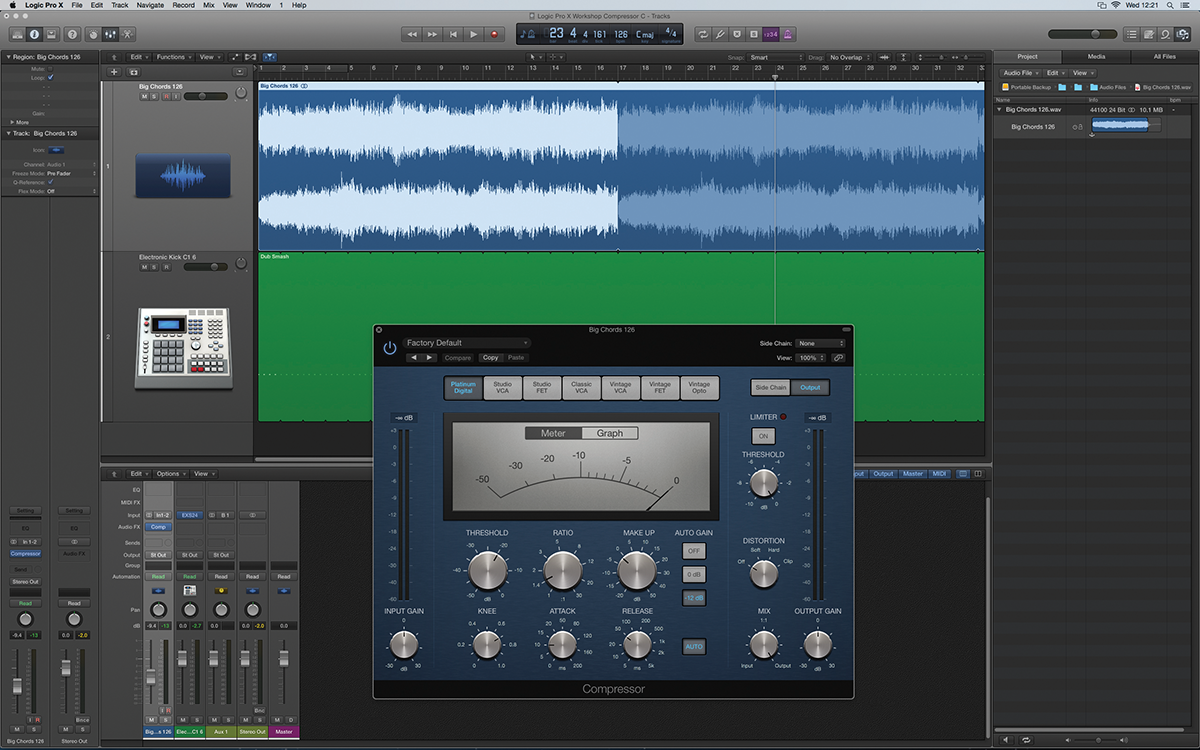
1: Open the first project included in the workshop folder. Across the drum loop, instantiate the Compressor plug-in and set up a moderate amount of compression using the Vintage VCA model – 5:1 Ratio, -30dB Threshold, medium Attack and Release.
2: Open the Side Chain section using the button on the top right-hand corner of the Compressor. In the Filter section, press Listen to hear the Side Chain input feeding the Compressor. By default, this is a low-pass filtered version of the input.

3:Reconfigure the Side Chain filter so that it removes the kick drum. Use the HP (high-pass) mode, and adjust the frequency so that most of the kick drum’s energy is attenuated. Deactivate the Listen mode and move the filter to On.
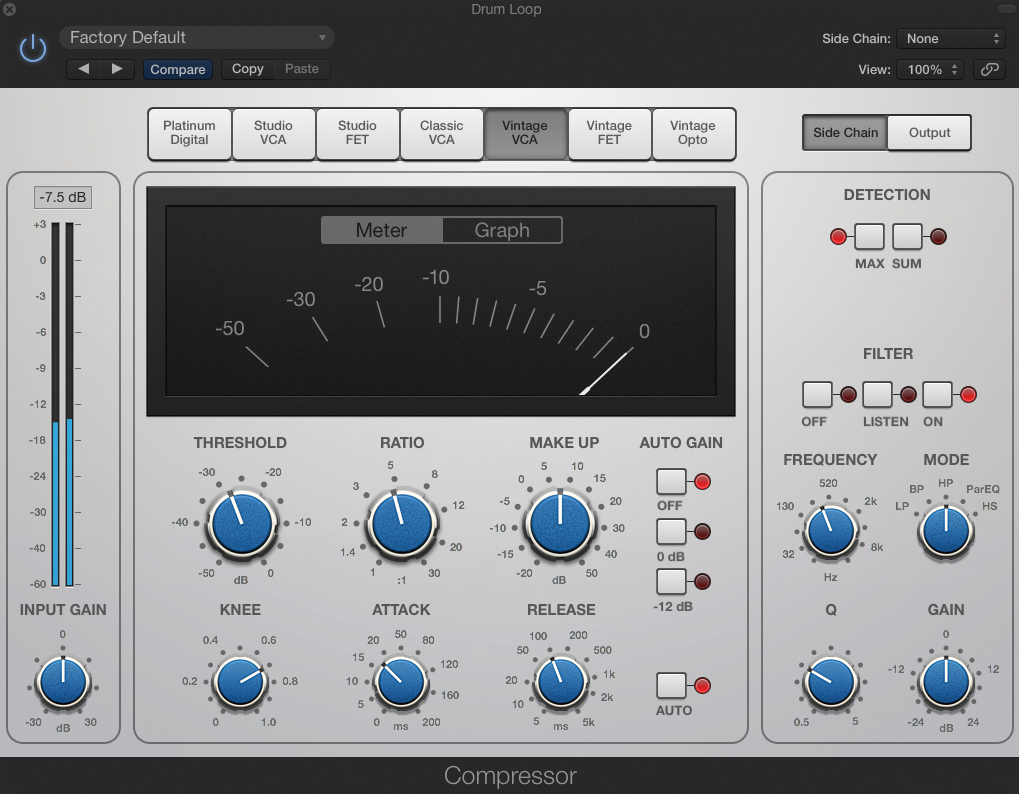
4: Toggle the Side Chain filter between on and off to hear the compression with and without kick drum attenuation. With the Side Chain in place the result is arguably more musical, and closer to how our ears hear the drums.
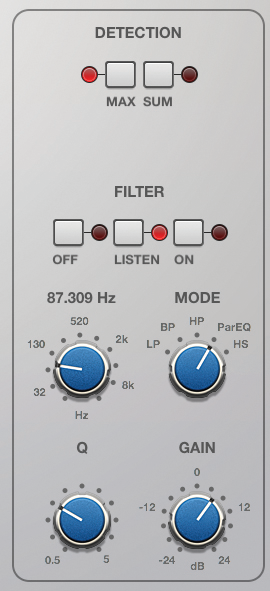
5: As an alternative, try adjusting the Side Chain so that the amplitude of the Kick is increased. This will create a deliberately ‘abused’ sound that ties the Compressor’s movement to the kick. Use the ParEQ mode and apply a gain increase at around 80Hz.

6: Now listen to the compression in action, which is now sensitive to the kick drum’s dominant frequency. You might want to adjust the Release times so that the movements are empathetic to the sound and speed of the kit.
Click Here To Continue To Part Two
This tutorial is endorsed by Point Blank. With courses in London, online and now in LA, Point Blank is the Global Music School. You can study sound to picture on their Music Production Diploma courses, with pro industry tutors.
