Logic Tutorial: Creative FX Routing – Step-by-Step
In this step by step guide Mark Cousins explores FX routing in Logic Pro X 1: Effects placed across inserts paths work cumulatively – in other words, each plug-in adds to the output of the previous insert. In this example therefore, the compressor compresses both the EQ’d drums and the reverb as it’s the last […]
In this step by step guide Mark Cousins explores FX routing in Logic Pro X
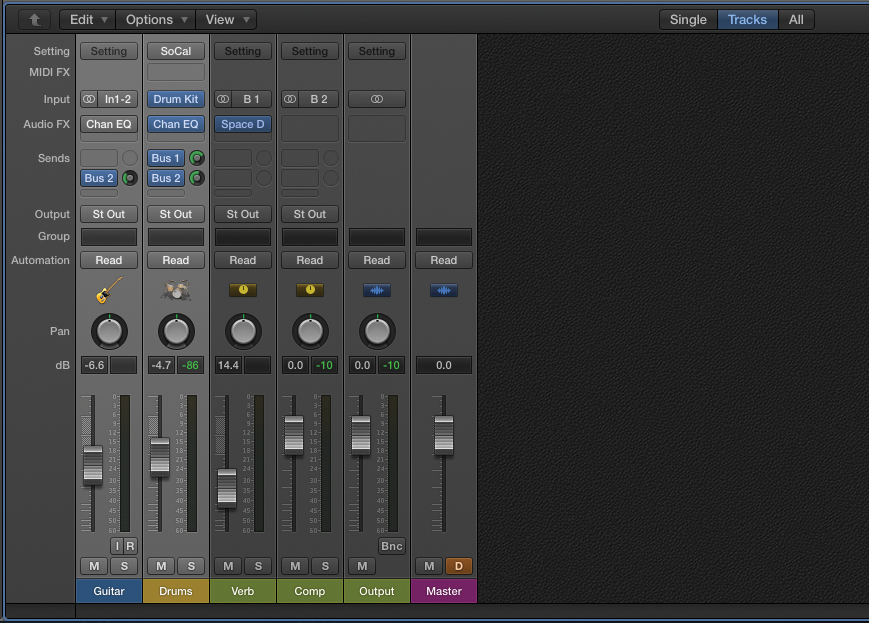
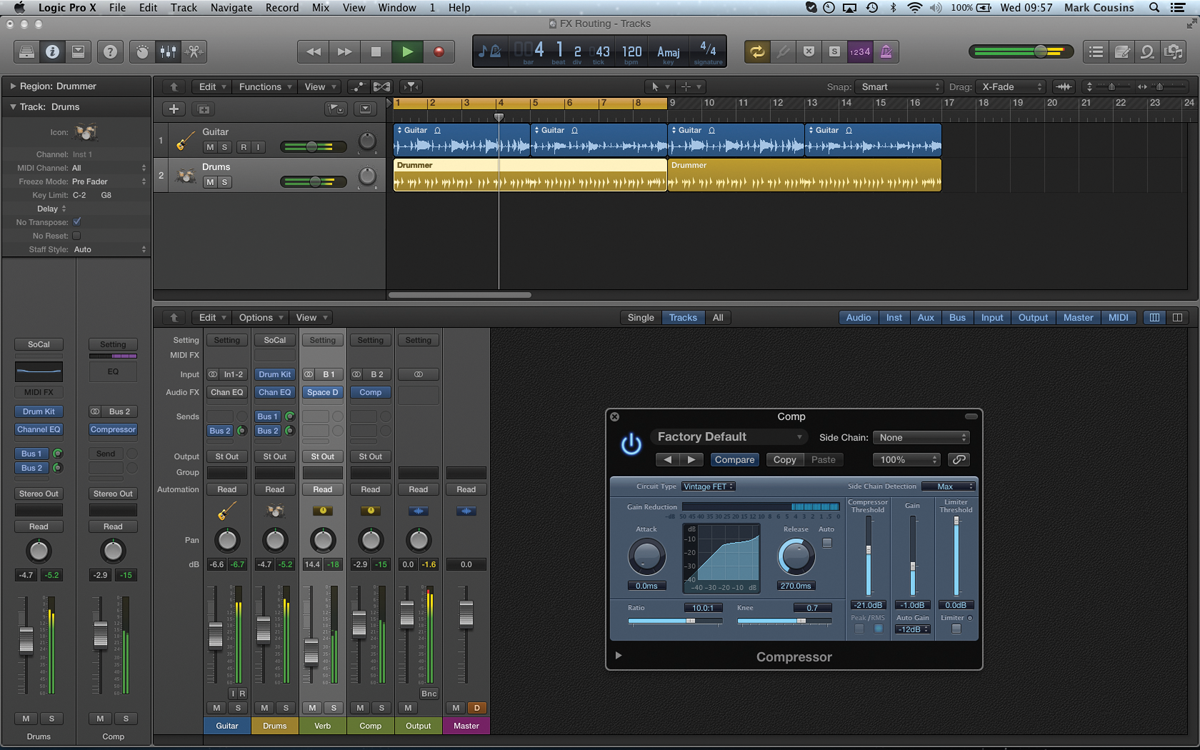
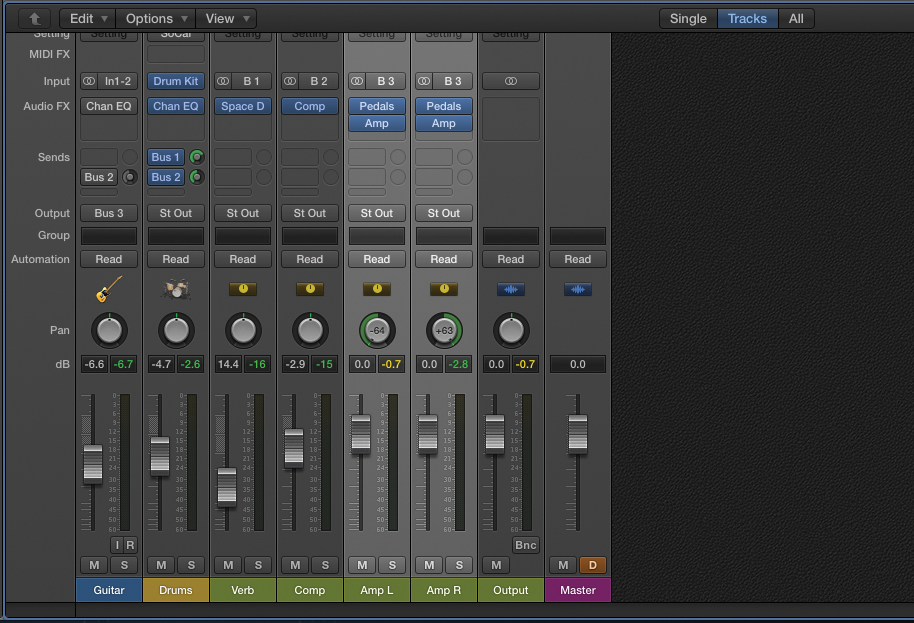
1: Effects placed across inserts paths work cumulatively – in other words, each plug-in adds to the output of the previous insert. In this example therefore, the compressor compresses both the EQ’d drums and the reverb as it’s the last plug-in in the insert path.
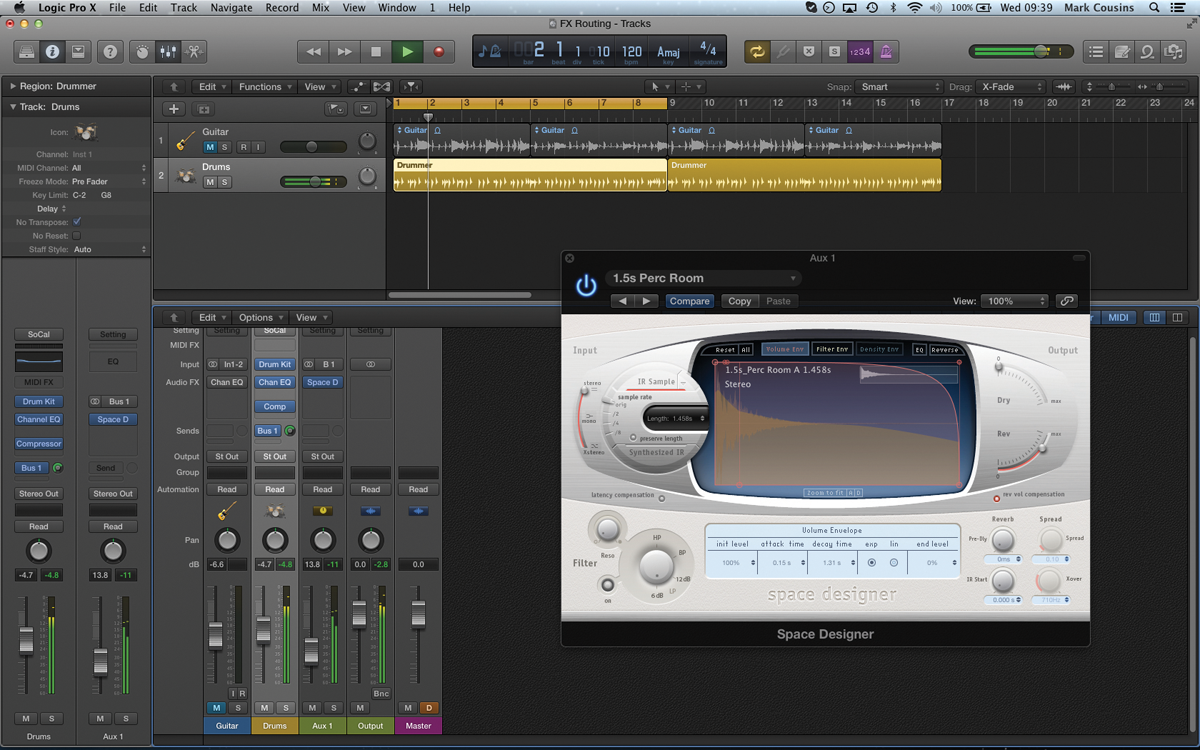
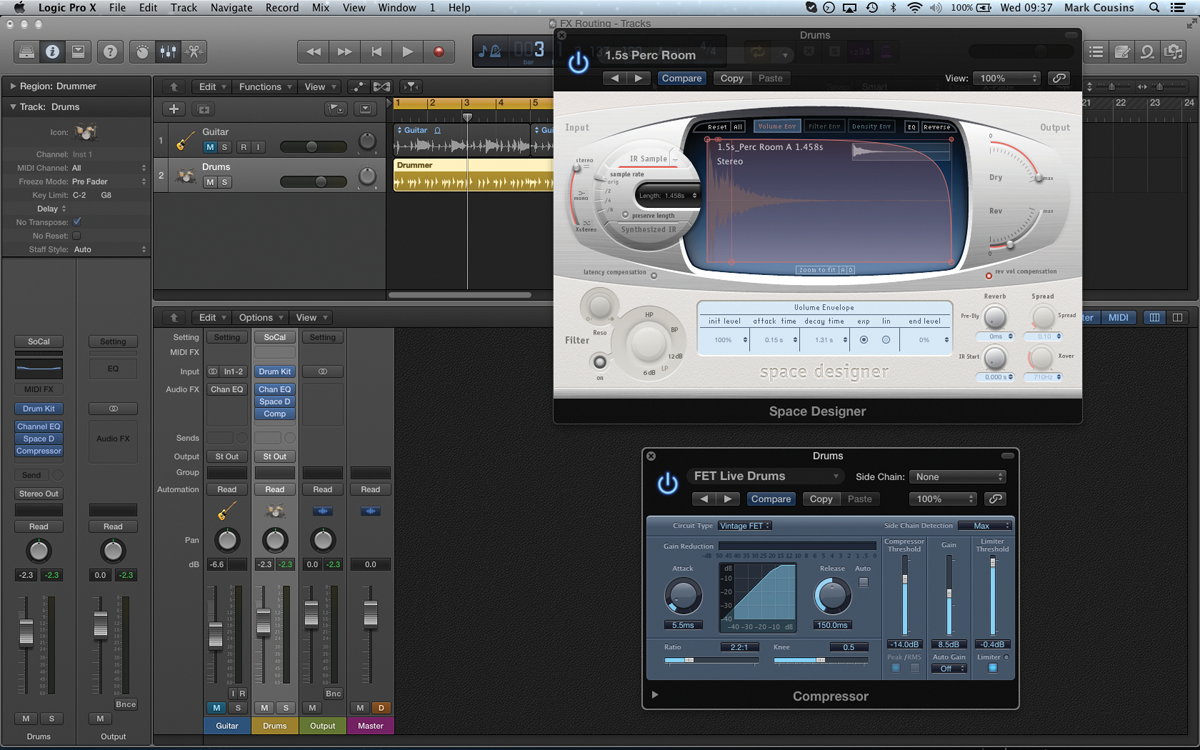
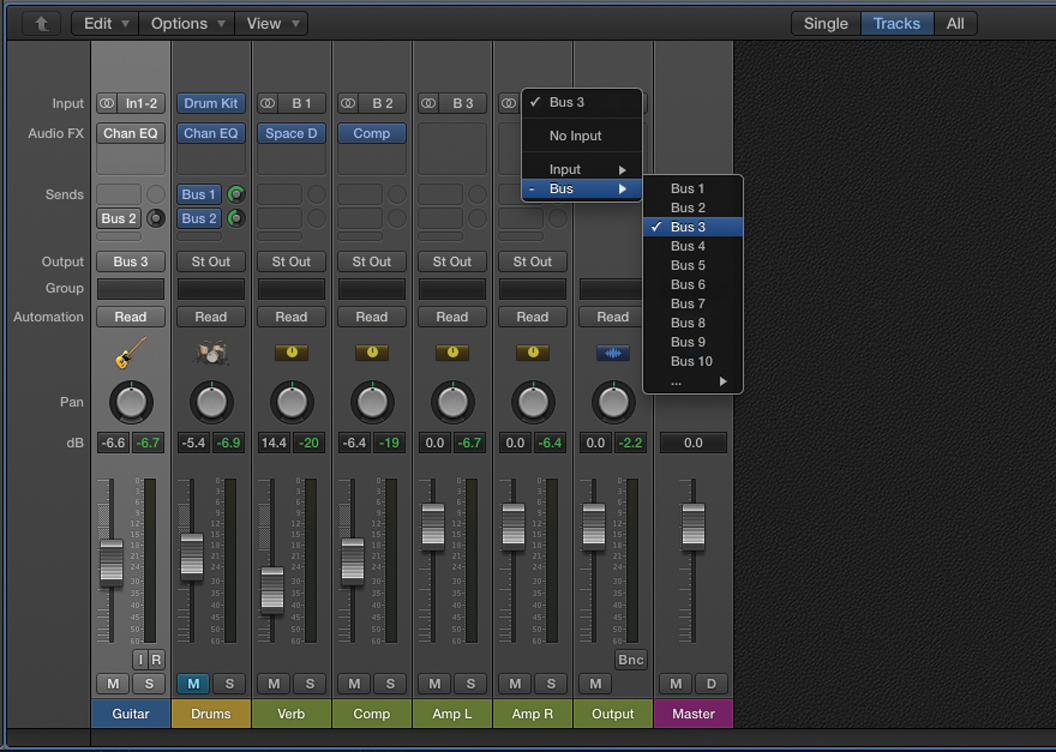
2: Using the aux sends system we have the option of ‘splitting off’ our effects, running them separately from the main channel insert path. With the reverb separate, the compressor isn’t compressing the reverb, just the sound of the EQ’d drums.
3: While we tend to perceive aux sends as being used for reverb and delay, they can be turned to a range of FX applications. The best example is parallel compression, whereby compression is applied via the aux sends, rather than inserts.

4: Create sends for both the guitar and drums and instantiate a compressor across the newly-created auxiliary channel. On the compressor, ensure there’s plenty of gain reduction being applied – with a fast attack, medium release and 10:1 ratio.
5: Blend-in the desired amount of signal from the aux channel, so that you add body to the drums and guitars. Varying the sends from the individual channels adapts the body-enhancing effect, maybe placing more emphasis on the drums and less on the guitar.
6: Now let’s take a look at processing the guitar using dual amplifiers. Change the guitar’s output assignment to Buss 3 – this will create a new auxiliary channel. Add another using the Mixer’s local menu: Options > Create New Auxiliary Channels.
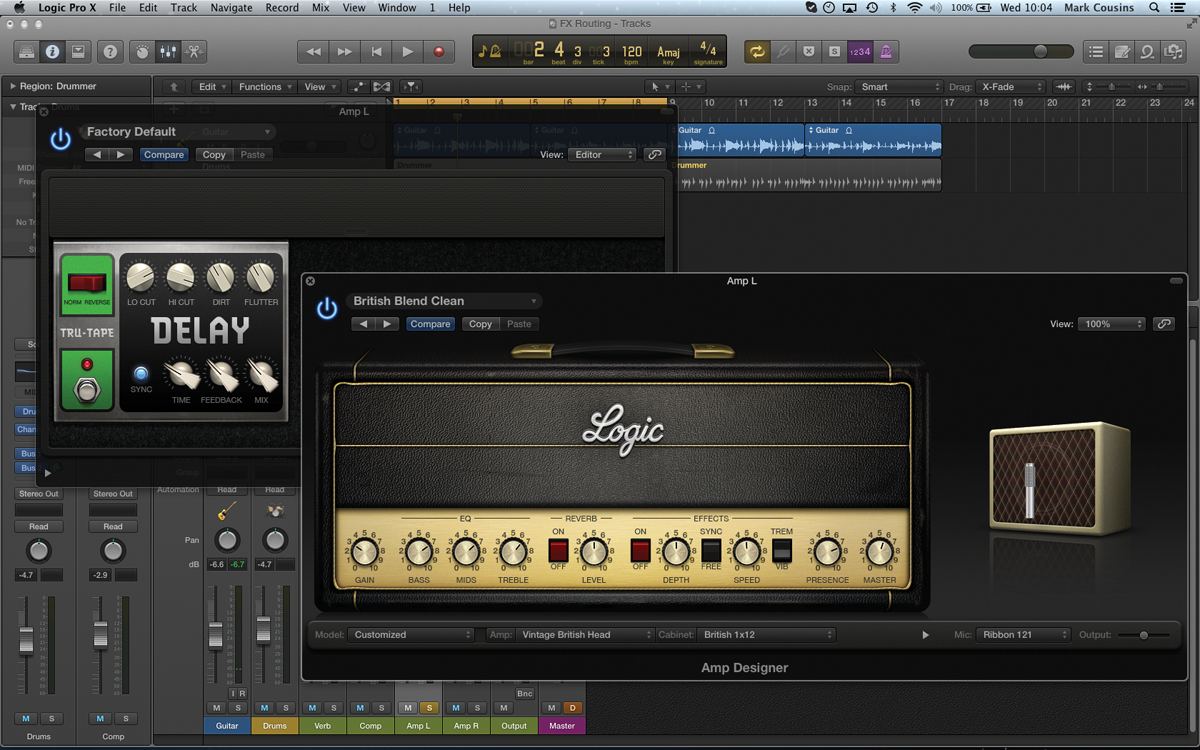
7: Make sure both auxiliary channels are set to Buss 3. On the first buss setup a combination of a tape delay and an amp setting of your choice. Set the Delay to its Sync setting, the time to 1/16th with just a small amount of feedback.
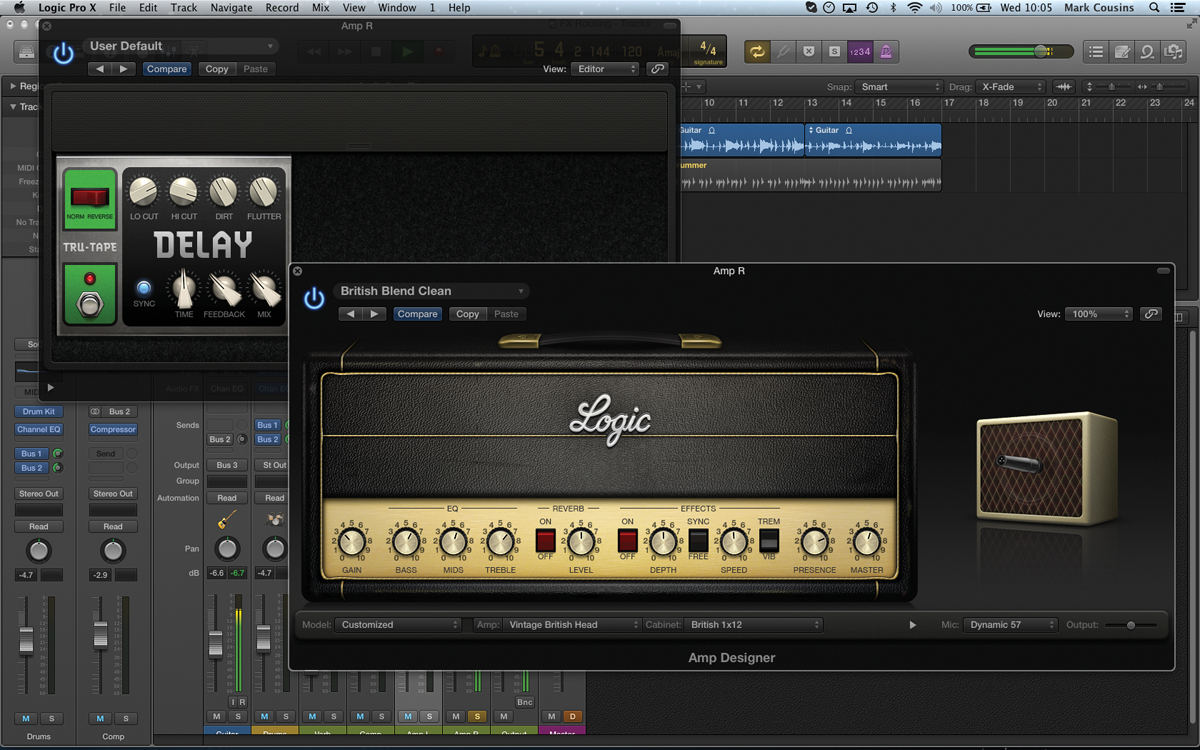
8: Duplicate the settings from the first buss (we’re labeled as Amp L) to the second (Amp R). Most importantly change the delay setting to 1/8th, and then make some small changes to the amp, like mic position and a bit more drive.
9: Pan the amps hard left and right. As the difference between the amps is subtle, we achieve a pleasant widening effect. The delay effect is more dramatic, though, with a distinct movement between the speakers courtesy of the different delay times.
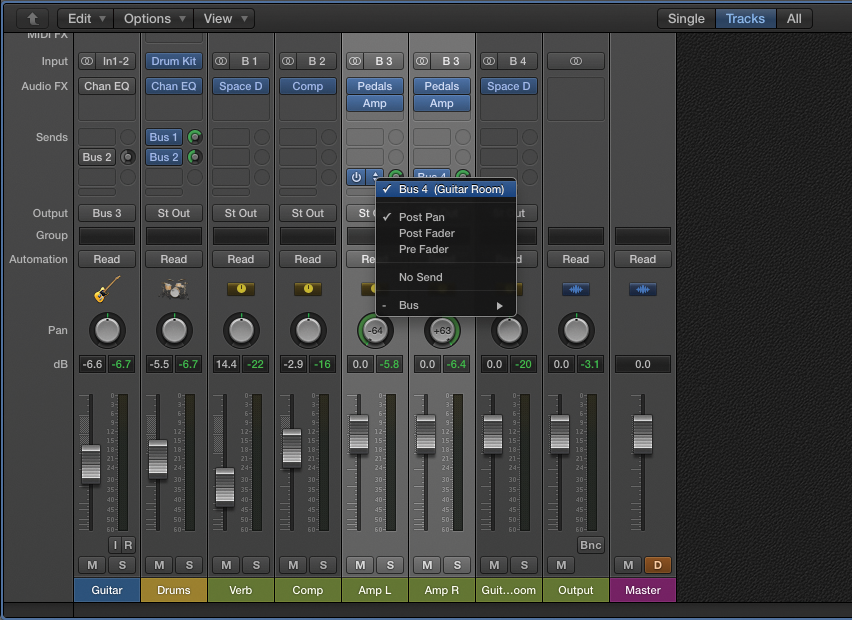
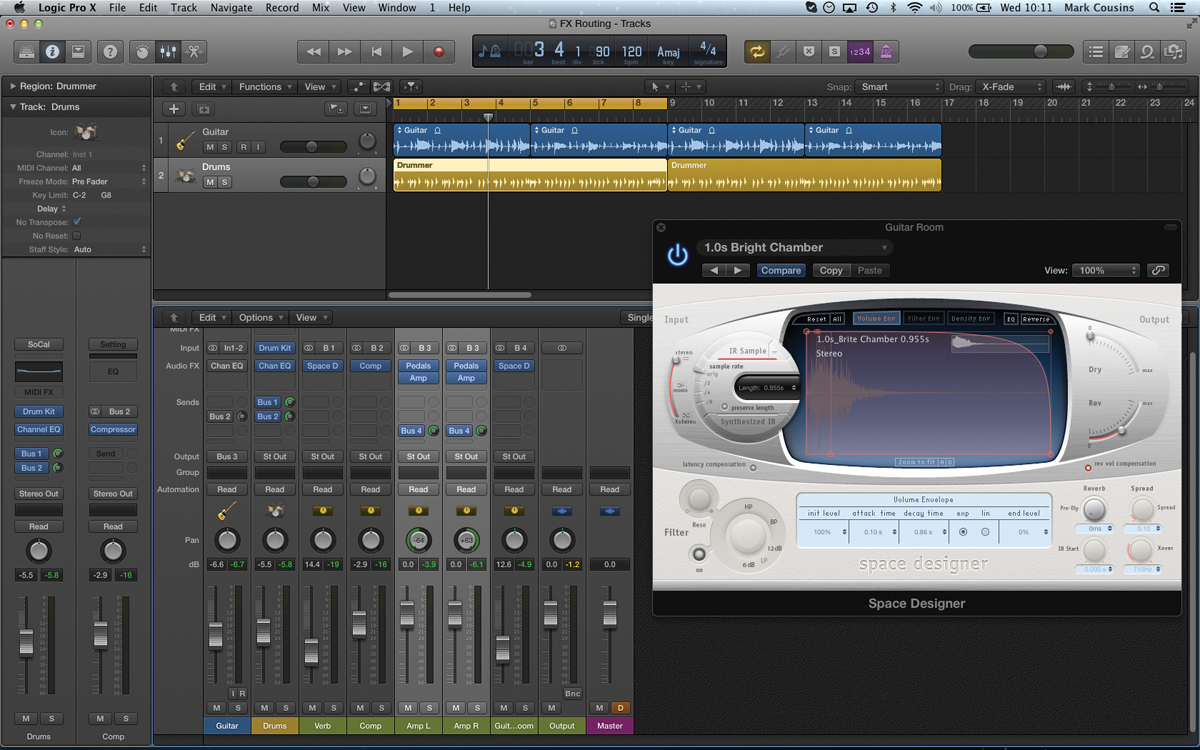
10: To place both amps in a virtual room, create a new buss send (to Buss 4) from the two auxiliary channels. Instantiate a reverb across the newly-created auxiliary channel with a small chamber setting.
11: Because of the way we’ve created the routing, you always have the option of monitoring through the plug-ins live. Of course, with the alternative method – where the finished audio track is simply multiplied – this isn’t possible.
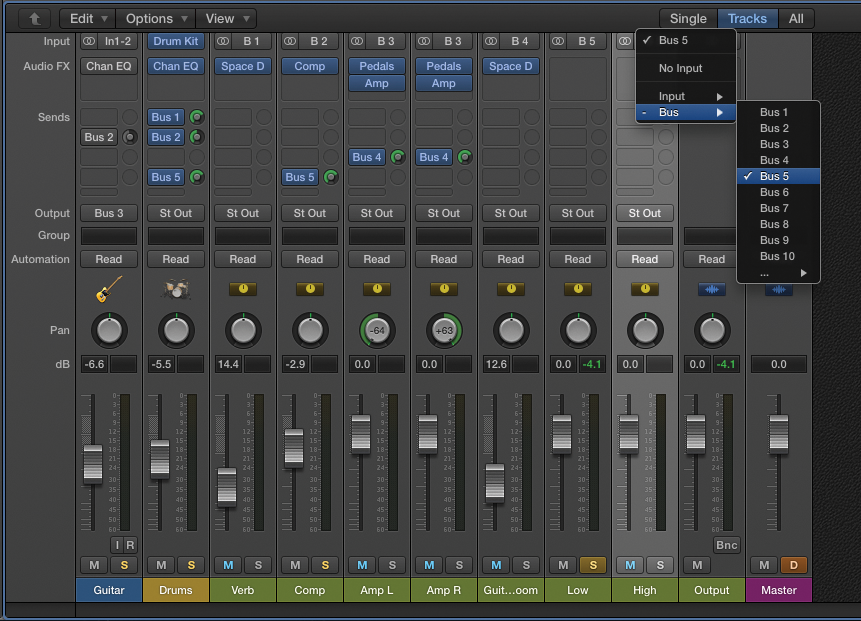
12: The next example explores the possibilities of parallel multiband distortion, using two buss sends from the Drums and Compressed Drums channels. Create two aux faders both set to the same buss input – Buss 5, in this case.
Click Here to Continue
