Logic Pro X Tutorial – Logic’s Updated Delay Plug-ins
With a graphic refresh and a host of new features, Logic’s delay plug-ins have never looked or sounded so good. Mark Cousins experiences the joys of repetition… It’s great to see a range of plug-ins receiving a much-needed facelift as part of the continual development of the application. From the vintage-styled Compressor to a range […]
With a graphic refresh and a host of new features, Logic’s delay plug-ins have never looked or sounded so good. Mark Cousins experiences the joys of repetition…

It’s great to see a range of plug-ins receiving a much-needed facelift as part of the continual development of the application. From the vintage-styled Compressor to a range of sample-accurate metering options, Logic’s plug-ins have not only received a visual upgrade, but also some important functional improvements. Arguably the most welcome developments have been the sonic functionality in Logic’s Delay plug-ins – including Stereo Delay, Tape Delay, and Sample Delay – adding improved routing options, distortion and so on.
Like Compression, EQ and Reverb, delay is a great way of adding interest to vocals, synths, guitars and a range of other instruments. Recognising this, Logic Pro X includes three principal delays effects – the aforementioned Stereo Delay, Tape Delay, and Sample Delay – which can be used for a number of different audio effects. Each delay plug-in brings a unique set of parameters, as well as a definable sound, so it’s well worth understanding how best to exploit these traits.
Tape Head
Whether or not you like ‘lo-fi’ treatments, I’d strongly recommend Logic’s Tape Delay plug-in as your primary plug-in for delay-based tasks in mixing. Based on a single delay line, Tape Delay is arguably the most straightforward delay plug-in to work with, whereas the other two delay plug-ins – Stereo Delay and Sample Delay – have a separate delay tap for each side of the stereo signal.
As we’ll see later on, despite the apparent appeal of a true stereo delay, it can also create its fair share of sonic problems that can impair the effectiveness of your mix.
The real beauty of the tape delay is, of course, its ‘coloured’ sound. Put simply, a delay sounds more musical when it’s not a flawless repeat of the input – whether it’s something as simple as a contrasting timbre or, in extreme cases, a touch of added distortion.
Compared to the Tape Delay plug-in in Logic Pro 9, which largely kept its signal degradation under wraps, it’s pleasing to see direct access to the ‘Character’ of the tape delay – moving between a subtle rolling off of the high-end, for example, to the more saturated delay effects used in dub music.
Another unique factor in the Tape Delay plug-in is the Modulation section. This Modulation section can be thought of as adding warmth to the output, effectively though the introduction of pitch-modulation artefacts.
In the case of the Flutter controls, we have a direct emulation of the small pitch instabilities that occurred on tape (especially when the mechanism wasn’t kept particularly clean), which you can add in varying amounts. The LFO control modulates the delay time, effectively creating the shimmering effect we know of as Chorus. As you’d expect, both of the Flutter and LFO controls come in really useful on guitars and vocals, where the extra warmth and pitch modulations sound pleasing to the ear.
Super Stereo
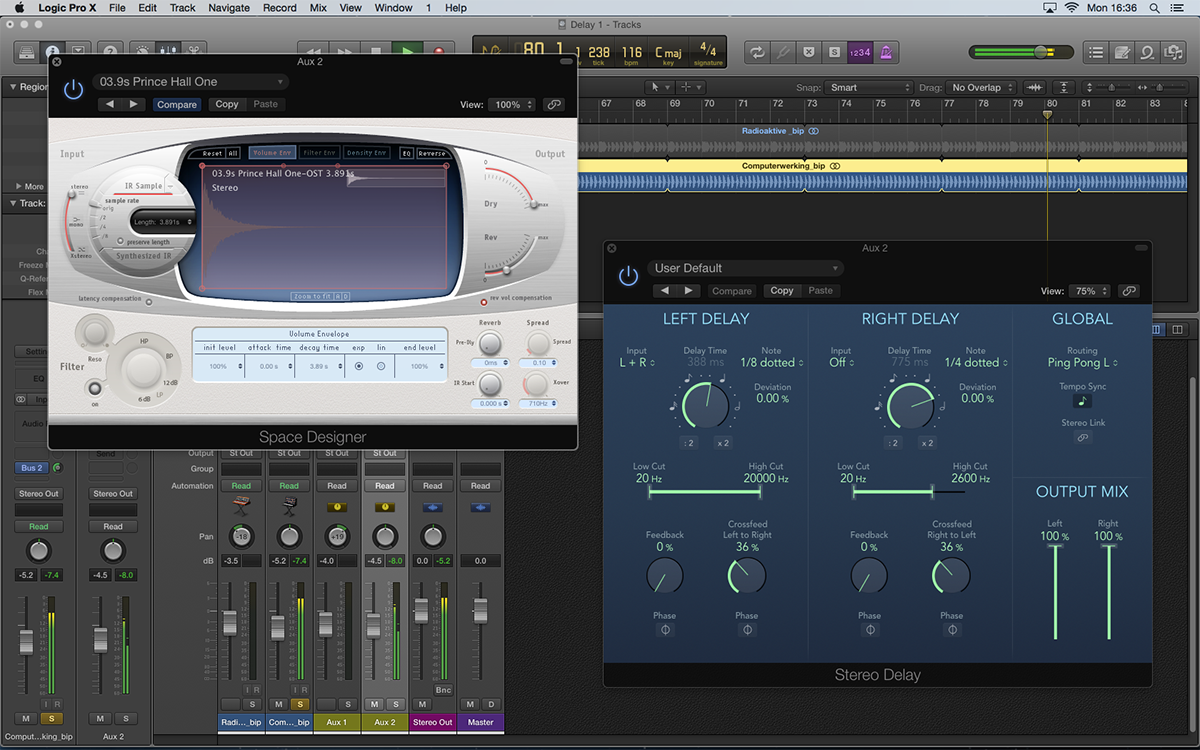
As the name suggests, Stereo Delay is specifically designed as a means of creating delay effects that vary between the left and right-hand channels. A classic ‘ping-pong’ delay effect, for example, will appear to jump from one side of the mix to other, usually working with a tempo-based time division. On its own, Stereo Delay certainly sounds impressive, but it can dominate the extremities of the sound stage.
In theory, the prime ‘real estate’ of any mix is either dead centre, or the extremes of left and right, and as such, you should avoid placing too many sounds in these all-important areas.

On the whole, the parameter set for the Stereo Delay plug-in is relatively straightforward, with an individual delay time for each channel, a basic low- and high-cut control, and two forms of feedback.
One prominent improvement in the way the plug-in works is the Routing control, which has a number of drop-down options that govern how the signal moves between the left and right-hand channels.
In effect, the Routing control works with the Feedback, Crossfeed and Phase controls, which would have previously needed to be set manually in order to configure effects like ping-pong delay. By quickly switching routing settings, therefore, you can explore a number of different styles of stereo delay.
In Sync
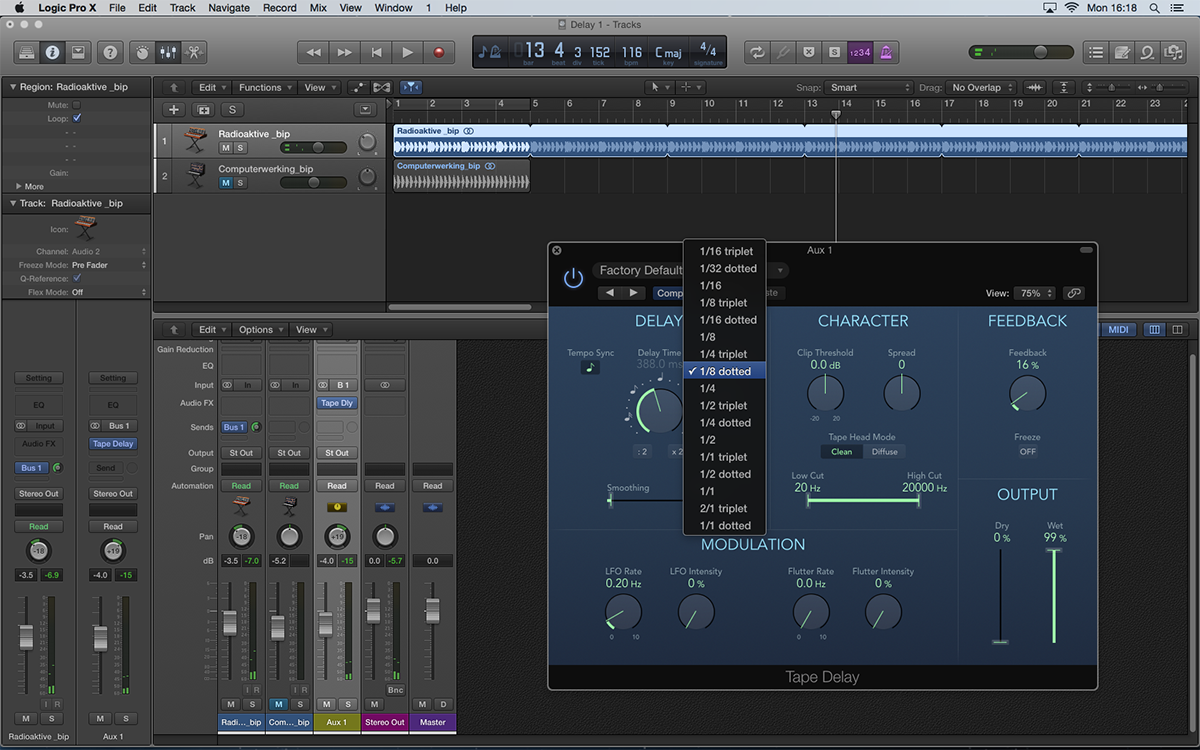
One feature common to both Tape Delay and Stereo Delay is the ability to lock delay time to a tempo-based division using the Tempo Sync button. In many cases, this is often the preferred application for delay, as exemplified by The Edge’s tempo-synced guitar delay, where the effect becomes a rhythmic feature in its own right. In this respect, it’s well worth exploring the syncopated delay settings (like 1/8 dotted), where the delays don’t fall onto main beats.
While most delays nowadays tend to be tempo-synced, there’s still a lot to be said for delay settings that don’t fall on grid divisions. The classic Tape Slap effect, for example, uses a delay time between 50 and 100ms as ameans of doubling an existing sound, like a vocal or a guitar line.
Add a small amount of LFO modulation on the delay time, and you’ll create what is often referred to as Automatic Double Tracking – or ADT – which approximates the sound of an instrument being double tracked. Again, ADT is something that has fallen out of use (mainly because infinite track counts make real double tracking easy), but although artificial, it has a sound of its own.
Delayed Reaction
Despite some strong third-party offerings, Logic’s Delay plug-ins are assured, dependable solutions that still get plenty of daily use in our studio. The combination of low CPU load, plenty of tweakable parameters and a great sound make them hard to resist.
See the walkthroughs for coverage of key parameters with the Tape and Stereo Delay, plus an advanced example for creating dub-like delays.
Focus On – Sample Delay
With just few controls to play with, Sample Delay isn’t a plug-in drenched in features, but don’t let this apparent simplicity put you off. Beneath its relatively simple exterior lies a number of interesting practical possibilities covering both corrective and creative applications. One primary use is in the time alignment of microphone capsules, especially where microphones are placed at relatively large distances.
Try applying a delay of 129 samples to your close mics for every metre of distance between them and a set of ambient mics. You can also try delaying one side of a stereo signal by around 50 to 100 milliseconds, to recreate the Haas Effect. The result is a shifting of the stereo image, with the delayed version appearing slightly quieter to the ear.
Step-by-Step – Reverb Basics
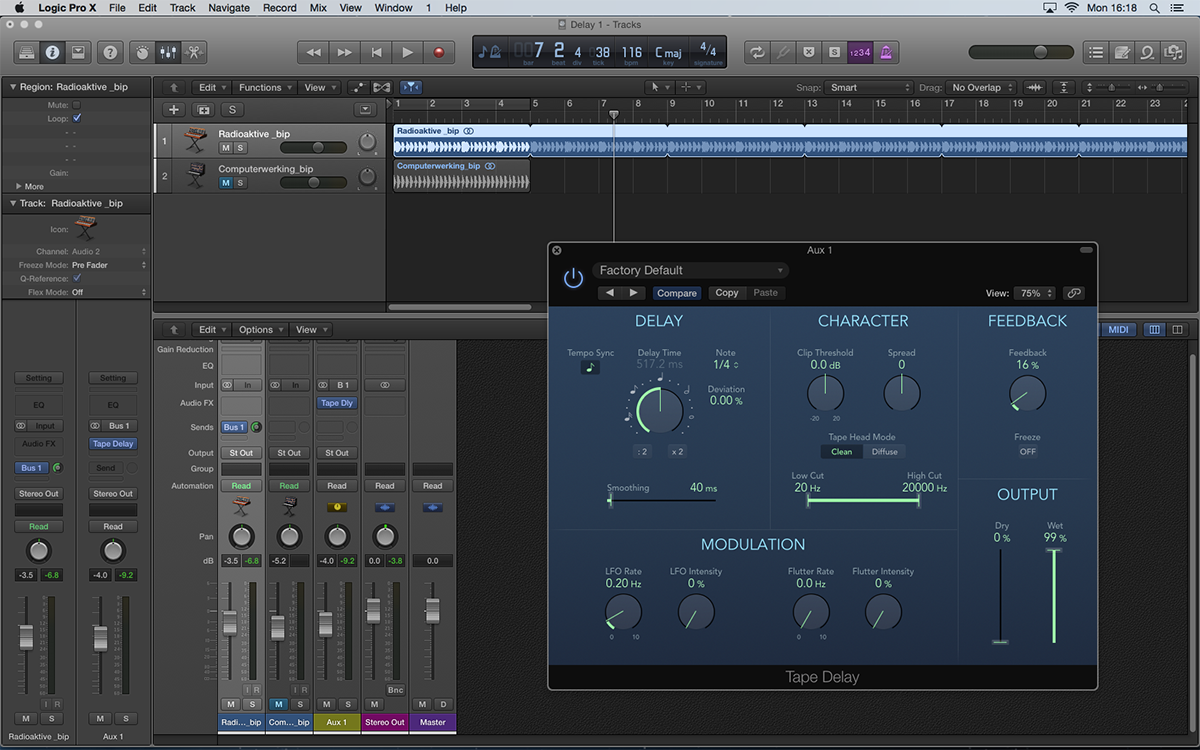
1: Create a bus send from the synth line on the first track. Across this bus, load an instance of the Tape Delay plug-in. You can set the wet/dry ratio either by reducing the bus send level, or by lowering the aux fader’s level.
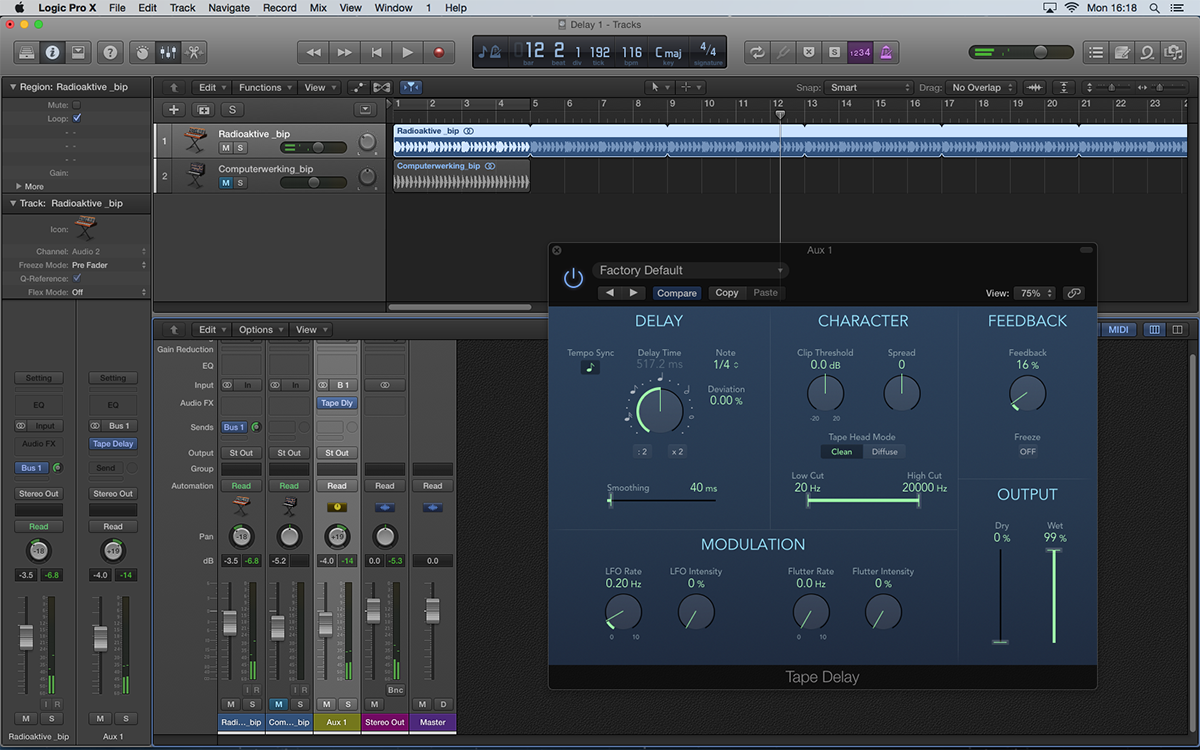
2: As Tape Delay works with just a single tap, it’s well worth thinking about the relative panning of the dry and wet signals. Panning each component slightly off-centre can help create some additional movement to the delay effect.
3: With the Tempo Sync button active, you can quickly move between a variety of tempo-matched delay settings. The dotted settings (like 1/8 dotted, which we’re using here) often work well as the delays will fall on syncopated beats.
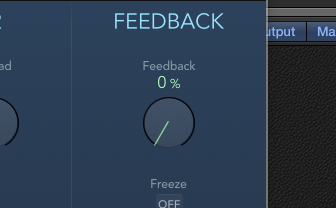
4: Adjust the Feedback control to create the desired amount of repeats. We’re reducing it to 0%, as we just want a single delay, but you could also choose to raise Feedback right up until the delay goes into self-oscillation.
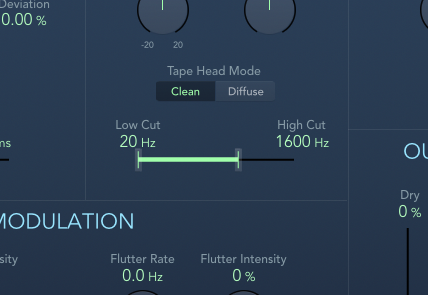
5: Change the colour of the repeats using the Low Cut and High Cut controls. Setting High Cut around 1600 Hz rolls off the high-end nicely, creating a darker delay. Use Low Cut to produce a progressively thinner sounding delay.
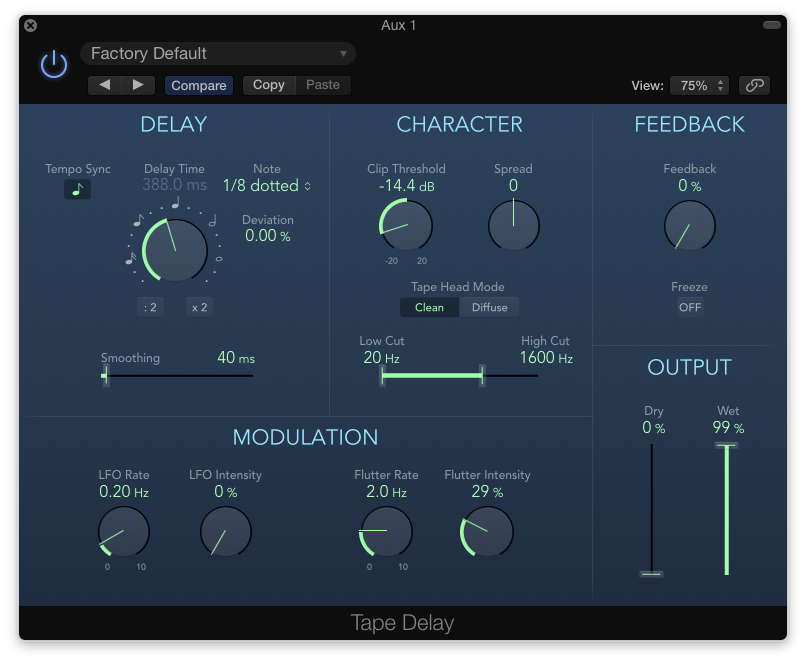
6: To change to degradation of the virtual tape unit, try varying the Clip Threshold and Flutter controls. Lowering the Clip Threshold will produce a more distorted sound, whereas Flutter adds small pitch deviances to the delayed signal.
Click Here To Continue
This tutorial is endorsed by Point Blank. With courses in London, online and now in LA, Point Blank is the Global Music School. You can study sound to picture on their Music Production Diploma courses, with pro industry tutors.
