Logic Pro X Tutorial: Logic’s Updated Delay Plug-ins – Step-by-Step
In this step by step guide to using Logic’s updated delay plug-ins Mark Cousins takes a look at stereo and dub delay… Stereo Delay 7: Now let’s explore the application of Stereo Delay on the second synth track. The Stereo Delay has a different delay line for each respective channel (left and right). In this […]
In this step by step guide to using Logic’s updated delay plug-ins Mark Cousins takes a look at stereo and dub delay…
Stereo Delay
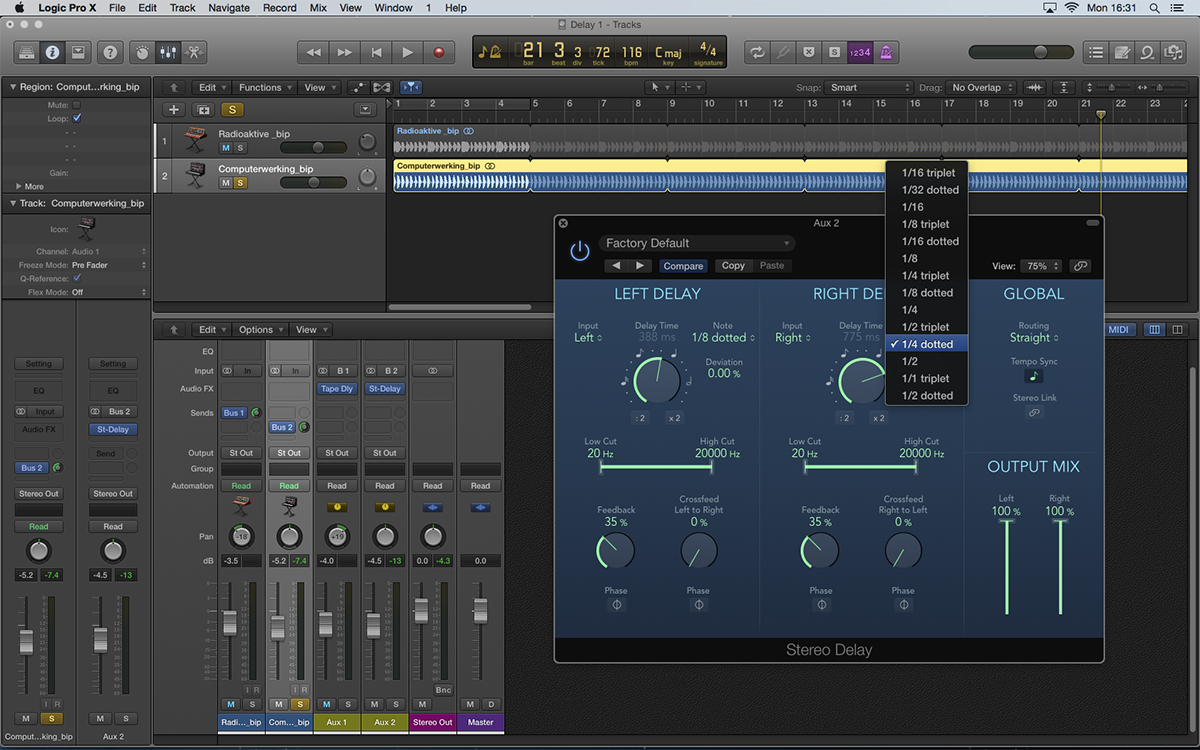
7: Now let’s explore the application of Stereo Delay on the second synth track. The Stereo Delay has a different delay line for each respective channel (left and right). In this example, we’ve loaded two different dotted settings on each channel.
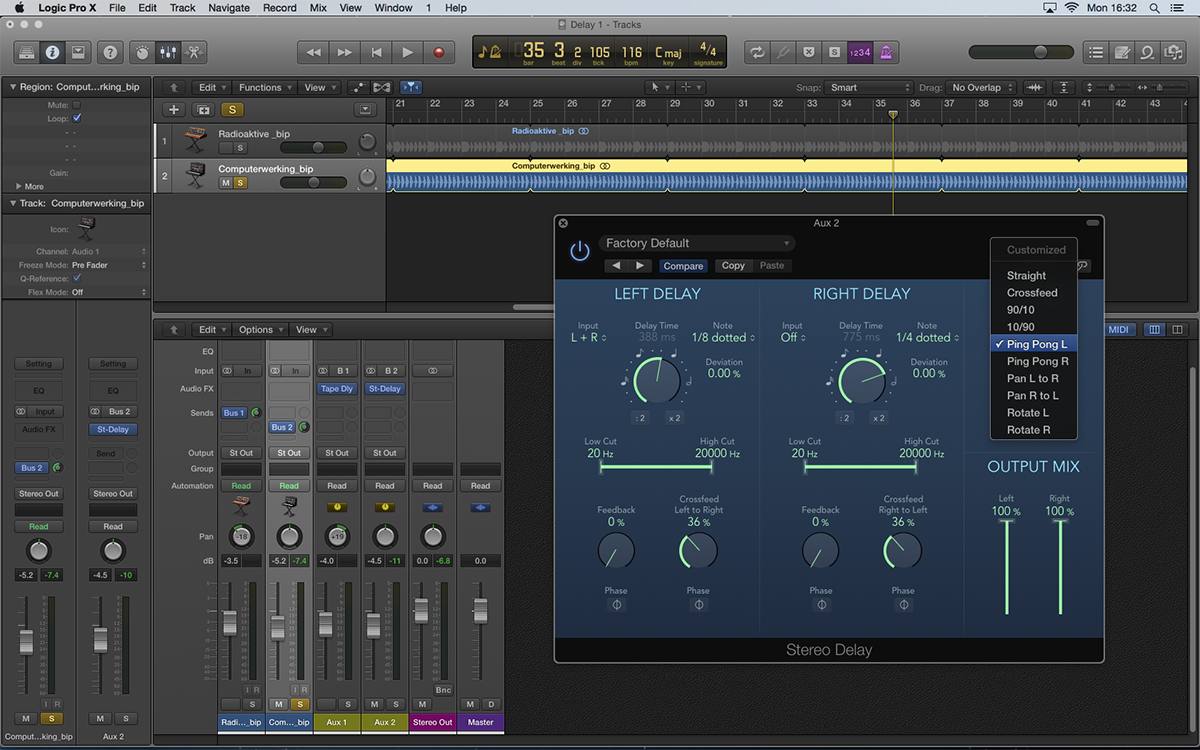
8: The Routing button lets you quickly explore a variety of signal routing options between the two channels of delay. The Ping Pong setting, for example, creates an effect where the delayed signal is passed from one channel to the next.
9: Some of the more complex routing options include both Crossfeed and Feedback setting, as well as phase reversal. The result is a more complicated delay, which appears to move around the stereo sound stage and surround the listener.
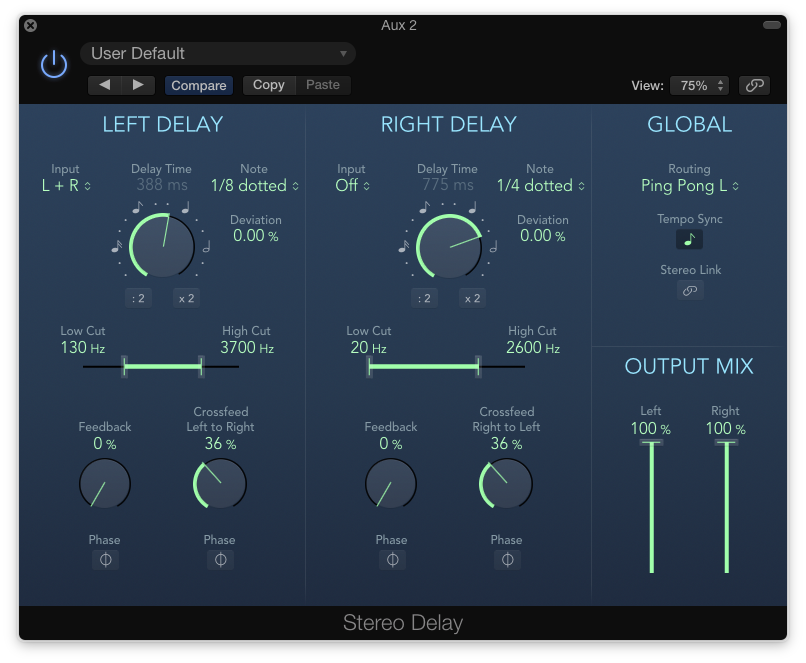
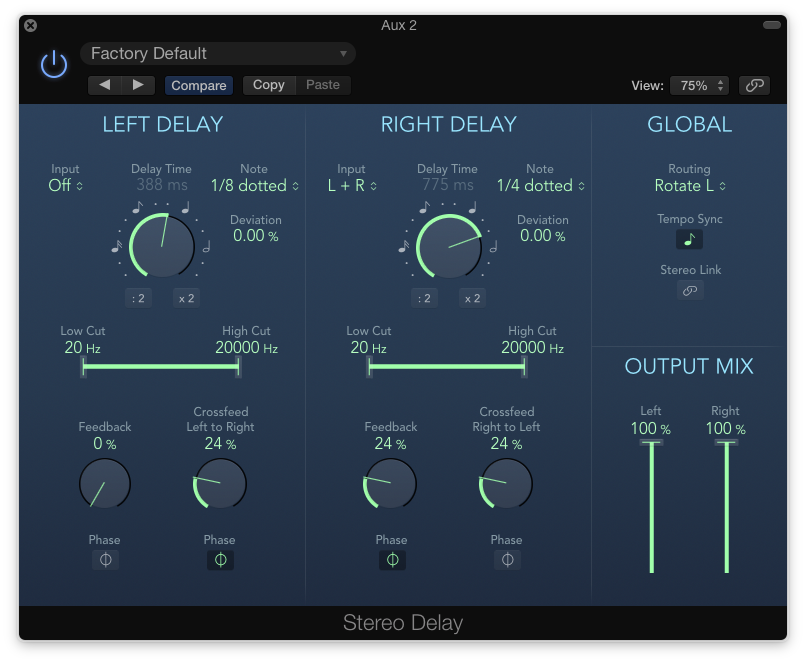
10: The Stereo Delay doesn’t have the distortion options included on the Tape Delay, but it does have Low and High Cut filters on a per-channel basis. In this example, we’ve reduced the High Cut on both channels, and the Low Cut on the left channel.

11: Sometimes, the extremities of the Stereo Delay can appear to be too wide for a mix. In these situations, try inserting an instance of the Direction Mixer after the Stereo Delay. Reducing the Spread control will make the delays progressively monaural.
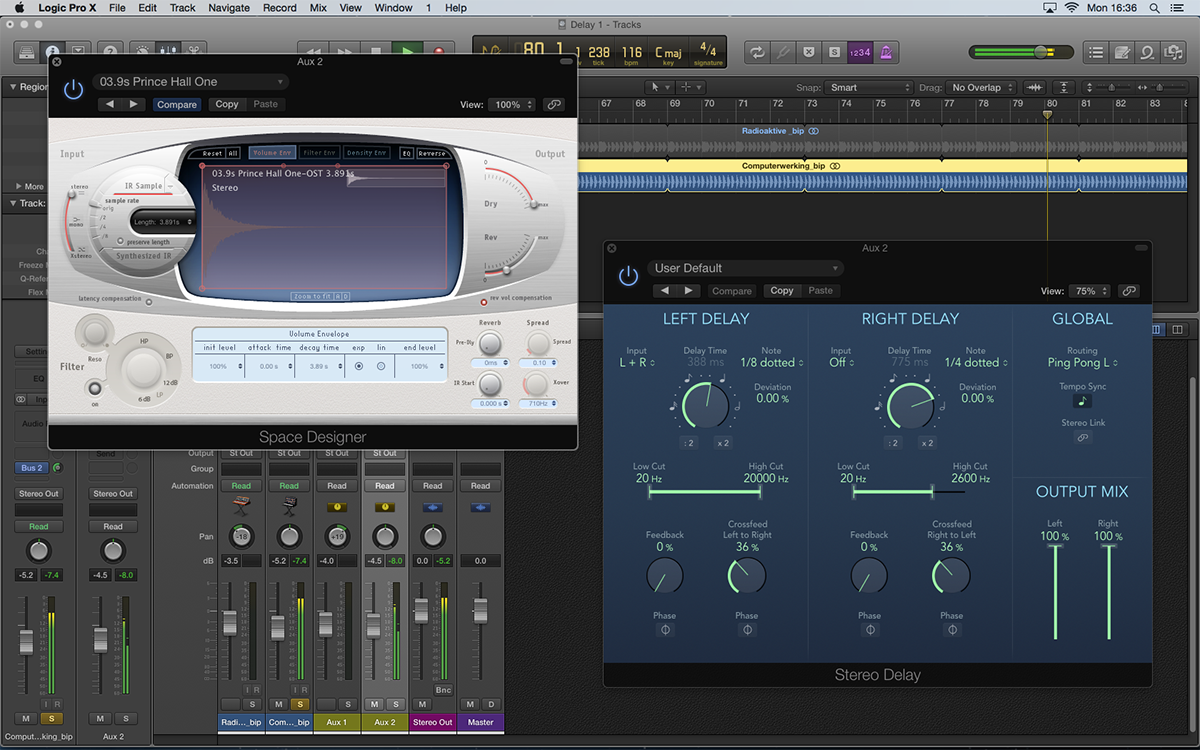
12: If you want the delays to recede in the mix, consider placing an instance of Space Designer after the Stereo Delay plug-in. The plug-in will default to a 100%-wet setting, though, so you’ll need to balance the Rev and Dry faders accordingly.
Dub Delay
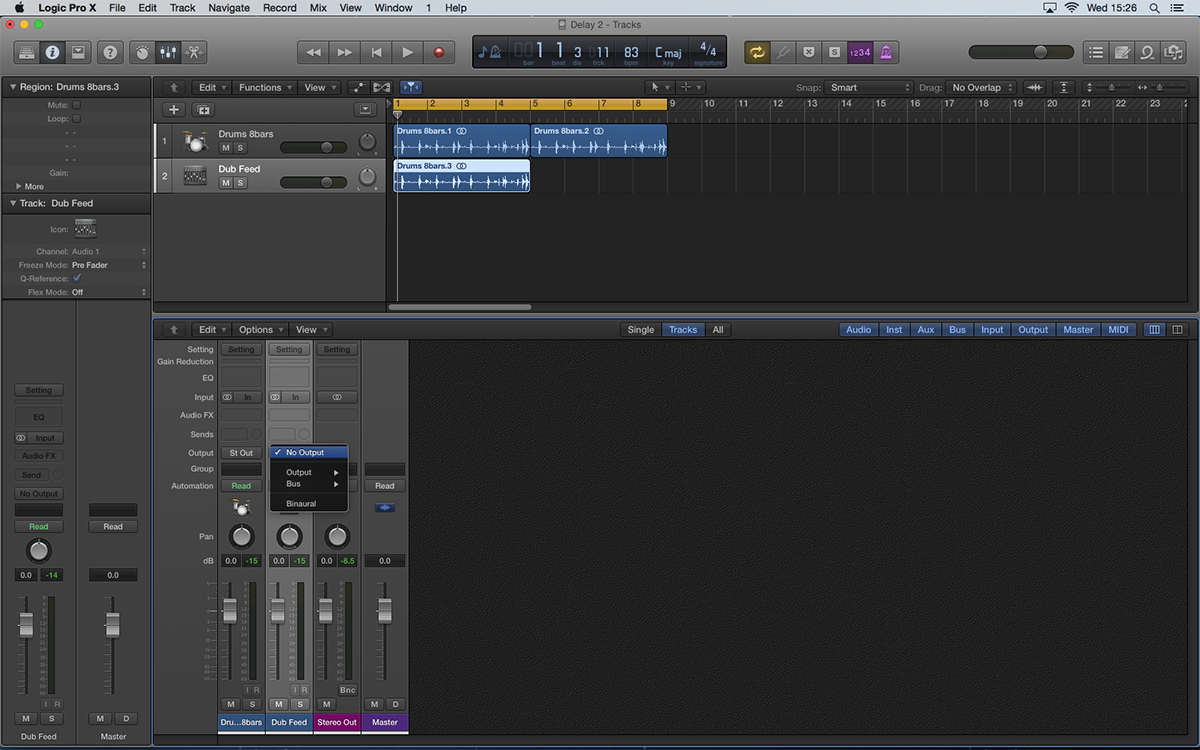
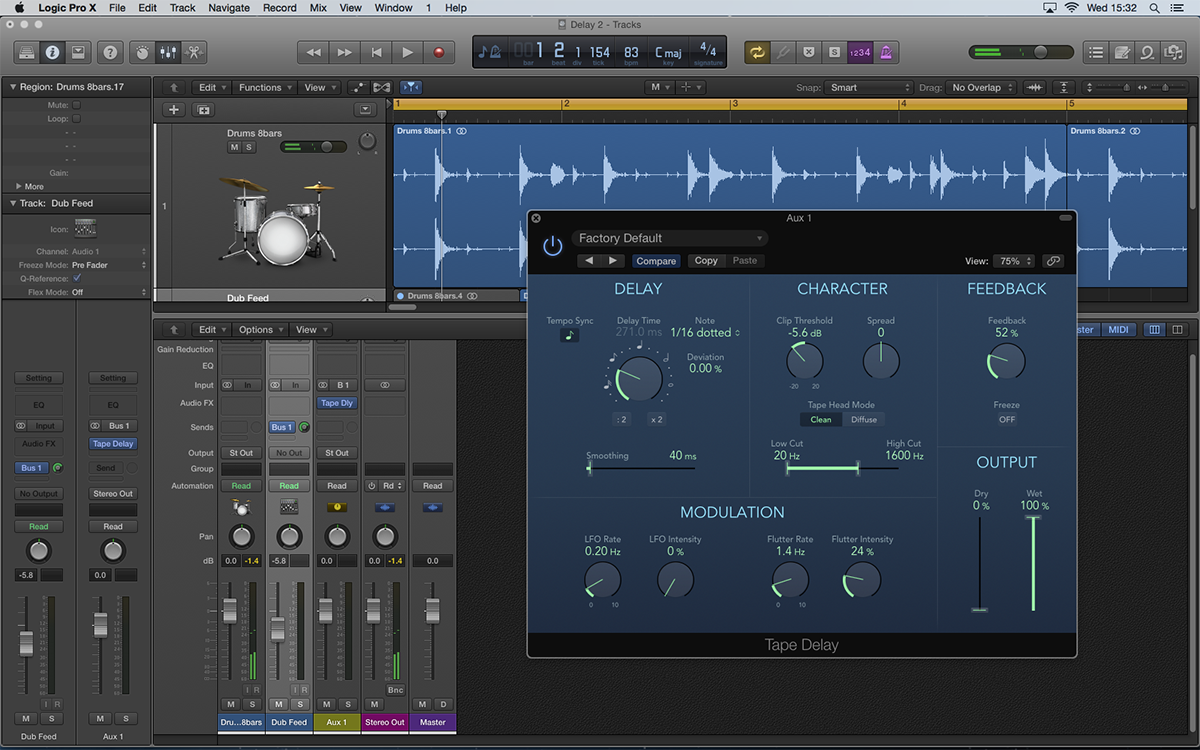
13: In this last example we’re going to explore the application of dub-like delays using the second Logic Project. Start by creating a duplicate track lane, with a copy of the drums region dragged across, set to No Output in the mixer.
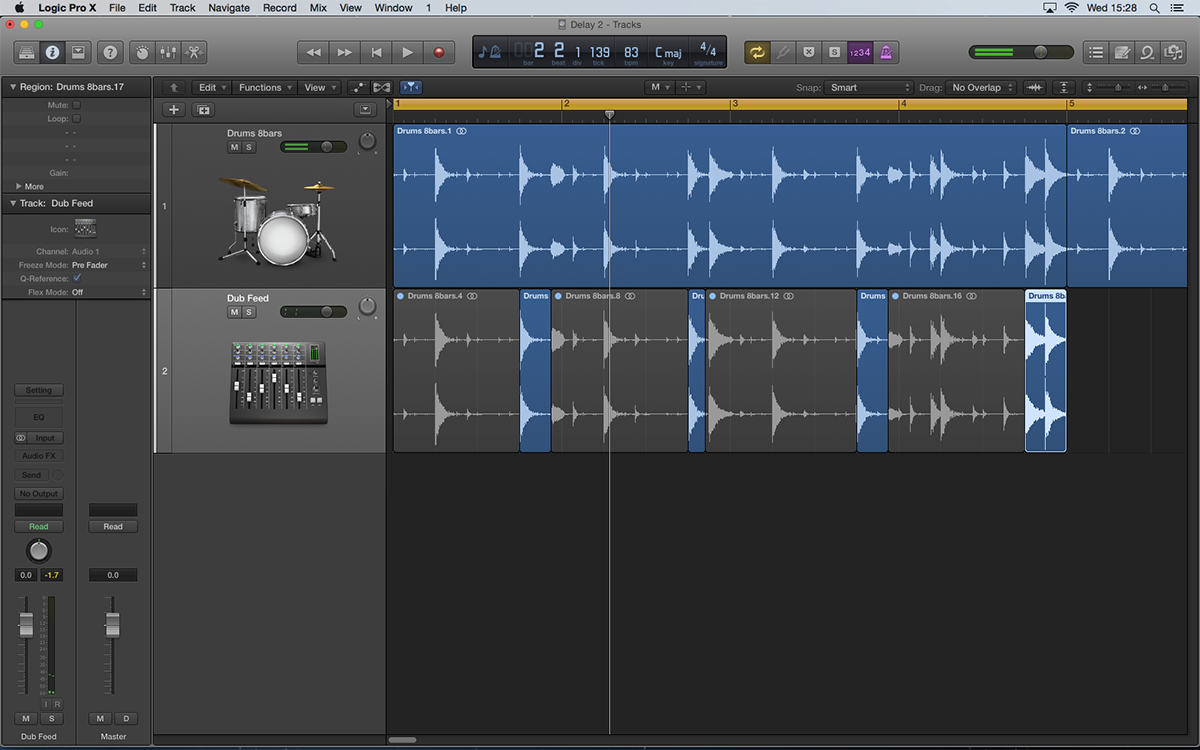
14: On the new track, edit the drum loop so that the region is only active when you want the dub delay effect to occur. You could do this by automating a bus send, but the ‘edited region’ solution is arguably easier to visualise.
15: Now create a bus send from the track with the edited region, with an instance of Tape Delay. The setting uses a 1/16 dotted setting with plenty of high-end roll-off, a lowered Clip Threshold and a touch of Flutter to degrade the sounds.
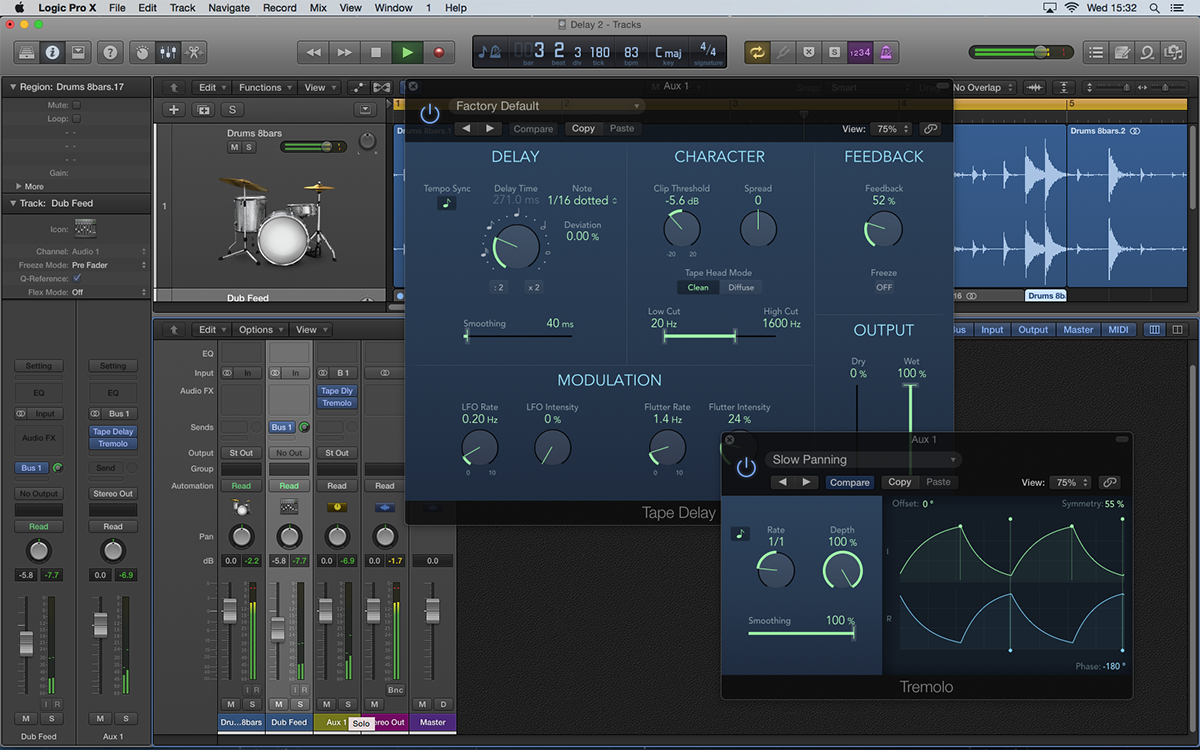
16: For another level of interest, we’ve added an instance of Tremolo after the Tape Delay plug-in. Using the Slow Panning setting, the dub delays appears to swing from side to side in the mix. Lower the Depth to lessen the width.
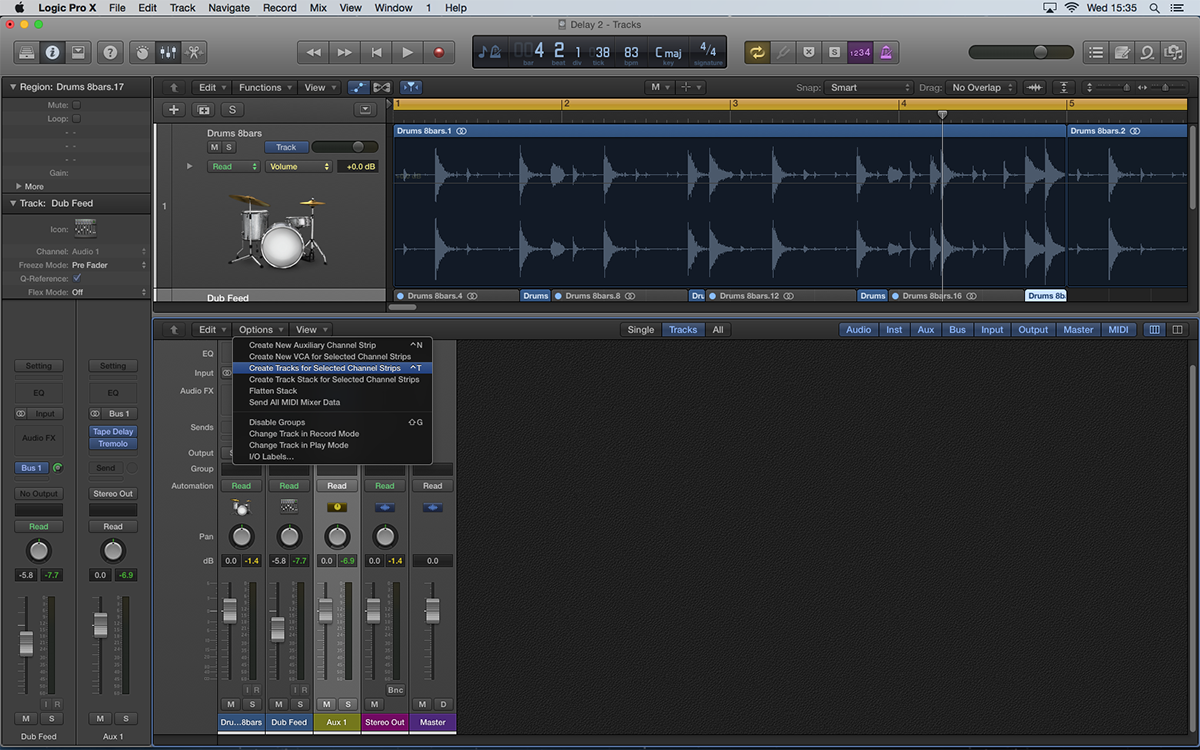
17: As well as switching the effect in and out, dub is often characterised by variations in the amount of feedback. To start automating the Tape Delay plug-in, use the menu function Options > Create Tracks for Selected Channel Strips.
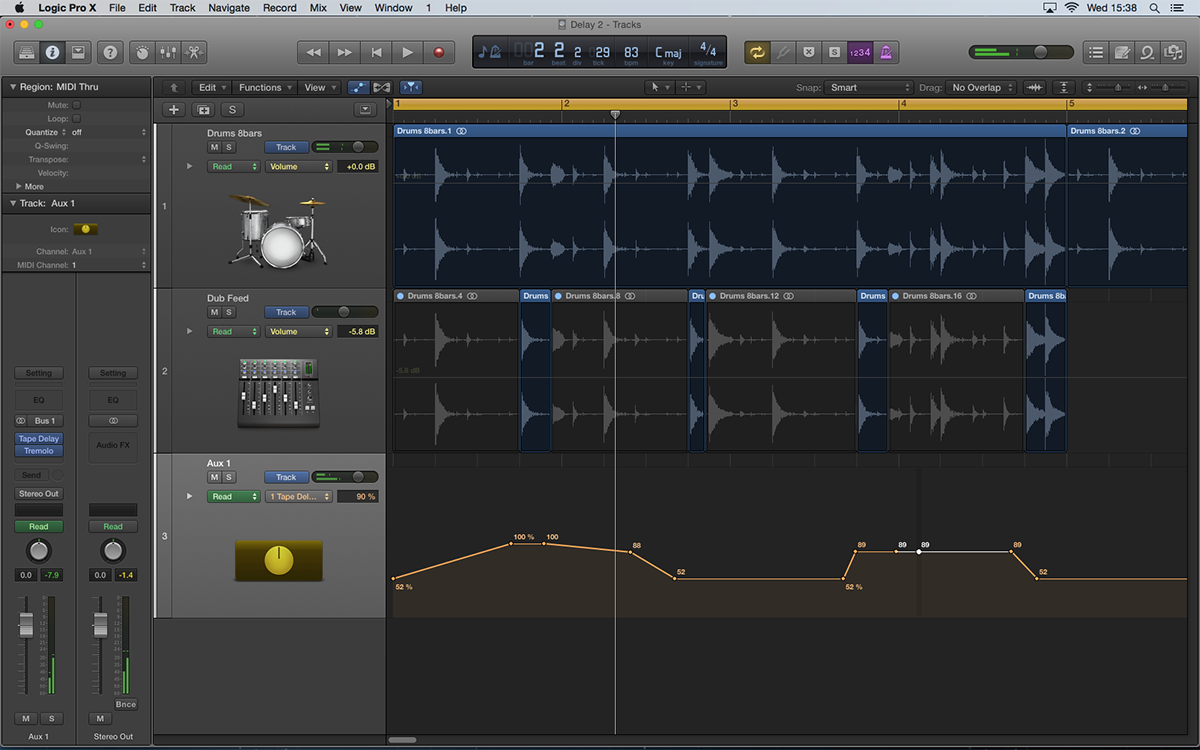
18: Enable the Automation View (A) and select the Tape Delay: Feedback parameter from the drop-down menu in the track list. Now draw in some automation moves, increasing the level of some of the points up to 100%, while lowering others.
This tutorial is endorsed by Point Blank. With courses in London, online and now in LA, Point Blank is the Global Music School. You can study sound to picture on their Music Production Diploma courses, with pro industry tutors.
