Logic Tutorial: Programming Drums – Tips And Techniques
Thanks to a raft of MIDI editing features, programming acoustic drums in Logic can yield surprisingly realistic results. Mark Cousins shows you how in this Logic Tutorial With the growth of virtual drumming software now available – including BFD, Superior Drummer and Steven Slate Drums – it’s never been easier to produce […]
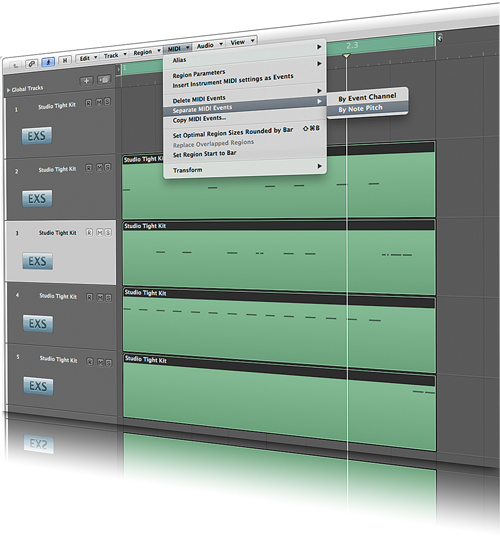
Thanks to a raft of MIDI editing features, programming acoustic drums in Logic can yield surprisingly realistic results. Mark Cousins shows you how in this Logic Tutorial

With the growth of virtual drumming software now available – including BFD, Superior Drummer and Steven Slate Drums – it’s never been easier to produce and program ‘acoustic’ drum tracks. However, despite the wealth of MIDI pattern files often included with these packages, there’s still a lot to be said for mastering the art of sequencing your own drum tracks. Here we’re exploring the process of ‘acoustic’ drum sequencing, using a variety of techniques in Logic to achieve a realistic performance.
For the purposes of this Logic Pro 9 tutorial we’re going to use some of the standard drum kits included with the EXS24. They’re good starting points, but it’s also worth trying the techniques with a more refined set of drum samples, perhaps one of the libraries mentioned above.
Vanilla Drums
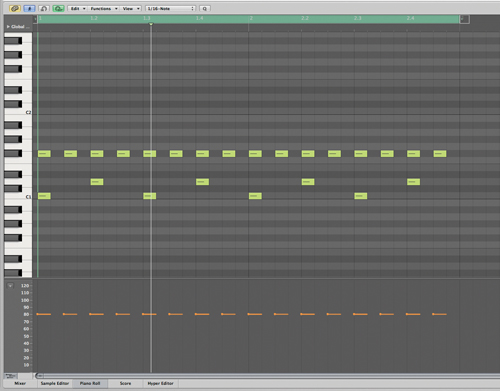
Let’s start by creating a basic ‘vanilla’ drum sequence, opening the empty two-bar region on track 1 using the Piano Roll Editor. In theory, you can use the Hyper Editor, but I prefer using the Piano Roll Editor as its colour-coding system makes the use of velocity nice and easy to see (which is something we’ll be returning to later on). For now, create the basic sequence, placing the kick on the downbeats (beats 1 and 3, in other words), the snare on the upbeats and a hi-hat playing 8th notes. Although the rhythm sounds mechanical at this stage, it arguably forms the key building block of the majority of drum patterns.
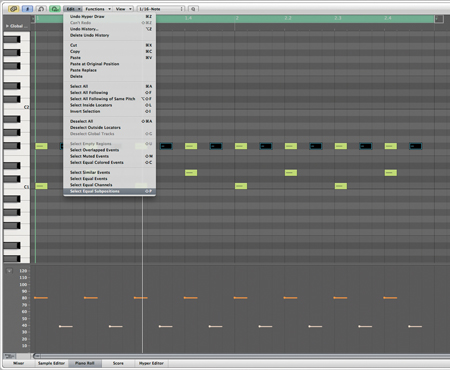
One of the key qualities of a realistic drum sequence is the use of velocity, which helps to define the accents within the rhythm as well as mimicking the natural way in which a drummer hits certain parts of the bar louder than others. In this example, we’re going to start to define accents by attenuating the velocity every other 8th note. To do this, select the alternate 8ths in the first bar and then select the local menu item Edit>Select Equal Subpositions (this is a great technique for selecting the same rhythmic divisions across a number of bars). Now reduce the velocity, using either the Velocity tool or the Velocities option as part of Hyper Draw (found at the bottom of the Piano Roll Editor).
Two Hands
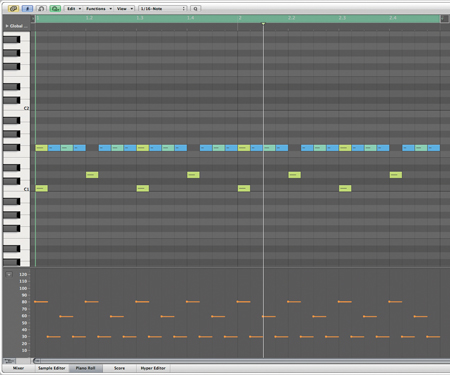
Think carefully about how real drummer would play the rhythm, being particularly wary of patterns that aren’t playable with just two hands. As an example, let’s change our basic 8th pattern to one that uses 16ths on the hi-hat. Again, use the Select Equal Subpositions feature to avoid unnecessary duplication of activities across bars, and consider refining the velocities further so that the added 16th notes fall at a lower velocity. The key point, though, is to delete the hi-hat whenever the snare occurs, as a real drummer would be alternating between their left and right hands to play such a fast-moving pattern.
While we’ve got a 16th pattern active, now’s a good time to introduce some of the concepts of quantizing. As the notes have been entered using the Pencil tool, quantizing isn’t necessary as a timing-correction tool but instead offers an interesting means of adding a touch more ‘groove’ to the performance. Try selecting the notes in our current sequence and applying one of the Swing quantize settings (16B Swing, for example). Note how the swing moves every other 16th note, with the stronger swing settings creating more of a shift. Although some of the stronger settings sound over- pronounced, it’s worth experimenting with the softer settings (16A or 16B, for example) to give a subtle groove to the sequence.
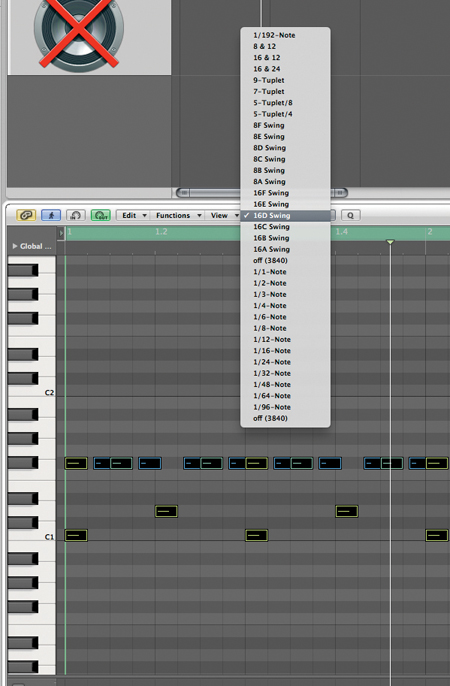
Ghost Watch
Let’s now take a step back and undo the sequence to return it to a basic 8th pattern. What we’re going to explore next is the concept of building up a more complex and interesting pattern – complete with ghost notes, bounce rolls and drags. To start with, try moving some of the bass drum hits around so that you can explore a different feel – in this case, moving the kick drum away from the second downbeat. Add some additional ghost notes to increase the note density slightly. Ghost notes should always be at a lesser velocity, adding colour and rhythmic interest but not changing the principal accents of the beat. In the case of the snare, notice how the ghost notes fall between the 8th hi-hat notes.
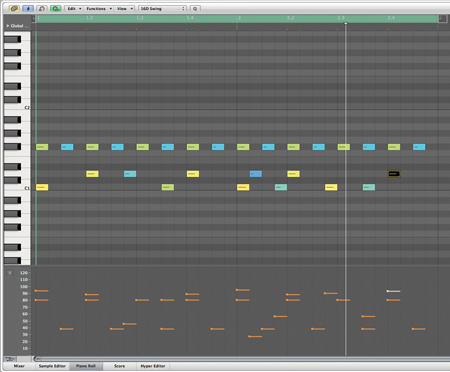
You can now start to add even more sonic interest and colour to the pattern by inserting a few strategic bounce rolls and drags to the pattern. In this example we’ve added a nice bounce roll at the end of the bar on the snare using two ultra-quiet 32nd hits (although it’s worth noting that these are much better placed by eye than switching the Piano Roll grid set to 32nd note). At the end of the bar there’s also a drag/flam that leads us into the simple snare and tom fill. As we saw previously with the ghost notes, these simple ornaments add further realism to the sequence, which can be heard in the pre-existing patterns we’ve left in the session for you to listen to.

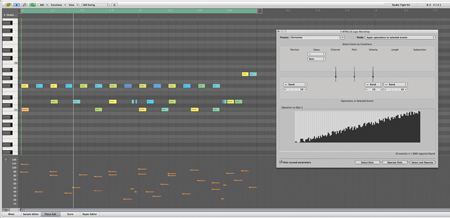
Despite the addition of accents, ghost notes and the drags, our sequence still has a distinct mechanical quality to it, arguably brought about by the somewhat rigid nature of its timing and use of velocity. One of the most essential tools for acoustic drum programming, therefore, is the Humanize preset (part of Logic’s Transform Editor). The Transform Editor is a form of text-based editor, allowing you to edit MIDI data in some intriguing ways. In this case we can use the Transform Editor to apply small amounts of randomisation – to the Position, Length and Velocity of each note – arguably mimicking the small fluctuations between notes you’d hear in a real performance.
With the drum sequence open in the Piano Roll Editor, select Functions>Transform>Humanize from the local menu. To apply the Humanization, press the Select and Operate button in the bottom right-hand corner of the Transform window. Of course, if you want a little more control over the effect – or, more specifically, the amount of randomisation – you can adjust the corresponding parameters in the Transform Editor window, either decreasing the amount of Velocity change, for example, or adding a greater amount of Position movement. Alternatively, consider applying the Humanizing process several times, with successive iterations becoming increasingly random.
As well as applying the Humanization feature, you might also want to investigate ways of ‘stealing’ the feel from a pre-existing drum loop – ideally, one that’s been played by a real drummer! What follows is also useful as a means of wholesale ‘reappropriation’ of an existing drum loop, offering the means of replicating an existing performance in a virtual form.
Start by importing the desired drum loop into your project. In this case we’re importing an Apple Loop, but this could be any existing audio file (although the clear advantage of an Apple Loop is that it automatically matches your project’s tempo).
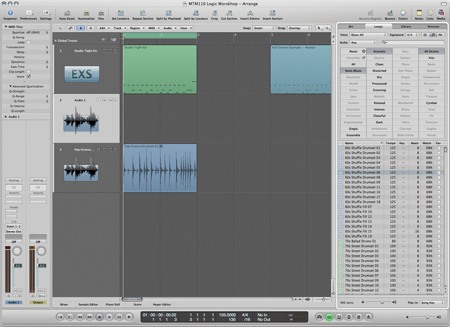
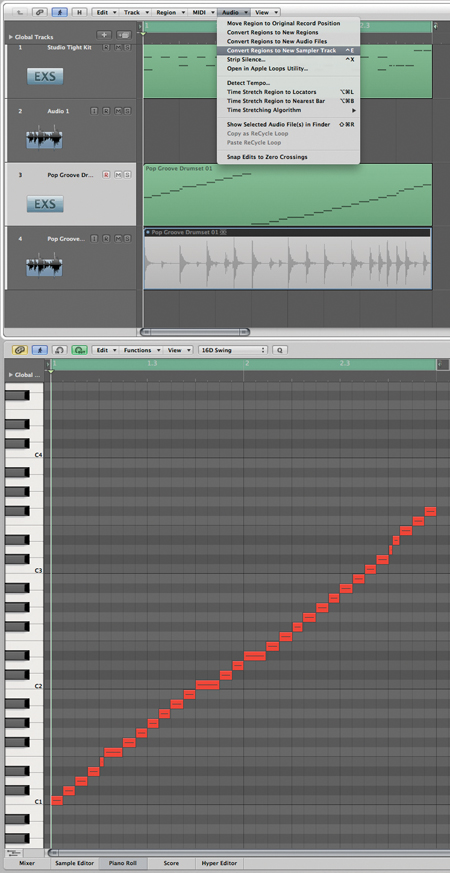
With the loop imported to a spare track lane, select the menu item Audio>Convert Regions to New Sampler Track. Logic will time-slice the loop (via its transient markers), creating both a new instance of the EXS24 and a new MIDI sequence to trigger the sample slices. If you’re interested in the wholesale reappropriation technique, use these MIDI triggers to program a new loop, dividing the hits between kick, snare and hi-hat as you can hear them in the loop. Of course, you’ll need to fine-tune velocity (among other things), but it’s surprising just how effective this technique can be.
Back In Time
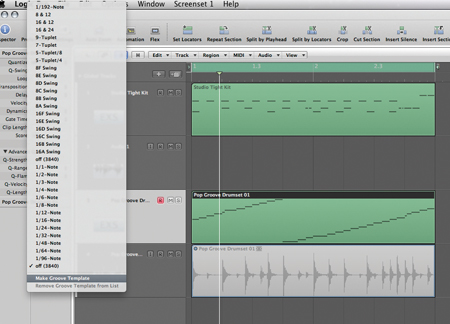
Going back to our original objective, though, what we’re principally interested in are the timing properties of the loop rather than its sound. To capture the feel, therefore, click on the dropdown Quantize list (as part of the Inspector) for the newly created MIDI region. At the bottom of the list you’ll find an option labelled Make Groove Template – this won’t quantize the loop, but instead extract its timing information.
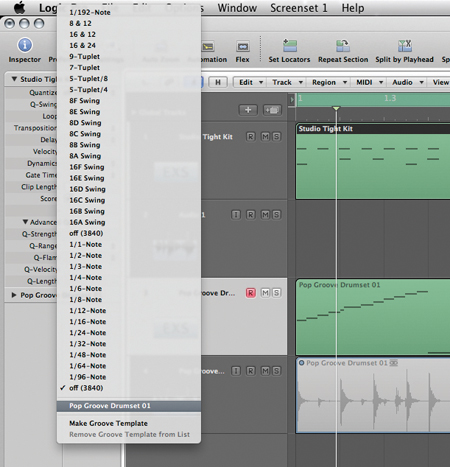
To apply the groove quantize, move back to our original drum sequence and from its dropdown Quantize list select the setting that corresponds with your newly created Groove Template. The drums should now be quantized in a way that corresponds to the audio loop, making it a perfect way of adding intelligent ‘feel’ to the drums rather than simply randomising the timing.
The Perfect Beat
Programming a realistic drum loop in Logic utilises a number of skills in respect to MIDI sequencing, from the ability to fine-tune MIDI data in the Piano Roll Editor to advanced quantizing features and, of course, the Transform Editor. The palette of skills and techniques that we’ve explored here are undoubtedly essential for drum programming, but they can also be extended into a variety of MIDI sequencing activities, especially when you need to emulate natural ‘lifelike’ performance qualities or manipulate timing and groove of a MIDI performance in a dynamic and interesting way.
This video from ProStudioTips explores drum programming in more detail: