Logic Pro X Tutorial: Become a Power User Tutorial Part 11 – Better mixing in Logic Pro X
Logic Pro X comes packed with features to help you mix effectively. Mark Cousins reveals the best ones for your perfect Logic Pro mix… Mixing is easily the most creative part of the recording process, so it’s reassuring to note that Logic Pro X has a range of features that can aid the mixing workflow, […]
Logic Pro X comes packed with features to help you mix effectively. Mark Cousins reveals the best ones for your perfect Logic Pro mix…
Mixing is easily the most creative part of the recording process, so it’s reassuring to note that Logic Pro X has a range of features that can aid the mixing workflow, as well as ensuring your mix is as musically effective as it can be. However, in the virtual domain it’s easy for the task of mixing to become a sloppy exercise, often tagged onto the process of writing and recording the track rather than a distinct and separate part of your creative workflow. Creating a better mix, therefore, is often more about how you’re mixing, rather than finding that elusive ‘quick-fix’ plug-in setting that makes everything sound ‘good’.

In this workshop we’re going to explore a number of key processes that can improve your mixes. We’ll start with the basics of a more methodical approach, taking time to organize your session so that it’s conducive to an effective mix. From an improved use of bus sends, though to Track Stacks and Groups, we’ll see how an organized mix can often end up sounding more defined and less haphazard. With a more organized project in hand, the second section explores where best to instantiate FX plug-ins, both in respect to channel inserts and bus sends. In many ways, this is where the finesse of a mix really lies – whether a compressor sits before an equalizer, for example, or the ability to precisely place a delay tap in the stereo field. Ultimately, it all helps create a more reasoned soundstage that ensures your music is presented as effectively as possible.
In our final section we take at the real ‘secret weapon’ of a good mix – automation. While it’s possible to get 80% there with a static mix, automation offers the icing on the cake, ensuring every piece of your music puzzle is articulated throughout the entirety of the track. Understanding Logic’s various automation modes – Touch, Write and Read – will allow you either to record fader moves in ‘on-the-fly’, or take a more methodical hand-drawn approach that lets you tweak a mix right down to 0.1dB. This tutorial is endorsed by Point Blank Music School, which specialises in courses on production, sound engineering, the music business, singing, radio production, DJ skills and film production, all run by top British music producers and media professionals, with regular visits from legends in music and media. www.pointblanklondon.com
Cleaner mixing
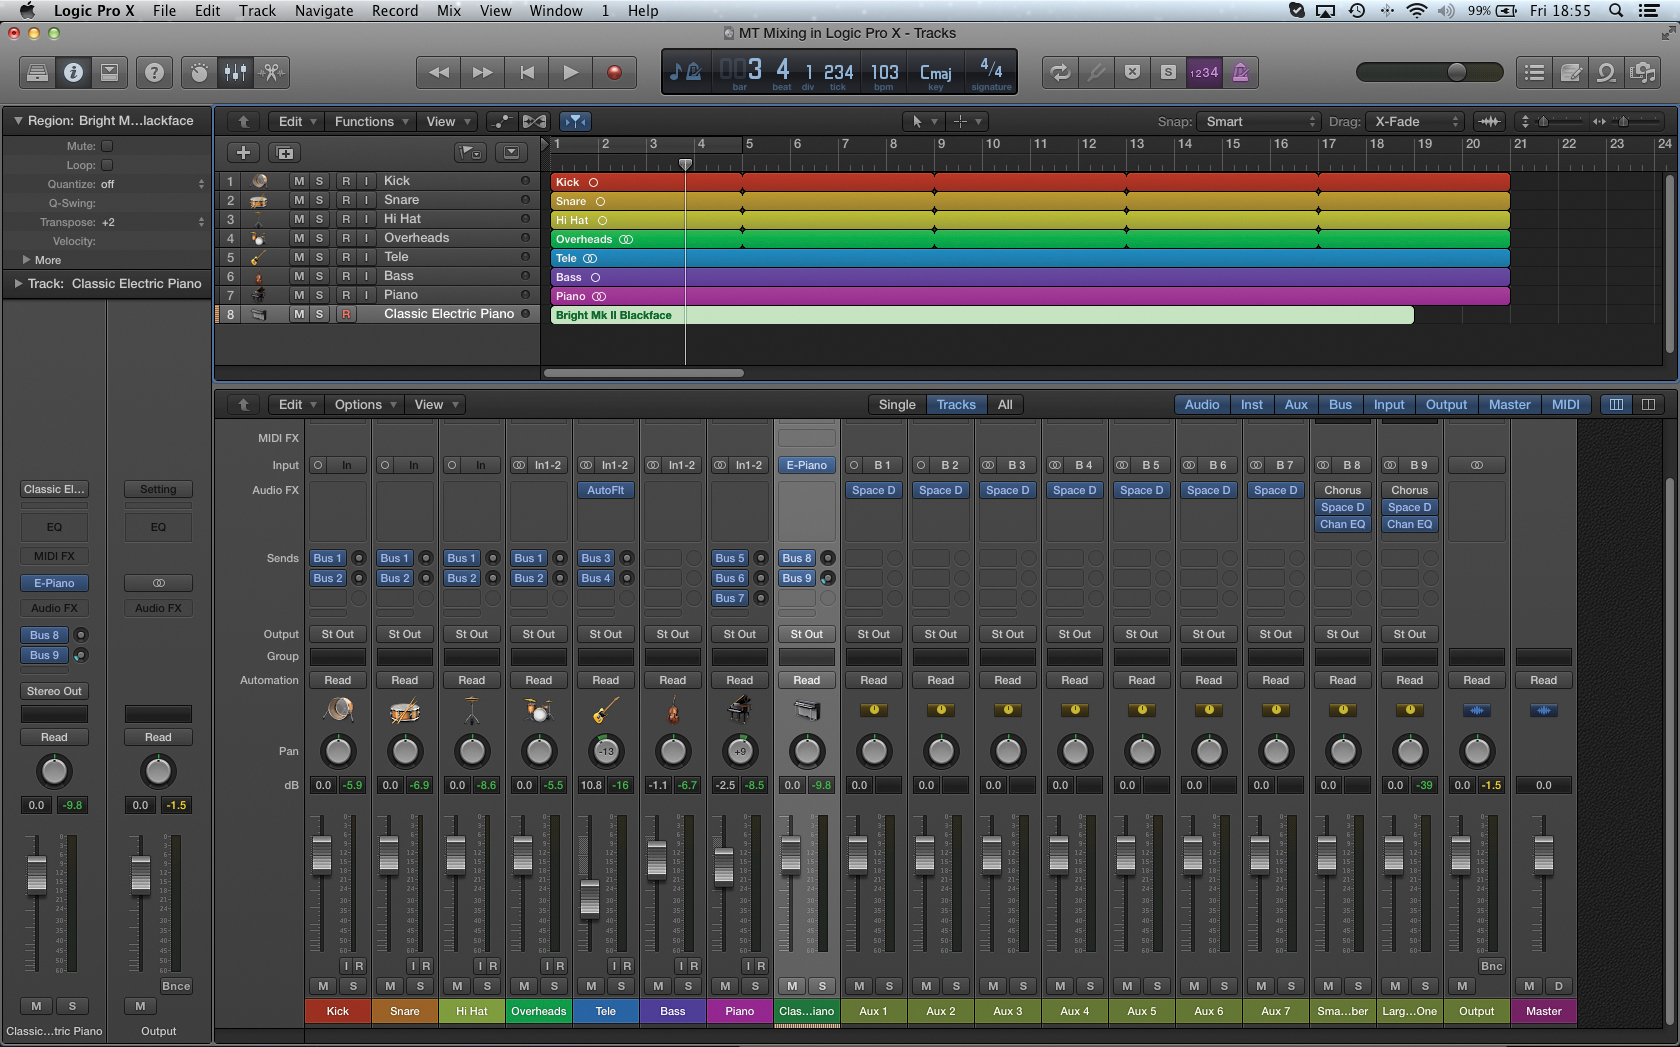
1: Creating an organized mixer layout can really aid your mixing process, especially if you’re running a large number of tracks. To begin with, consider how best to order your tracks so that you can navigate the mix effectively. As long as the mixer is set to Track Mode, the order in your Tracks Area will be reflected in your mixer.
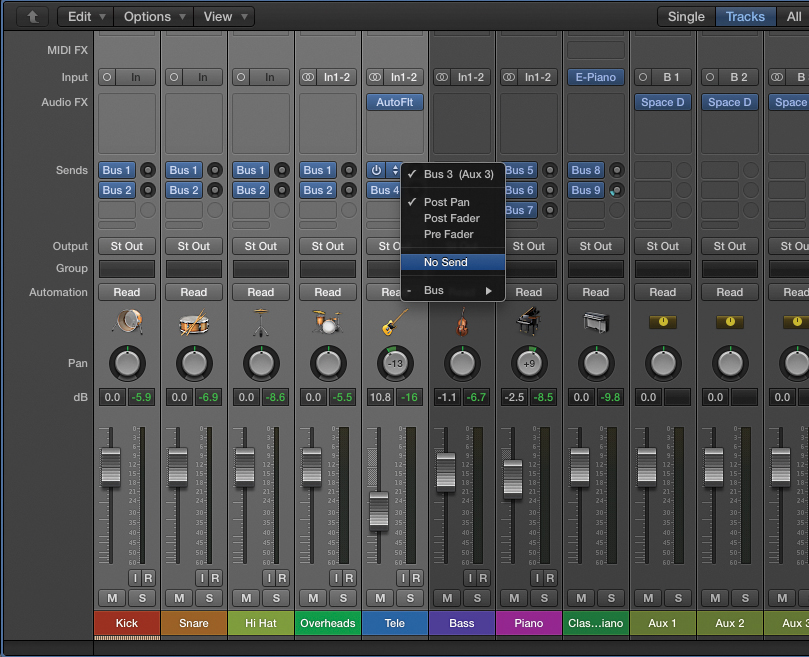
2: If you’ve used the Library, it’s likely that you’ll be left with a large number of dormant bus sends and auxiliary channels. Consider removing the unwanted bus sends, therefore, and deleting their associated aux channels. It also worth instantiating the bus sends so that Bus 1, for example, is only ever on the first send slot.
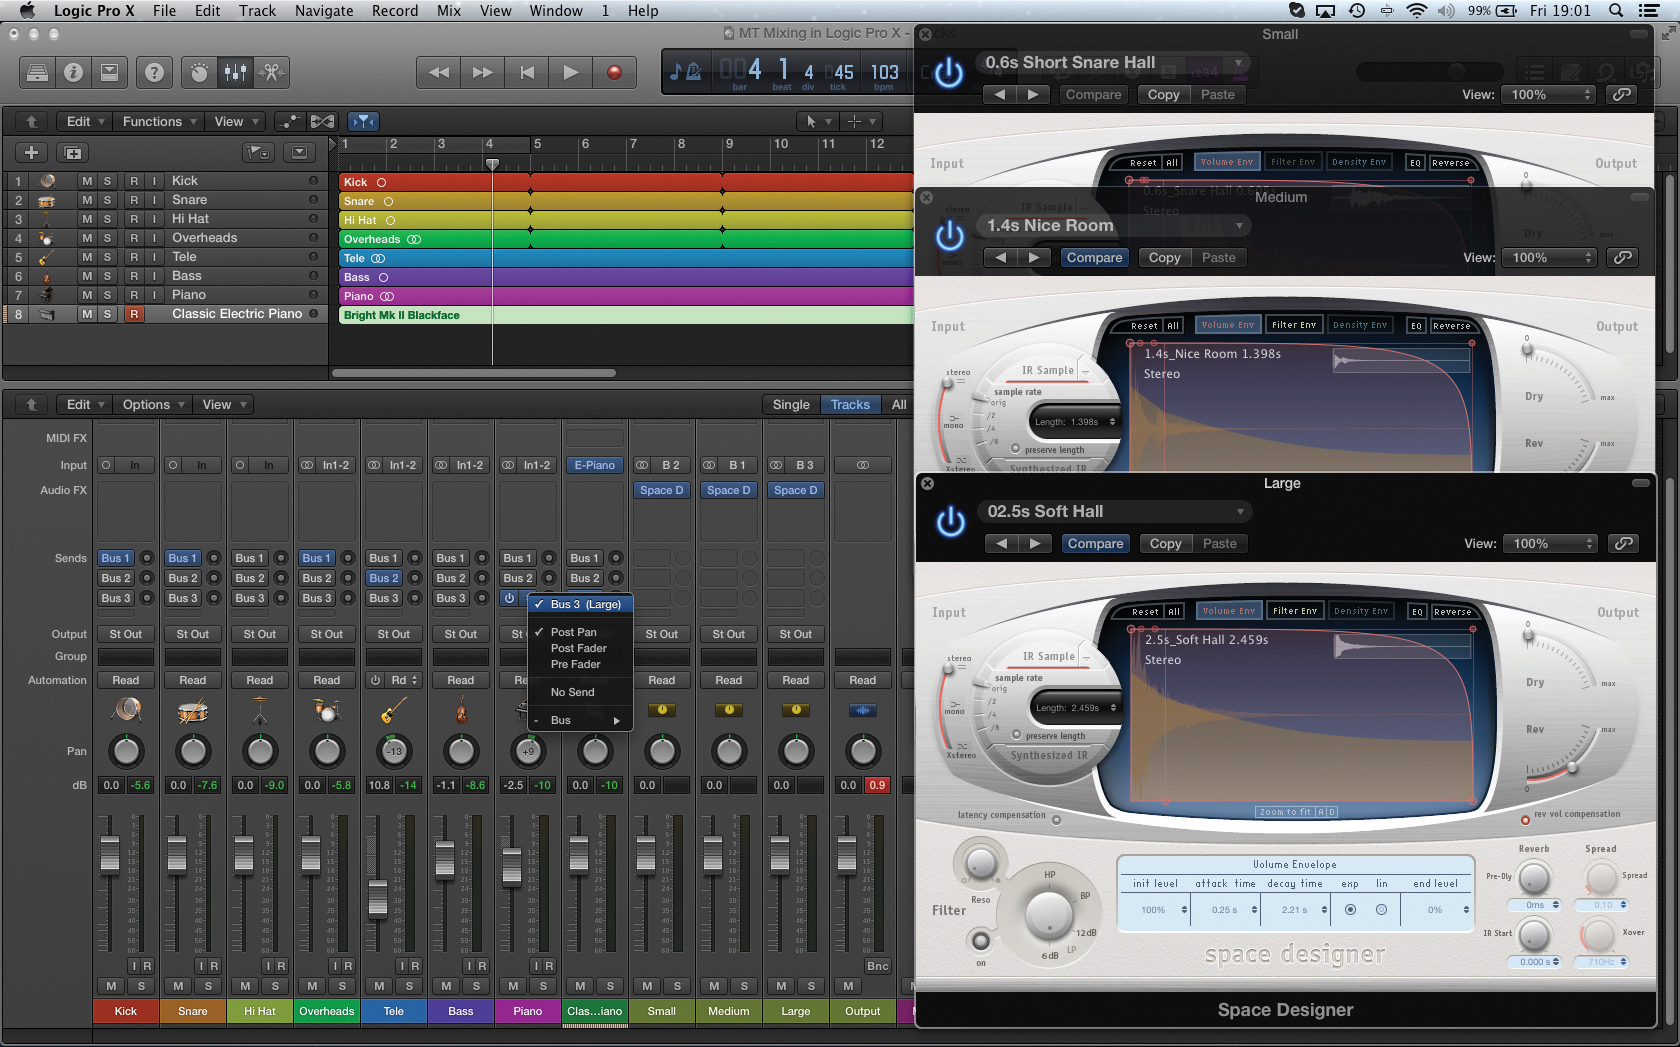
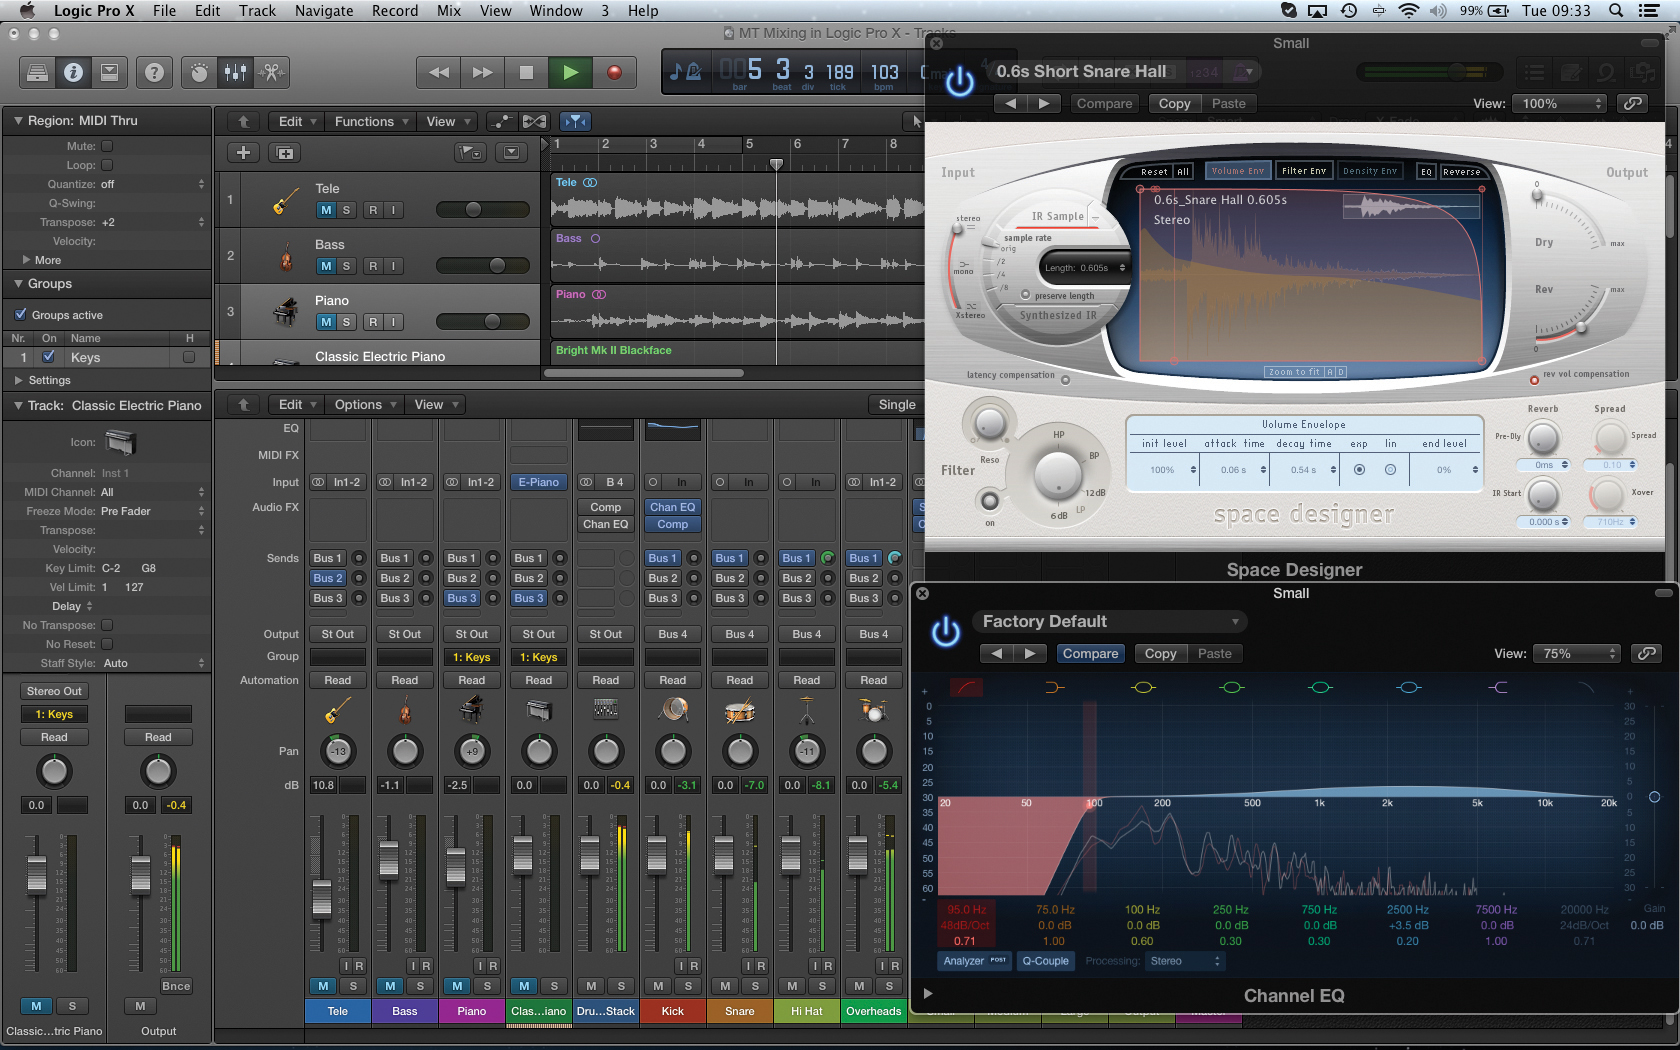
3: To create a defined depth to the soundstage, it’s often the case that you only need to use around three reverbs, each with a progressively larger size setting – Small, Medium and Large. In this example, we’ve instantiated and named the three reverbs, as well as made the relative bus sends clearer by their slot assignment.
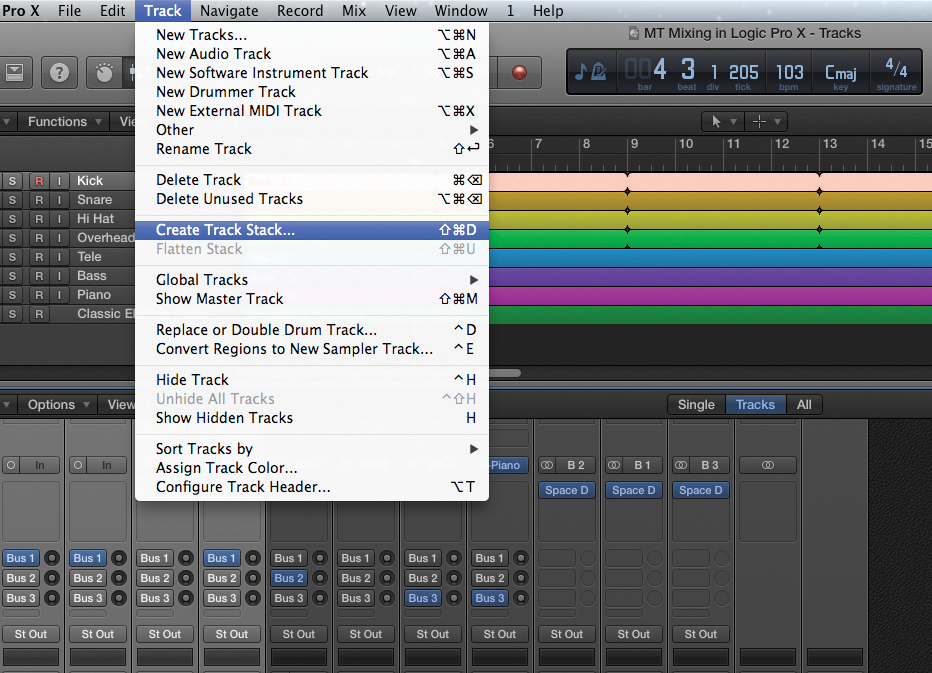
4: Where you have groups of sounds – like a collection of drums, for example – it’s well worth creating a Track Stack. Create the Track Stack by cmd-clicking on the desired tracks, and then selecting the menu option Track > Create Track Stack. When prompted, select a Summing Stack so that you have a master fader.
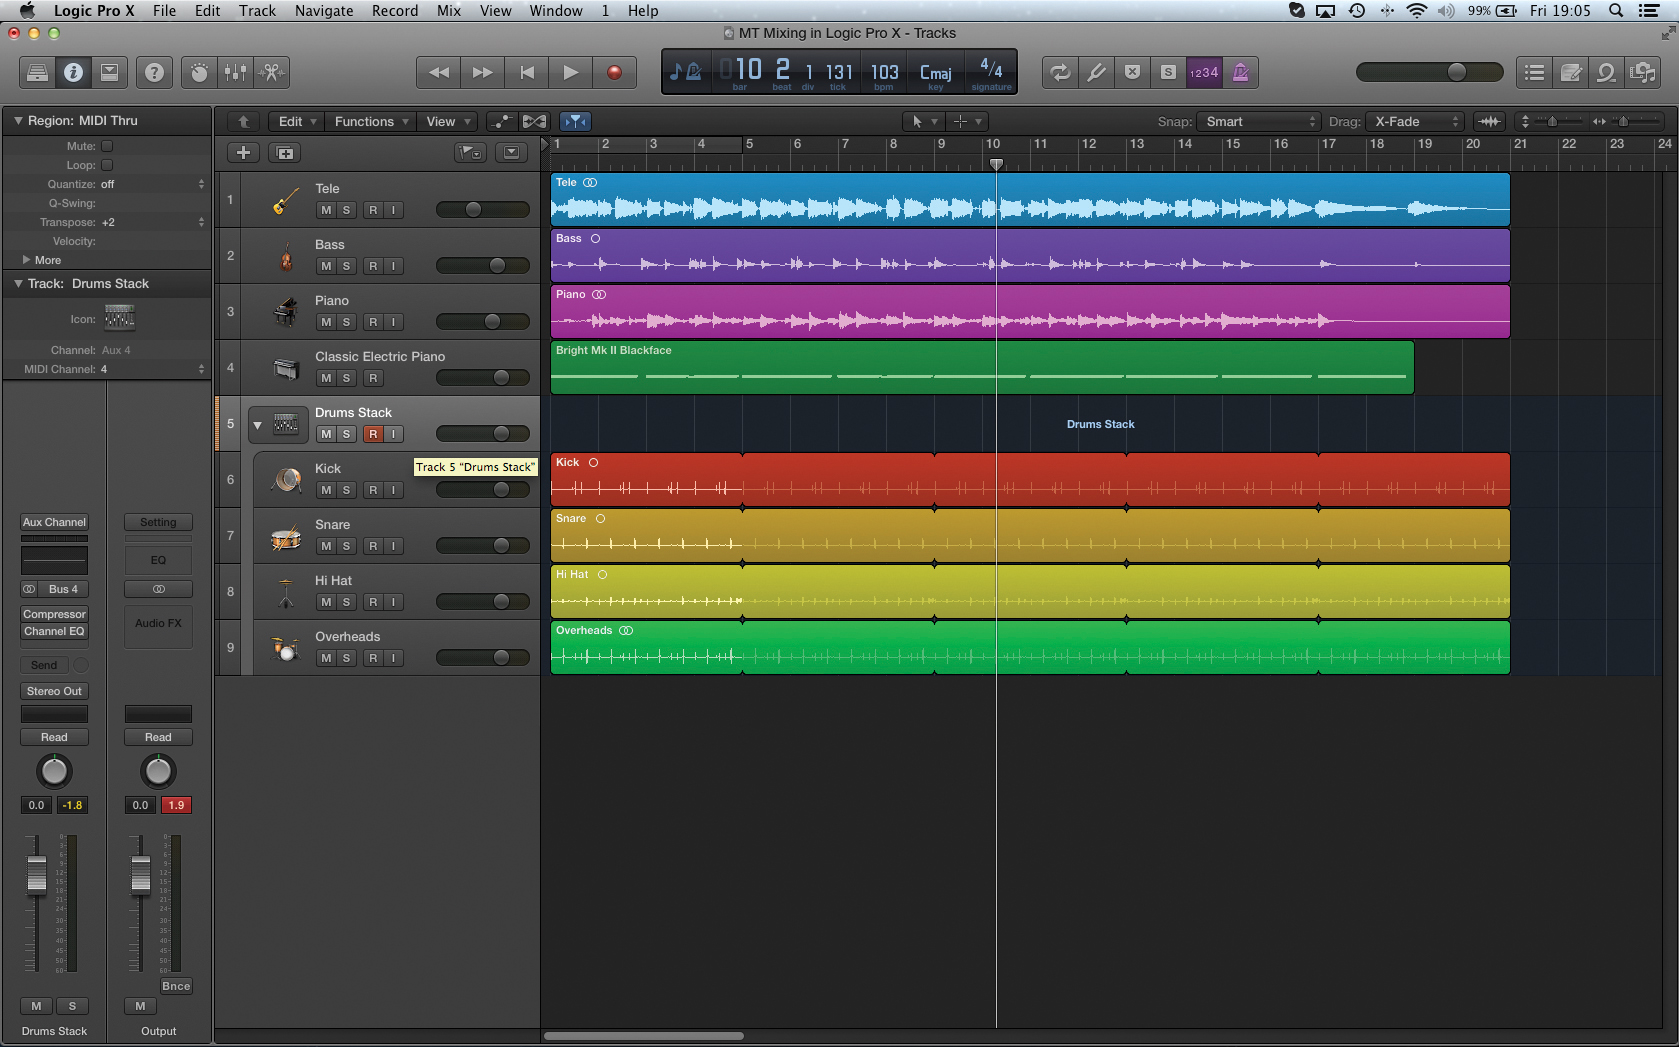
5: You can open and close the stack using the small arrow in the Track List. It’s also worth naming the Summing channel (currently labeled Sum 1) and possibly colour coding it for clarity. On the whole, the mixer is clearer with Track Stacks placed towards the end of the mixer, so consider moving Summing Stack accordingly.
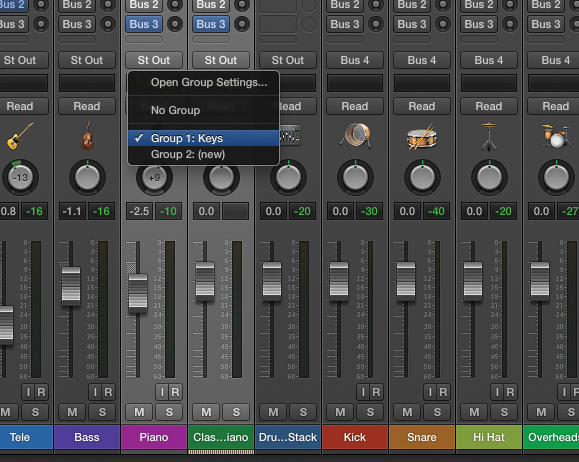
6: An interesting alternative to Track Stack is the Group function. A Group links the fader’s movements, rather than sending them to a summing fader, but you don’t get the option of hiding the tracks. Assign a Group using the Group slot just below a fader’s output assignment. You can suspend Groups at any point with the keyboard shortcut Shift + G.
Using signal processing
1: As you’re piecing together the mix, try to make a distinction between the signal processing applied on channel inserts and via bus sends. On the whole, inserts should be reserved for changing tone, timbre and dynamics. Also, experiment with the order of processing as this can have a subtle but important effect on the cumulative sound of the plug-ins.
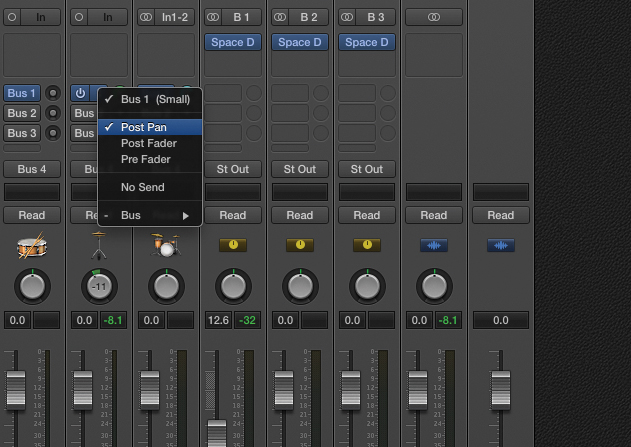
2: By contrast, bus sends are reserved for ambience effects – namely, reverb and delay – where it’s important to control the amount of effect, also referred to as the wet/dry ratio. If you’re using reverb, consider using the Post Pan option on the Bus Send slot as a means of preserving the signal’s stereo position.
3: With both reverb and delay, we can control the amount of effect in the mix either with the relative level of bus sends, or by modifying the aux channel accordingly. From a mix perspective, you also gain the option of applying processing solely to the reverb – rolling-off the bottom end with an equalizer, for example, or adding a touch of chorus.

4: When you’re applying delay, it’s well worth considering how it’s placed in the stereo field. For example, the Telecaster in our Logic project is panned slightly to the left. Sending the Telecaster to a 16th tape delay, though, we can pan the delayed signal to the opposites side of the mix, adding a unique dimensionality to the mix.
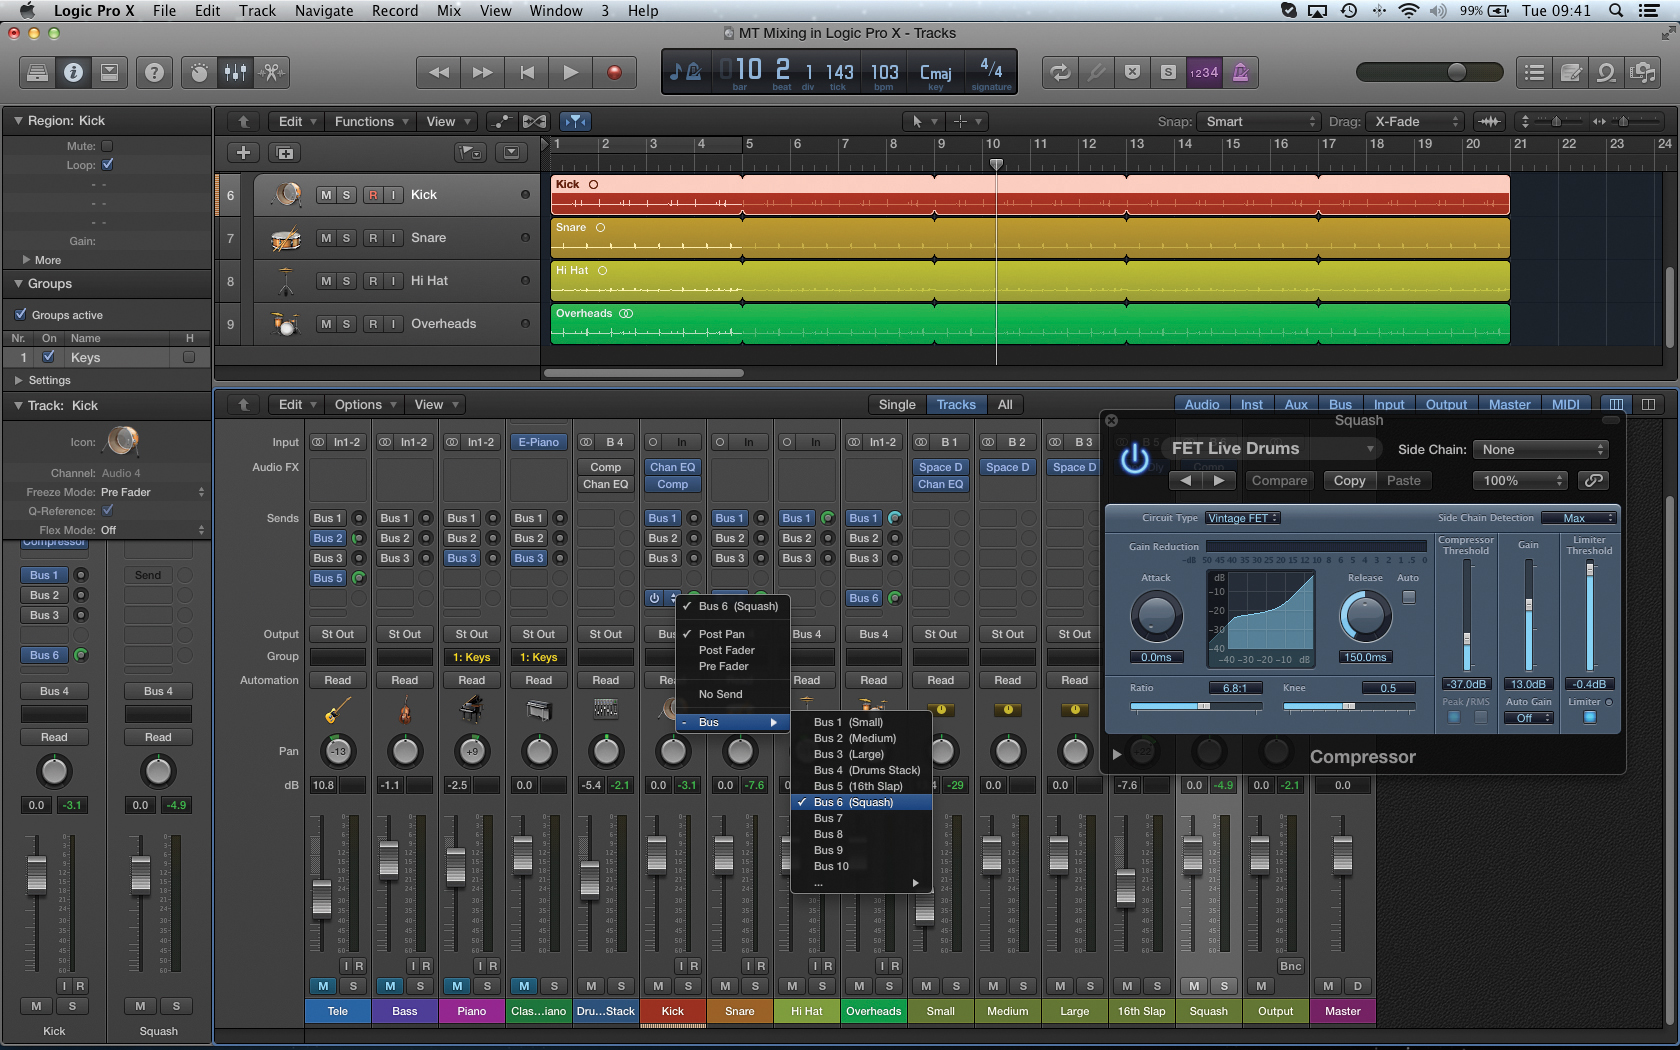
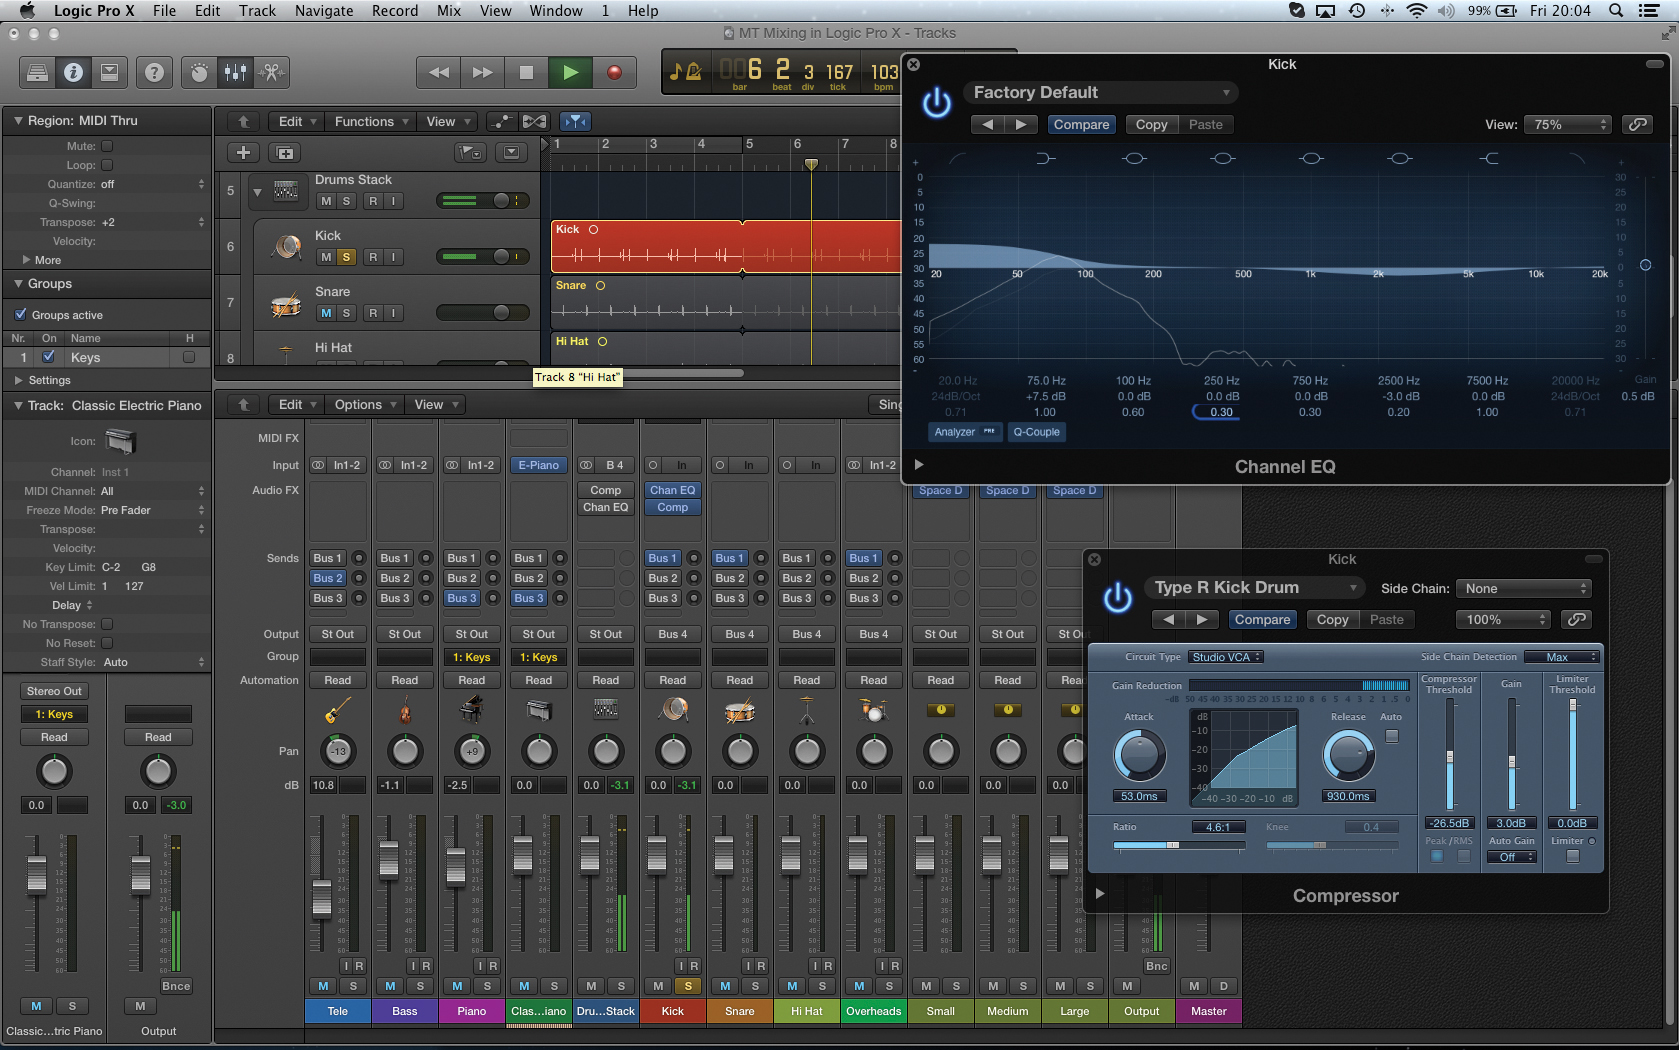
5: With every rule there’s an exception, and in this case it’s the application of compression as a send effect, creating what is often referred to as parallel compression. Create bus sends from the main drum channels, and instate a compressor plug-in across the newly created aux channel. Setup a fast-acting compression on a 6:1 ratio, yielding around 10dB of gain reduction.
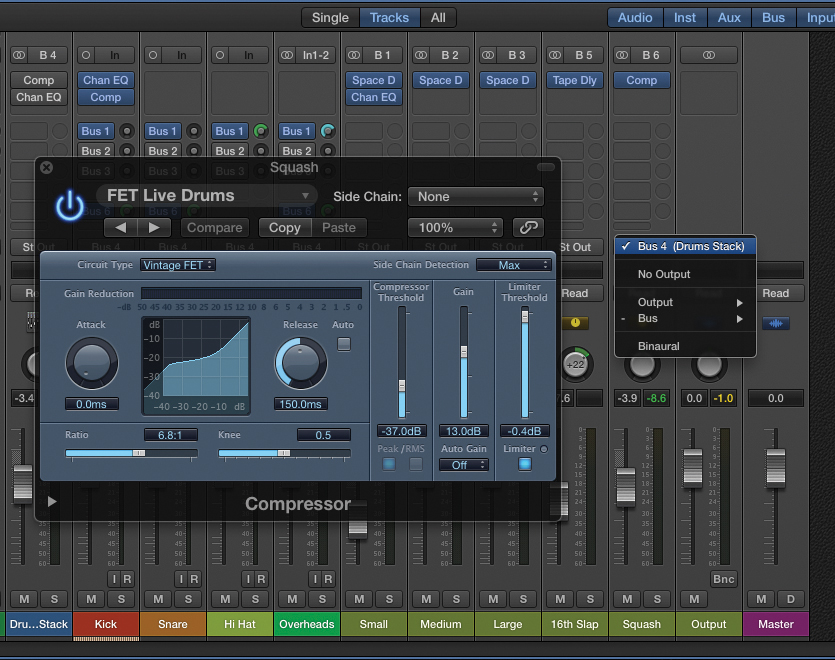
6: As with reverb and delay, the added dimension of parallel compression is decided and the amount of ‘squash’ injected back into the mix. In this case, the level of the aux channel sets the density of the effect, and the amount of body added to the drums. Remember to route the signal through to the drum bus as well.
Adding automation
1: Although it’s possible to control a lot of the mix using dynamic processing, there’s still often a need to tweak the mix using automation, usually to help accentuate a particular part of the mix that’s getting lost in the body of sound. The first stage of adding automation is to enable the Automation View using the keyboard shortcut A.
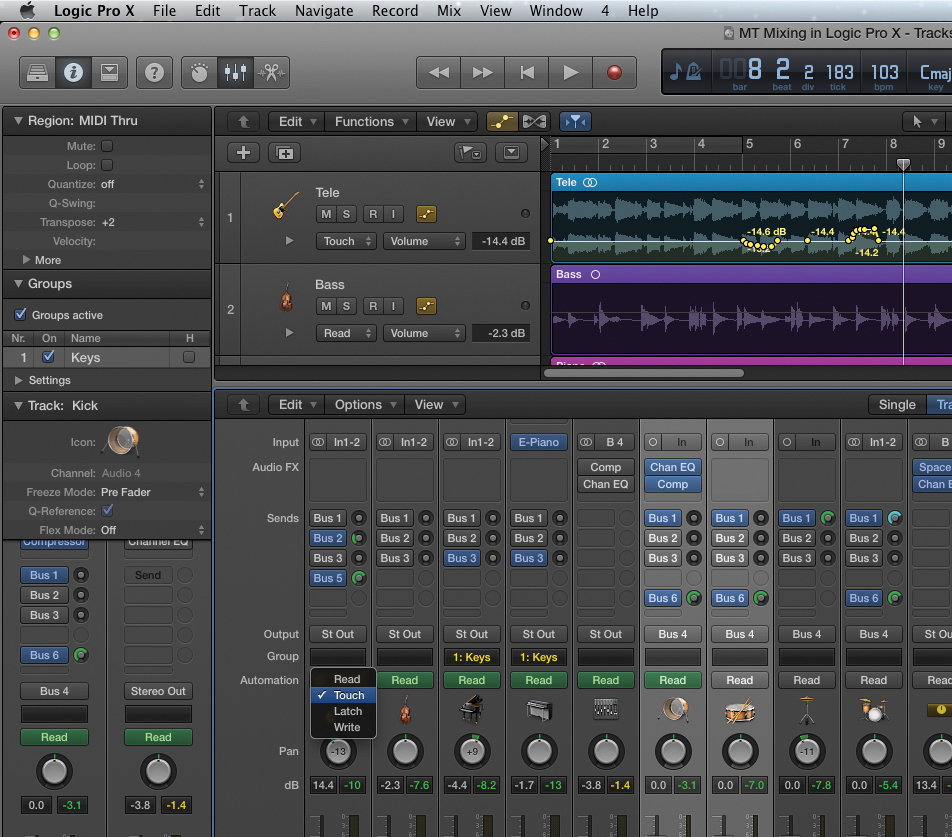
2: The automation modes – found in the track header, and as part of the mixer – are important in defining how you apply the automation. Use the Touch mode for example, for manual on-the-fly fader moves. Automation is written while you hold the fader. When you release, the fader returns to its original level. Read, of course, is the safe playback mode.
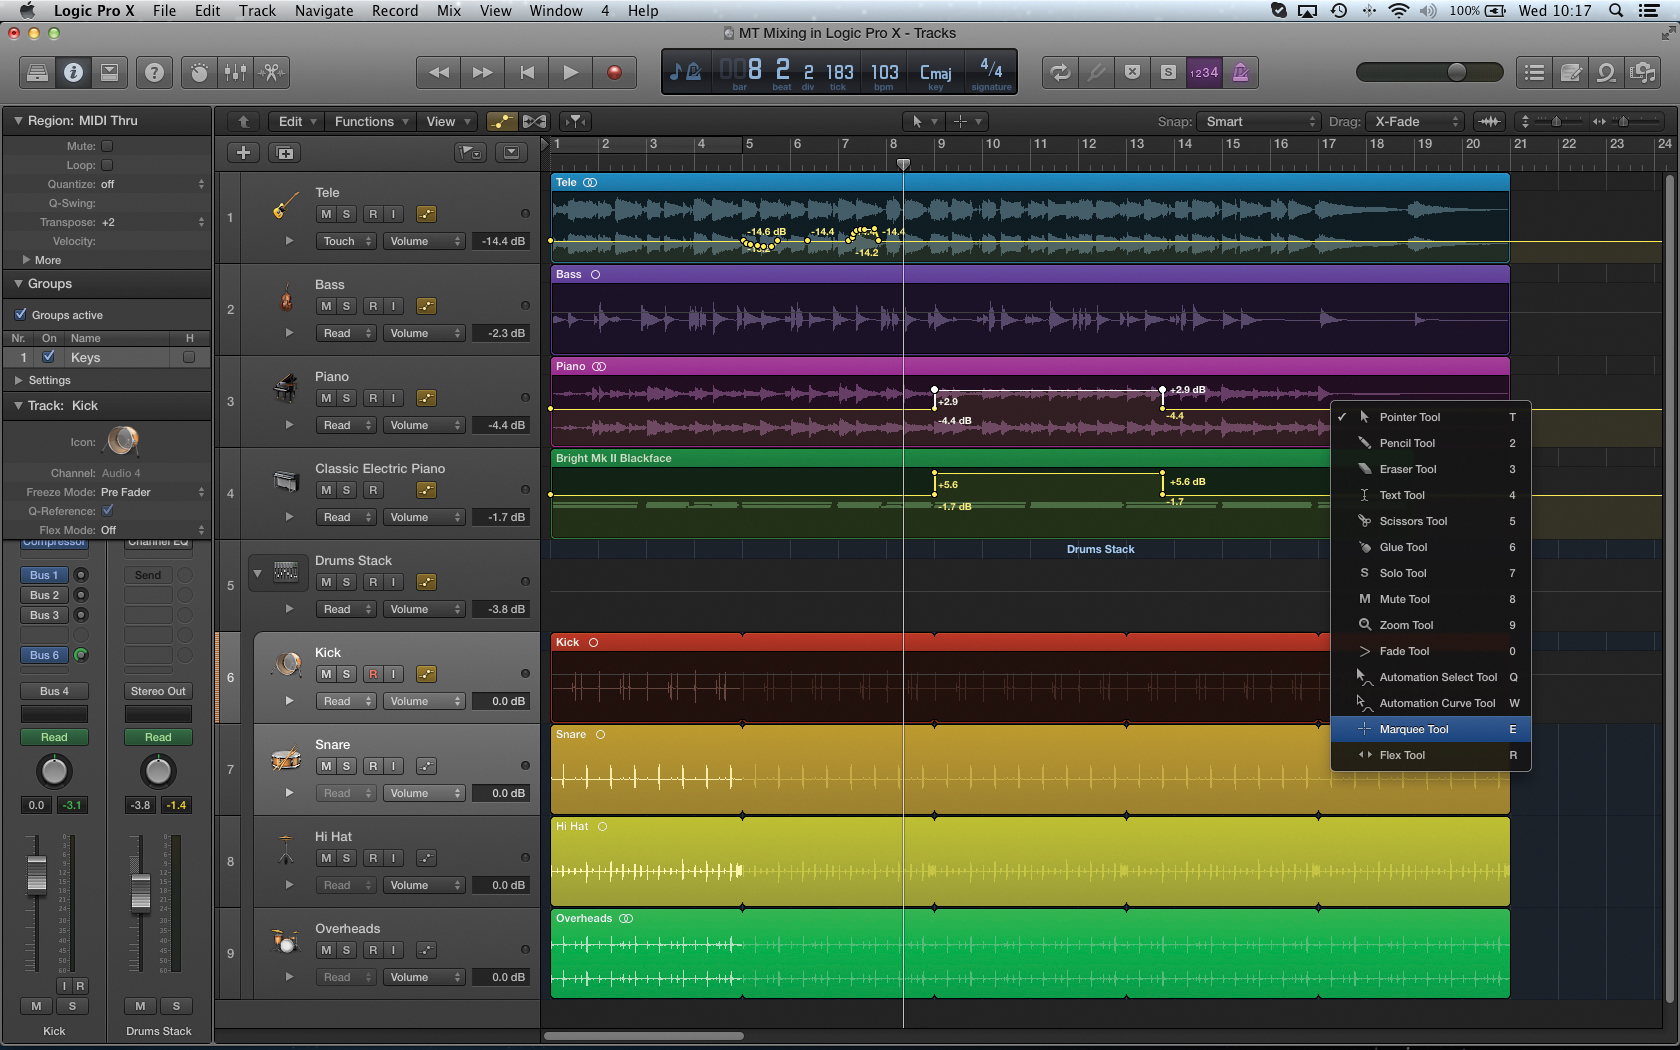
3: For more precise control over signal levels, consider using the Tracks Area and drawing the moves by hand – either using the Pointer or Pencil tool accordingly. If you need to raise a specific section, consider using the Marquee tool to define the area, and then use the Pointer tool to create the desired amount of lift or cut.
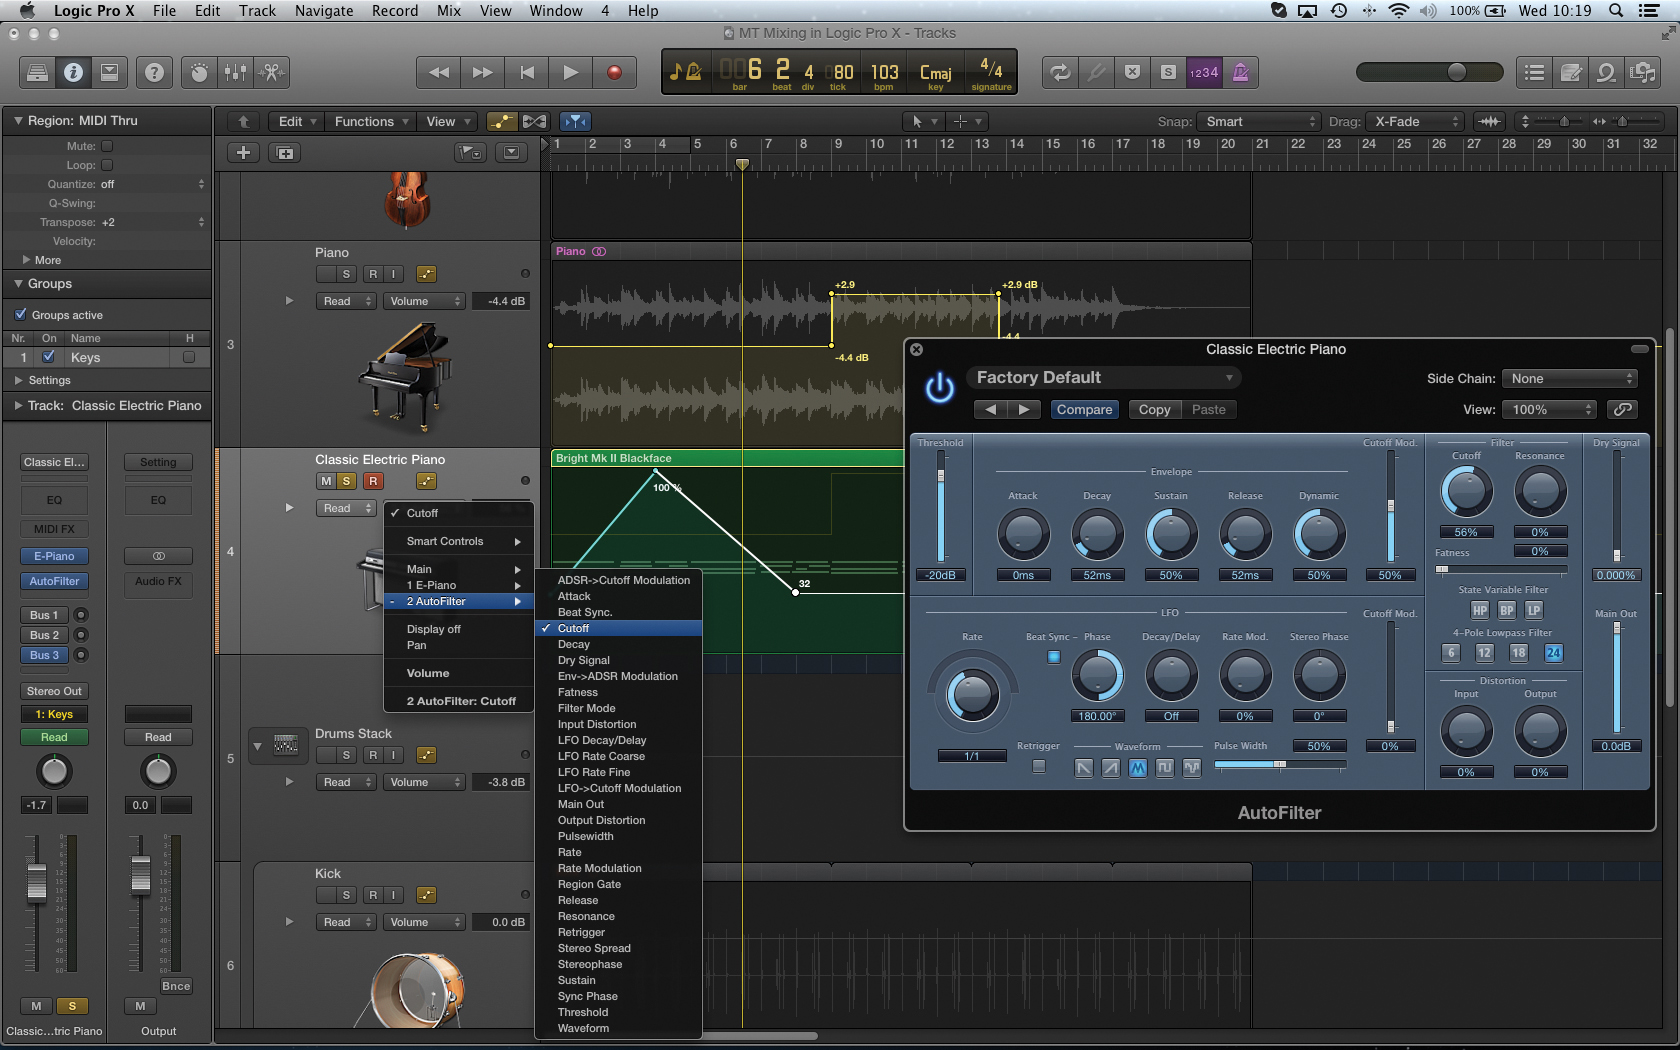
4: While most automation moves are concerned with the volume, it’s also worth noting that you can automate any plug-in parameter in Logic’s mixer. Use the drop-down menu in the track header to change the currently viewed parameter (listed by plug-in). For example, try changing the filter cutoff on the Rhodes track so that it slowly opens over four bars.
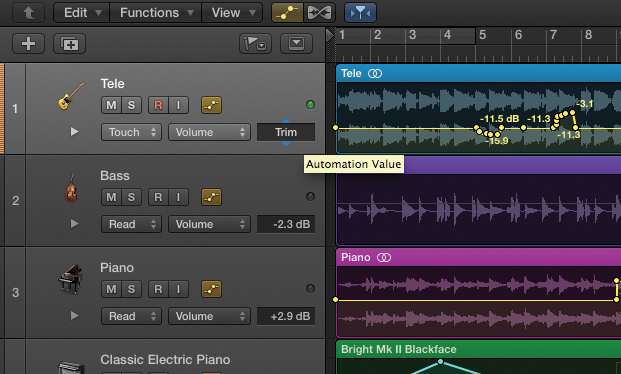
5: One potentially annoying aspect of automation can be re-gaining the current settings – lifting a track by 2dB, for example, once a series of moves have been written in. Use the Trim control, therefore, as part of the Track Header to attenuate or lift the level globally across a track, keeping all the moves in place.
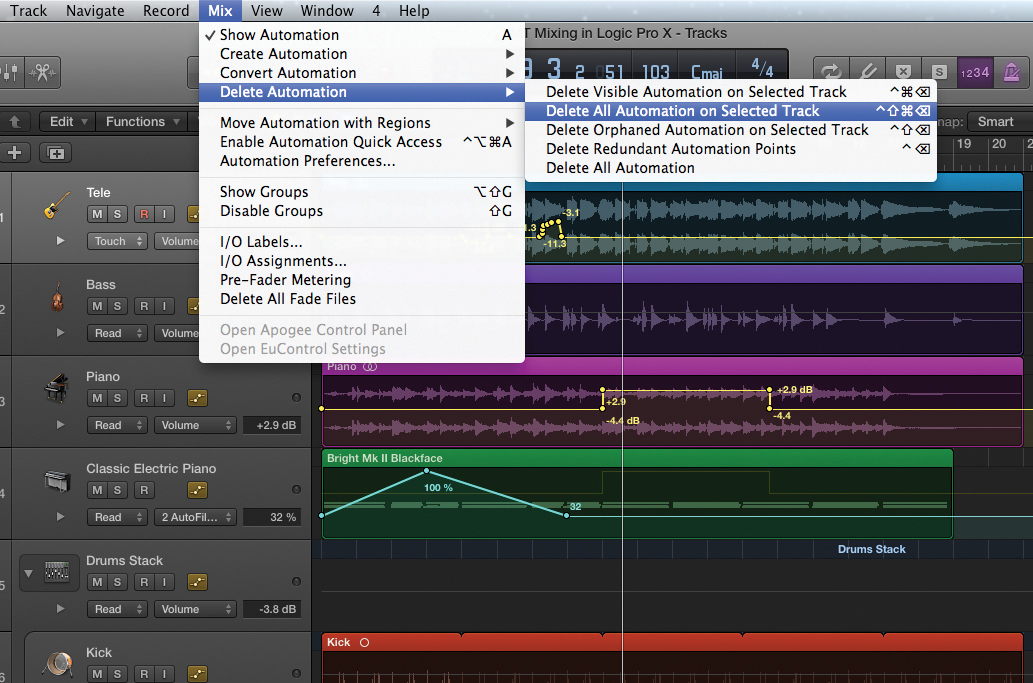
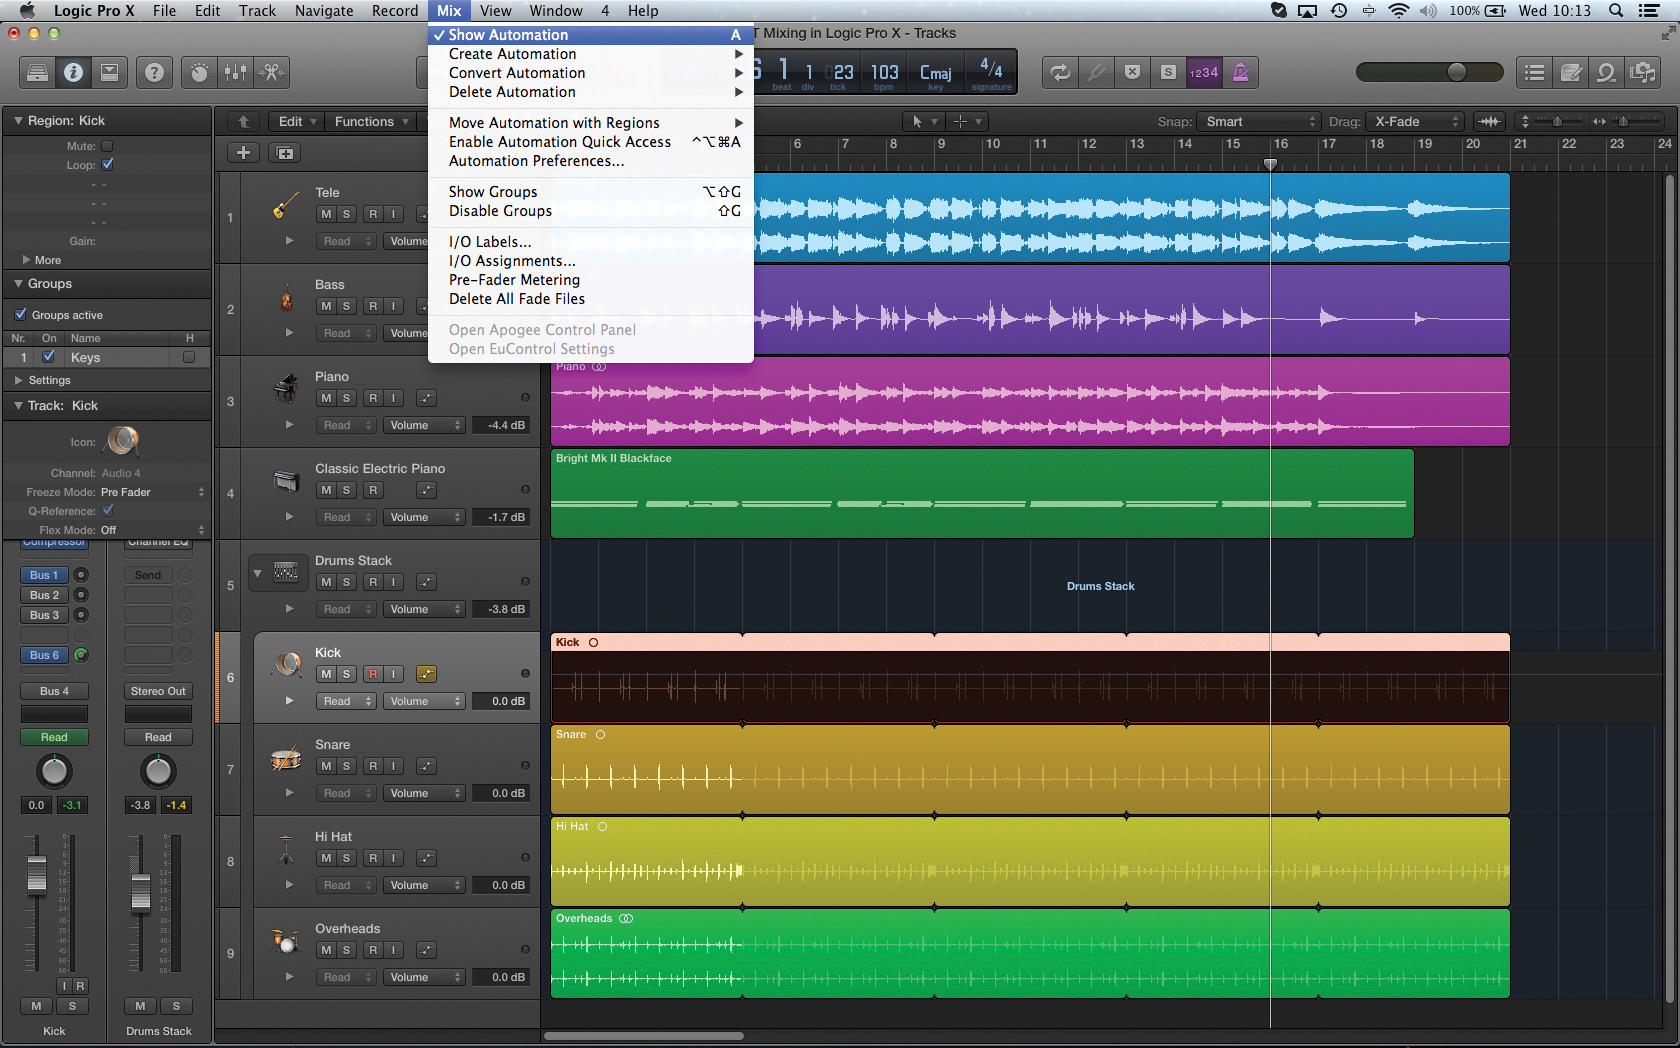
6: In situations where the automation has gone horribly wrong, or is simply becomes redundant, consider exploring the various delete features found under the menu option Mix > Delete Automation. You can delete ‘visible’ automation data, for example, automation data on a selected track, or all automation data across the entire project.
