Quick Tip: How to automate auxiliary effects in Logic Pro
Learn how to use automation to dictate when you send your tracks to an auxiliary effect send.
Automating auxiliary effects
Auxiliary effects can be an invaluable tool in mixing – you can send multiple instruments to a single bus channel loaded with a compressor and de-esser for example, and process them all at once. You can also automate your tracks in Logic Pro X to choose when you want them to be sent to the auxiliary effects, as we will explore below.
Automating auxiliary effects: step-by-step
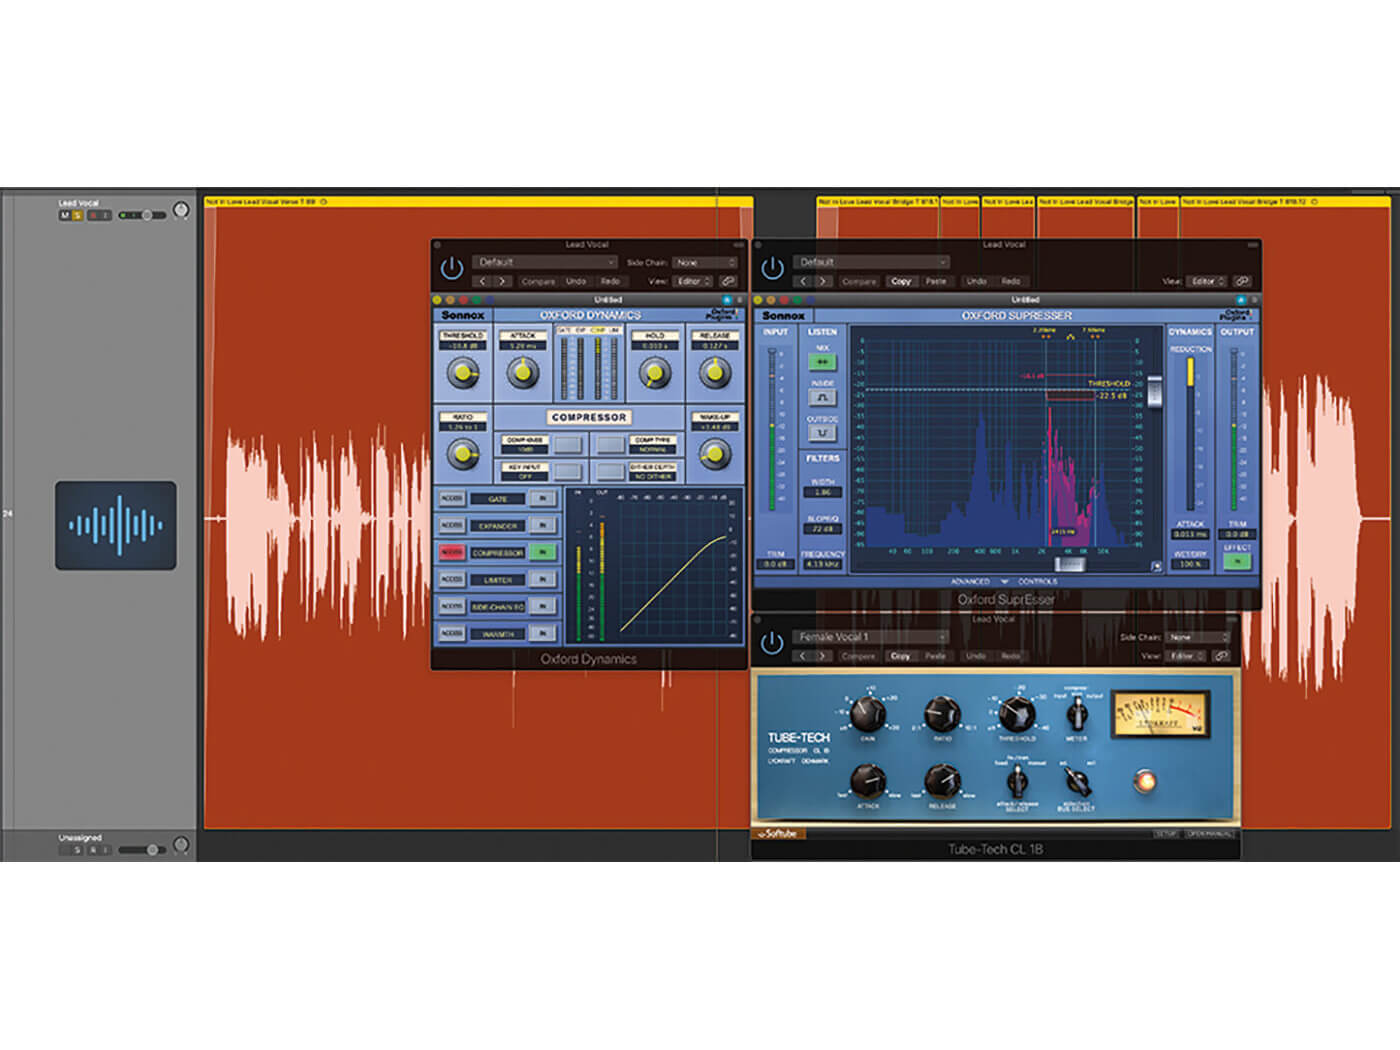
1. We start with a dry lead vocal. This features insert effects of an EQ, a first layer of compression, a de-essing treatment and a second compressor to further control dynamics.
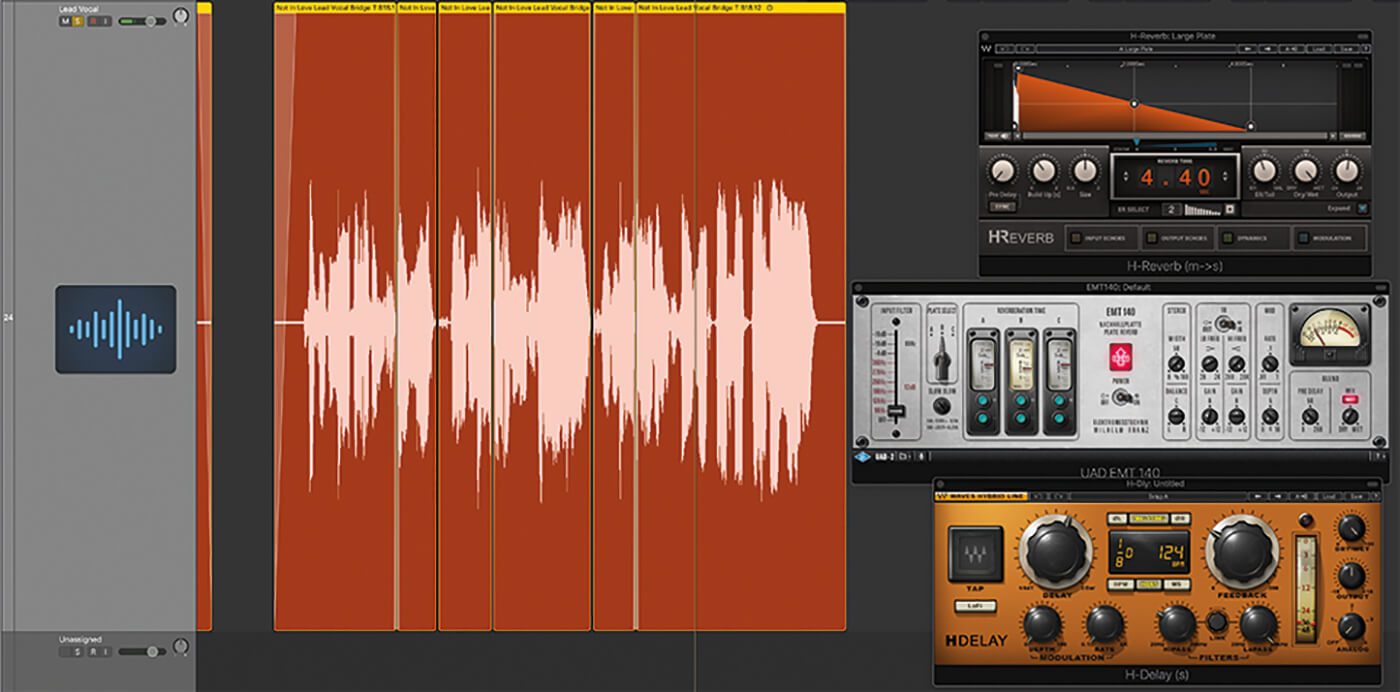
2. We add three ‘static’ auxiliary effects which remain present and unchanged throughout. These are a simple dotted 1/8th note delay, an EMT140 Plate Reverb and a second, longer plate treatment from Waves’ H-Reverb
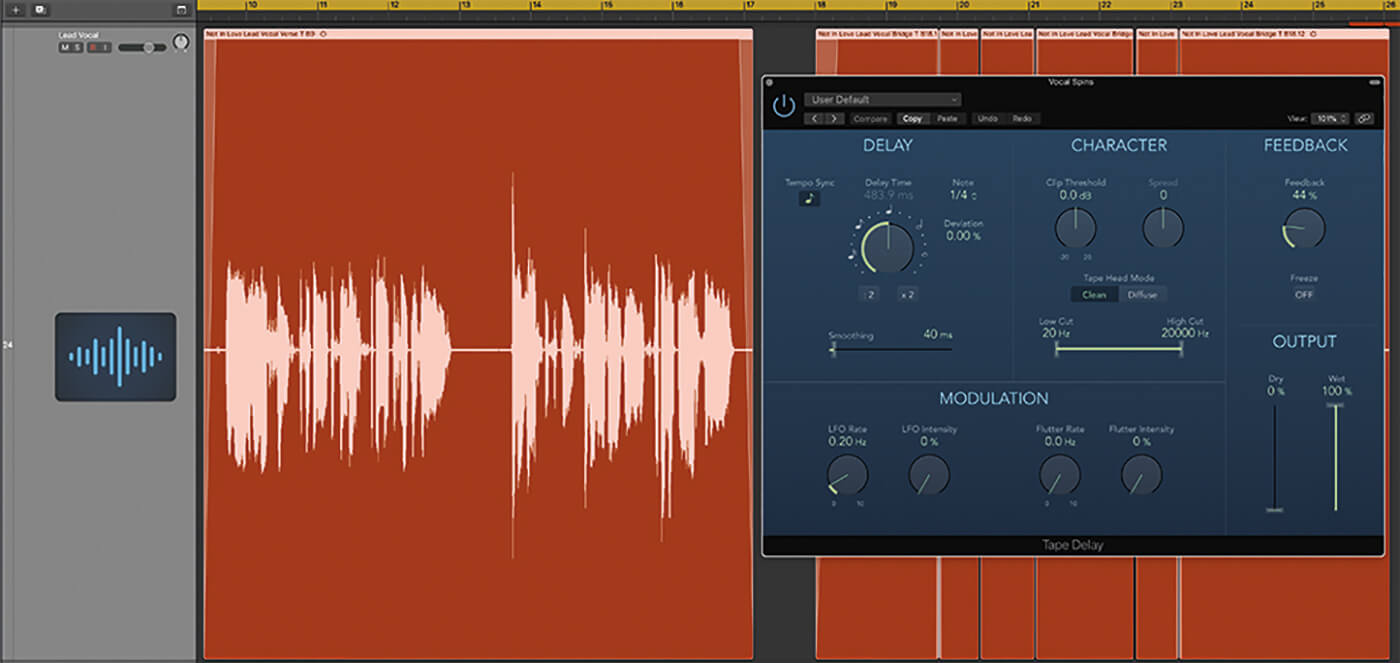
3. We want to add some dynamic vocal effect ‘spins’, which introduce a second delay effect on key lines of the song. We start by setting up a new auxiliary channel and instantiating Logic’s own Tape Delay plug-in, set to 1/4 notes

4. Rather than setting a static Auxiliary send level, we instead use Automation data, drawing increases in the Send level only for the moments we want the effect to be introduced.

5. The Send Level controls the amount of volume sent to the Vocal Spins auxiliary but we can also adjust the level of those effects using the Auxiliary’s fader. Rather than re-drawing all of the Send Level automation, we can turn the auxiliary effect level up or down.
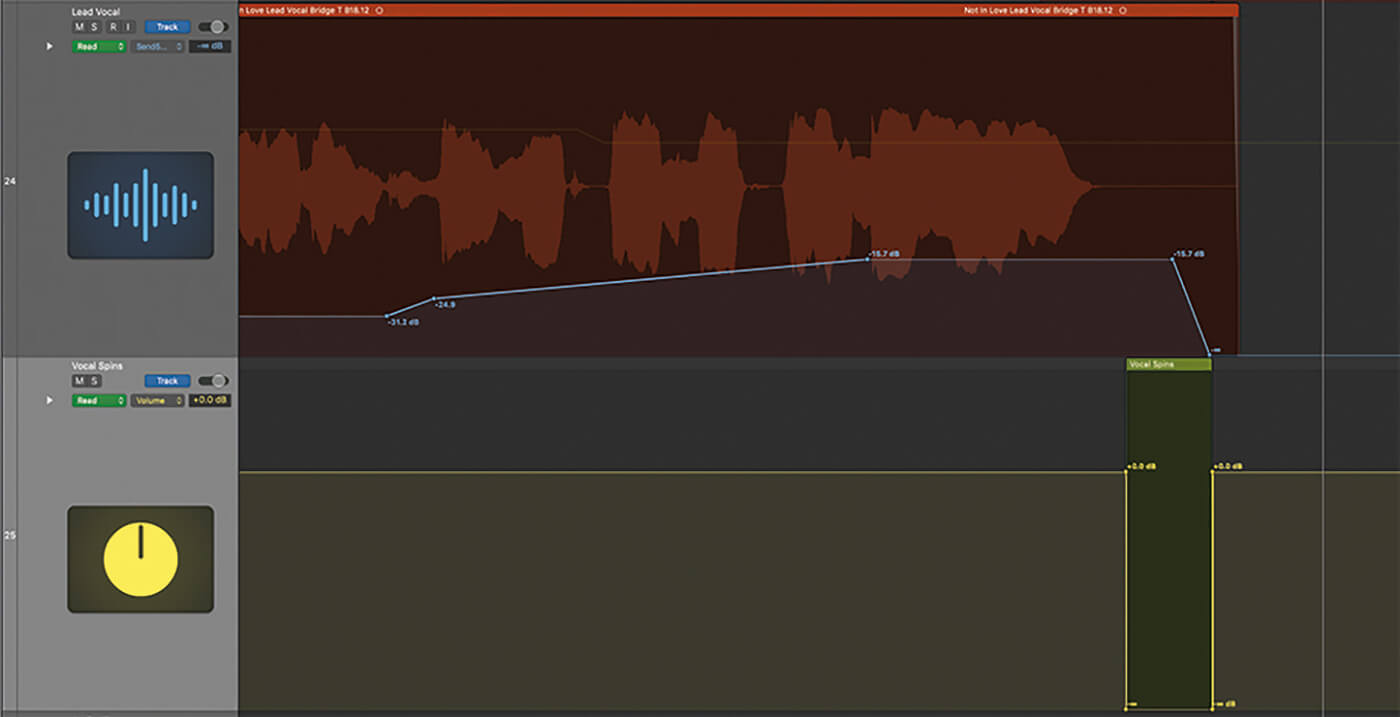
6. We want to be able to stop the vocal effects ‘dead’ to stop them playing back in various breaks during the song. So we add the auxiliary channel to our Logic project, and add volume automation data to drop levels completely whenever necessary.
For more Logic tutorials and workshops, check here.