Bass guitar processing in Logic
Able to transform even the most sterile DI’d bass into something that sounds like it’s been recorded through a monstrous rig, Logic Pro X has real low-end credentials.
Unless they’ve got some particularly understanding neighbours, most engineers and musicians tend to record bass guitar DI’d into their audio interface. A clean DI’d bass might be all that your track needs – enhanced perhaps by EQ and compression – but if you want a more amped-up sound, you’ll need to turn to some form of virtual-amp plug-in.
Logic Pro X’s Bass Amp Designer and host of other low-end-friendly plug-ins let you create mix-ready sounds straight out of the box. Delve deeper though, and you’ll discover that there’s more to Bass Amp Designer than simply boosting bass signals. This is a surprisingly flexible tool.
Amp it up
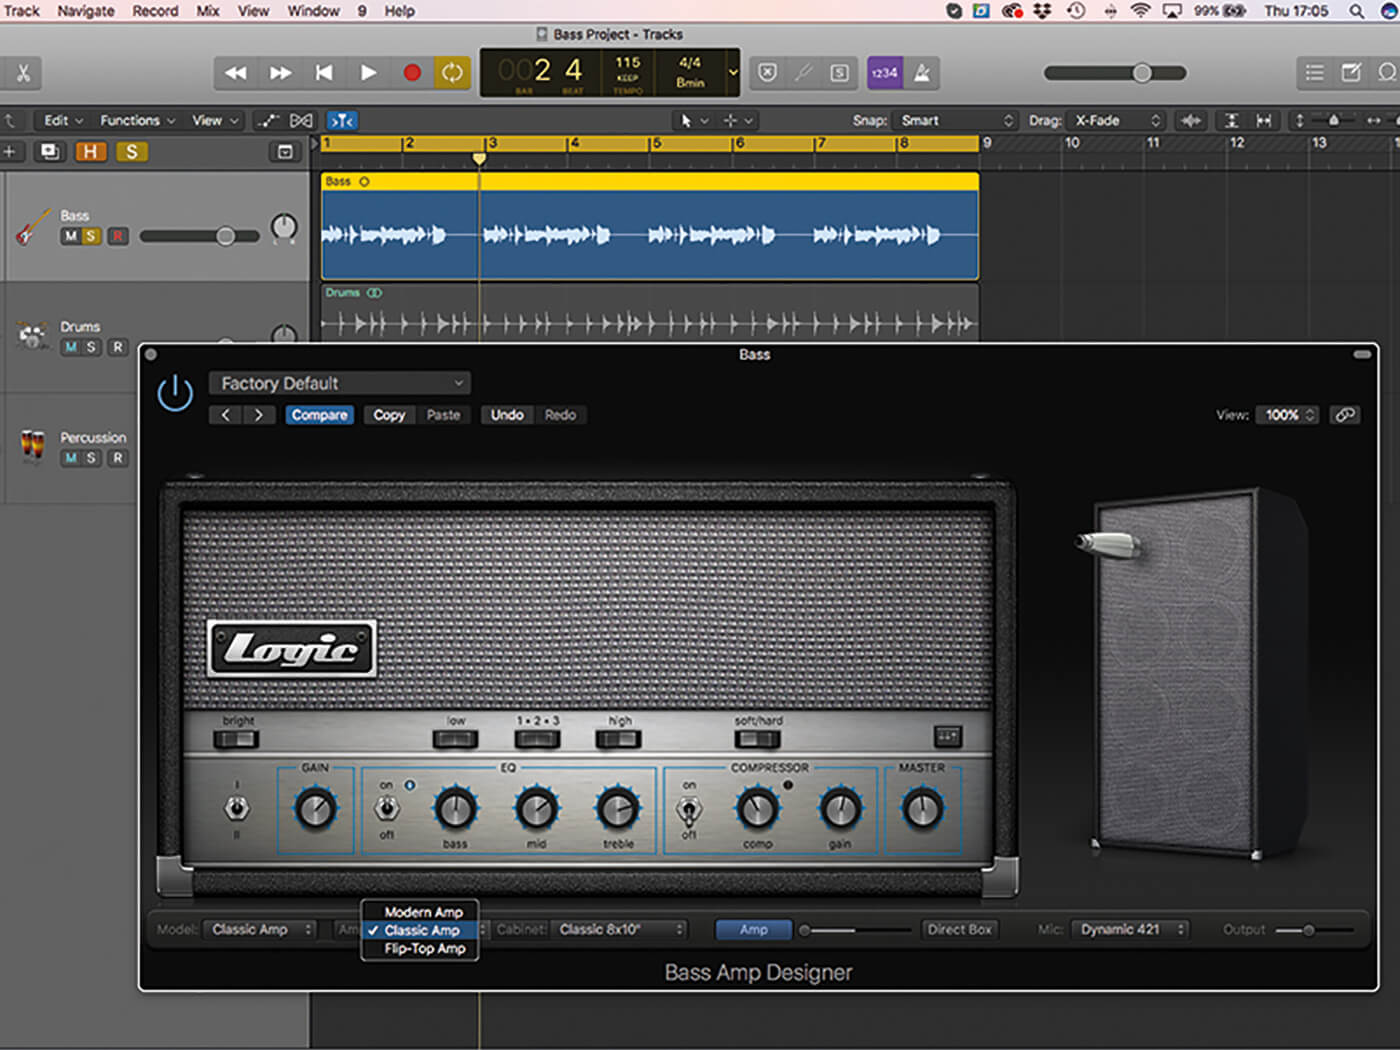
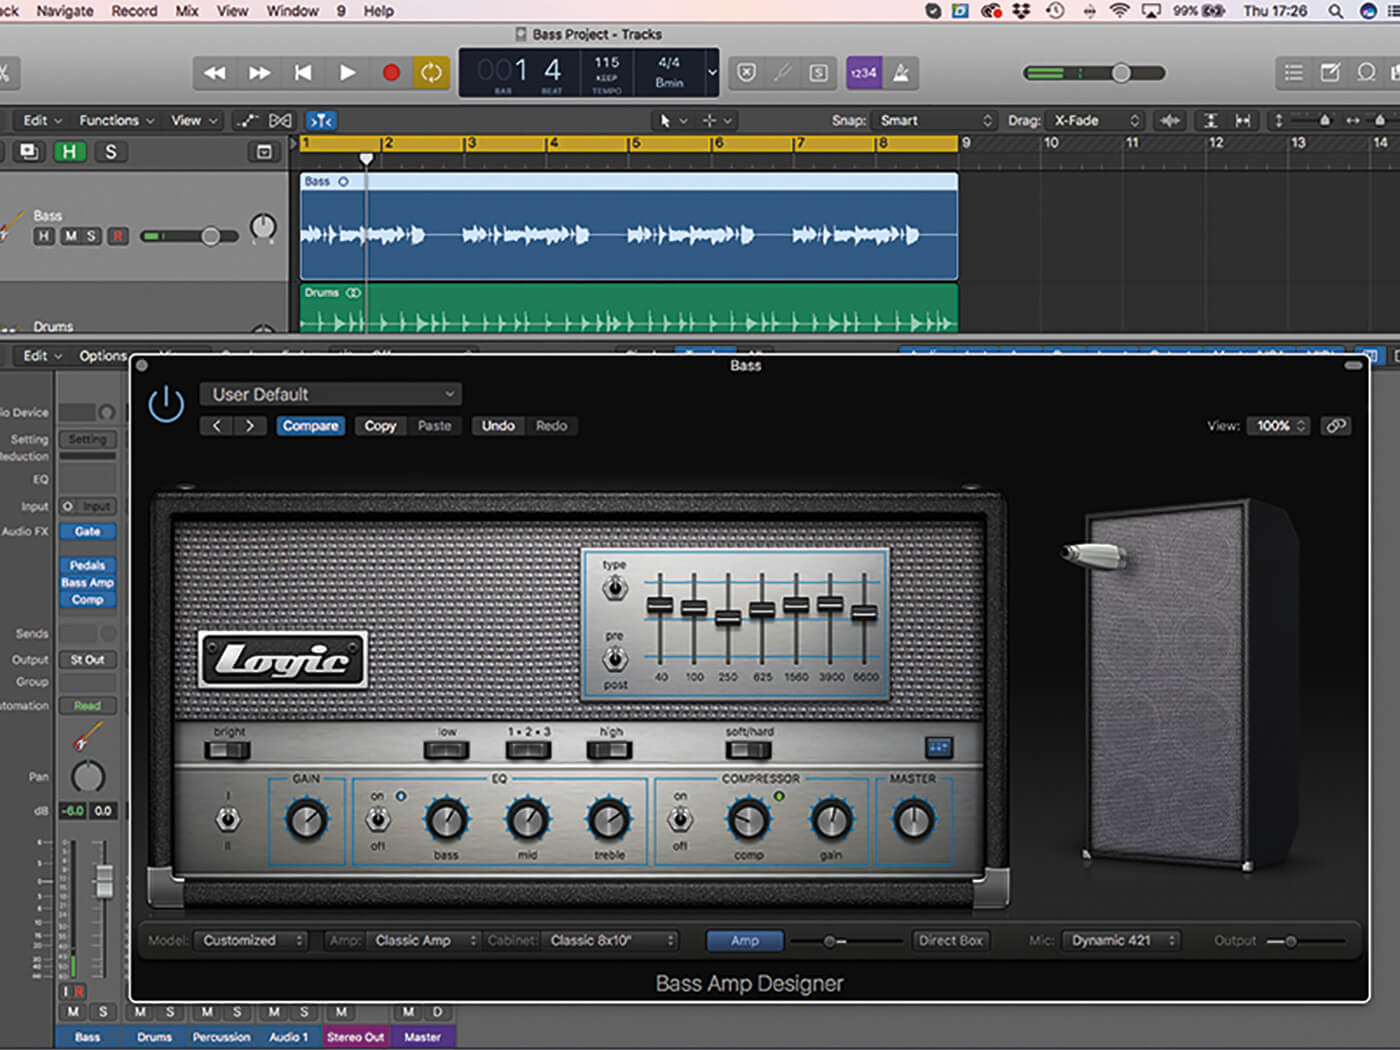
Bass Amp Designer takes much the same approach as Logic’s Guitar Amp Designer in providing a virtual combination of amplifier, cabinet and microphone with which you can mimic the sound of a properly recorded bass guitar. The plug-in is designed to let you build your ultimate bass rig by selecting the amp head, cabinet and mic that capture your chosen tone and timbre. You could leave Bass Amp Designer’s setting relatively open and transparent or, for example, you could build a more driven sound by pushing the amp harder and opting for a more colourful microphone.
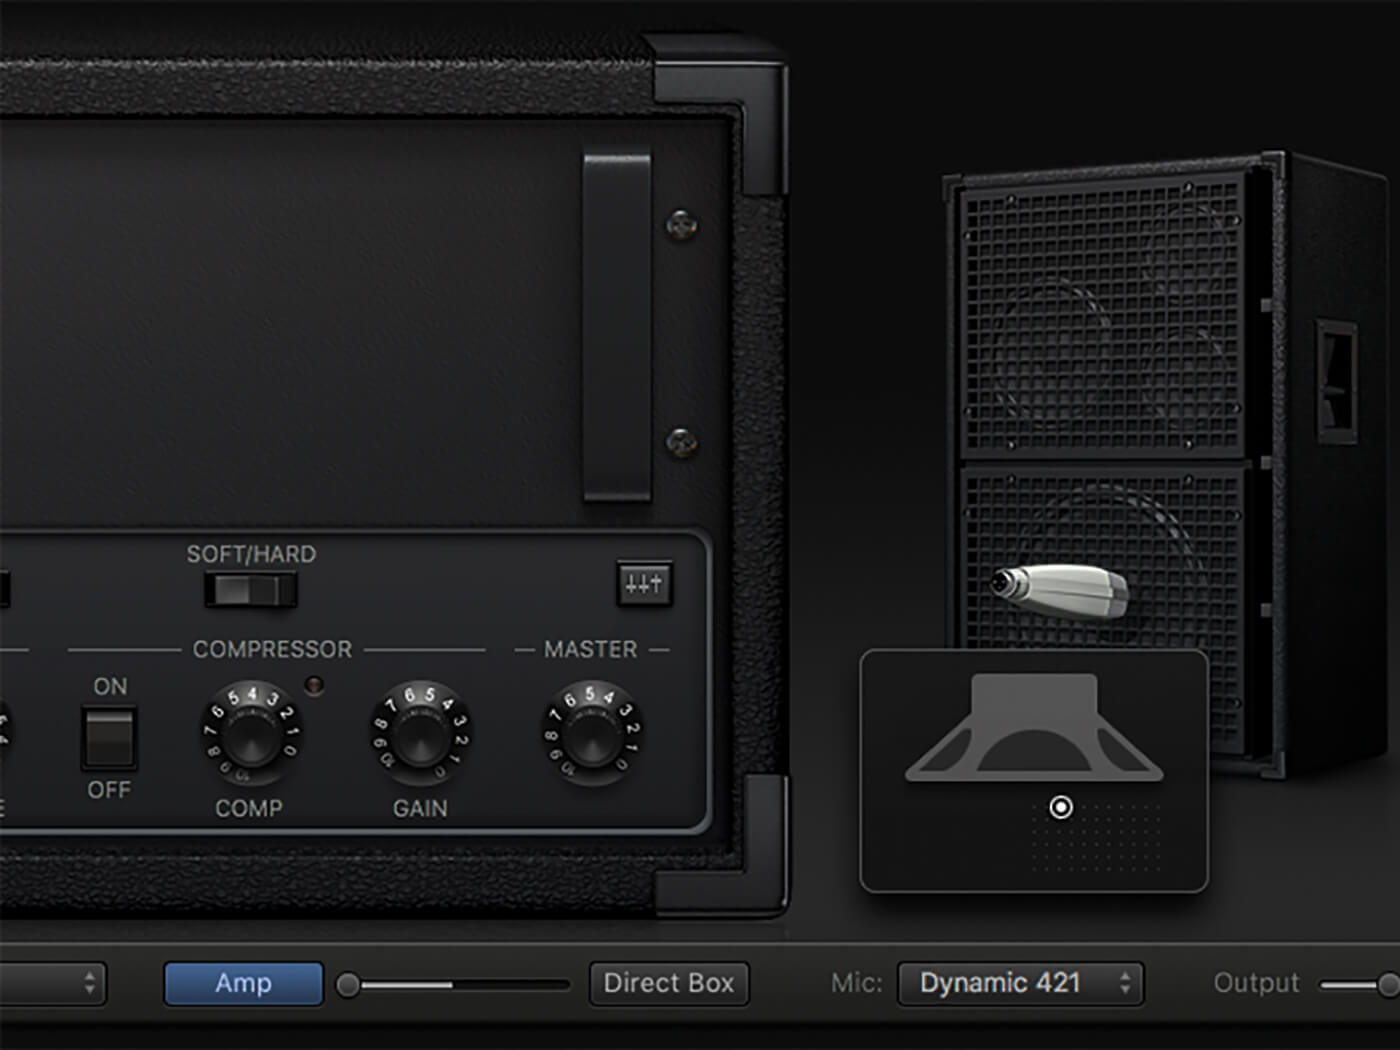
Though its guitar-amp equivalent has more options in terms of amps and cabinets, Bass Amp Designer features a few elements that its sibling does not. It includes a parallel signal path that allows you to combine an amped signal passed through an amplifier, cabinet and microphone, and a direct-box path that leaves the bass guitar relatively unprocessed. As with many bass-dedicated pedals, this parallel path is often used as a means of preserving the low-end weight of a DI’d bass but combining it with the more colourful sounds available when the instrument is recorded through an amplifier.
Gain brain
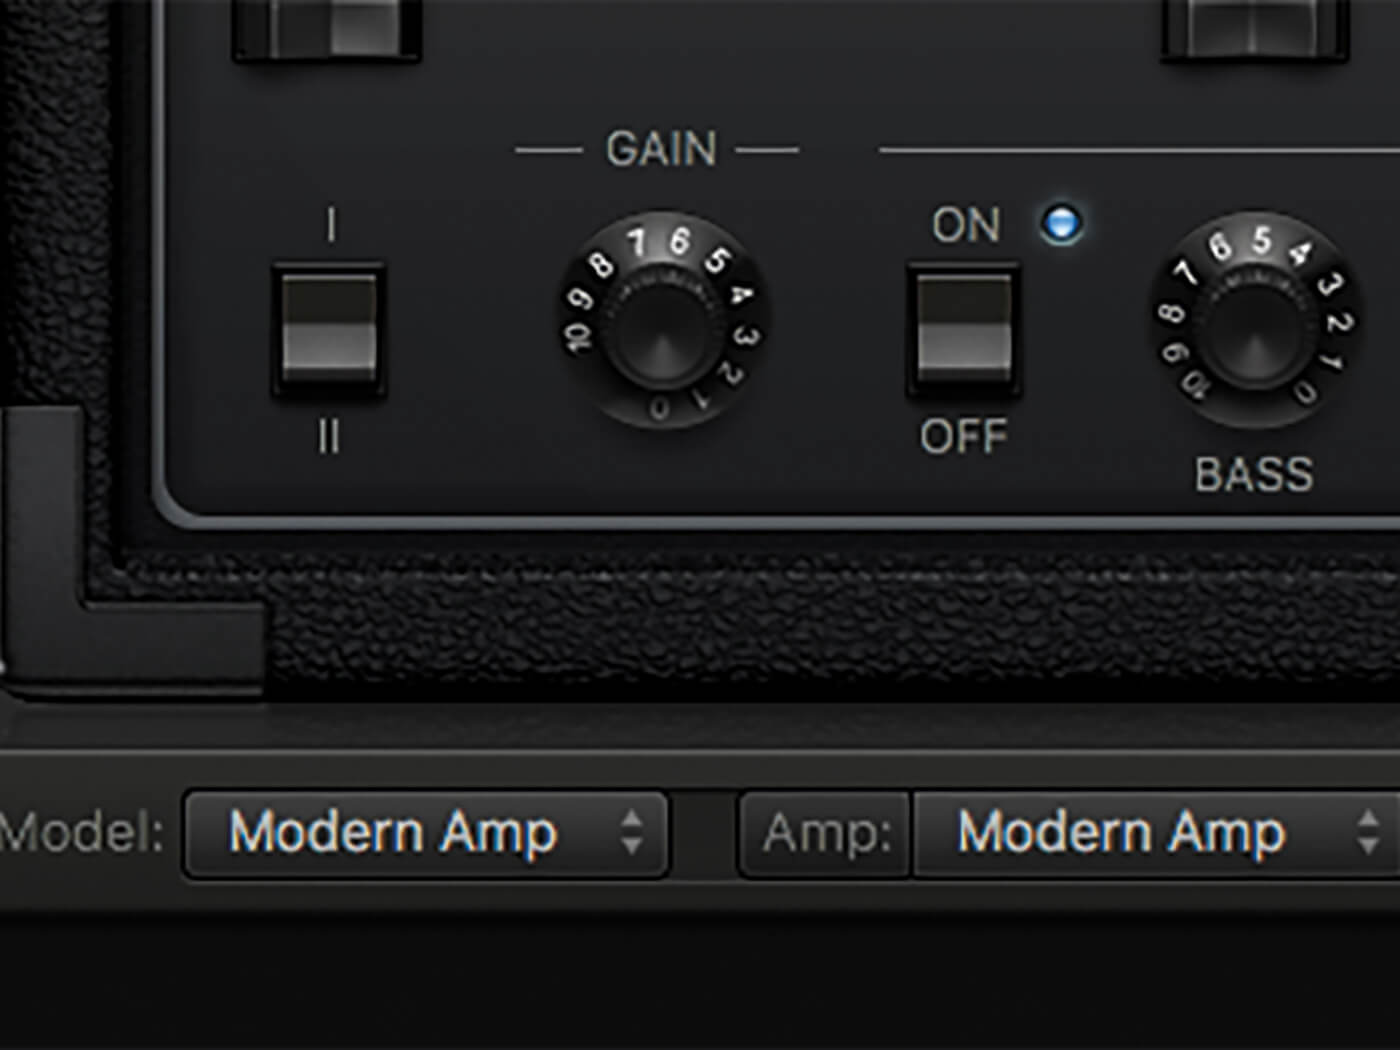
Before investing in the sound-shaping characteristics, understand the distinctions between the basic settings of your amp: its gain, how hard the cabinet is driven, and the mic options, for example. Even at this stage, you’ll likely notice some marked colouristic differences between the available combinations. The Classic Amp, for example, has a much richer sound than that of the Modern Amp, and the Condenser 87 microphone has a wider timbre than the more nasal Dynamic 421. Start with the correct combination of amp, cabinet and microphone for your needs and everything else should fall into place.
If you run either the gain and/or master controls hot, remember that the plug-in’s output control provides another way to attenuate your output levels, giving you a final layer of management to ensure your mixer isn’t running into the red. The master control is actually part of the cabinet modelling, so attenuating at this stage will actively change the tone and saturation of the sound along with its level.
Basses loaded
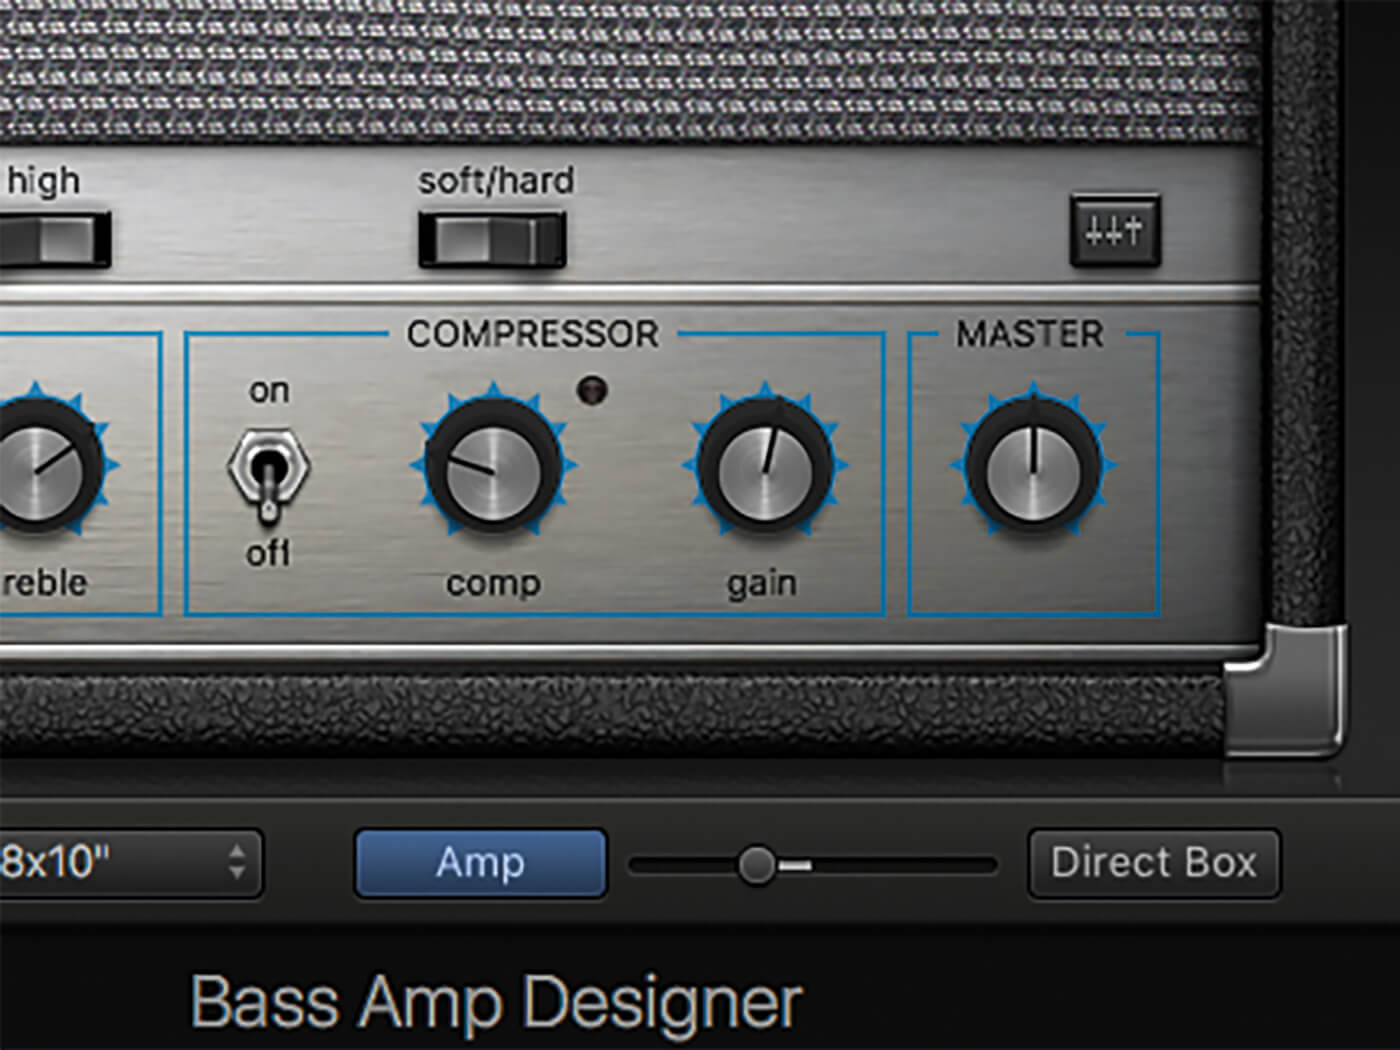
Next, consider how best to apply EQ to your amplifier. Here, the bass, mid and treble controls work in much the same way they do on a guitar amp, with the gain control offering an additional level of interest. If you want the EQ to really pop, for example, turn up the gain. The Bright option adds instant top end to your bass guitar, and has two channels (labeled I and II) that model active and passive operation.
One of the most overlooked parts of Bass Amp Designer is the Direct Box option, which runs alongside the amped signal. The mix control found towards the bottom of the interface gives you control over the relationship between the two paths, so that you can create a custom blend of both an amp and direct signal, for example, or favour one over the other entirely. The Direct Box takes a clean version of the bass as its starting point and lets you sculpt its path – the six-position tone control featuring various scooped EQ settings is the easiest way to do so. In most cases, the Direct Box can restore some of the clean low end that a more driven or bright amp setting might reduce.
Keep in mind that Bass Amp Designer shouldn’t be the beginning and end of your signal path. Carefully placed plug-ins both before and after this one can add some arresting enhancements to your sound. This walkthrough demonstrates how you can use Pedalboard ahead of Bass Amp Designer to create an overdriven bass sound, or how effects such as compression can be used before or after Bass Amp Designer to change the dynamic range of the bass.
The combination of Bass Amp Designer and bass-friendly effects lets you craft a range of sounds in Logic Pro X. Of course, there’s no reason to restrict these techniques solely to bass guitars. Try them on synths, drums or anything that features low end and demands some extra drive.
Bass guitar processing in Logic Pro X: step-by-step
Download the project here!
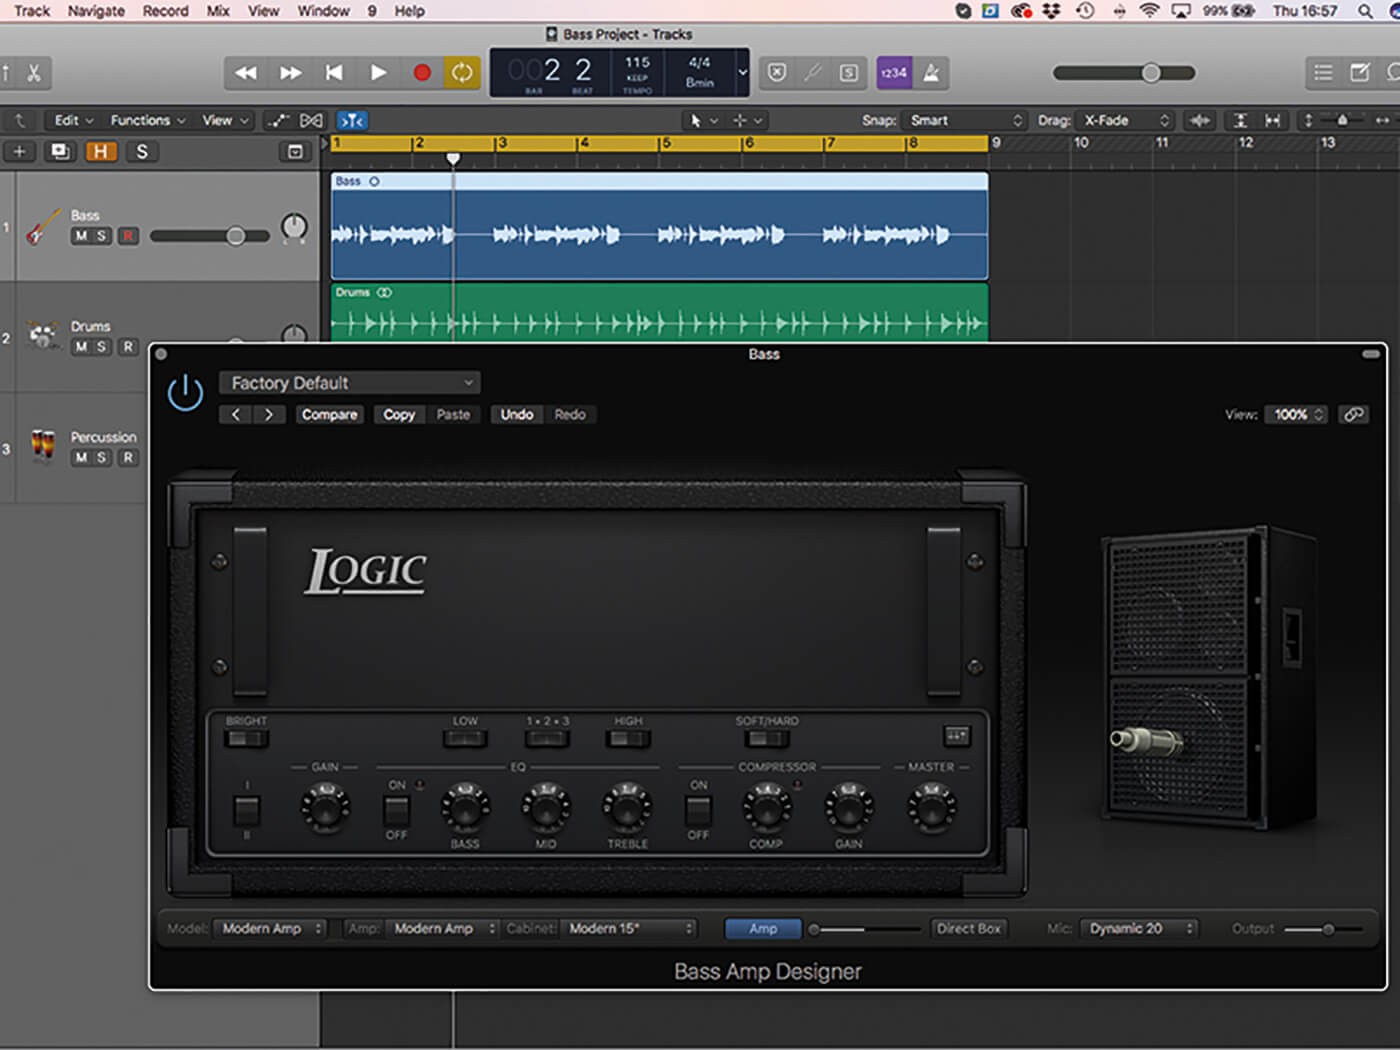
1. Working from a clean setting with no EQ or compression, experiment with the gain and master controls to see how hot the amp should run. Use the output control to compensate for any loud gain or master settings.
2. Running the gain and/or master controls higher than 7 will produce a more saturated tone. To preserve the natural qualities of the bass, as we have here, run both controls at a more respectable 5.
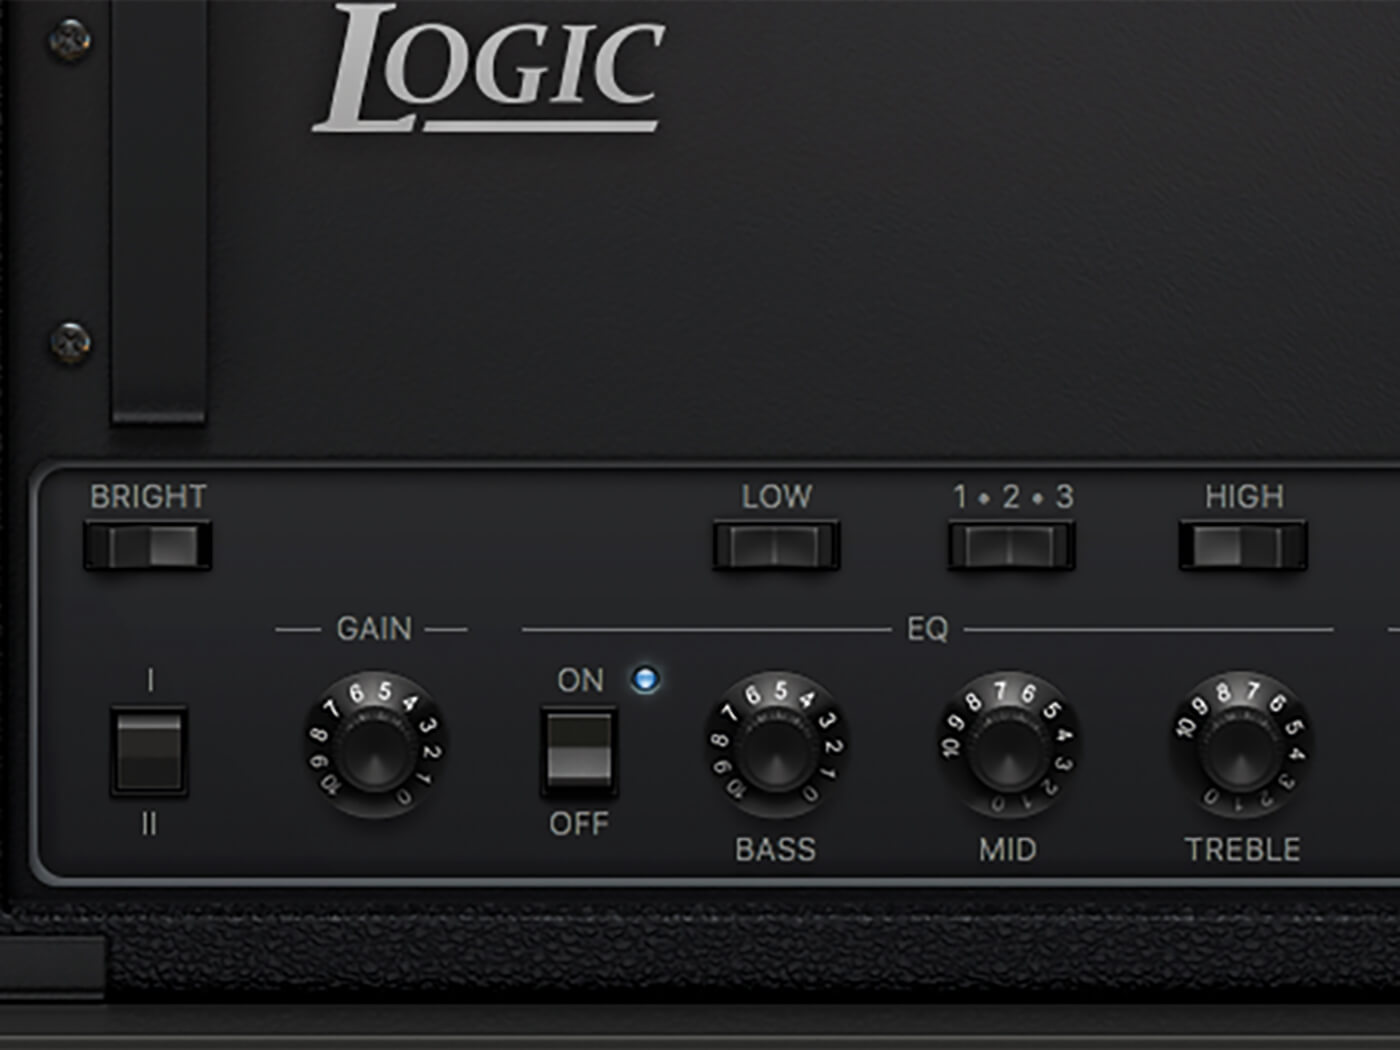
3. With the basic tone set, activate the EQ and enhance the timbre of the bass. Activate the Bright switch and push the treble to emphasise a clean and prominent-string sound.
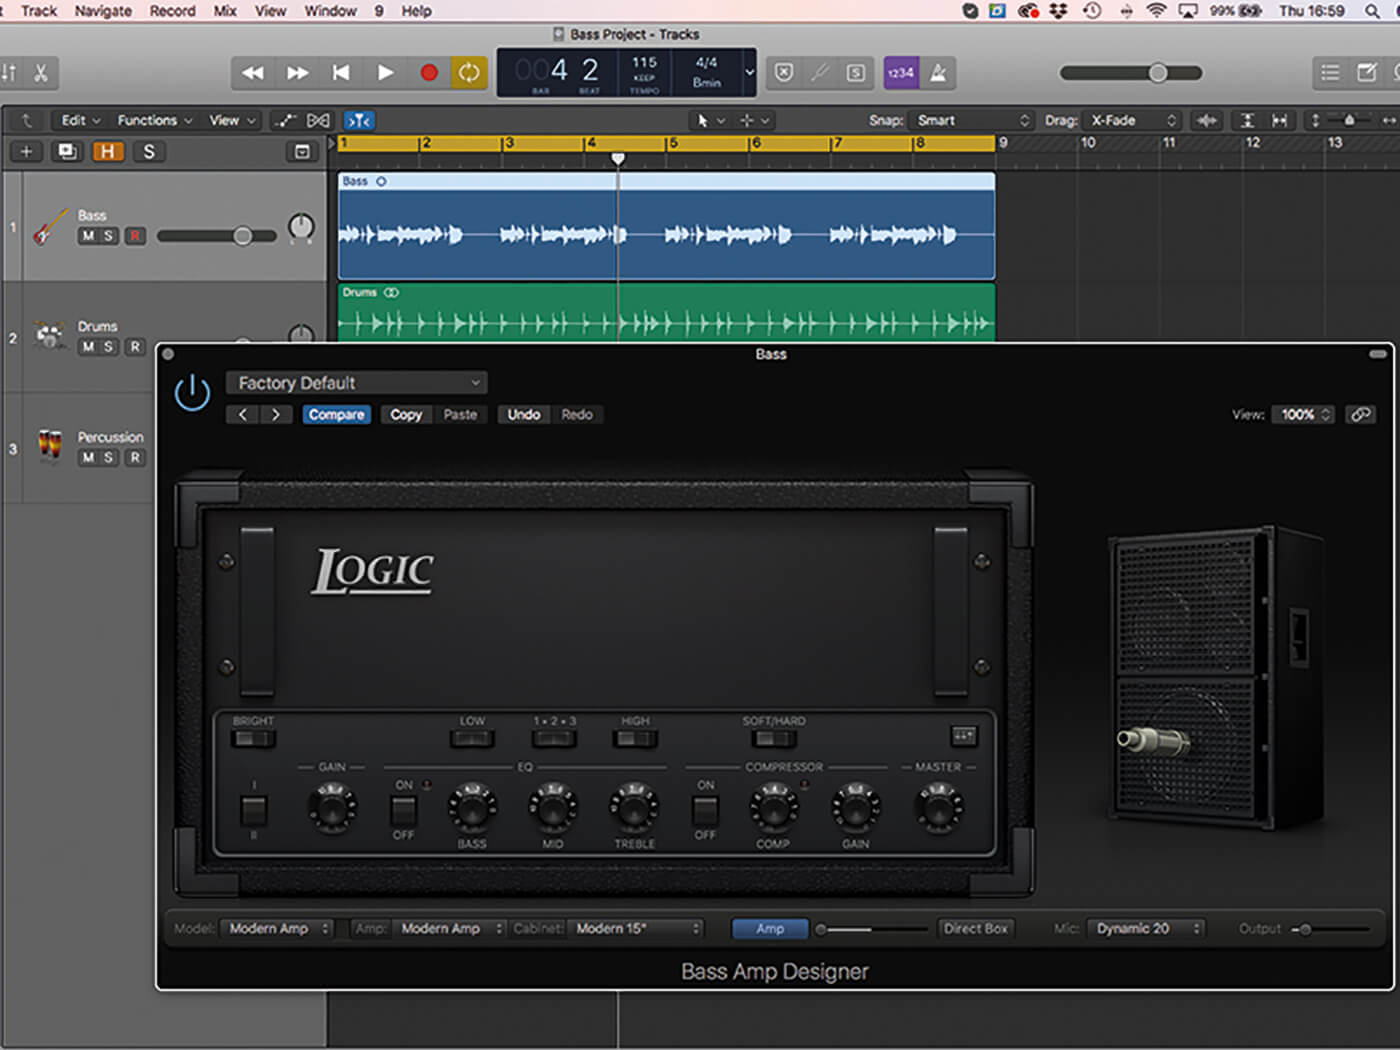
4. The Preamp Gain setting can vary the EQ sound, with more aggressive gain settings producing more pronounced forms of EQ. Experiment with the channels (I and II) and see how the EQ is affected.
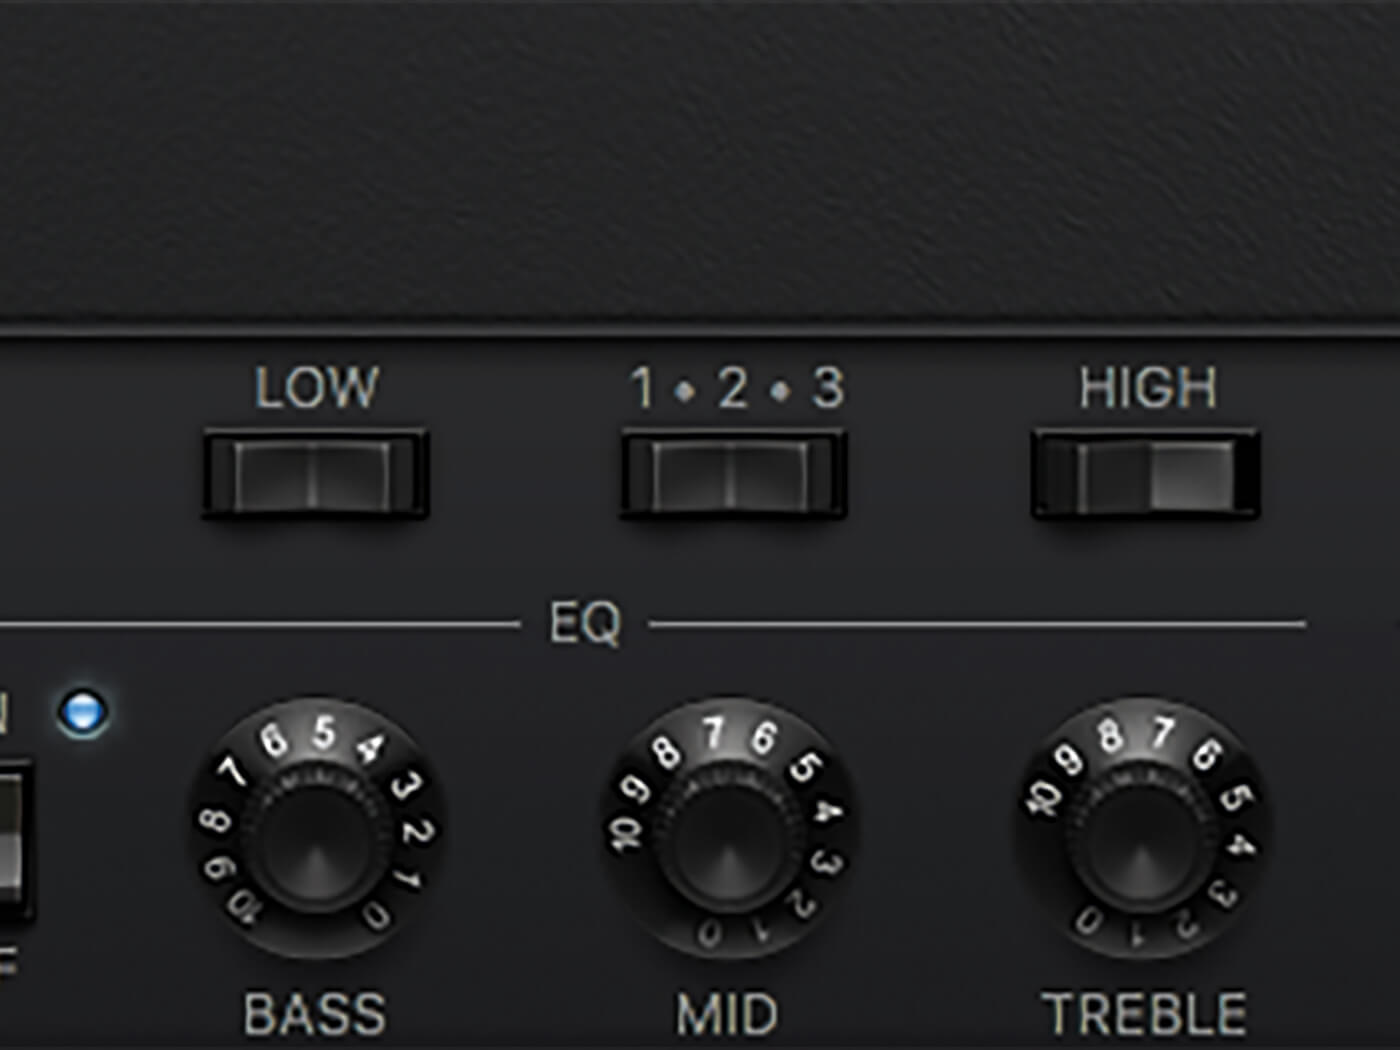
5. The switches at the top of the EQ change how the bands operate, particularly in relation to their chosen frequency. The High switch, for example, moves between High and Super-High frequency settings.
6. The choice and positioning of the microphone can also affect timbre. The Dynamic 421 mic, for example, has pronounced upper mids, which can be softened by moving the mic to the speaker’s edge.
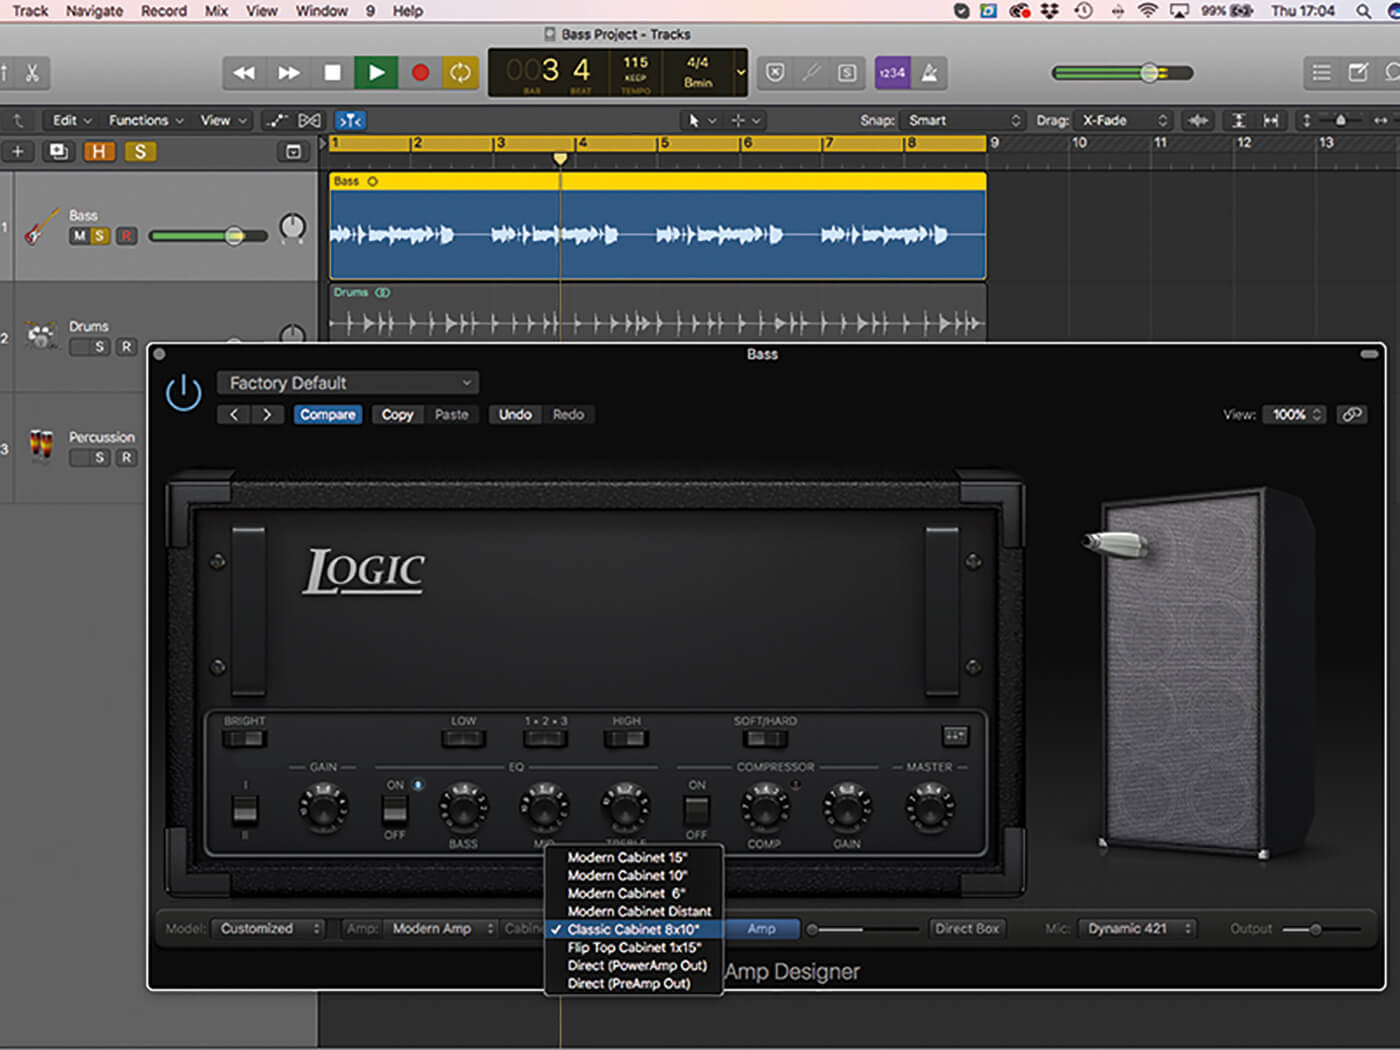
7. Switch between different cabinets. Notice how the size of the speaker affects the treble, bass and mids. Use the Classic 8×10” cabinet for a pleasing scooped sound.
8. Experiment with the amps. Match the amp head to your cabinet by choosing Classic Amp, which features more pronounced gain and EQ colour.

9. The Direct Box is a parallel signal path to the amp. Turn the Mix control all the way to the right and click on the direct box to see and hear it in action. The controls are simple, as the direct box is designed to be clean.
![]()
GATEKEEPER If you’re going to use a lot of drive, place a noise gate at the first plug-in in the insert path. Gating the bass at the end of the chain will be much more difficult, as the distortion will reduce the dynamic range. Use a noise gate as the first plug-in and it will be relatively easy to ensure that the bass is muted between notes.
10. Dial back the Mix control to get a predominantly amp-led sound but with some direct-box bleed. This is a good way to restore low-end frequencies lost by the amp.
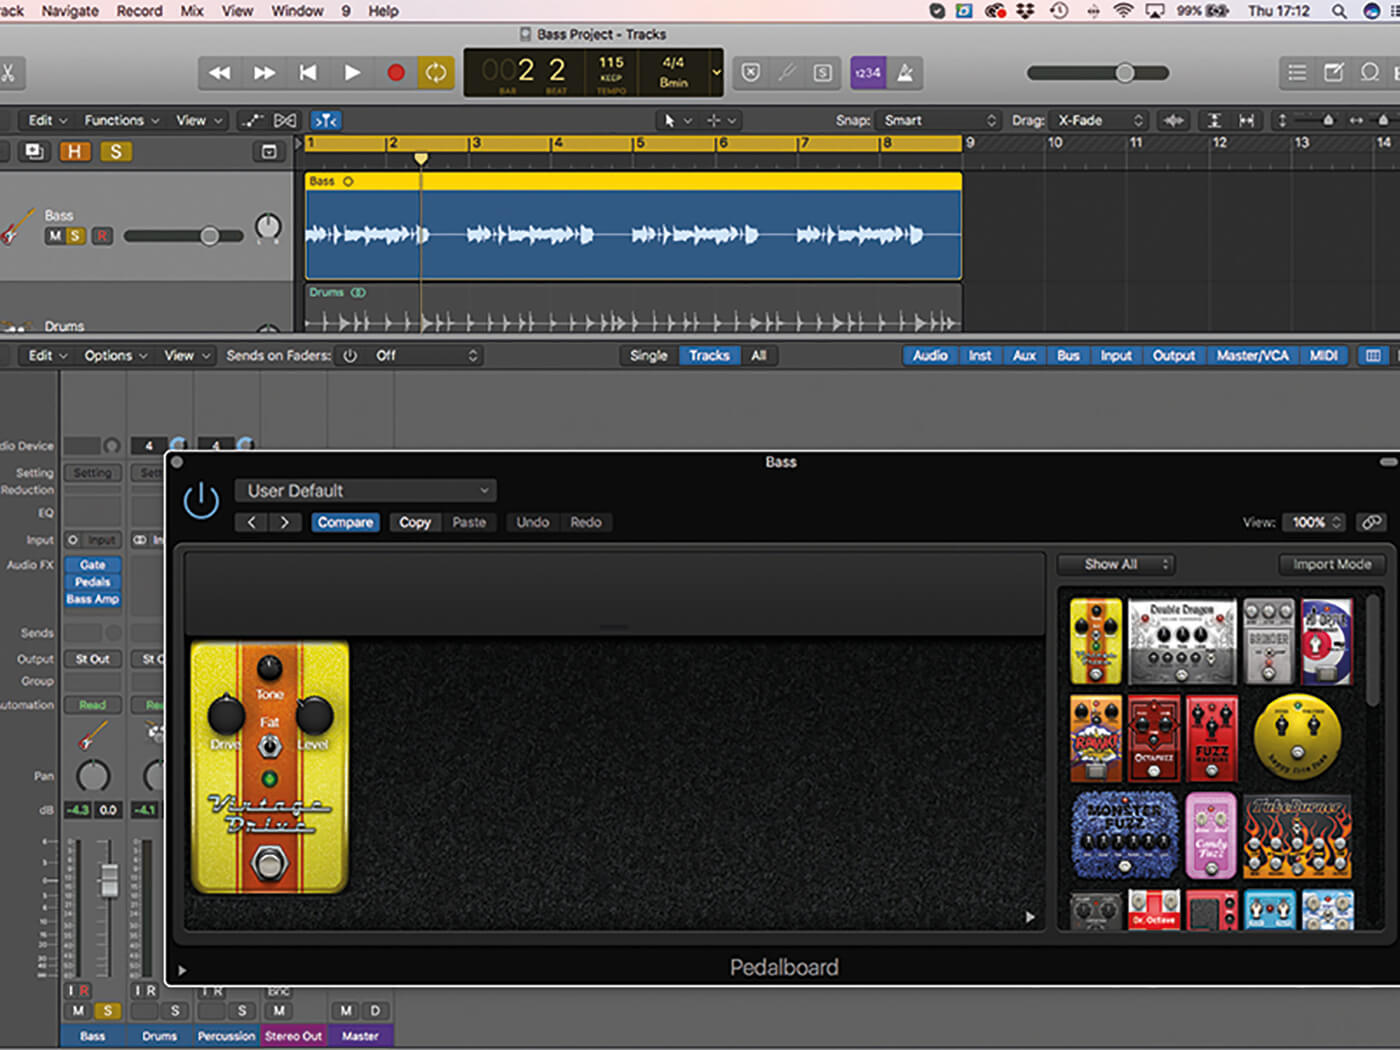
11. Shuffle the insert order so that you place an instance of Pedalboard between the noise gate and Bass Amp Designer plug-ins. Add the Vintage Drive plug-in so that the bass has a noticeably distorted tone.
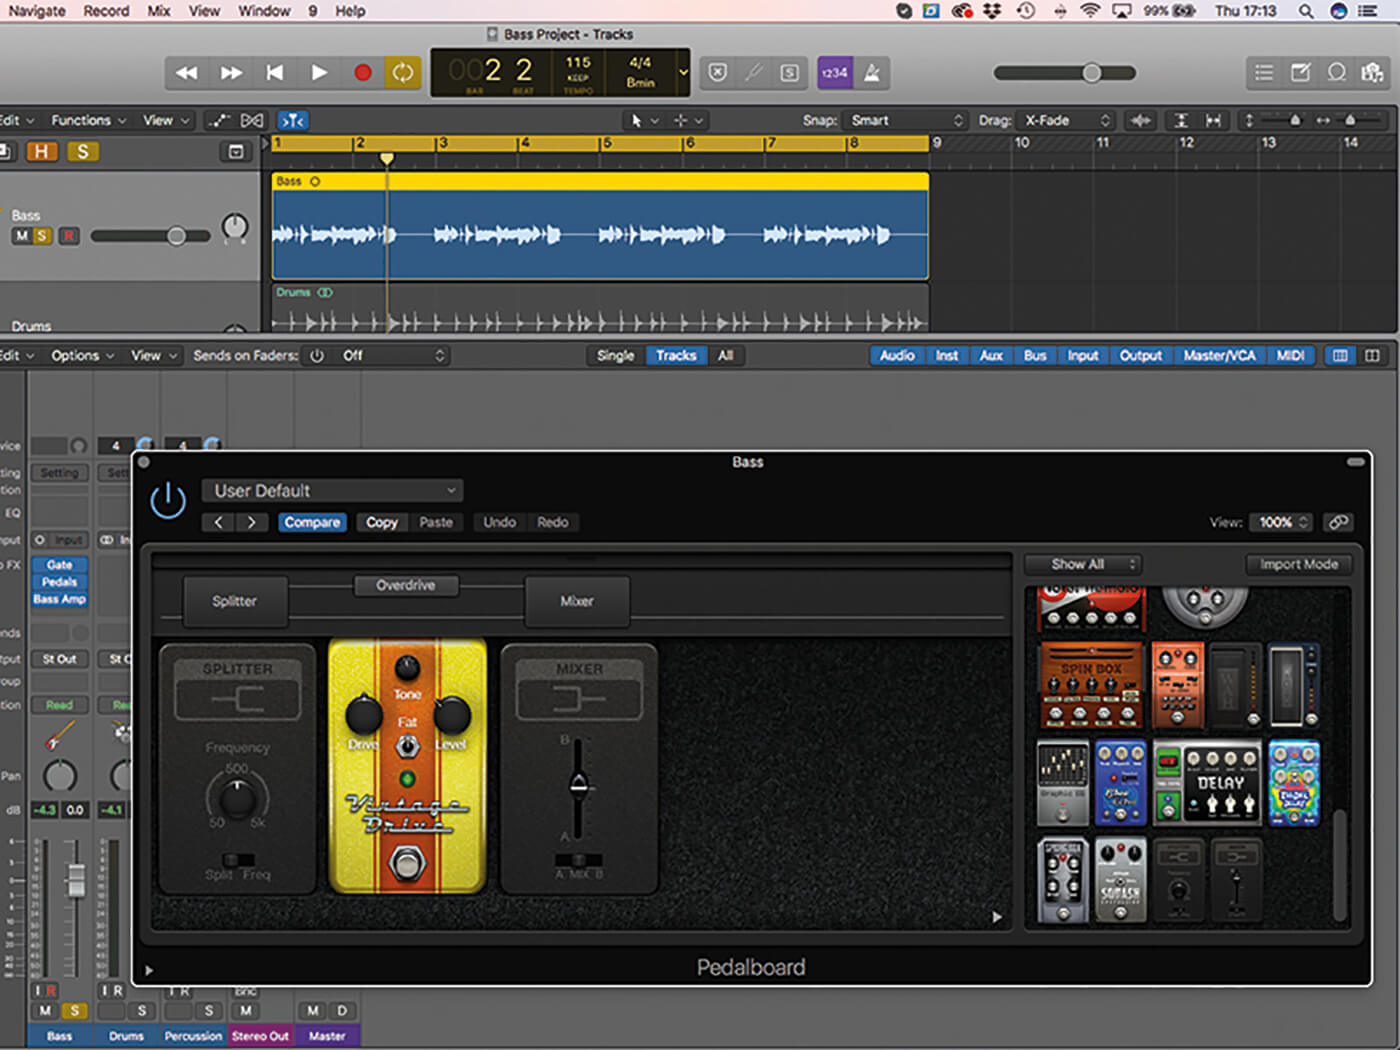
12. Place a Splitter at the start of the pedal chain and ensure the Overdrive pedal is moved up to the upper signal patch. The Splitter lets us apply distortion to the upper frequencies of the bass.
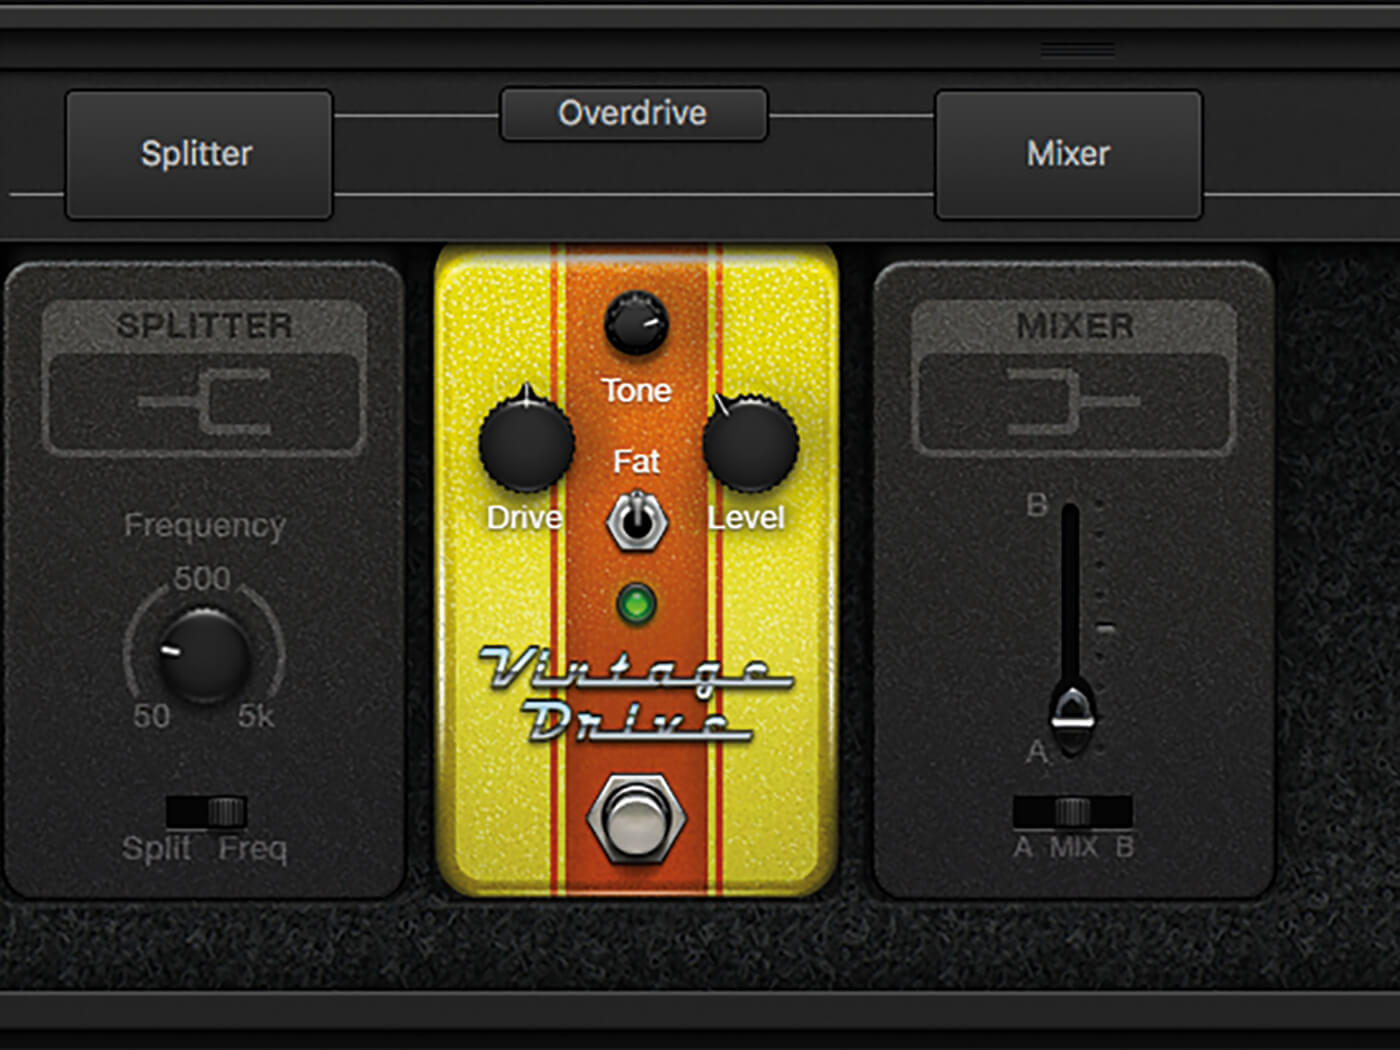
13. To make Pedalboard frequency-specific, move the Splitter to Freq mode and set the frequency control to about 150Hz. Use the Mix control to blend your desired amount of mid-high distortion to the output.
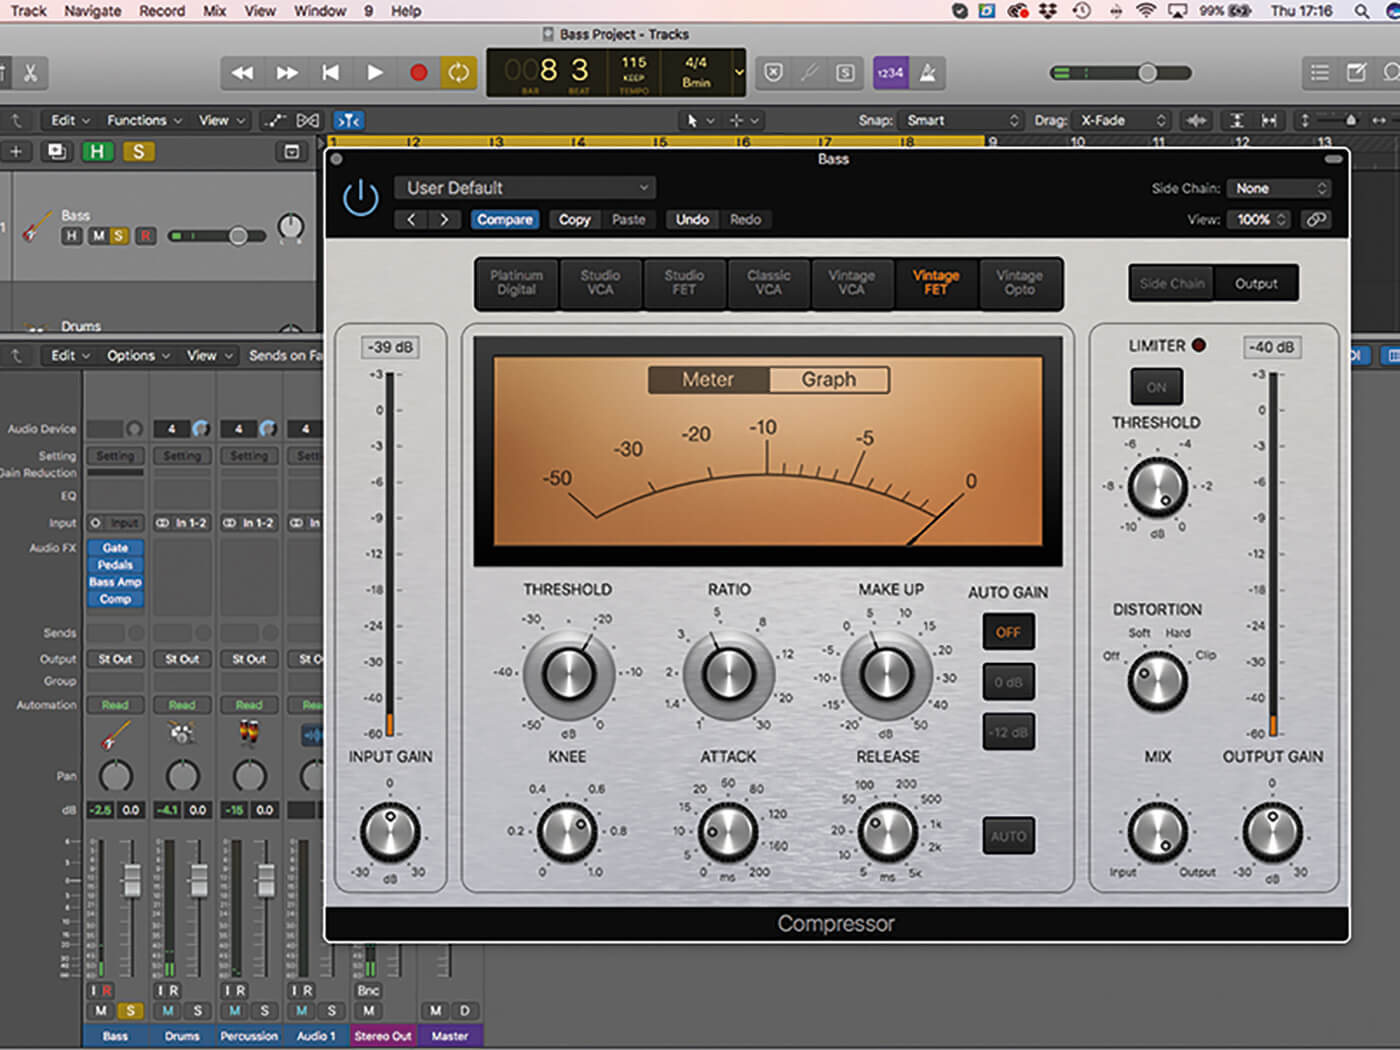
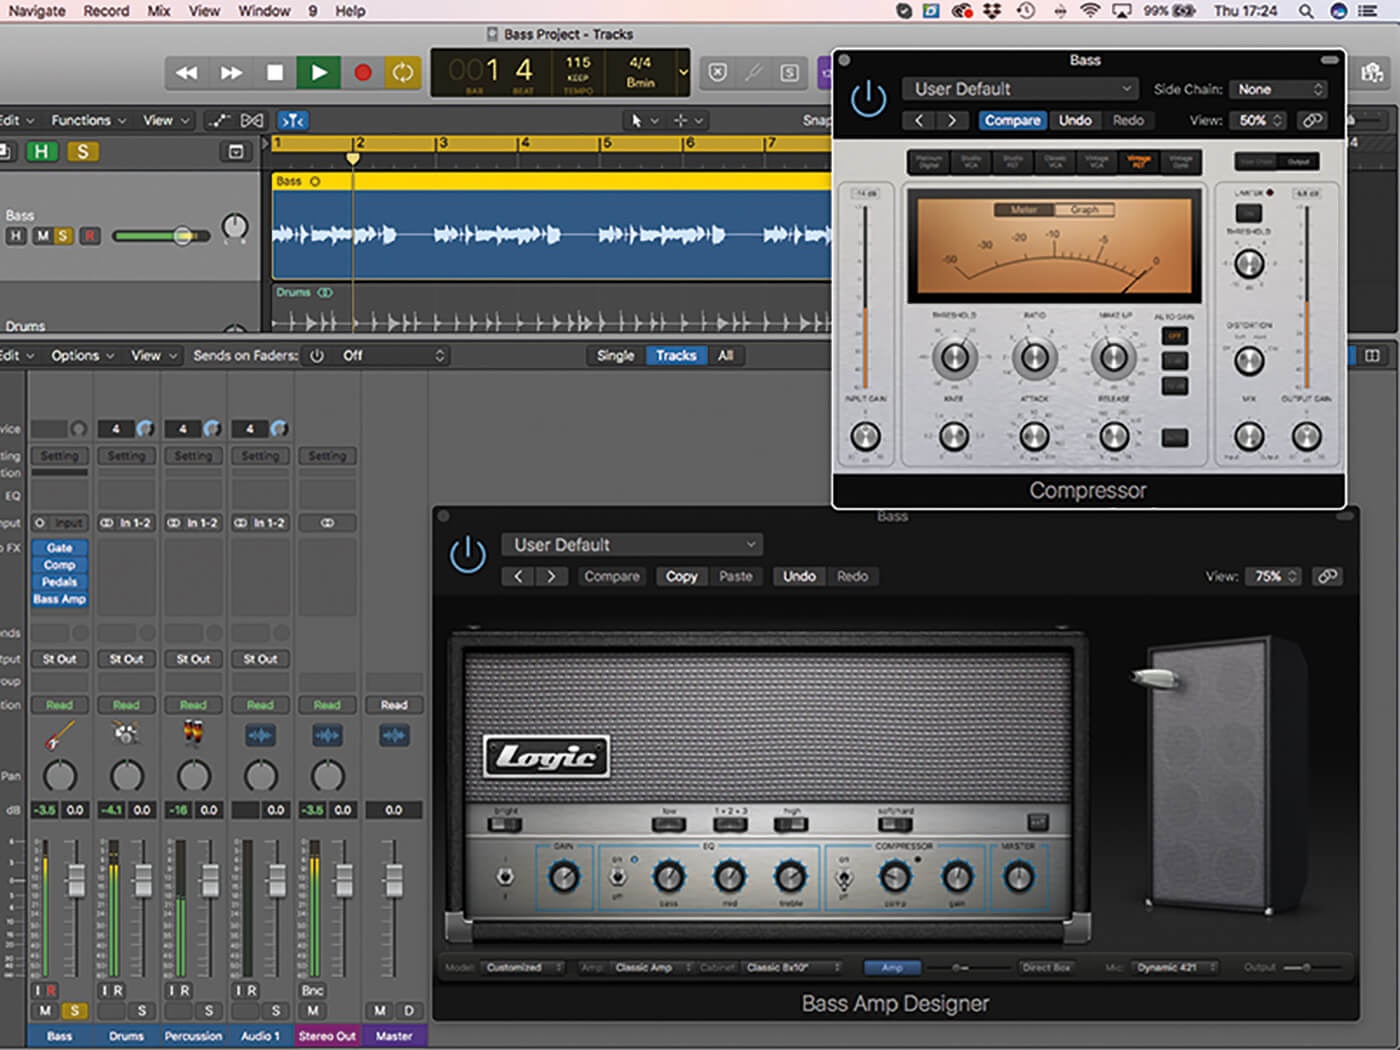
14. The compressor plug-in can give you different results depending on where it is in the signal path. Here, we’ve placed it at the end.
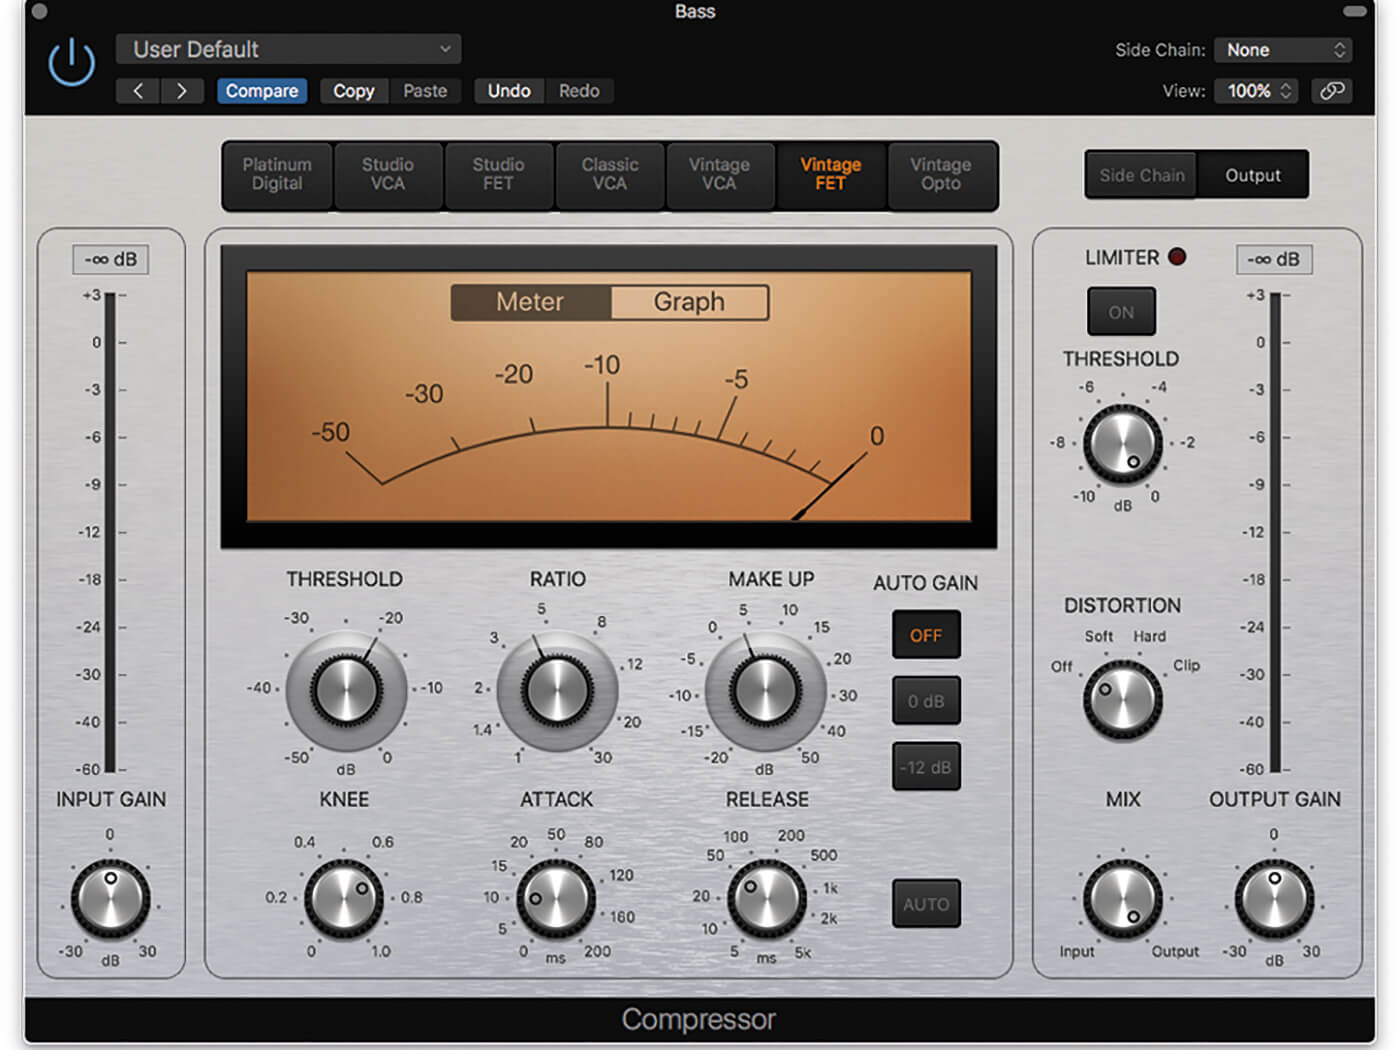
15. The setting on the compressor delivers a tight bass sound, using a ratio of about 4.5:1 and a threshold that delivers 5 to 10dB of gain reduction. We’ve used the Vintage FET model to maintain our retro vibe.
16. Shuffle the plug-in order again, this time placing the compressor after the noise gate. Notice how the compressor now changes how the amp behaves, rather than simply compressing the amp’s output.
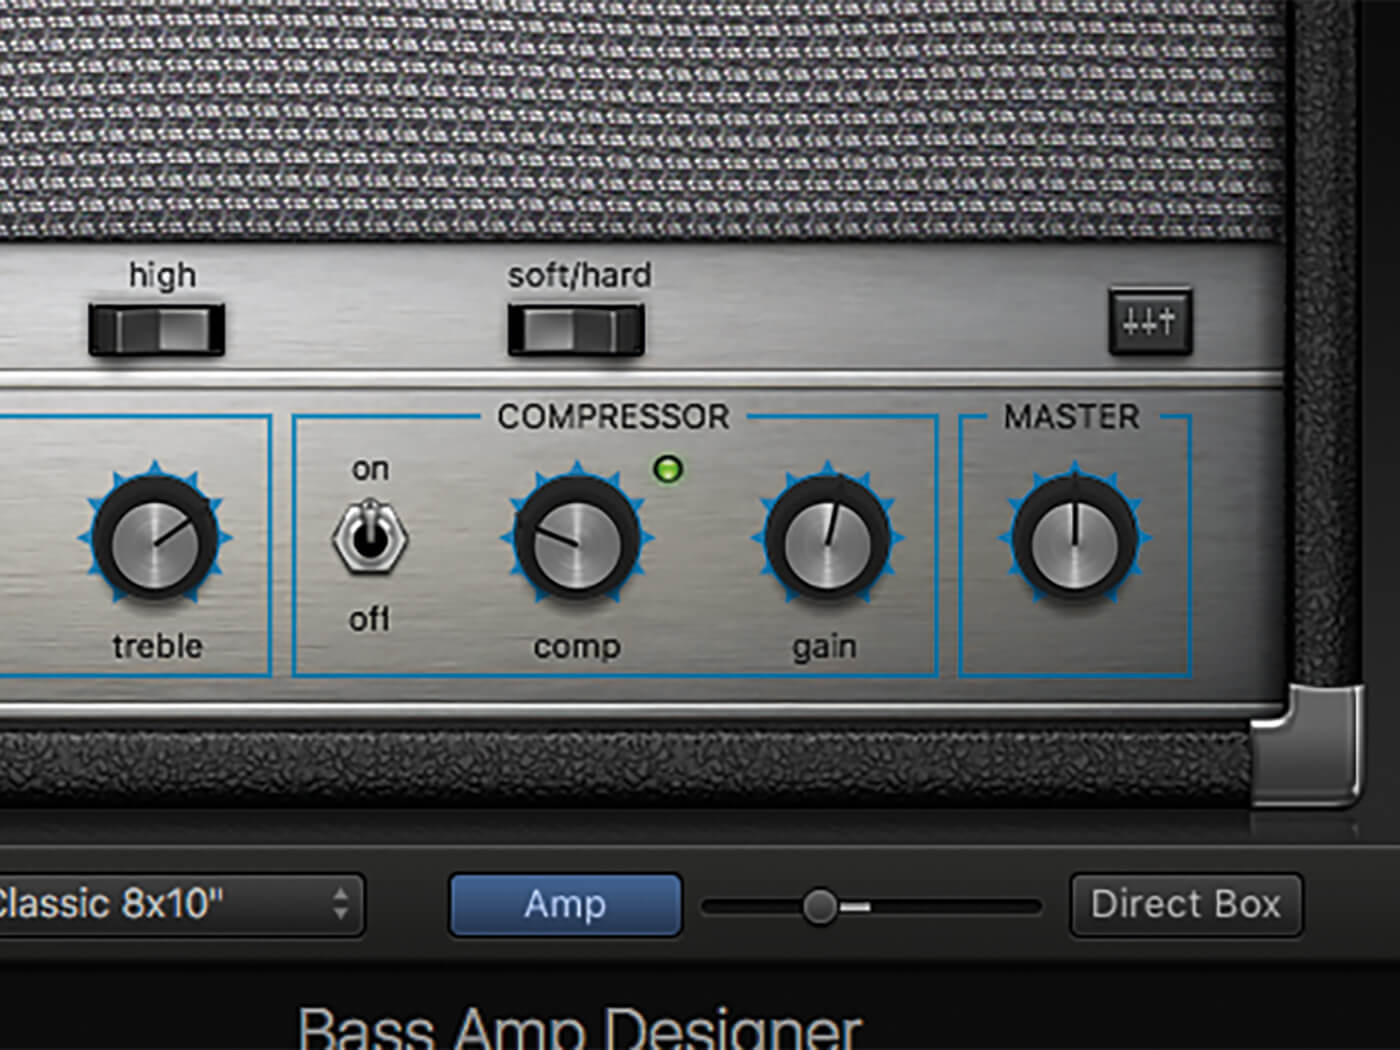
17. Bass Amp Designer includes its own compression section, so if you like the sound of pre-amp compression and can live with fewer controls, this will be a valuable tool to experiment with.
18. Additional EQ can be activated via the button above the master control. The Graphic mode is particularly useful for Ampeg-like settings, scooping out mids and adding more bass and treble.
For more Logic tutorials and workshops, check here.