How to control loudness when mastering in Logic
Loudness control is an essential part of the mastering process, but it can also be a handy ‘quick fix’ means of ensuring your rough mixes stand up to commercial recordings…

More than any other part of the music-production workflow, the art and science of mastering seems to evolve and adapt dramatically over time. The reasons behind these fundamental shifts can be explained in two ways – an evolution in music formats and more intriguingly, changes in peoples’ taste in respect to the perceived ‘sound’ of recorded music. In the lifetime of MusicTech, we’ve seen the fading out of the disc format and the rise of streaming and unexpected rebirth of vinyl, all largely in the last decade. Likewise, the so-called Loudness Wars seem to have passed, but have we really moved to an era of wide dynamic range, or do musicians still have a desire to push their music to the limits?
In this two-part Logic workshop, therefore, we want to take an in-depth and practical look at the state of mastering and how it fits into your Logic workflow. Rather than just explore mastering as a distinct and separate exercise, though, we want to explore its practical impact on the later stages of production – from loudness considerations and headroom in mixing, through to ‘quick fix’ reference mastering and a more detailed approach to file delivery.
In this tutorial, we’ll look at the latter stages of mixing and how the issues of mastering start to impact on your mixing decisions.
Making headroom
The seeds of effective mastering start from decisions you make at the tail-end of mixing – namely in relation to headroom and the loudness of the track you’re mixing. Opinion varies as to how much headroom you should leave in your final bounce – either in respect to the mastering engineer working with the file, or your own self mastering – but at the very least, you should ensure the stereo buss isn’t clipping. If you’ve observed good gain structure (and maybe mixed to an ‘average’ of -12dBFs rather than 0dBFs) there should still be a decibel or two on the main mix buss. If the main output is too hot, though, consider using Fader Groups, VCAs or the Gain plug-in to attenuate the mix level rather than simply pulling down the Master fader, which has limited merit as a post-fade attenuator.
As well as headroom, you’ll also want to start considering the mix’s loudness, using Logic’s dedicated Loudness meter. We’ll come back to Loudness at various points, but at this stage, you’re mainly seeking to ensure that the mix isn’t over-compressed on a channel-by-channel basis.
Look at the Integrated Loudness level and make your judgement based on the style of music you’re working with. If you’re already hitting -14 LUFS, then you’re maybe mixing too hot. A loud mix doesn’t necessarily make a loud master, so be wary of judging it against commercial recordings that have already been mastered. Instead, ensure the music breathes and that the instruments work together in an effective way.
Quick-fix mastering
In an ideal world, our music would either exist in ‘mixed’ or ‘mastered’ form, but there’s a vagueness in between, whereby other people need to hear the mix in a way that’s closer to a finished release without having to spend too much time fully mastering it. What we’re exploring for the rest of the workshop, therefore, is so-called ‘quick-fix’ mastering that can be applied directly across the stereo mix so that you can send out rough mixes that are broadly comparable to commercial tracks. The key here is not to go too far (applying EQ, M/S adjustment and so on) as you’re simply managing loudness rather than fixing the mix.
If you want to keep things simple, a touch of limiting using Logic’s Adaptive Limiter will give you the desired loudness without too much hassle. Raising the Gain parameter will increase the amount of compression, lowering the dynamic range and raising the LUFS level. On the whole, most streaming services level-adjust tracks metering over -14 LUFS, so this is a good ballpark level to start with. Lowering the Output level to -1dBFS can also avoid inter-sample peaks, although you could also adjust the Output level to shave off your LUFS figure at the same time.
Mix glue
If you’re still feeling that your music sounds underpowered, it might also be worth applying a soft ‘glue-like’ compression before the limiter. The Adaptive Limiter should always be the penultimate plug-in on the main mix bus, with the Loudness Meter (as the last plug-in) displaying the final LUFS levels. Any other plug-ins – such as single-band compression, EQ and so on – should always be earlier on in the signal path. When you’ve achieved the Loudness and body you want, bounce the mix with both the processing enabled (this is the ‘reference’ mix) and then with processing disabled; to form the final ‘archive’ mix that you’ll eventually use for your mastering session.
For the purposes of ‘quick-fix’ mastering we’ve deliberately avoided any form of signal processing that starts to drastically alter the feel of the mix other than basic loudness adjustment. You can, of course, add EQ, but this will start to have its own input onto the perceived balance of instruments. In an upcoming tutorial, we’ll turn our attention to the proper application of mastering in Logic Pro X, which should be distinct and separate to the mindset and methodology of mixing, transforming our unmastered ‘archive’ mix into a polished final master.
Controlling loudness in Logic: step-by-step
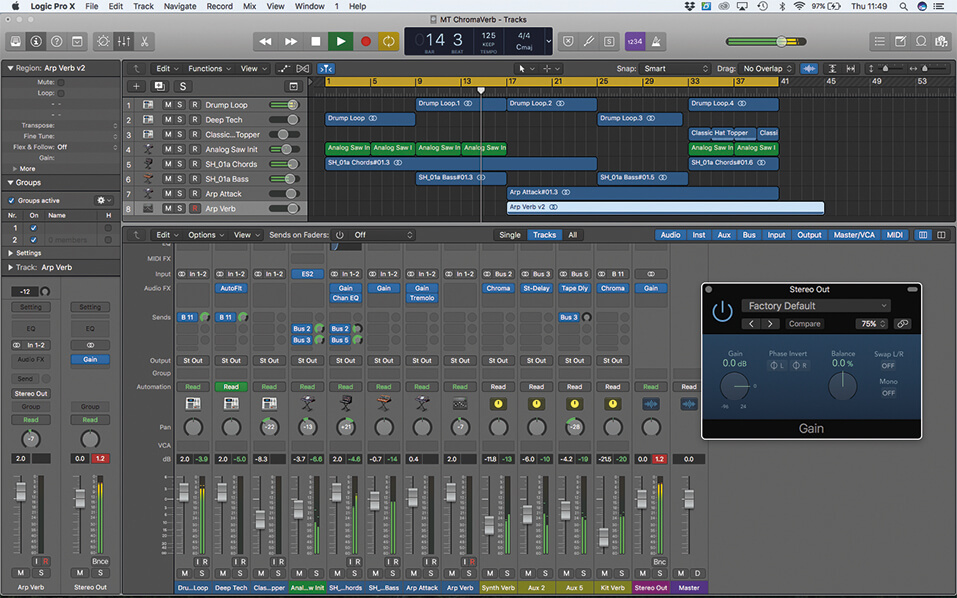
1. Before we apply any signal processing over the Stereo Out buss, we need to ensure there’s no clipping and there’s an appropriate amount of headroom. One quick-and-easy solution is an instance of Gain on the first plug-in slot.
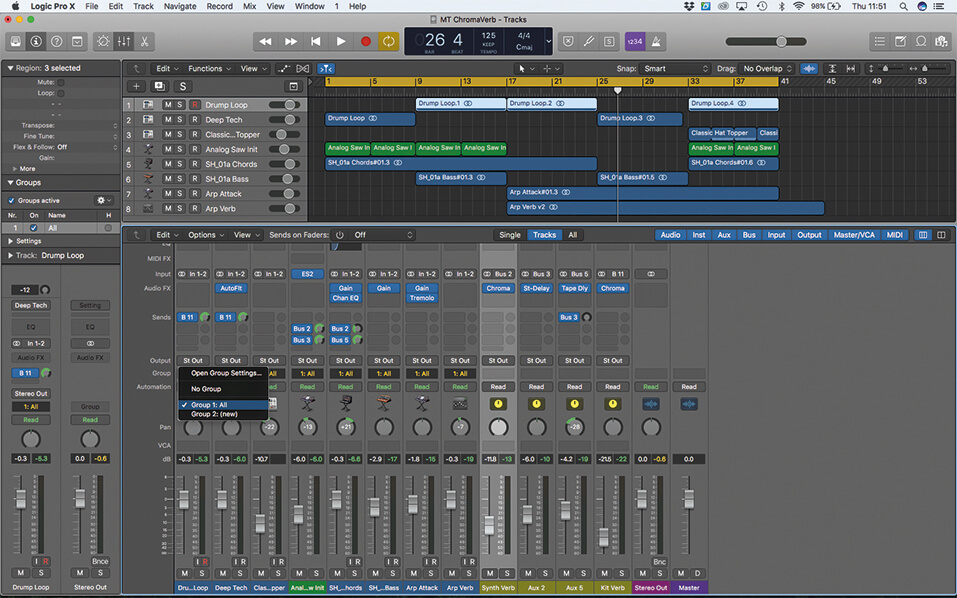
2. A more elegant solution, assuming you haven’t applied any automation, is to use Fader Groups for all the instrument/audio tracks and attenuate them ahead of the main Stereo buss. This is a good solution if you’re still mixing.
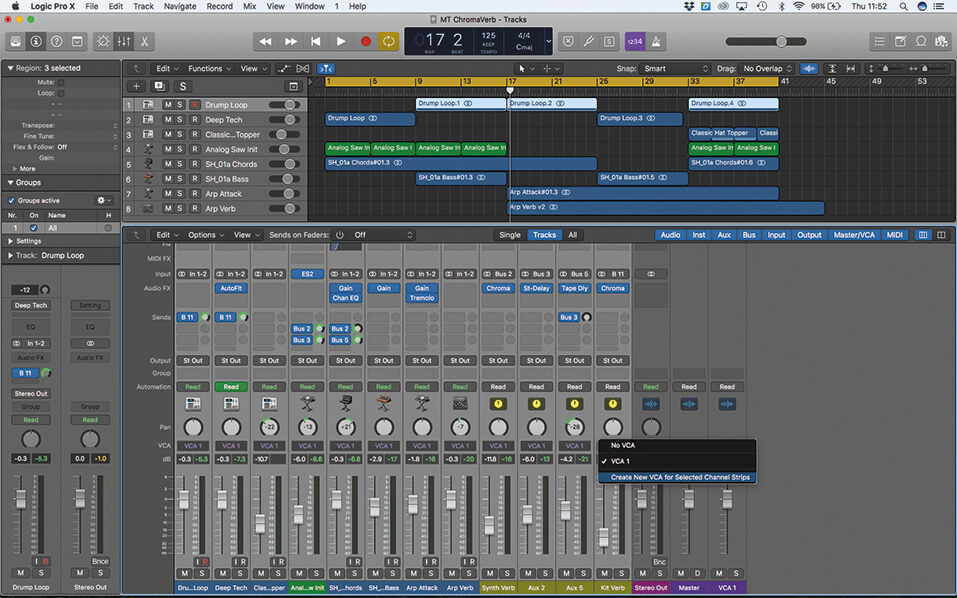
3. If the mix has automation, try creating a VCA fader group of all channels (including the FX returns). Logic creates a new VCA master fader that will attenuate the signal levels feeding the Stereo Out buss accordingly.
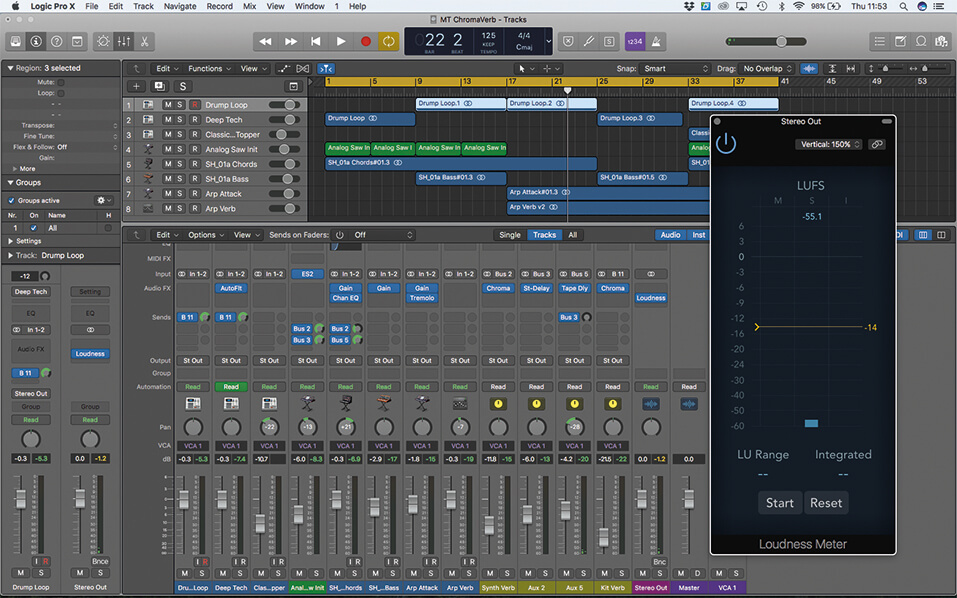
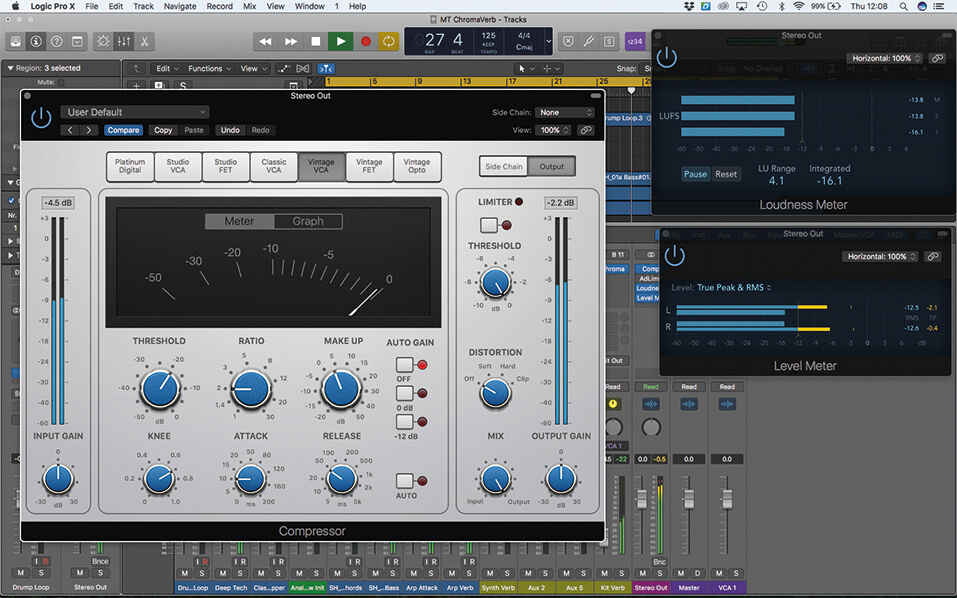
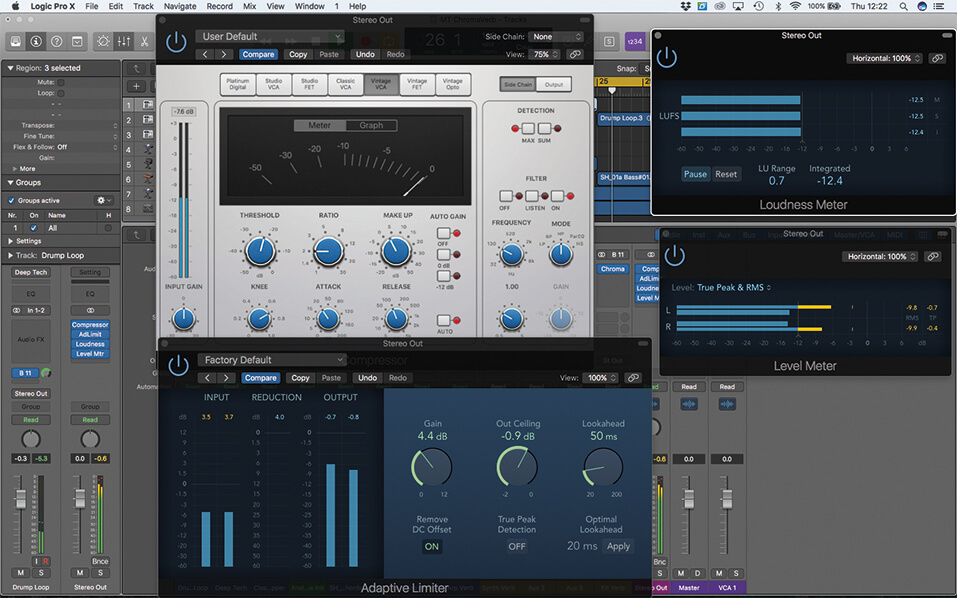
4. The Peak meters on the mixer’s faders give us little understanding of the perceived Loudness of our mix/master, so insert a Loudness Meter on the main Stereo Out buss. Set the target level to -14 LUFS.
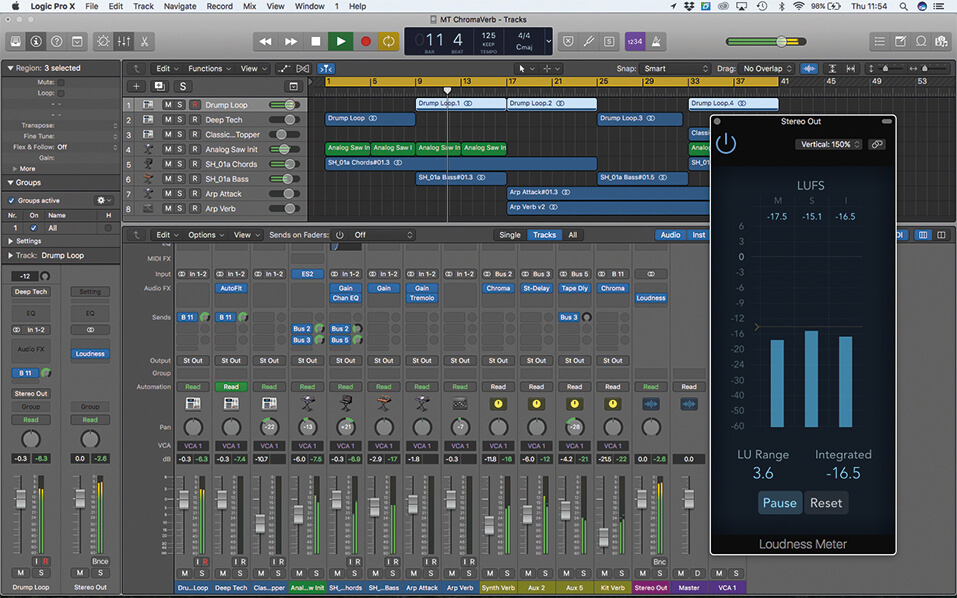
5. Press Start on the Loudness Meter and playback the track. The Integrated LUFS figure – which is measured over time – is the figure to watch. Assuming you’ve attenuated the buss, this should measure about -16 LUFS.
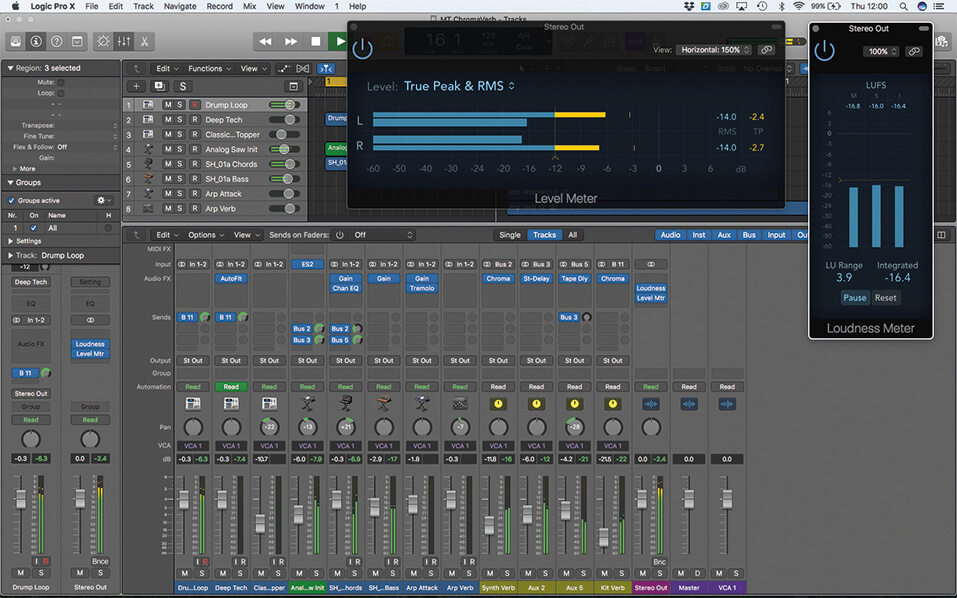
6. As well as Loudness, we’ll also want to keep a close eye on the Peak readings. Add a Level meter and set it to True Peak & RMS mode. True Peak overs should be avoided at all costs.
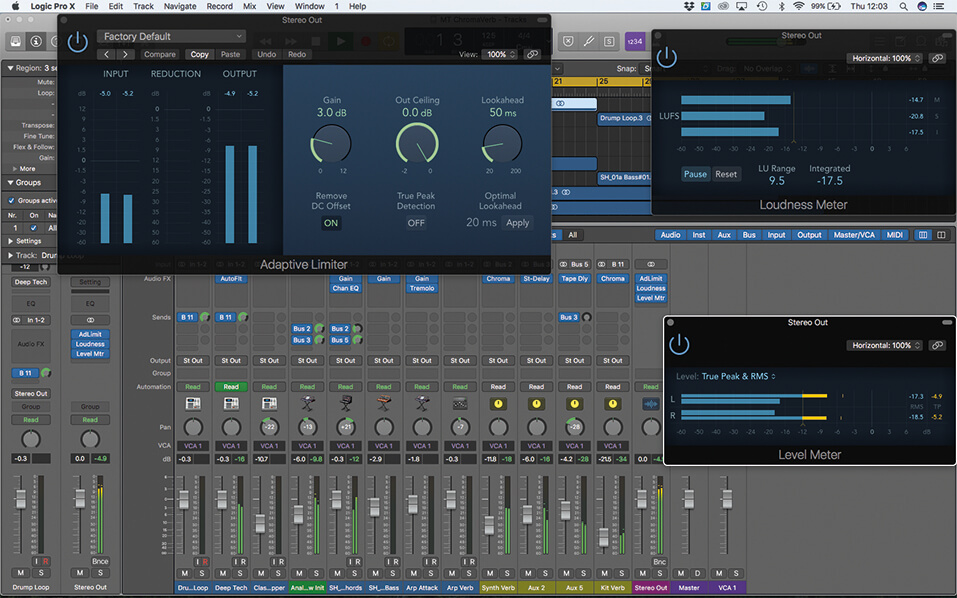
7. Now that we’ve understood our metering, let’s apply some Limiting to increase the perceived loudness. The Adaptive Limiter should be instantiated at the last point in the signal processing chain, but ahead of the metering.
8. Try increasing the Gain on the Adaptive Limiter so that you hit around -12 LUFS (you can always reposition the guide to help). Remember the Integrated figure is averaged, so you’ll need to play most of the track.
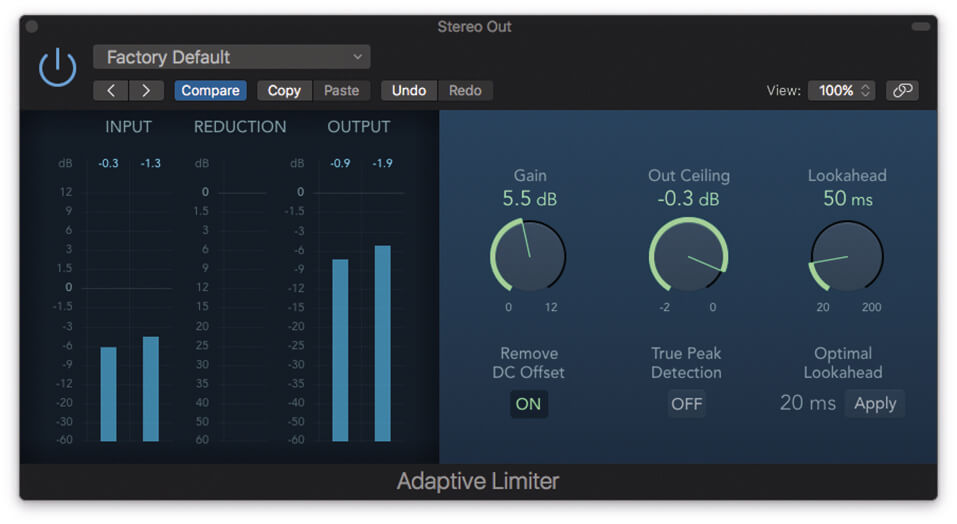
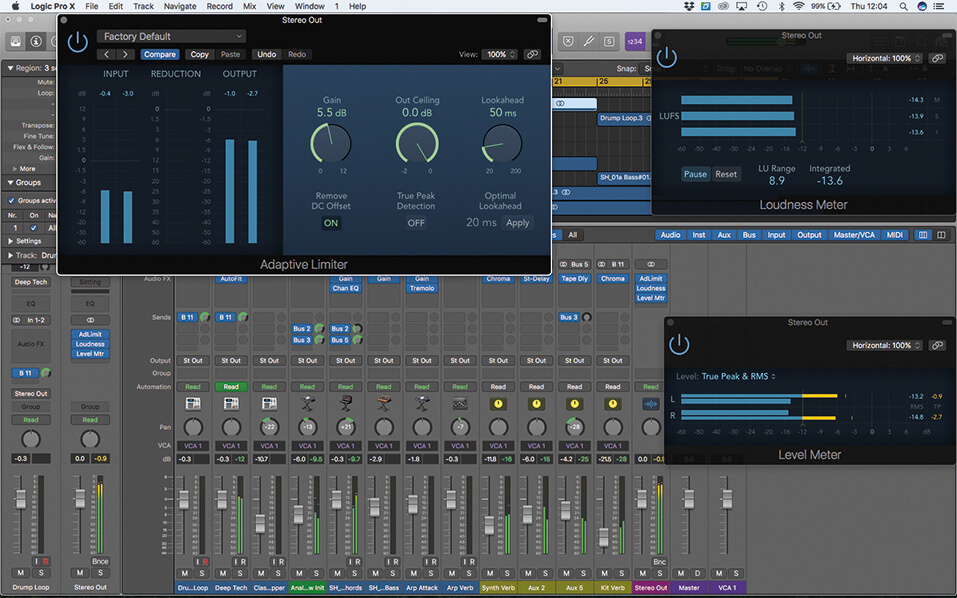
9. Reduce the Out Ceiling to around -03dB so that True Peak overs aren’t being triggered. You now have a mix that’s loudness corrected, although you may want to go further and add another layer of compression.
![]()
STREAMING STANDARDS All music-streaming services now adopt some form of Loudness control based on the track’s LUFS levels. The standards seem to fall between -12 and -14 LUFS, so there’s no absolute figure. If your track has a higher loudness, it will be attenuated to match music with a greater dynamic range, ultimately resulting in a more comfortable listening experience for the end user.
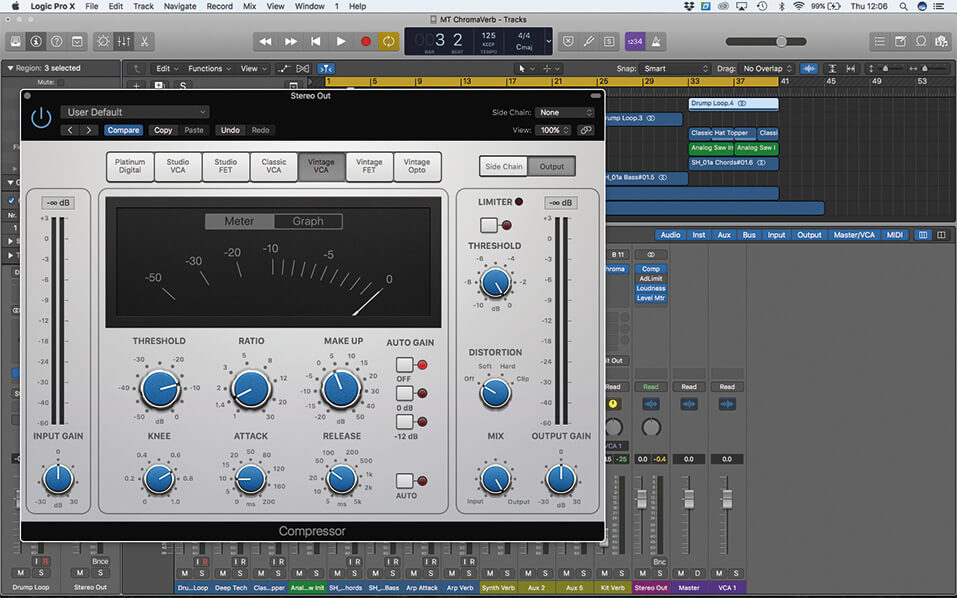
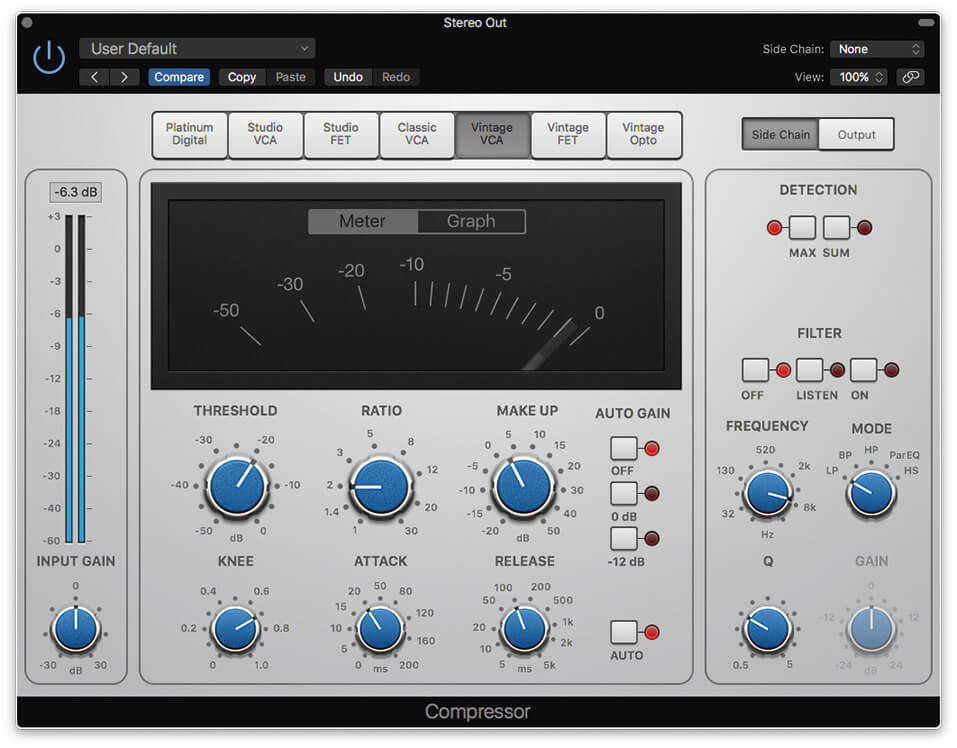
10. Bypass the Adaptive Limiter for now, and instantiate the Compressor plug-in, placed before the Adaptive Limiter plug-in. Select the Vintage VCA Circuit Type and lower the gain Make Up to around 0dB.
11. Set up an ‘over easy’ style of compression, using a 2:1 ratio and reducing Threshold so that the compressor moves into about 3-5dB of gain reduction. Increase the Make Up slightly to account for the gain reduction.
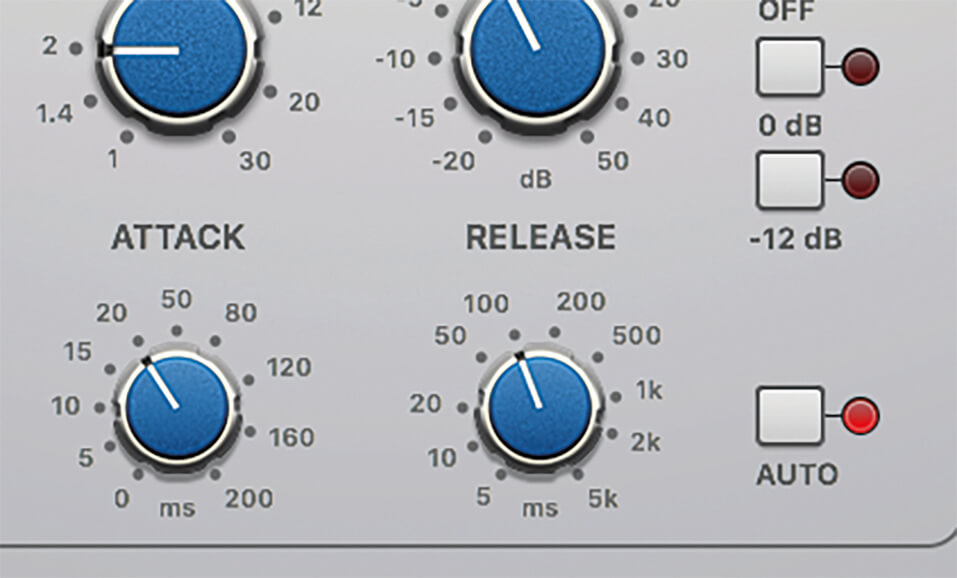
12. The Attack and Release should both be set to moderate settings, so that the compressor moves empathetically. Set Attack to around 20ms and Release to around 100ms, with the Auto button engaged.
13. Notice how the kick drum tends to dominate the gain reduction, something that can make the compression sound ‘pumpy’. To reduce this unwanted movement, we’re going to set a frequency-conscious side chain.
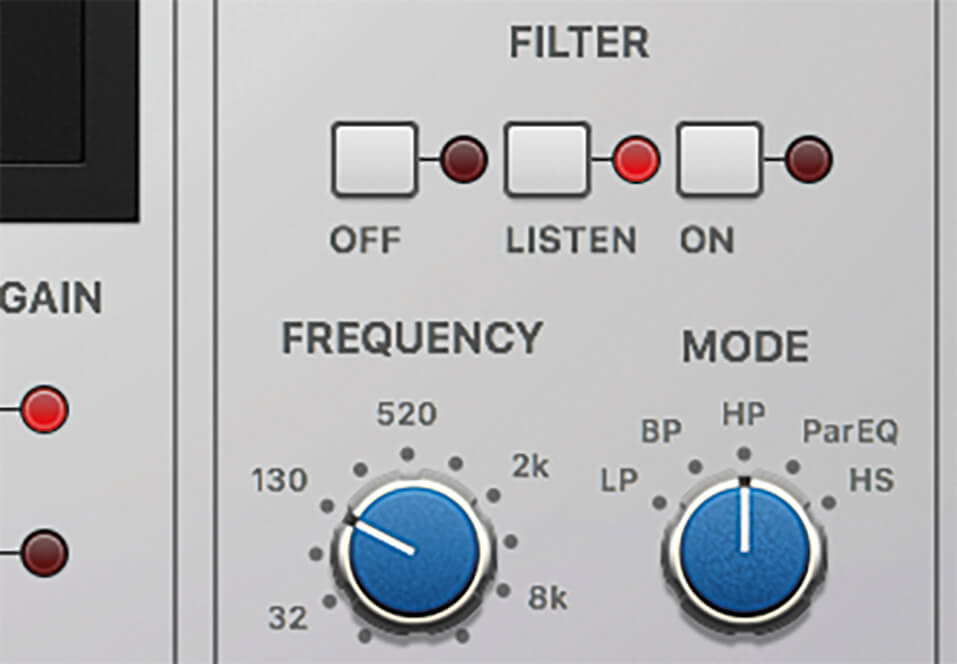
14. Move over to the Side Chain and click on the filter’s Listen mode. Set the Mode to HP and reduce the low-end using a Frequency setting of 130Hz. The compressor now ‘hears’ a different version of the input.
15. Now move the Filter mode to On, and also compare with the Off setting. Notice how the kick drum has less impact on the compressor’s movements, which might mean you want to reconsider the current Threshold.

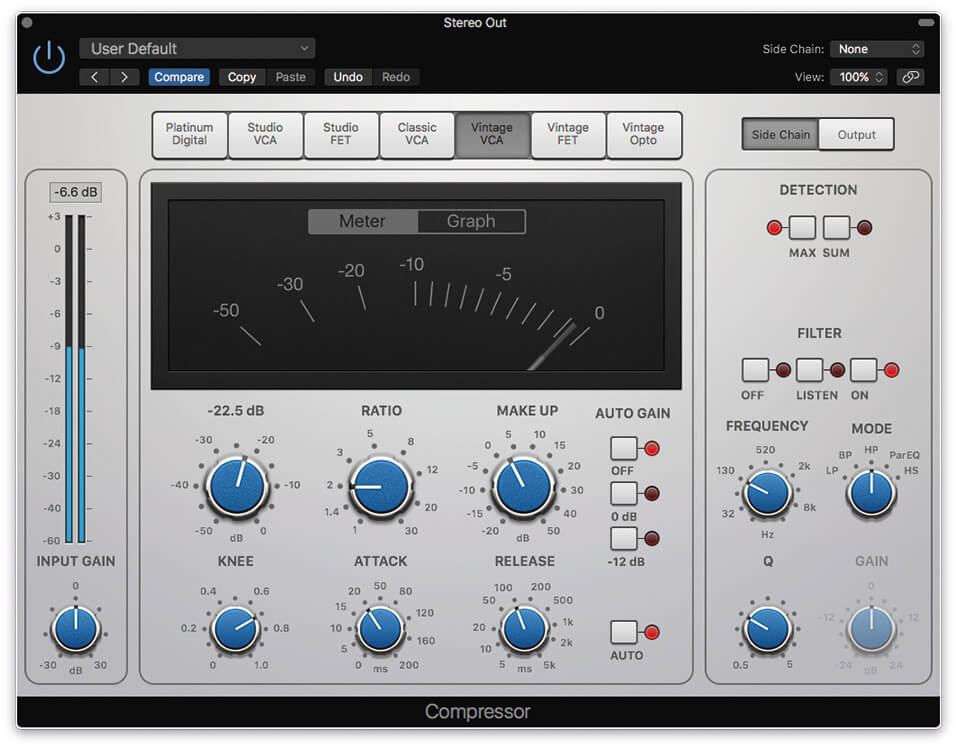
16. Reactivate the Adaptive Limiter. Given the ‘over easy’ compression you’ve just applied, the Adaptive Limiter will be probably working too hard. Dial down the amount of Gain on the Adaptive Limiter accordingly.
17. Your final LUFS figure – which you should probably aim for about -12 LUFS – is a product of both stages of compression, combined with the final Out Ceiling control. Remember to also avoid True Peaks!
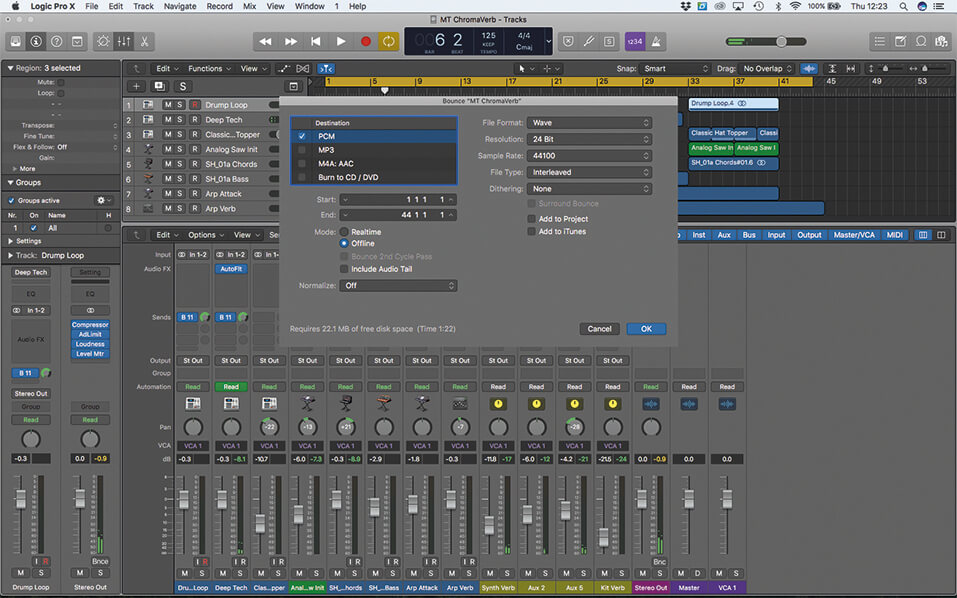
18. If you’re happy with the final loudness level (which will involve listening to the track’s full duration), you can bounce the reference master to disk. The loudness correction makes comparisons with commercial recording easier.
For more Logic tutorials and workshops, check here.