How to sidechain in Logic Pro X
The sidechaining process has become a popular and essential tool for many professional mix engineers, but how can we apply the technique in Logic Pro X? Here’s a sideways look…
From French-style EDM compression, through to de-essing and chopped-up synth pads, there’s a range of creative signal-processing techniques powered by sidechaining. However, while most of us have heard about the concept, things can get confused when it comes to implementing it in your DAW. In the case of Logic Pro X, you’ll find a large number of plug-ins that support sidechaining, but what can you expect to achieve and how do you configure and route signals in your mix to make best use of sidechaining?
In this workshop, we take a look at both the practicalities of setting up a sidechain in Logic Pro X, as well as exploring some of the key techniques and approaches used in music production.
Sidechaining as a technique that originates from the days of dedicated studio hardware, where a device would have multiple inputs (more on this in a bit) and engineers had complete flexibility in respect to how they routed a signal around the studio.
The key point to note is that signal processors like compressors and gates have both an audio input – which was used as the input for the signal need to be processed – and a so-called ‘Sidechain’ or ‘External Key’ input that allowed the engineer direct access to the ‘listening’ circuitry.
As such, this meant there could be a distinction between the signal being processed and the signal being used to drive the signal processor like a compressor.
Chain gang
The classic contemporary examples of sidechain would be the aforementioned French-style EDM compression, where a kick drum is fed to the sidechain input of a compressor, while the rest of the mix (or a large proportion of it) is fed through the main inputs. The result creates a unique pumping effect, where the presence of the kick attenuates the rest of the track. Applying greater amount of compression creates more ‘pumping’, while the compressor’s release time dictates the movements (quick or slow) of the pumping effect.
Now that we understand these principles, let’s look at how it’s implemented in Logic. The first thing to note are the specific plug-ins that support sidechaining, most notably the Compressor plugin, but also Noise Gate, Auto Filter and the EVOC 20 TrackOscillator. Going a stage further, there’s even a range of software instruments – including the ES2, Sculpture and the EVOC 20 PolySynth – that also feature the provision of sidechain inputs. If the instrument or plug-in features sidechaining, you’ll find a drop-down menu in the top-right corner of the interface that lets you select a separate input (either an audio track, instrument or buss) as the sidechain source.
Taking sides
In the case of the aforementioned French-style compression, we’d either have a compressor patched across a pad sound or, if we’re processing a proportion of the whole mix, a compressor patched across and aux channel being used as a submixer (this could be done using a Track Stack, for example). On the compressor plug-in, we’d then select the kick drum as a sidechain source, and assuming both elements are playing (kick and pad), we’d achieve the distinctive pumping effect.
When it comes to other plug-ins – such as the Noise Gate, AutoFilter and the ES2 instrument – it’s important to comprehend how the sidechain facilities are integrated. With both the Noise Gate and AutoFilter plug-ins, this works in close conjunction with a Threshold control. The Gate, for example, is opened and closed in relation to the sidechain hitting a given threshold, whereas the AutoFilter uses the threshold to trigger a pre-programmed ADSR envelope setting. Establishing the sidechain routing is therefore just the beginning, as you need to be clear on how to tweak the plug-in or instrument to hear the effect in action.
French style
One of the key benefits of sidechaining is its ability to make a mix more dynamic and even more importantly, create space in a mix. This probably goes a long way to explain why the effect is so popular in EDM music, where big synths and equally expansive reverbs can eat up the soundstage with just a few instruments. The application of this concept – whether it’s clawing back a few decibels from synth pad or adjusting the reverb levels in response to the instruments playing – really aids the considered creation of ‘sound space’ within a mix. Sidechaining also makes the music more dynamic, more responsive and much less static… all properties that, even when deployed in subtle ways, can increase the listener’s enjoyment.
Having understood some of the basics, the walkthrough details several practical examples of sidechaining in action that can hopefully inspire you to think about how you might want to apply the technique in your productions.
Sidechaining in Logic Pro X: step-by-step
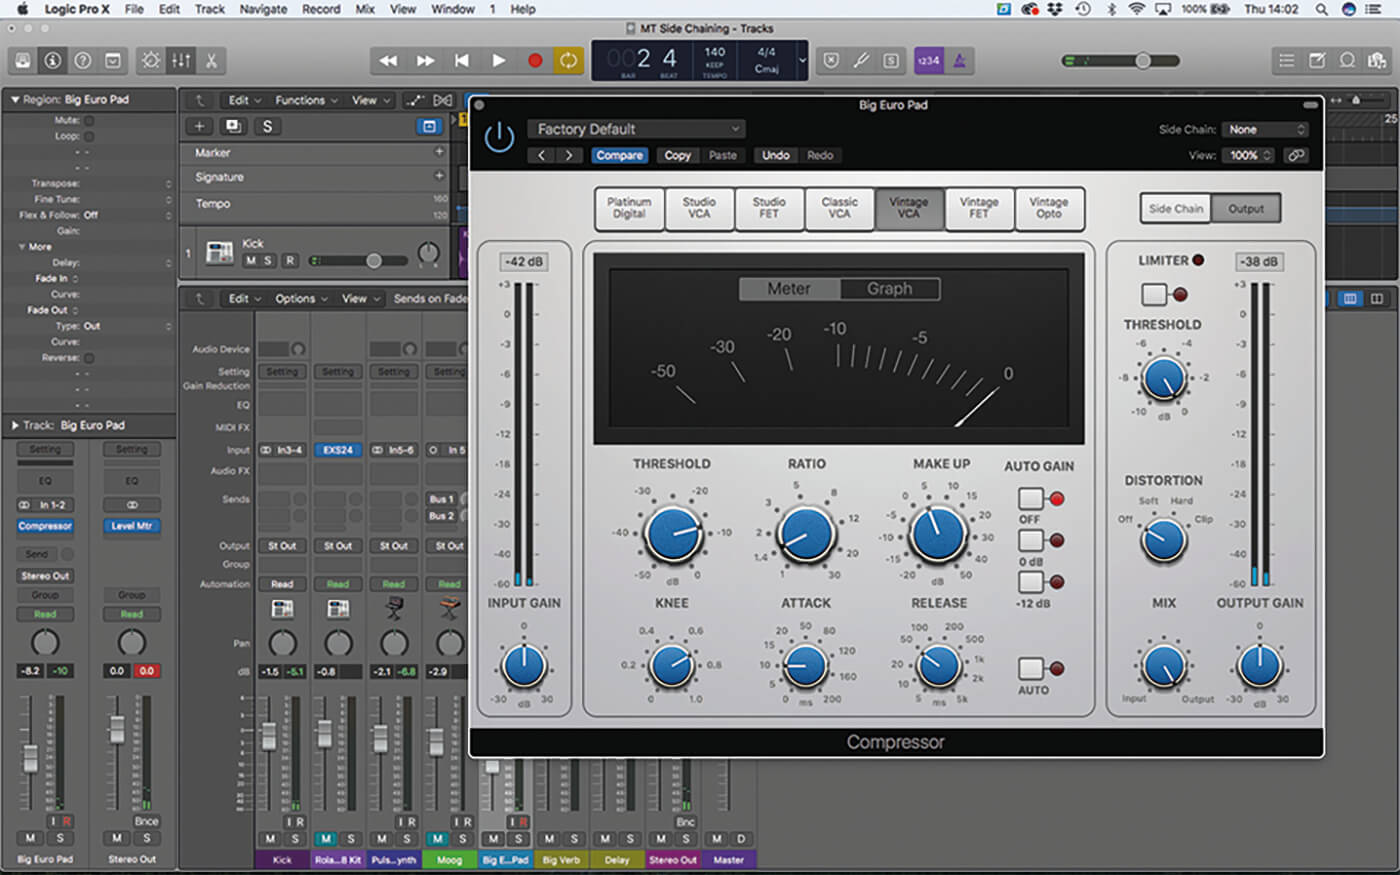
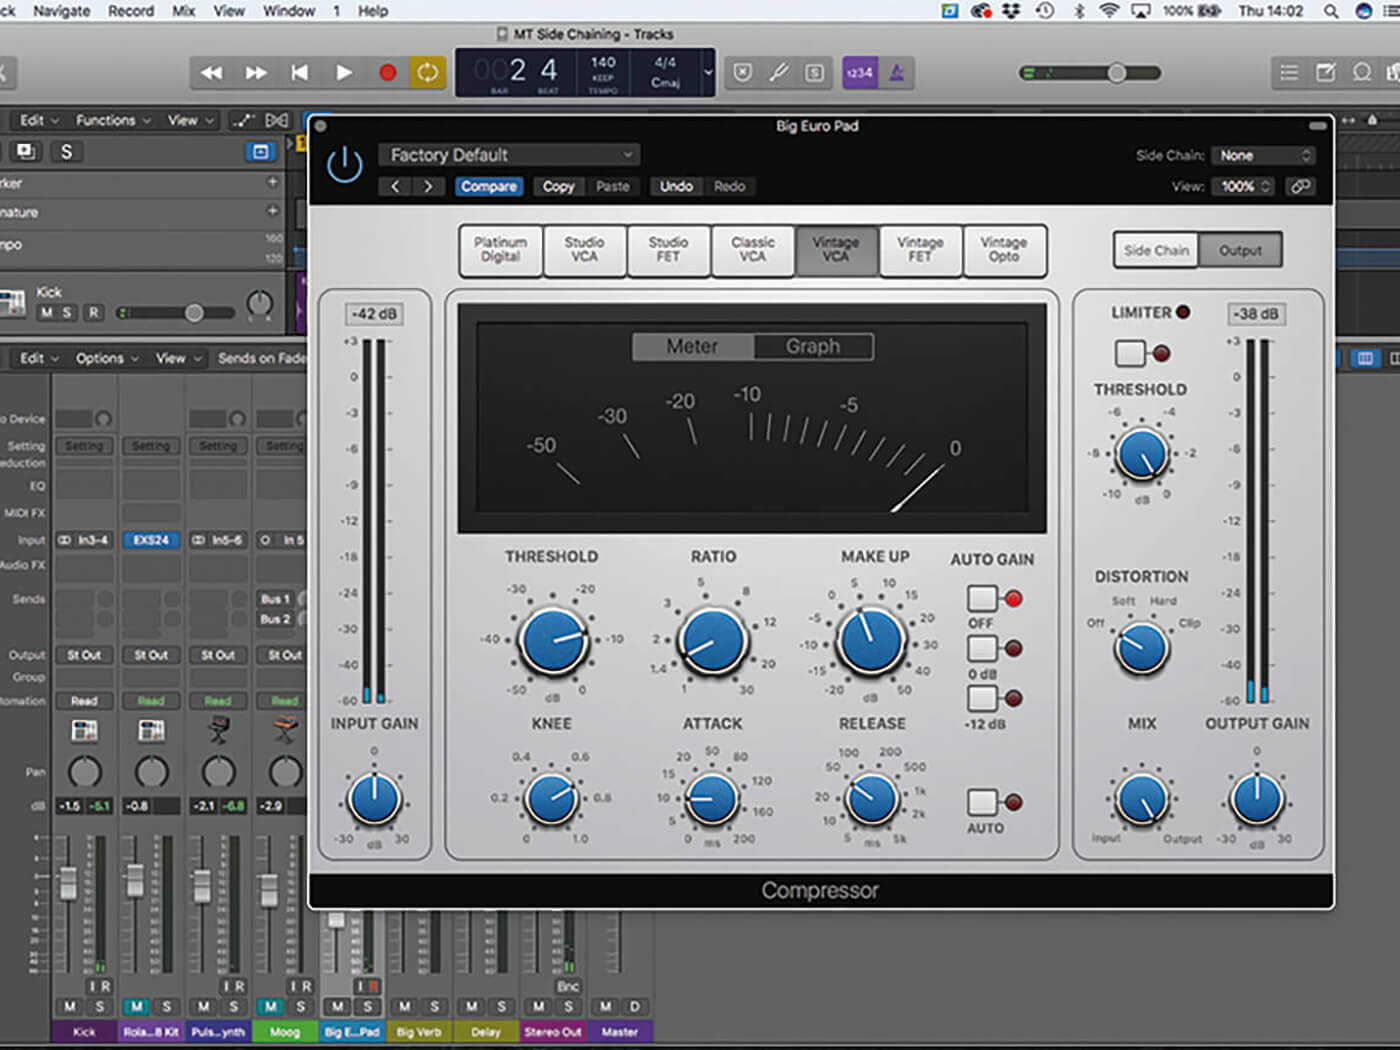
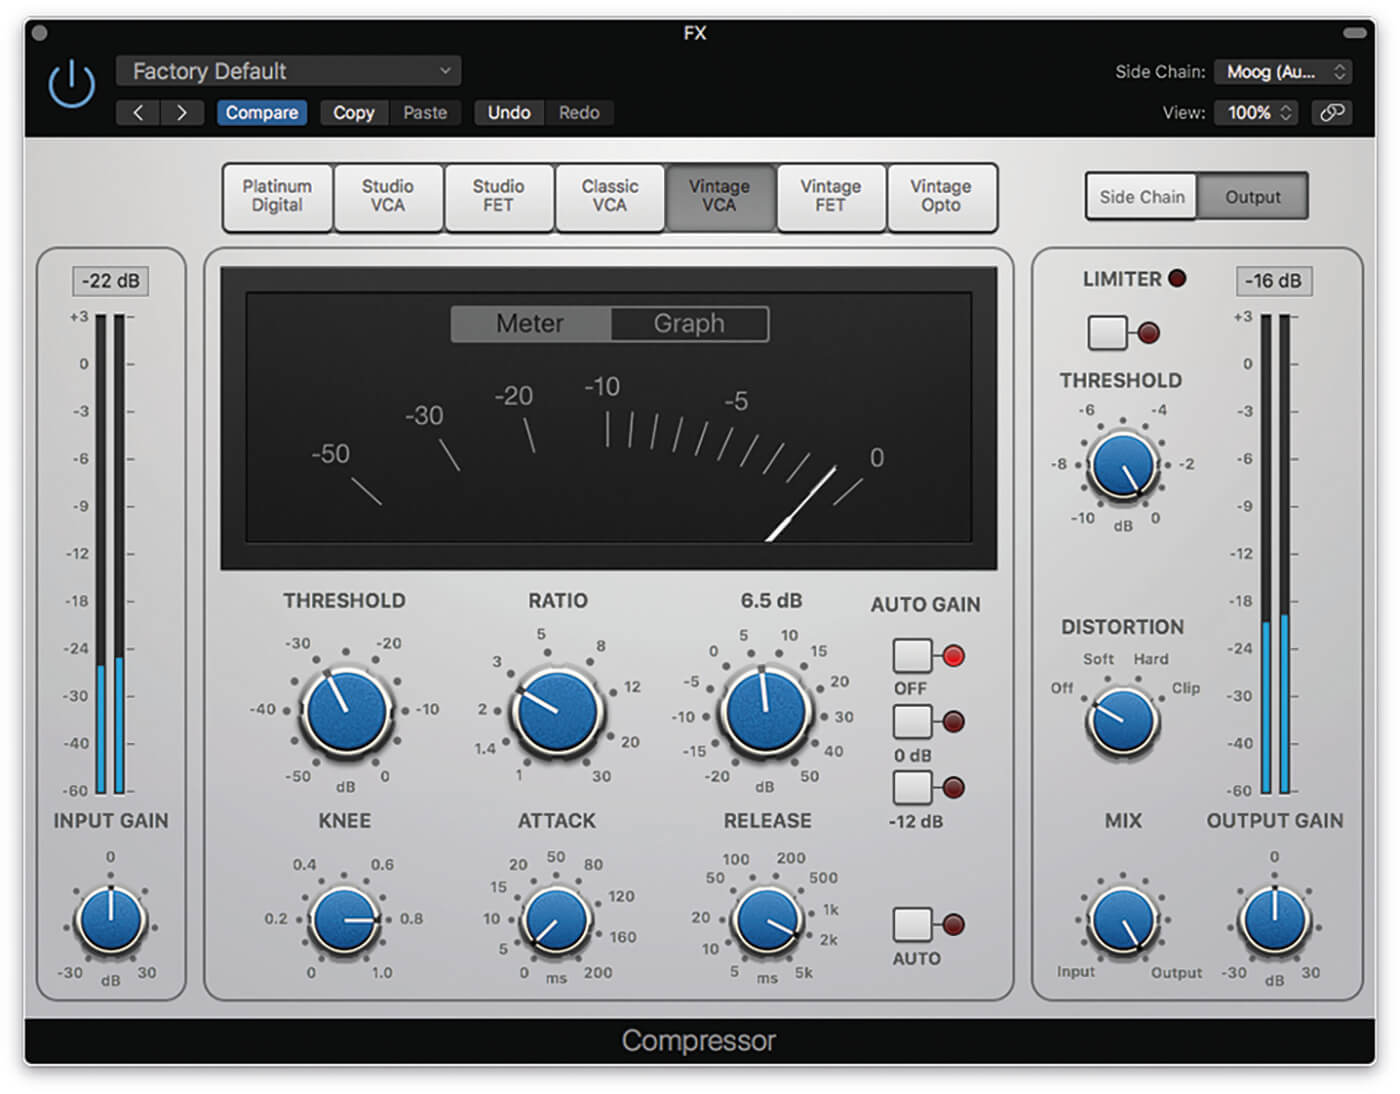
1. We’ll start by looking at French-style compression, using the Compressor plug-in across the insert of the Big Euro Pad track. We’ll use the Vintage VCA mode, as this has a fast response and relatively clean sound.
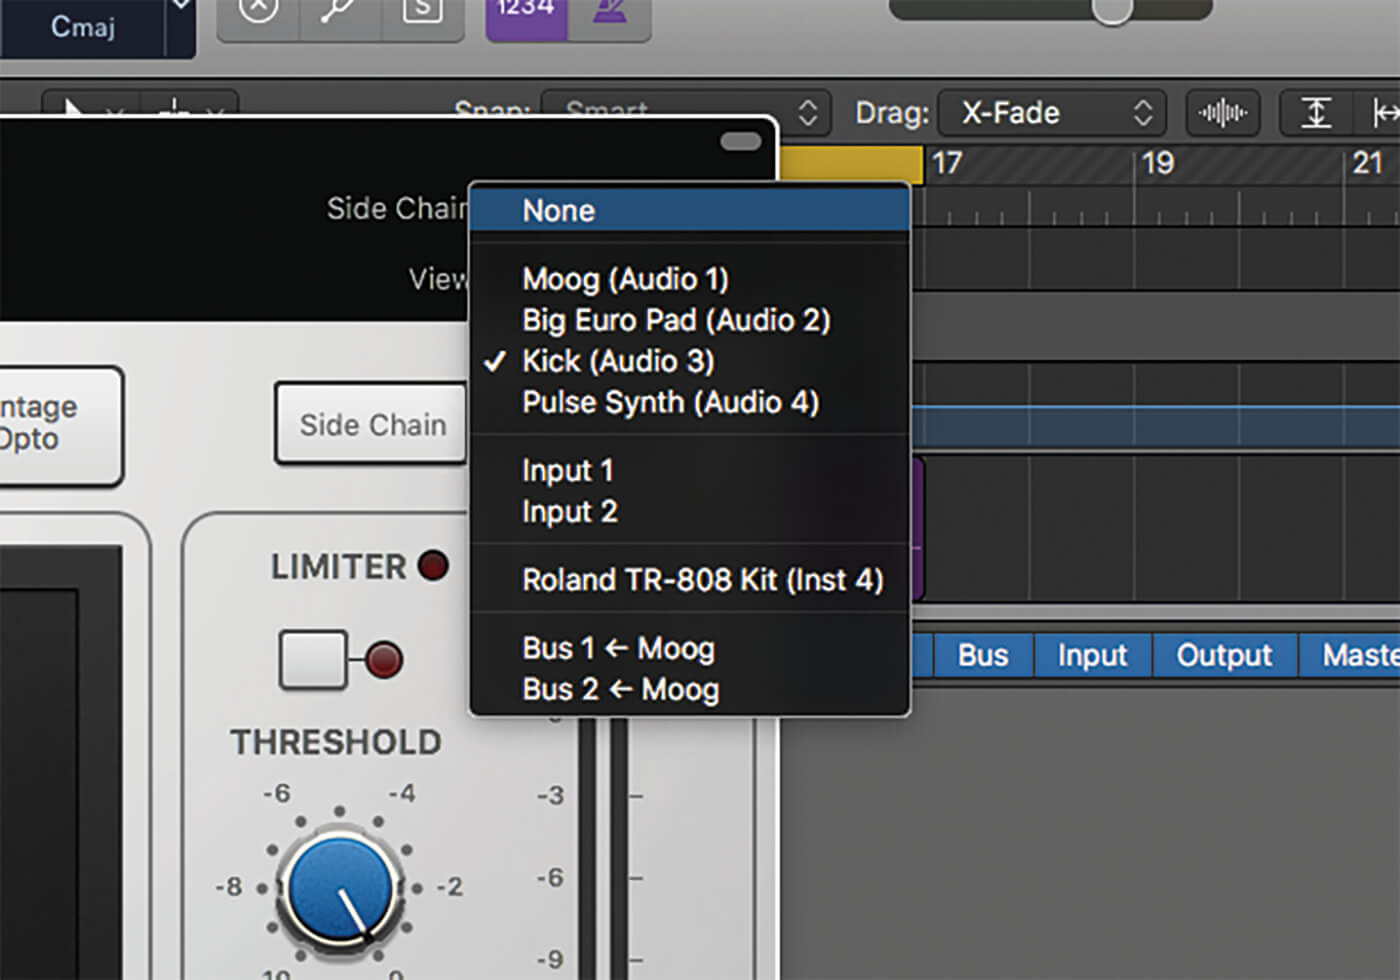
2. On the Compressor’s sidechain input, select Kick (Audio 3) from the drop-down menu. This will now route the Kick Drum track through the Sidechain input of the compressor, letting the Kick dictate the compression.

3. The first two parameters to investigate are Threshold and Release. Setting Threshold at -30dB makes the compressor responsive enough, with the amount of ‘pump’ defined by the ratio – in this case, using a 5:1 ratio.
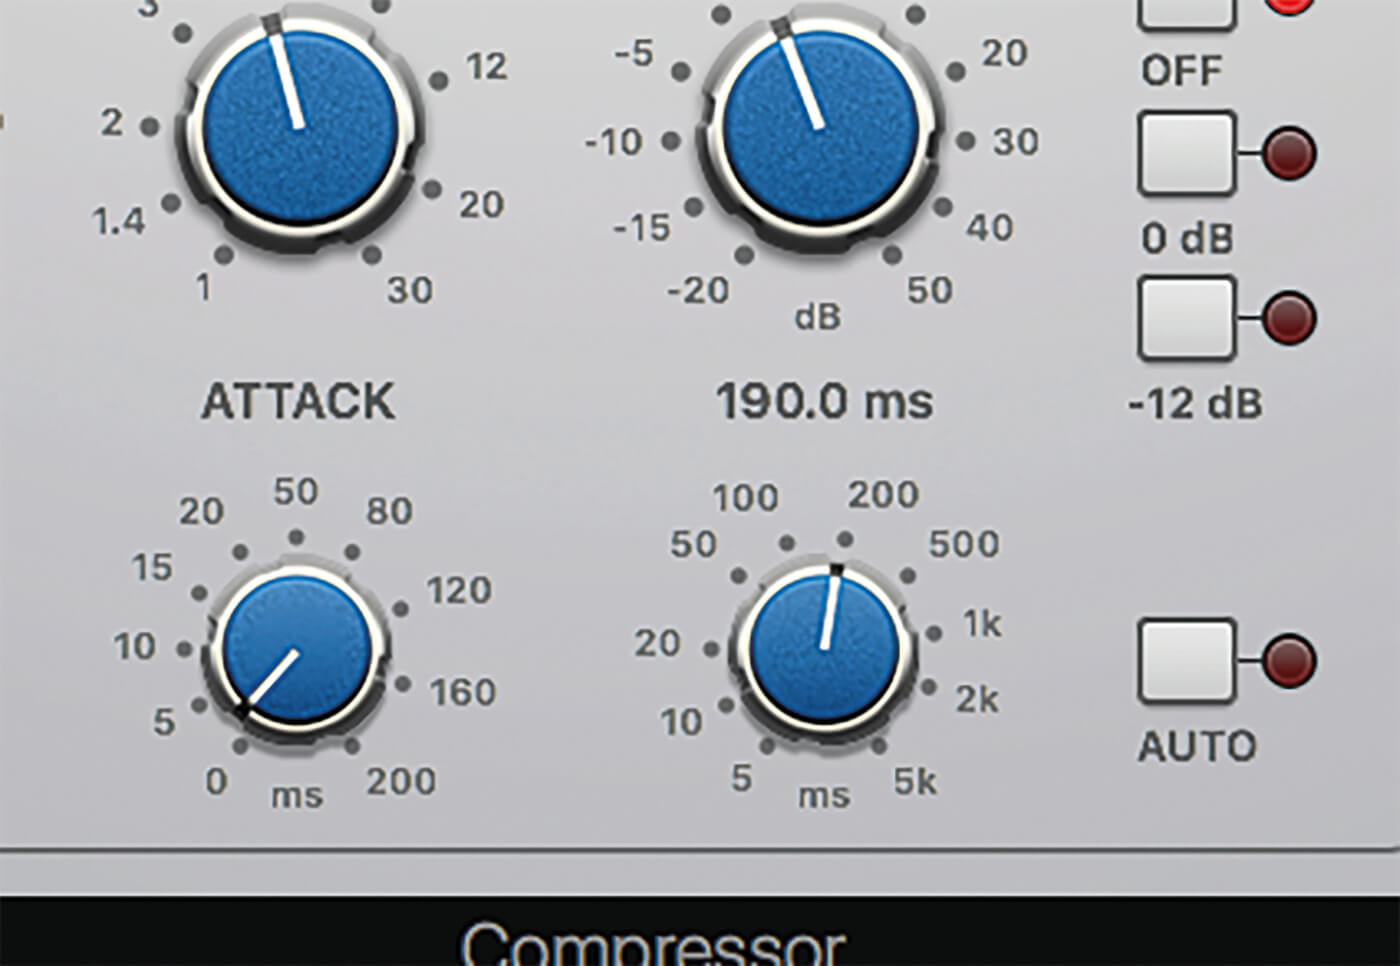
4. Once you’ve set the amount of pump, you’ll need to define the movement. You’ll want to keep the Attack fast (around 2ms) and then set the Release to match the duration between the kick hits – in this case, 200ms.
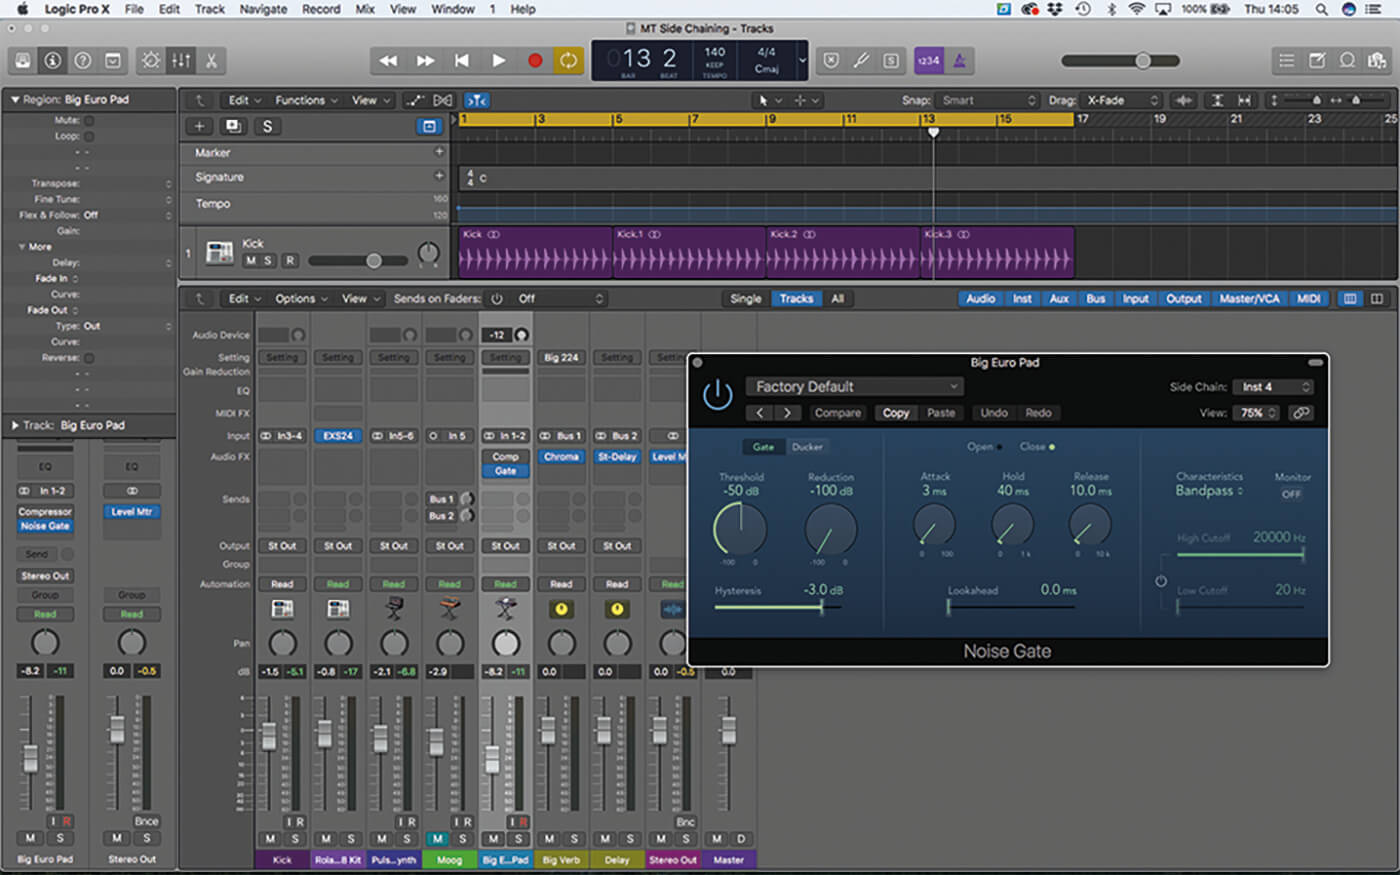
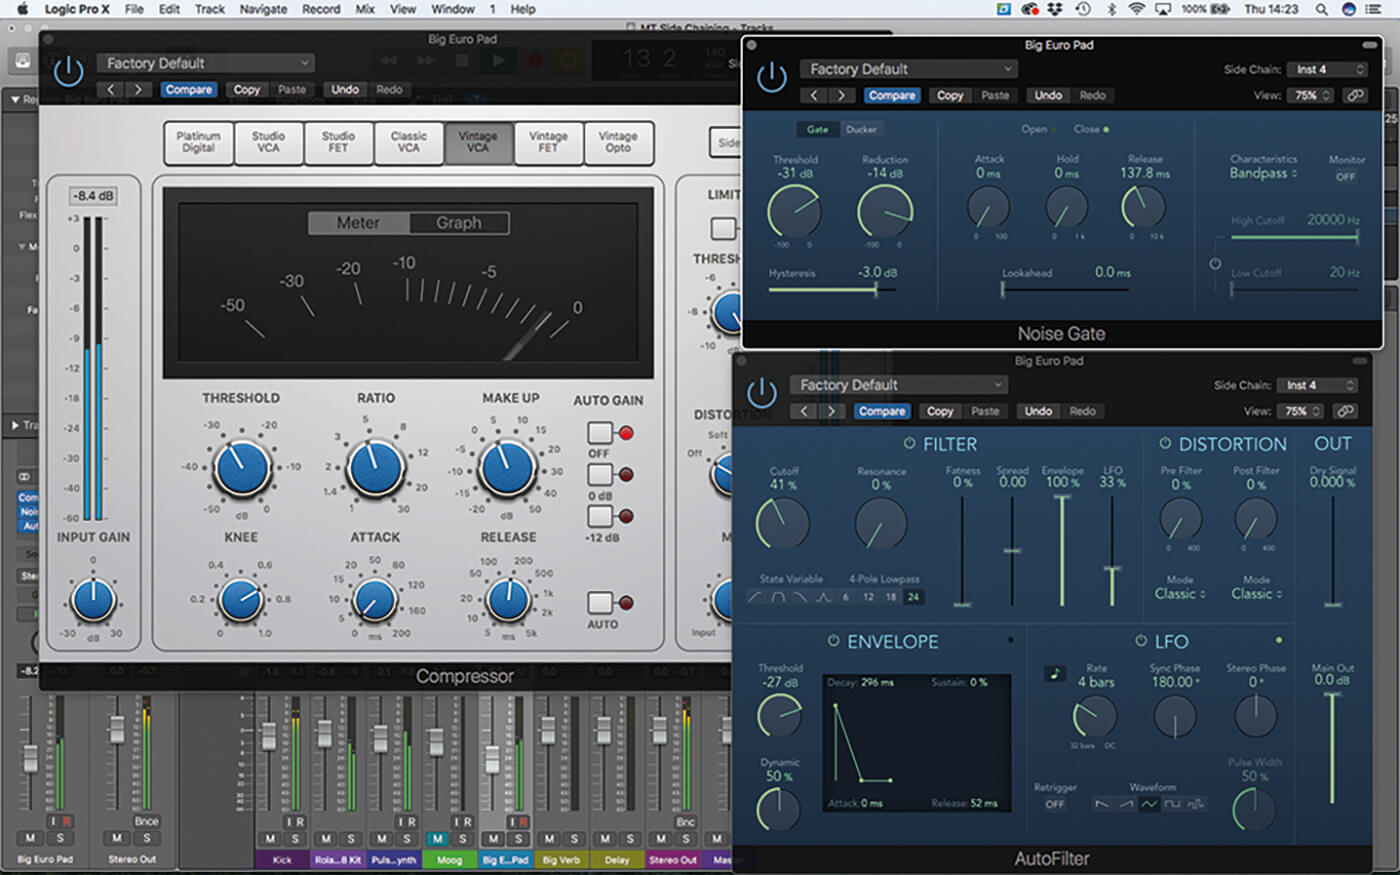
5. Bypass the compressor for now and let’s take a look at sidechaining using the Noise Gate. In this case, we’re going to use the Hi-Hat pattern (Instr 4) to open and shut the Noise Gate inserted across the pad.
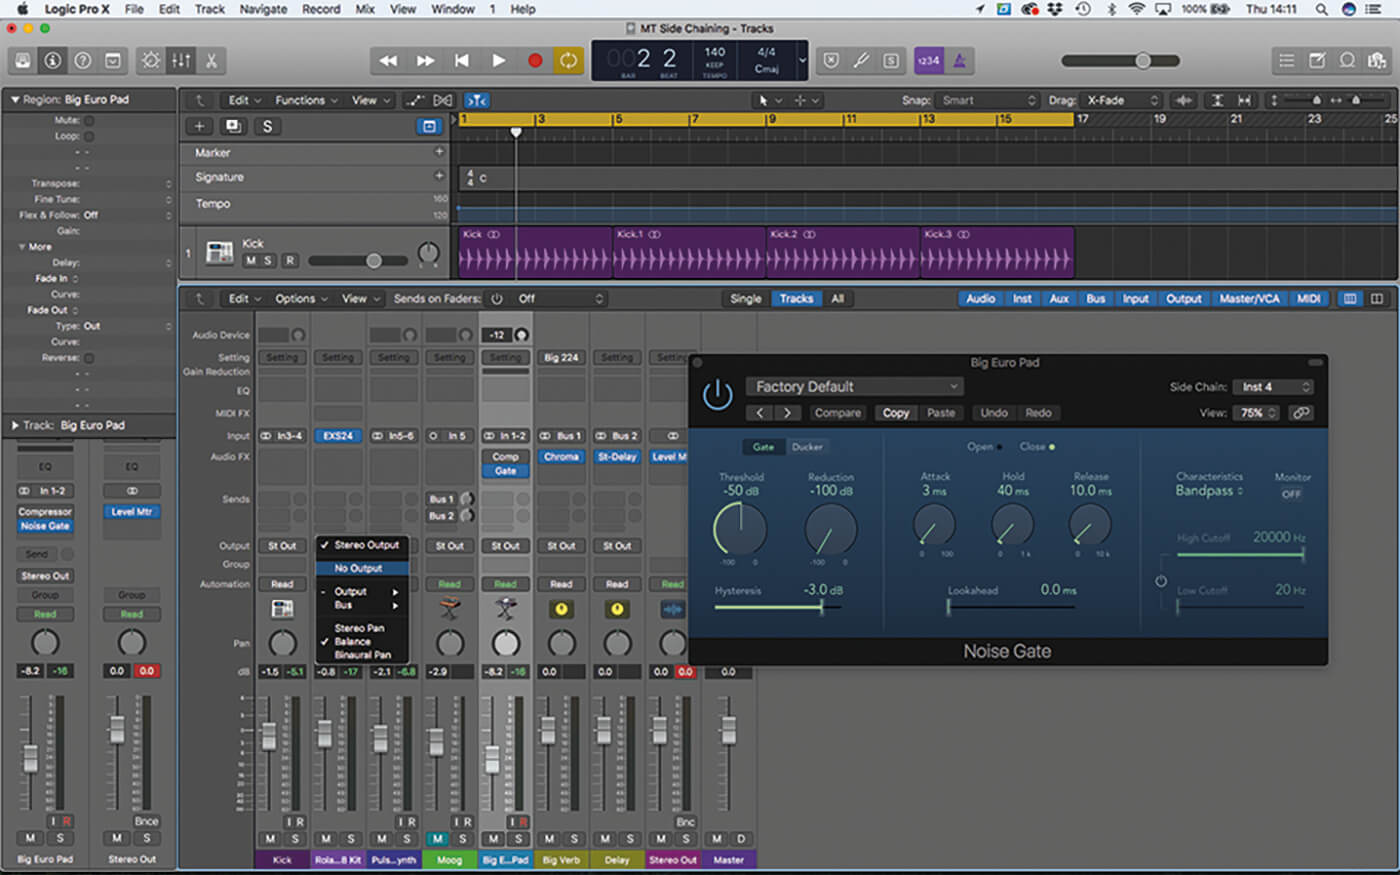
6. You should remember it isn’t essential that the sound being used as the sidechain source is present in the audio mix. In this case, we’ve removed the Hi-Hat track’s output assignment so that we can’t hear it.

SIDECHAIN ES2 Despite its age, the ES2 is still an impressively flexible polysynth, made even more exciting by the addition of a sidechain input in the modulation matrix. The sidechain works as a form of envelope follower, following the dynamic movement of the input rather than working with audio-rate modulation. Try using various drum sounds – like a kick or a hi-hat – patched through to the filter.
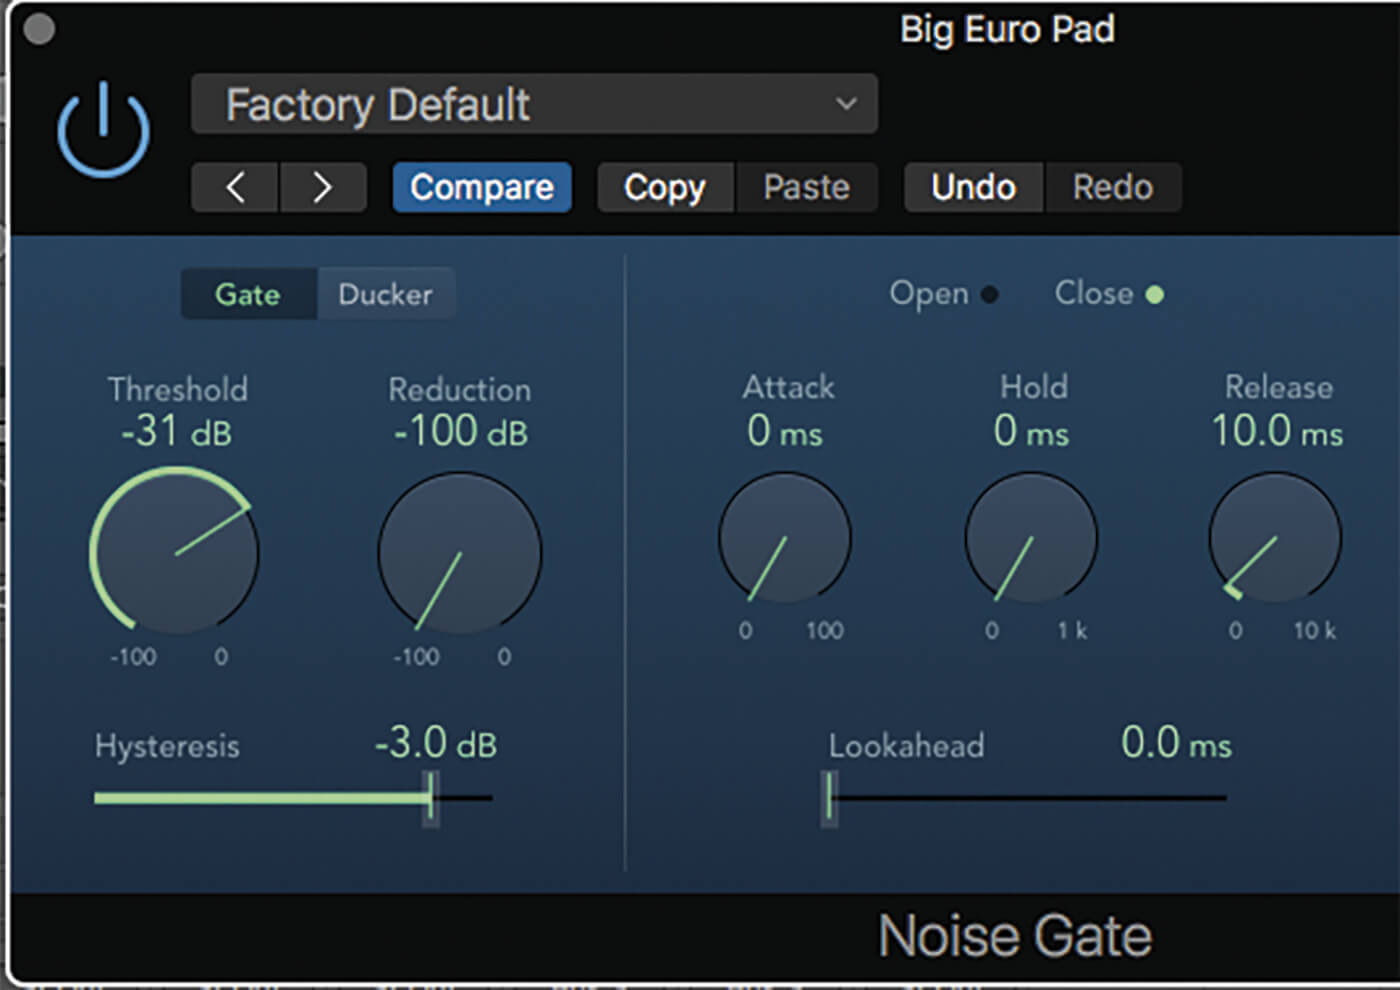
7. To fine-tune the Noise Gate settings, set the Envelope parameters so that they’re quick-acting – Attack and Hold on 0ms and Release on 10ms. A Threshold setting around -30dB makes the Noise Gate responsive to the hi-hat.

8. The effect sounds best when it has a graduated Release stage – around 140ms. You can also create a softer effect by raising the Reduction control to around -14dB so that the pad pulses rather than being chopped.
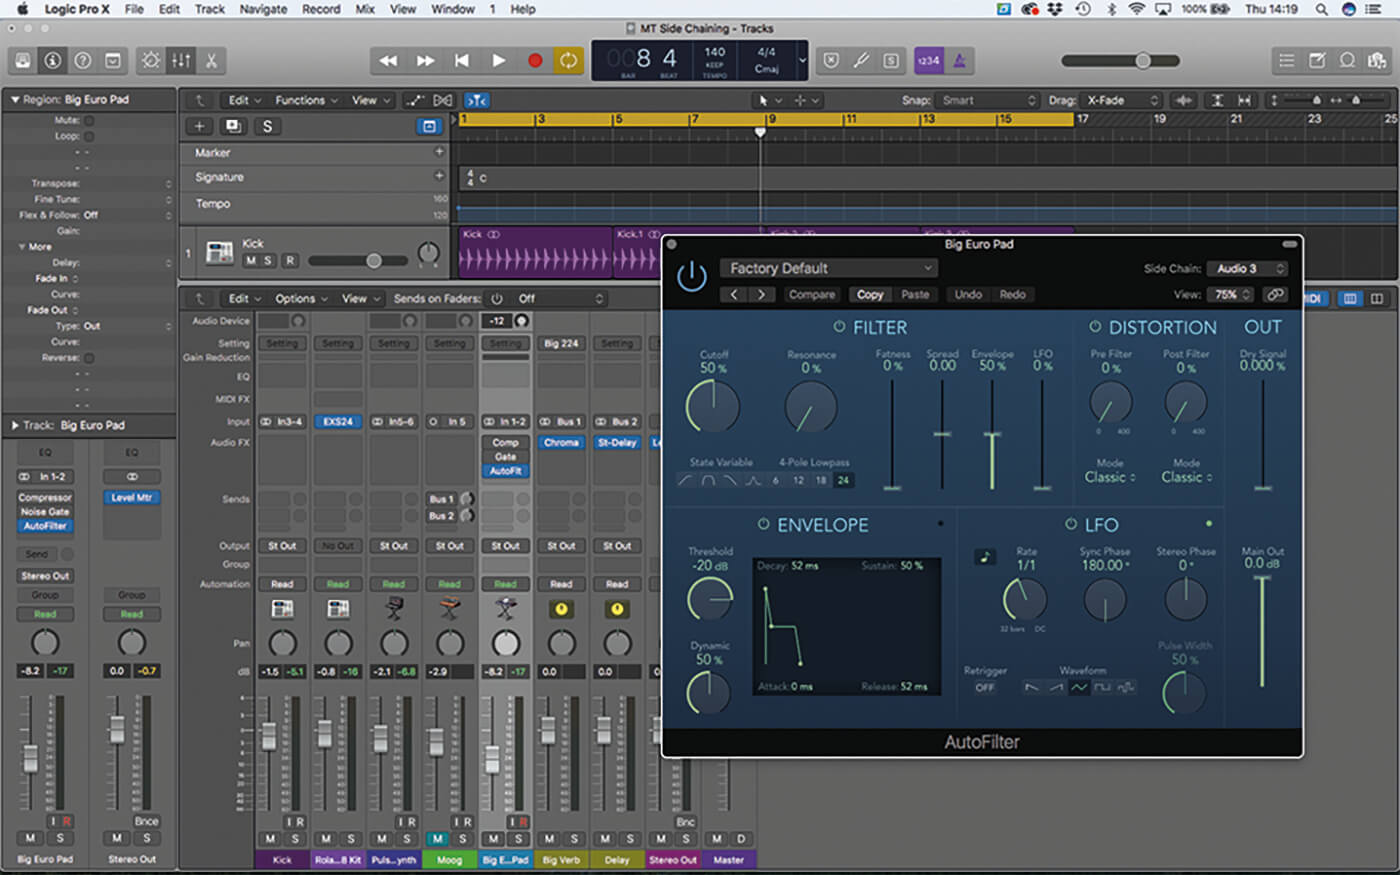
9. The AutoFilter plug-in in Logic also has a sidechain input, but acts a little differently. Rather than directly modulating the input, the sidechain is used to trigger the AutoFilter’s envelope, much the same as the Noise Gate.
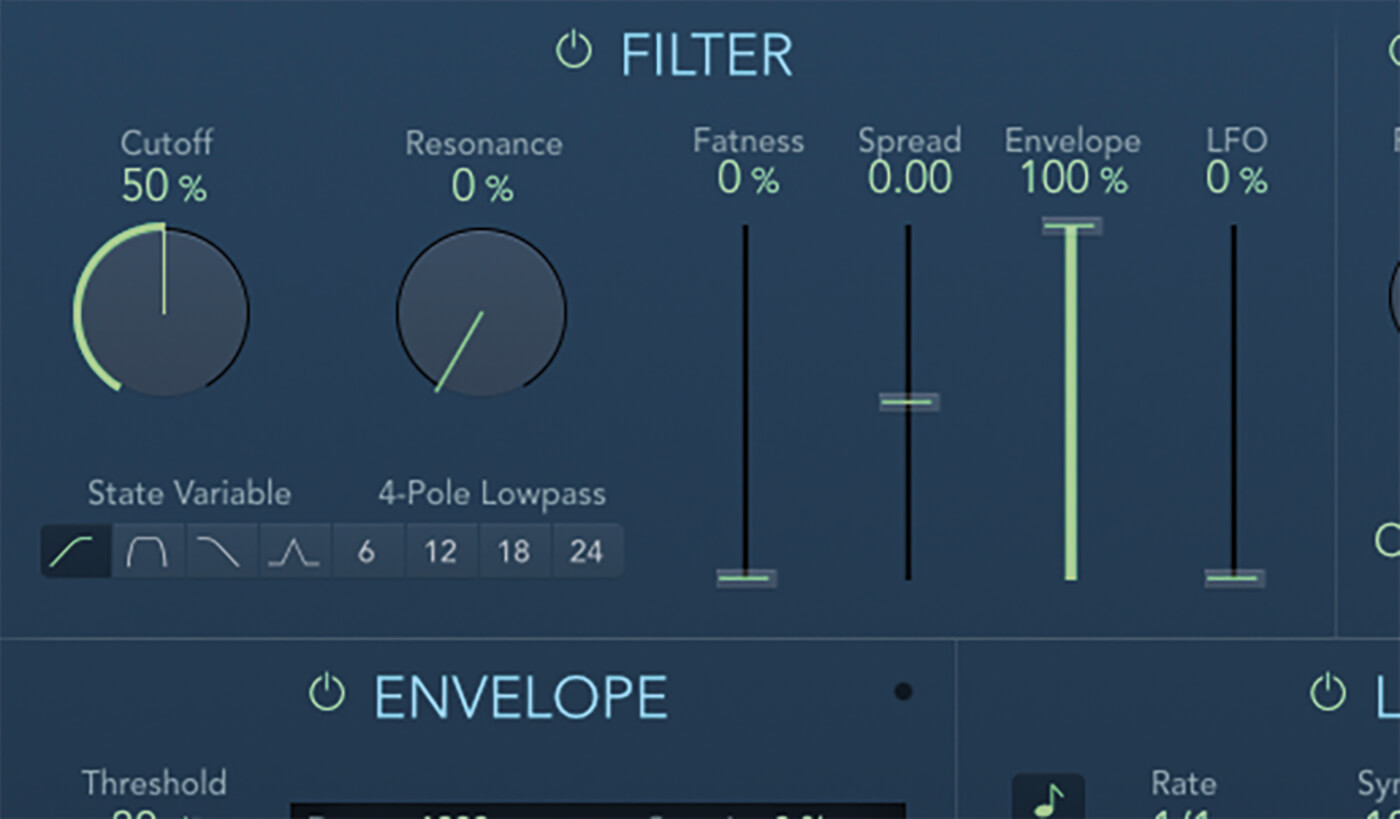
10. Now, in this first example of sidechaining, we’re going to use the AutoFilter in its High-pass mode, using the kick drum as the sidechain input. Set the Envelope depth to 100% so it has full control over the filter.
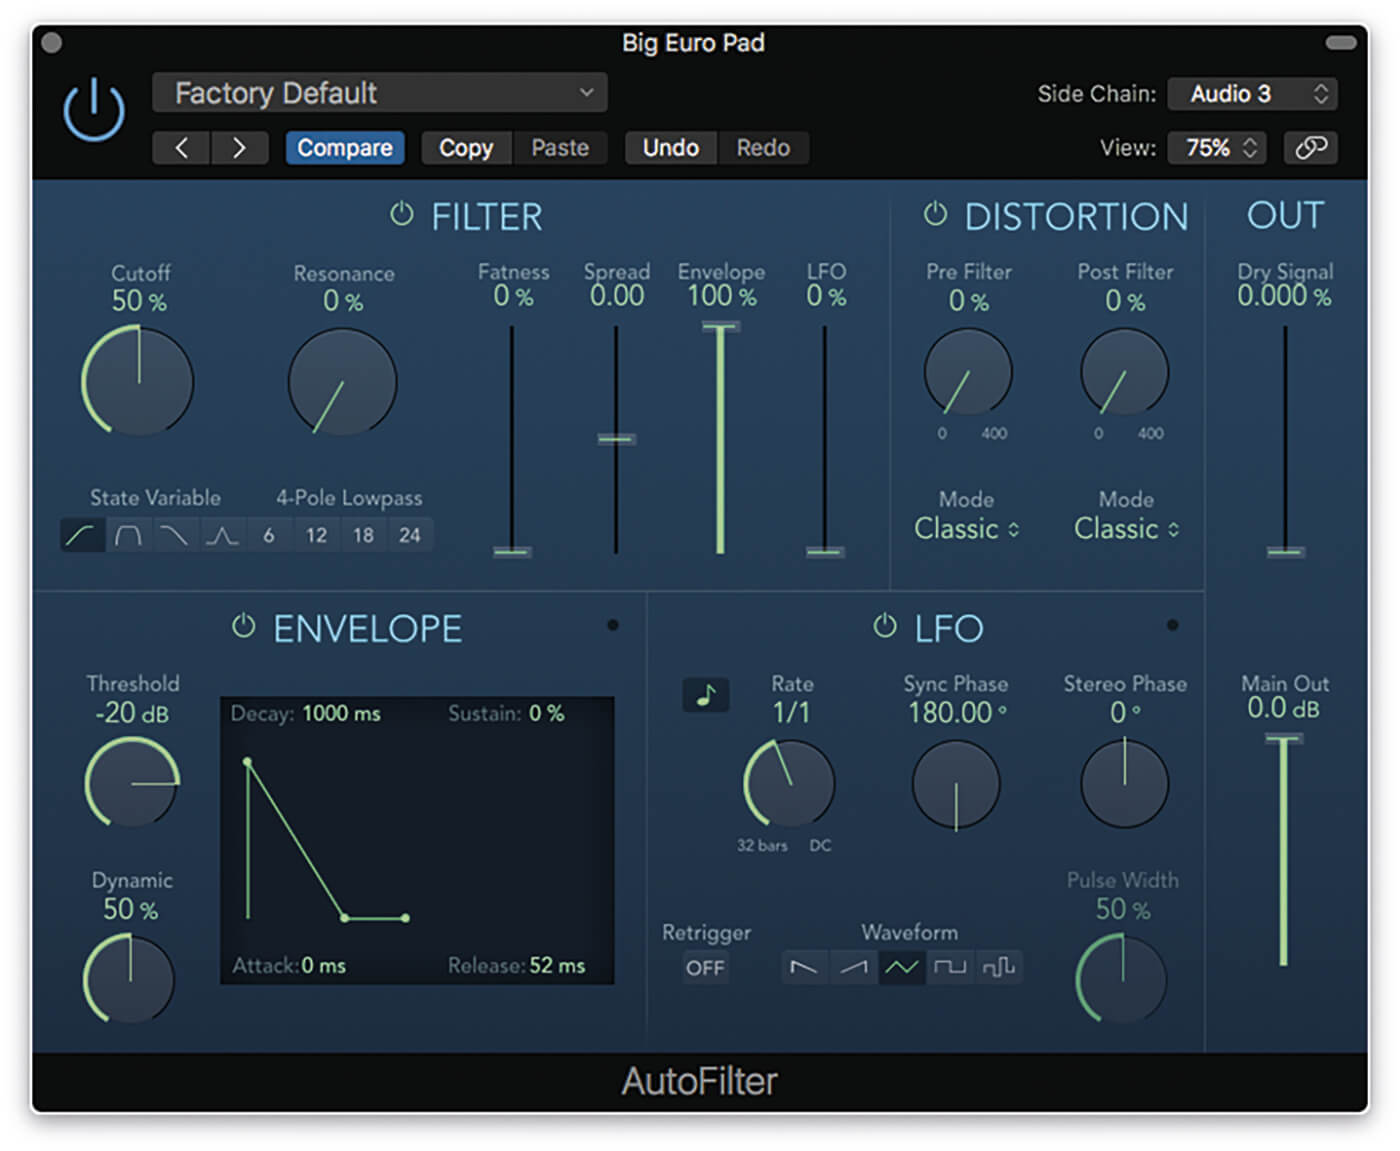
11. As with the previous examples, the finesse of setting the effect relates to both the Envelope shape and the Threshold, so the envelope is triggered correctly. We’ve set a fast Attack and Decay at around 1000ms.

12. Here’s a completely different solution, this time using the hi-hat to drive a low-pass filter. As the space between the notes is shorter, we’ve used a shorter Decay as well as adding an LFO for extra movement.
DON’T JUST KICK IT The kicking sidechain effect is perhaps a little overused now, so don’t just stick to it. As you can see from the walkthrough, the possibilities of sidechaining are vast, especially when you consider the variety of plug-ins featuring sidechaining and the almost infinite number of sound combinations that can be used with them. Experiment away!
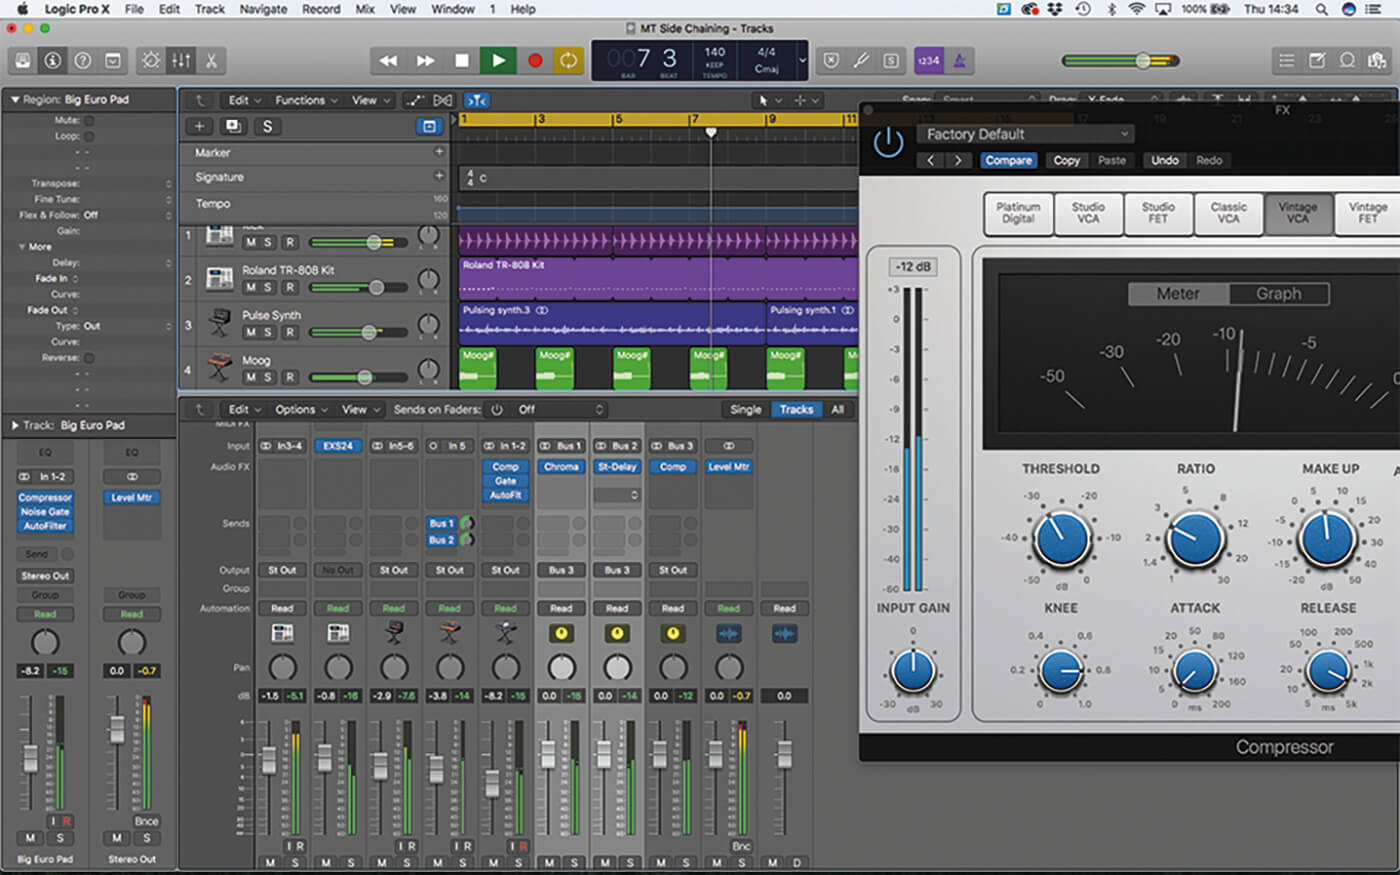
13. To illustrate how creative your approach can be, try activating all three sidechain treatments – Compressor, Gate, and AutoFilter at once. The result is a hybrid, with elements of each effect in the final output.
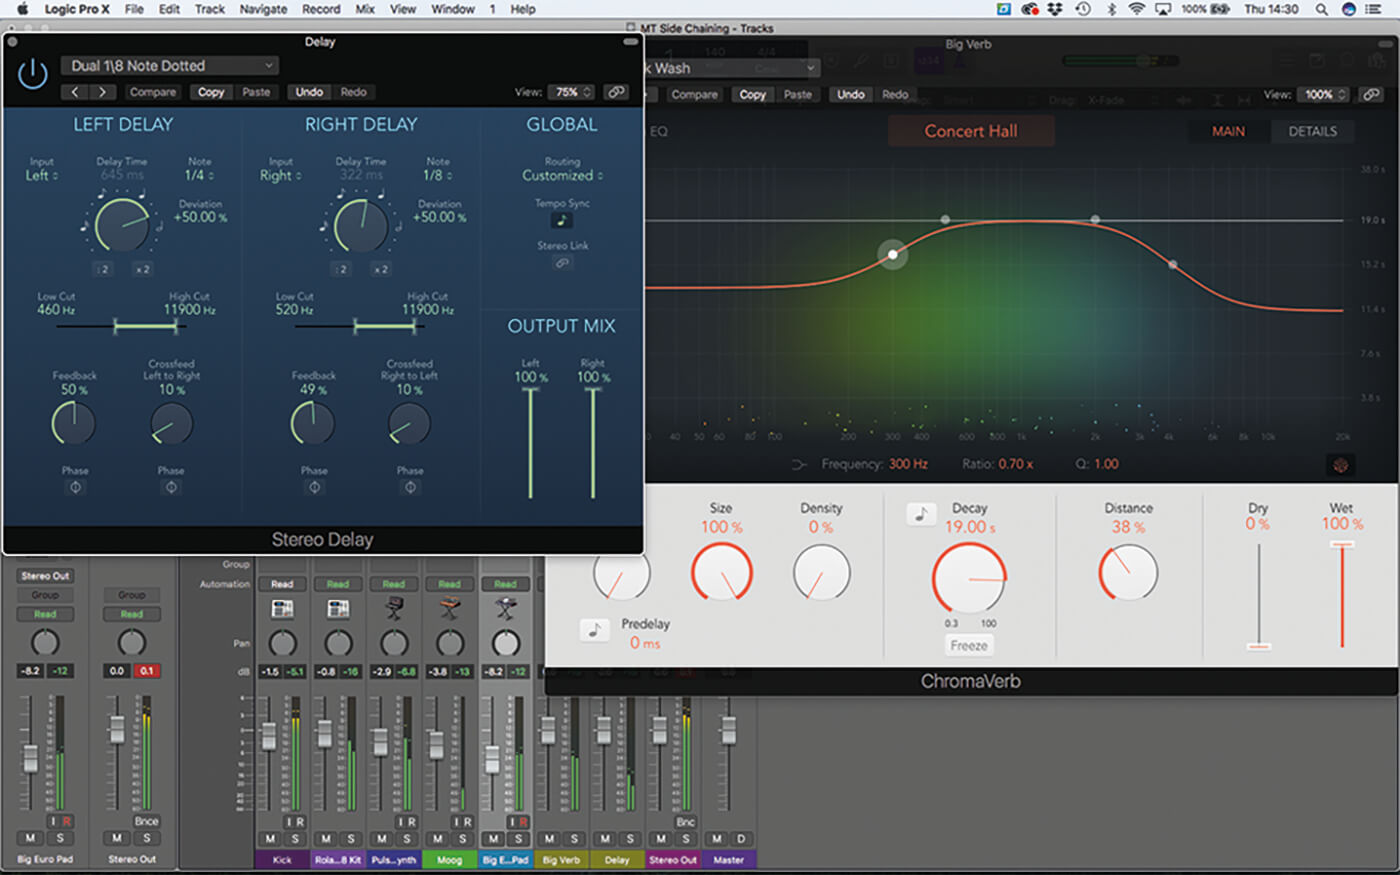
14. Sidechaining can be a great way to claw back space in the mix. In this example, start by placing plenty of reverb and delay (found on Bus 1 and 2) over the Moog synth lead. The sound is big and spacious.
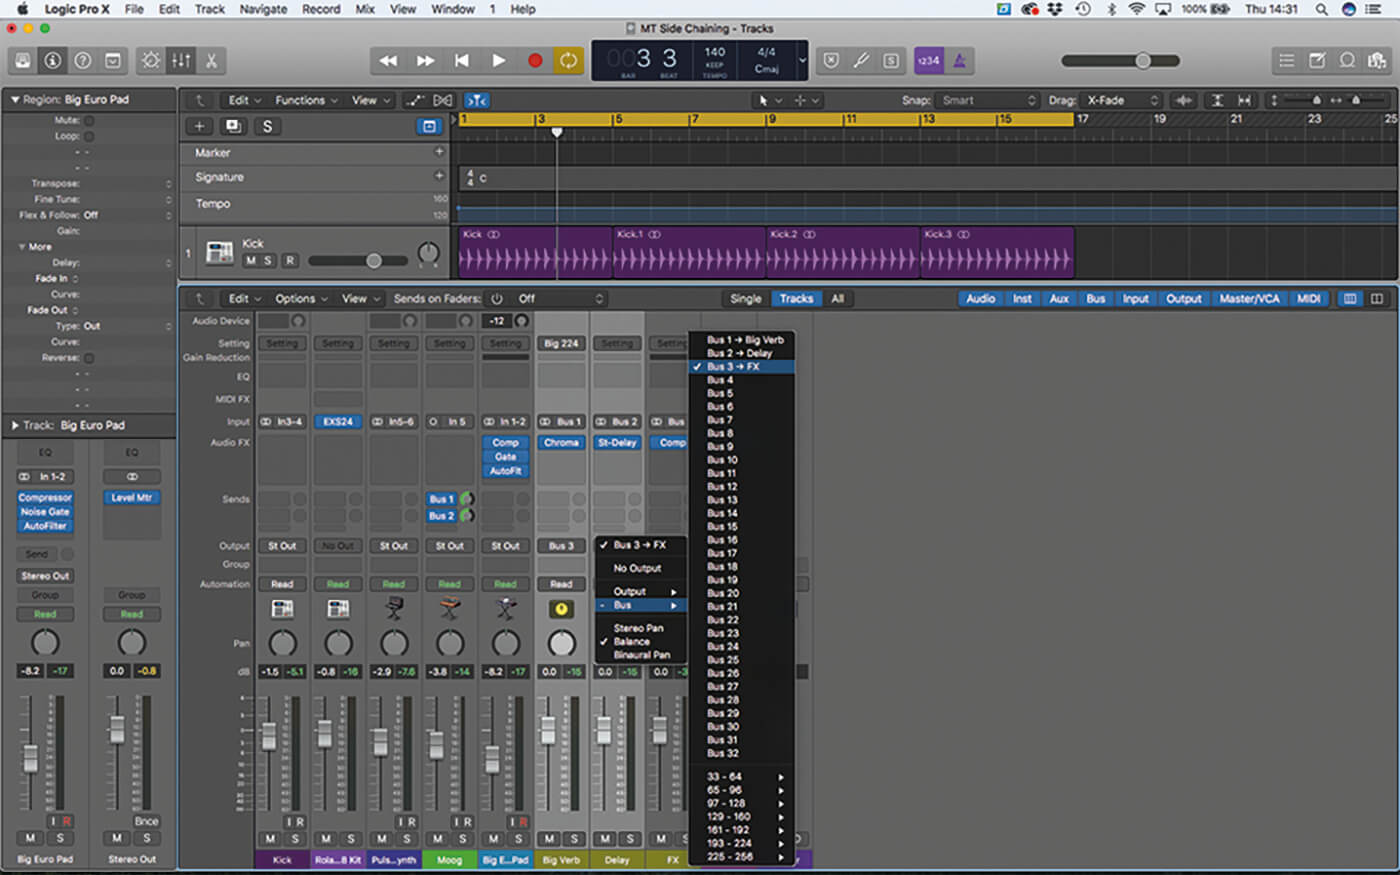
15. What we want to achieve here is some sidechain compression on the FX return, so that the reverb only ‘flowers’ between the notes. Route both of the reverb and delay returns to a new, spare bus.
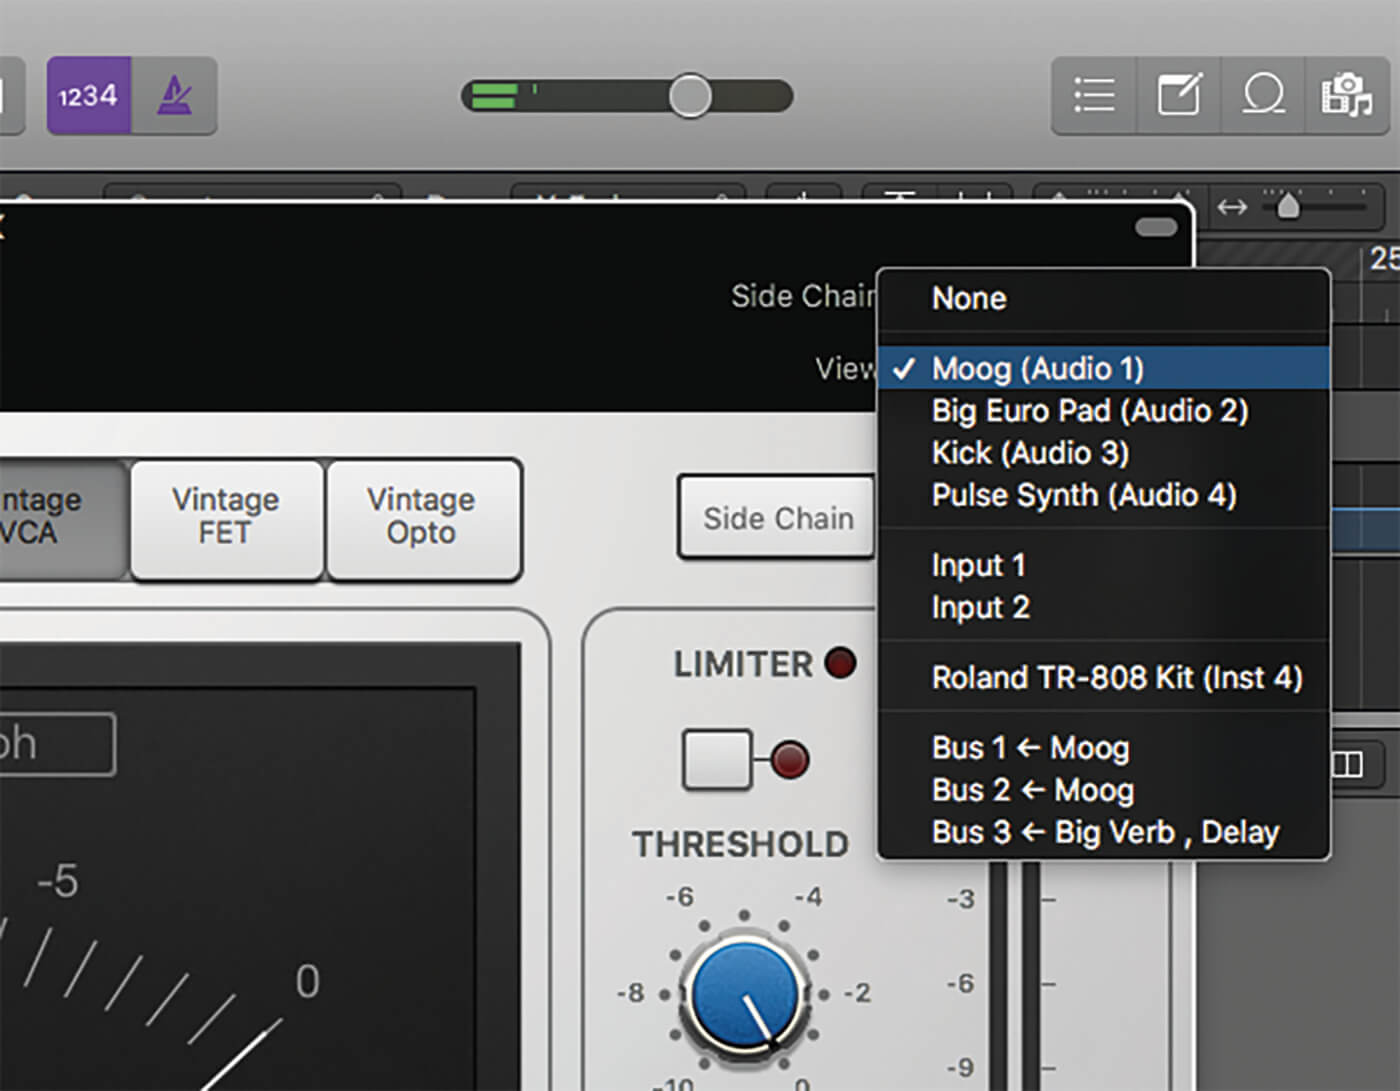
16. Place a compressor across the summed FX return, although in this case, use the synth lead (Moog Audio 1) as the sidechain source. Notice how the presence of the synth attenuates the reverb, making the mix drier.
17. Fine-tune the effect using a soft ratio (around 3:1) as we don’t want the attenuation too extreme, as well as long Release (around two seconds), so that the reverb returns back over the duration of the bar.
18. Try listening to the mix as a whole, with and without the various forms of sidechain processing. Notice how the effect helps regain space in the mix and well as adding an extra layer of dynamism.
For more Logic tutorials and workshops, check here.