How to program your own beats in Logic Pro X
With features like Note Repeat and a vast library of drum sounds, Logic Pro X is the perfect tool for programming your own beats. We pick up our sticks and show you how to get more creative with the DAW.
We spend a lot of time in our Logic Workshops taking a look at a particular function or plug-in, often missing out the ‘wider’ picture of how a collection of features knits together to produce a particular sonic outcome. In this workshop, therefore, we’re going to take a more holistic exploration of beat programming in Logic, looking at a range of features
from the Note Repeater through to use of compression on individual drum sounds.
Drum head
Logic’s Electronic Drum Kit folder contains a wealth of drum samples, perfect for creating your own programmed drums. As well as the kits that are compatible with GarageBand (labelled Drum Machine GB), you’ll find a folder called Drum Machine Designer and Drum Machine. The difference between the two is in relation to the playback engine – with the Drum Machine folder being powered by the Ultrabeat plug-in, while the other uses Drum Machine Designer.
One benefit of the Electronic Drum Kits is that they’re presented as a Track Stack. These are useful as a means of accessing the plug-in’s additional outputs (so that you can process each part of the kit separately), and as a means of packing away the multiple MIDI regions that a DIY drum loop can be made up of. The result is a clear arrangement, where you only access the MIDI regions and audio tracks of the drums as and when you need them.
Repeat performance
One really useful feature for programming your own drums is the Note Repeat feature, which originally featured as part of Akai’s MPC drum machines and is arguably responsible for the classic ‘trap’ hi-hat effect. Note Repeat can also create some great glitch-and-stutter effects, or for those with a more acoustic persuasion, snare ‘drag’ articulations that a drummer might add to their performance.
As the name suggests, Note Repeat creates a succession of drum hits perfectly locked to the tempo and grid of the track you’re working on. In a simple way, this could be a straightforward as a 16th hi-hat produced by holding down the hi-hat trigger. Where things get decidedly more trap-like is where you actively vary the note division (between 1/8th, for example, and 1/16th) live during the performance. With Note Repeat, the rate can be controlled from the lowest octave of the keyboard, making it easy to record these rapid, machine gun-like hi-hat patterns with relative ease. By moving to faster note divisions – like 32nd and 64th note – you can start to replicate drum rolls and drags, or rapid, glitch-like drum tracks where a sample is rapidly retriggered.
Into the groove
Beyond the programming of the drum track, it’s also important to consider the processing on the drum samples, as this often forms one of the key components behind the vibe of many commercially produced drum loops. As we saw earlier, the big benefit of the Electronic Drum Kits is that they’re presented with faders for each key instrument (kick, snare, hi-hat, toms, and so on), letting you quickly explore the addition of processing like compression, EQ and reverb on a drum-by-drum basis.
One dramatic way of changing the presentation and drive of the kit is the addition of compression. Start by focusing on the kick and snare, as these elements contain the force behind your drum groove. The key to getting the right sound isn’t so much the amount of compression (although, of course, you want the gain reduction to actually be moving), but the relationship between the attack and release. The attack has an inverse relationship with the transient – so that a quicker attack squashes the drum’s transient, while a slower one preserves the attack, making the transient sharper. Release, on the other hand, lets the drum sound ‘breath’ – with a kick often preferring longer ‘breaths’ to that of the snare.
On the beat
The joy of any DAW is in the way features knit together to produce a musically effective workflow. Programming and mixing your own beats in Logic has always been enjoyable, but the combination of Note Repeat, Track Stacks and a collection of compressors makes Logic perfect for programming your own drum loops.
Programming your own beats: step-by-step
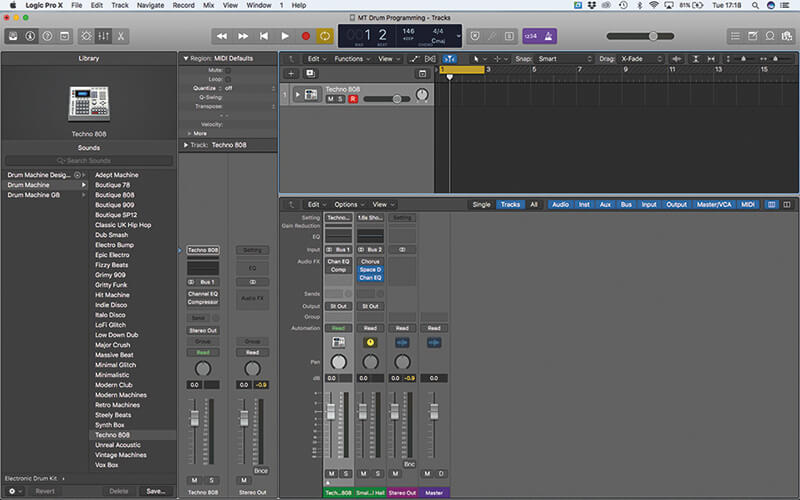
1. Open up the Library and load the Techno 808 patch. What you’re presented with is a Track Stack although, to start with, we’ll want to disable the compression across the main outputs to hear the drums ‘raw’.
2. Start by playing a basic groove between the kick and the snare. Use the Inspector’s Quantize parameter to correct your performance to the nearest 16th. Expand the Track Stack to reveal the individual outputs.
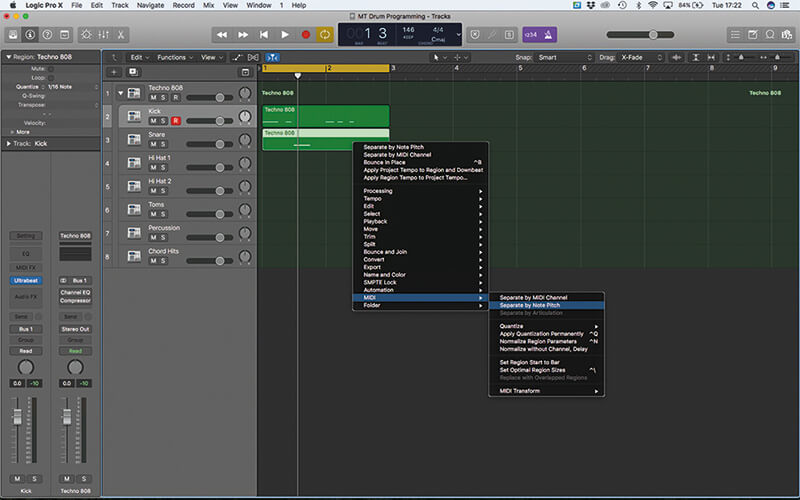
3. Control-click on the region and select MIDI > Separate by Note Pitch to have separate MIDI regions for each drum. Align the split MIDI regions with the corresponding outputs to make their relationship clear.
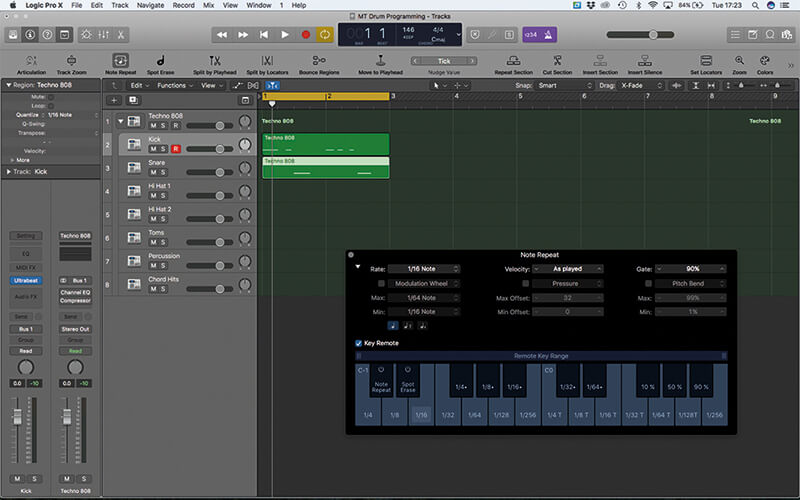
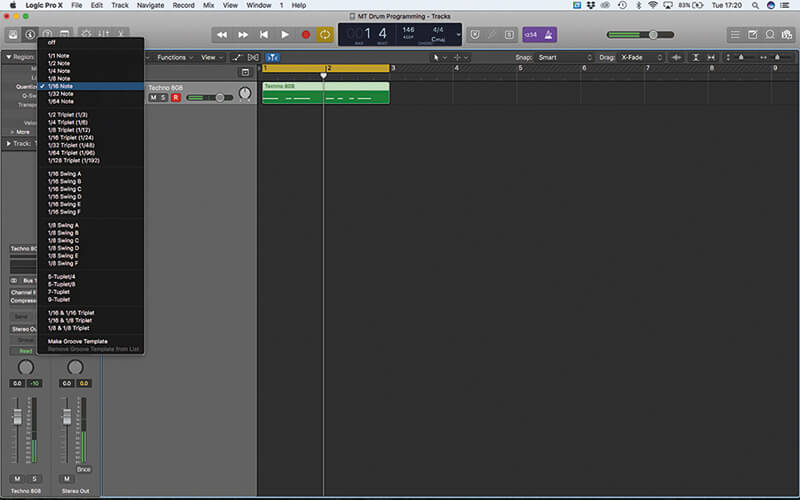
4. Open Note Repeat via the Toolbar. Expand it to reveal all the options and also enable Key Remote. Note Repeat is great for programming elements like hi-hats and shakers that occur over repeating, fast note divisions.
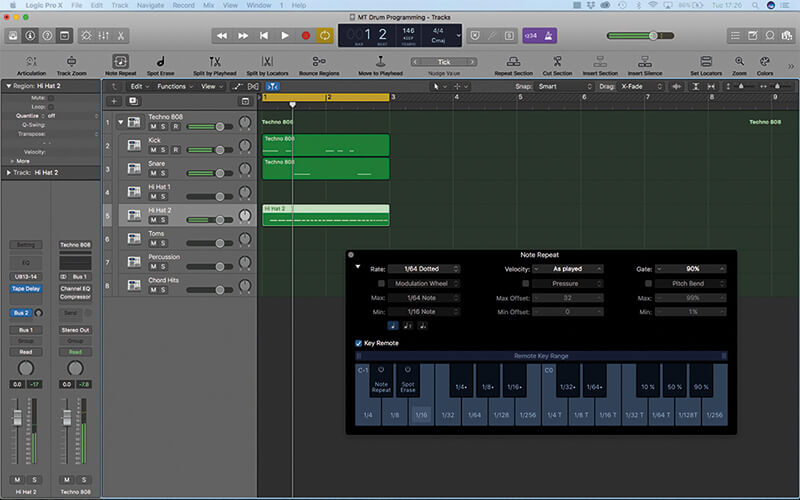
5. You can create trap-like hi-hats with ease by using the Key Remote to vary the speeds between 8th, 16th and 32nd divisions on-the-fly. Use the lowest octave on an attached MIDI keyboard to vary the rate.
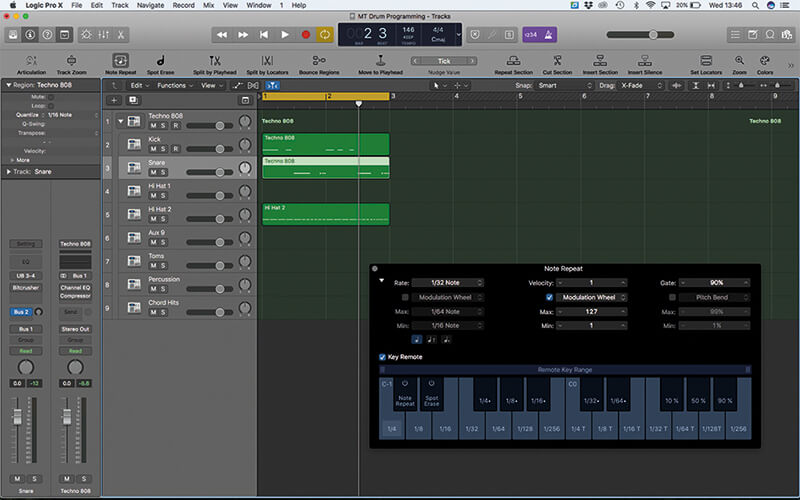
6. Another interesting feature is the ability to use the mod wheel to control velocity. Set velocity to 1, enable the modulation wheel from the drop-down menu and set the range from 127 (Max) to 1 (Min).
![]()
GET IN KEY One of the advantages of programming your own drum loops is tuning your kit to the key of your song – especially the kick drum. Use the Tuner plug-in (or your ear) to find the existing pitch and then use Ultrabeat’s Pitch control to force it up or down the required number of semitones.
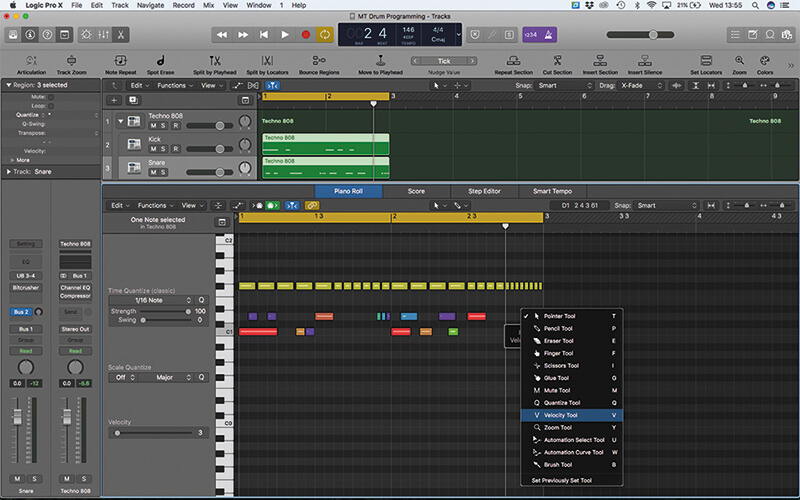
7. The velocity feature works well on the snare drum, where you can create short rolls/drags. As you’re recording, use the mod wheel to lower the velocity (from high to low) over the duration of the roll/drag.
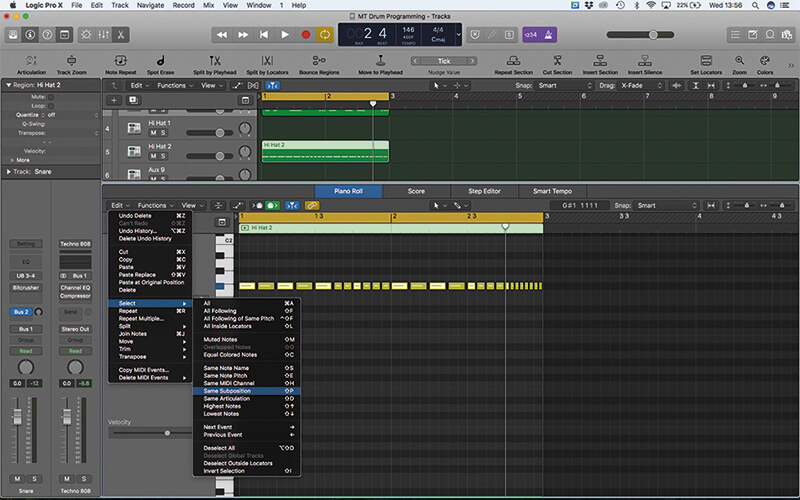
8. It’s important to define the accent of a drum groove. On the hi-hat, select where you want the accent to appear in the first bar. Use the menu option Edit > Select > Same Supposition to duplicate the selection across bars.
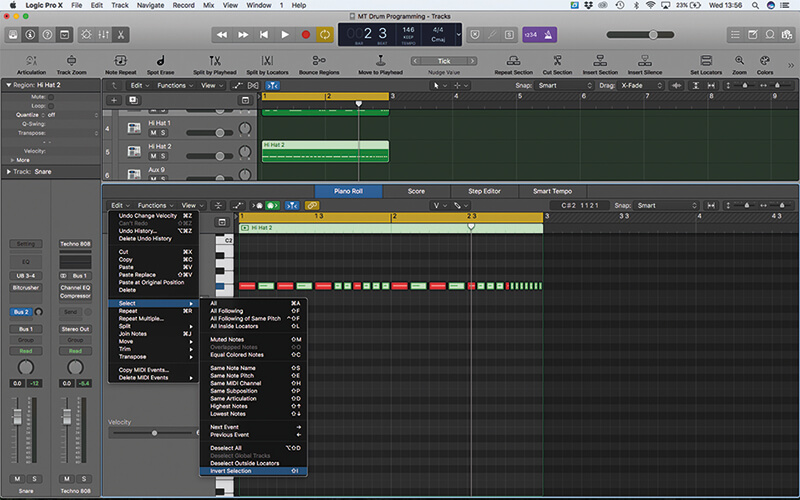
9. Raise the velocity to increase the accent on the main beats. You might also want to invert the current selection (Edit > Select > Invert Selection) so that you can turn down the un-accented notes.
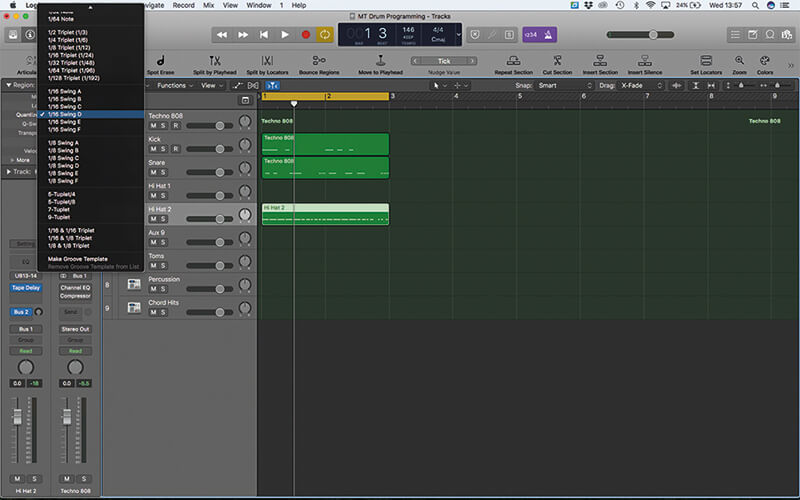
10. As well as accents, you might want to explore swing as a means of creating groove in your pattern. Try using one of the 1/16th Swing settings in the drop-down Quantize menu, especially on the hi-hat.
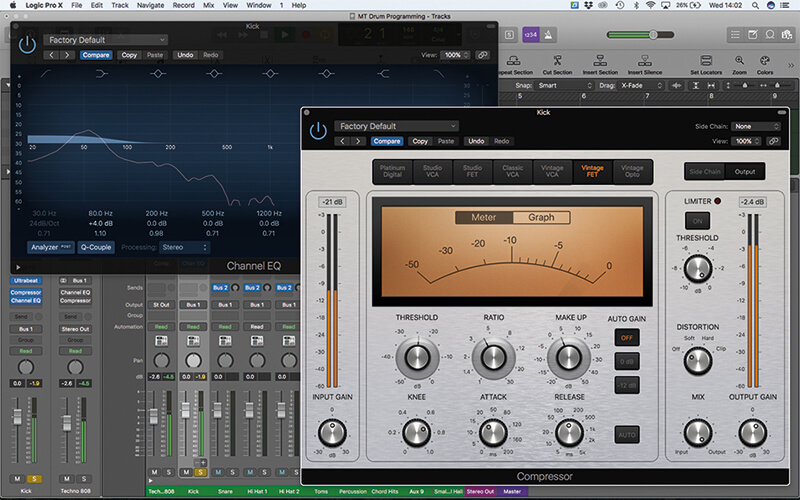
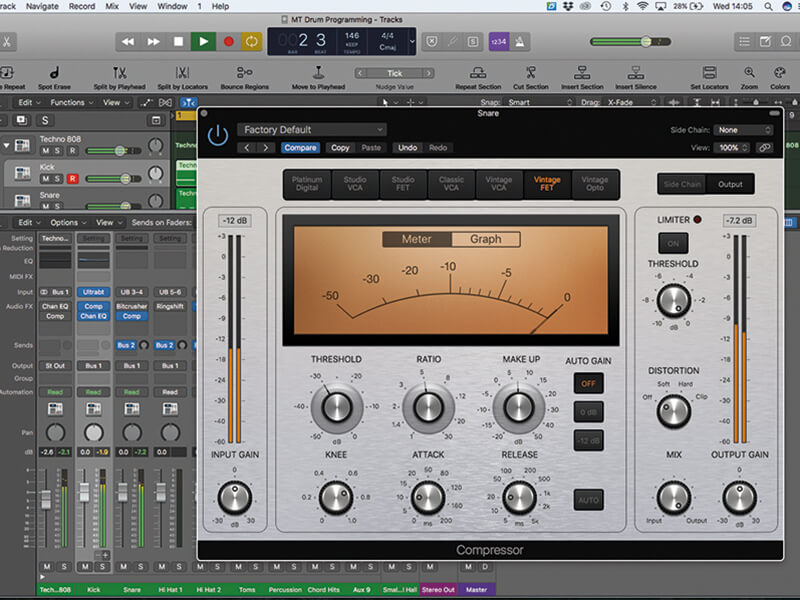
11. Adding compression is a great way of changing the sound of the kit, starting with the kick. Pay close attention to the Attack and Release settings. Lengthen the Attack, for example, to preserve the percussive transient.
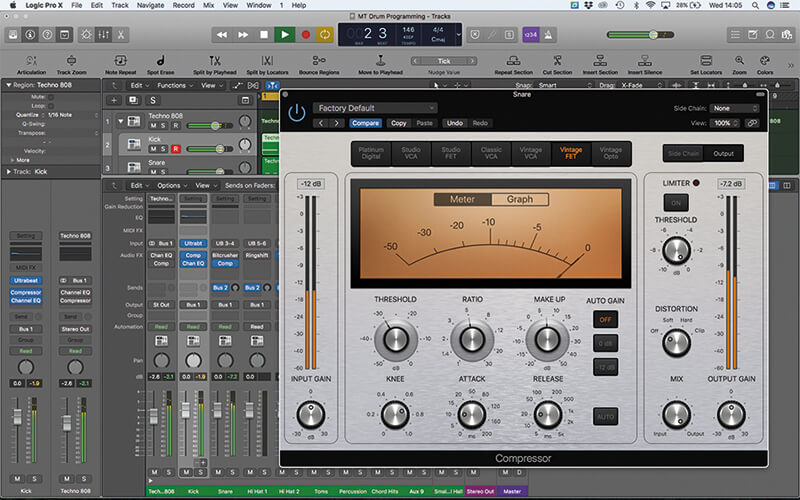
12. Here, we’ve turned our attention to the snare. Again, try to lengthen the Attack so that you don’t kill the transients, and then fine-tune the Release so that the compressor ‘breathes’ with the envelope of the sound.
![]()
USE APPLE LOOPS? Although it’s tempting to turn to your Apple Loops folder (or the Drummer feature) for rhythmic elements, there’s a significant value in creating your own beats, particularly as a means of stamping your own sonic identity on your musical output.
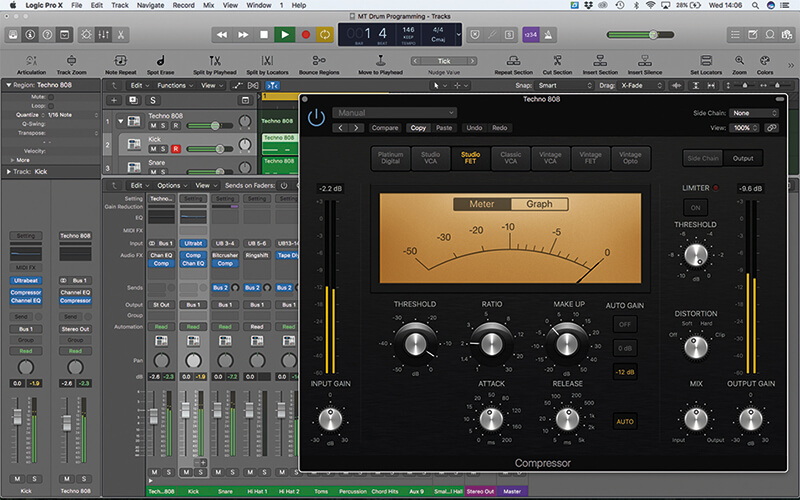
13. Compression across the whole kit tends to glue the sound together and make the sound cohesive, although you’ll want to use less compression (with a lower ratio setting like 2:1) than on the individual kit pieces.
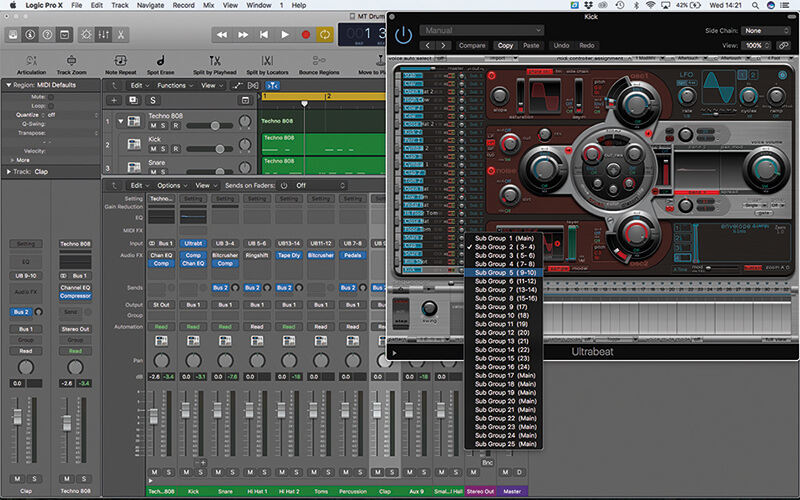
14. Rather than subjecting the whole kit to reverb, look towards selective application on one or two sounds. In this case, we’re rerouting the clap in Ultrabeat so that it goes out to one of the spare sub outputs.
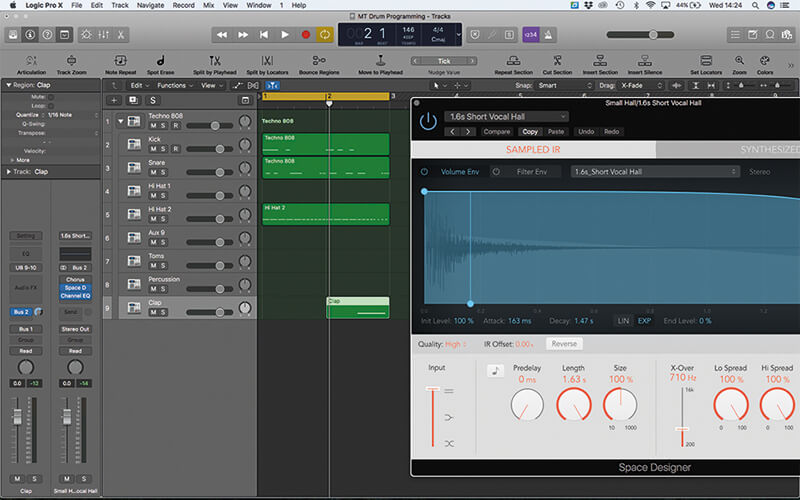
15. With the clap sound directed to its own output, raise the amount the send to Bus 2 to add the reverb. Using reverb selectively means to can be bolder and more dramatic with longer release times.
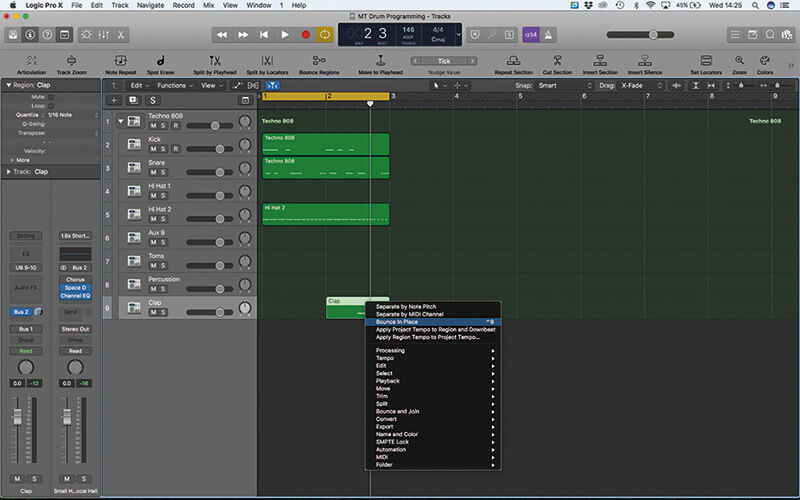
16. While it’s tempting to remain in the domain of MIDI, there’s lots of potential printing some of the drums as audio. Start by using the Bounce in Place feature to print a copy of the clap sound.
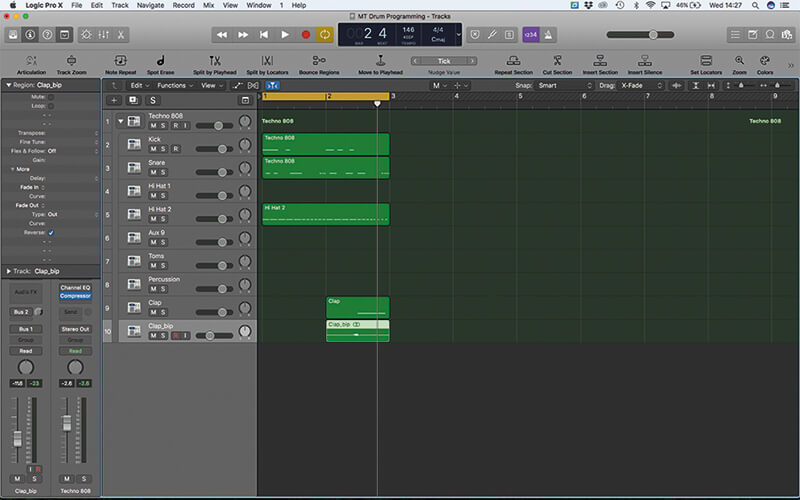
17. Use the Inspector to Reverse the playback of the newly created audio region. This can then be aligned with the MIDI clap so that the sound appears to ‘suck’ out of the reversed version.
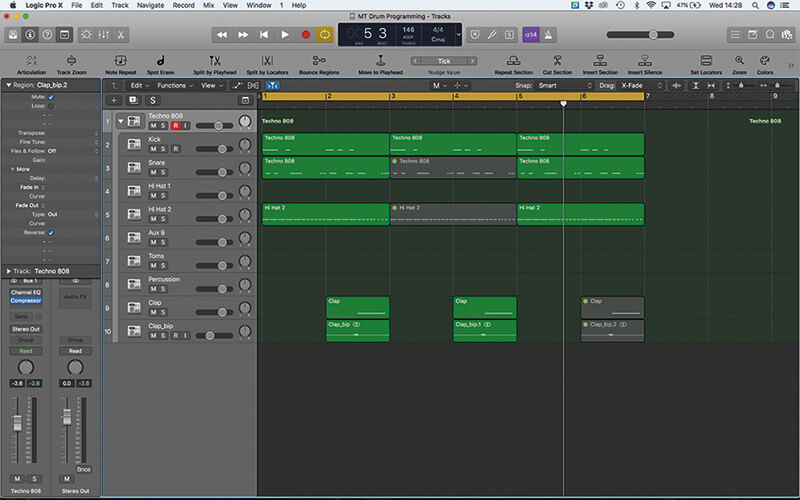
18. The use of a Track Stack makes it very easy to move between the ‘micro’ level of the arrangement, with respect to the individual drums sounds, and the ‘macro’ level with a range of different instruments.