Quick Tip: How to build a music-to-picture template in Logic Pro X
When you’re writing music for film and TV, time is precious. Here’s how to build a perfectly tailored template project in Logic Pro X that will keep you focused on creativity and speed up stem creation.
If you’re not yet using templates for your music-making, regardless of what style you’re creating, then it’s about time you did. Rest assured, once you’ve made your first template, you’ll wonder how you survived without them.
Many composers swear by templates because they’re such a time saver. Instead of setting up all their favourite instruments from scratch for every single project, the template means everything is ready with just a couple of clicks, so the composer can focus on the important work of music-making.
Here’s how you can build your own to carry you through the creative music-to-picture process. With the following method, creating stems will also become much easier, saving you time and headaches.
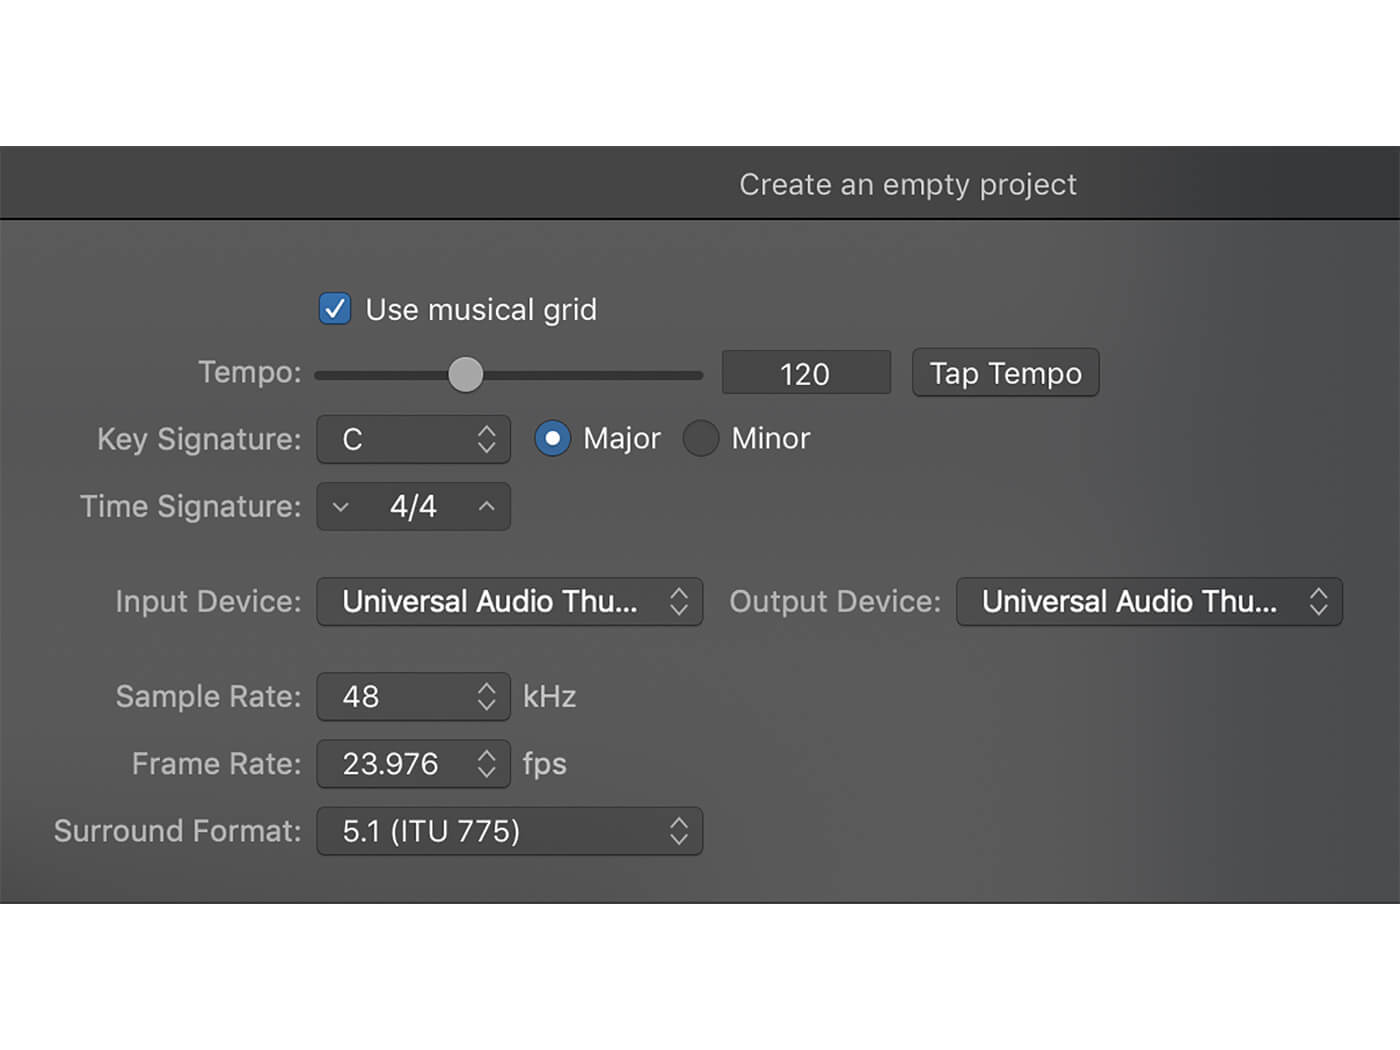
1. Open an empty project in Logic Pro X and create an empty Instrument Channel. The default audio preference for music-for-picture applications is 48kHz. Make this your sample rate. Leave the other settings, including the tempo, at their default settings for now.

2. Duplicate that empty channel twice to give you three tracks, which are not yet assigned to instruments. These three channels will form your first group of instruments which we will label ‘synth pads’. If synth pads aren’t something you reach for often when you’re writing, then pick another instrument group that you frequently use.
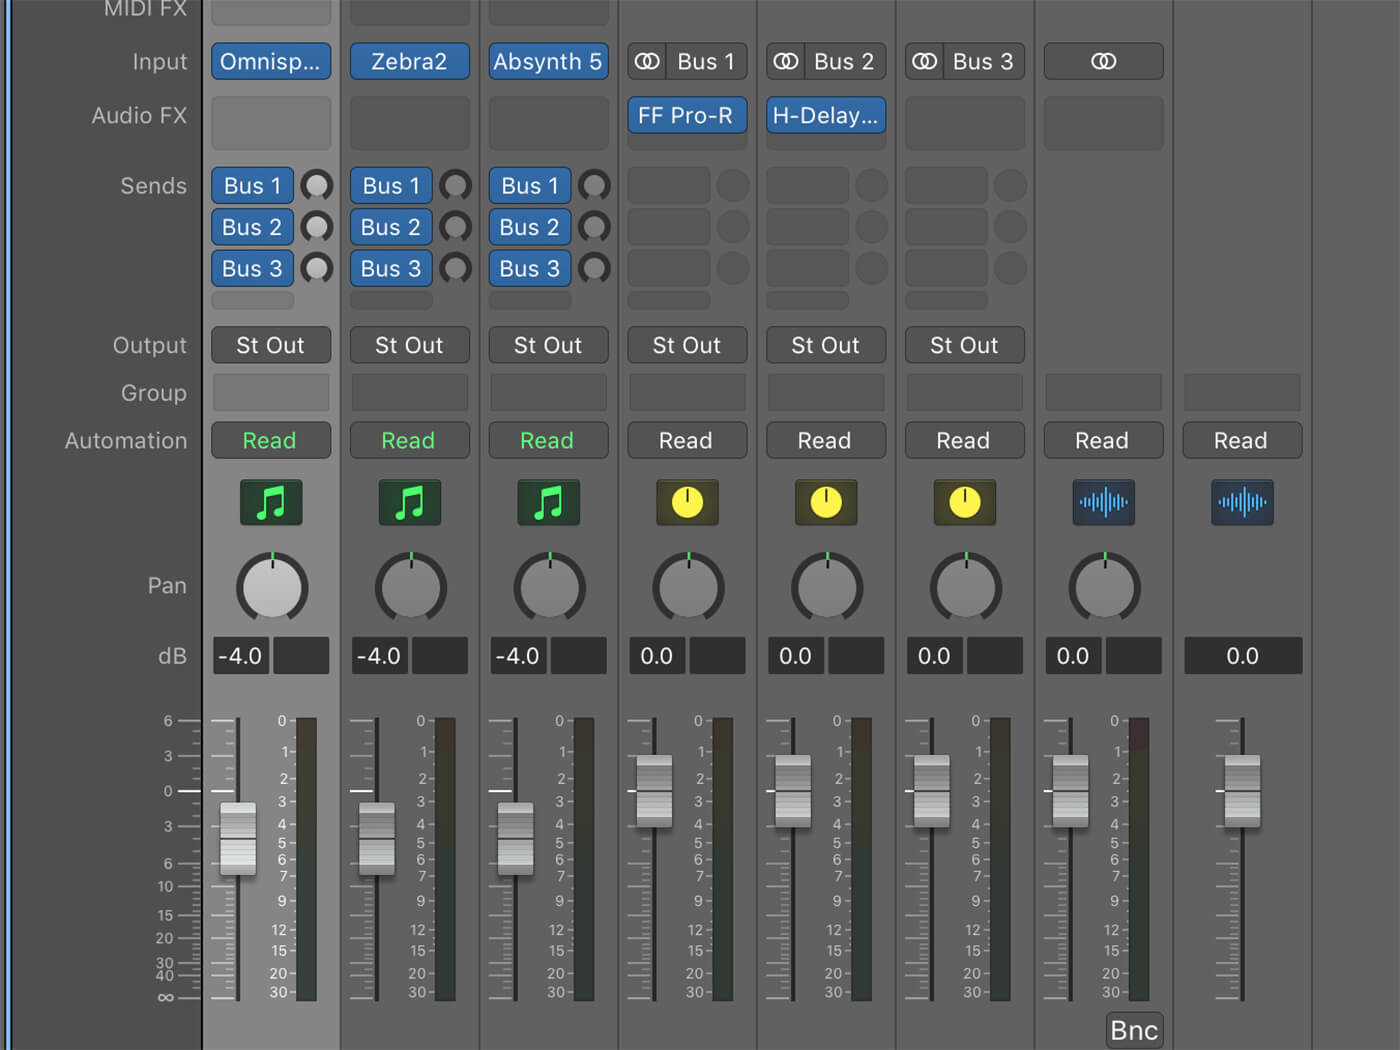
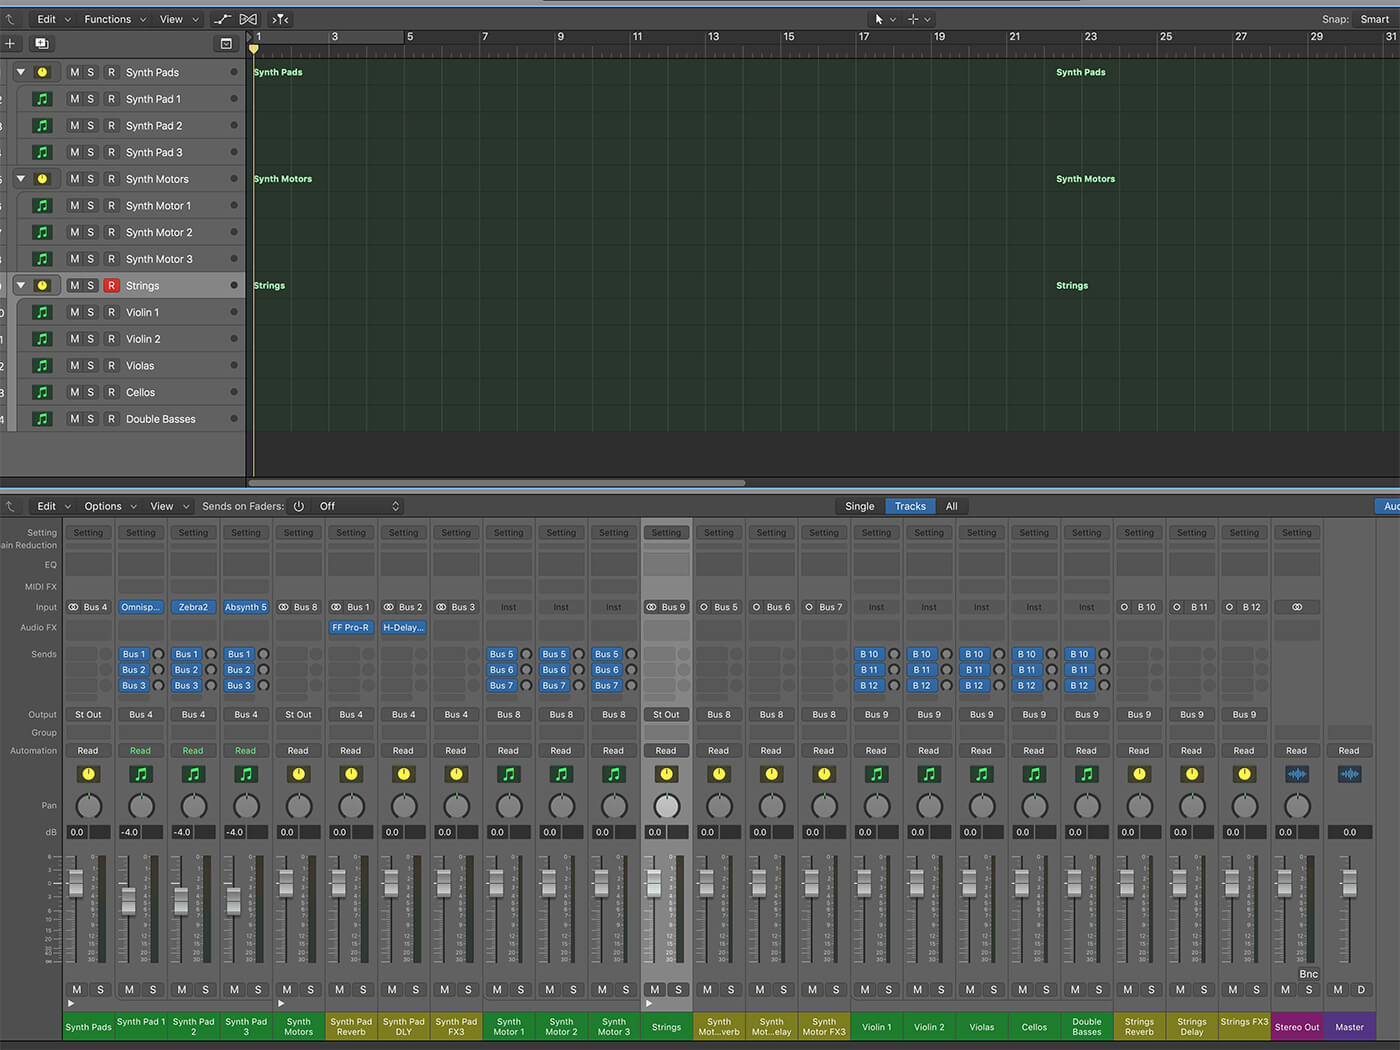
3. Pick three of your most-used virtual instruments within your first group. For synth pads, Omnisphere, Zebra 2 and Absynth 5 are great choices. Assign these instruments to tracks one, two and three, respectively. Then, on each channel, create three aux sends. Route these to a reverb (we’ve used FabFilter Pro-R), a delay (Waves H-Delay) and an unassigned third bus. Label this Synth Pad FX3.
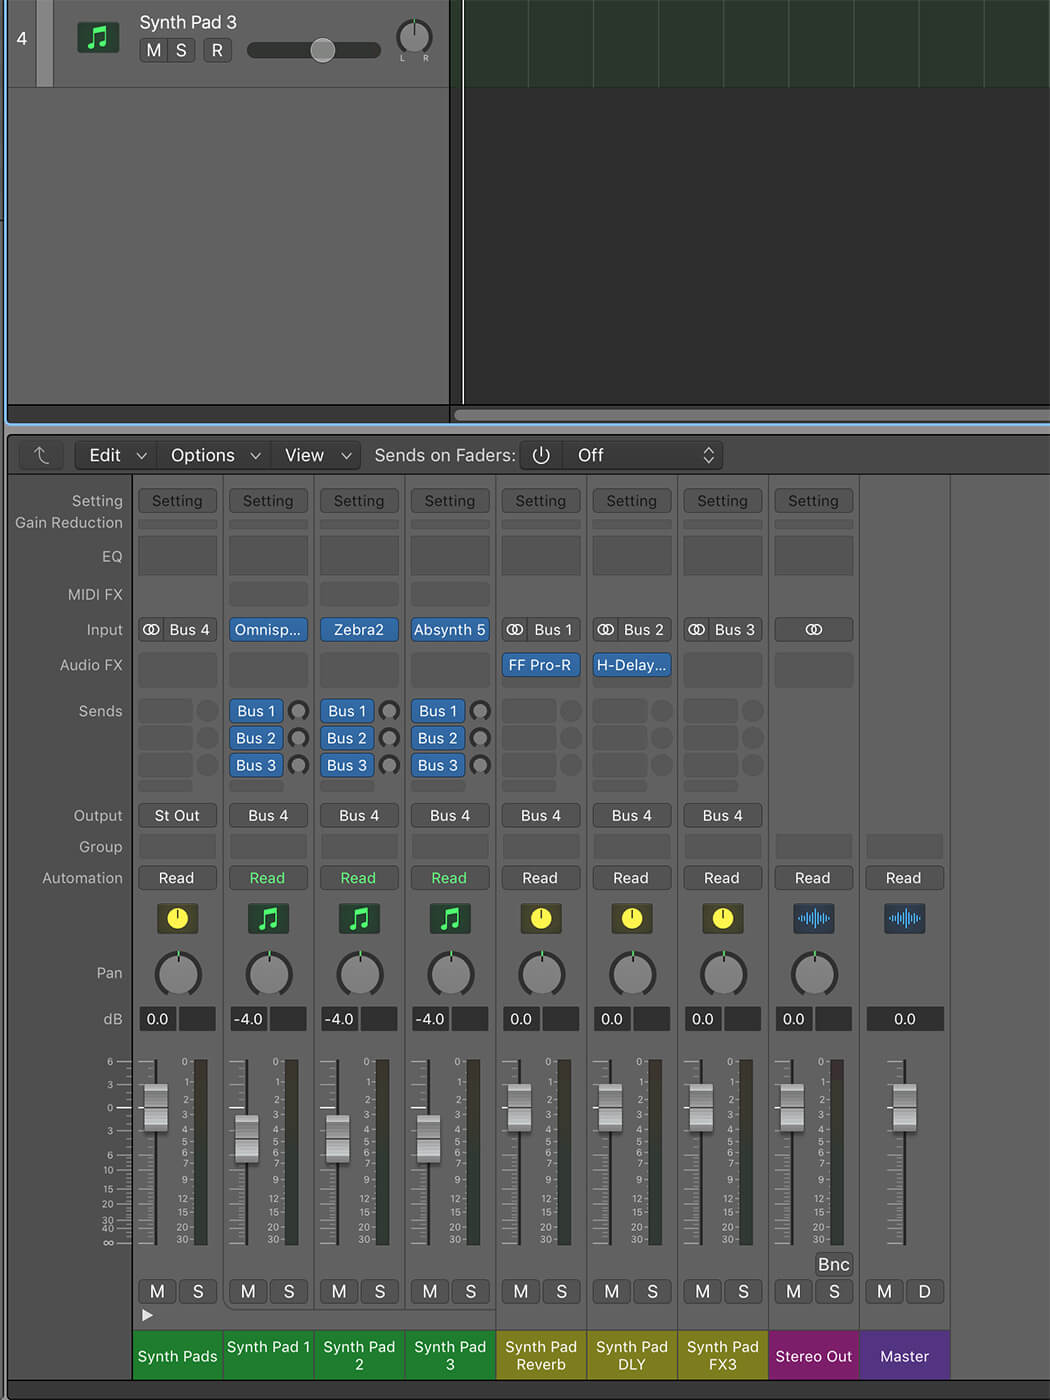
4. Logic has a feature called Track Stacking, which automatically assigns instruments to an auxiliary bus. Select all instrument and effect return channels that are part of the Synth Pads group. Go to Track > Create Track Stack… and select Summing Stack from the pop-up menu. If your DAW doesn’t allow this, do this manually. Route the three instruments and their effects to output to bus 4.
5. Repeat this process, creating a Track Stack for ‘synth motors’ and ‘strings’ (or whichever groups you use often). Assign three new, dedicated effects channels for reverb, delay and an unassigned effect, rather than using the effects for the synth pads for each new instrument group. This will take up greater system resources than sharing the reverbs and delays, but the reason for this will become apparent.
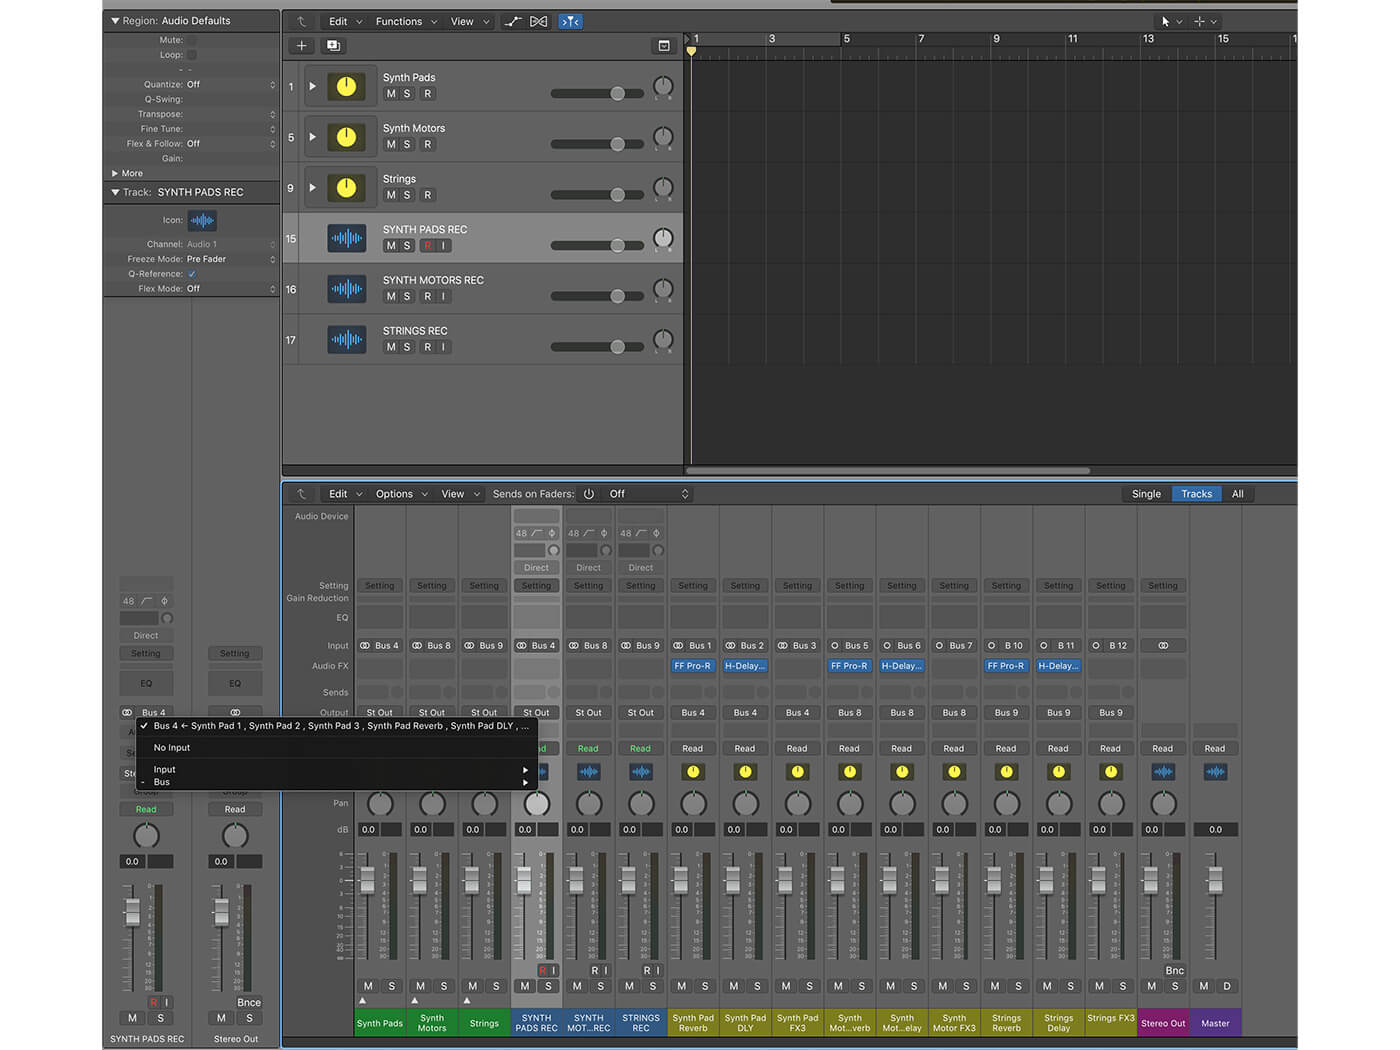
6. Finally, create three audio tracks. Switch their inputs to match each instrument/effects group, so the synth pad input is set to bus 4, for example. This means that you can eventually record individual track stems, with their effects, all in one pass. When it comes time to print (or export) stems for mixing, all of the effects for each section will be contained in each individual audio track.
Stay tuned for the next tutorial on setting up movie files. For more tutorials and workshops, check here.
Creating sounds for the screen? Check out our practical tips on soundtracking for film and television.