Logic Pro X Tutorial – Stem Mixing
Stems can transform the way you mix, and can be a versatile means of archiving and delivering your music output. Mark Cousins takes a closer look at stem mixing For this tutorial you will need the Stem Mixing project file – download here Like many buzzwords in the audio industry, the term ‘stems’ can mean […]
Stems can transform the way you mix, and can be a versatile means of archiving and delivering your music output. Mark Cousins takes a closer look at stem mixing

For this tutorial you will need the Stem Mixing project file – download here
Like many buzzwords in the audio industry, the term ‘stems’ can mean different things to different people. For some audio engineers, stems are about mixing – a means of strategically combining groups of sounds to then apply compression as a form of glue and the art of stem mixing is no different…
For other engineers, especially those working in the film industry, stems are a means of archiving and delivering music, offering greater flexibilities for changes further down the production process. Going further still, many mastering engineers suggest stems as being a more suitable means of mastering, rather than the restricted two-channel format of a stereo mix.
Stem Cell
Whatever your reasons for stem mixing, it’s clear that there are a variety of ways the process can dictate or influence your workflow. On a basic level, you could choose to bounce the mix multiple times, each time muting and un-muting the components to produce a series of stems grouped by instrument type.
If done correctly, the stems allow you to recreate the complete stereo mix with all the stem files aligned at the same time point and all faders set to 0dB. In theory, subsequent users – like a mastering engineer or a film’s dubbing mixer – can then tweak the mix (maybe lifting the vocal, or dropping the level of the drums) without a complete mix recall.
If you don’t produce a lot of music and have plenty of time on your hands, then the manual approach to stem creation may well be the best solution. If, however, you need to produce stems on a more regular basis, or indeed, you want to explore different ways of mixing, archiving and delivering your music, then a more automated means of working with stems can be a better solution.
By embedding stems directly into your workflow, you’ll be able to produce both stereo and stem-based mixes at a moment’s notice, as well as looking at the sonic possibilities of mixing in a more segmented and incremental fashion.
Logical Stems
When it comes to a stem-based workflow in Logic Pro X, there are several key points to consider, and indeed, it’s only since the release of 10.2.2 that Logic offered a true end-to-end solution.
Firstly, you’ll need to consider how you want to divide and organise your mix, balancing too many stems against too few. As a start, consider the principle instrument groups – like drums, guitars, keys and vocals – which might need further separation to split off key parts of the track, like lead vocals, or bass, as a separate stem.
For the task of separating the stems, begin by reordering your tracks, followed by colour coding and the creation of a new Track Stack for each required stem. Make sure you pick a summing stack so that you end up with a separate aux-bus fader for each stem.
At this stage, you should find the mix easier to navigate, especially if you remember the Alt modifier, which allows you to expand or close all the stems in one move.
Stem Processing
For the application of effects, you need to remember to stay within the confines of the stem. So, rather than having a single reverb for the whole mix routed to the stereo outputs, you’ll need an individual reverb instance for each stem, itself routed to the corresponding stem bus.
Once you’ve created the reverb for the stem, you can either choose to pack the reverb into the same Track Stack (keeping a cleaner ‘top level’ of your mix) or keep the reverbs and delays running free from the folder. In that case, ensure you route the output of the reverb so that it uses the corresponding stem bus.
Treat the stem bus faders much the same as your main stereo output channel. A purist approach, for example, might keep the stem busses at their default 0dB setting and devoid of any form of plug-in processing (this might be the case if you’re simply stemming an existing finished mix).
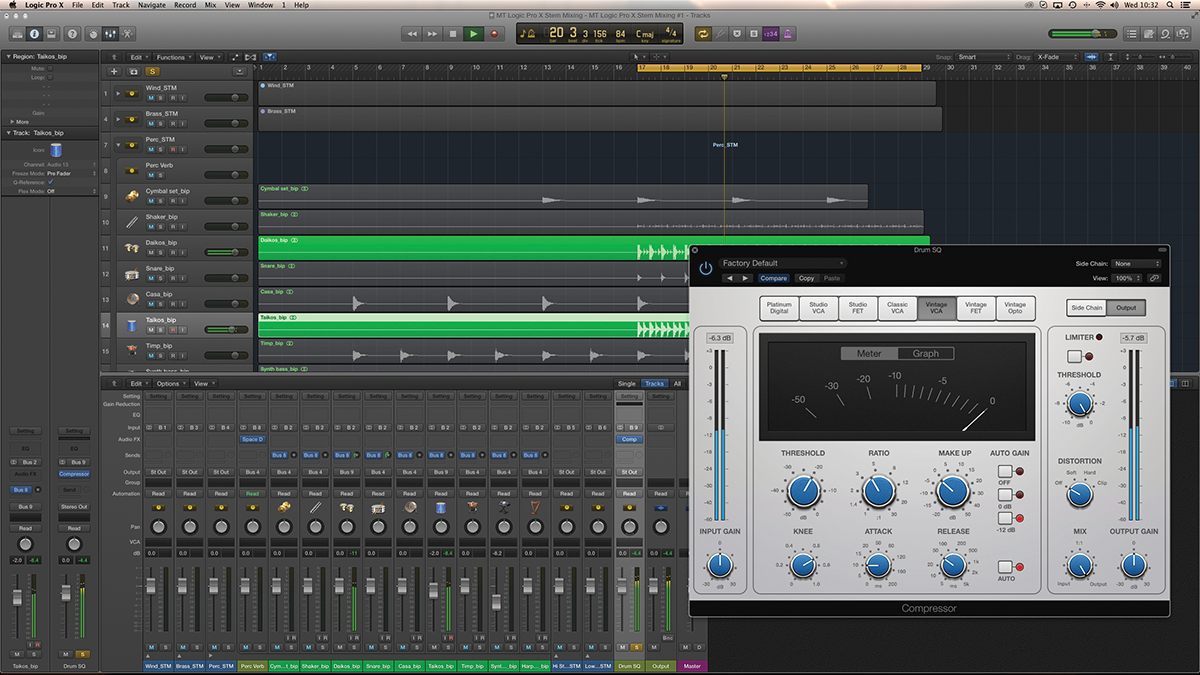
At the other end, you could consider using the stem busses for macro levelling across instrument groups, as well as potentially adding ‘bus sweetening’ effects like EQ and compression. As with a stereo master, even if you decide to apply these effects, be wary of using an approach that’s too heavy handed.
Special Delivery
Having created your stemmed stereo mix, now comes the task of rendering the final stems ready for delivery. Ideally, what we want is a means of exporting the mix in one pass, but rather than creating a single stereo file (as we would if we used the bounce feature), we need the mix rendered as a series of files, each of which represents the exact state of the stem busses (complete with level adjustments and additional plug-in processing).
Rather than using the bounce feature, therefore, you want to use Logic Pro X’s Track Export feature: which, since version 10.2.2, lets you export a series of selected tracks (alongside exporting all tracks or a single track).
By selecting just the stem busses you can therefore export only the stems into your project’s Bounces folder. In the accompanying dialogue box, uncheck the option to bypass plug-ins so that any compression or equalisation you’ve applied is carried through into the bounced stems.
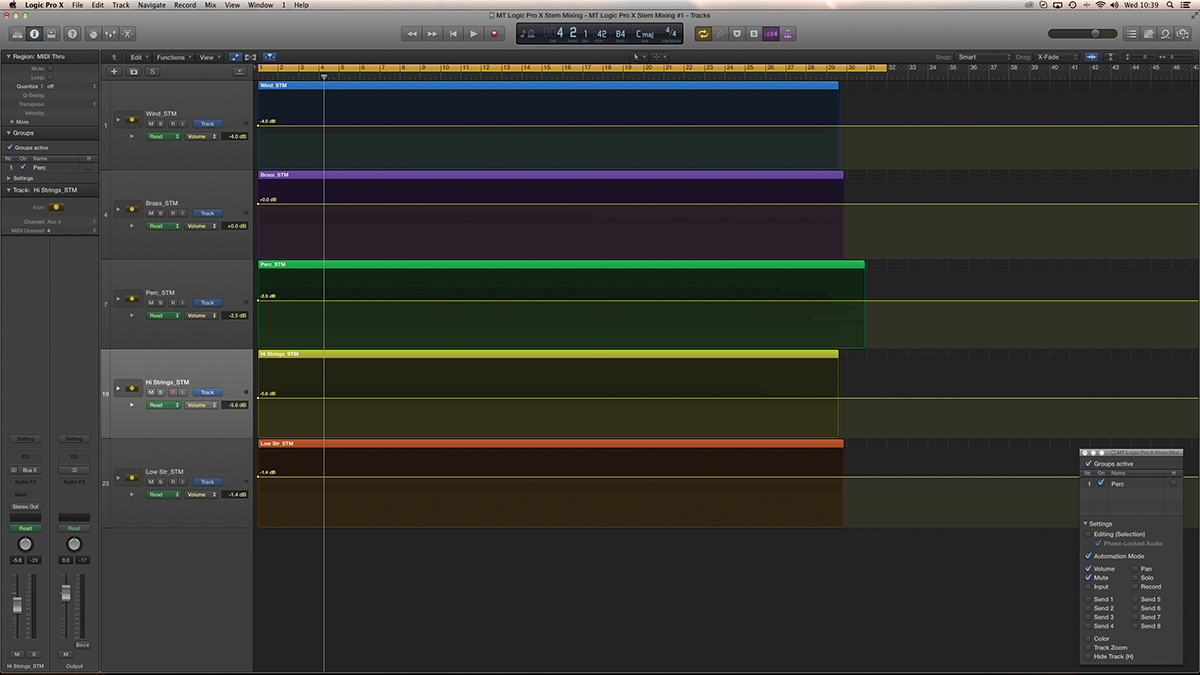
The final caveat with the process involves any levelling you might have done across the stem faders. By default, Logic exports a track pre any form of fader adjustment, which makes most sense if you’re using the export function to move over to mixing on another DAW. By adding automation into the track lane, even just a single node at the start of the track, you can make use of the Include Volume/Pan Automation option, so that the export is made post-fade.
Focus On – Custom Stem Mixing
If you’ve got space on your monitor, consider opening a second mixer window – Window > Open Mixer. This second mixer can be used solely to display the stem masters, so they can be muted, solo’d or rebalanced at any point.
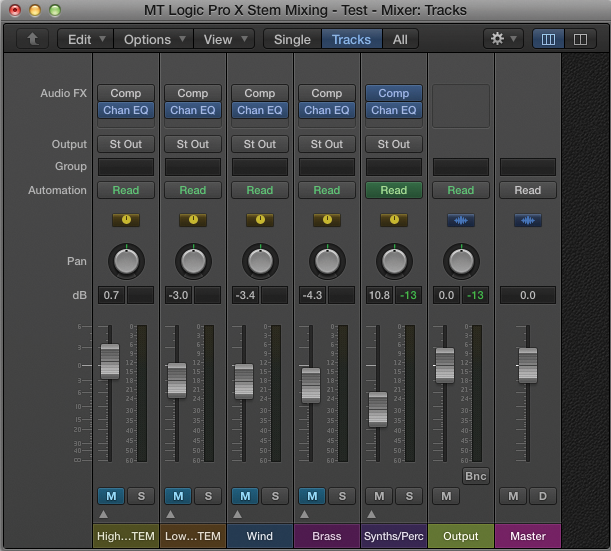
To slim the mixer down, deactivate the Audio and Inst selection from the top right-hand corner of the window, leaving just the aux channels (being used as the stem masters) and the main output faders. Consider using the local menu option View > Channel Strip Components to remove anything superfluous from the channel strip, making the mixer even clearer and focused on its specific task.
Step by Step – Stem Mixing
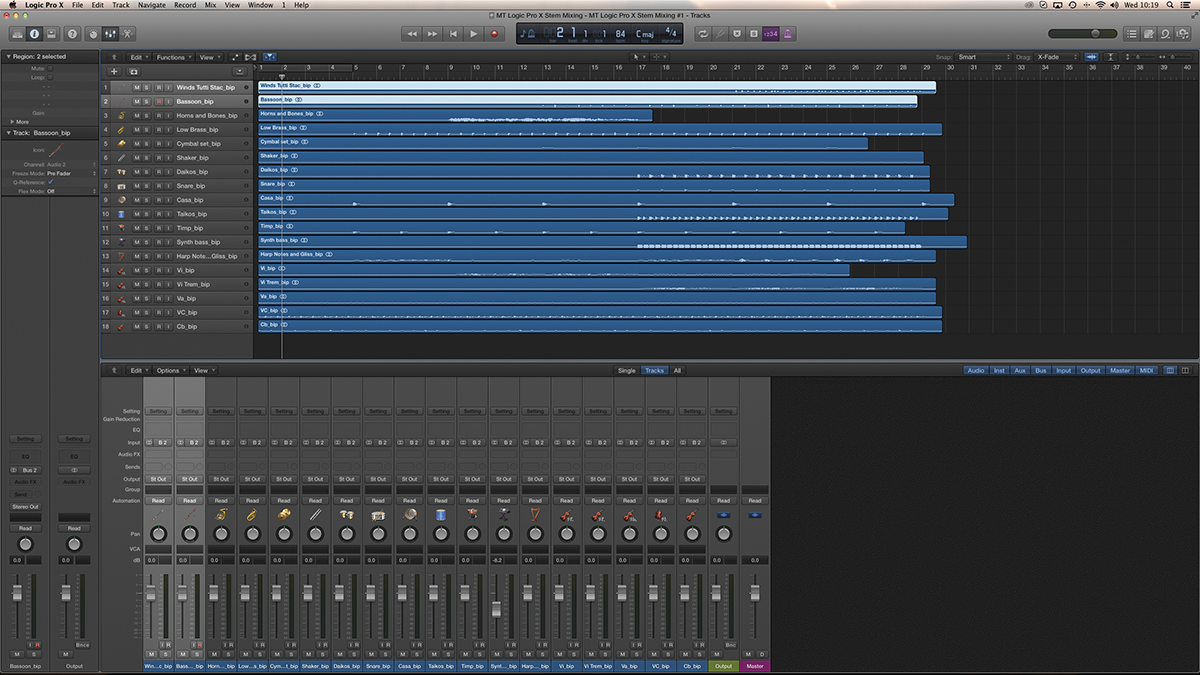
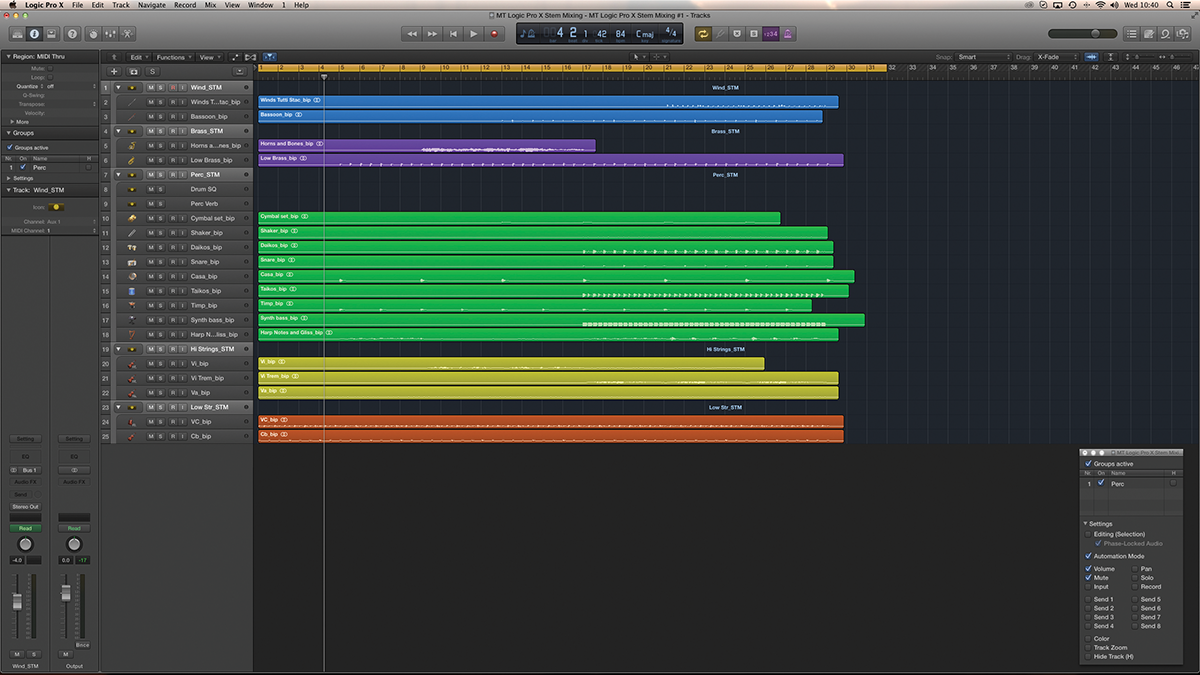
1: Working from the project you can download from here, order the tracks so that they broadly conform with the stems you want to construct. In this case, we’re creating stems for wind, brass, percussion, high strings and low strings.
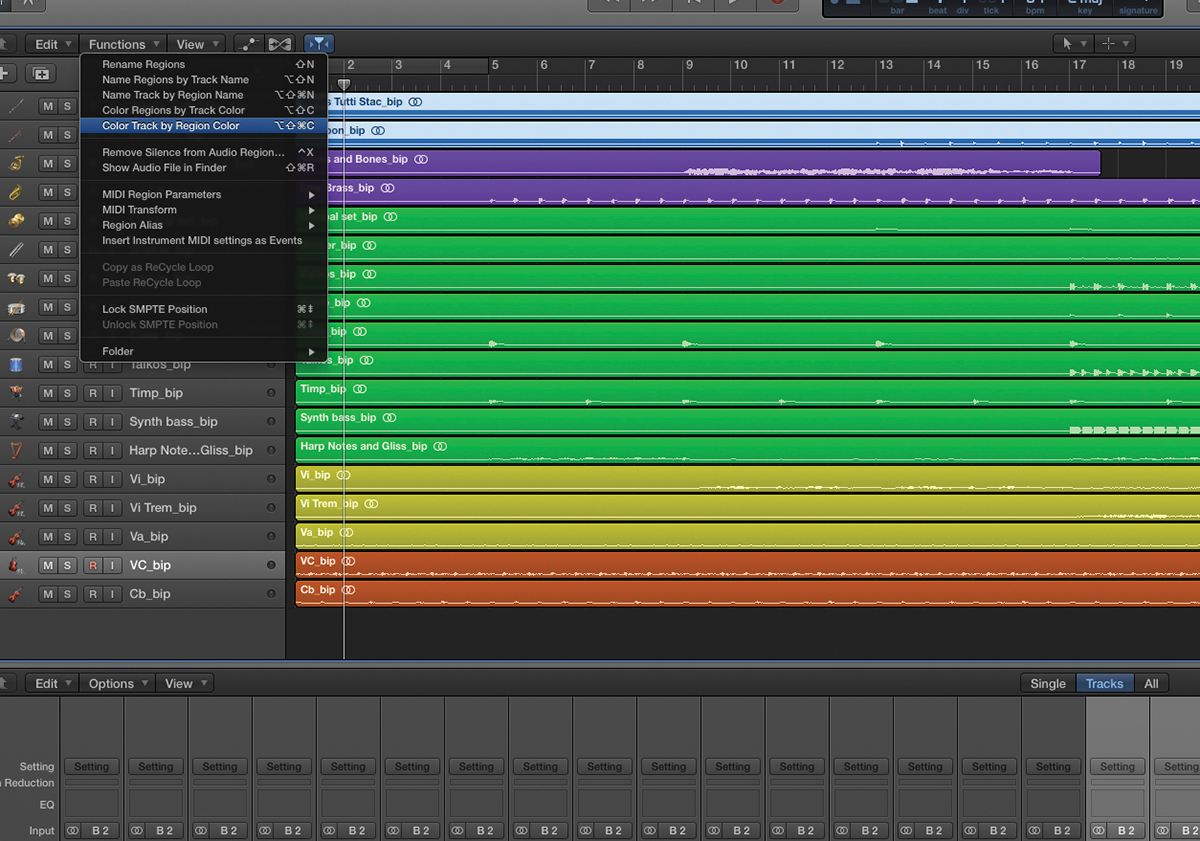
2: For clarity, it’s worth using colour coding. Use View > Show Colors and colour code each of the channel’s strips on a stem-by-stem basis. Use the local-menu option Functions > Color Regions by Track Color to change the regions accordingly.

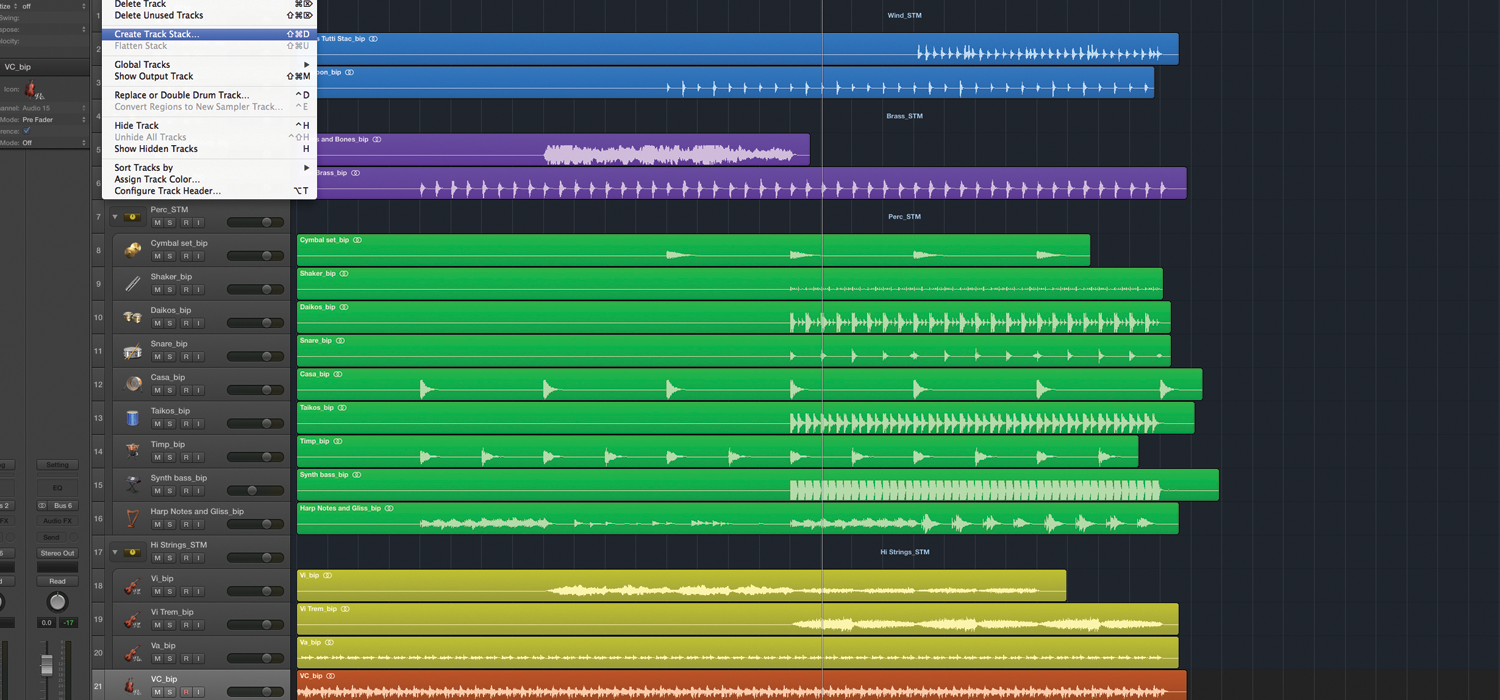
3: Select the tracks you want to use when stem mixing and then use the menu option Track > Create Track Stack. Ensure you pick the Summing option, so that a corresponding aux bus is created. Name the aux fader accordingly, arguably with an _STM suffix.

4: A handy way of moving from the micro to macro level of your mix is to use the Alt key modifier as you click on a track stack. This lets you quickly move from stem-level modifications to the individual tracks in the mix.
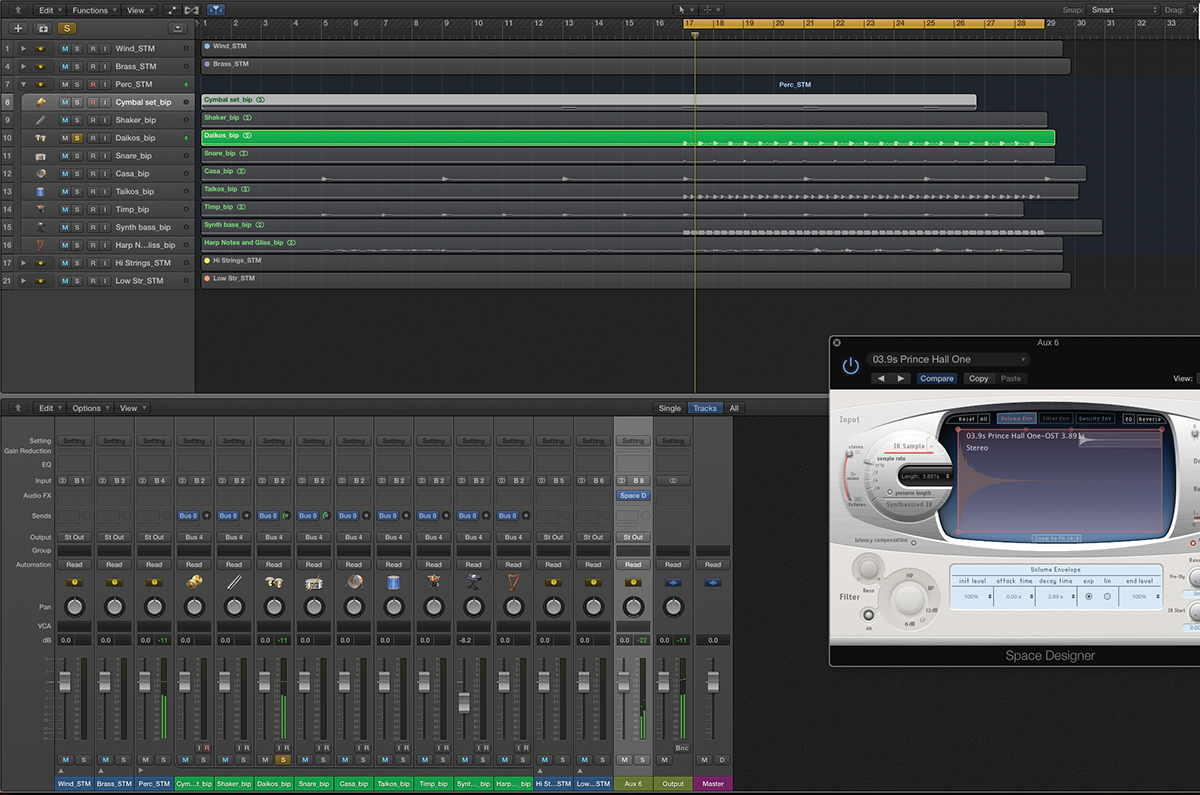
5: Send effects like reverb and delay should be kept within the stem, so that no other signals outside of the stem share the same reverb. In our example, try applying some reverb to sounds in the percussion stem.
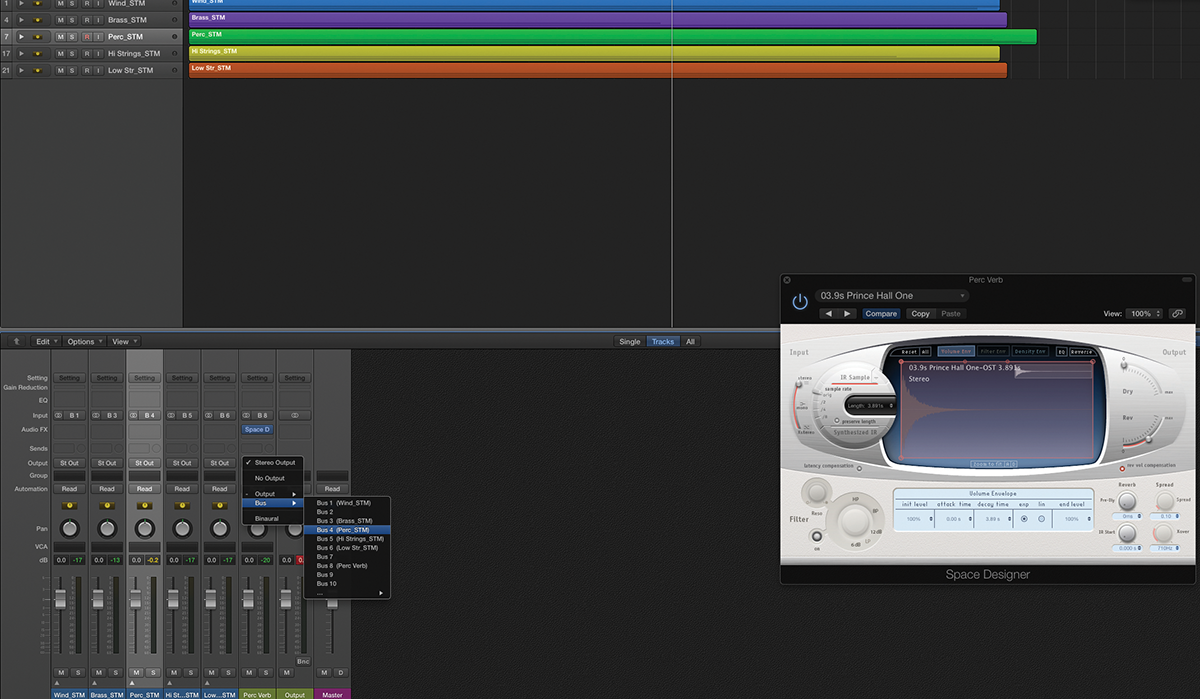
6: When it comes to the reverb’s aux fader, you have a choice of leaving it ‘floating’ on the top level of the mix, or placing it inside the stem folder. Either way, it’s essential that the outputs are routed to the same stem bus.
Click Here to Continue
This tutorial is endorsed by Point Blank. With courses in London, online and now in LA, Point Blank is the Global Music School. You can study sound to picture on their Music Production Diploma courses, with pro industry tutors.
