Logic Tutorial: 25 Pro-Tips
Get under the hood of Apple’s popular software studio and take your workflow to another level. Mark Cousins reveals a few tricks of the trade.
Get under the hood of Apple’s popular software studio and take your workflow to another level. Mark Cousins reveals a few tricks of the trade in this Logic Tutorial

Buss Automation
Audio, instrument and MIDI tracks all appear in the Arrange area’s track list, but you’ll struggle to immediately find equivalent tracks for your project’s aux faders (either running as aux sends or being used for buss mixing) or additional auxiliary outputs from multi-timbral software instruments. Although this isn’t immediately problematic, things become more difficult if you want to start automating these mixer objects. To solve this problem, select Options>Create Arrange Tracks for Selected Channel Strips from the mixer window’s local menu. Once this is done you should be able to use automation as you can on audio tracks.
A Click In Time
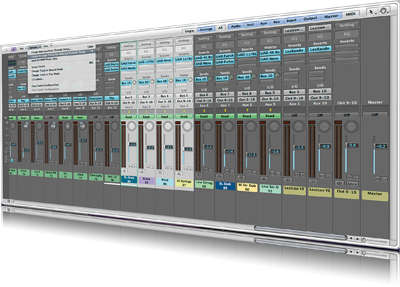
Having access to Logic’s click can be useful in a number of different situations. For example, you might you want to send a click to a pair of musician’s headphones but leave your monitor mix click-free (or switch the default ‘Klopfgeist’ sound for a sample of your own choosing). You can access the click via the mixer window – change its display mode from Arrange to All and look for the last software instrument (No 256) in your setup. Once located, you can change its output setting to direct the click to a set of headphones or switch the software instrument to select a different click sound.
Coloured Compression
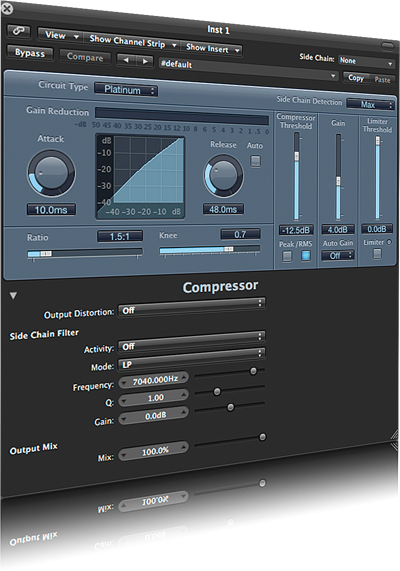
Try using the compressor’s Side Chain Filter (found as part of the plug-in’s extended parameter set) as a means of colouring the response of your compressor. Although the equalisation doesn’t directly affect the sound you’re processing (instead, the equalisation adapts what the compressor responds to), it will change how the compressor reacts to the input you’re feeding it. Try adding a Side Chain boost around 100Hz on a drum loop, for example. This action will make the compression more kick-heavy – arguably losing some of the track’s low-end weight, but also adding some unique ‘low-end glue’ into the equation.
An End To Clipping
Tired of your master output clipping by the end of the mix? Well, one simple technique is to raise the level of your Master fader at the beginning of the production/mixing process ��– usually by the same amount that your final mixes end up clipping by (+4dB is a good starting point). With just a few instruments in the mix, the output will be suitably ‘hot’. As you add new instruments, though, you can pull down the Master fader, negating any output distortion and achieving a perfect output level without having to adjust the individual channel faders.
Fade To Grey
If you’re working on a project with lots of fades, you might have noticed the occasional erratic response or ‘Fade Update’ error message from Logic. It’s important to remember that Logic renders its own fade files in response to fades and crossfades you apply to an audio region. If you’ve placed a fade across 24 tracks, therefore, you’ll be placing extra strain on your drive resources as Logic renders the fade. Also, if you re-save the project under a different name (in the same project file), Logic will need to re-render the fades. In most cases, though, a little time and patience will alleviate the error messages.
Power To Your CPU
Even with today’s multi-core CPUs, it’s easy to end up with a project that uses up a lot of your computer’s resources. A simple technique to remember is to always run the final mix with the current selected channel being an audio track – potentially saving you a few precious cycles of your CPU power. By contrast, whenever you’re resting on an instrument track, Logic optimises the particular channel strip’s plug-ins to deliver the lowest latency possible, irrespective of whether you’re playing the instrument or not.
Self-Oscillation
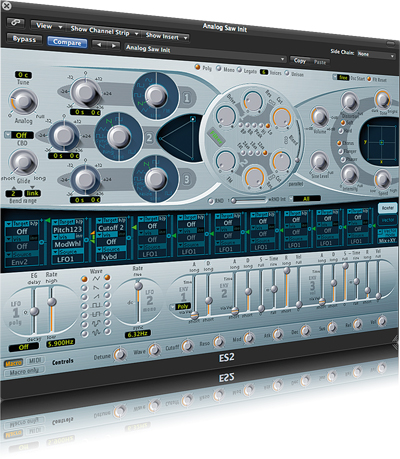
As well as using the ES2’s three oscillators as starting points for a sound, you can also make use of its extremely powerful self-oscillating filters. When the resonance is pushed to an extreme (especially on Filter 2), the filter will produce a distinctive pitched sound that’s not entirely dissimilar to a sine wave. A clever twist is to use the Keyb modulation source routed to the Cut-off 2 Target as a means of directly controlling the Filter’s pitch from the keyboard. Set the Amount slider to 0.50 to achieve the correction pitch intonation and tracking.
FM Filter
One of the most intriguing features of the ES2’s filter section is the FM control, which modulates the cut-off frequency using Oscillator 1. Create a basic sawtooth sound using Oscillators 2 and 3 and experiment with how the ‘audio spectrum’ modulation changes the sound. With small amounts you can achieve a unique form of distortion that can vary between a musical effect (whereby Oscillator 1 is tuned an octave above or below 2 and 3) to something harsher (where the tuning relationship is more dissonant).
Real EQ
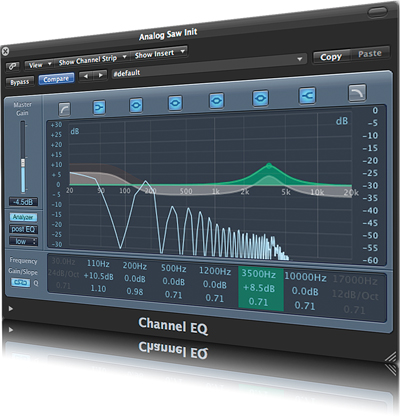
Assessing the true effect of EQ can be difficult if you’ve applied large amounts of additive gain – +6dB bass boost at 100Hz, for example. Put simply, any increase in level (even in relation to a specific frequency band) will always sound better to the ears, so simply switching in and out with the EQ’s bypass control might not give you a fair and accurate comparison. To be truly objective, attenuate the output using the Channels EQ’s Master Gain, ideally so that the same output level is achieved with and without EQ.
Ultra Gate
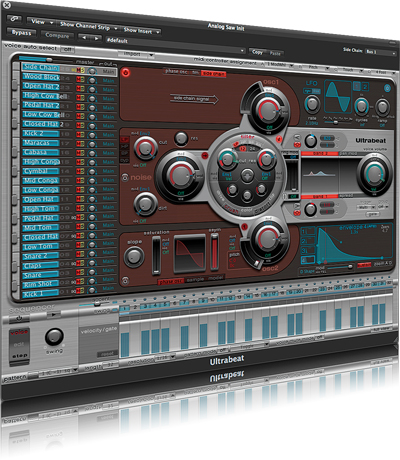
Key gating is a popular effect in trance music, whereby a pad sound is ‘rhythmically chopped’ by a gate being triggered from a hi-hat. Although you can achieve this effect using Logic’s Noise Gate plug-in, why not go a step further and try using Ultrabeat’s sidechain input? Once you’ve selected your input source, you’ll need to change an available voice lane from its Phase Osc or FM mode to the sidechain option. Once set, you can trigger the gate effect like any other drum voice, as well as using the Step mode to automate aspects such as the filter cut-off.
Manual Labour
As with an original Hammond organ, the EVB3 has three discrete sounds that are accessible at any one time from its virtual manuals (a manual being ‘organ-speak’ for another keyboard). You can access the three manuals using different MIDI channels – MIDI Channel 1 for the upper manual, Channel 2 for the lower manual, and Channel 3 for the bass pedals. Alternatively, change the Keyboard mode at the bottom of the EVB3’s interface from Multi to Split and enjoy all three manuals spread across one MIDI channel.
Global Enterprise
If you’re trying to duplicate an entire song from within a project (if, for example, you wanted to create an instrumental version of a track), it’s worth opening Global Tracks. Now, when you select all of the song (Edit>Select All), Logic will select both the audio/MIDI regions and the associated Global Track information. When the duplicate version of the song is slid over, you’ll find that the markers, tempo markings and time signature changes are all in place as well.
Making A Performance
Channel Strip presets are a great way of recalling a software instrument setting complete with effects. Going one stage further is the Performance feature, which effectively allows you to call up a Channel Strip setting (complete with instrument and effects) via a program change. You can create a Performance via the Channel Strip settings menu using the ‘Save As Performance…’ option, then assign it a program change number. Although mainly intended as a stage tool, the Performance feature is a great way of recalling your favourite sounds directly from a controller keyboard, all without having to go anywhere near a mouse.
Crushed To Bits
As well as compression, it’s amazing how many plug-ins can be given a new lease of life when used in a ‘parallel’ configuration – in other words, using an aux send to route the effect rather than patching the plug-in directly via the channel inserts. A great example of alternative parallel routing in action is the Bitcrusher plug-in. Try this on a drum loop, sending the loop to a heavy Bitcrusher setting (with plenty of clipping) but bleeding only a small amount of the Bitcrusher back into the mix.
BE Articulate
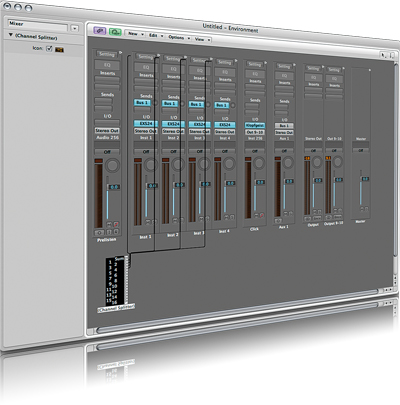
Creating a realistic instrumental performance often requires the use of different articulations – alternating between a staccato violin, for example, and a tremolo patch. Such switching is easy enough on a multi-timbral instrument such as Kontakt, loading different articulations on separate MIDI channels then switching the assigned articulation using the channel number in the Event List. In the EXS24, though, use a Channel Splitter object to split out a single track lane (with different MIDI channels for each articulation), patching each node to a separate instance of the EXS24.
Bar Ruler
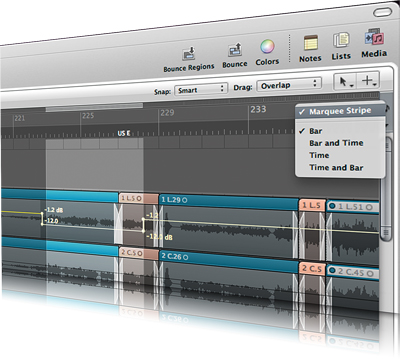
It’s a well-known fact that you can change the bar ruler between Bars and Beats and SMPTE time, using the small musical note icon on the right-hand side. A lesser-known feature, though, is the option to display a so-called Marquee Stripe. The Marquee Stripe is an alternative way of creating a Marquee enclosure rather than using the Marquee tool. The advantage is that you can see the precise length of your enclosure in relation to the time ruler, as well as quickly creating an enclosure across all tracks in the project.
Marquee Party
As well as being useful for audio editing, the Marquee tool is also an excellent way of adding or refining automation moves. By drag-enclosing an area with the Marquee tool you can impose any automation moves in a way that’s specific to that period of time and that doesn’t affect automation data to either side of the selection. For example, use it to raise the level around one region, with nodes being created on either side (to preserve the level before and after), as well as existing moves in the selection area being scaled accordingly.
Power Group
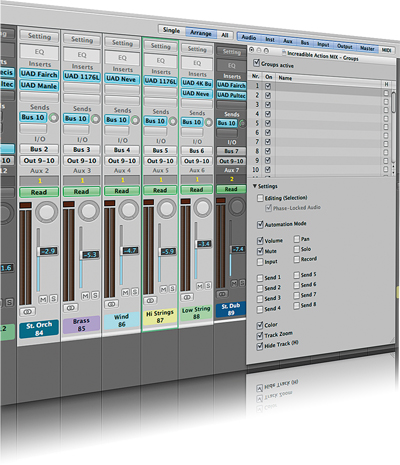
Since version 9, there’s been much more to Logic’s Group functions than you might at first imagine. As well as being able to link faders and edit multiple regions across several grouped tracks, you can also use the Group function to hide tracks en masse, colour-code grouped channel strips, or use the track zoom across multiple track lanes. You can find these extended options as part of the Group Settings; it’s also worth noting the keyboard shortcut to temporarily suspend ‘grouped’ behaviour – [Cmd]+[G].
SMPTE Lockdown
The function Region>Lock SMPTE Position was originally implemented as a means of fixing the position of an audio event in relation to spotting sound effects for film and TV. In music production, though, it also works as a handy way of locking off your audio and MIDI regions so that you can change the tempo grid to half- or double-time. Once locked, you can change the tempo of the project without the region’s duration or speed being affected. Once finished, simply revert the regions back to normal by highlighting them and selecting Regions>Unlock SMPTE Position.
A New Start
By default, all projects start from Bar 1, but it is possible to change a project’s start point to create a number of bars’ worth of pre-roll before the music starts. To change the project’s start time, click on the start marker on the far left-hand side of the Bar ruler and drag the marker backwards accordingly. Changing the start point is useful when it comes to bouncing, as without a degree of pre-roll it is possible for Logic (or, more specifically, a third-party plug-in) to create a small click around the first bar.
Cut Guide
If you’re producing music for various forms of media it’s often useful to be able to supply different versions of the same track at various lengths – like a 30-second commercial cut, for example, plus a five-second sting – as part of the same Logic project. An excellent way of creating these cuts is to have pre-rendered audio regions set to the desired length, with a drum hit marking each second. Rather than listening to these files, you can use them as reference points for cutting – with both the total duration and the seconds that divide the region up being visually identifiable.
Ultrabeat Bass
As well as having a series of single-pitched drum voices, Ultrabeat has an additional voice that chromatically follows your position on a MIDI keyboard. You can find the ‘pitched voice’ on the top of Ultrabeat’s voice list, as well as being able to play it on a keyboard with notes above C3. Although clearly not as powerful as the ES2, the synthesis options available on Ultrabeat – including phase oscillators, FM and physical modelling – do make it an interesting choice for bass lines.
Model Piano
As well as being an interesting source of electric piano sounds, you can also turn the EVP88 into a form of physical modelling synthesizer for bell-like patches. Try using the less conventional models on offer – including Metal Piano and Attack Piano – and experiment with the key model parameters such as the Tine’s Decay and Release, as well as the relative volume of the Damper and Bell. Pushing the parameters in a deliberately extreme way (especially using lots of Bell) takes the sound far away from that of a typical electric piano.
Lord Of The Rings
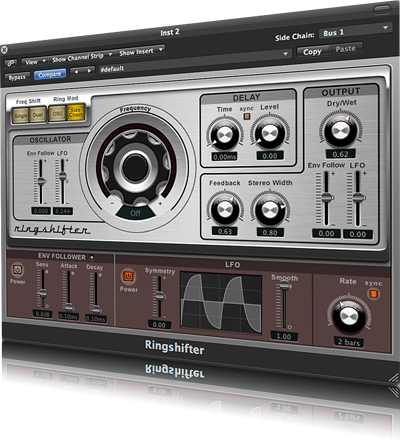
As well as its own oscillator, you can also use Ringshifter to ring-modulate two sounds together. The results of ring modulation are sometimes too bizarre to be musically useful, but you can achieve a more pleasing effect using a duplicate version of the original sound with some form of pitch transposition involved. Adding small amounts of the ring-modulated version (using the Ringshifter’s Mix control) adds a unique form of coloured distortion that can be varied by changing the amount of transposition involved.
Lost Automation
If you’ve applied automation moves to a track without regions – on an aux fader, for example, or a buss – you can’t guarantee that automation data will be copied correctly. The problem is that automation is moved/copied only when an associated region is dragged with it. To solve this problem, it’s a good idea to draw in empty regions (using the Pencil tool) over areas with important automation moves. Now you’ll know where there’s data to be moved and, more importantly, Logic will copy it accordingly.
